The Services module in Booknetic is where you define and structure the services your business offers. Whether you run a salon, a gym, a medical clinic, or any appointment-based business, this section allows you to create services, categorize them, set pricing, assign staff, and configure booking settings, all in one place.
To provide a seamless experience for both administrators and customers, Booknetic offers a multi-level service categorization system. This helps businesses maintain a structured and intuitive service hierarchy, making it easy for customers to find and book the right services.
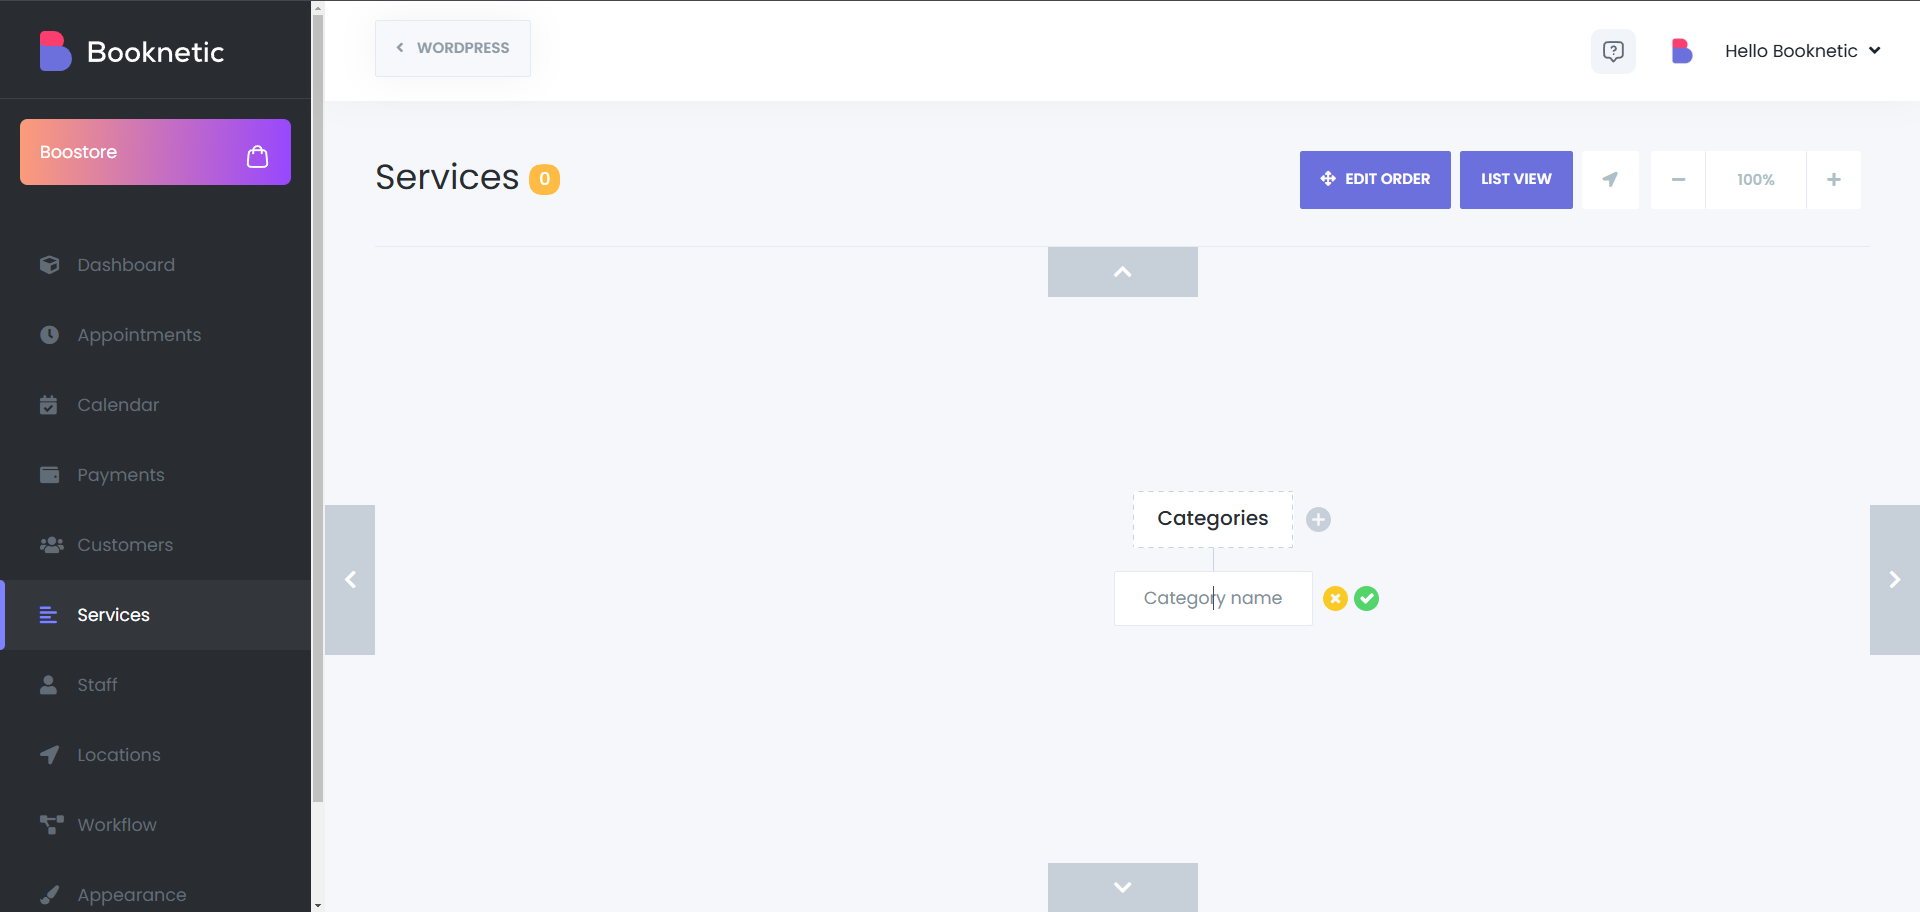
Creating and Managing Service Categories
Categories serve as the foundation for organizing your services. With a well-structured service menu, your customers will have an easier time navigating through available services and booking the ones that suit their needs.
How to Create a New Service Category
Access the Categories Panel
Navigate to the Services section in the Booknetic dashboard.
Add a New Category
Click the "+" (plus) icon next to Categories.
A new field will appear where you can enter the category name.
Once you've entered the name, click the Save icon to finalize the category creation.
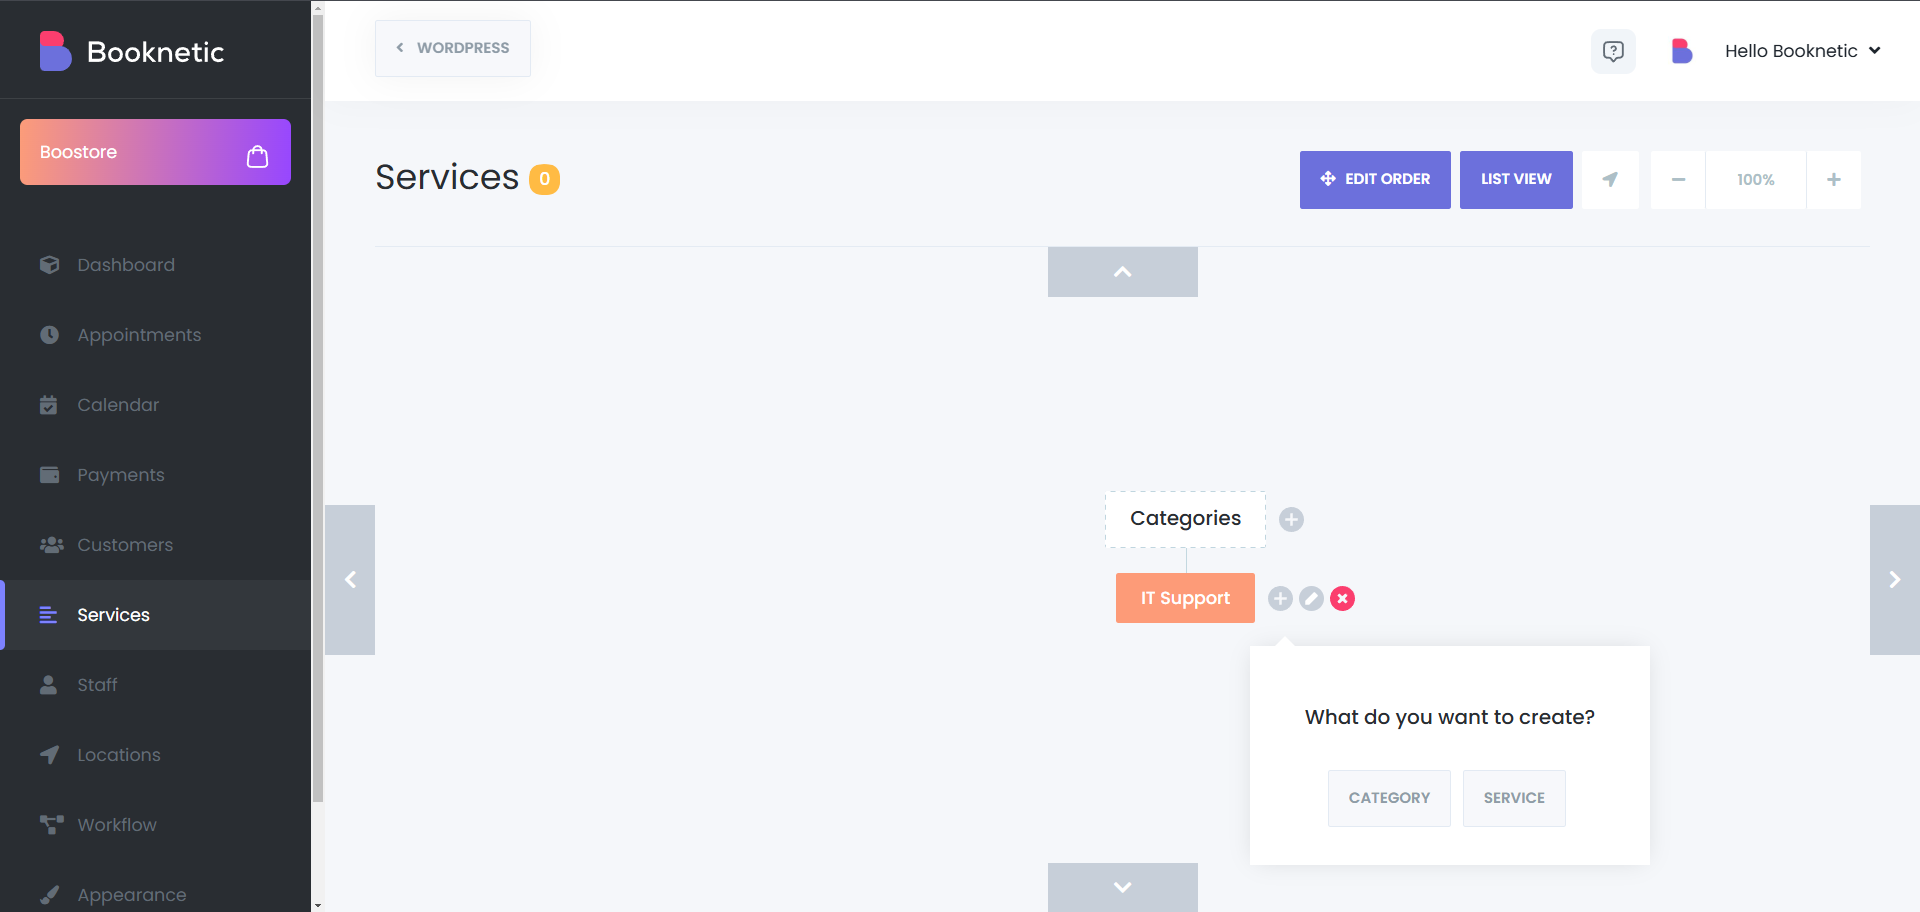
Organizing Categories and Subcategories
You can create multiple levels of categorization. For instance, a Beauty Services category can have subcategories like Hair Treatments and Skin Care, and each subcategory can contain individual services.
To create a subcategory under an existing category, click the "+" icon next to that category and choose Category when prompted.
Editing and Deleting Categories
To rename a category, click on it, modify the name, and save the changes.
To delete a category, hover over it and click the trash icon. Keep in mind that deleting a category will also remove all associated subcategories and services, so use this option with caution.
Adding and Configuring Services
After setting up your categories, you can start adding individual services. A service represents a specific offering your business provides, such as a 60-minute massage, a personal training session, or a dental check-up. Each service can be customized with its own pricing, duration, staff assignments, and additional settings.
How to Add a New Service
Assigning the Service to a Category
Click the "+" icon next to the category where you want to place the new service.
Choose Service when prompted.
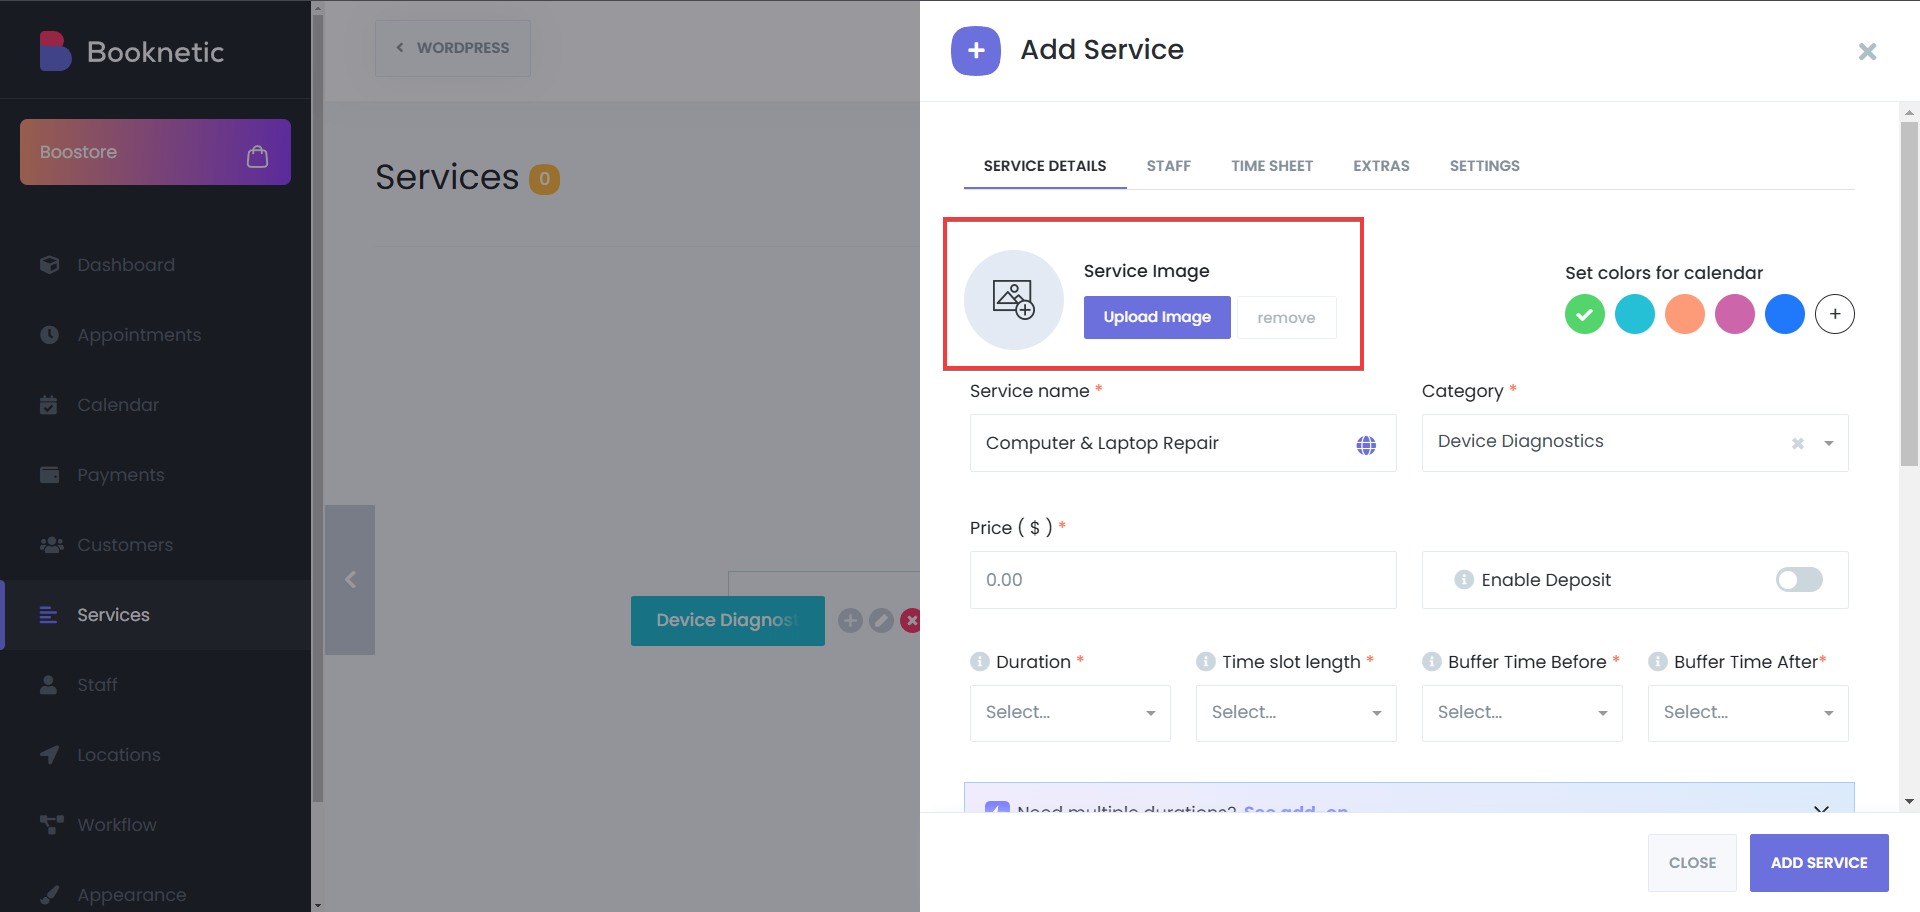
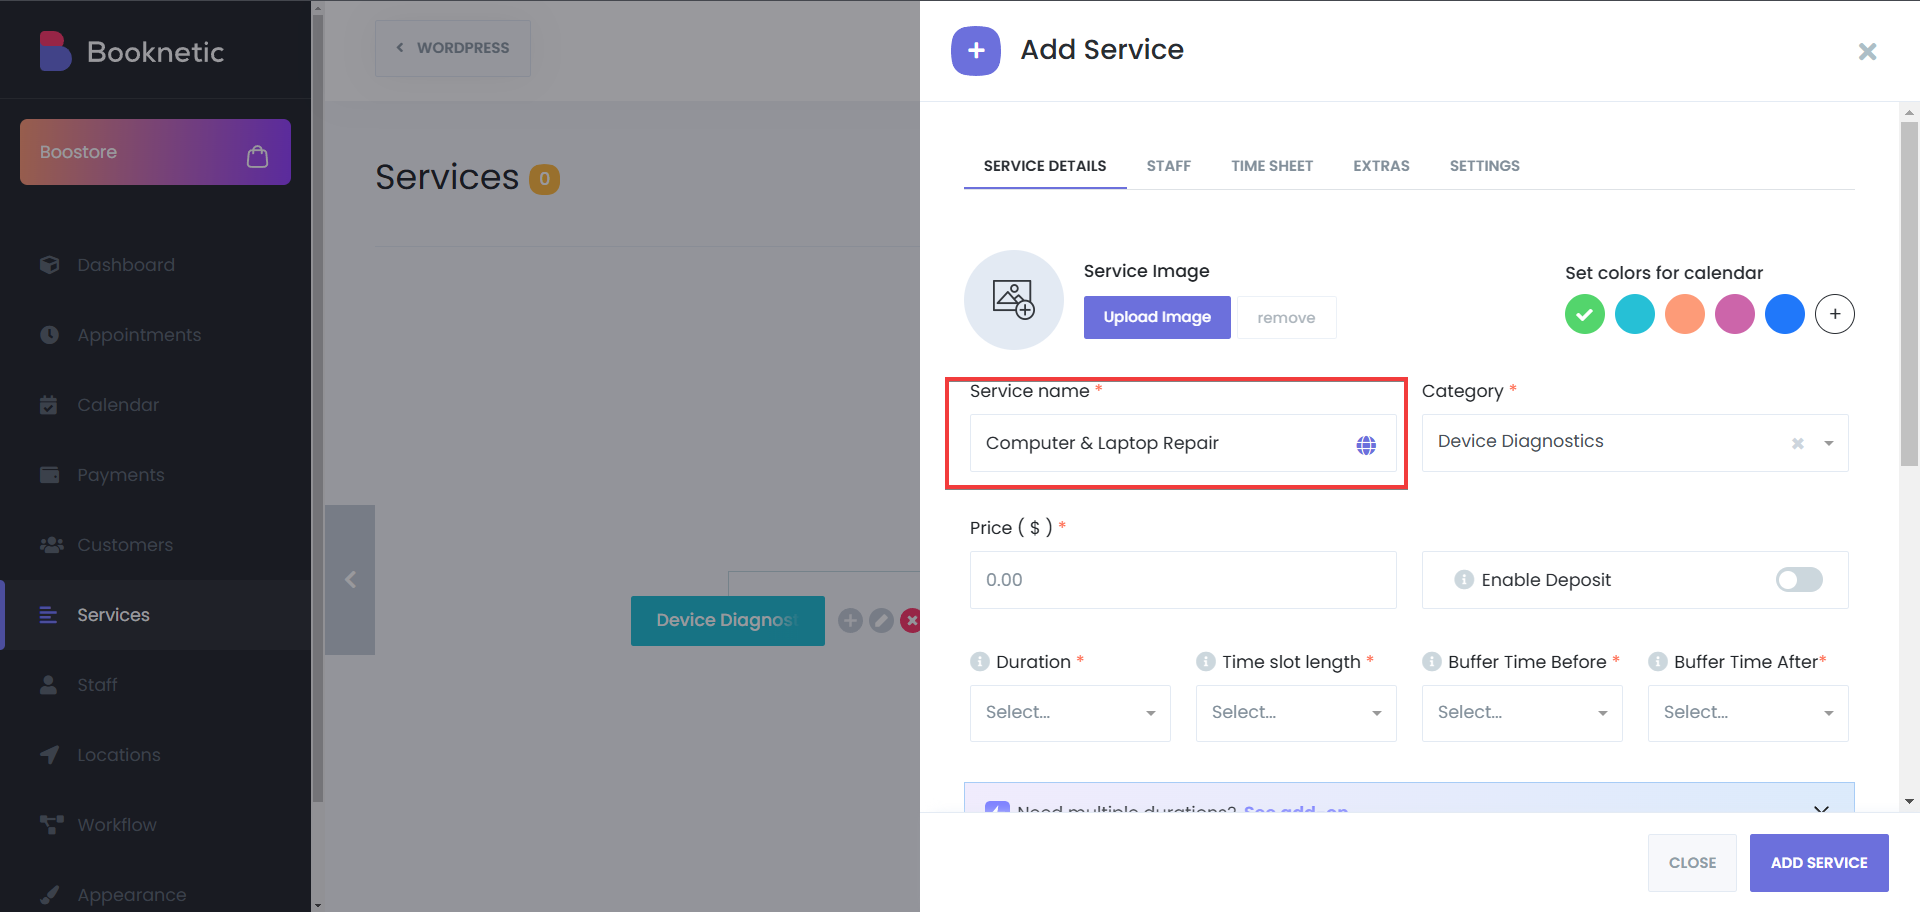
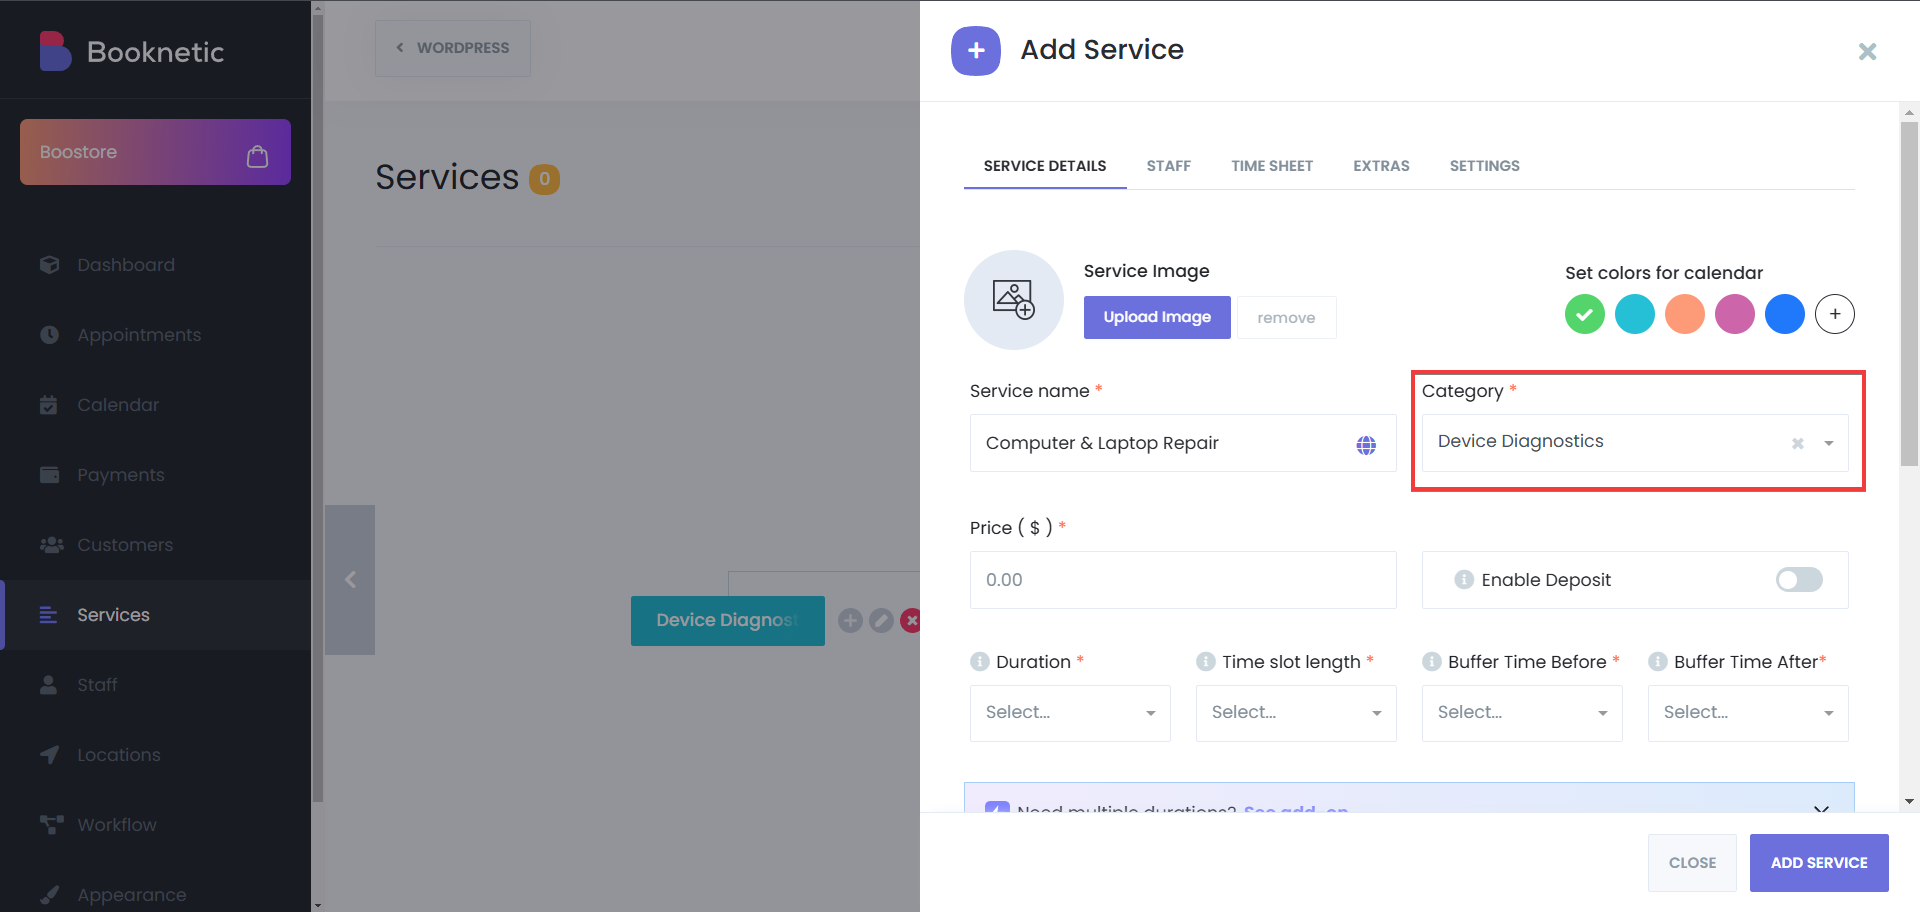
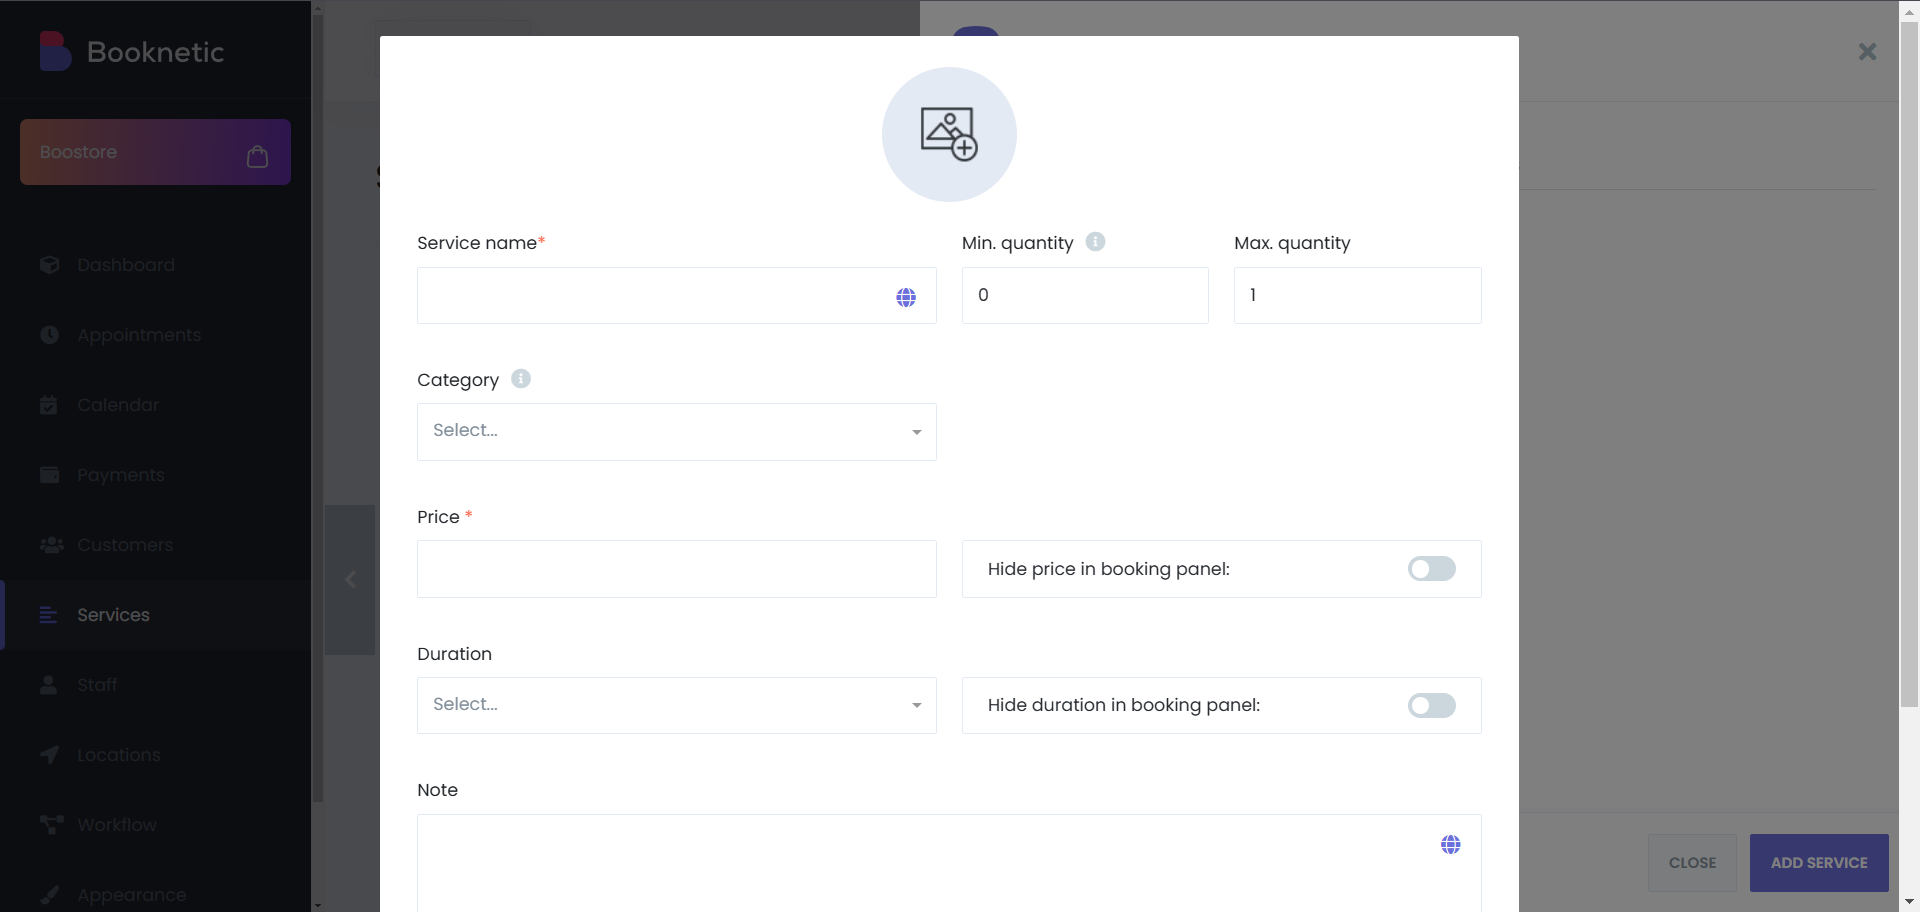
Configuring Basic Service Details
After selecting "Service," a settings panel will open where you can define the core attributes of the service:
Service Image
Upload an image that visually represents the service.
This image will be displayed to customers during the booking process to make selection easier.
Service Name
Enter a clear and descriptive name for the service (e.g., "Full Body Massage" or "Men’s Haircut").
Assigning a Category
The category you selected earlier will be pre-filled, but you can change it if needed.
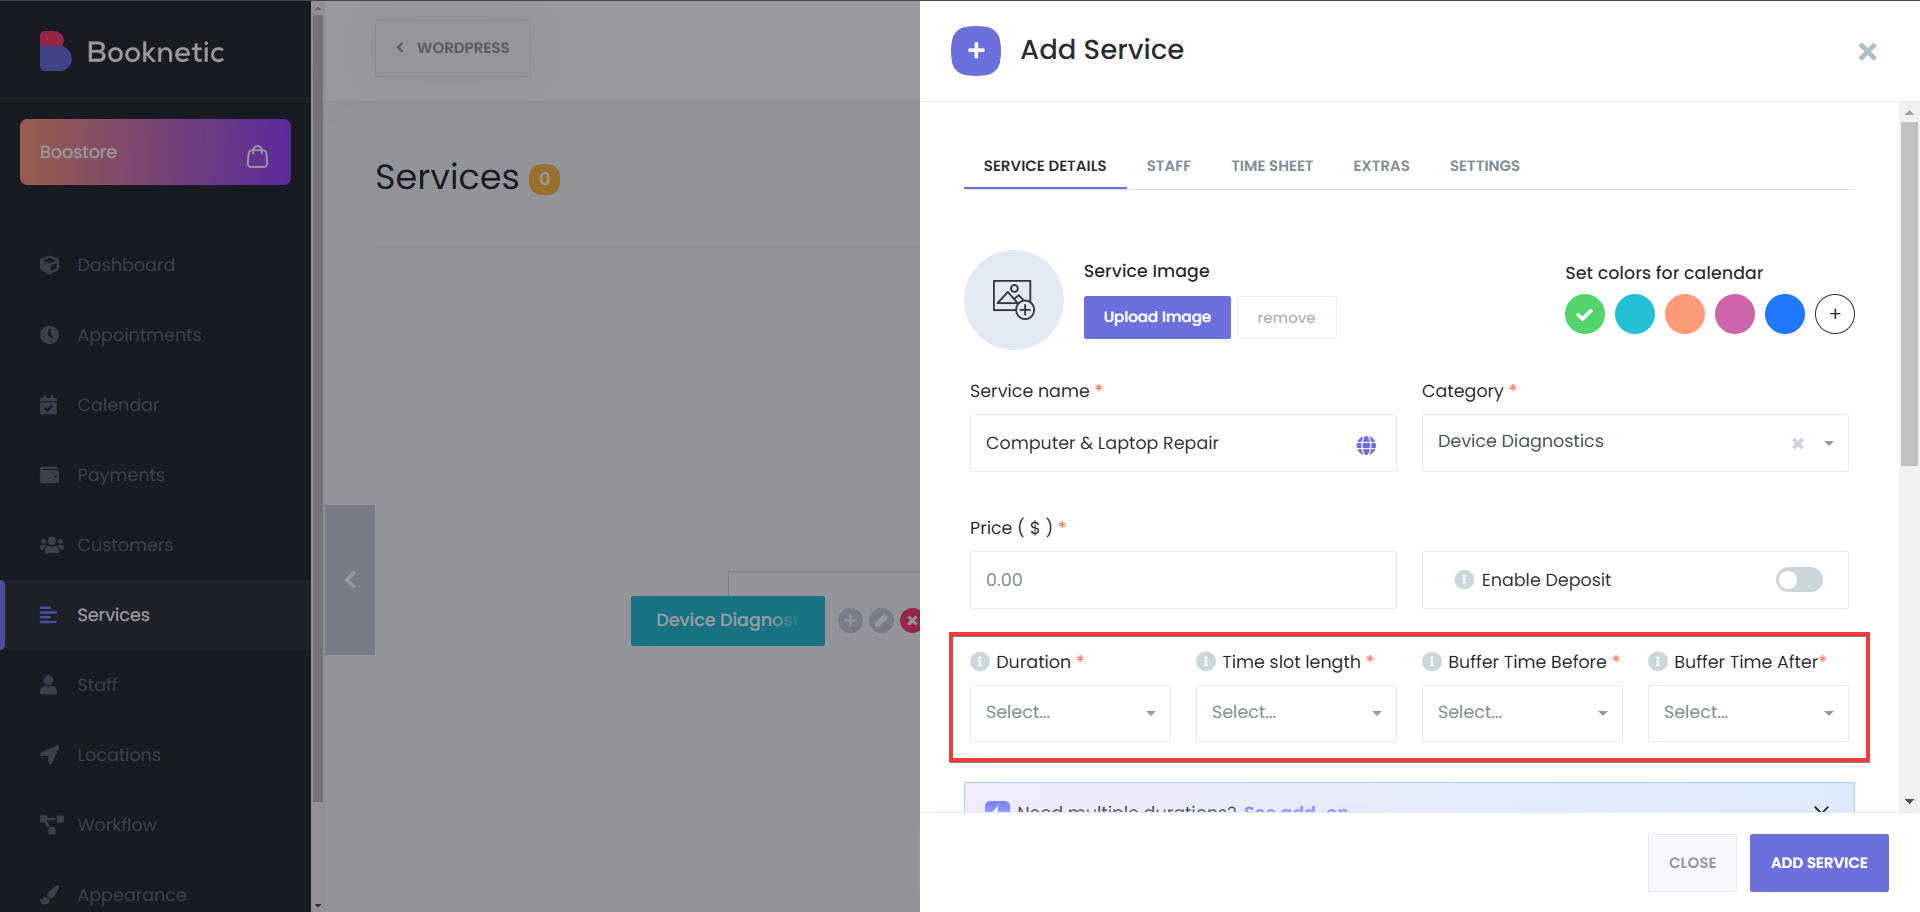
Service Duration & Buffer Time
Define how long the service lasts.
This directly impacts scheduling availability, so make sure the duration accurately reflects the actual service time.
Adding Buffer Time Before & After Appointments
Buffer Before: Adds extra time before the appointment begins. Useful for preparation, setting up equipment, or allowing transition time between clients.
Buffer After: Adds extra time after the appointment ends. Useful for cleaning up, writing reports, or handling post-service tasks.
Example: If a service is 60 minutes long with a 10-minute buffer before and after, the total blocked time in the calendar will be 80 minutes (10 min before + 60 min service + 10 min after).
Service Price
Enter the cost of the service. The currency format will follow your Booknetic settings.
If you offer variable pricing, you can create multiple pricing tiers based on different options, depending on your setup, using the Conditional Prices add-on.
You can also set multiple durations for one service, and this way, you will not need to create multiple services for each duration. If you’d like to learn more about the multiple services add-on, you can check the Custom Durations add-on feature page.
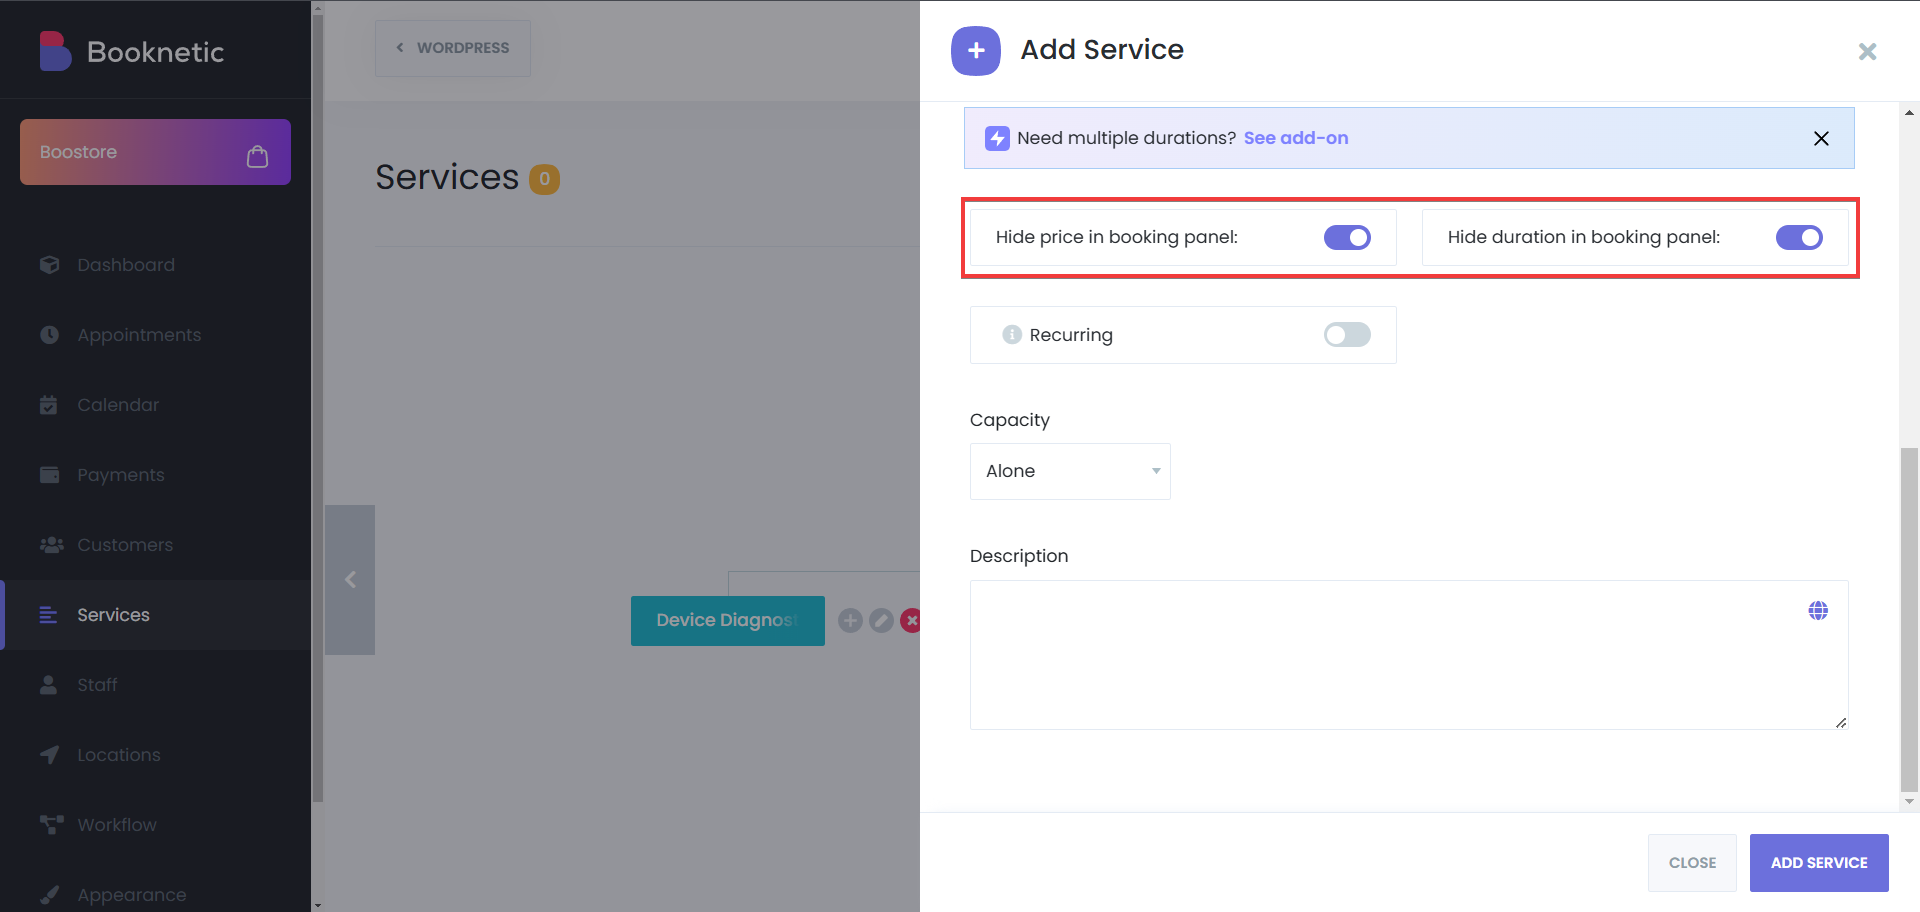
You can also hide price of the services, and the duration of those services in the booking panel, this way, your customers will be able to see the service name and description of that service, but not the duration and the price of the service, depending on your setup..
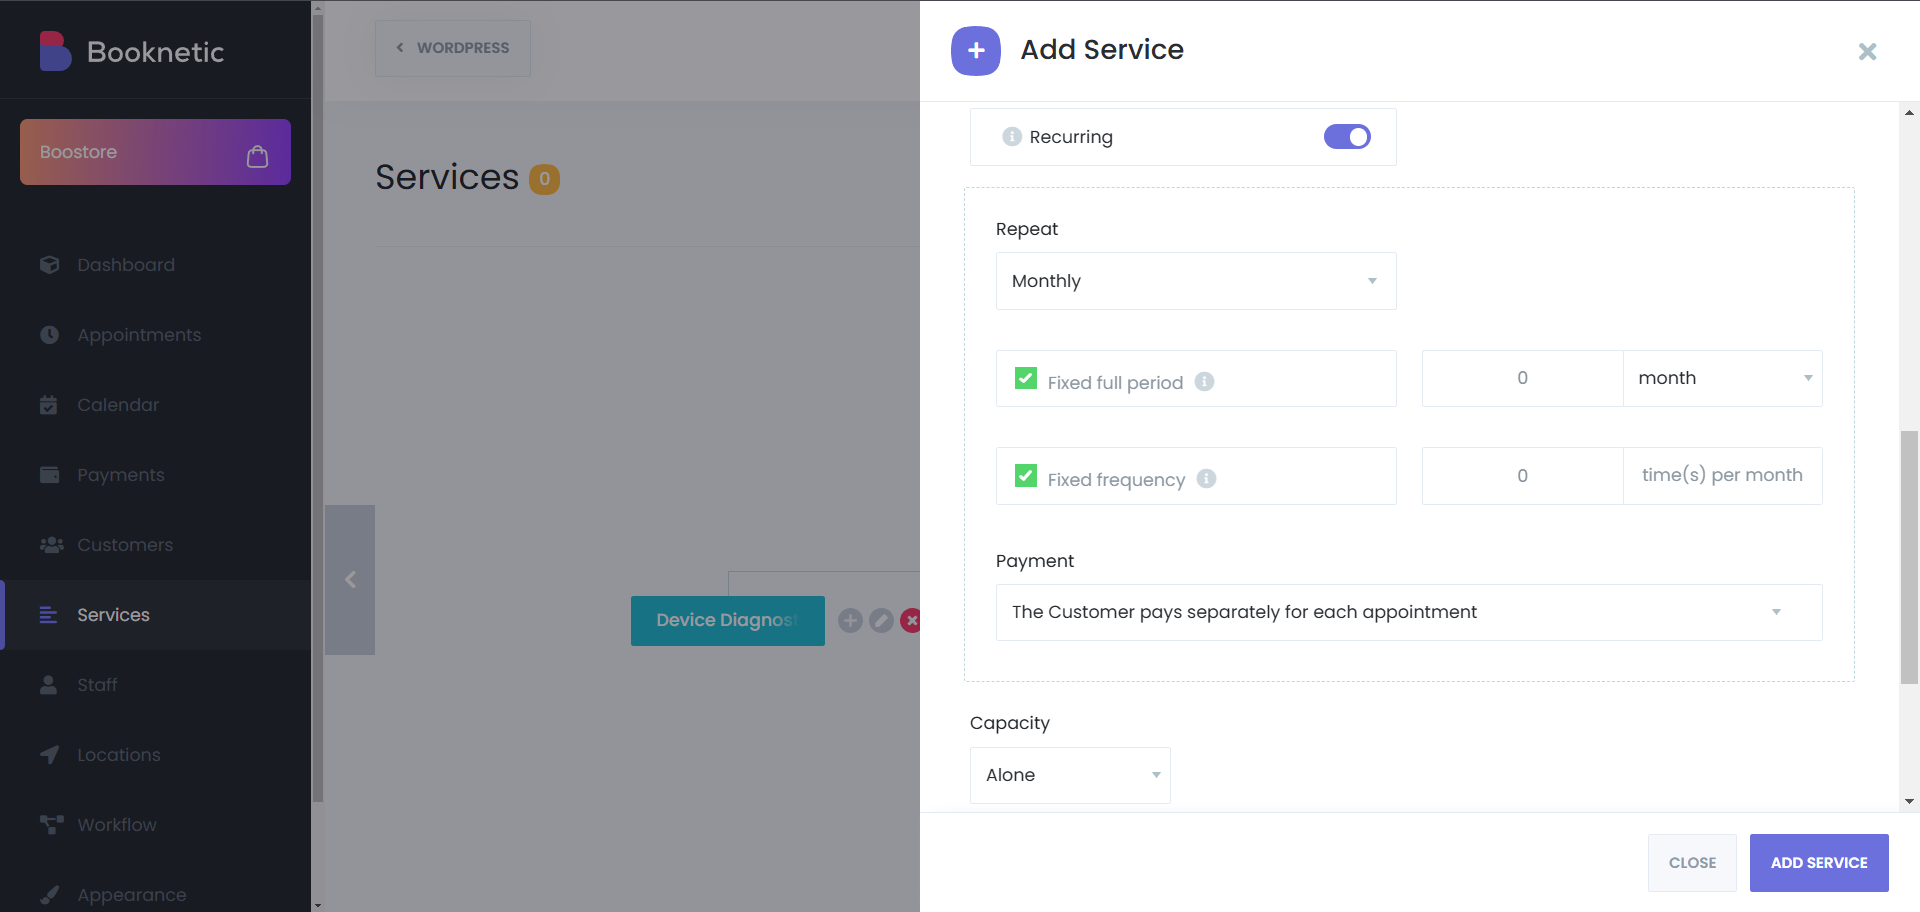
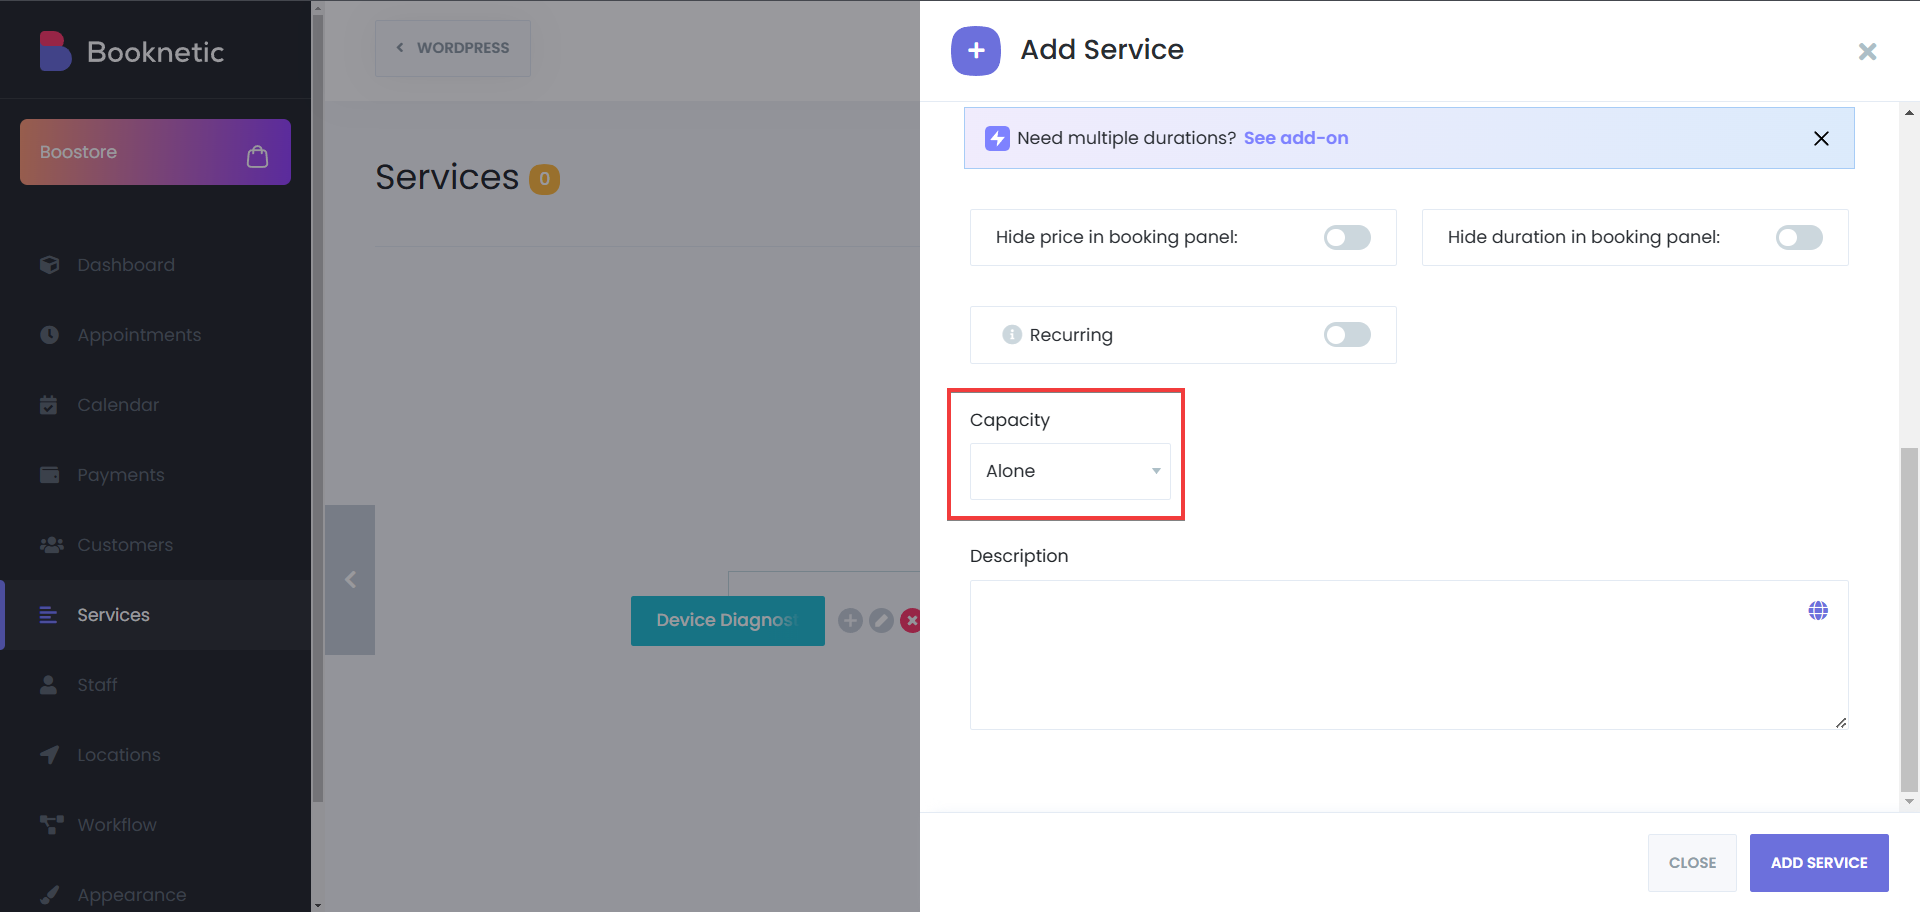
Booknetic's Recurring Appointments feature allows clients to schedule services that repeat over a set period, eliminating the need to book each session individually. This is particularly beneficial for services like weekly classes or monthly consultations. For detailed information on setting up and managing recurring appointments, please visit our dedicated feature page.
Booknetic's Group Appointments feature enables multiple clients to book the same time slot for a shared service. This is ideal for classes, workshops, or any service designed for group participation. For detailed information on setting up and managing group appointments, please visit our dedicated feature page.
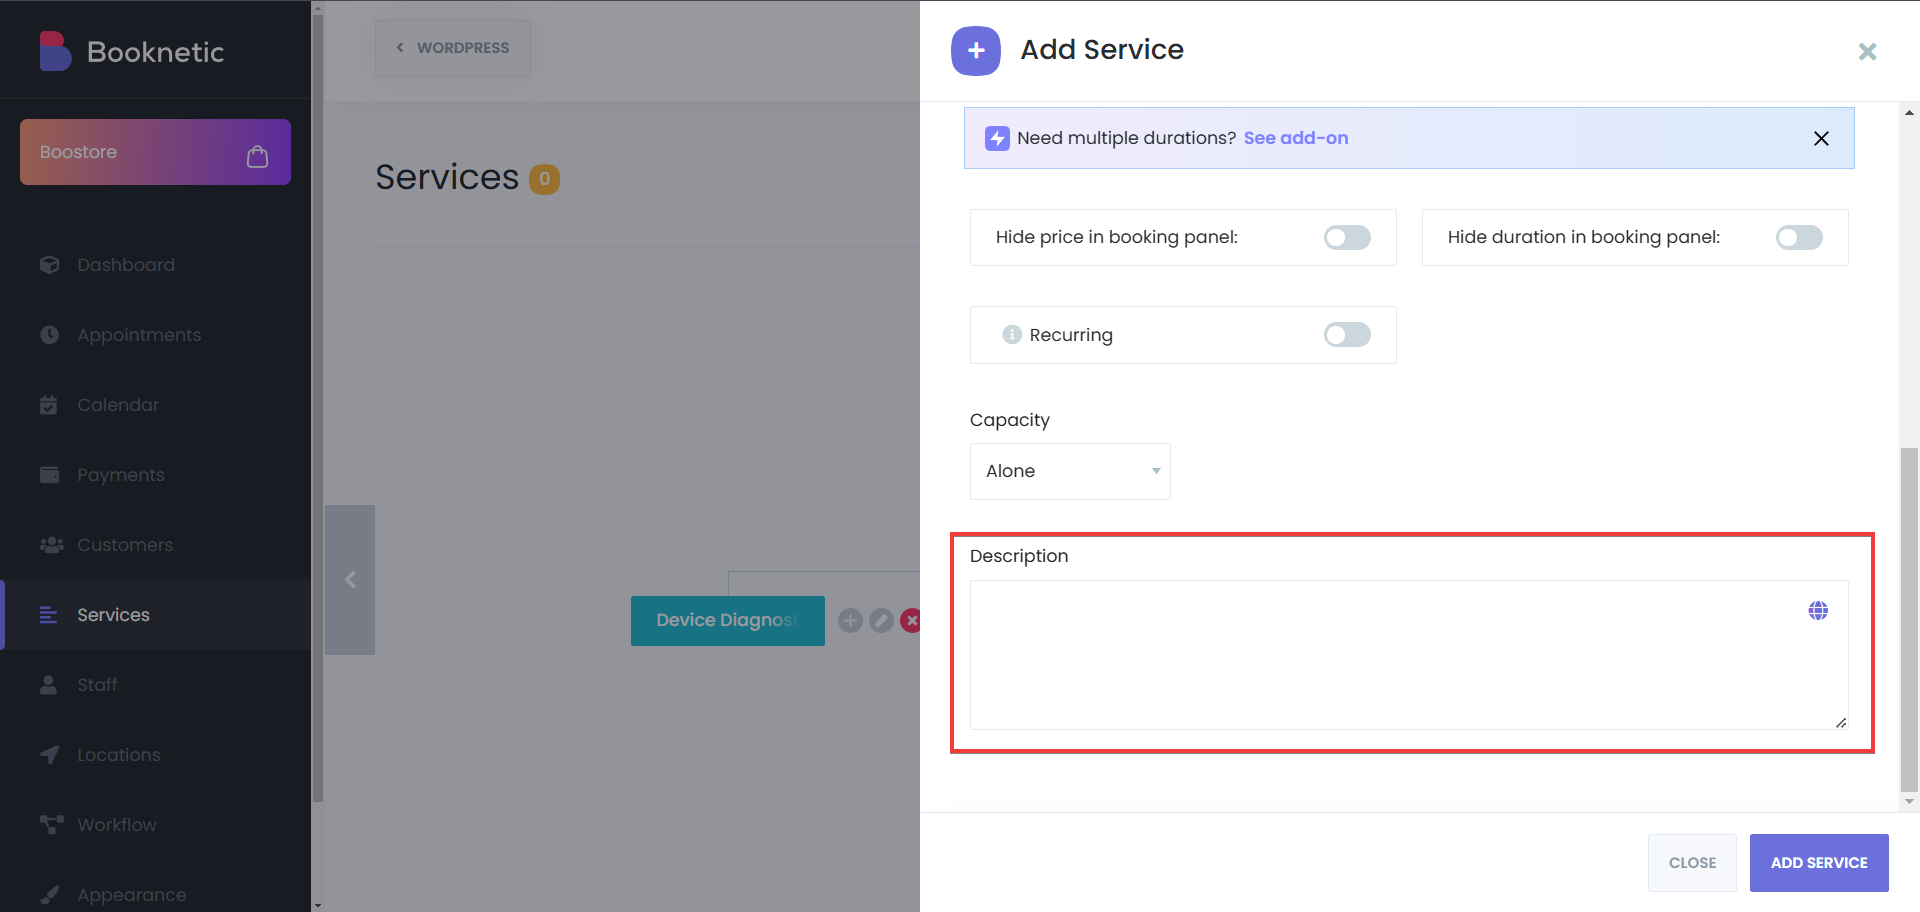
The Service Description field allows you to provide a brief but informative overview of the service being offered. This helps customers understand what to expect before booking.
Keep it clear and concise, highlighting key details about the service.
Mention any important requirements (e.g., "Clients must arrive 10 minutes early").
Use this space to differentiate your service by mentioning unique features or benefits.
A well-written service description improves the customer experience and helps them make informed booking decisions.
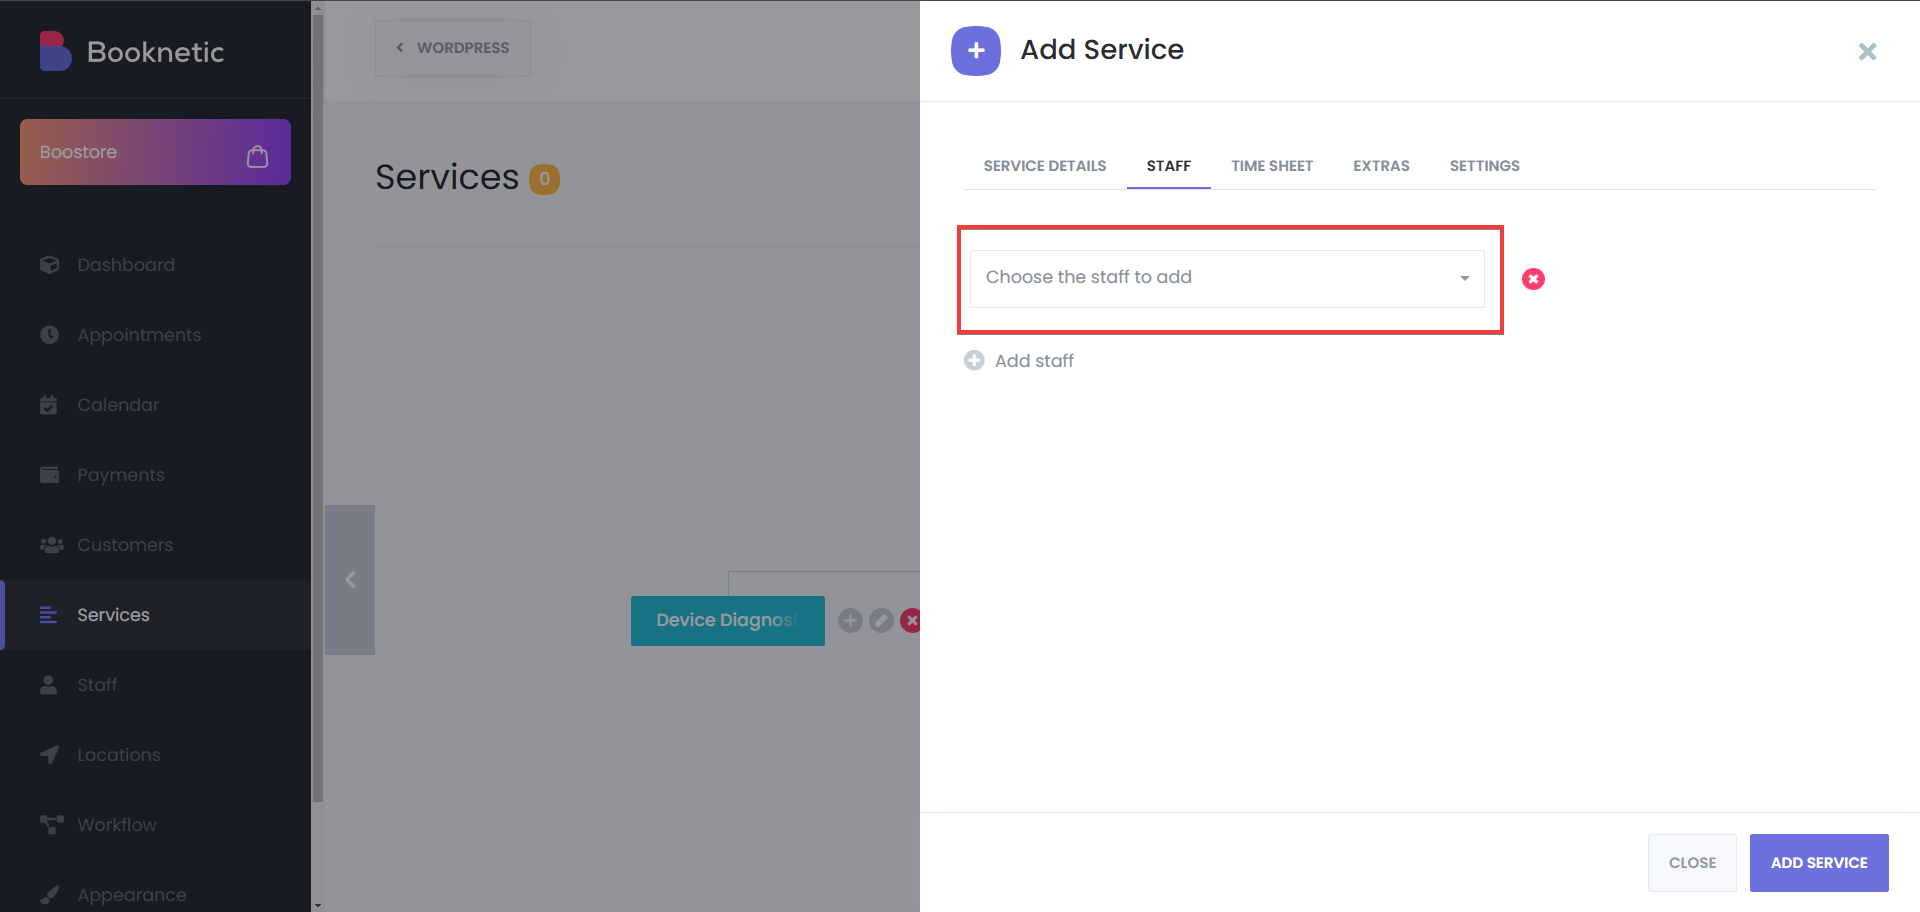
Assigning Staff to Services
Every service must be assigned to at least one staff member who will provide it. Without staff assignments, the service will not be available for booking.
Navigating to the Staff Tab
In the service settings panel, go to the Staff tab.
Selecting Staff Members
Choose which staff members are available to provide the service.
If a staff member is assigned to multiple services, their schedule will automatically adjust to prevent double bookings.
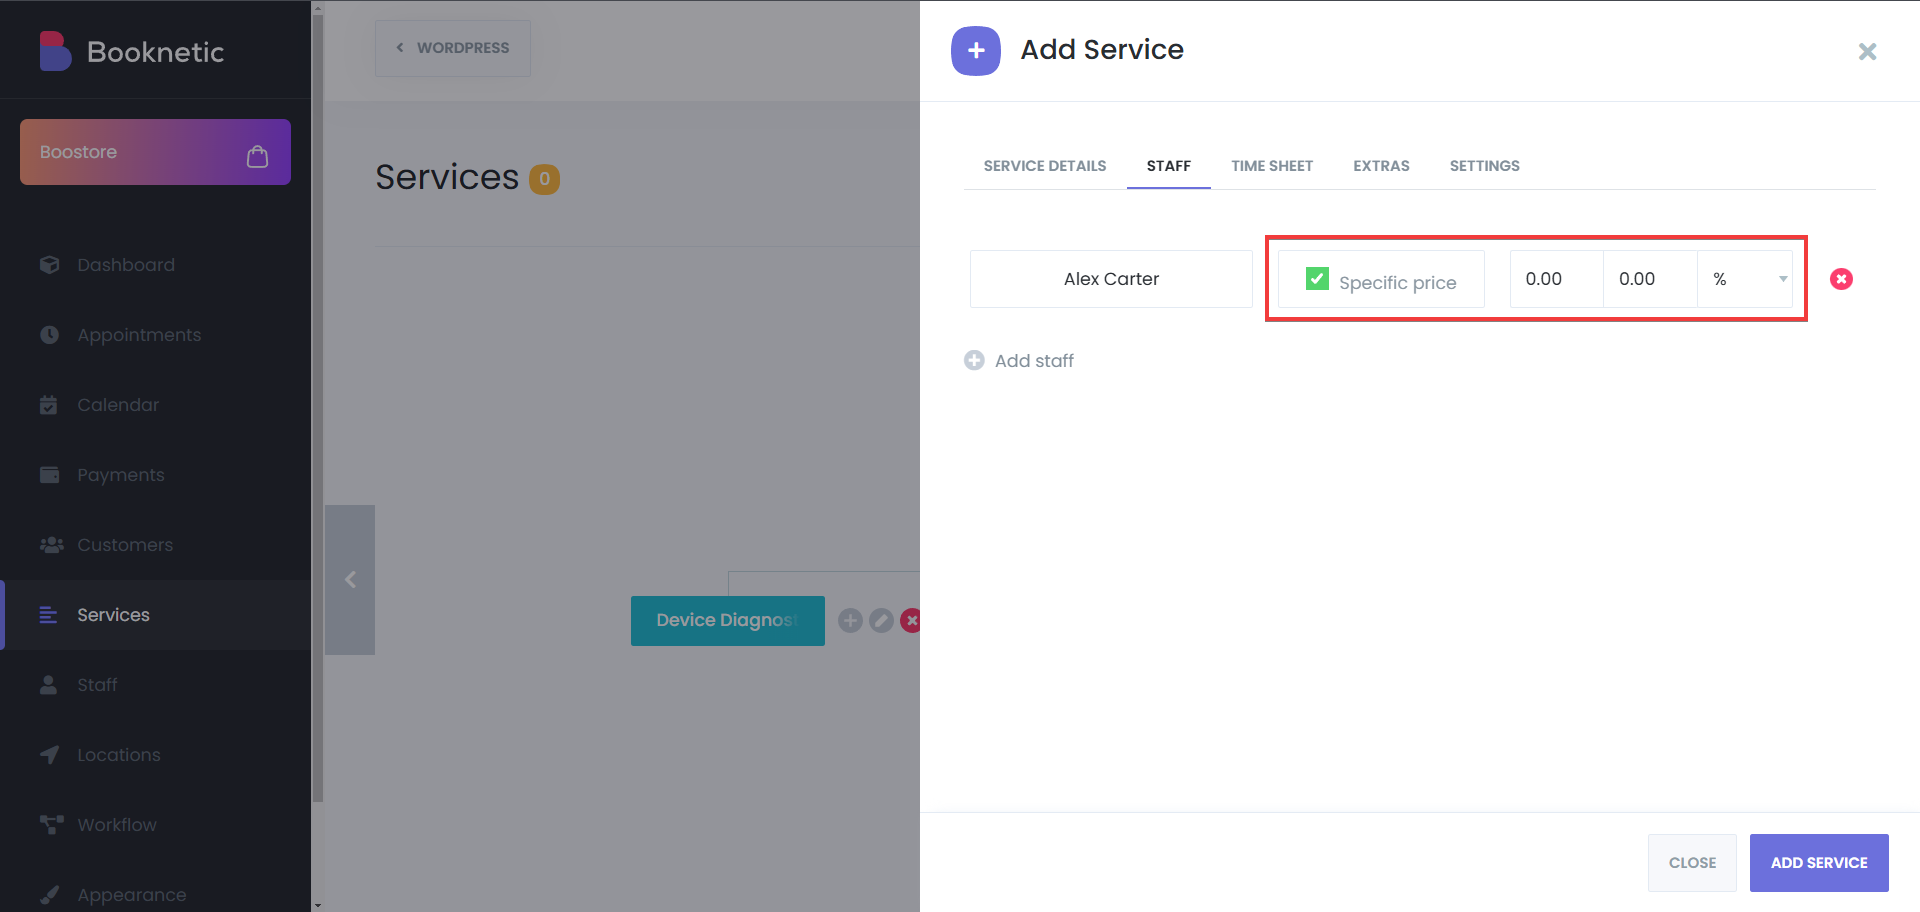
Customizing Staff-Based Pricing (Optional)
If different staff members charge different rates for the same service, you can set staff-based pricing under the pricing section.
This ensures customers are billed correctly based on the selected staff member.
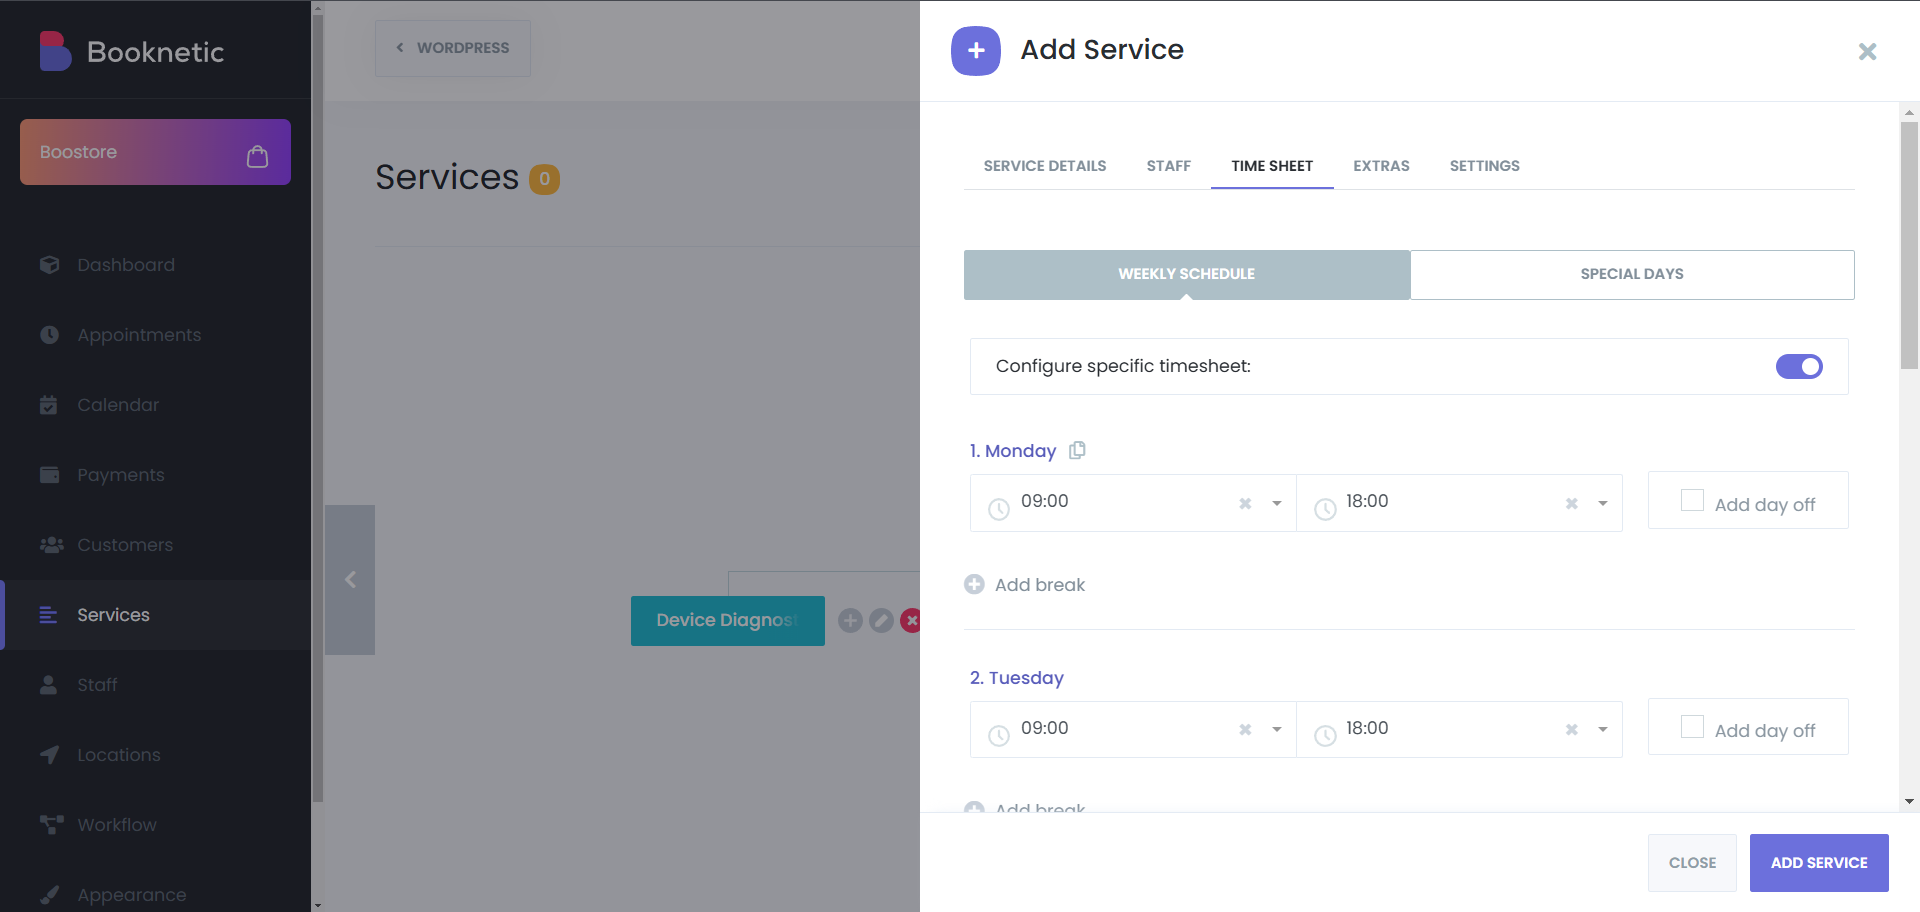
Setting Service Availability
Each service can have its own availability settings that determine when it can be booked.
Navigating to the Timesheet Tab
Click the Timesheet tab in the service settings panel.
Defining Service Hours
By default, services follow the general working hours of assigned staff members. However, you can define custom availability by selecting specific days and time slots for the service.
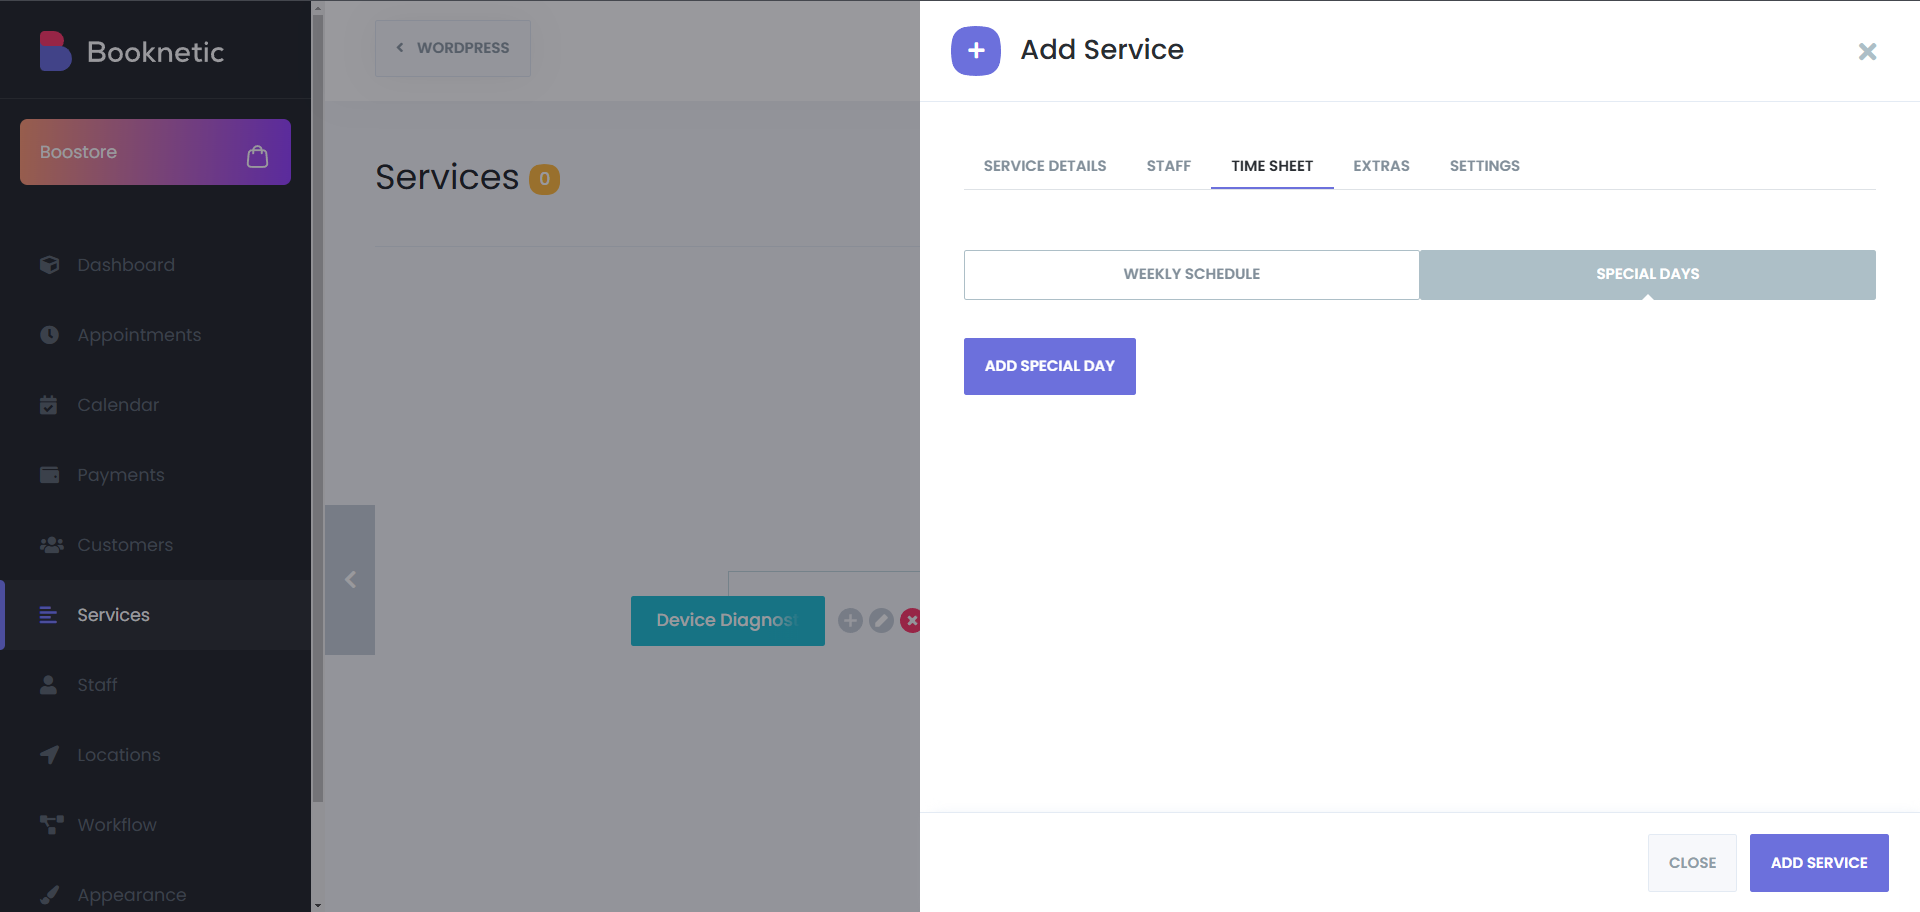
Managing Holidays and Special Availability
You can configure blackout dates for holidays or unavailable periods.
You can also add special availability for peak seasons or promotional events.
Please also take into consideration that, if you configure weekly schedule for a service, it will override your business hours settings in the general settings. And if you set up a specific working hours for a staff, and assign this service to that staff, then the staff’s working hours will override your service specific weekly schedule. Therefore, the priority is as such:
Staff - Highest priority
Service - 2nd highest priority
Working hours (General settings) - Lowest priority
Adding Extra Options to Services
Booknetic allows you to add Extras, which are optional add-ons that customers can select when booking a service. This is useful for businesses that offer additional features, upgrades, or customizations.
How to Add Extras to a Service
Go to the Extras Tab
Open the service settings panel and navigate to the Extras tab.
Create a New Extra
Click “Add Extra” and enter the details:
Extra Name – A short, descriptive name (e.g., "Aromatherapy Upgrade" or "Premium Hair Treatment").
Extra Price – Define the cost of the extra item or service.
Extra Image – Upload an image that represents the extra.
Extra Duration – If the extra adds time to the service, specify the additional minutes. Leave blank if it doesn’t extend the booking duration.
Maximum Quantity – Set the limit for how many times a customer can select the extra in a single booking.
Activating Extras for Booking
Once saved, customers will be able to select extras when booking the associated service.
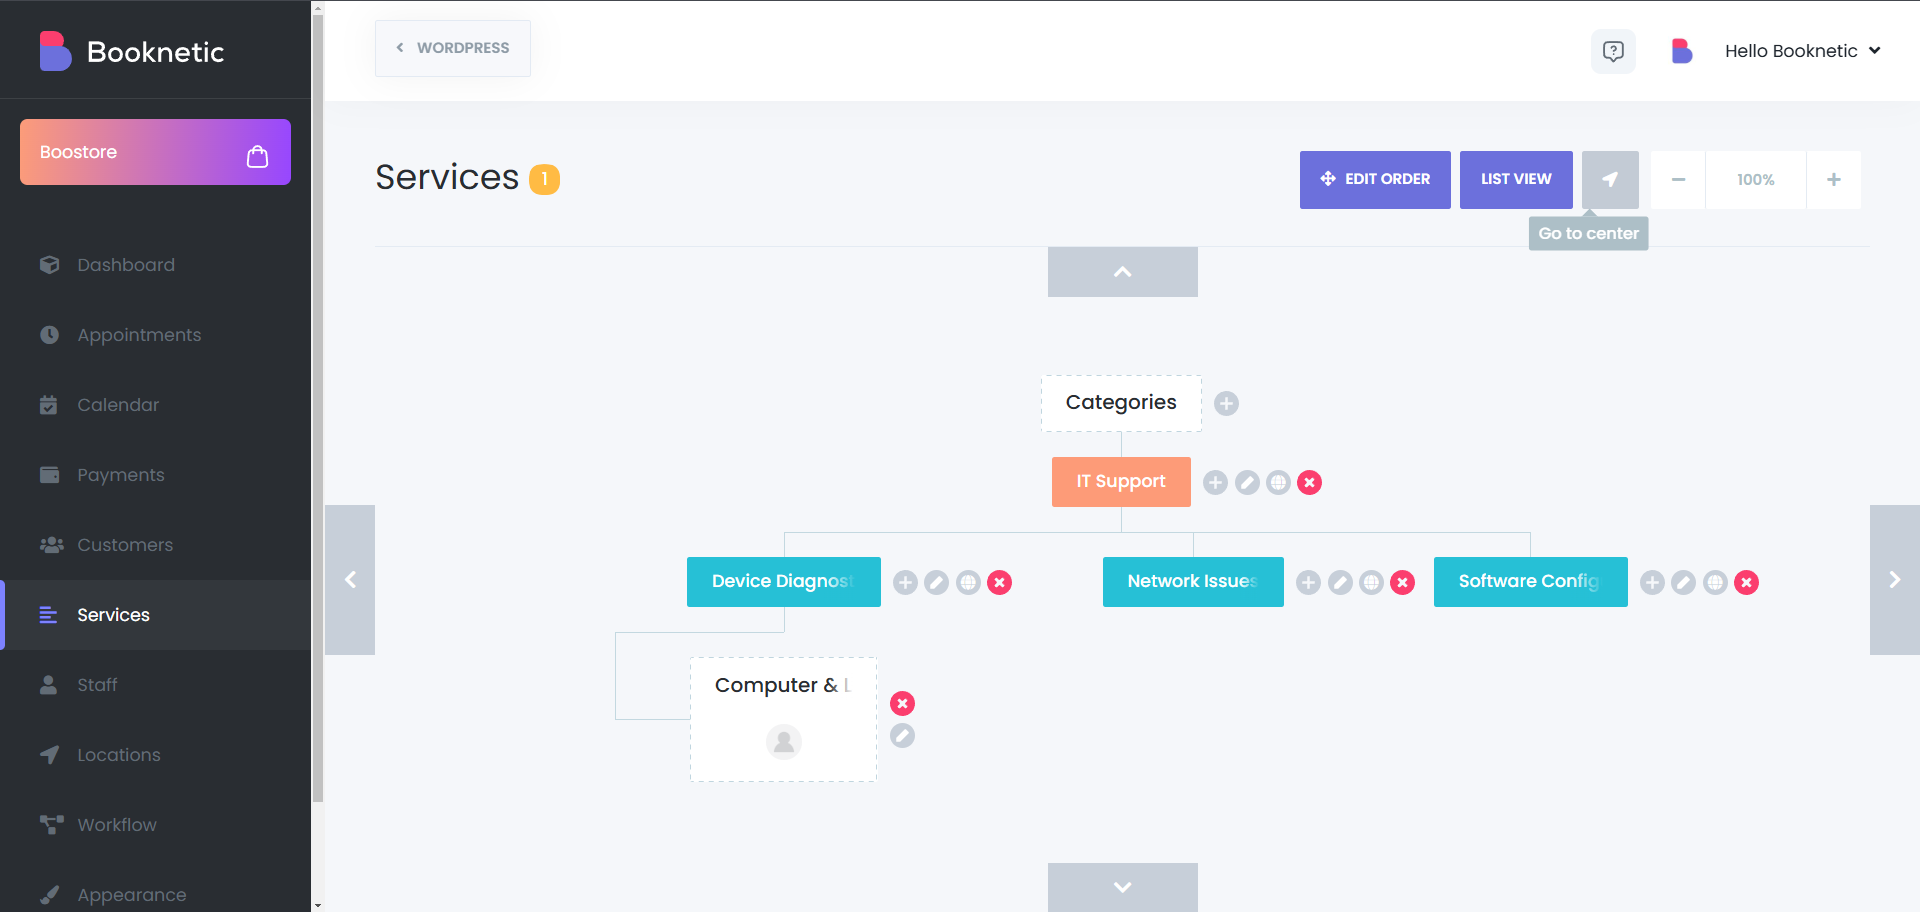
Navigating the Service Structure Map
Booknetic offers an interactive Service Structure Map, allowing you to visualize your service hierarchy.
Moving and Zooming
Use your mouse or trackpad to pan around the map and explore different categories and services.
Zoom in and out to get a better view of the structure.
Re-centering the Map
If you lose track of your position on the map, click the re-center button next to the zoom controls to reset the view.
Overall
The Services module in Booknetic is designed to give you full control over your service offerings, ensuring a smooth and organized booking experience. With categories, subcategories, staff assignments, pricing structures, availability settings, and extras, you can create a service setup that aligns perfectly with your business model.
By taking the time to properly configure your services, you ensure that customers can easily find, book, and enjoy the services you provide.
Enter your email
We will create a sandbox demo with special access and you will be able to test this sandbox demo as you wish within 3 days