Google calendar
Google calendar settings of Booknetic. Multi-purpose Appointment Booking Plugin For Wordpress.
By using this site, you agree to our Cookie Policy
Google calendar settings of Booknetic. Multi-purpose Appointment Booking Plugin For Wordpress.
The Google Calendar Integration add-on for Booknetic enables seamless synchronization between your Booknetic calendar and Google Calendar, ensuring that your scheduling is efficient and avoids double bookings. This integration provides a two-way sync, where appointments made in Booknetic will automatically appear in Google Calendar, and any events marked as busy in Google Calendar will block corresponding times on Booknetic.
This documentation will guide you through the setup process and how the integration works.
The Google Calendar integration allows you to sync your Booknetic appointments with Google Calendar, giving both customers and staff a comprehensive overview of their schedules. This helps manage appointments more effectively by ensuring that the availability in Booknetic matches that in Google Calendar.
From Booknetic to Google Calendar: Any appointments or events scheduled in Booknetic will appear in Google Calendar. This helps to ensure that your Google Calendar is always up-to-date with your Booknetic schedule.
From Google Calendar to Booknetic: Any time marked as "busy" in Google Calendar will automatically block those times in Booknetic, preventing customers from booking appointments during unavailable times.
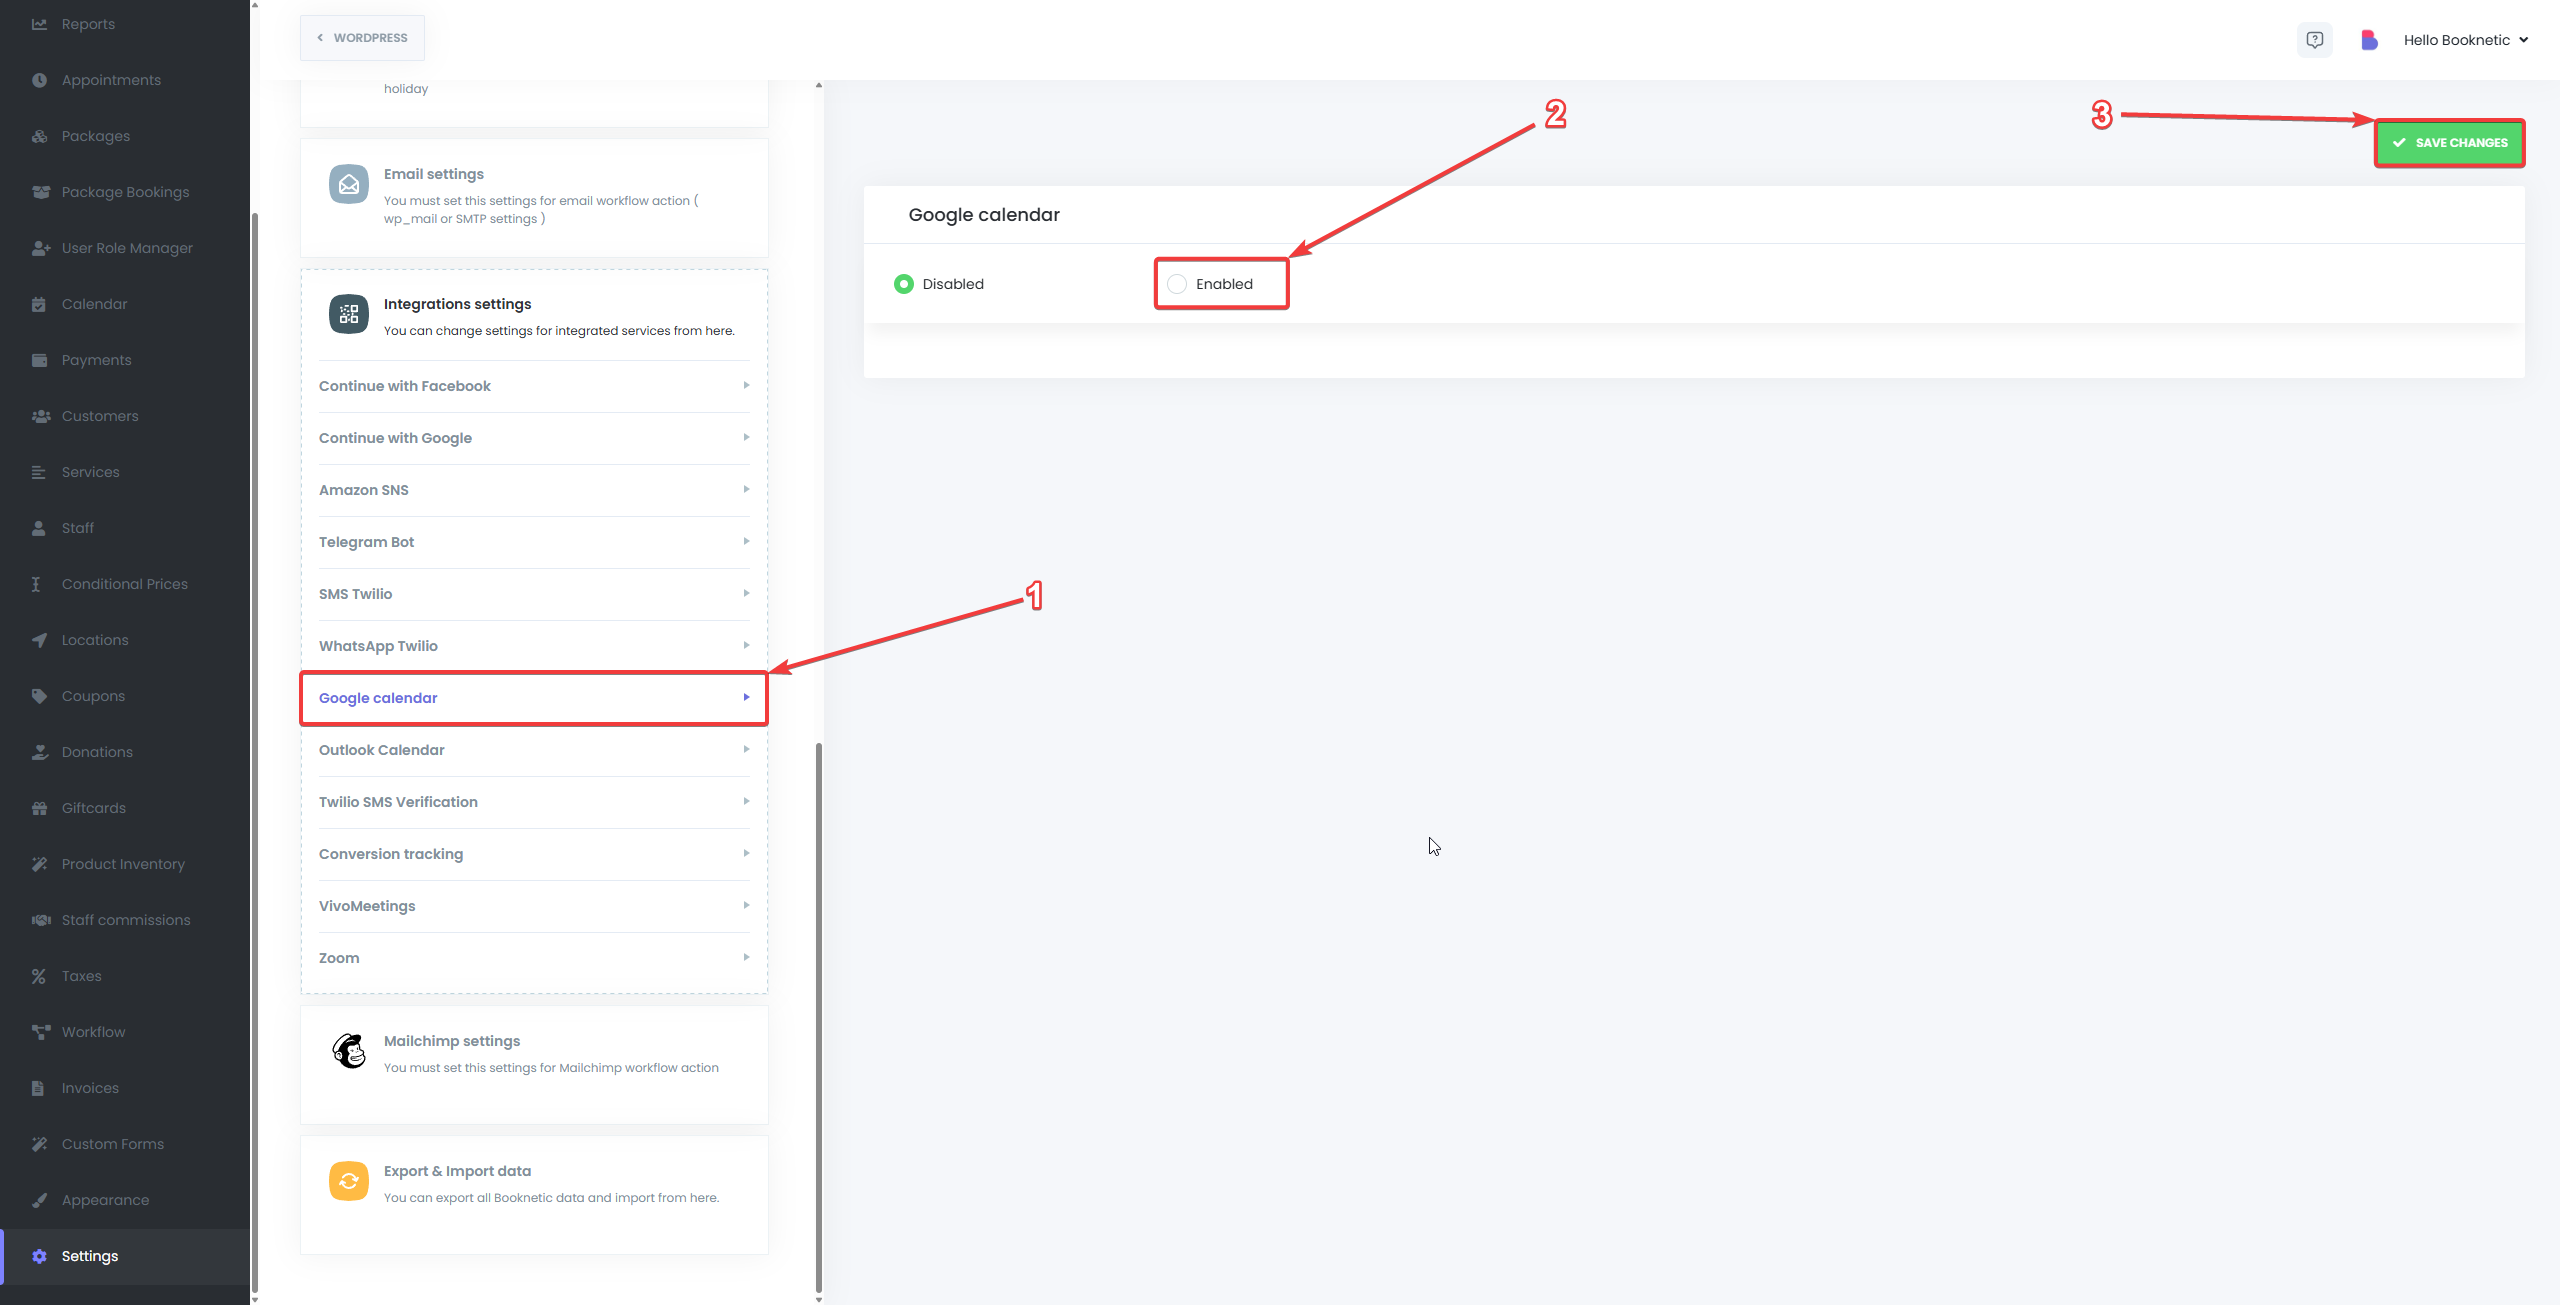
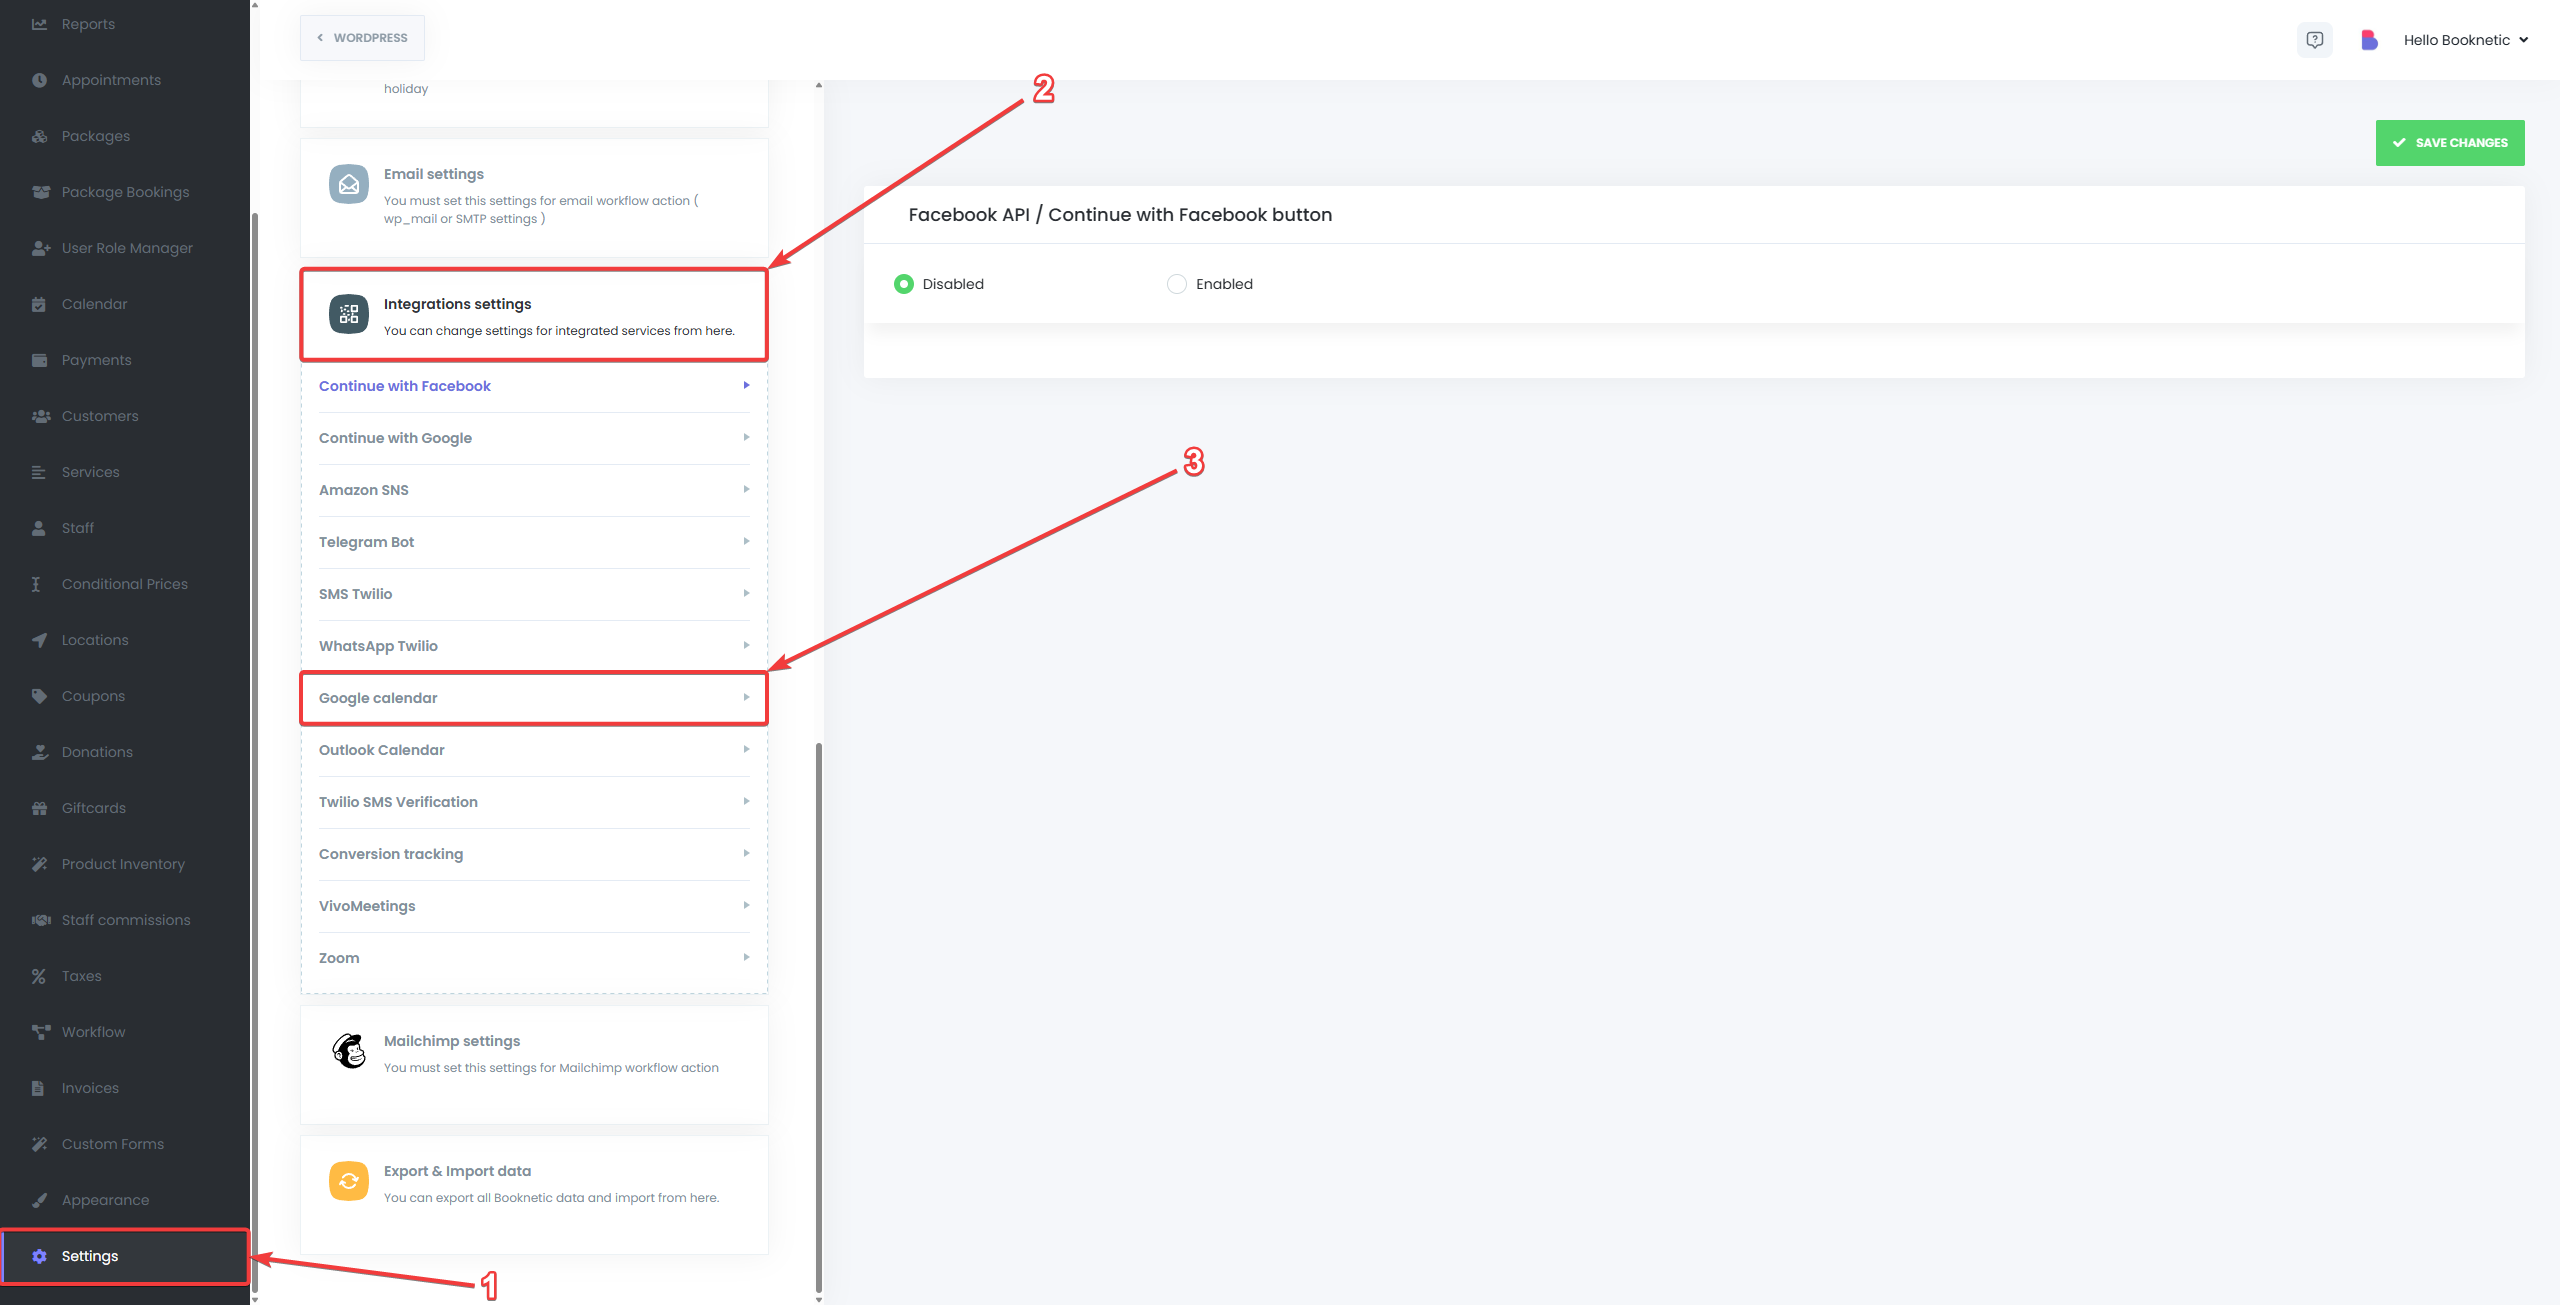
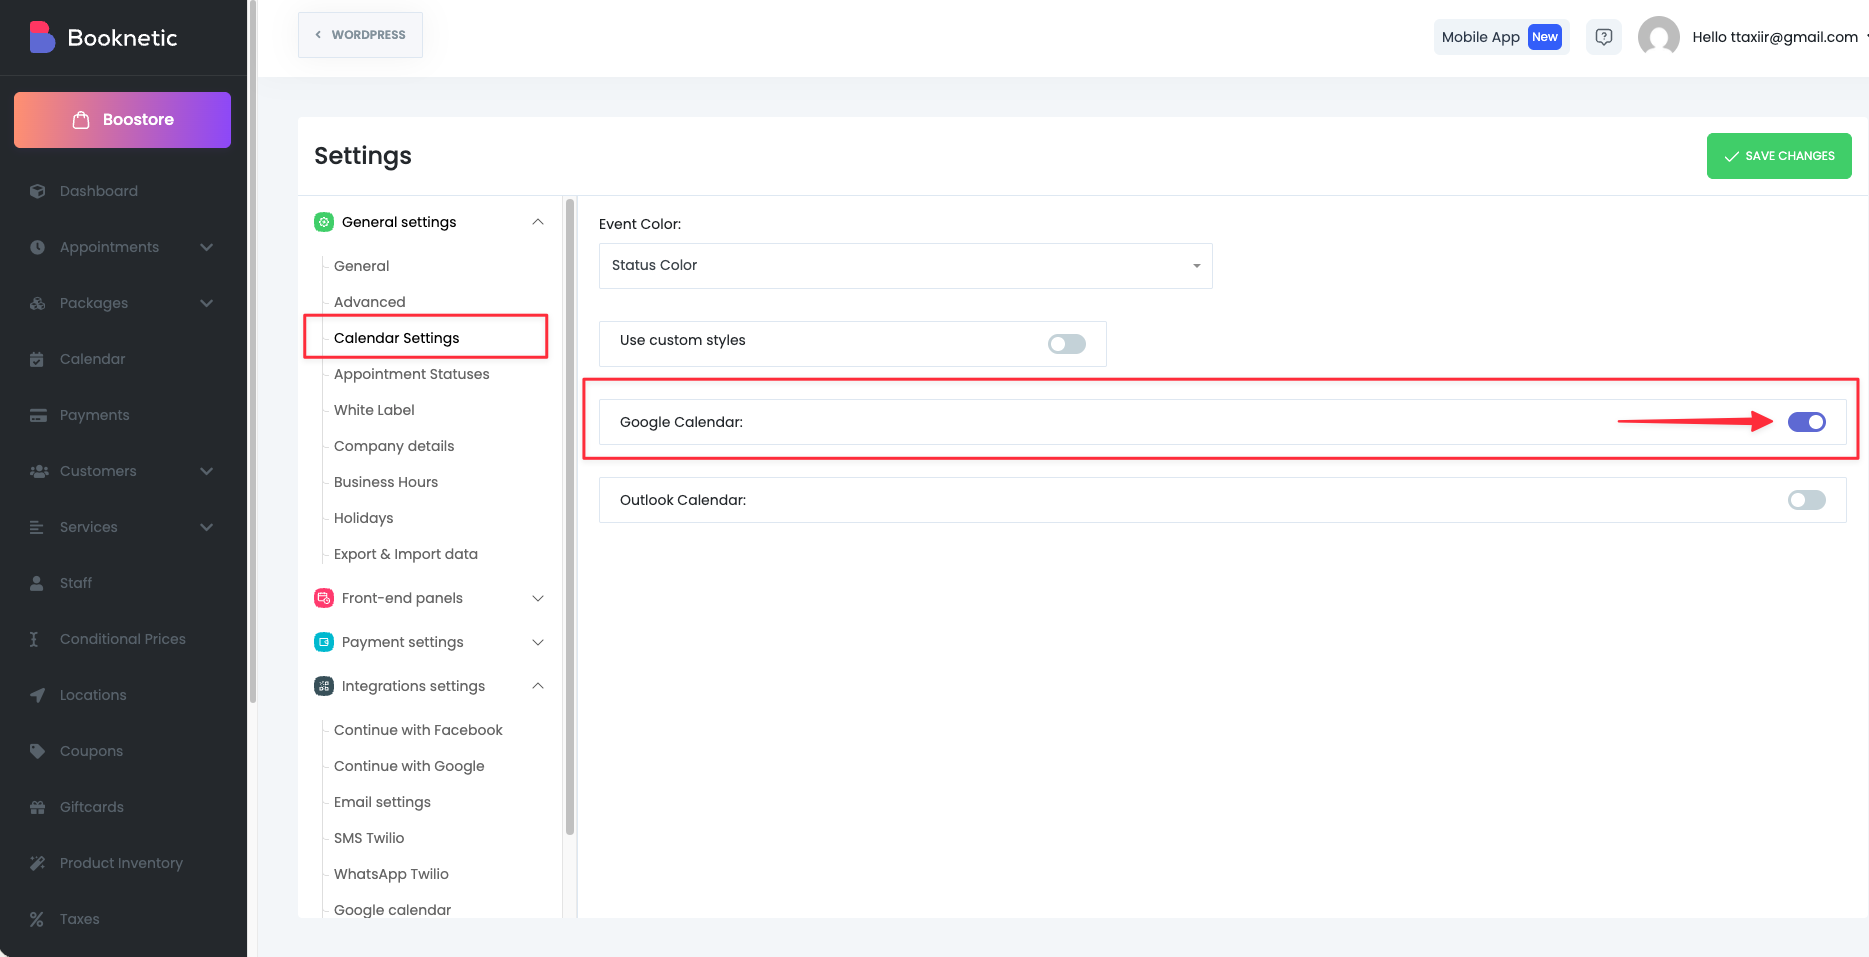
Before using the integration, you need to enable it in the Booknetic Admin Panel.
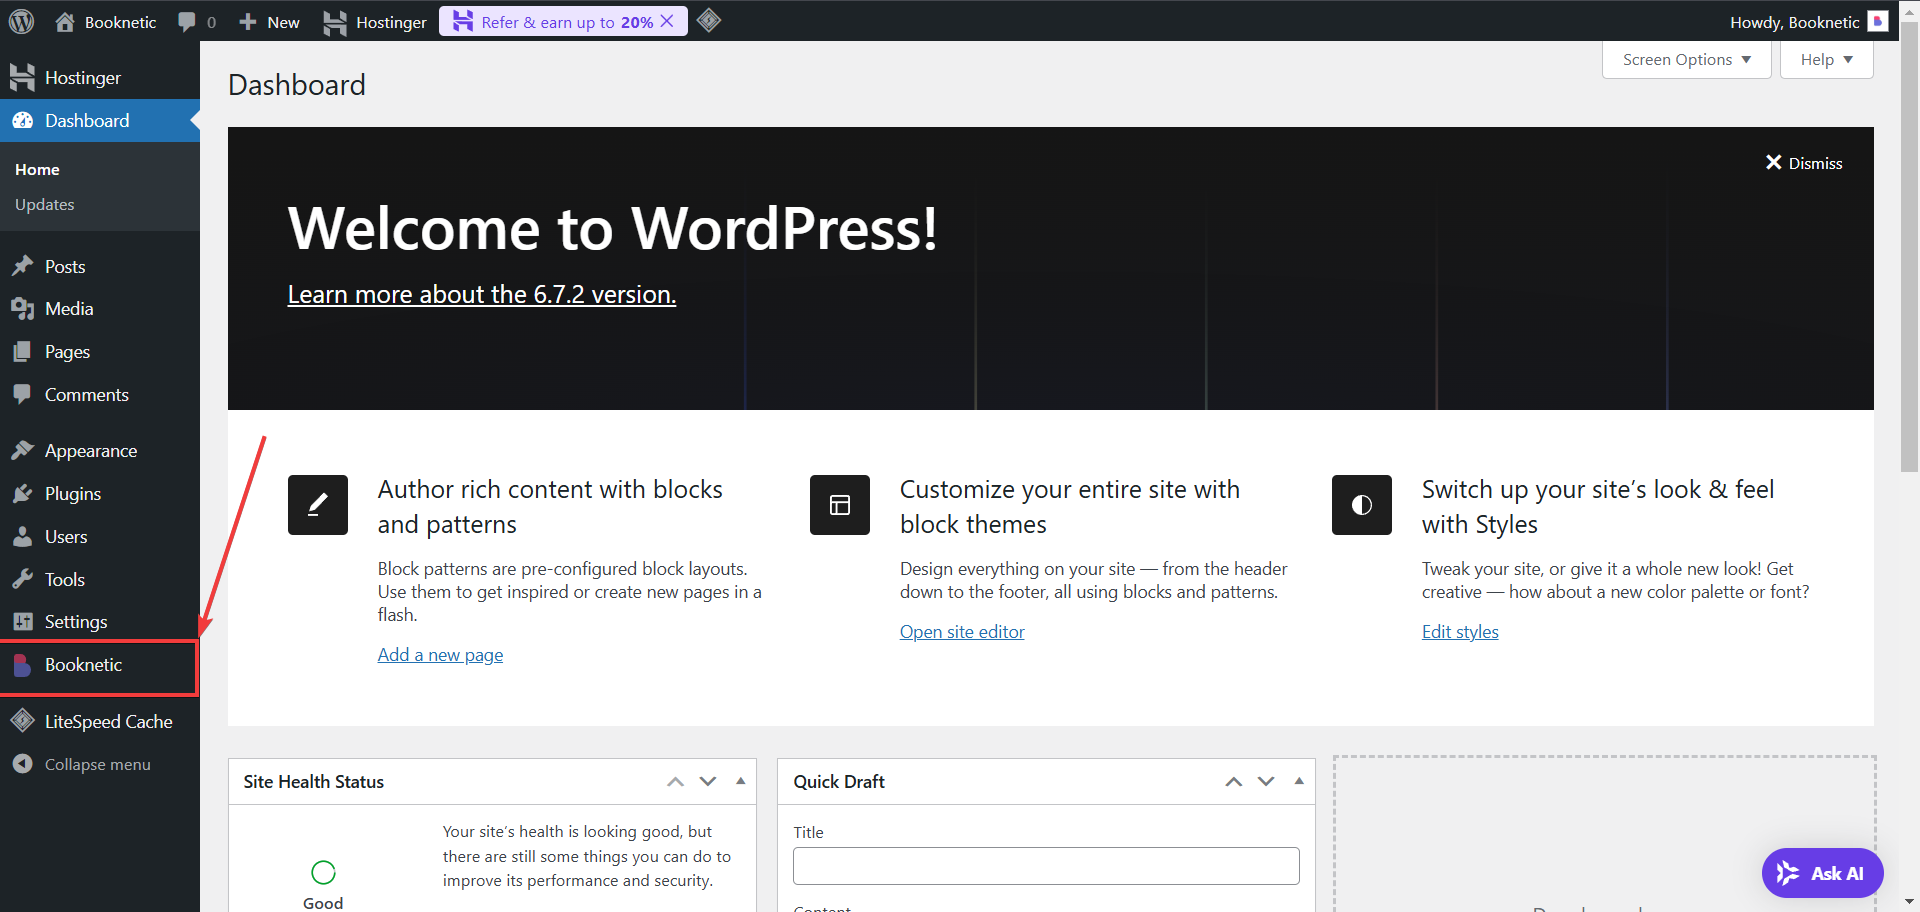
Go to Booknetic Settings
In the Booknetic Admin Panel, navigate to Settings in the left sidebar.
Enable Google Calendar Integration
Select the Integrations tab.
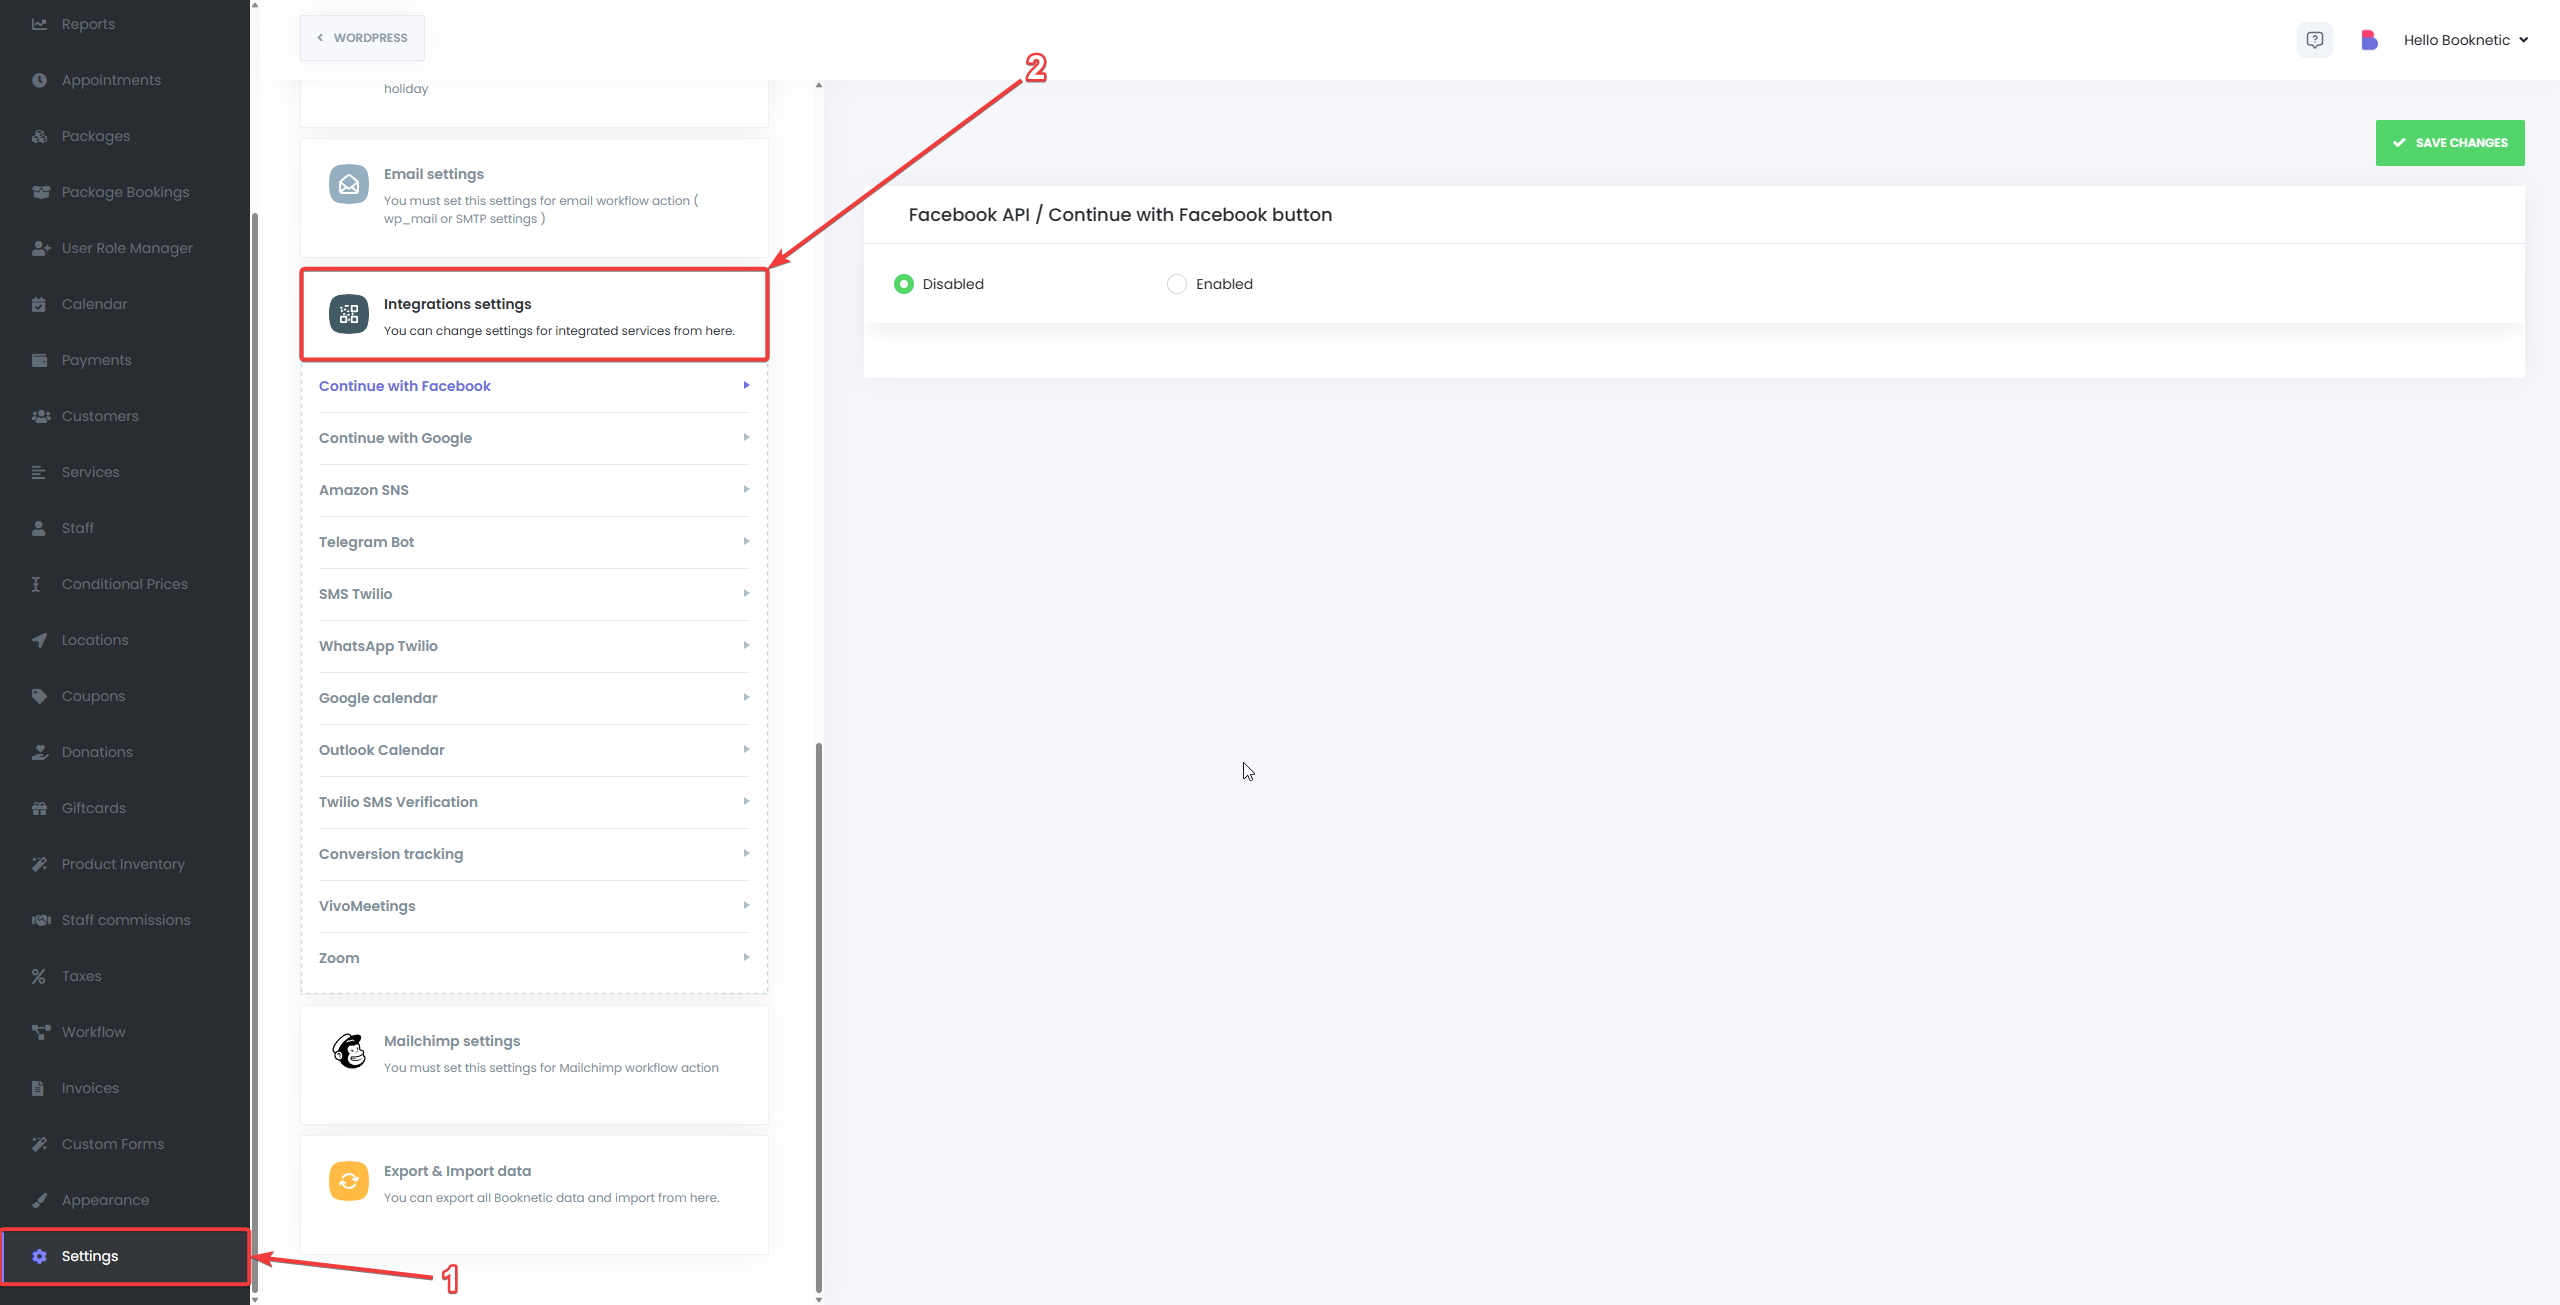
In the Google Calendar section, toggle the integration ON to enable the sync.
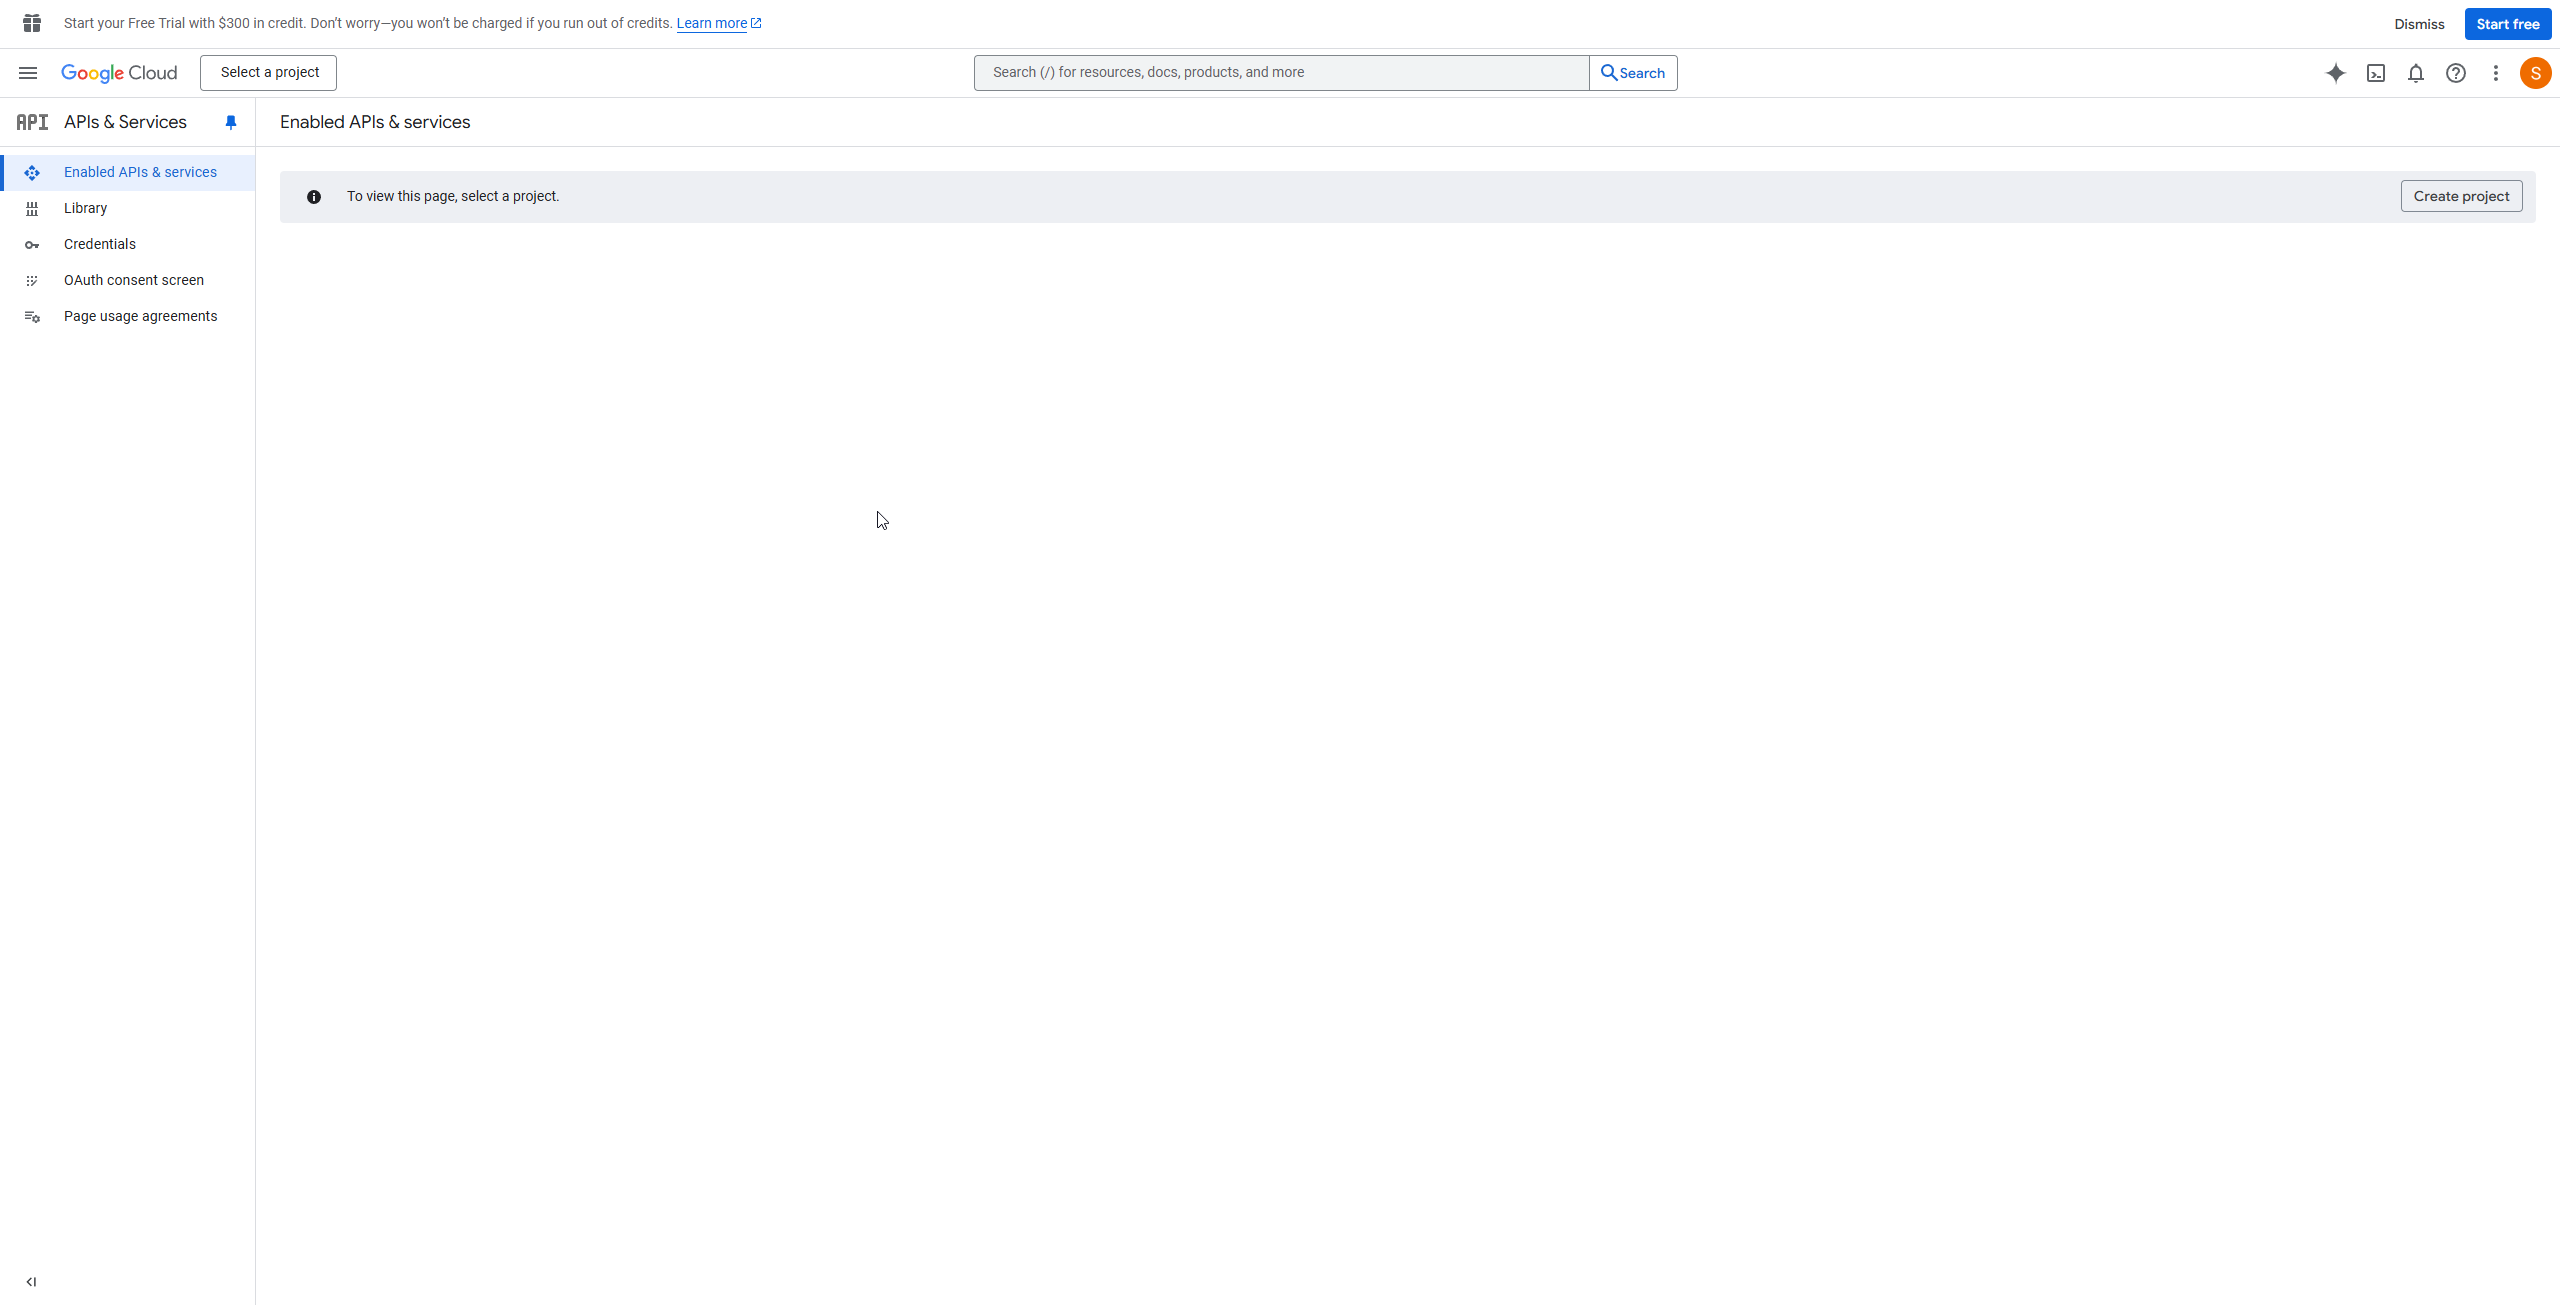
To set up the integration, you’ll need to create a project in the Google Developer Console and obtain OAuth 2.0 credentials.
Sign In
Go to the Google Developer Console and sign in with your Google account.
If this is your first time logging into the Google Developer Console, you will have to agree to the terms of service first.
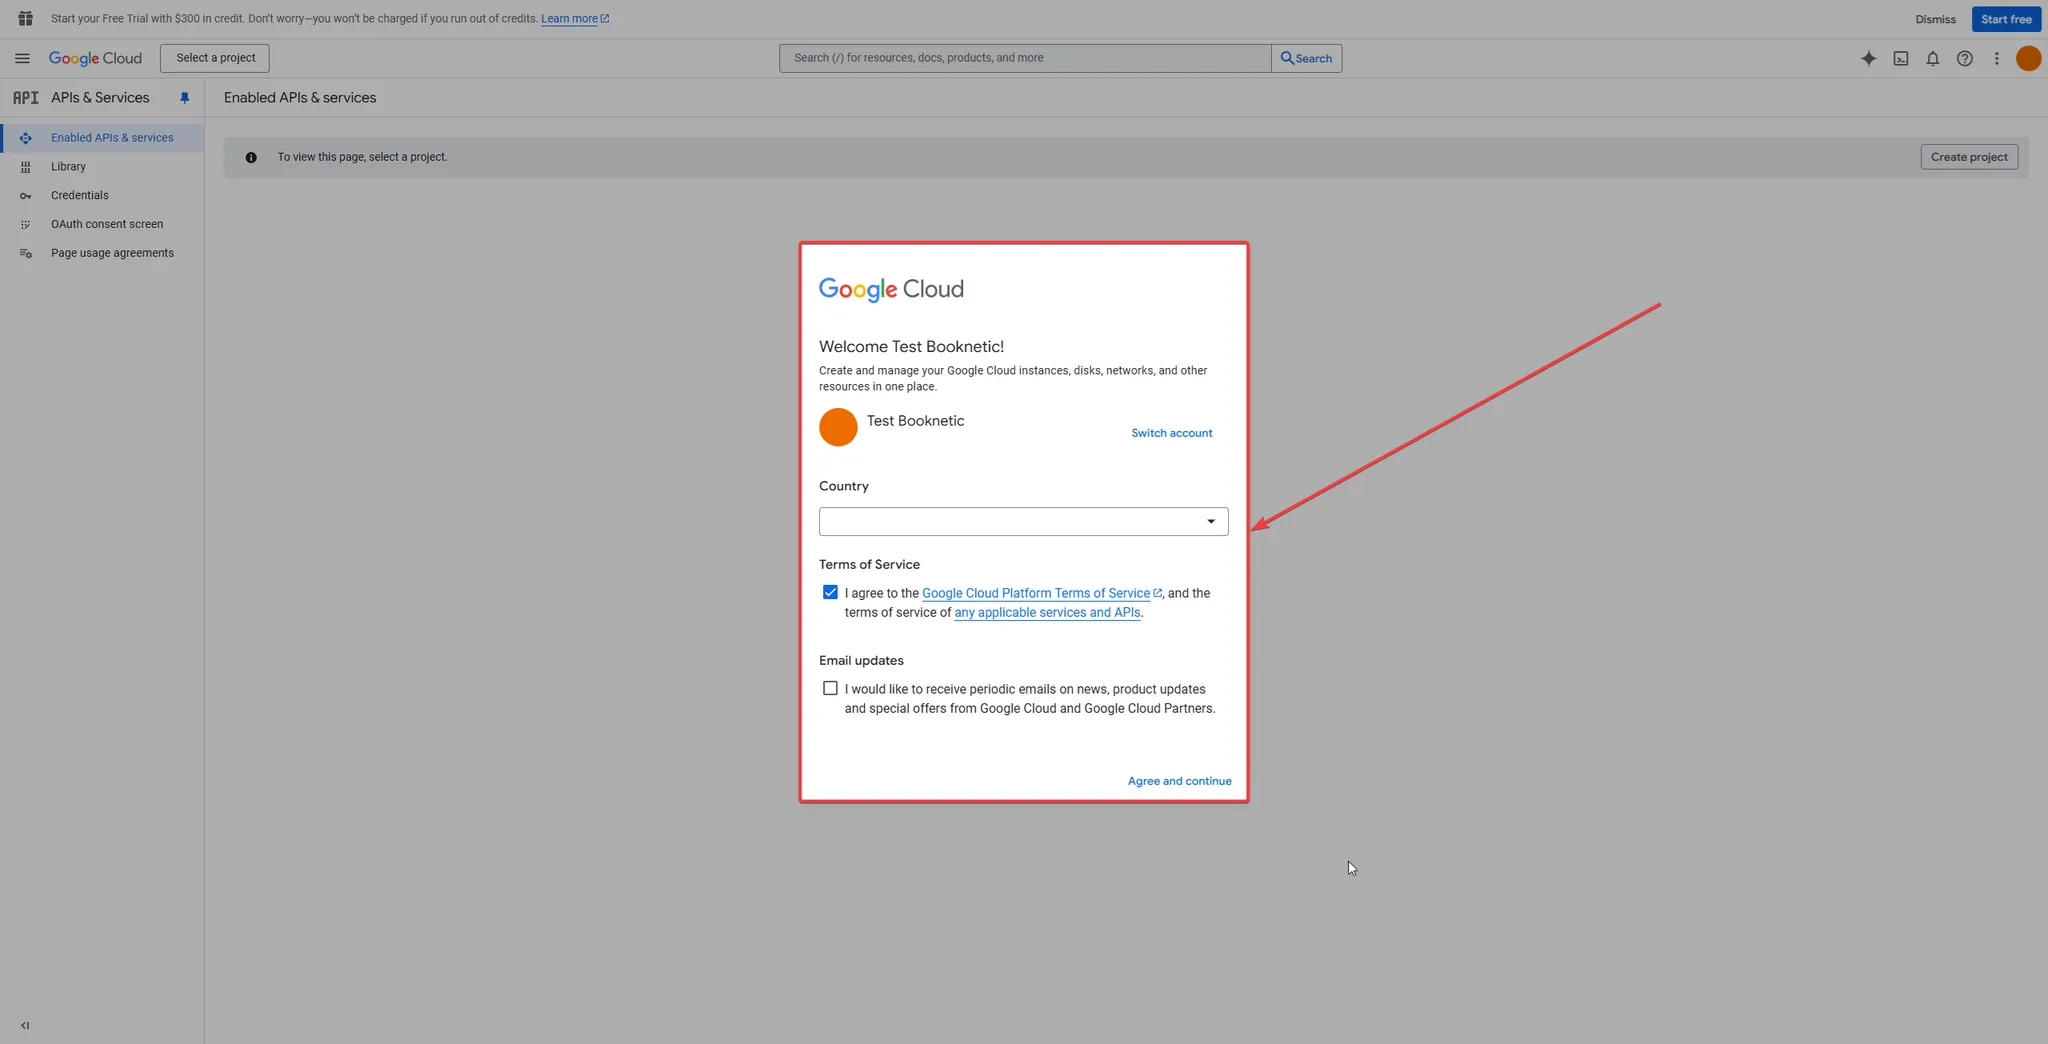
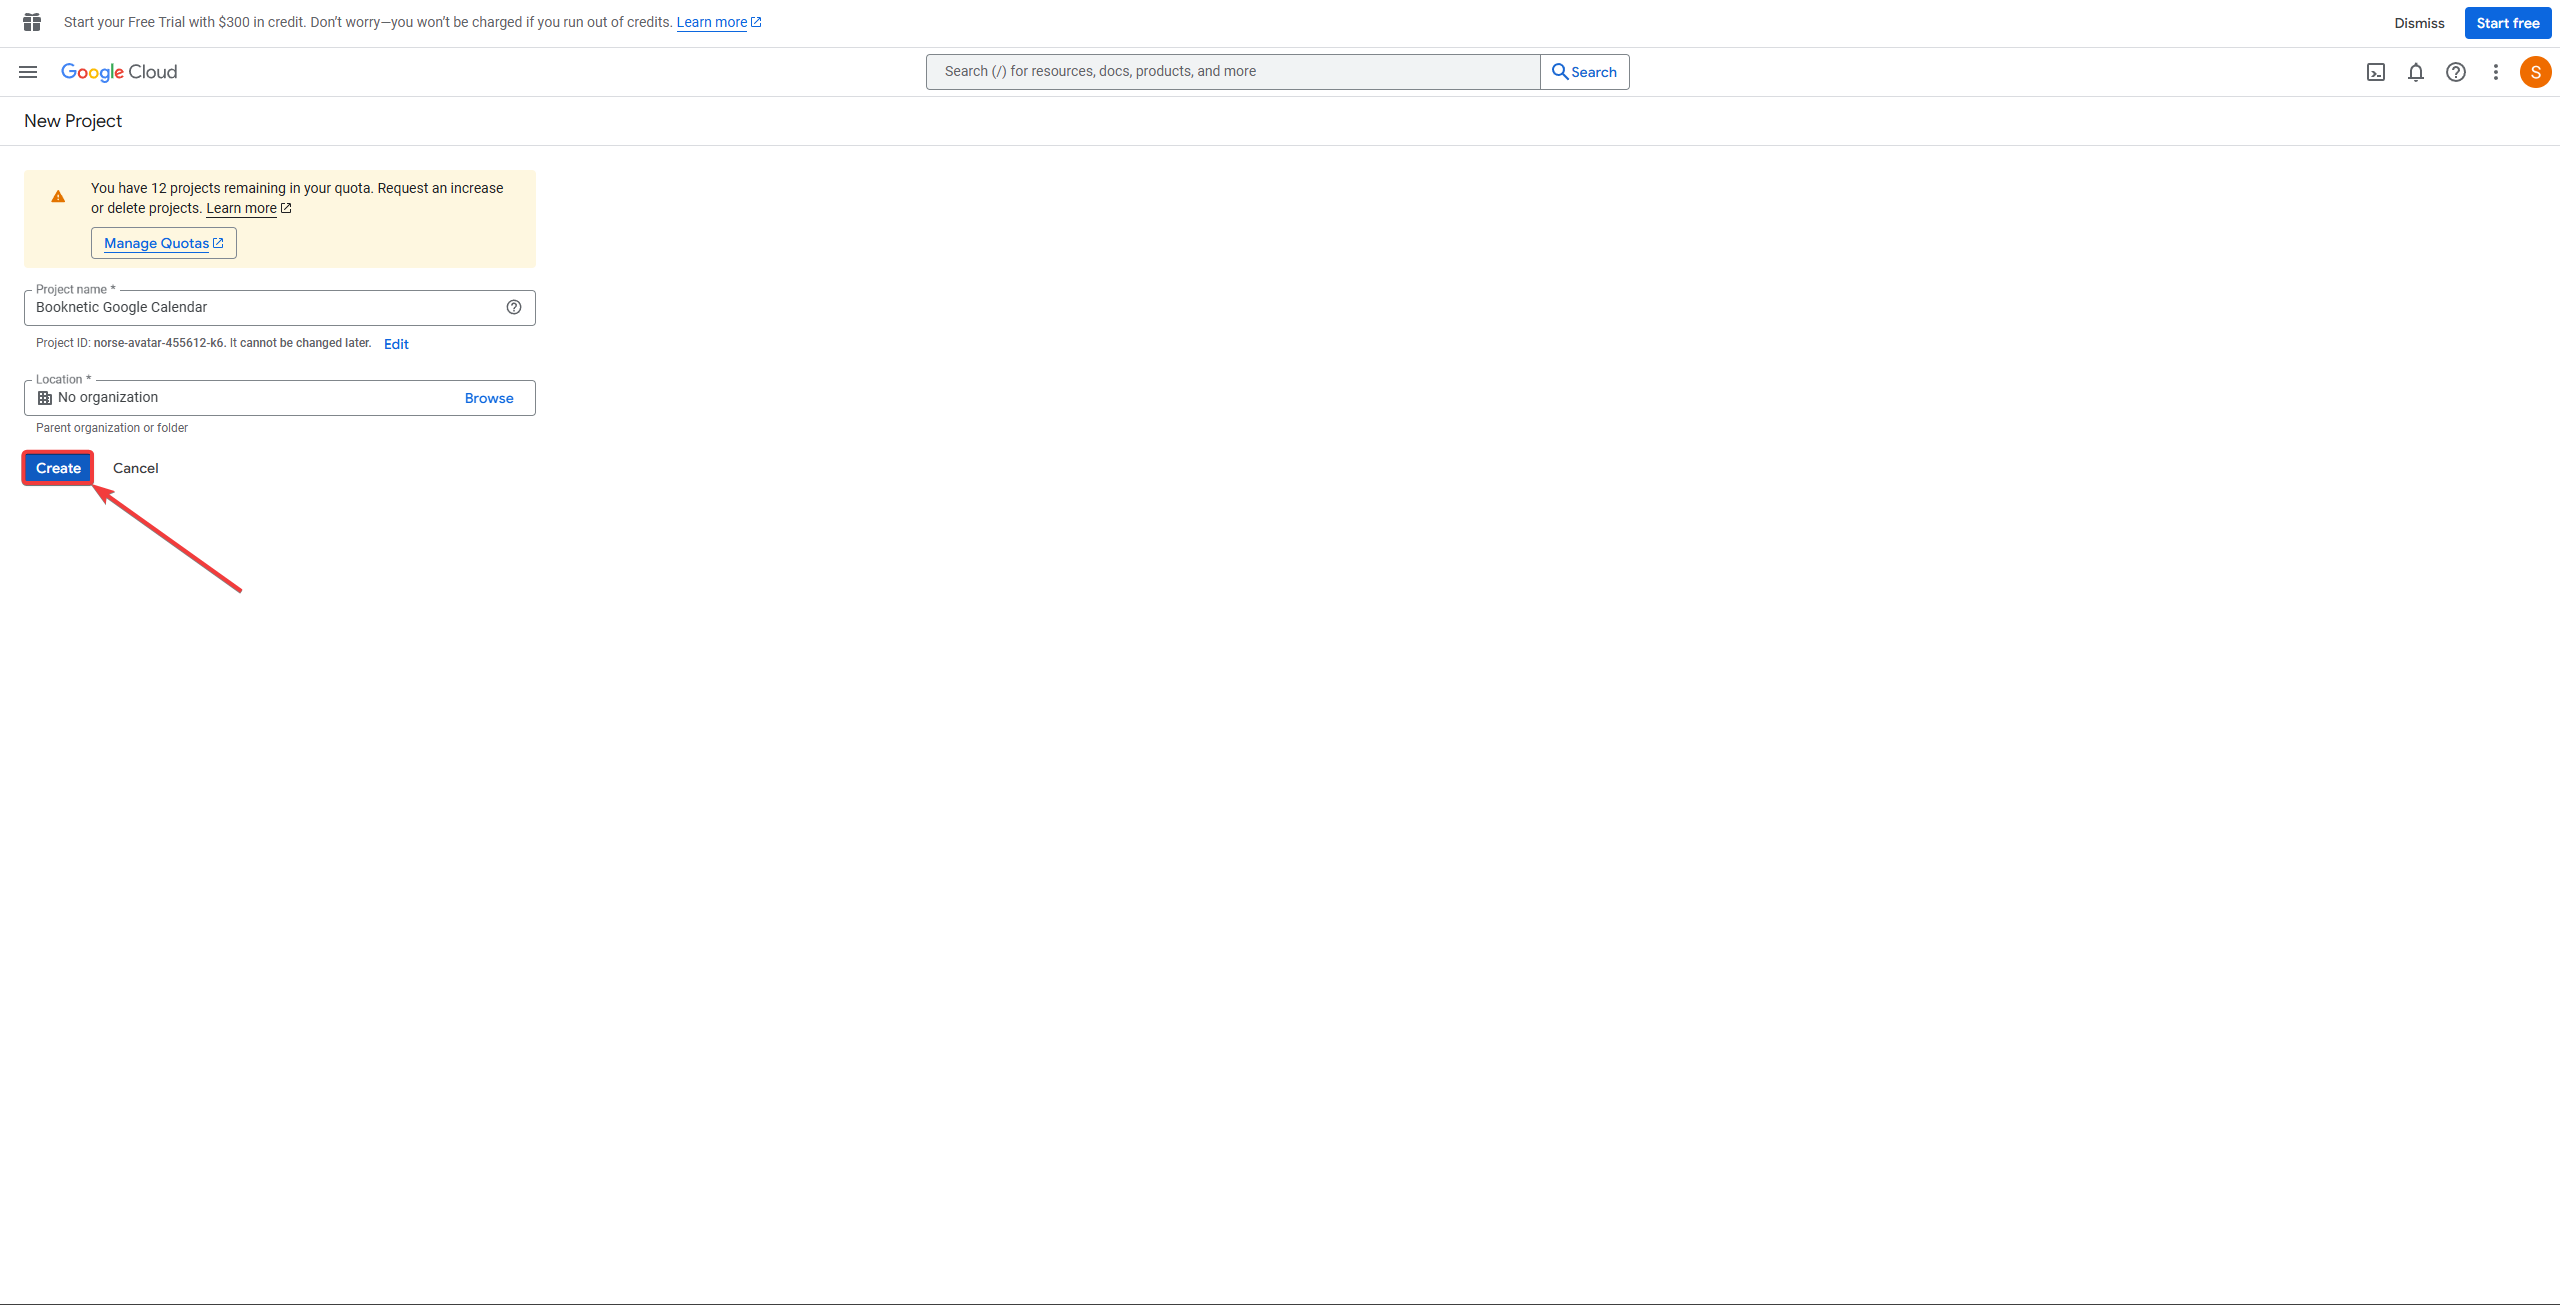
Create a New Project
Click on the Select a project button at the top of the page.

Then click NEW PROJECT.

Name the project (e.g., Booknetic Google Calendar) and select No organization.
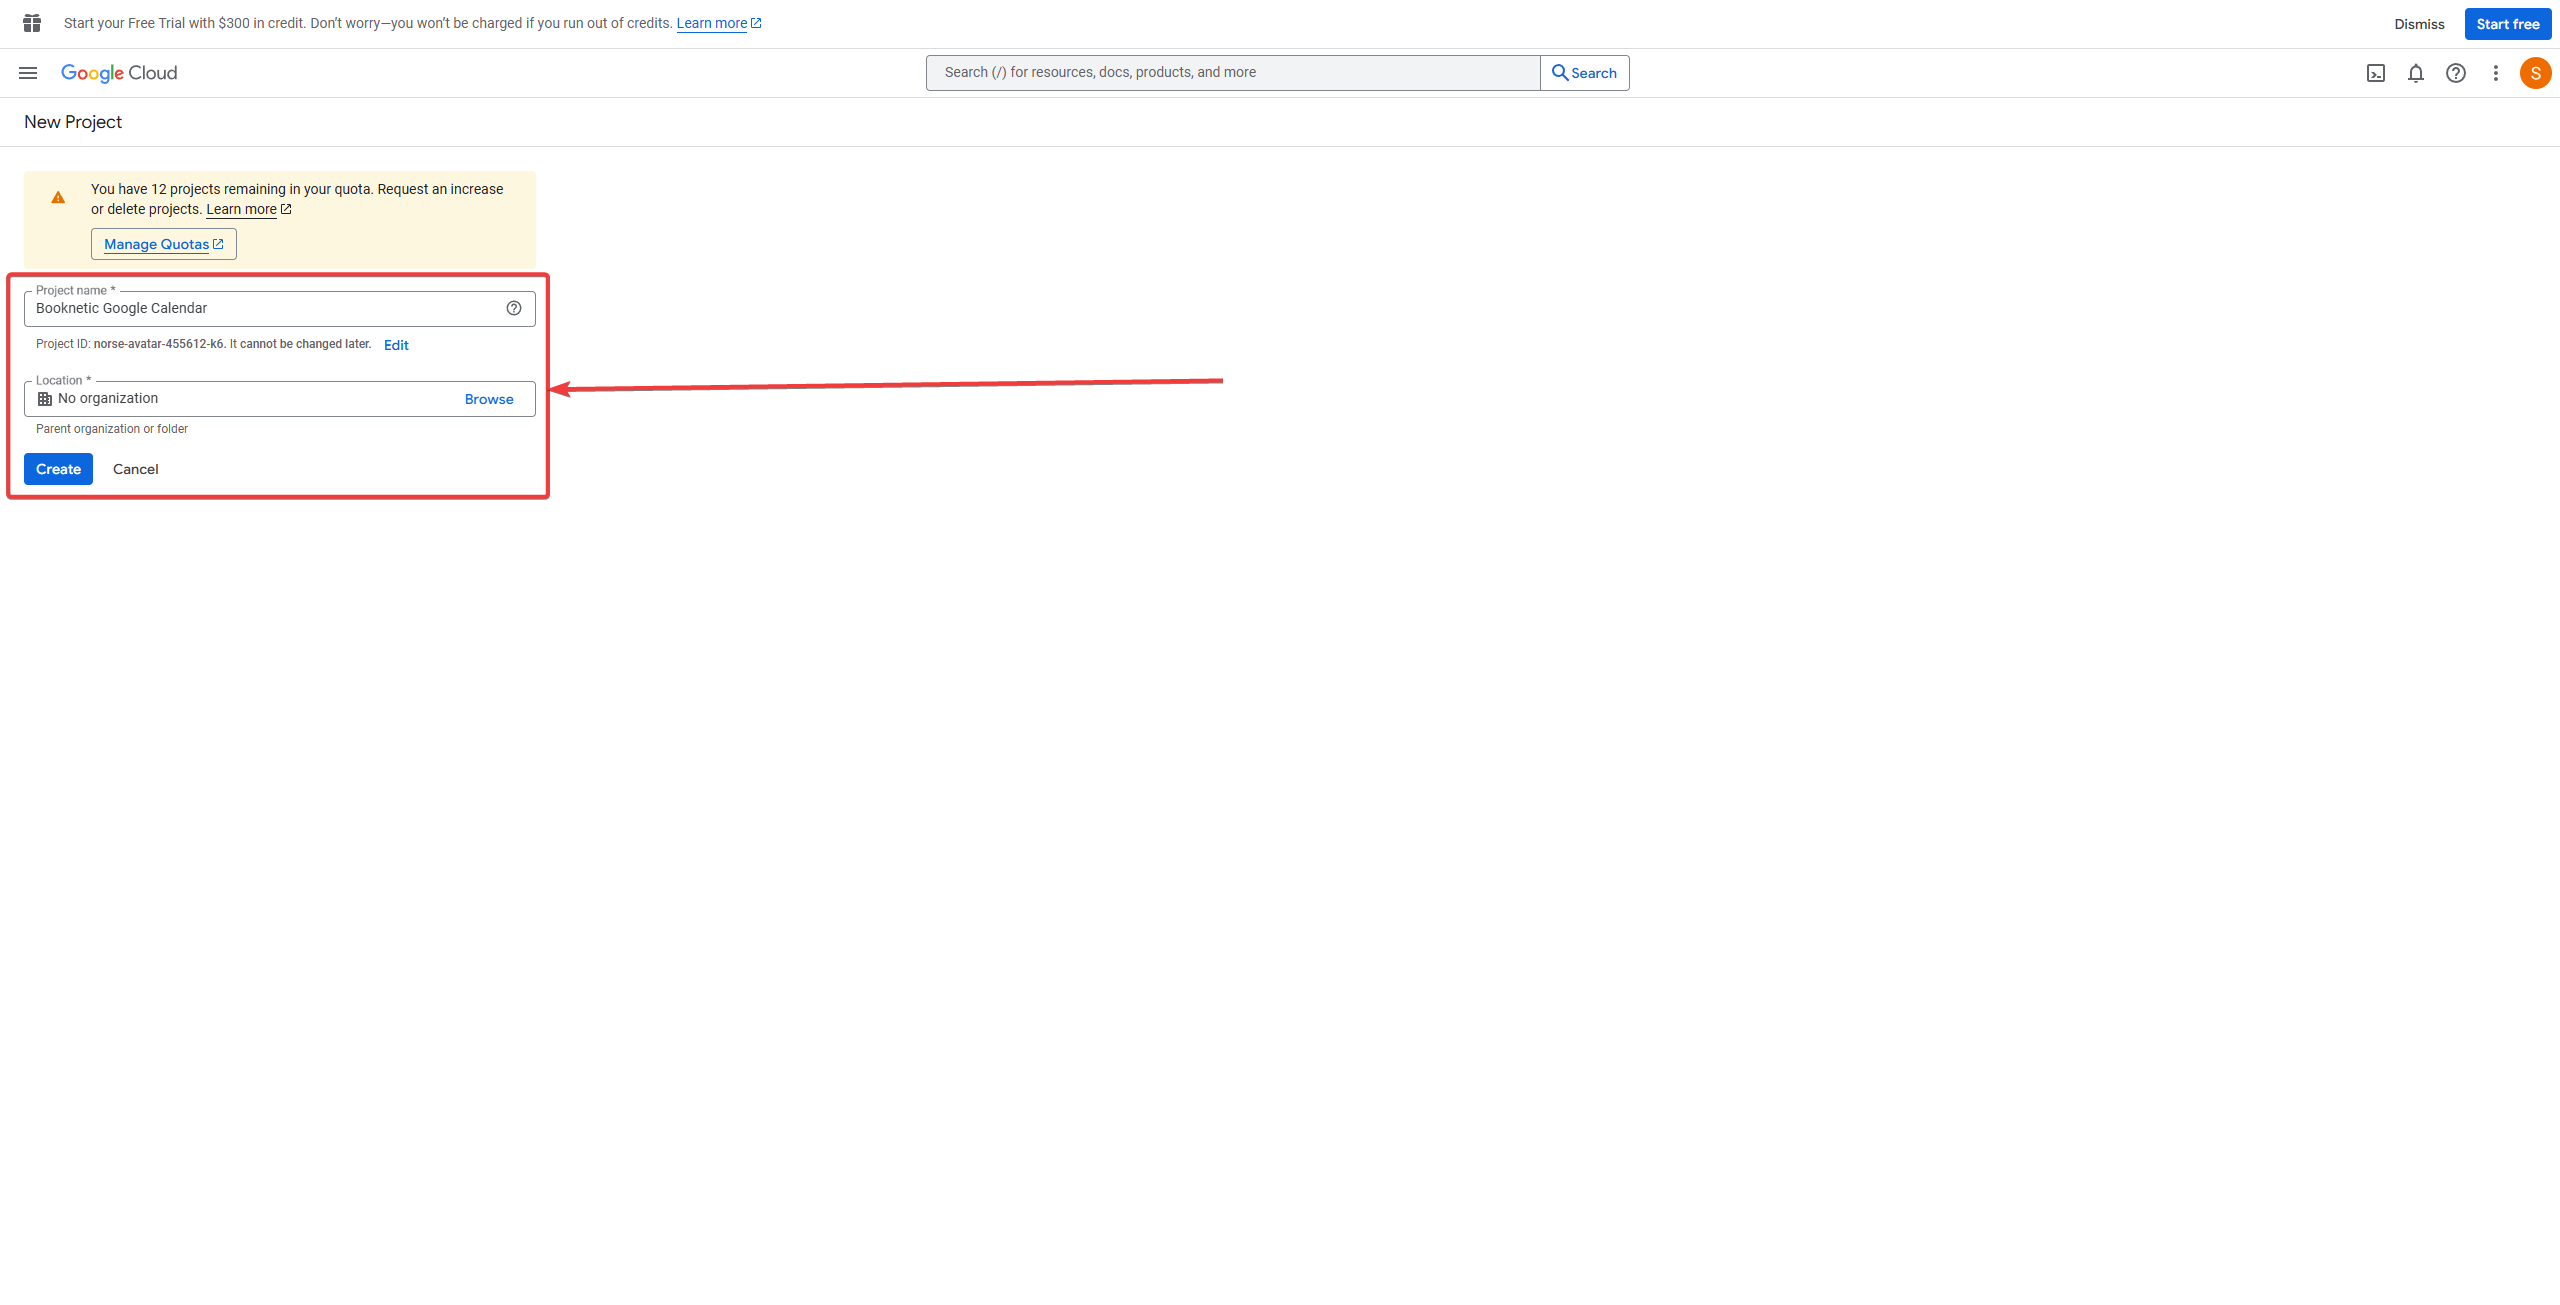
Click Create to finalize.
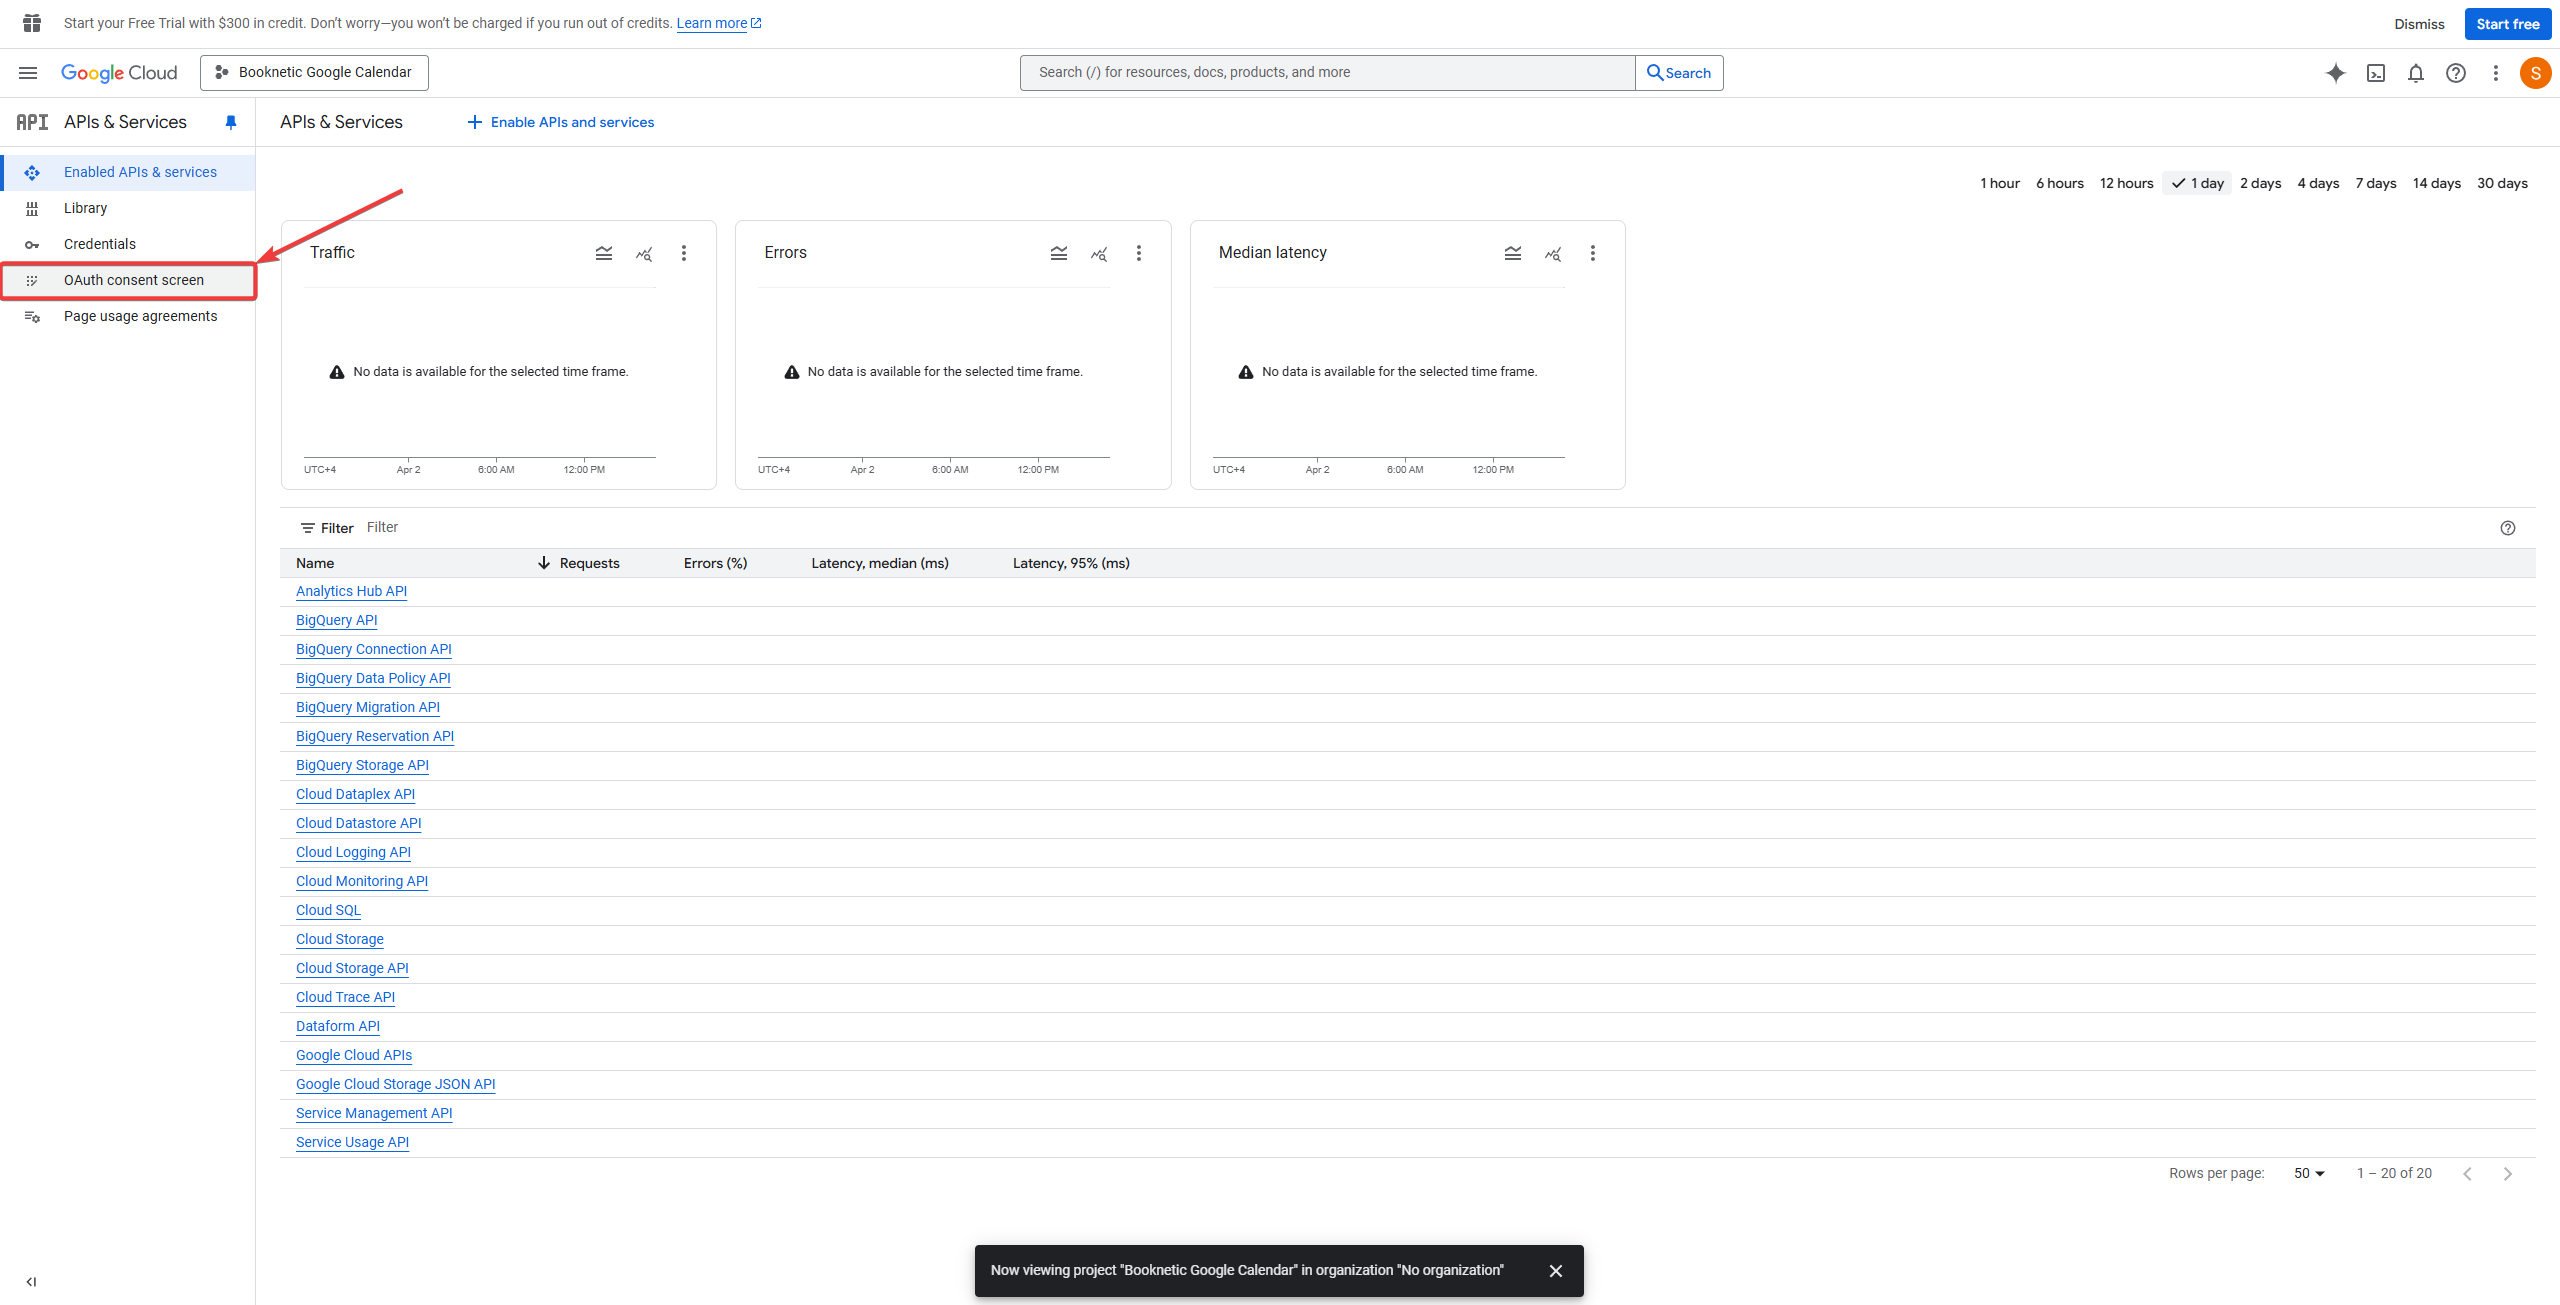
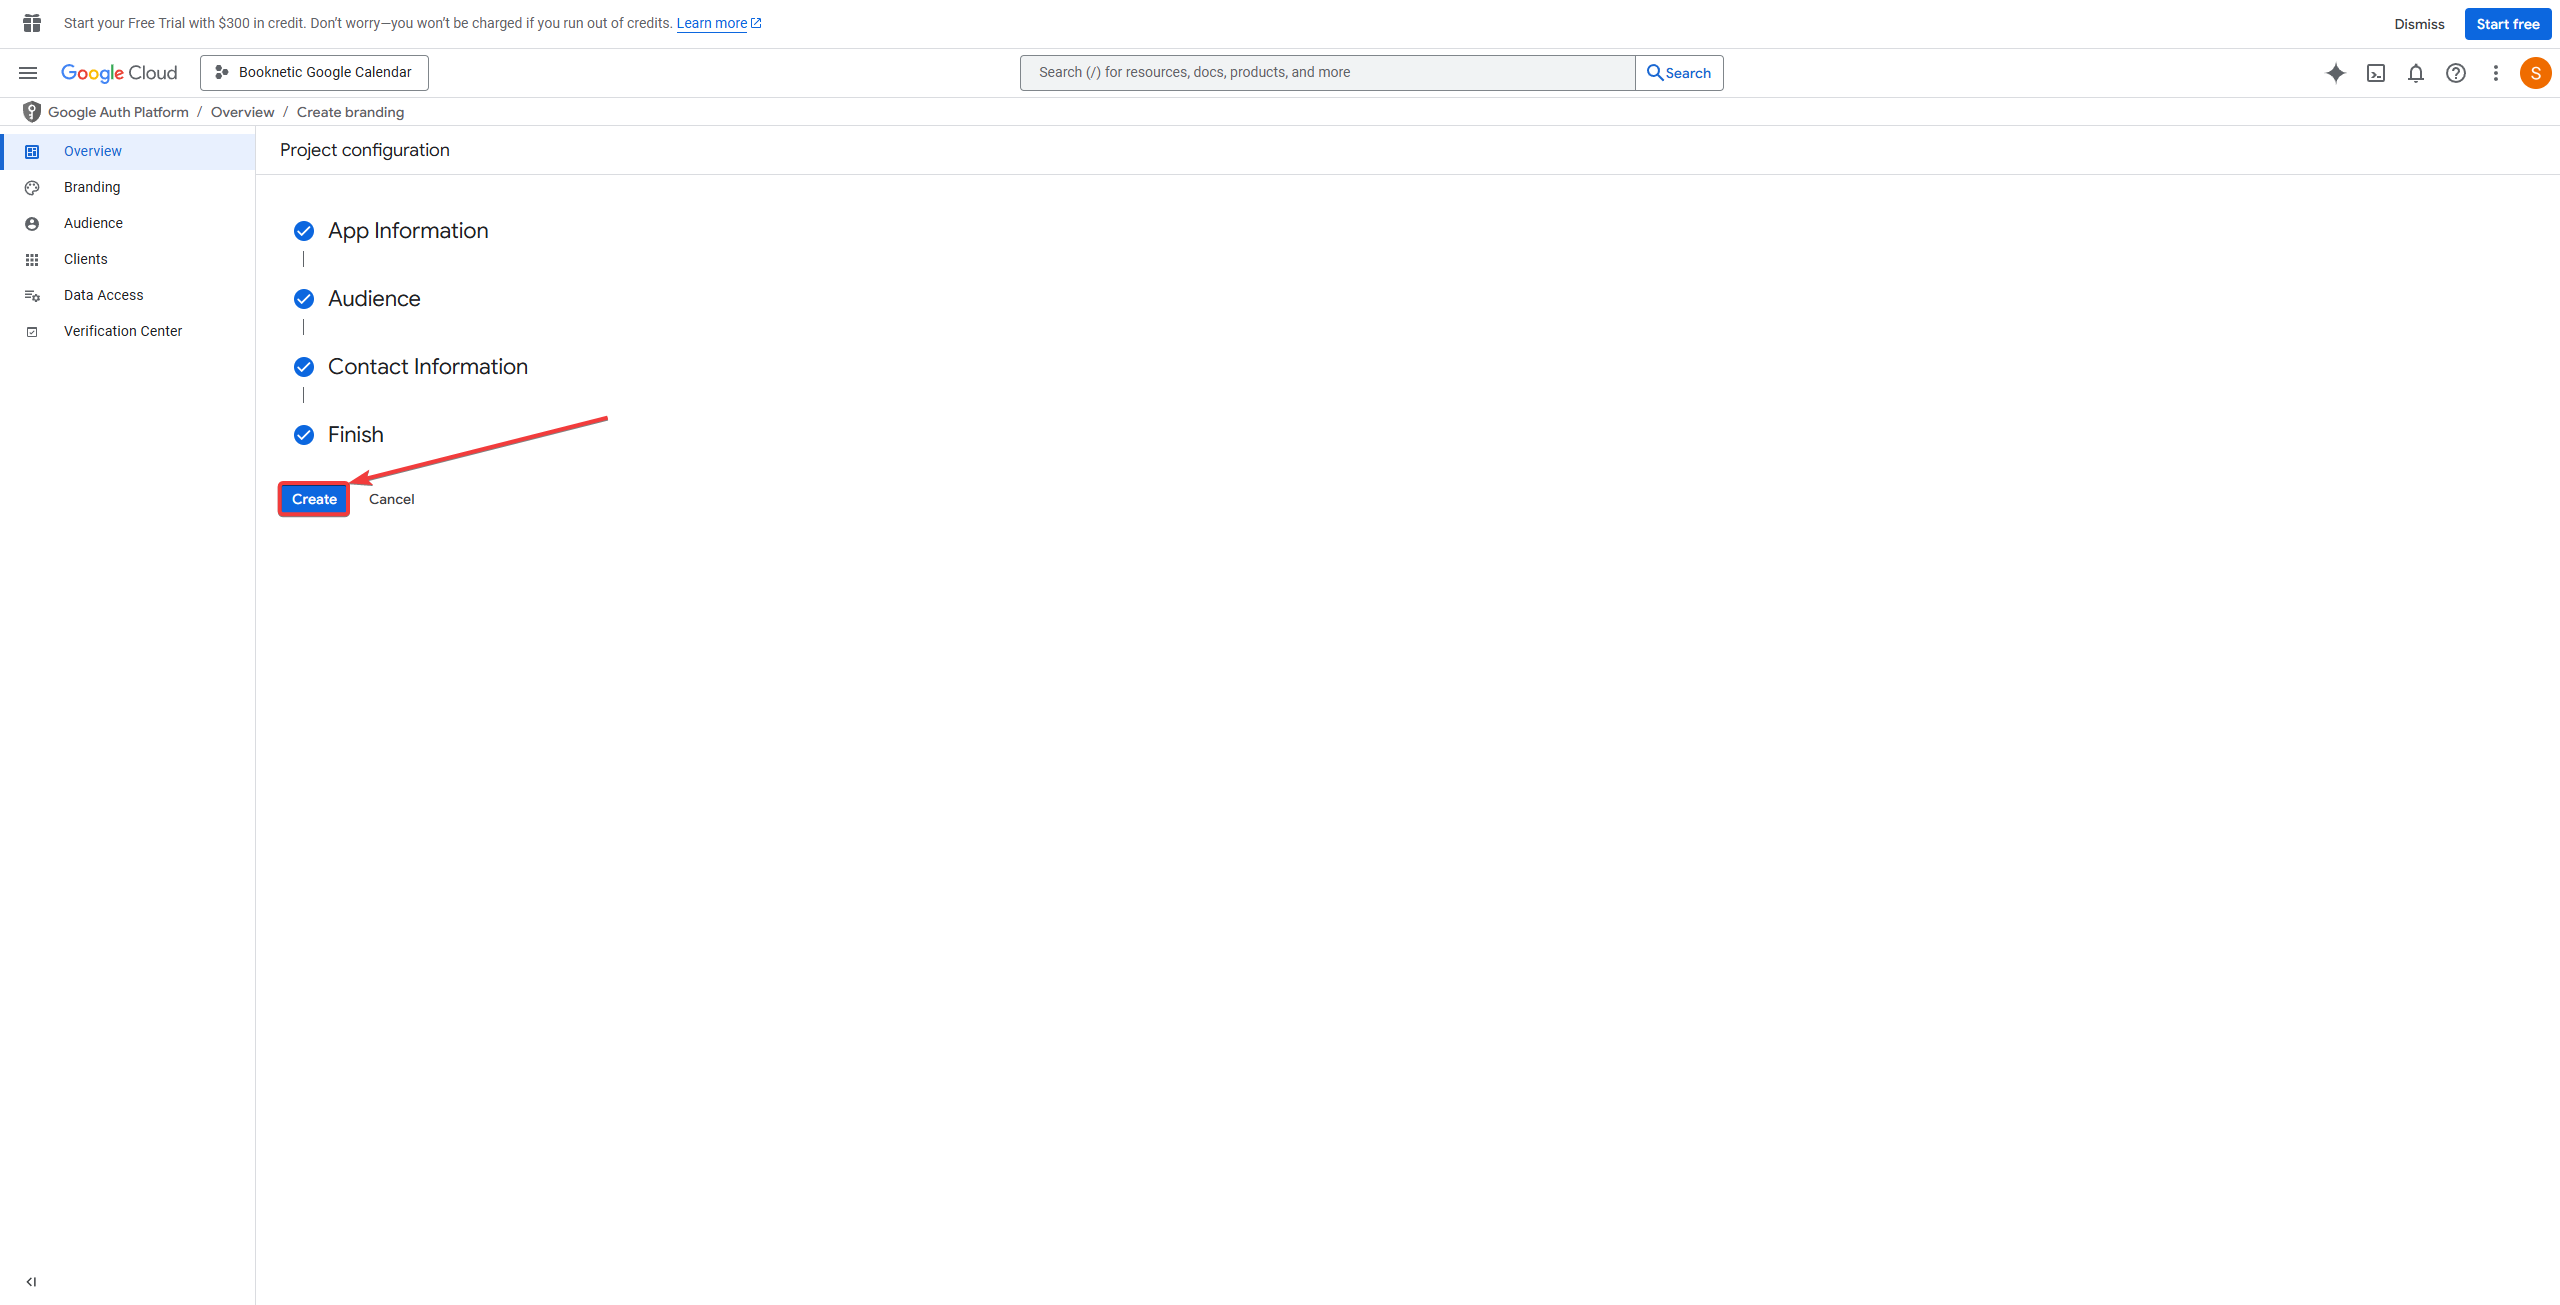
Configure OAuth Consent
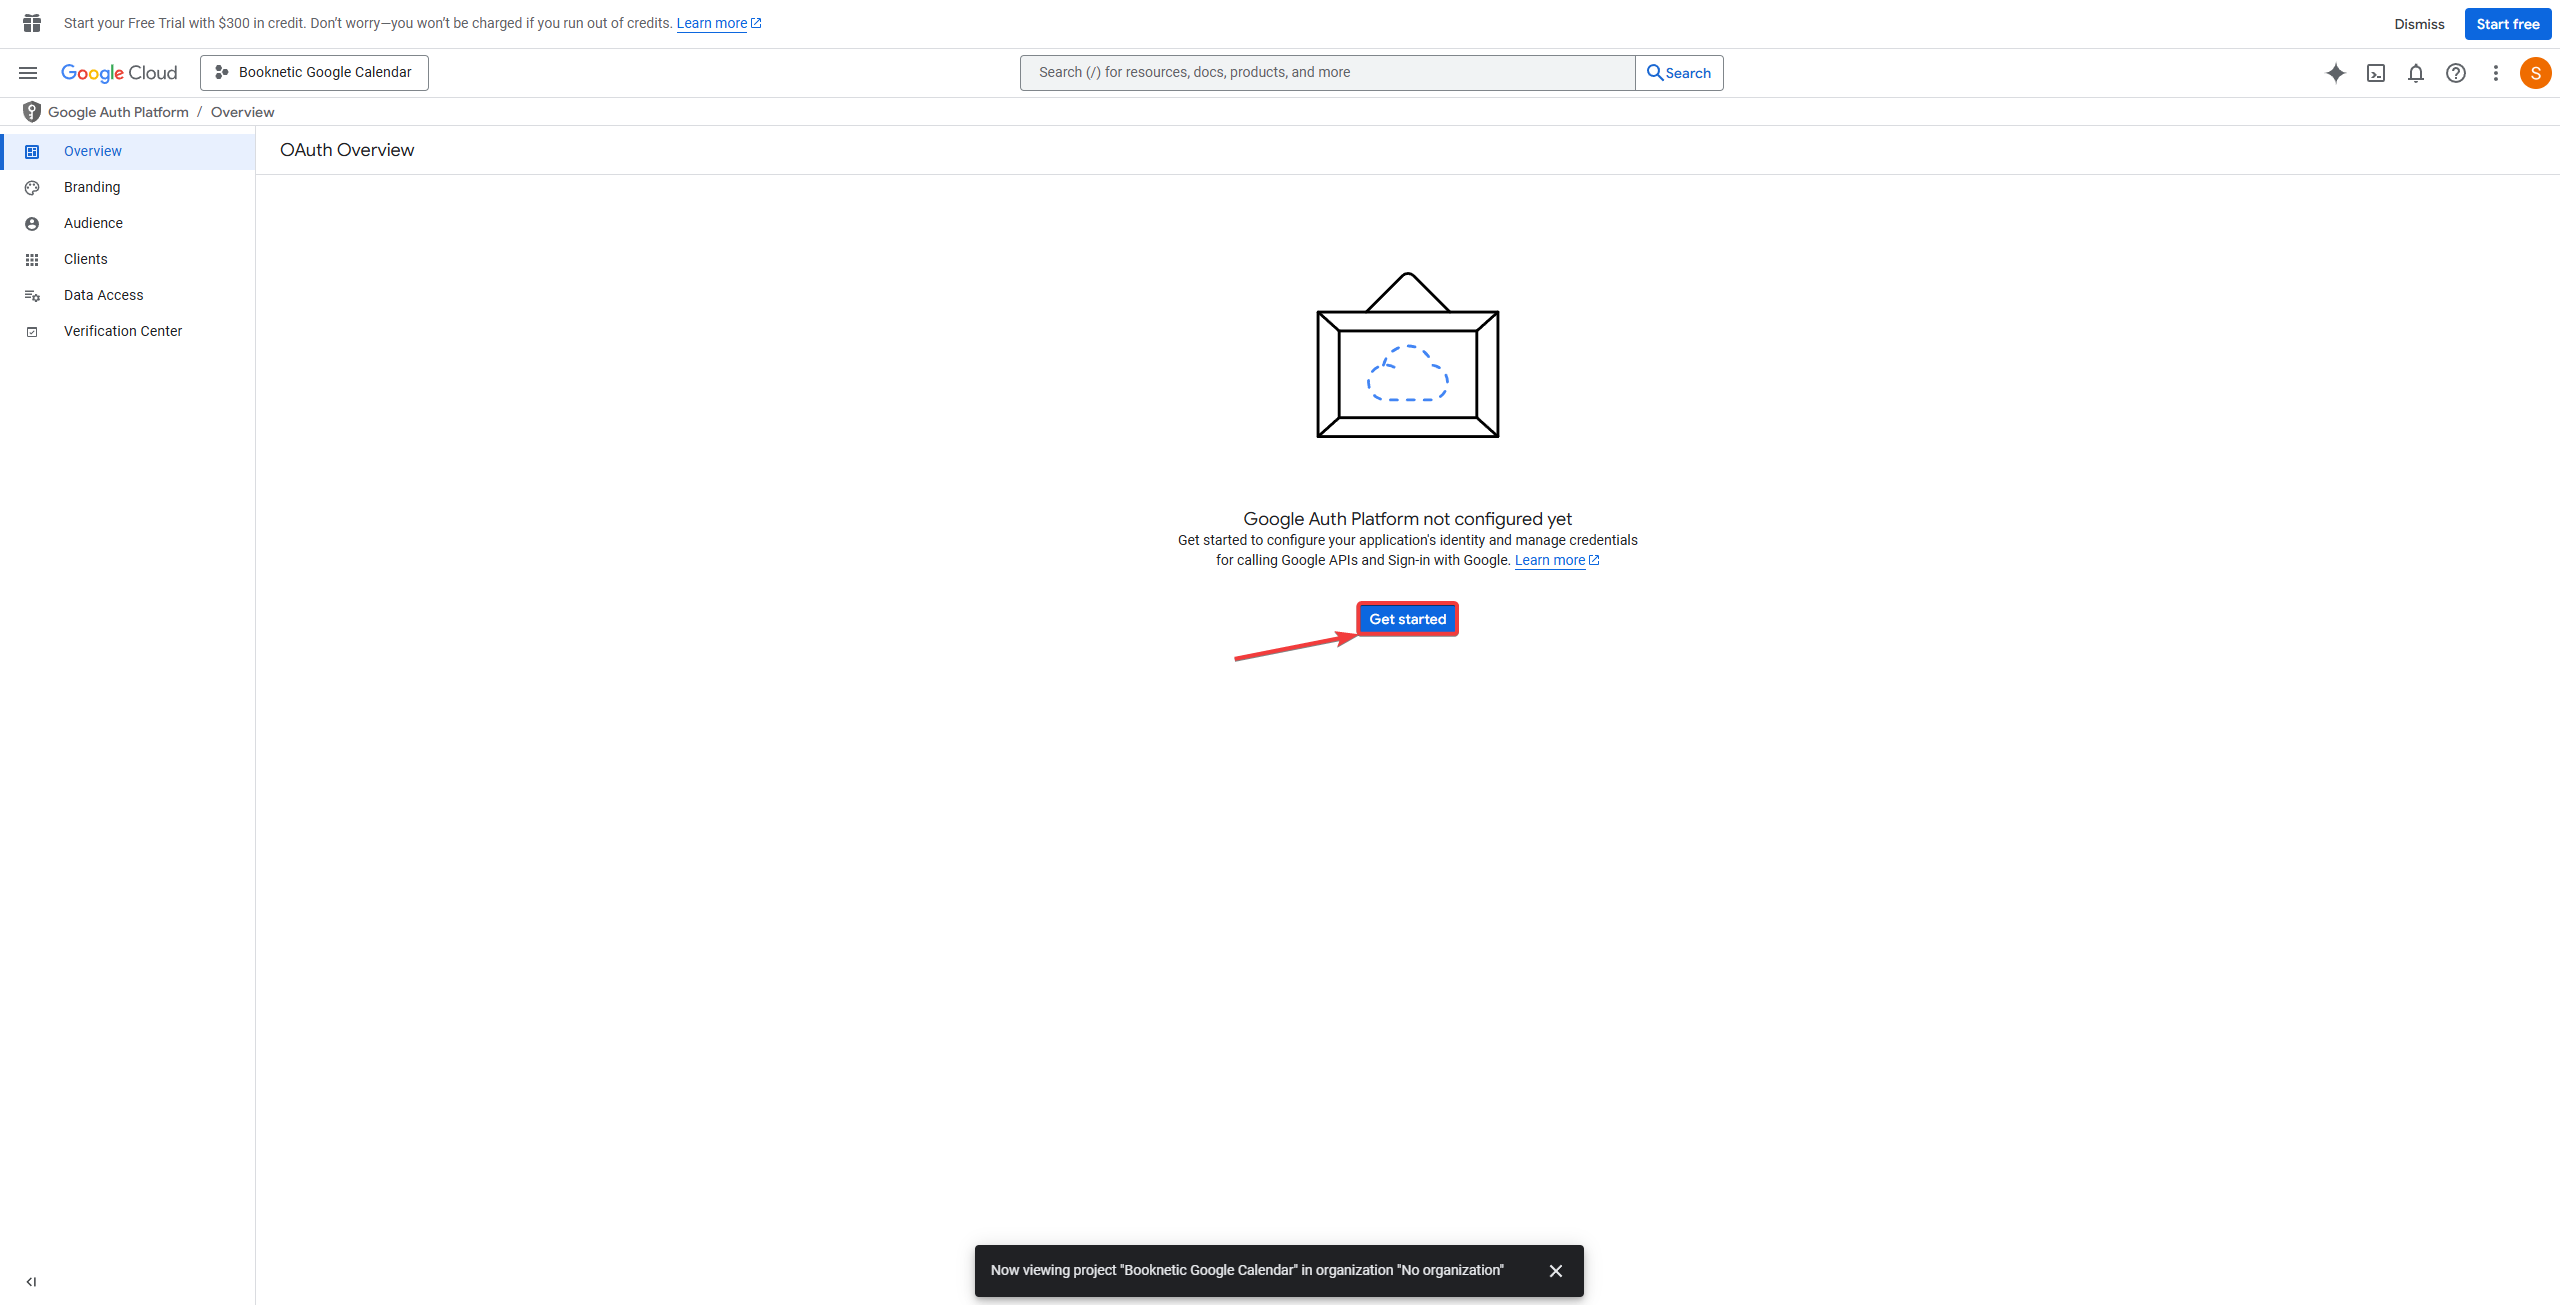
After creating the project, go to APIs & Services > OAuth consent screen.
Select Get Started.
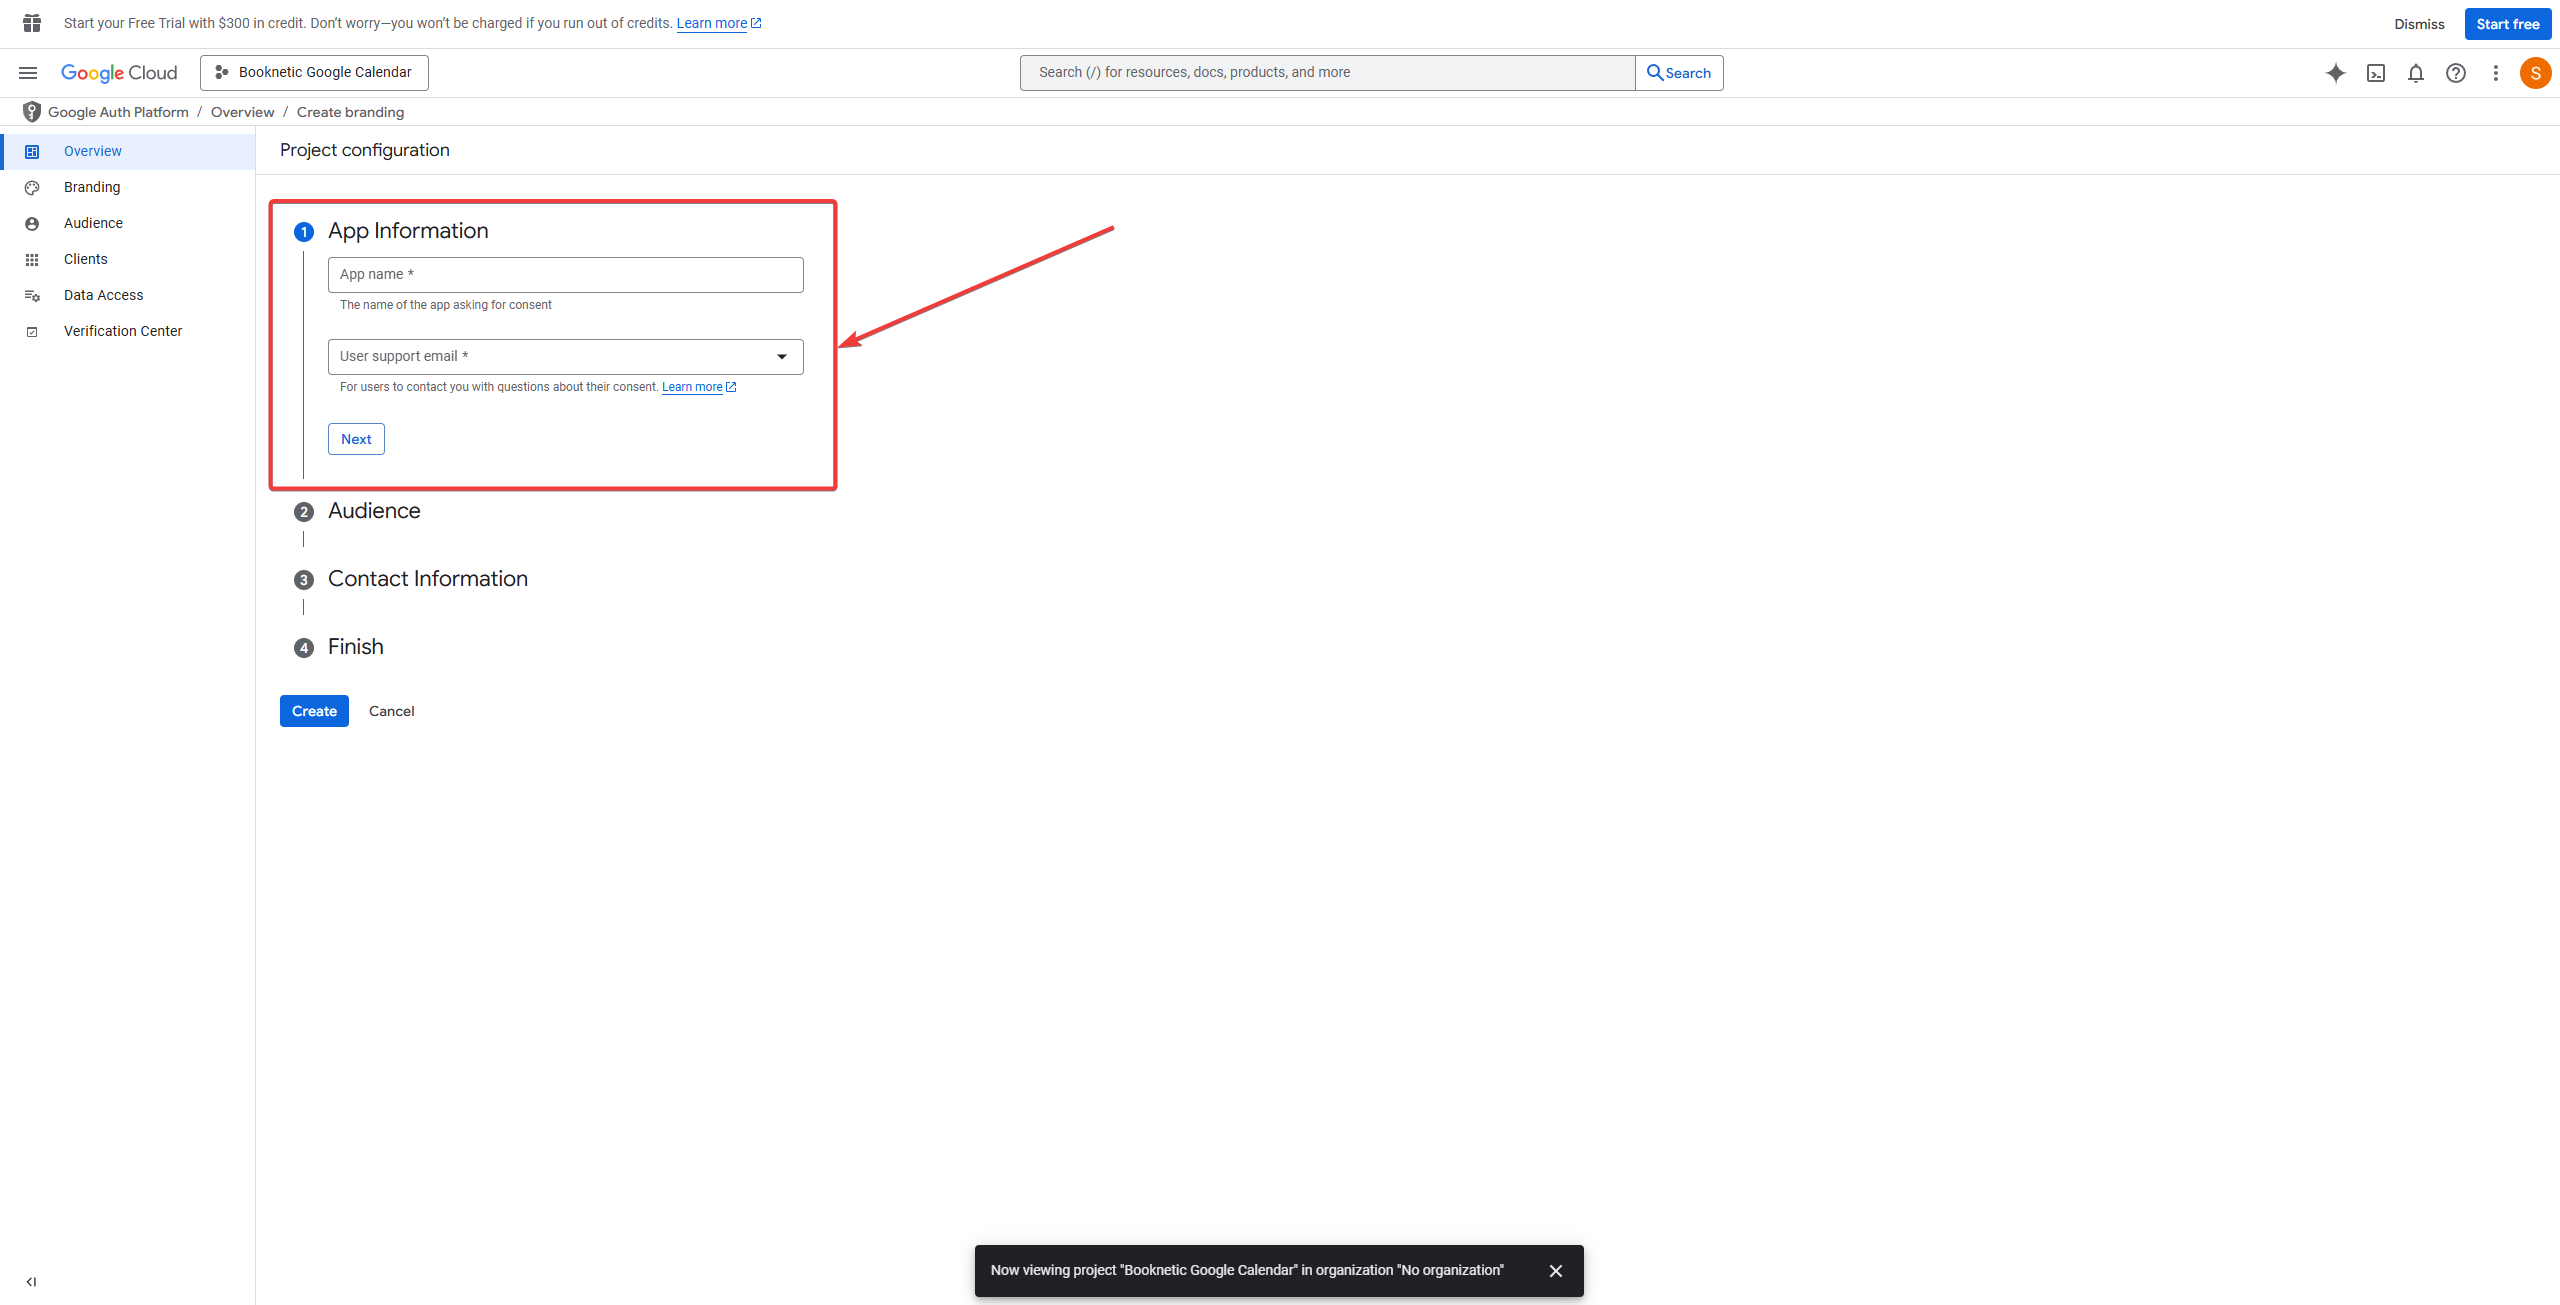
Fill in the App information details.
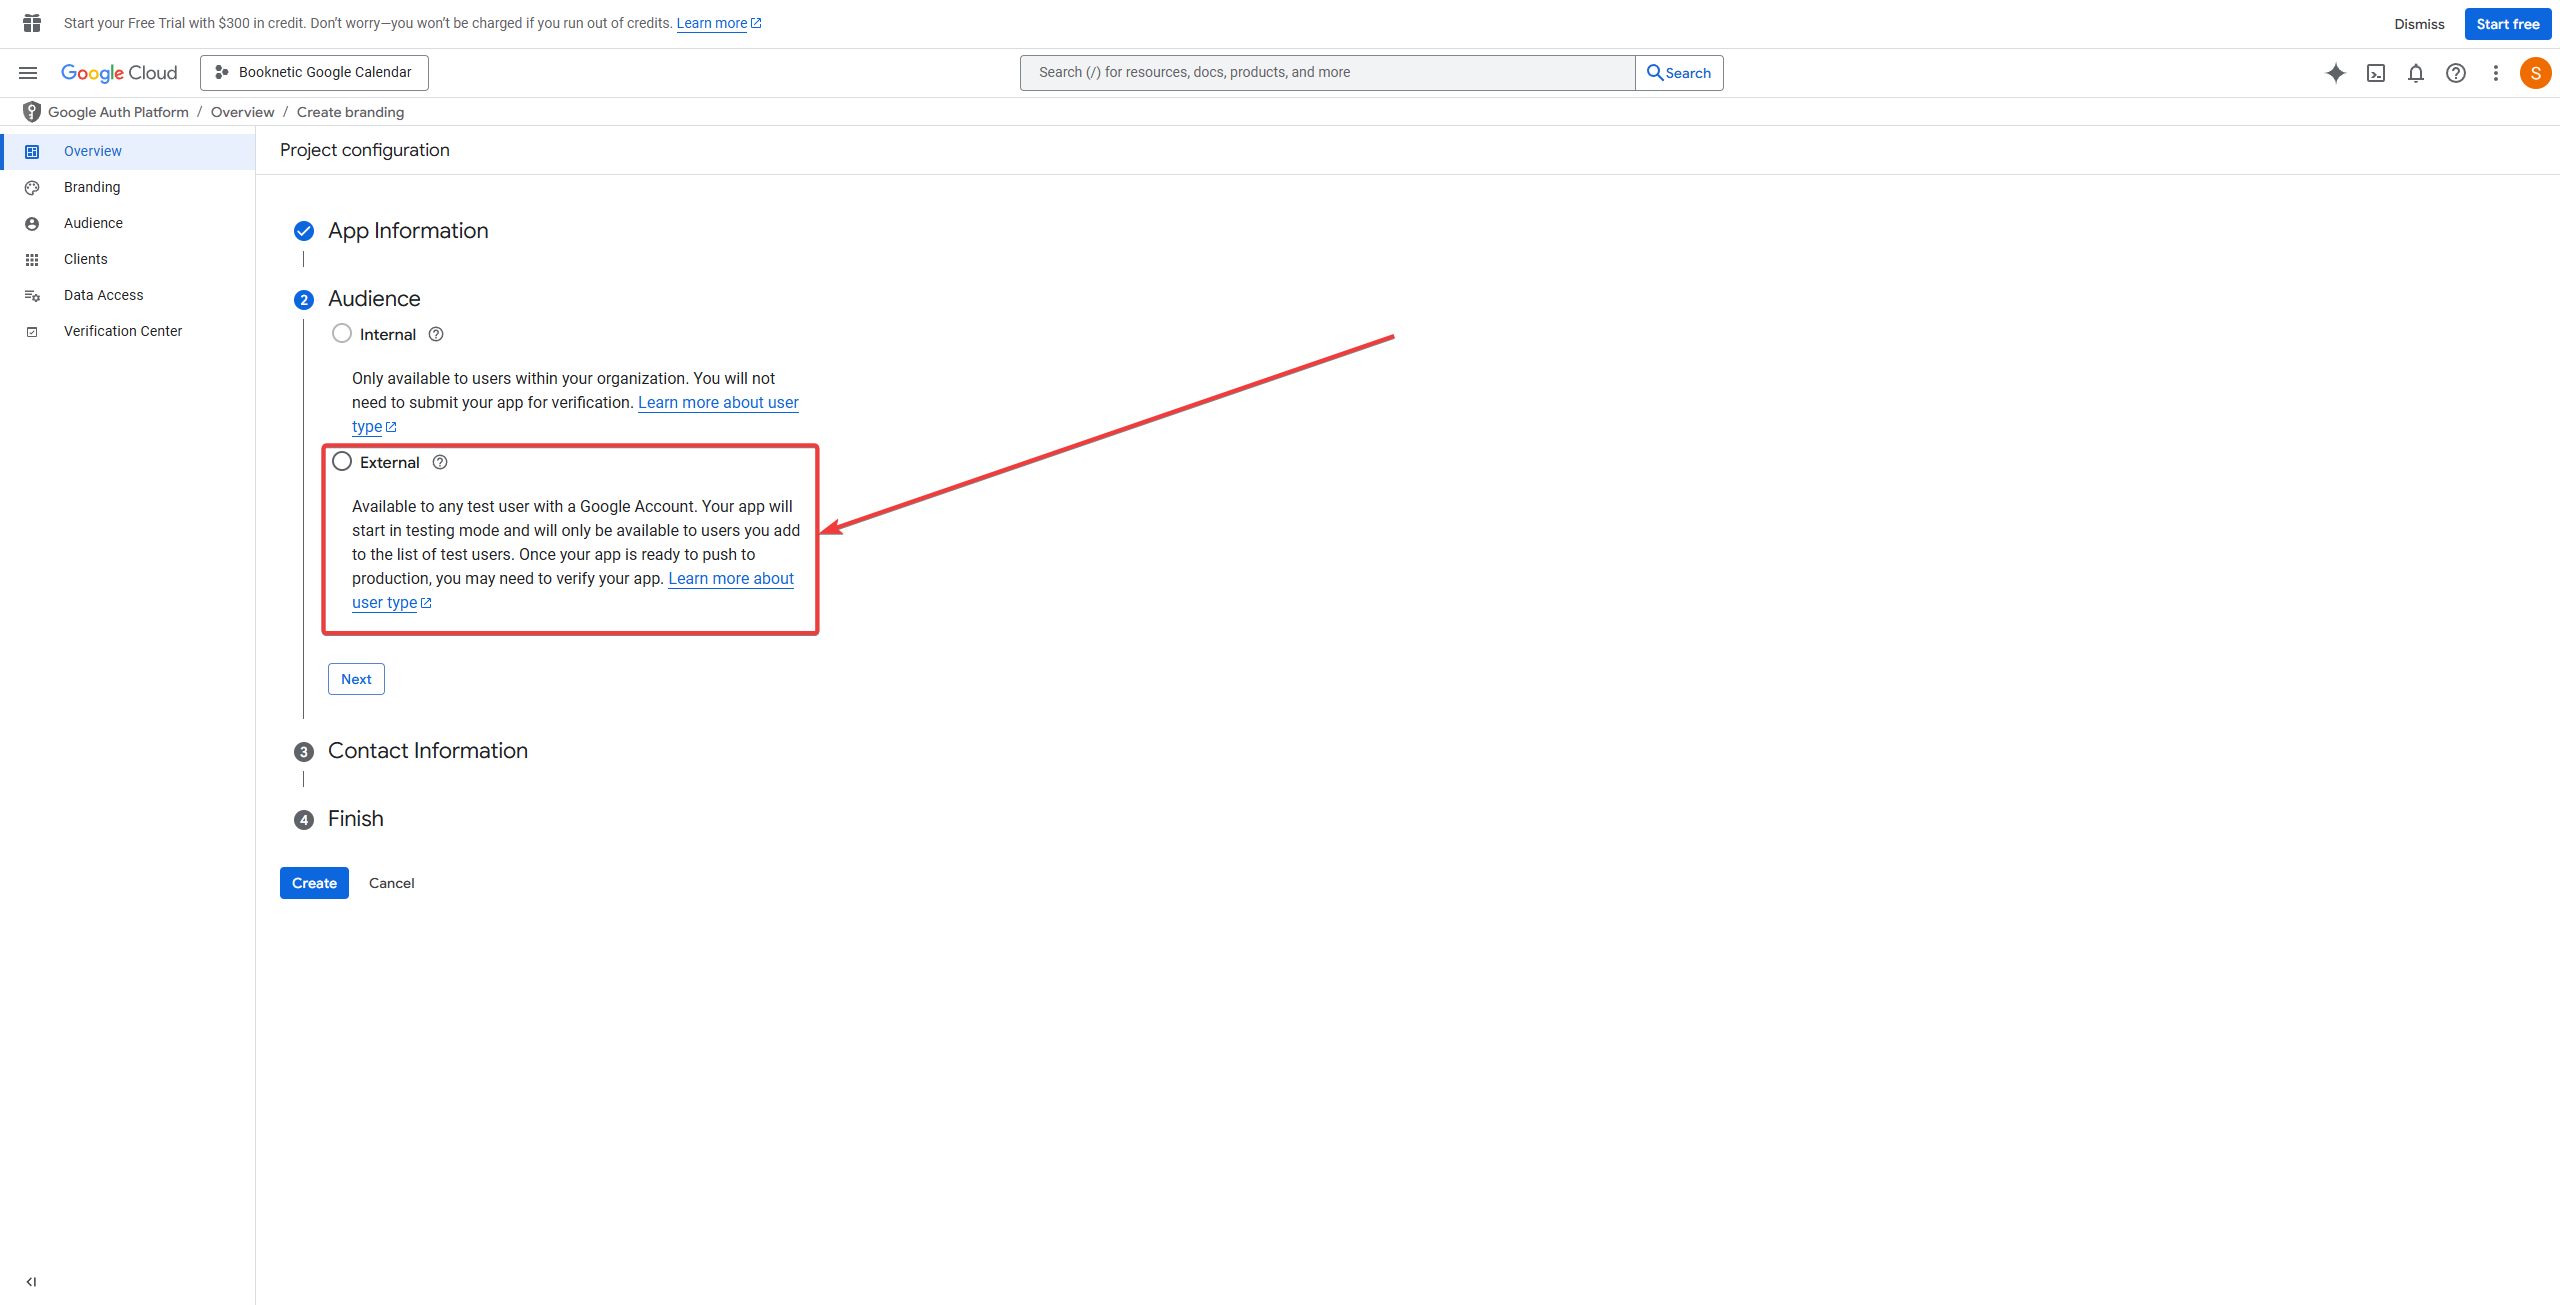
Select External for the user type and click Create.
Fill out the Contact information. (For example, your work email).

Select the I agree to the Google API Services: User Data Policy.. button, then select Continue.
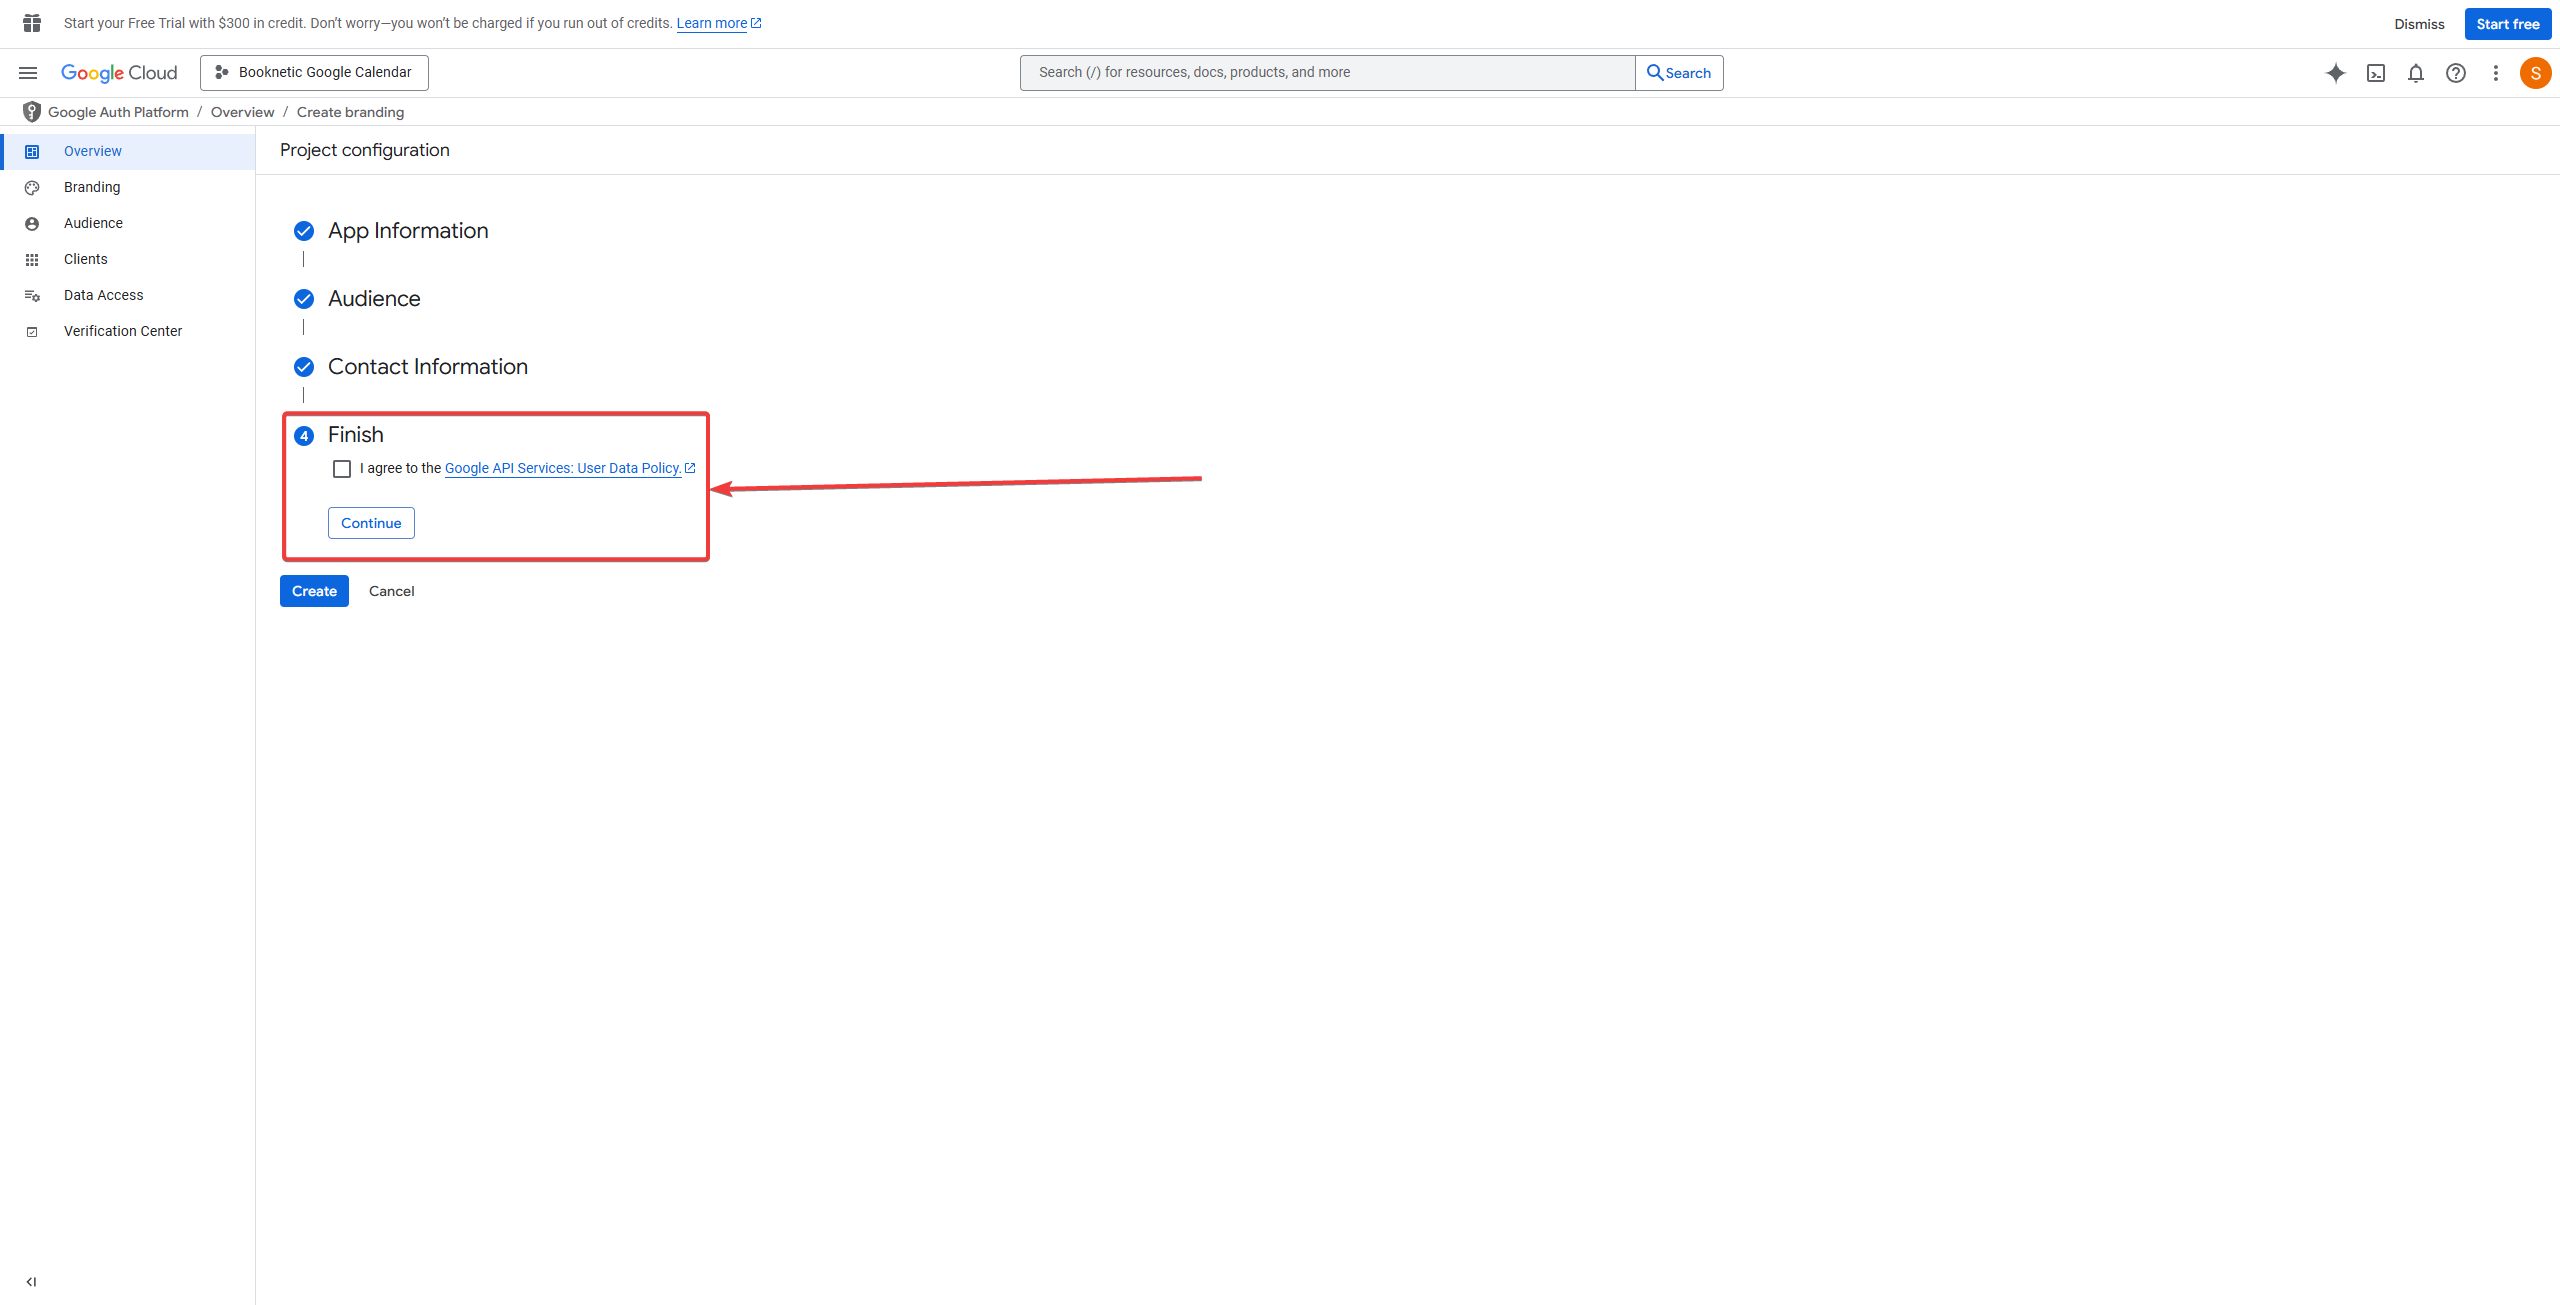
Click Create once completed.
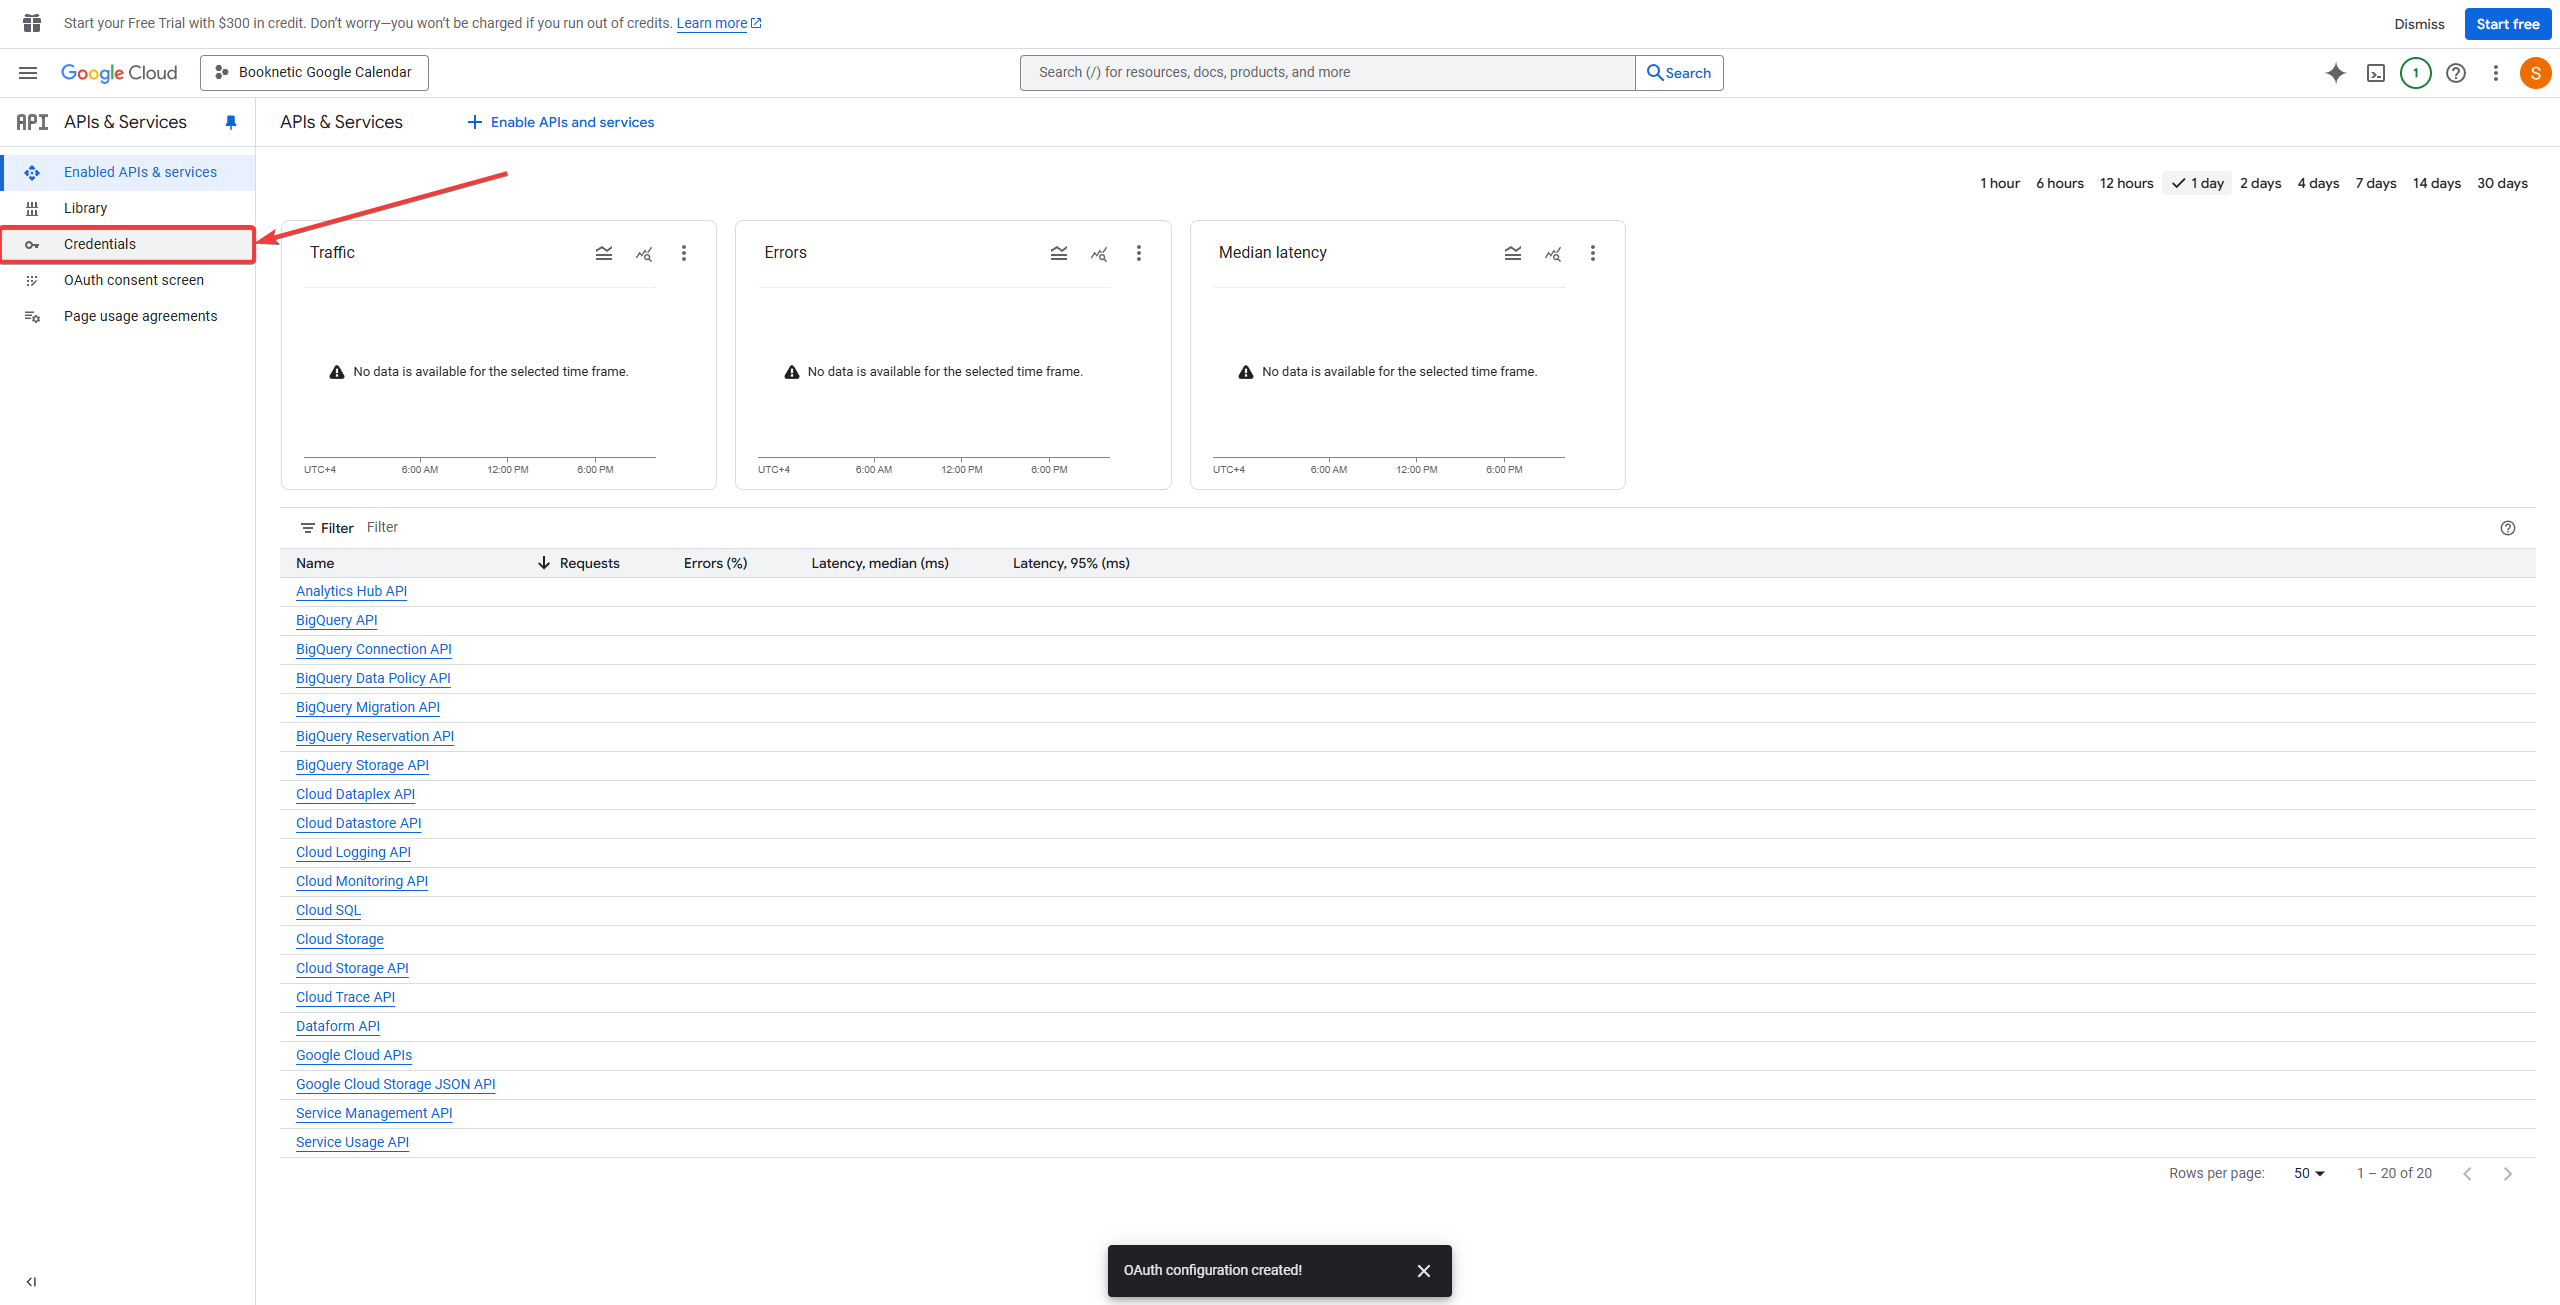
Create OAuth Credentials
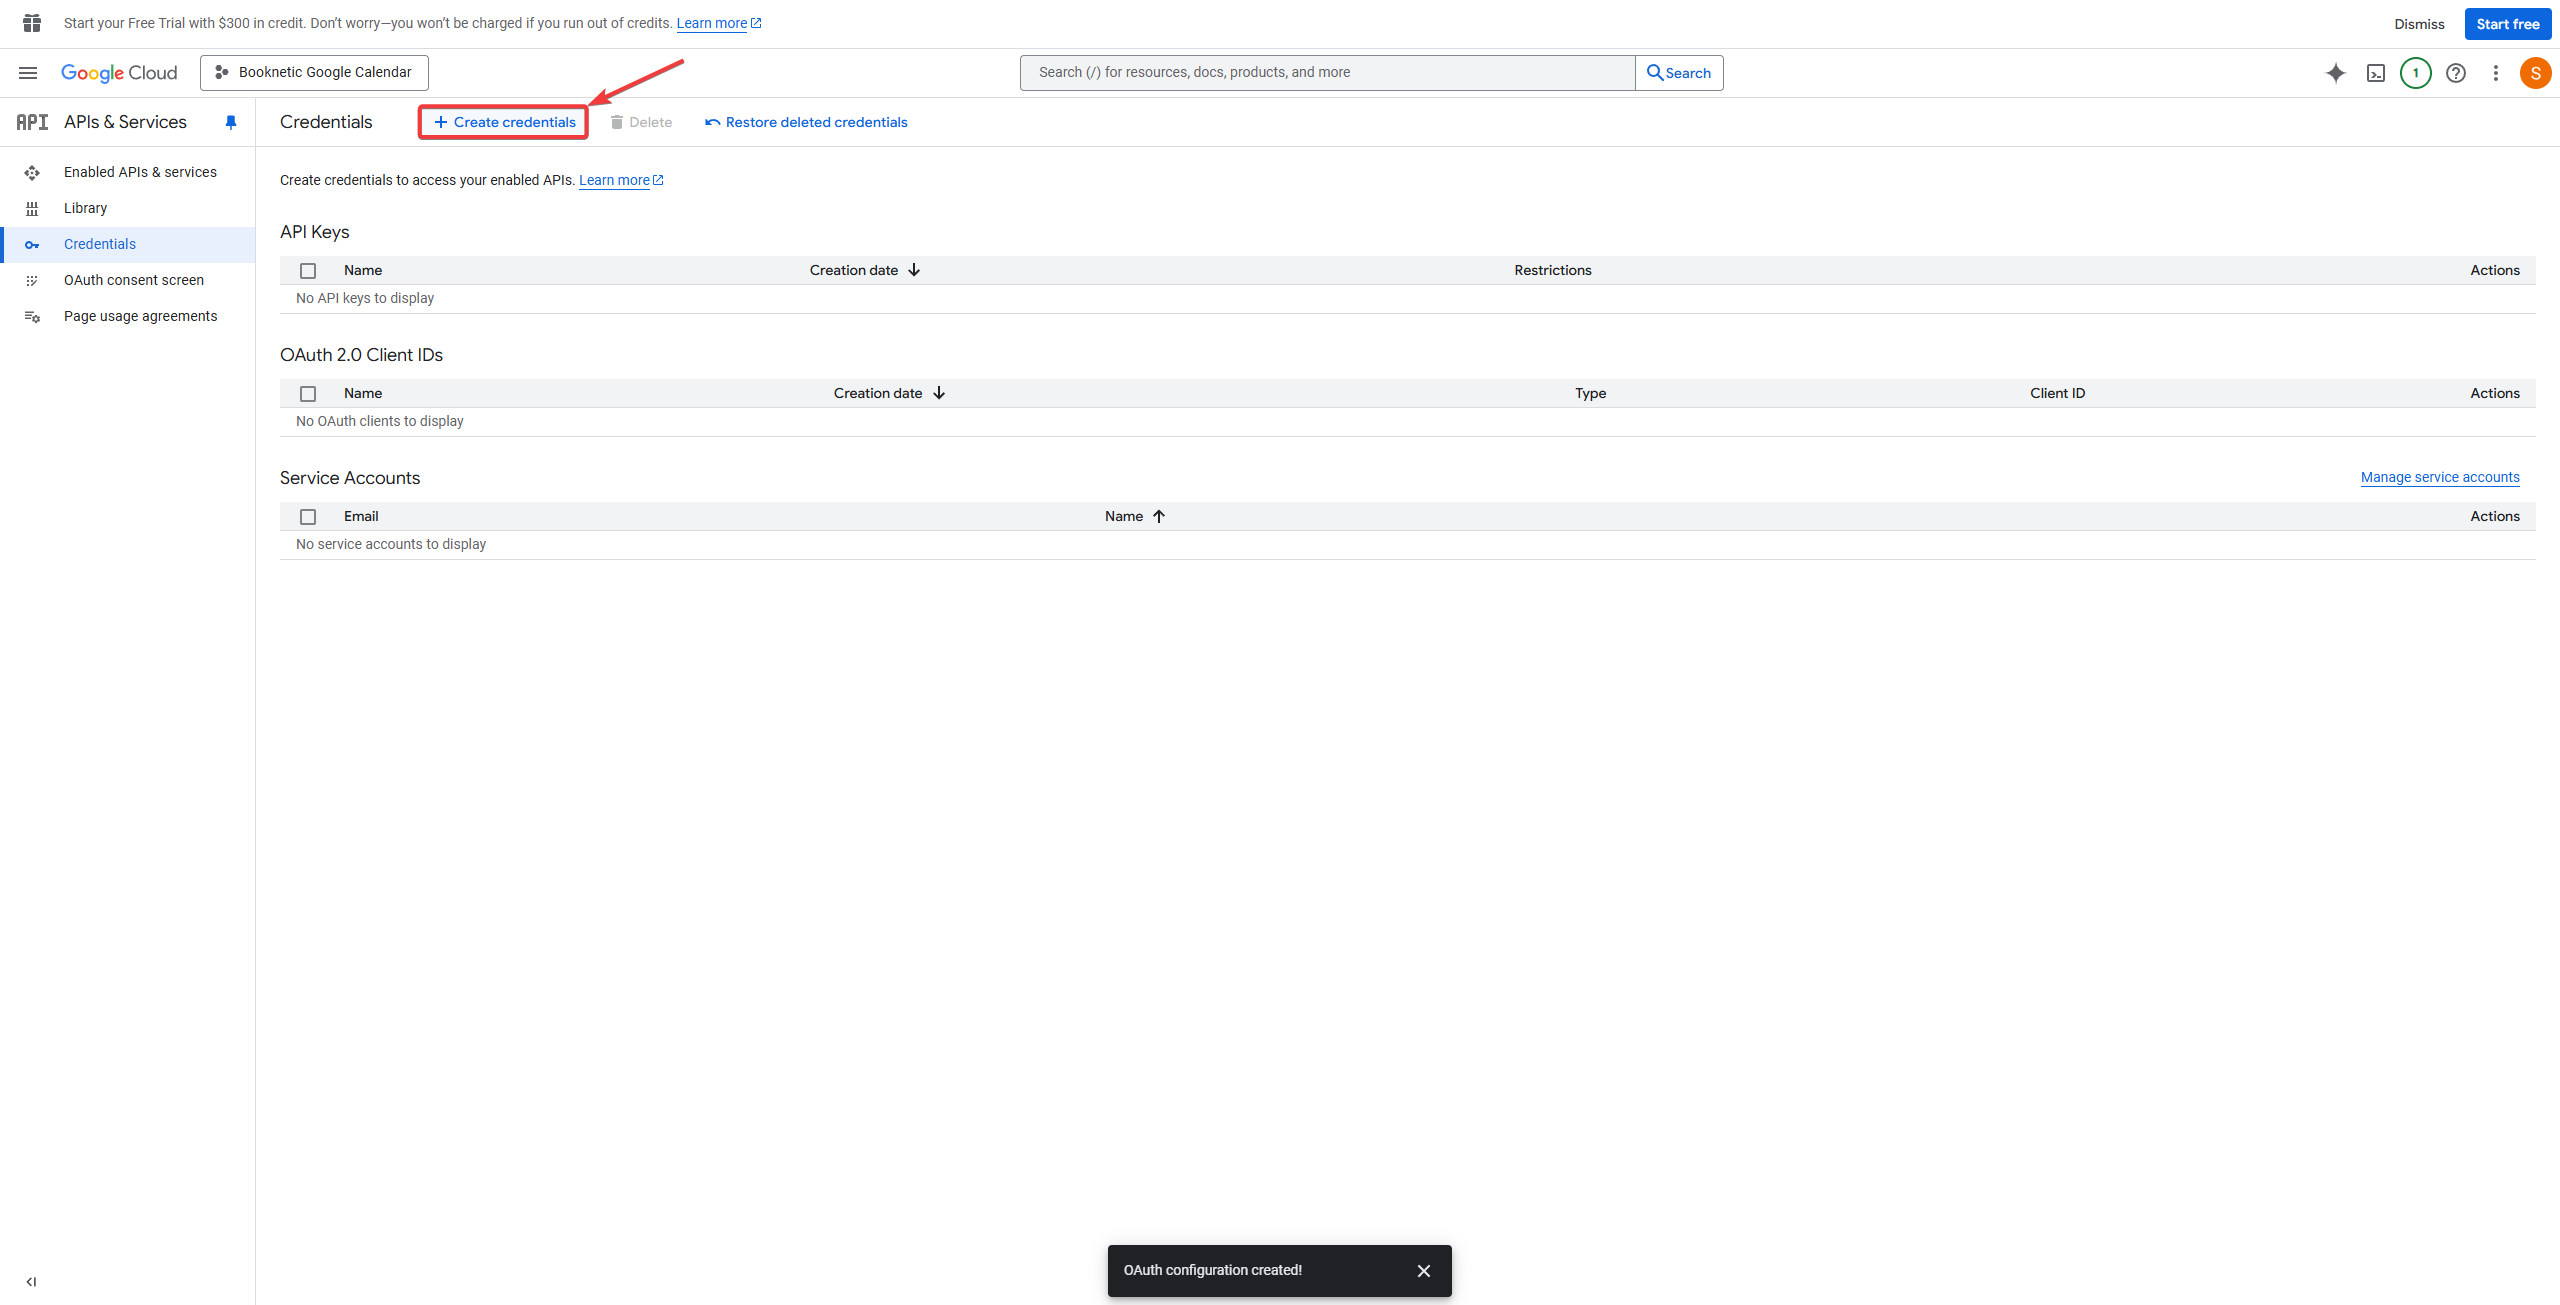
Go to APIs & Services > Credentials.
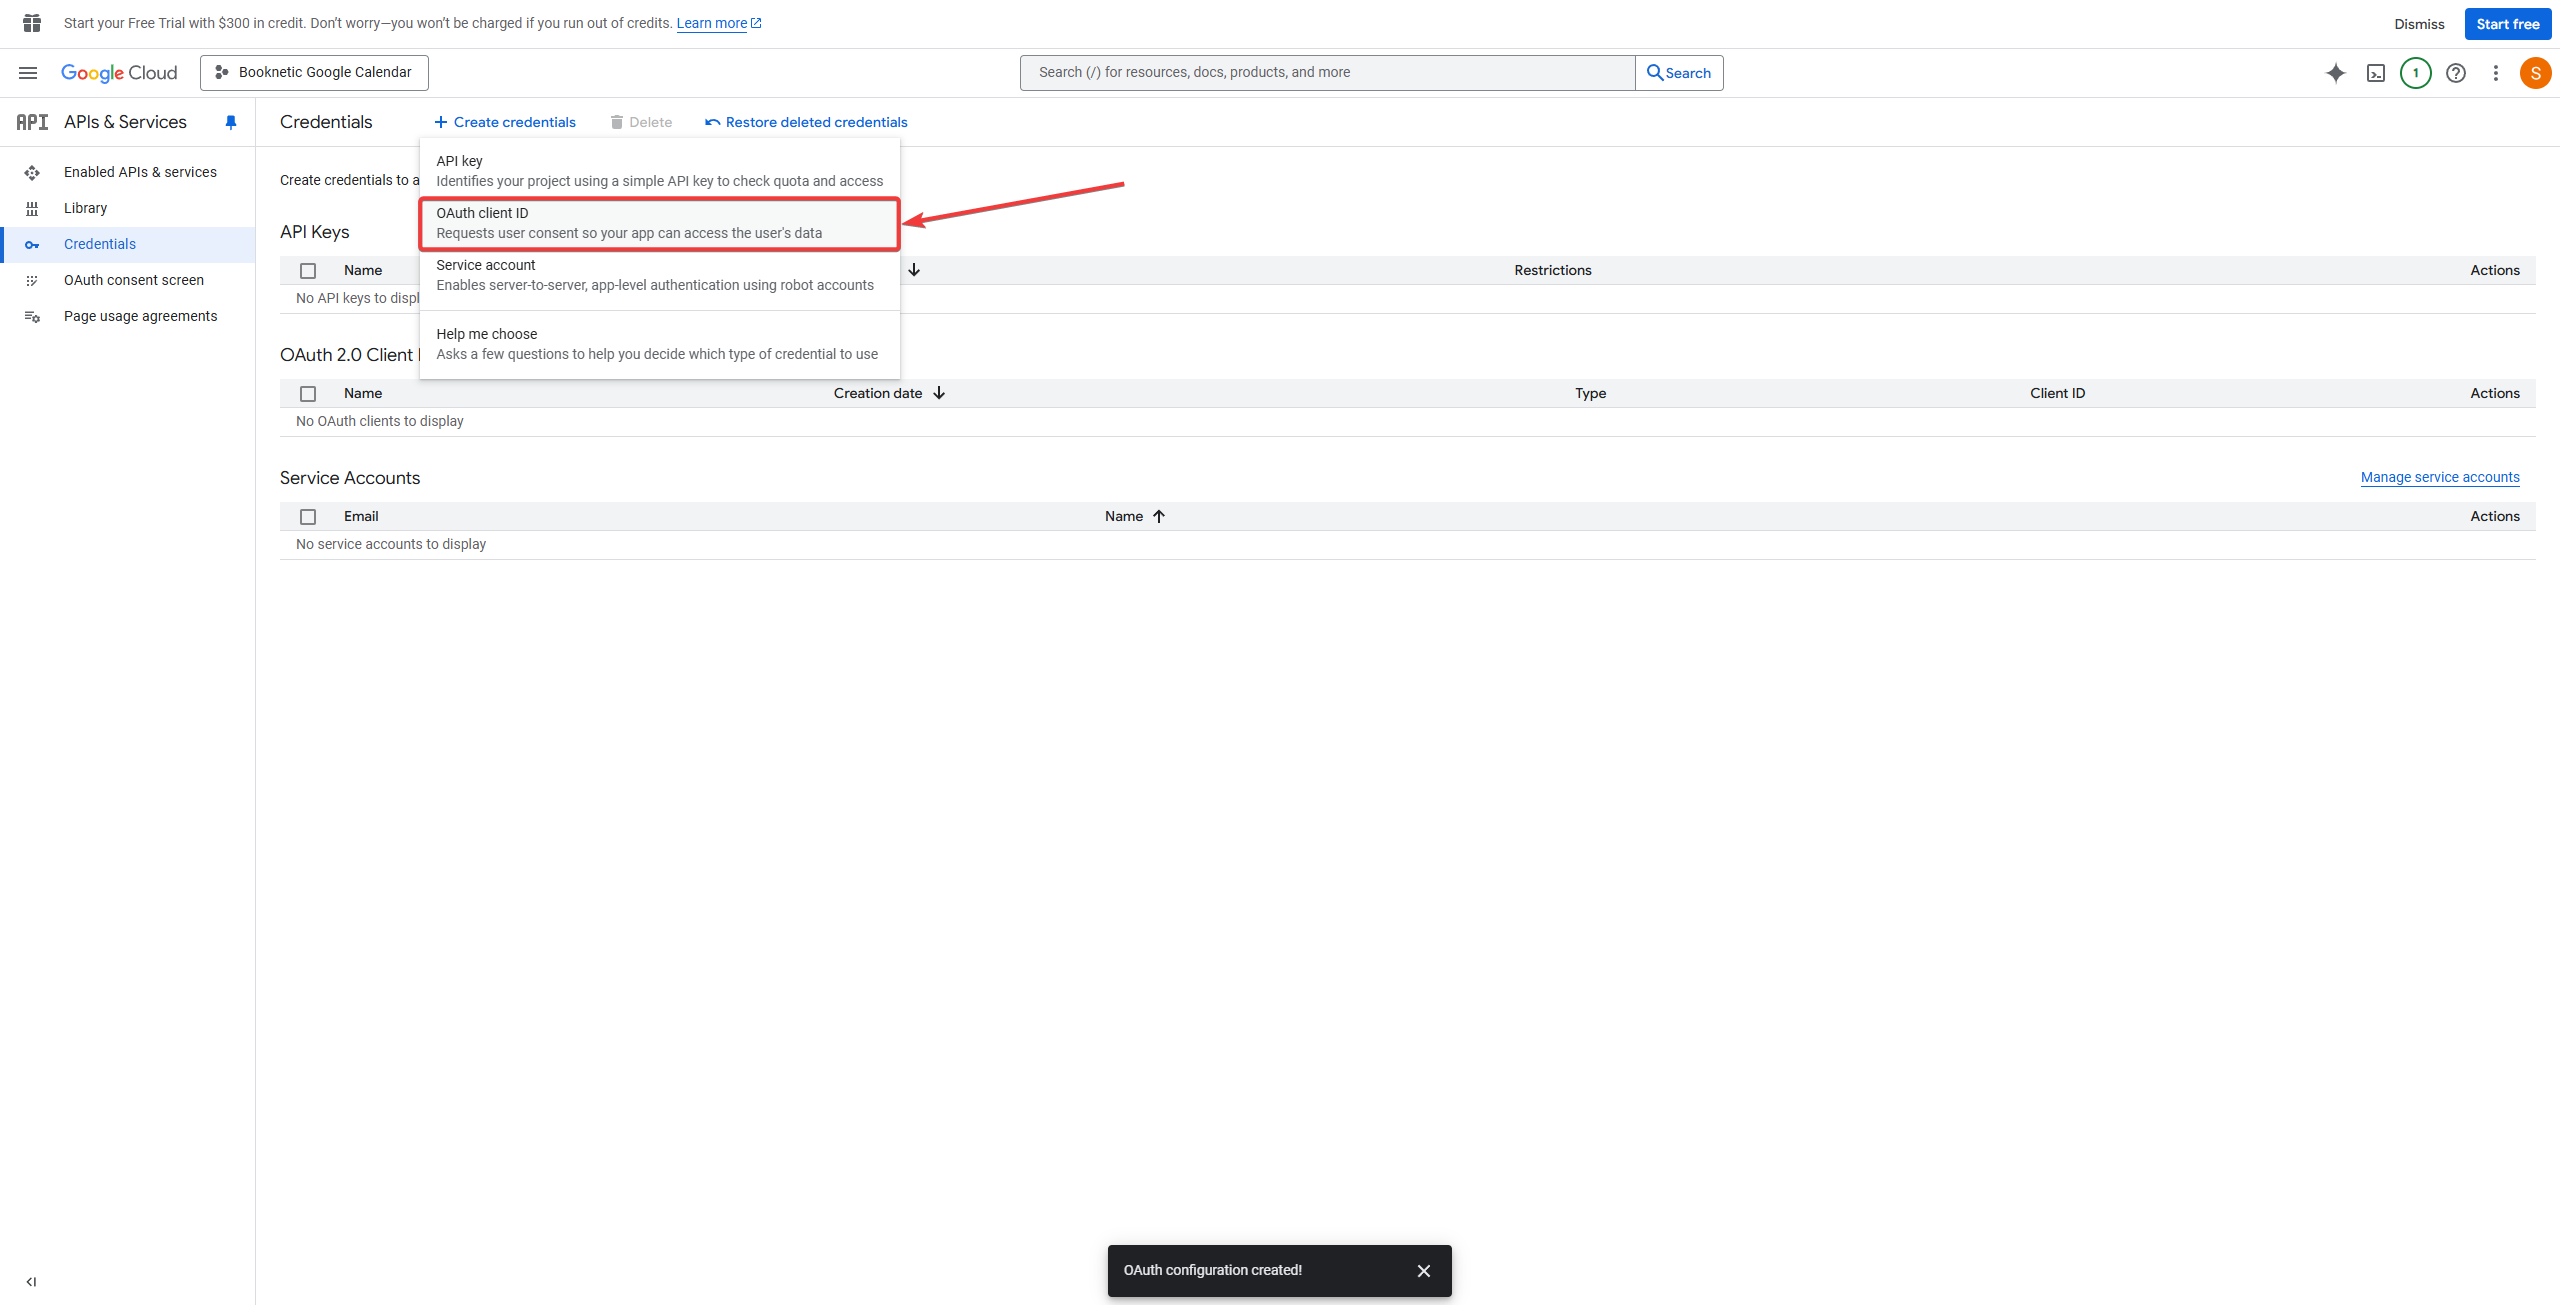
Click Create Credentials and select OAuth 2.0 Client ID.
Configure Application Type
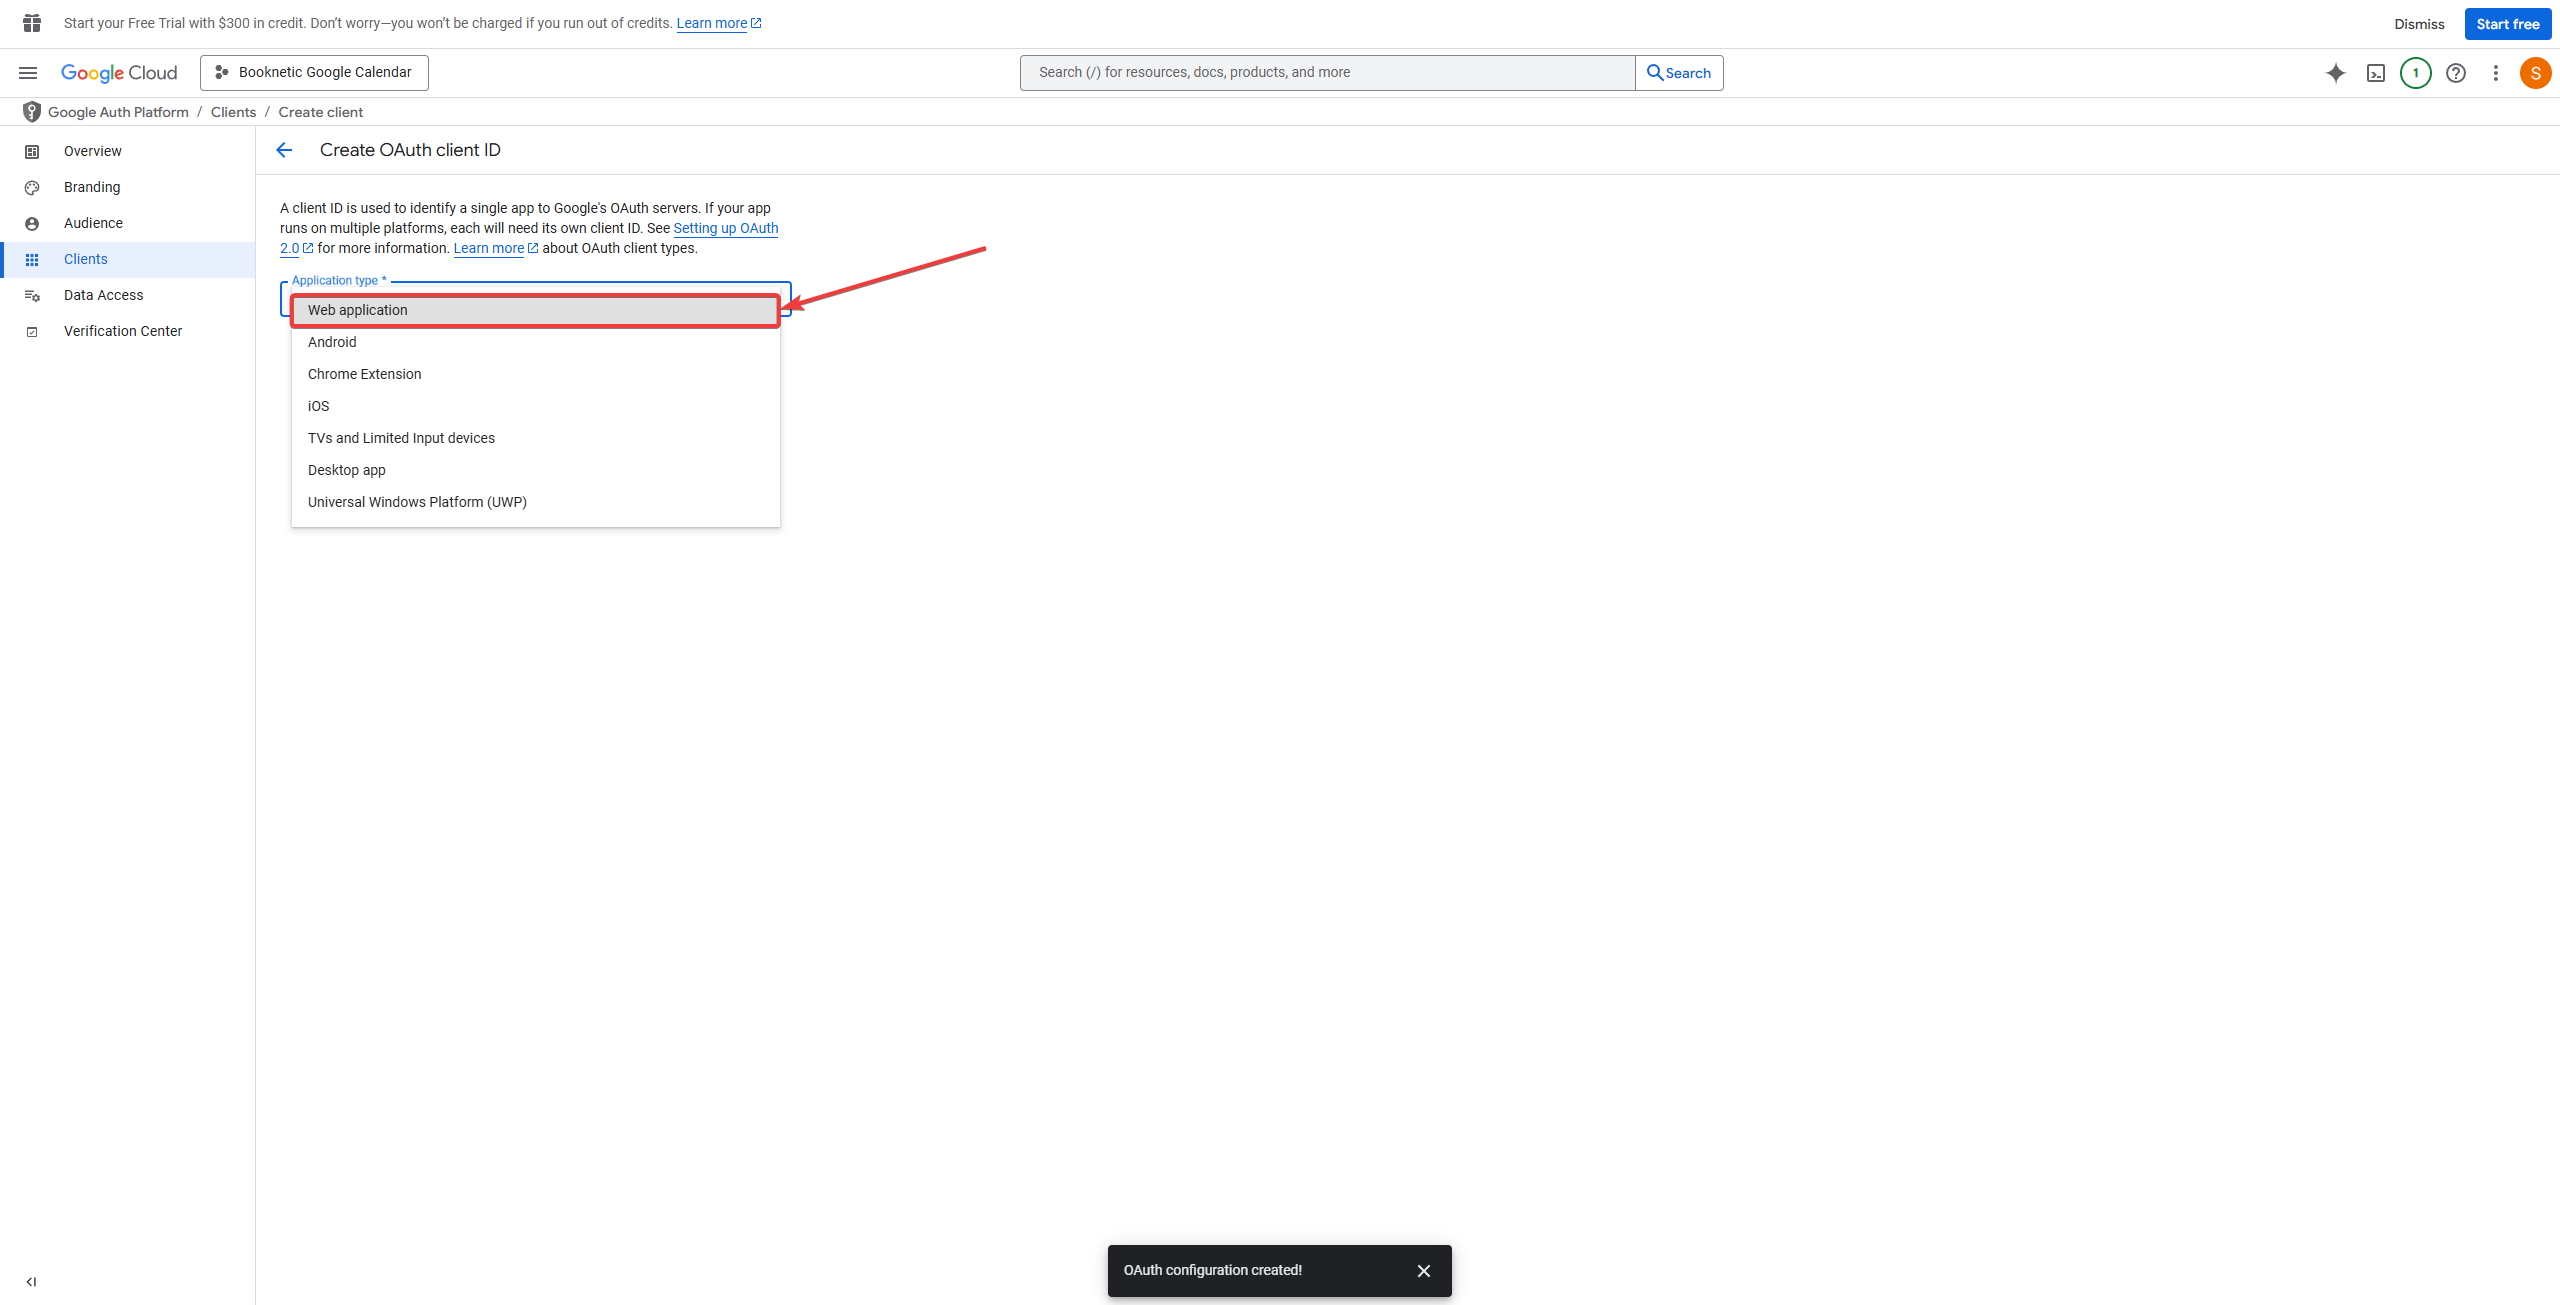
Choose OAuth client ID as the credential type.
Choose Web Application as the application type.
Under Authorized redirect URIs, paste the redirect URI provided by Booknetic.
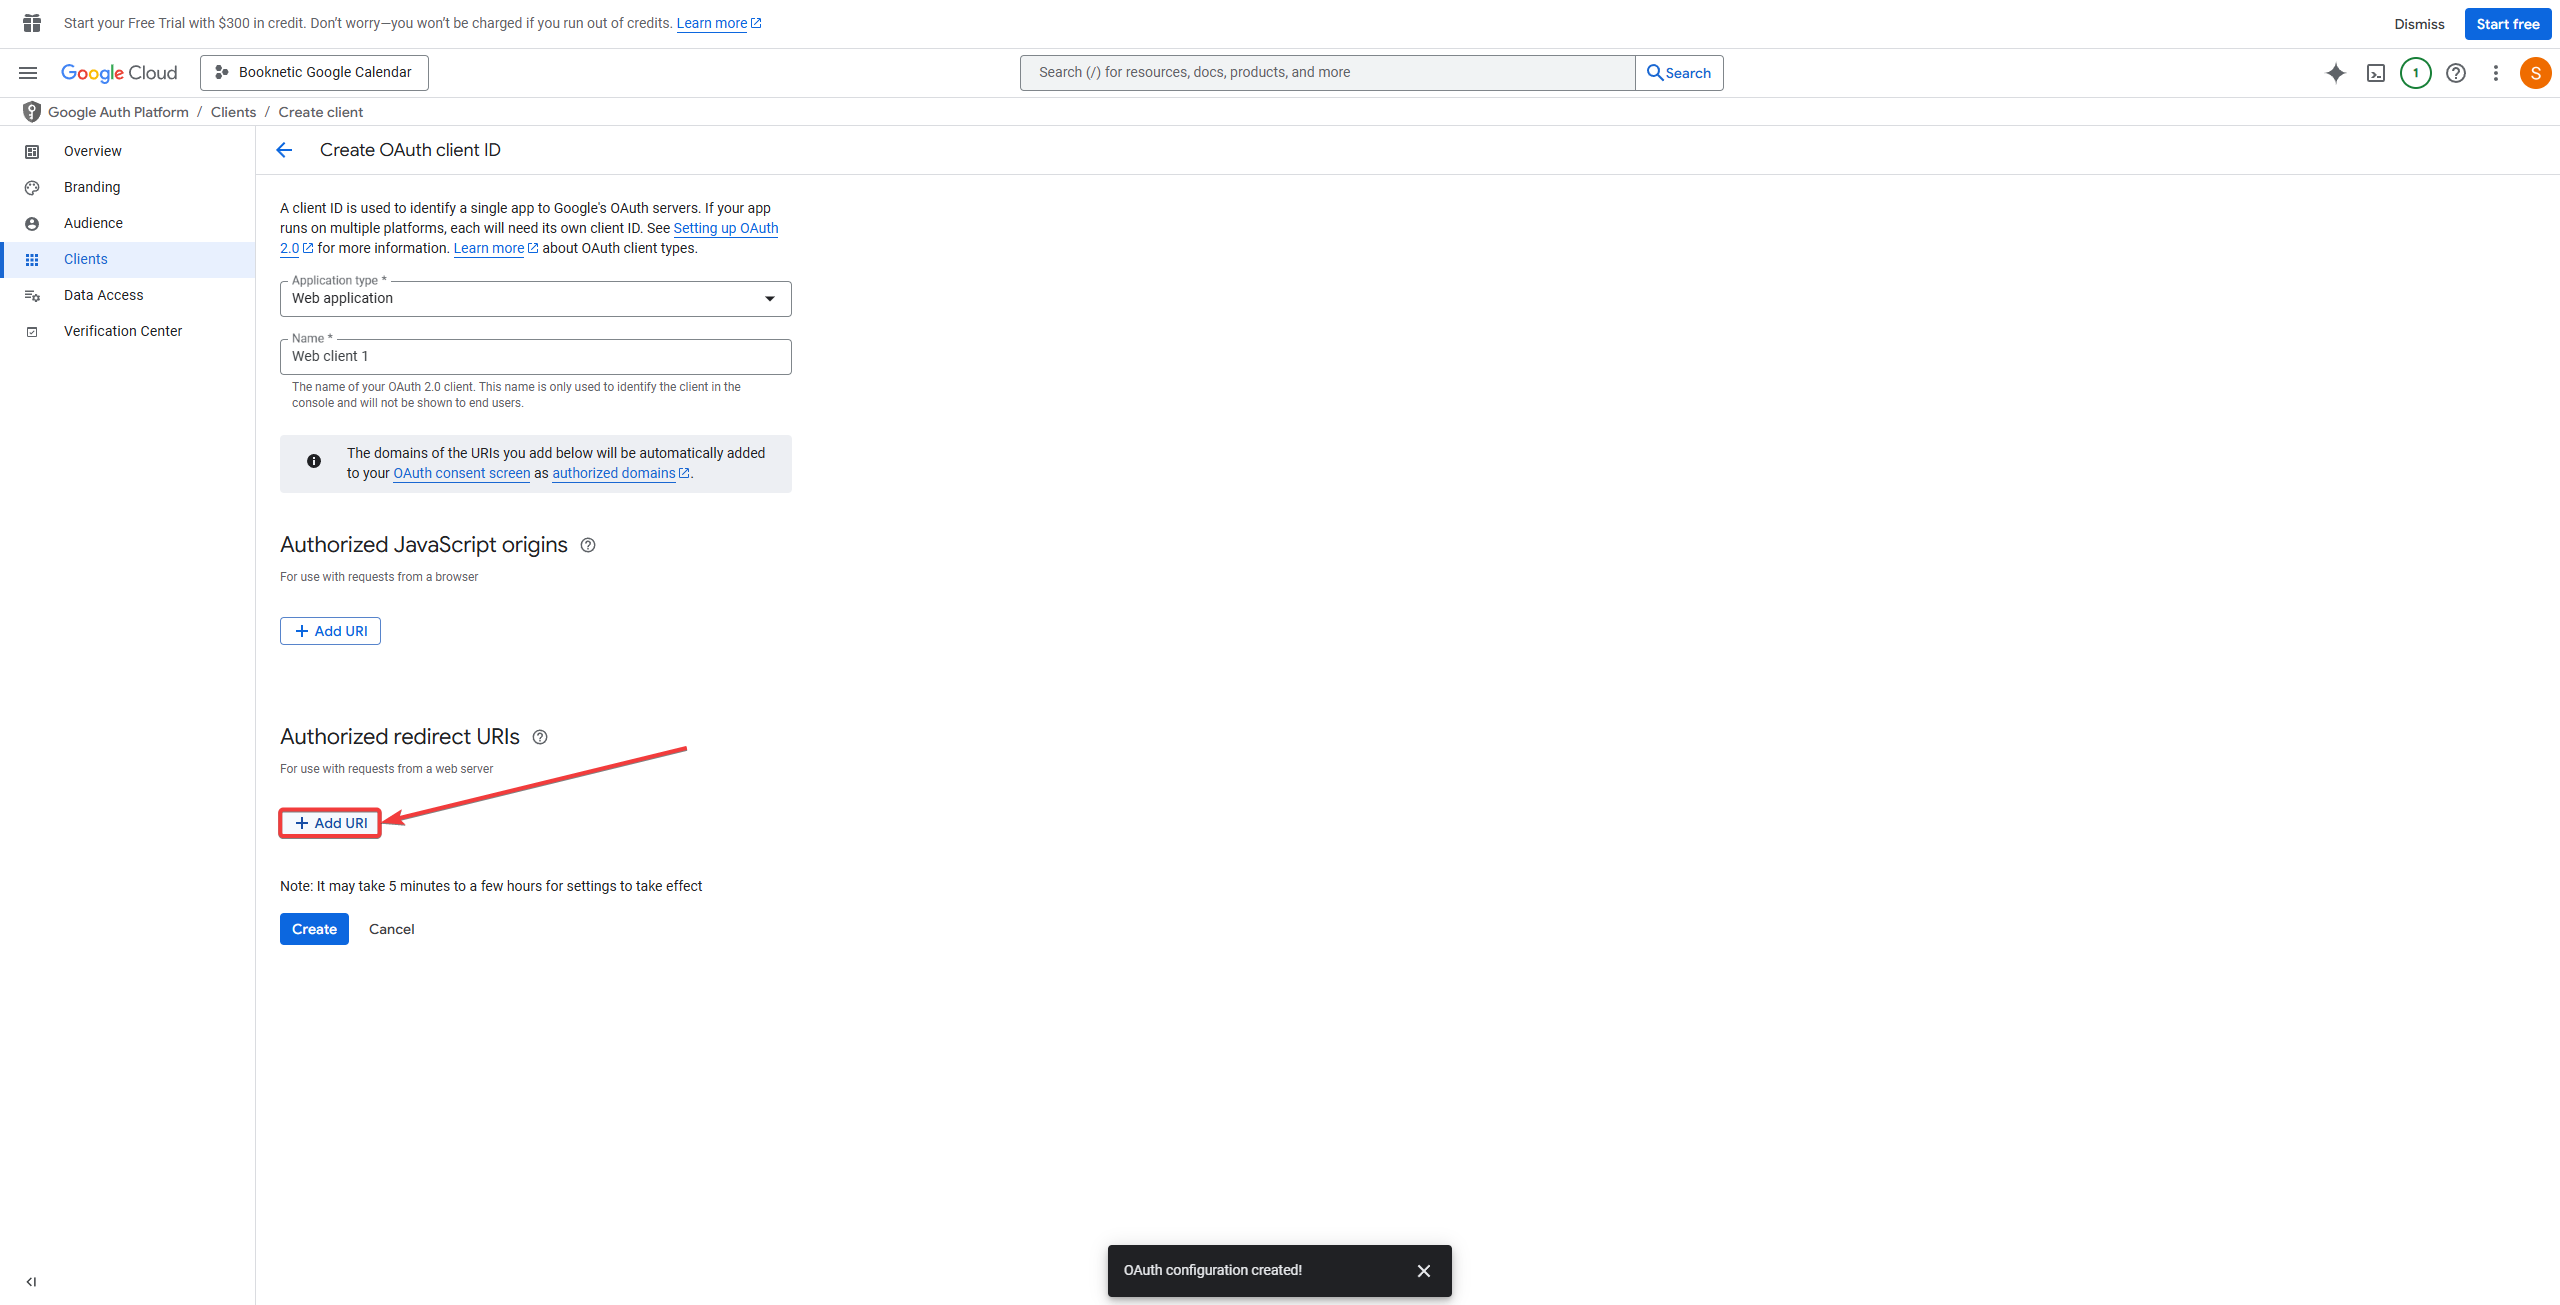
The URL is found in the Booknetic Google Calendar settings page.
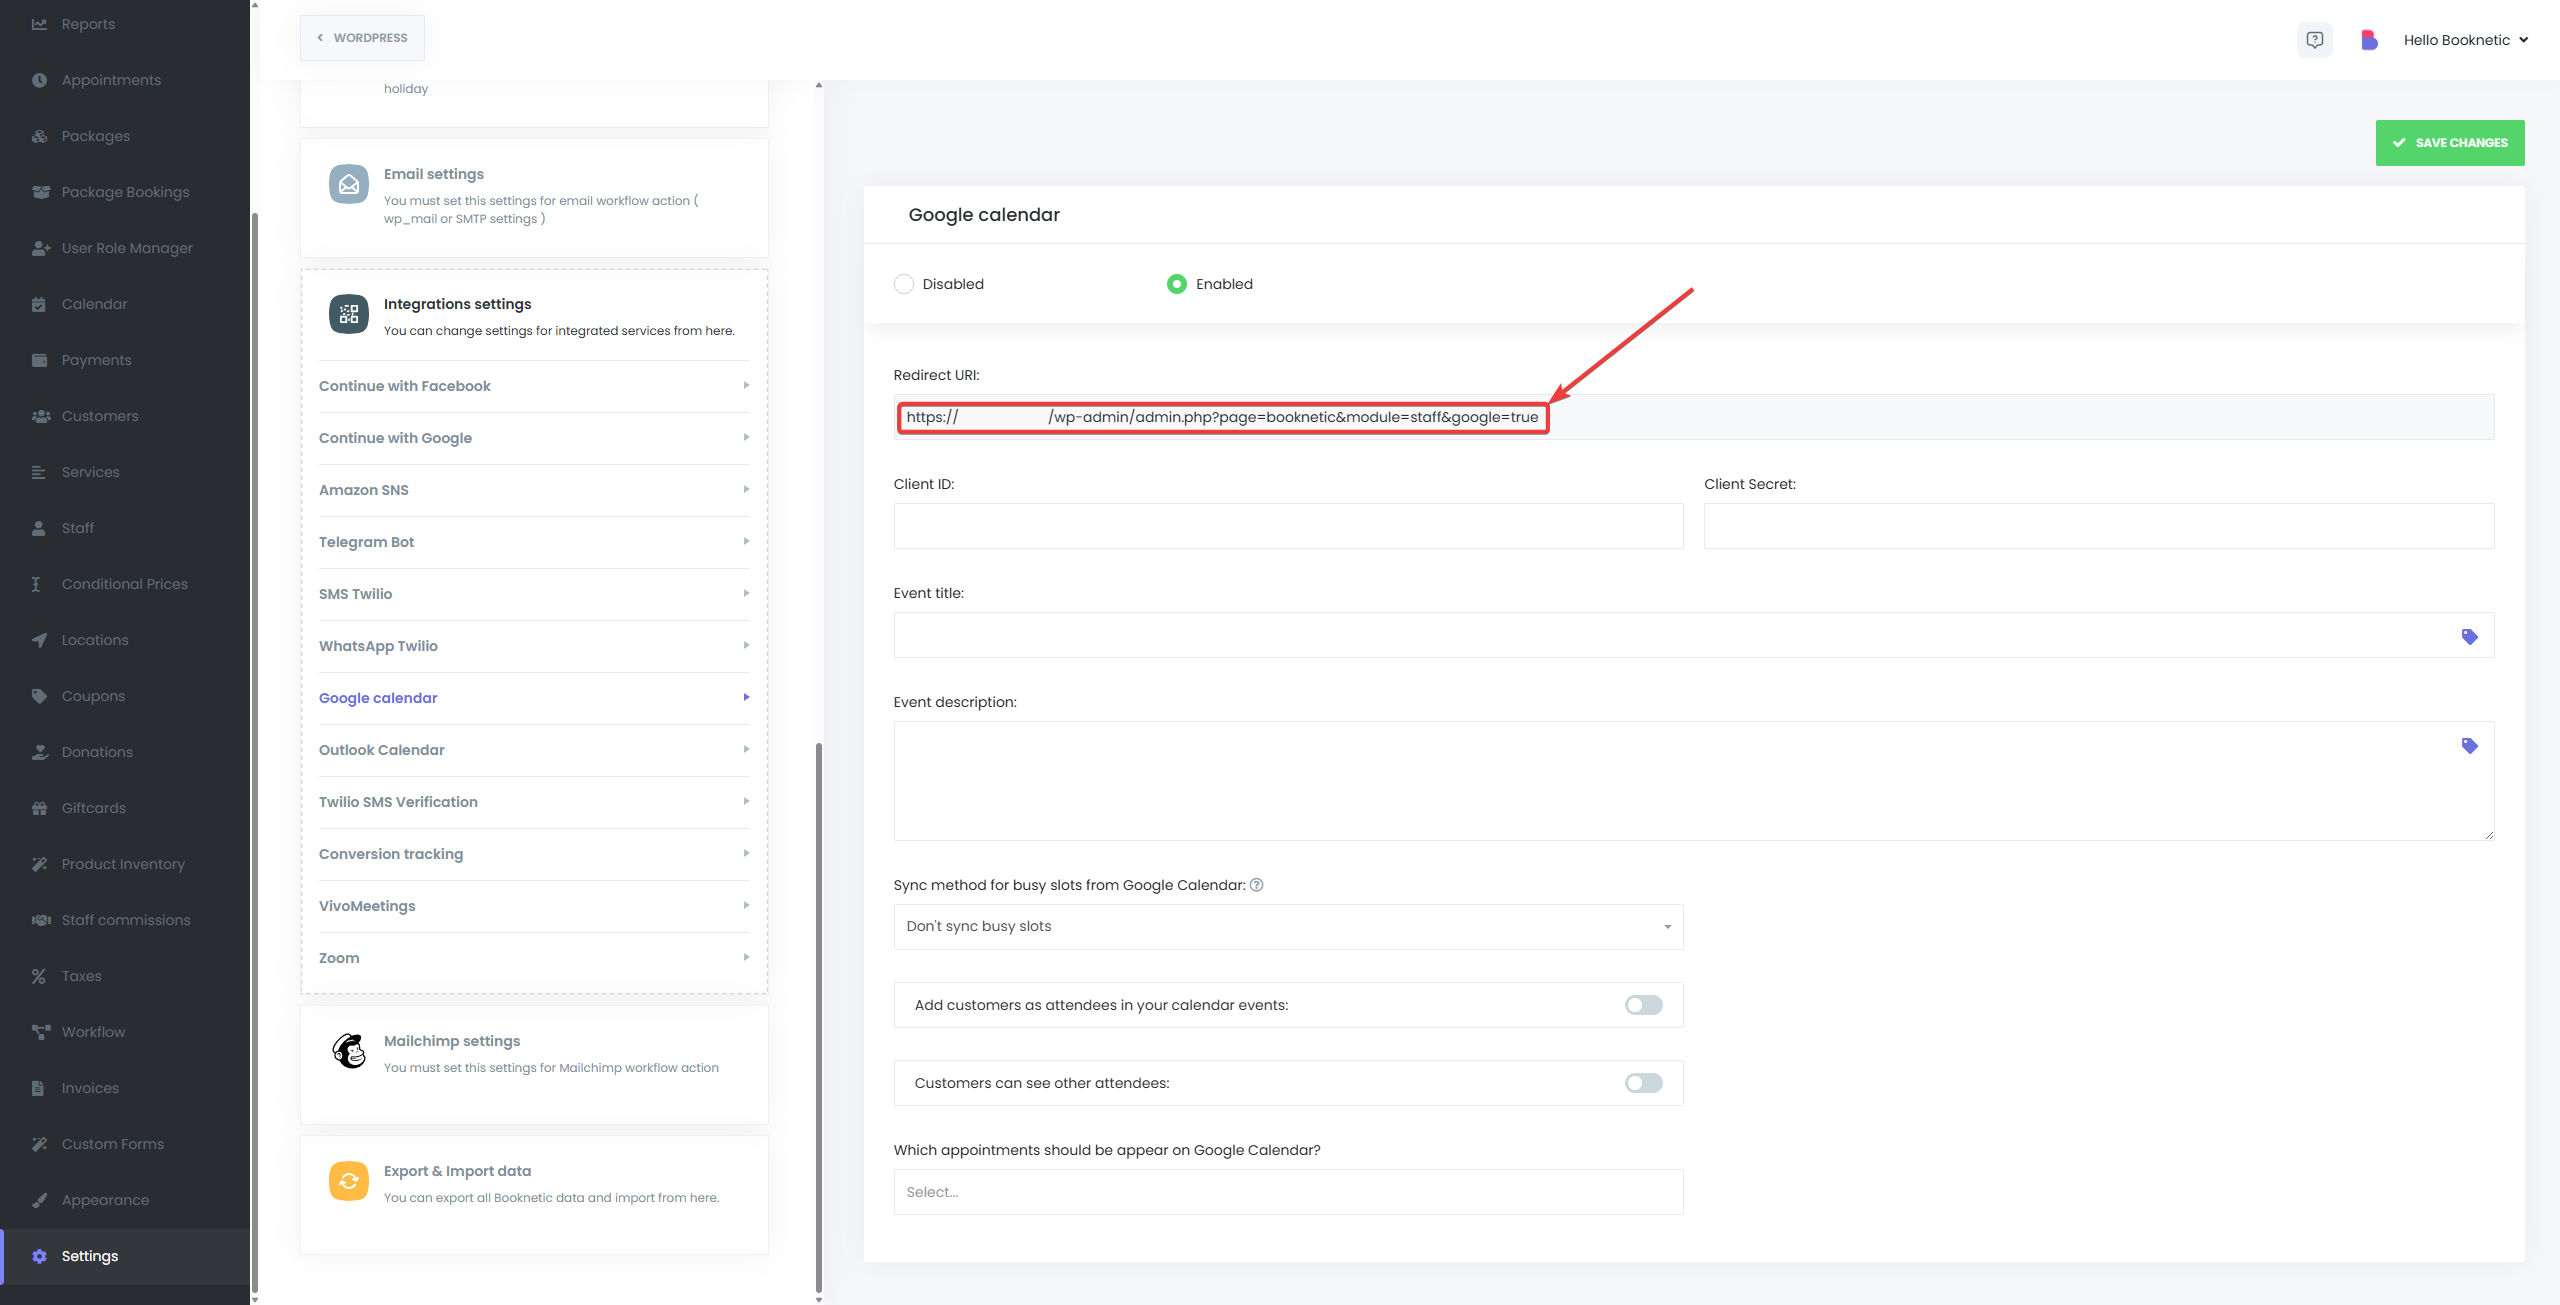
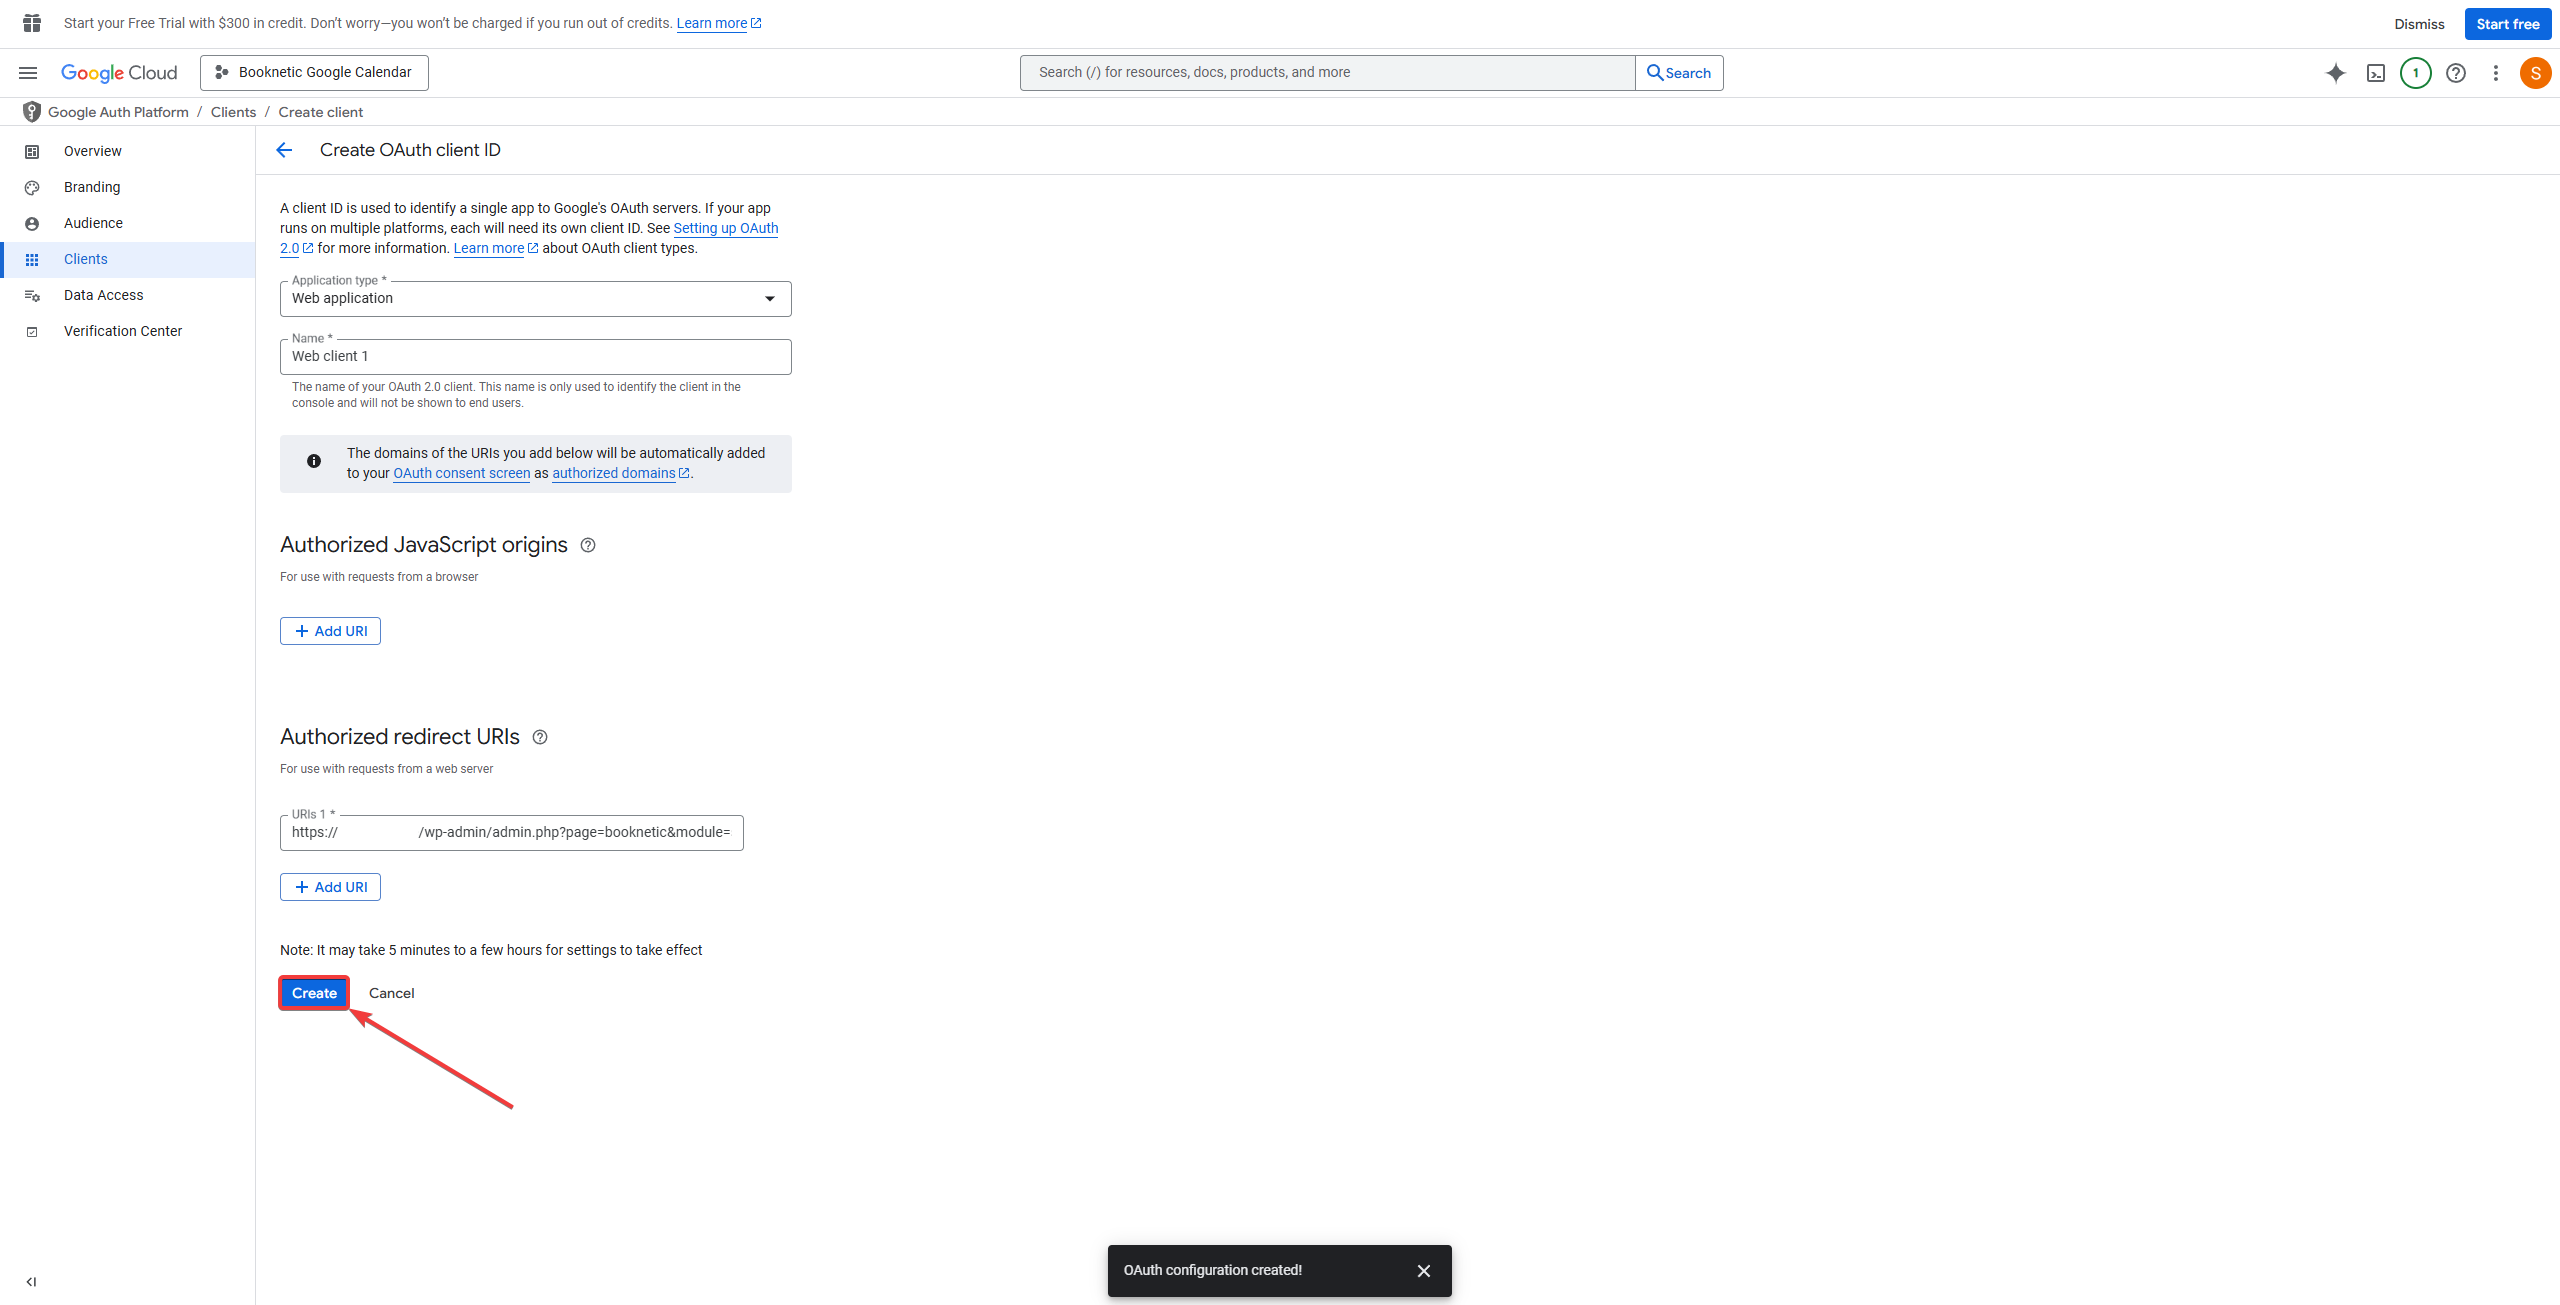
Paste the redirect URL provided by Booknetic, then click Create.
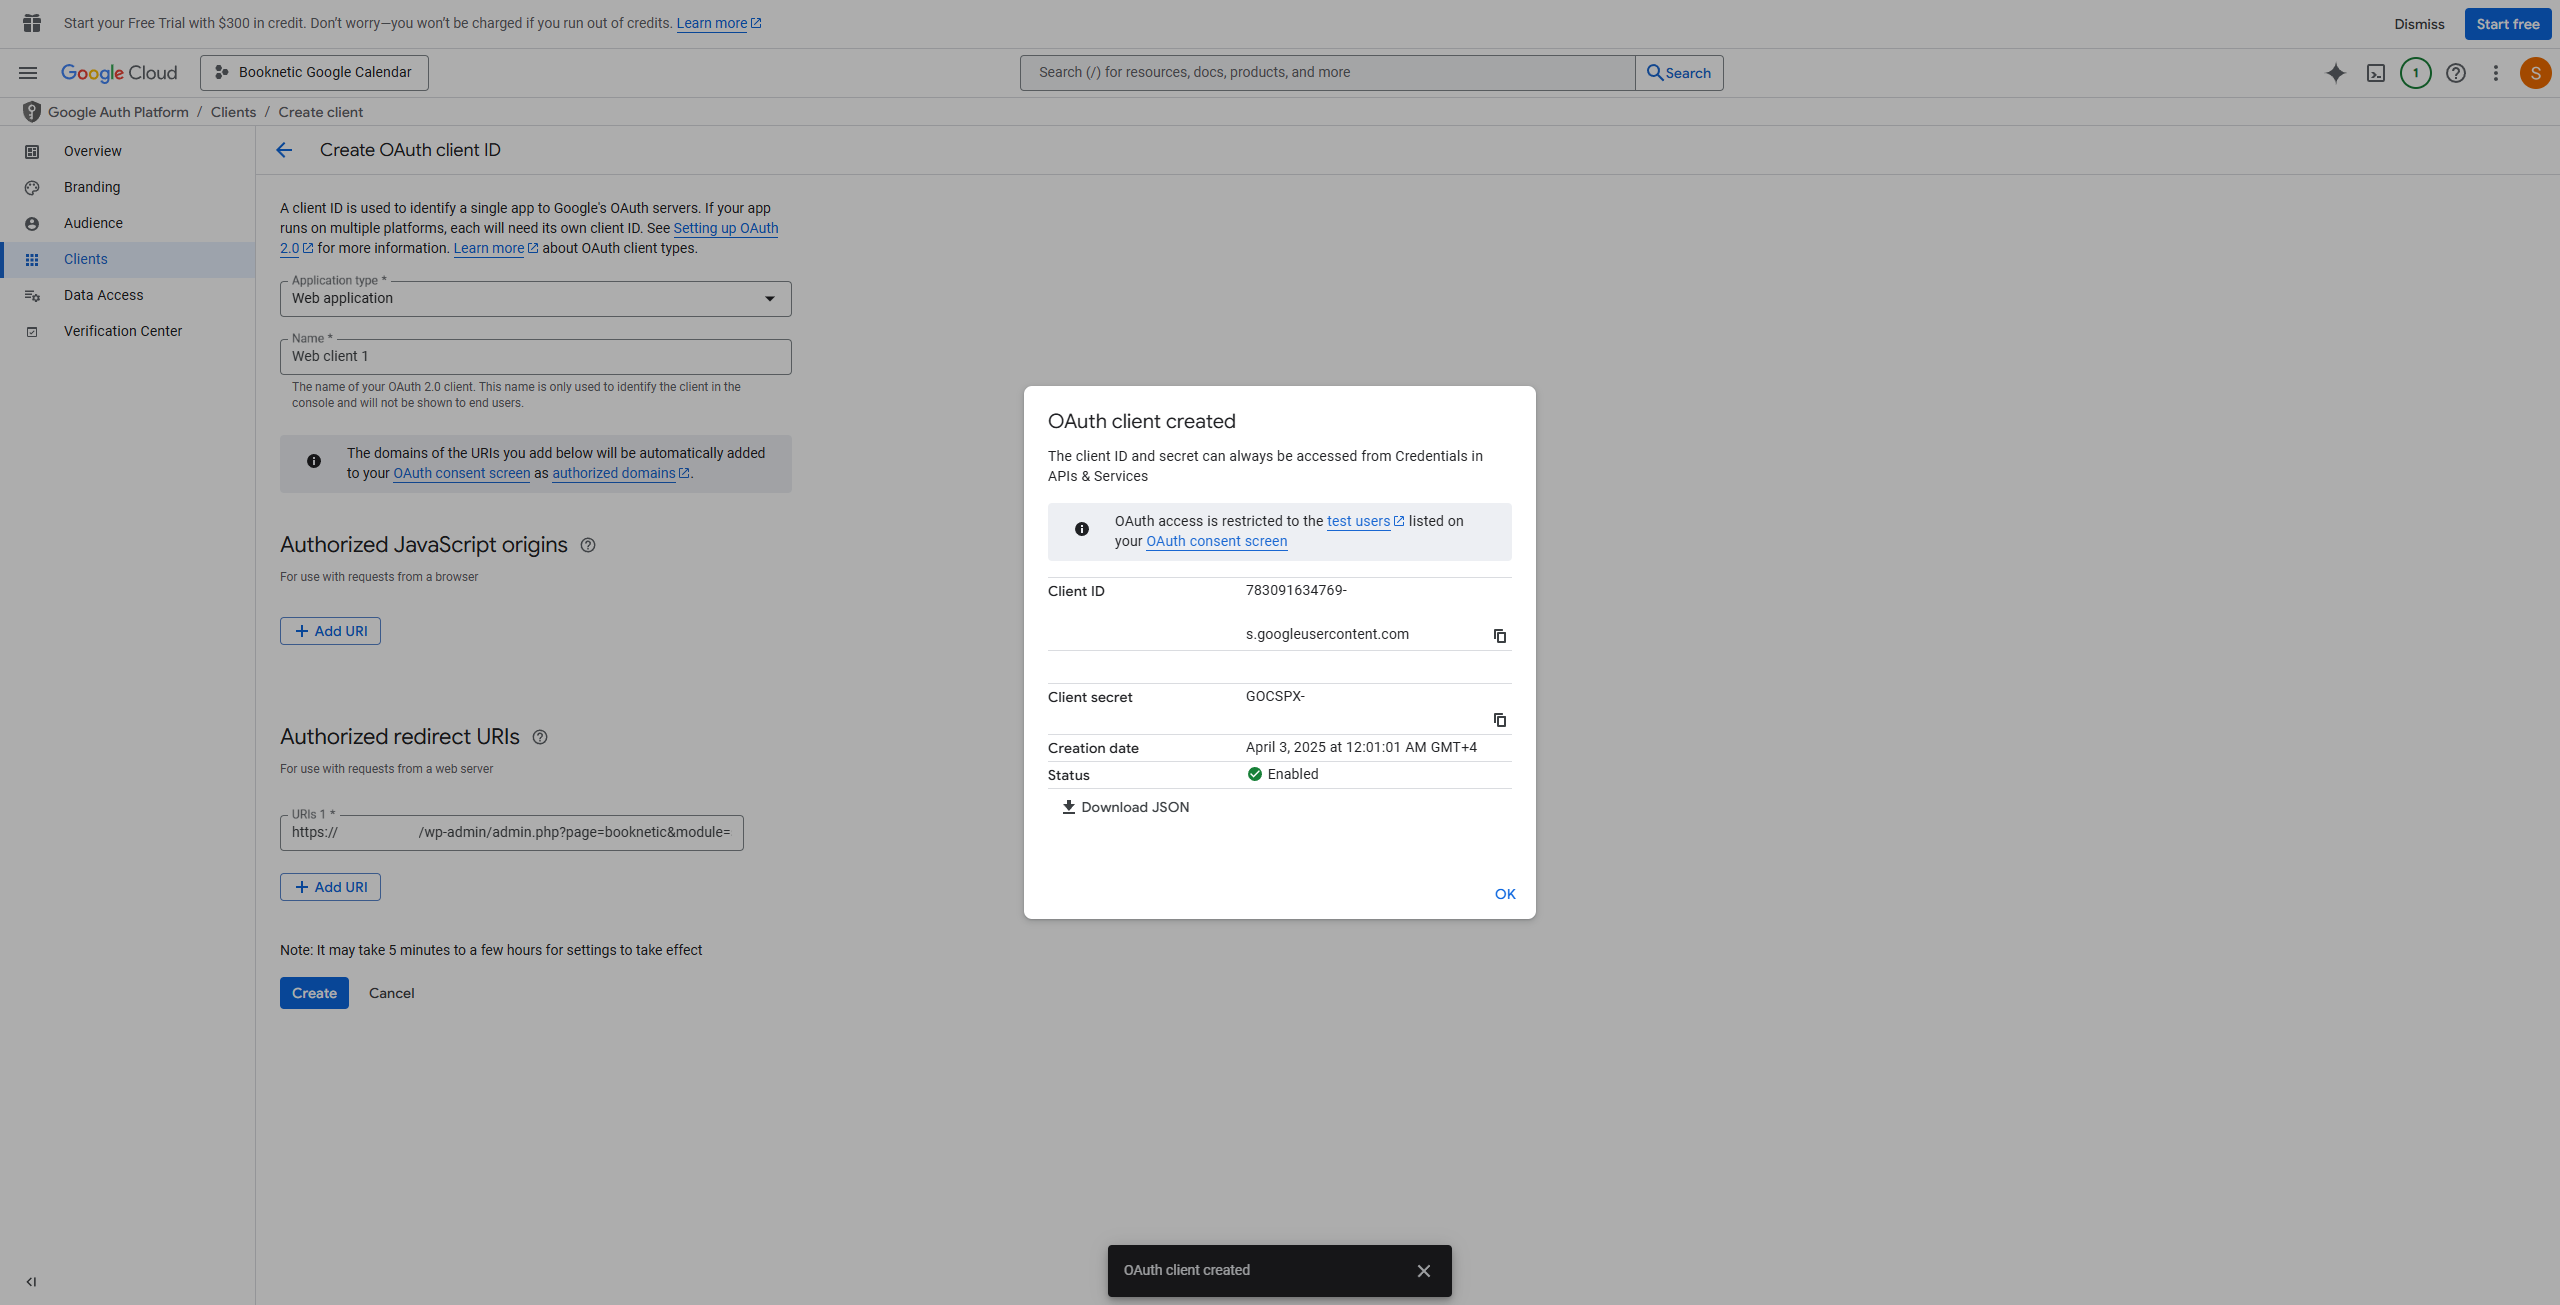
Save and Copy Client ID
Once the credentials are generated, copy the Client ID and Client Secret.
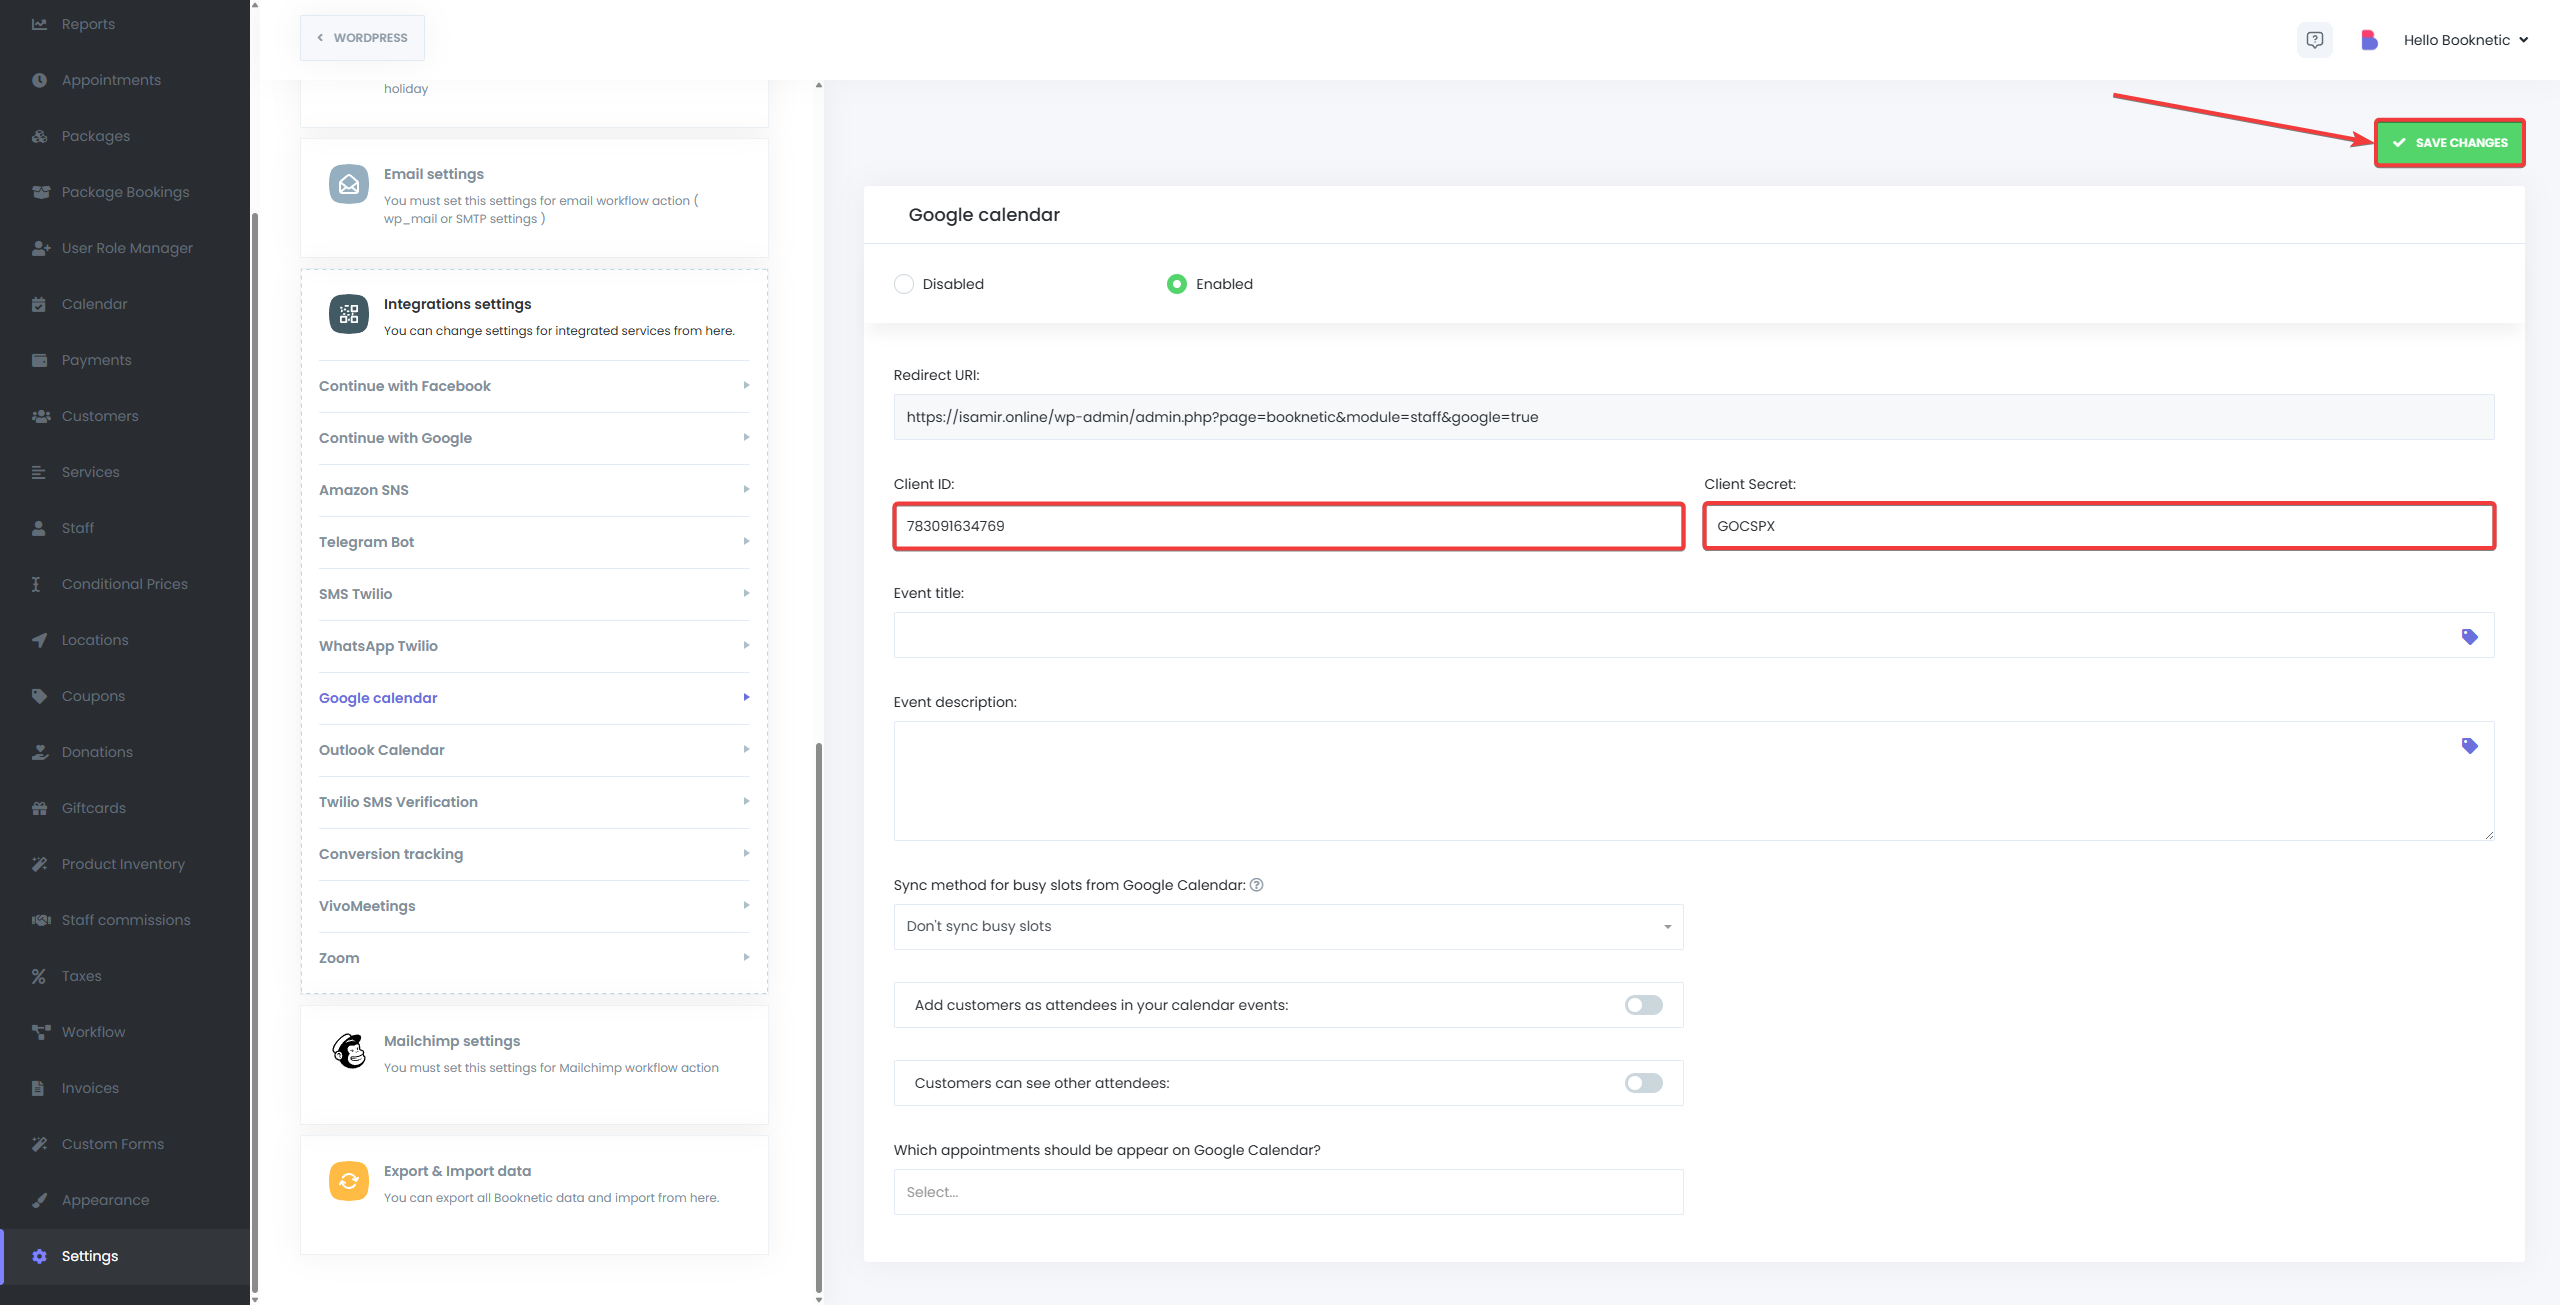
Paste Credentials into Booknetic Settings
Go back to Booknetic > Settings > Integrations > Google Calendar.
Paste the Client ID and Client Secret into their corresponding fields.
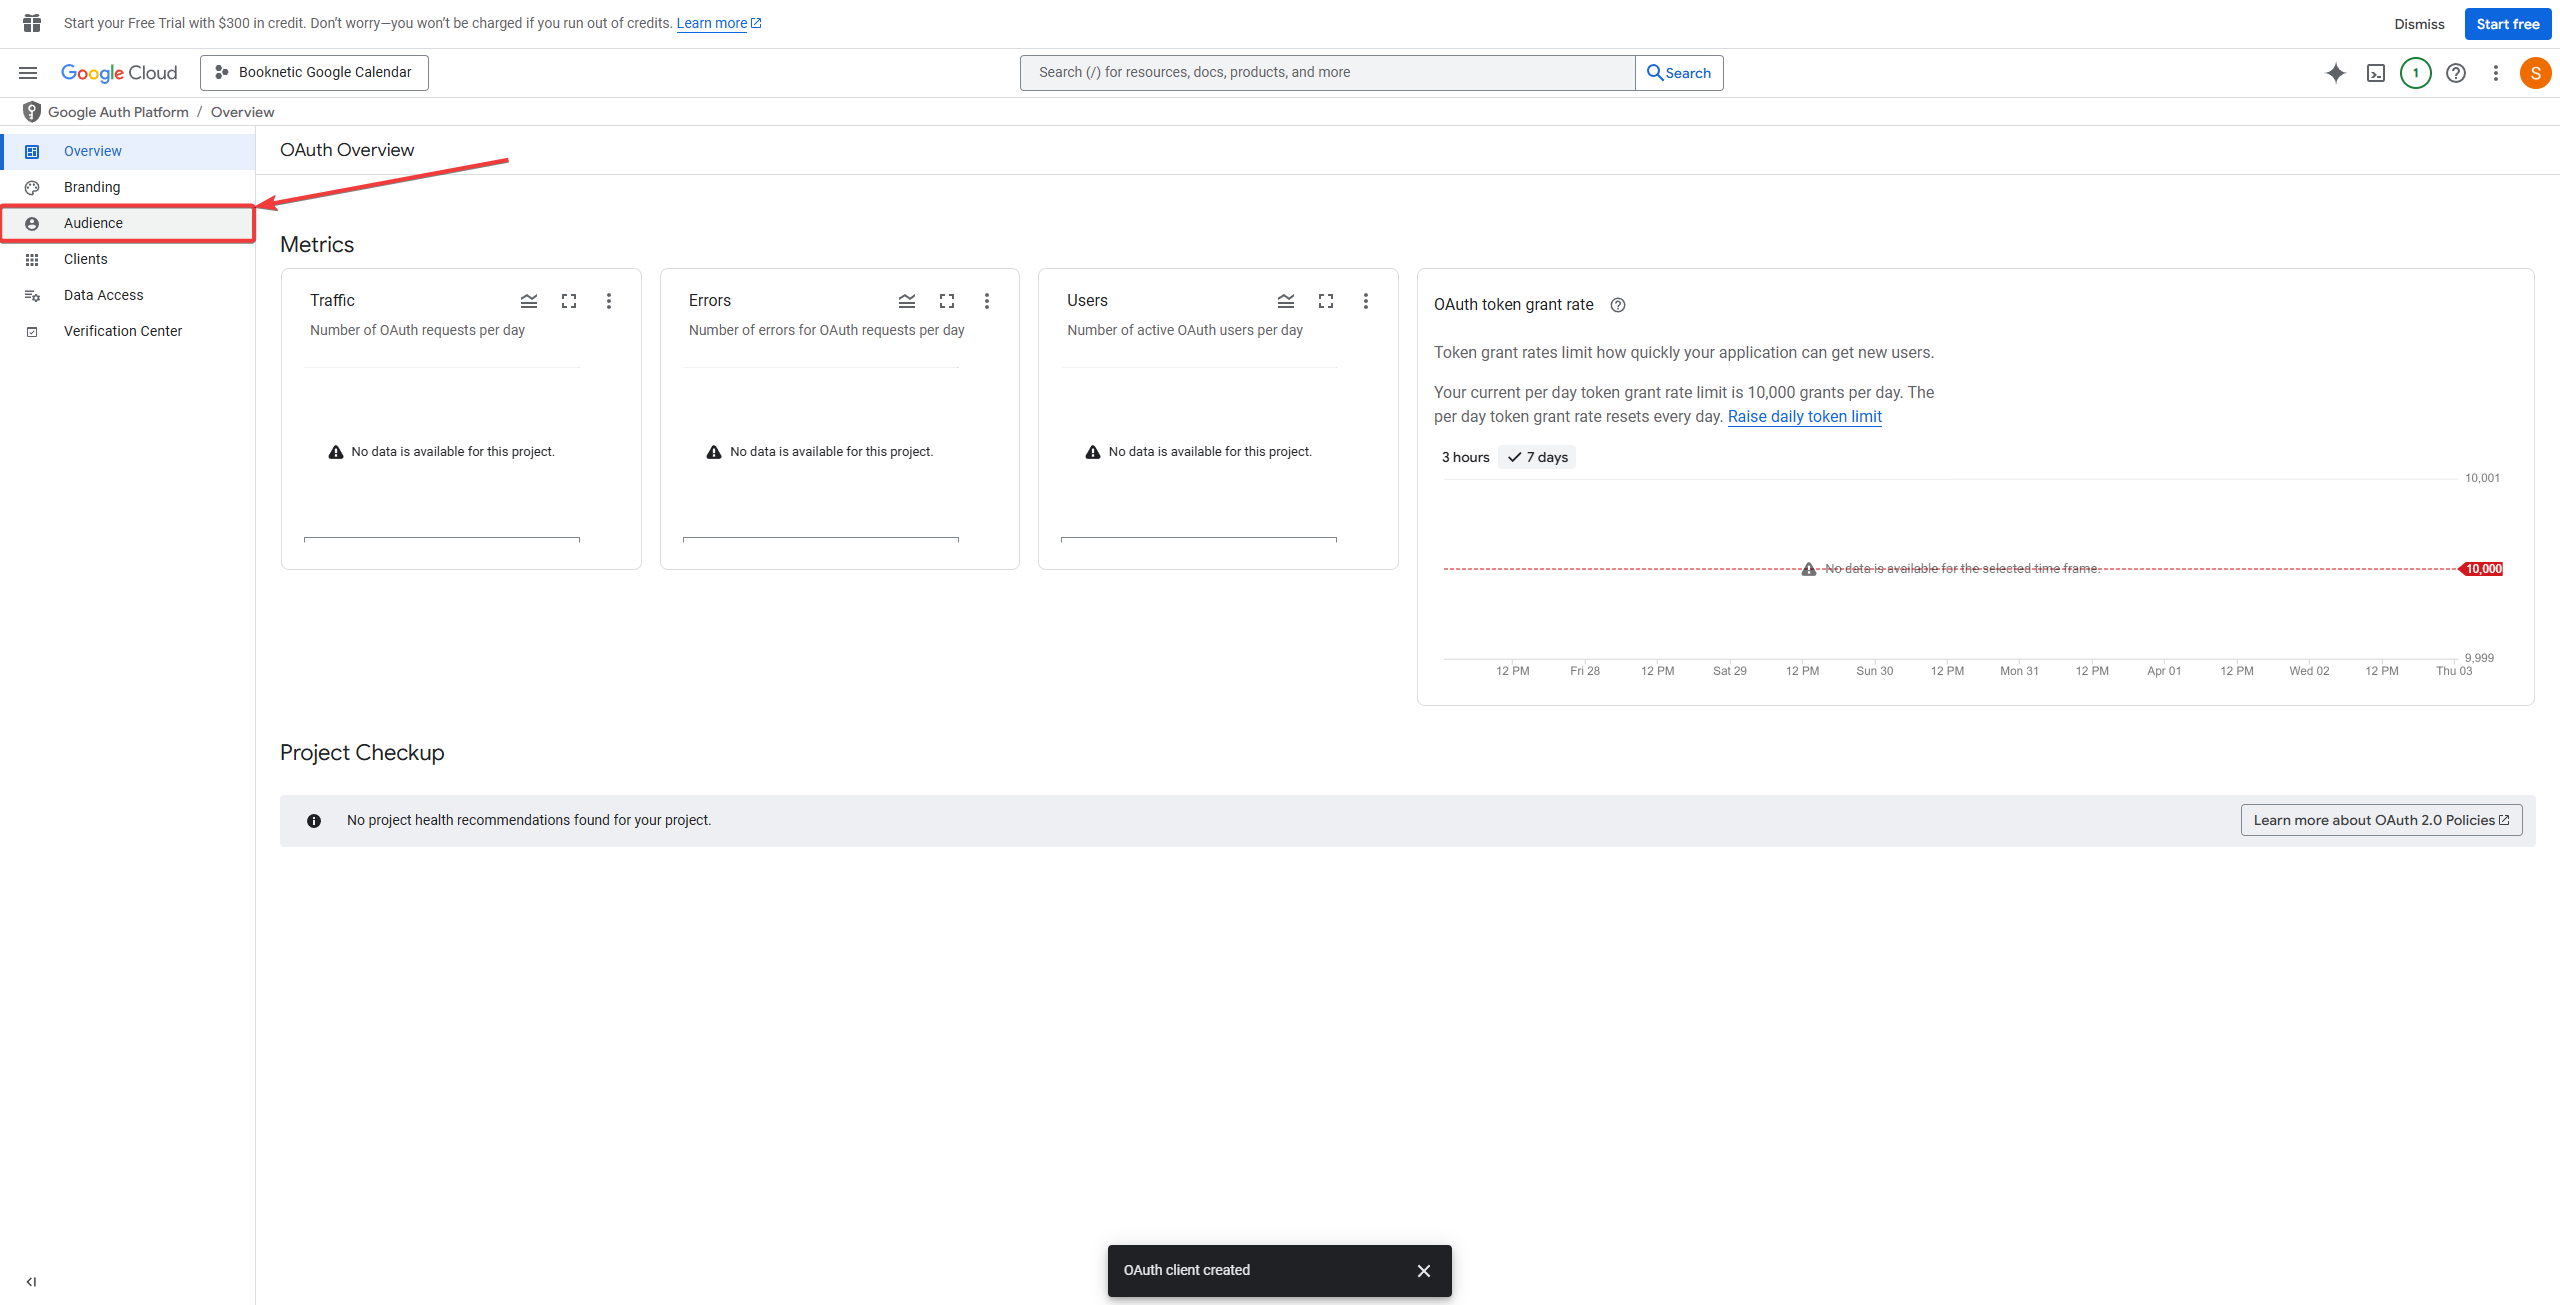
Go to APIs & Services > OAuth consent screen.
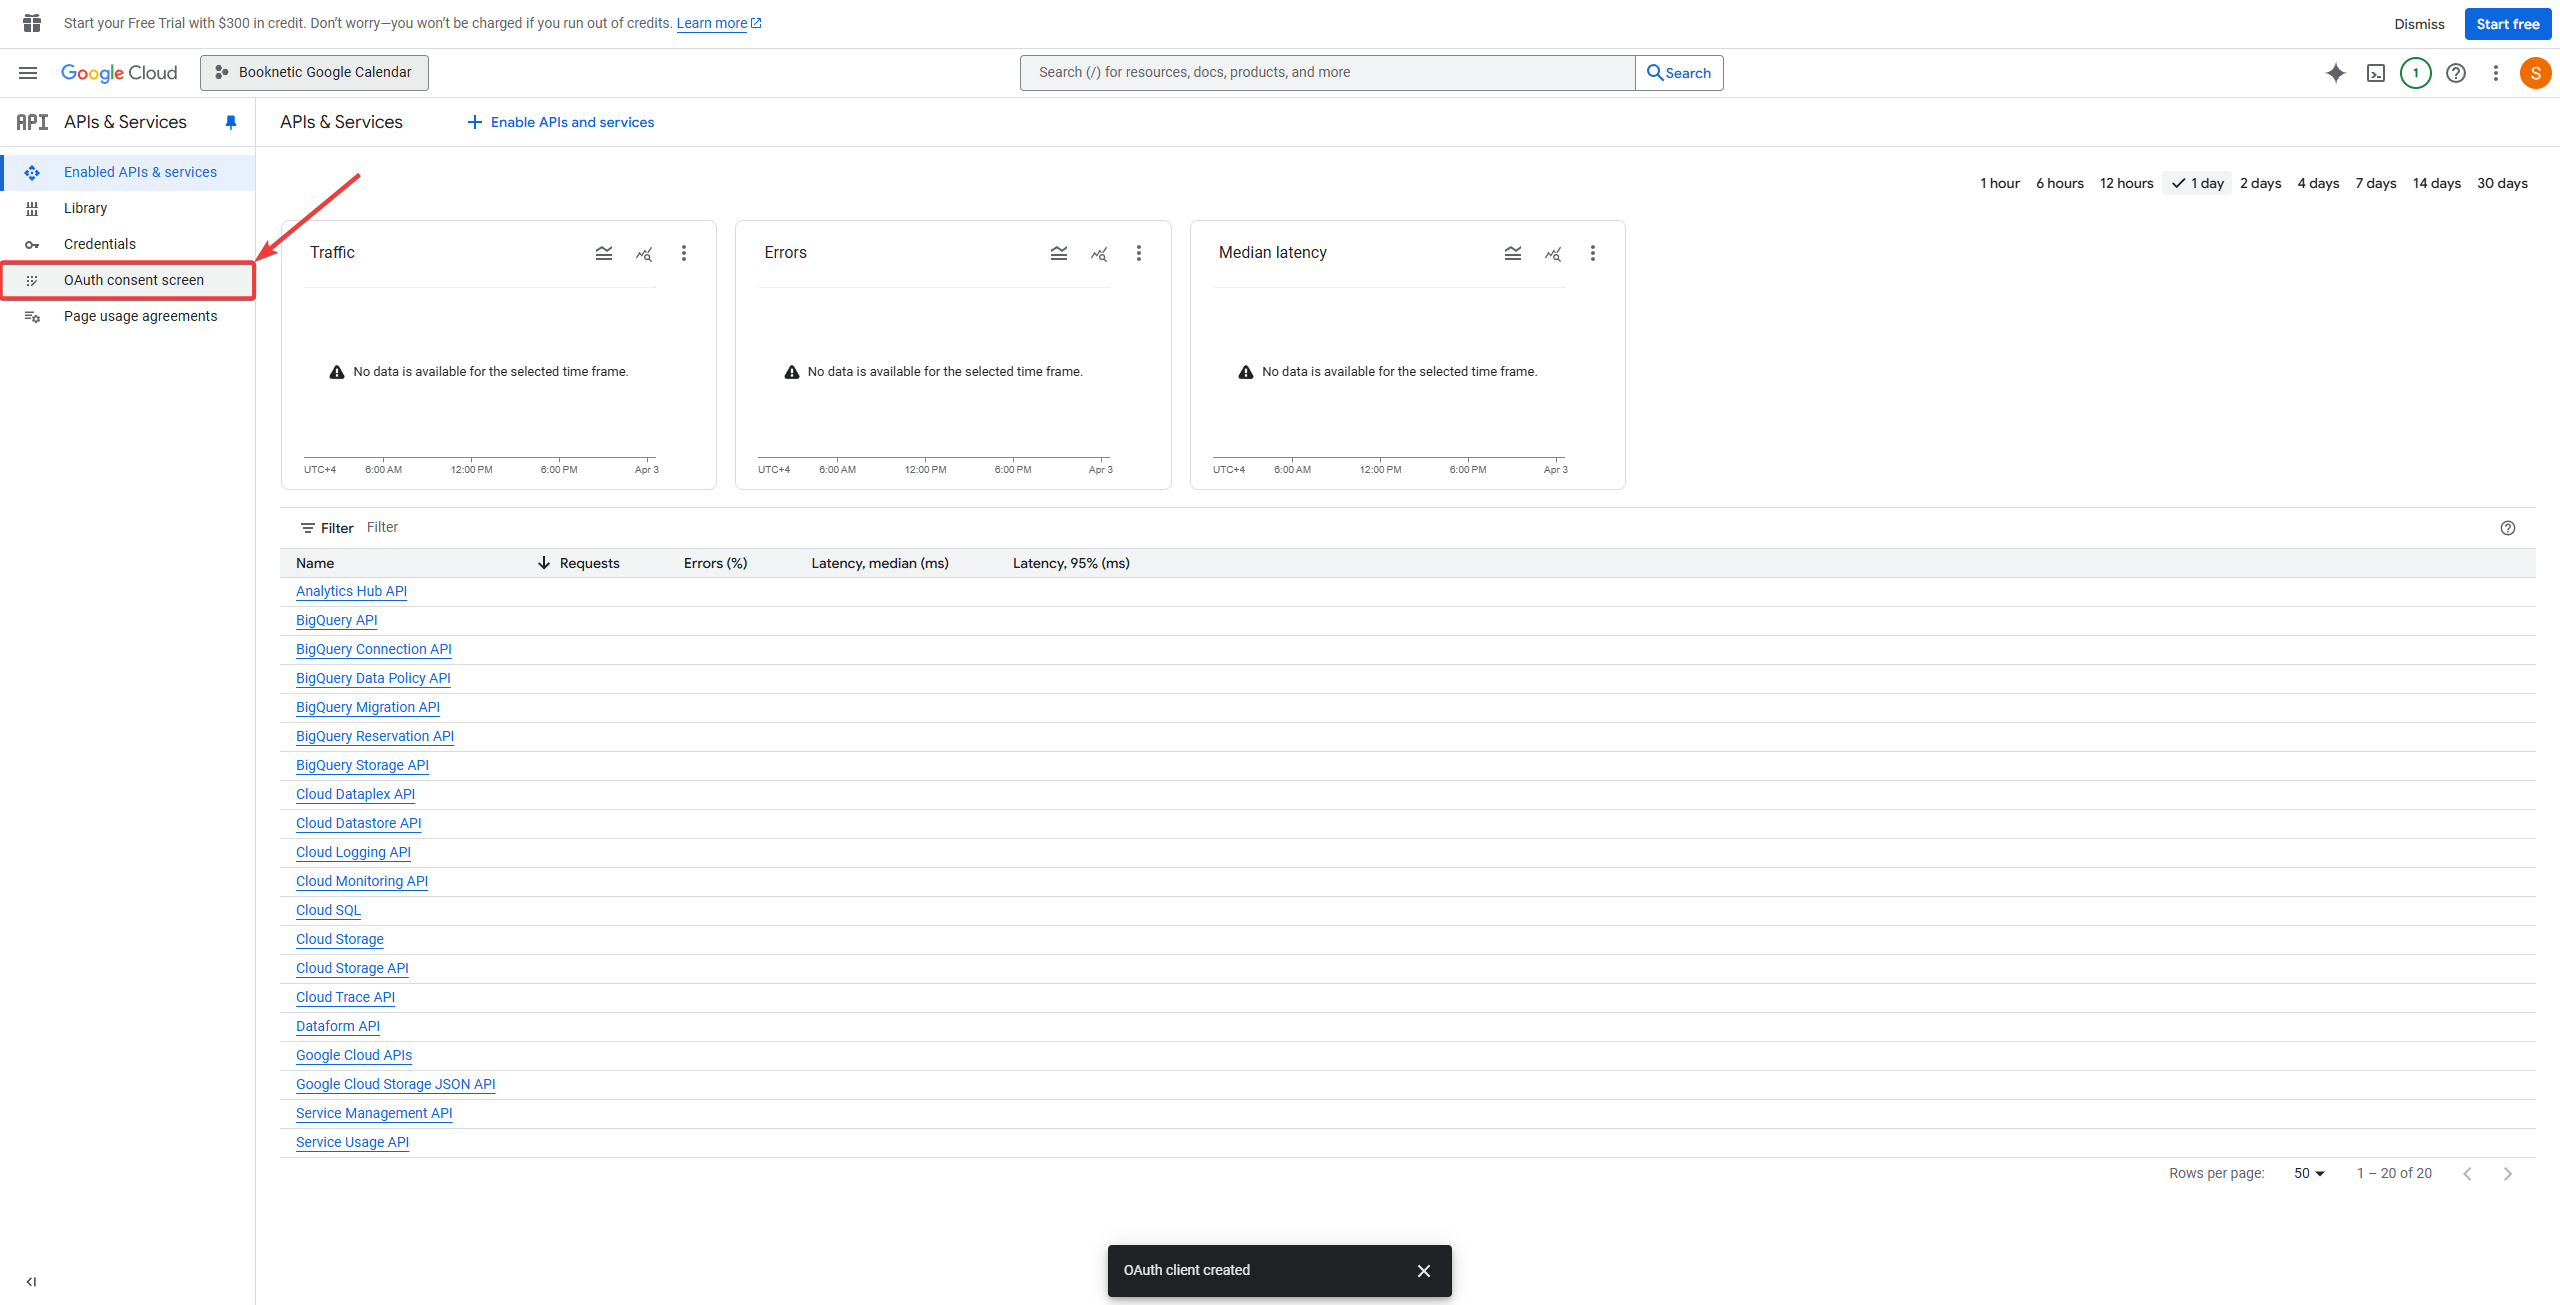
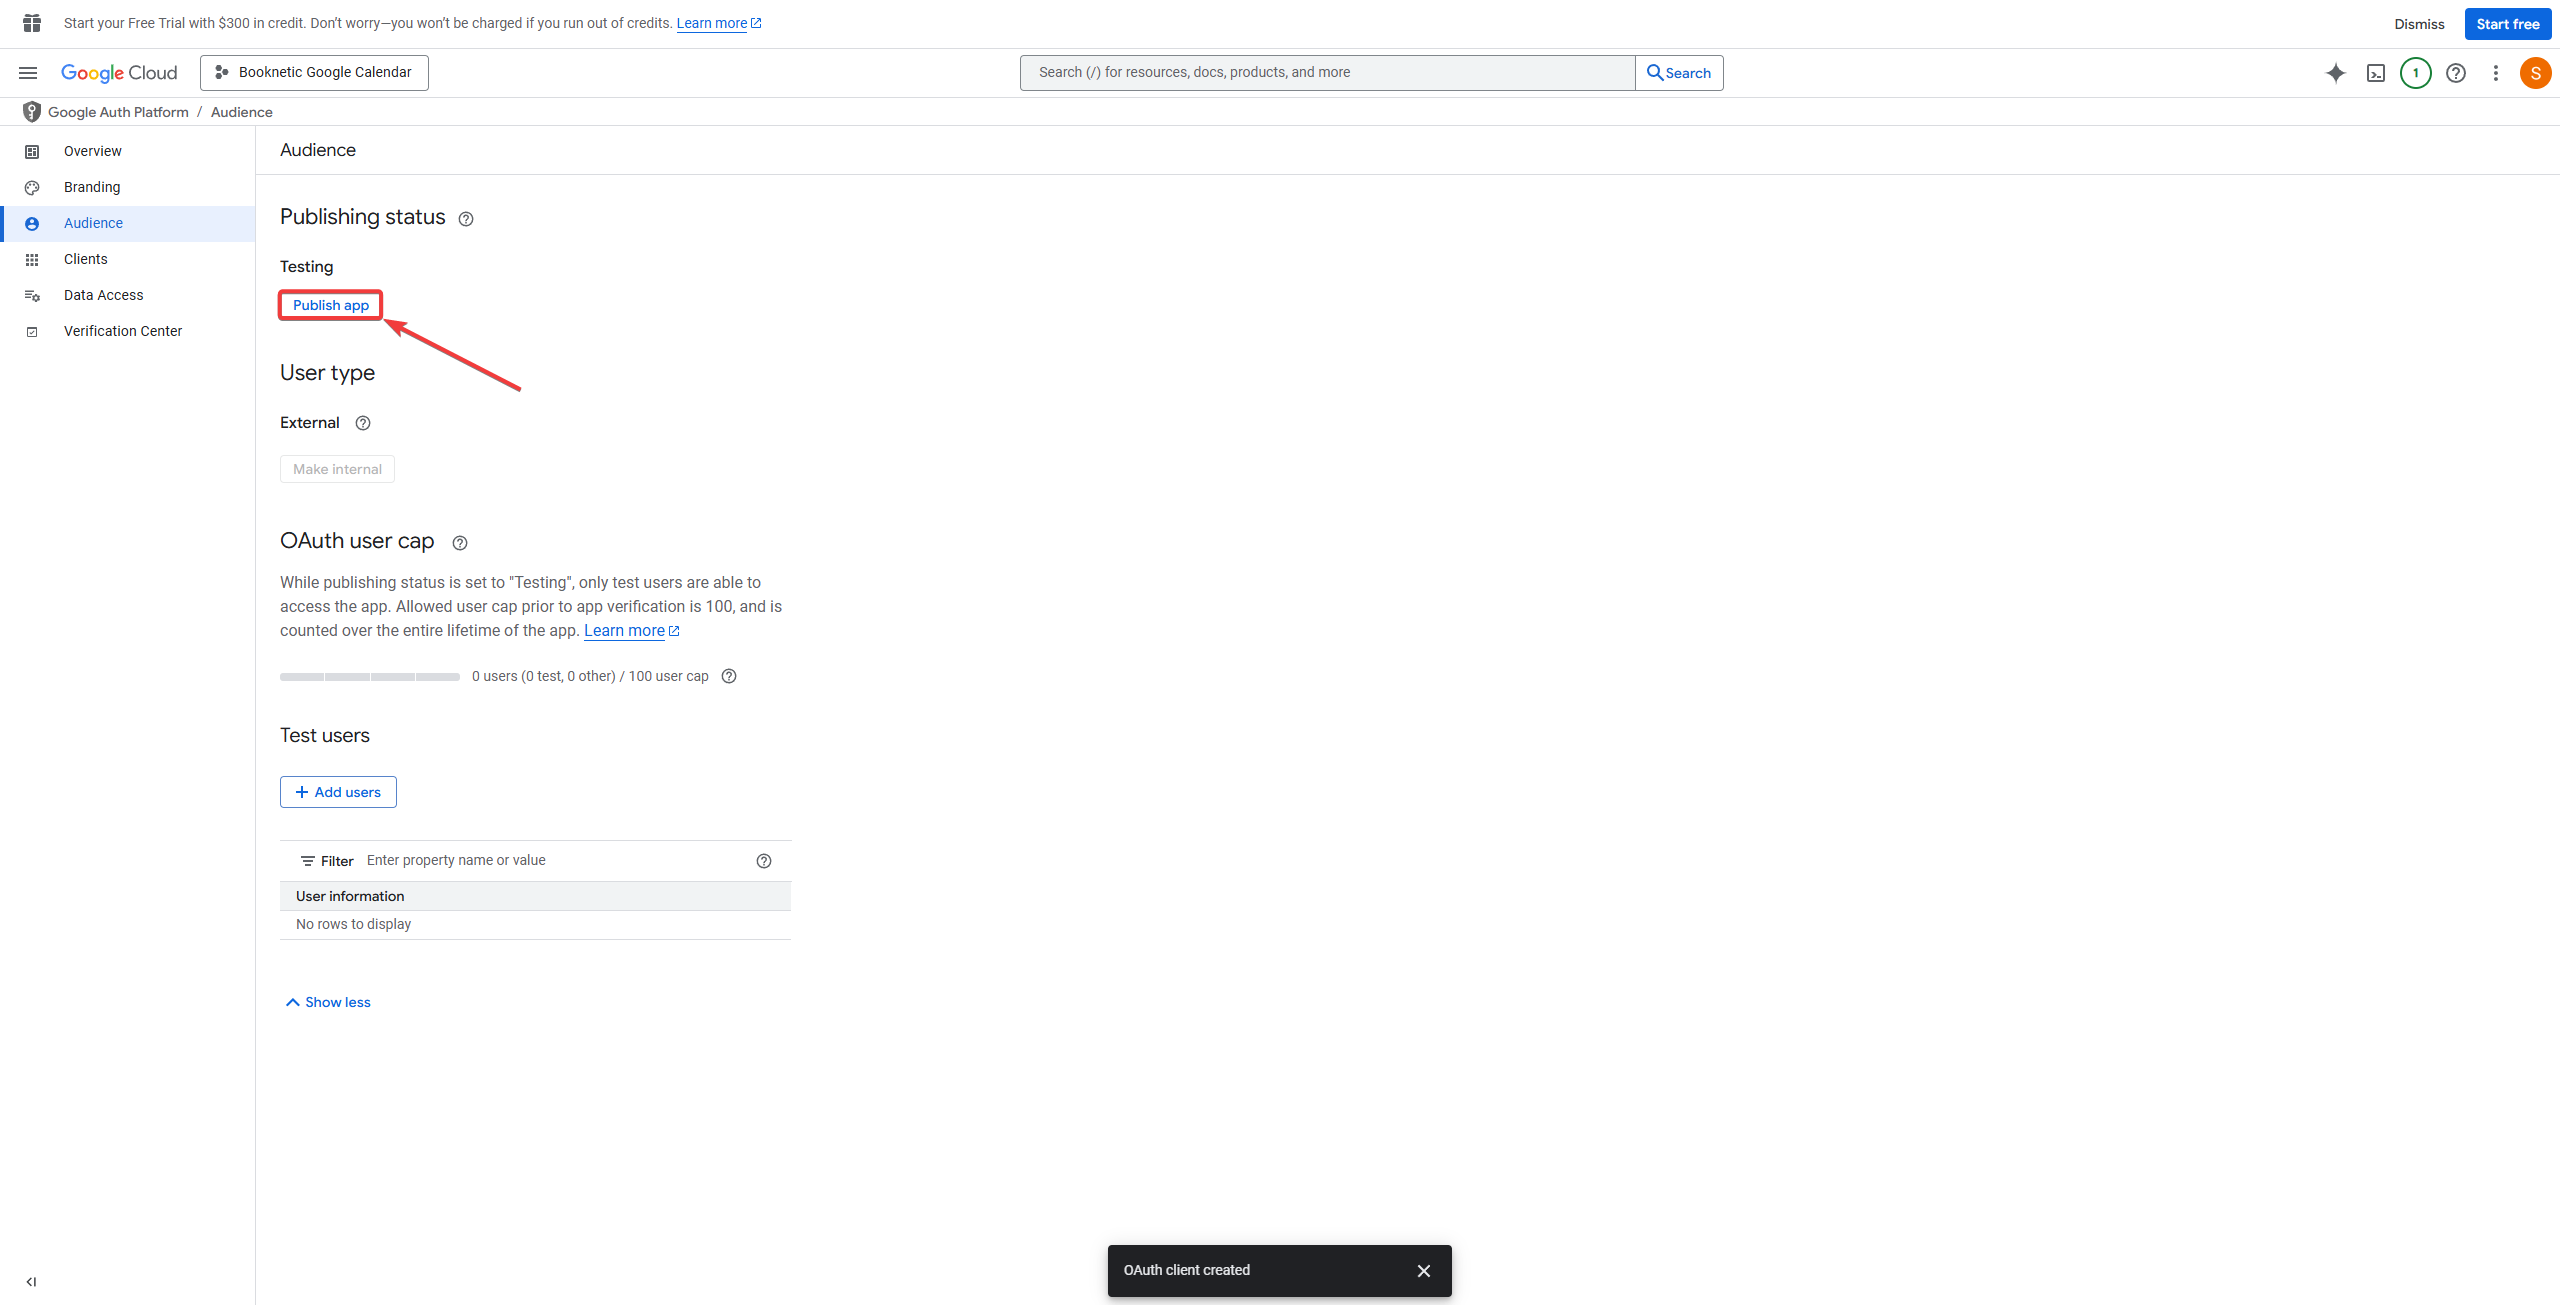
Go to APIs & Services > Audience.
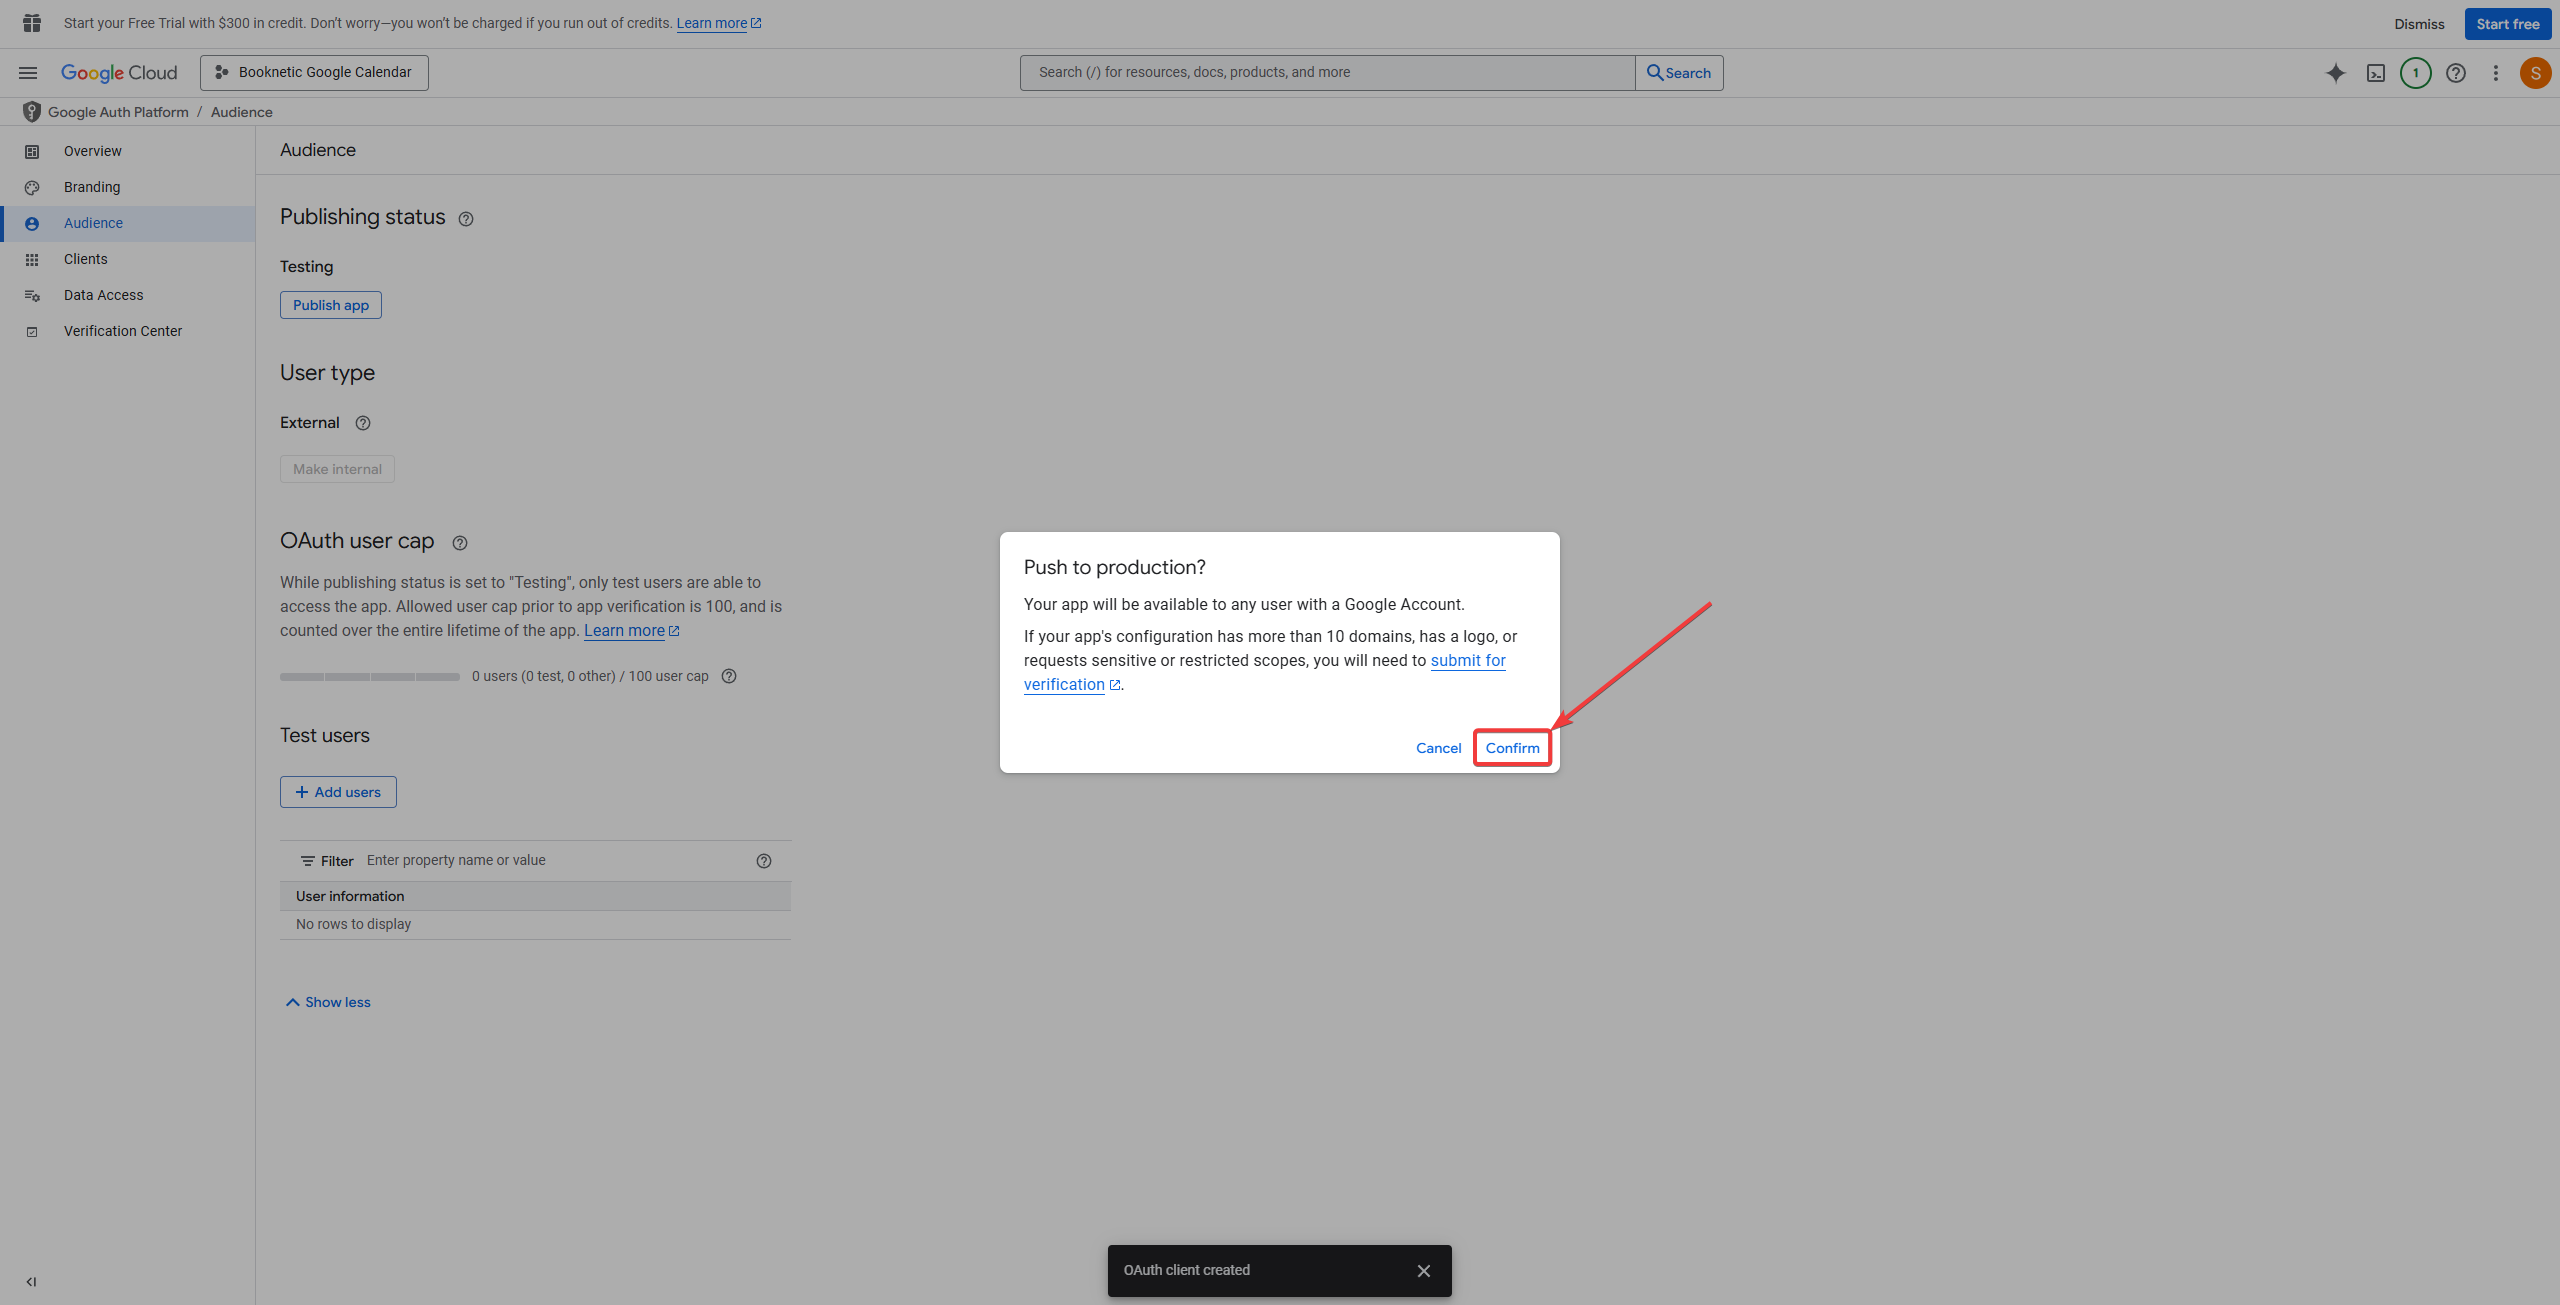
Click on the Publish app button.
Confirm the status change.
Go to APIs & Services > Library.
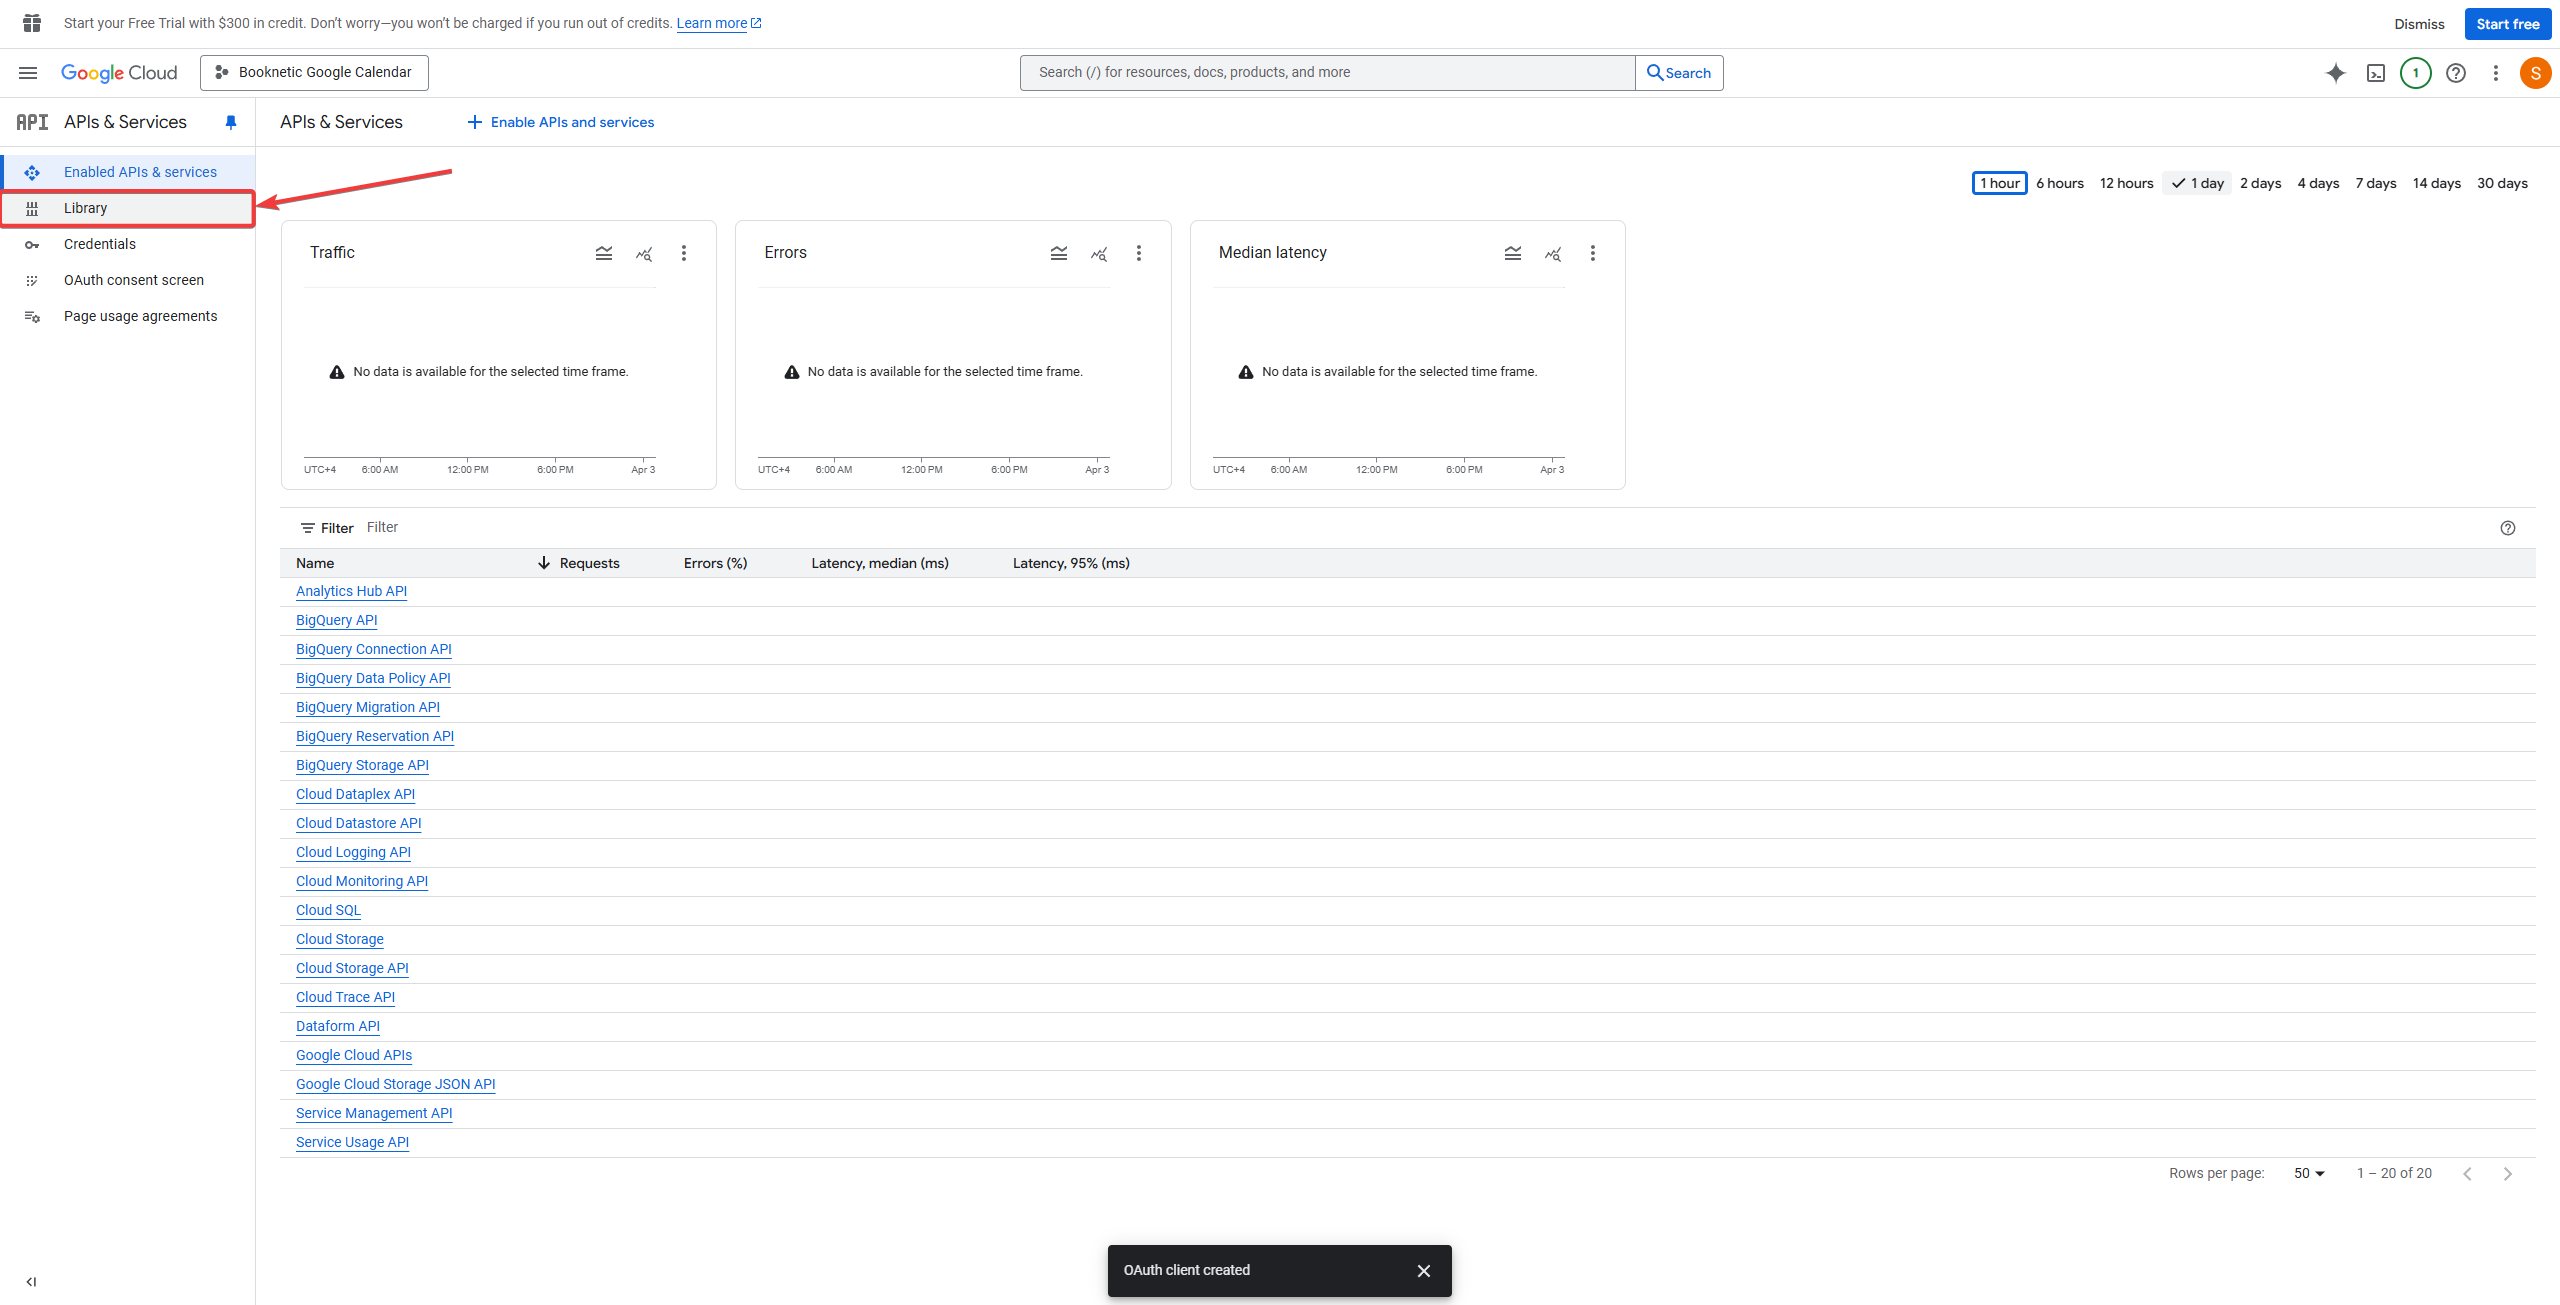
Search for Google Calendar API and search it.
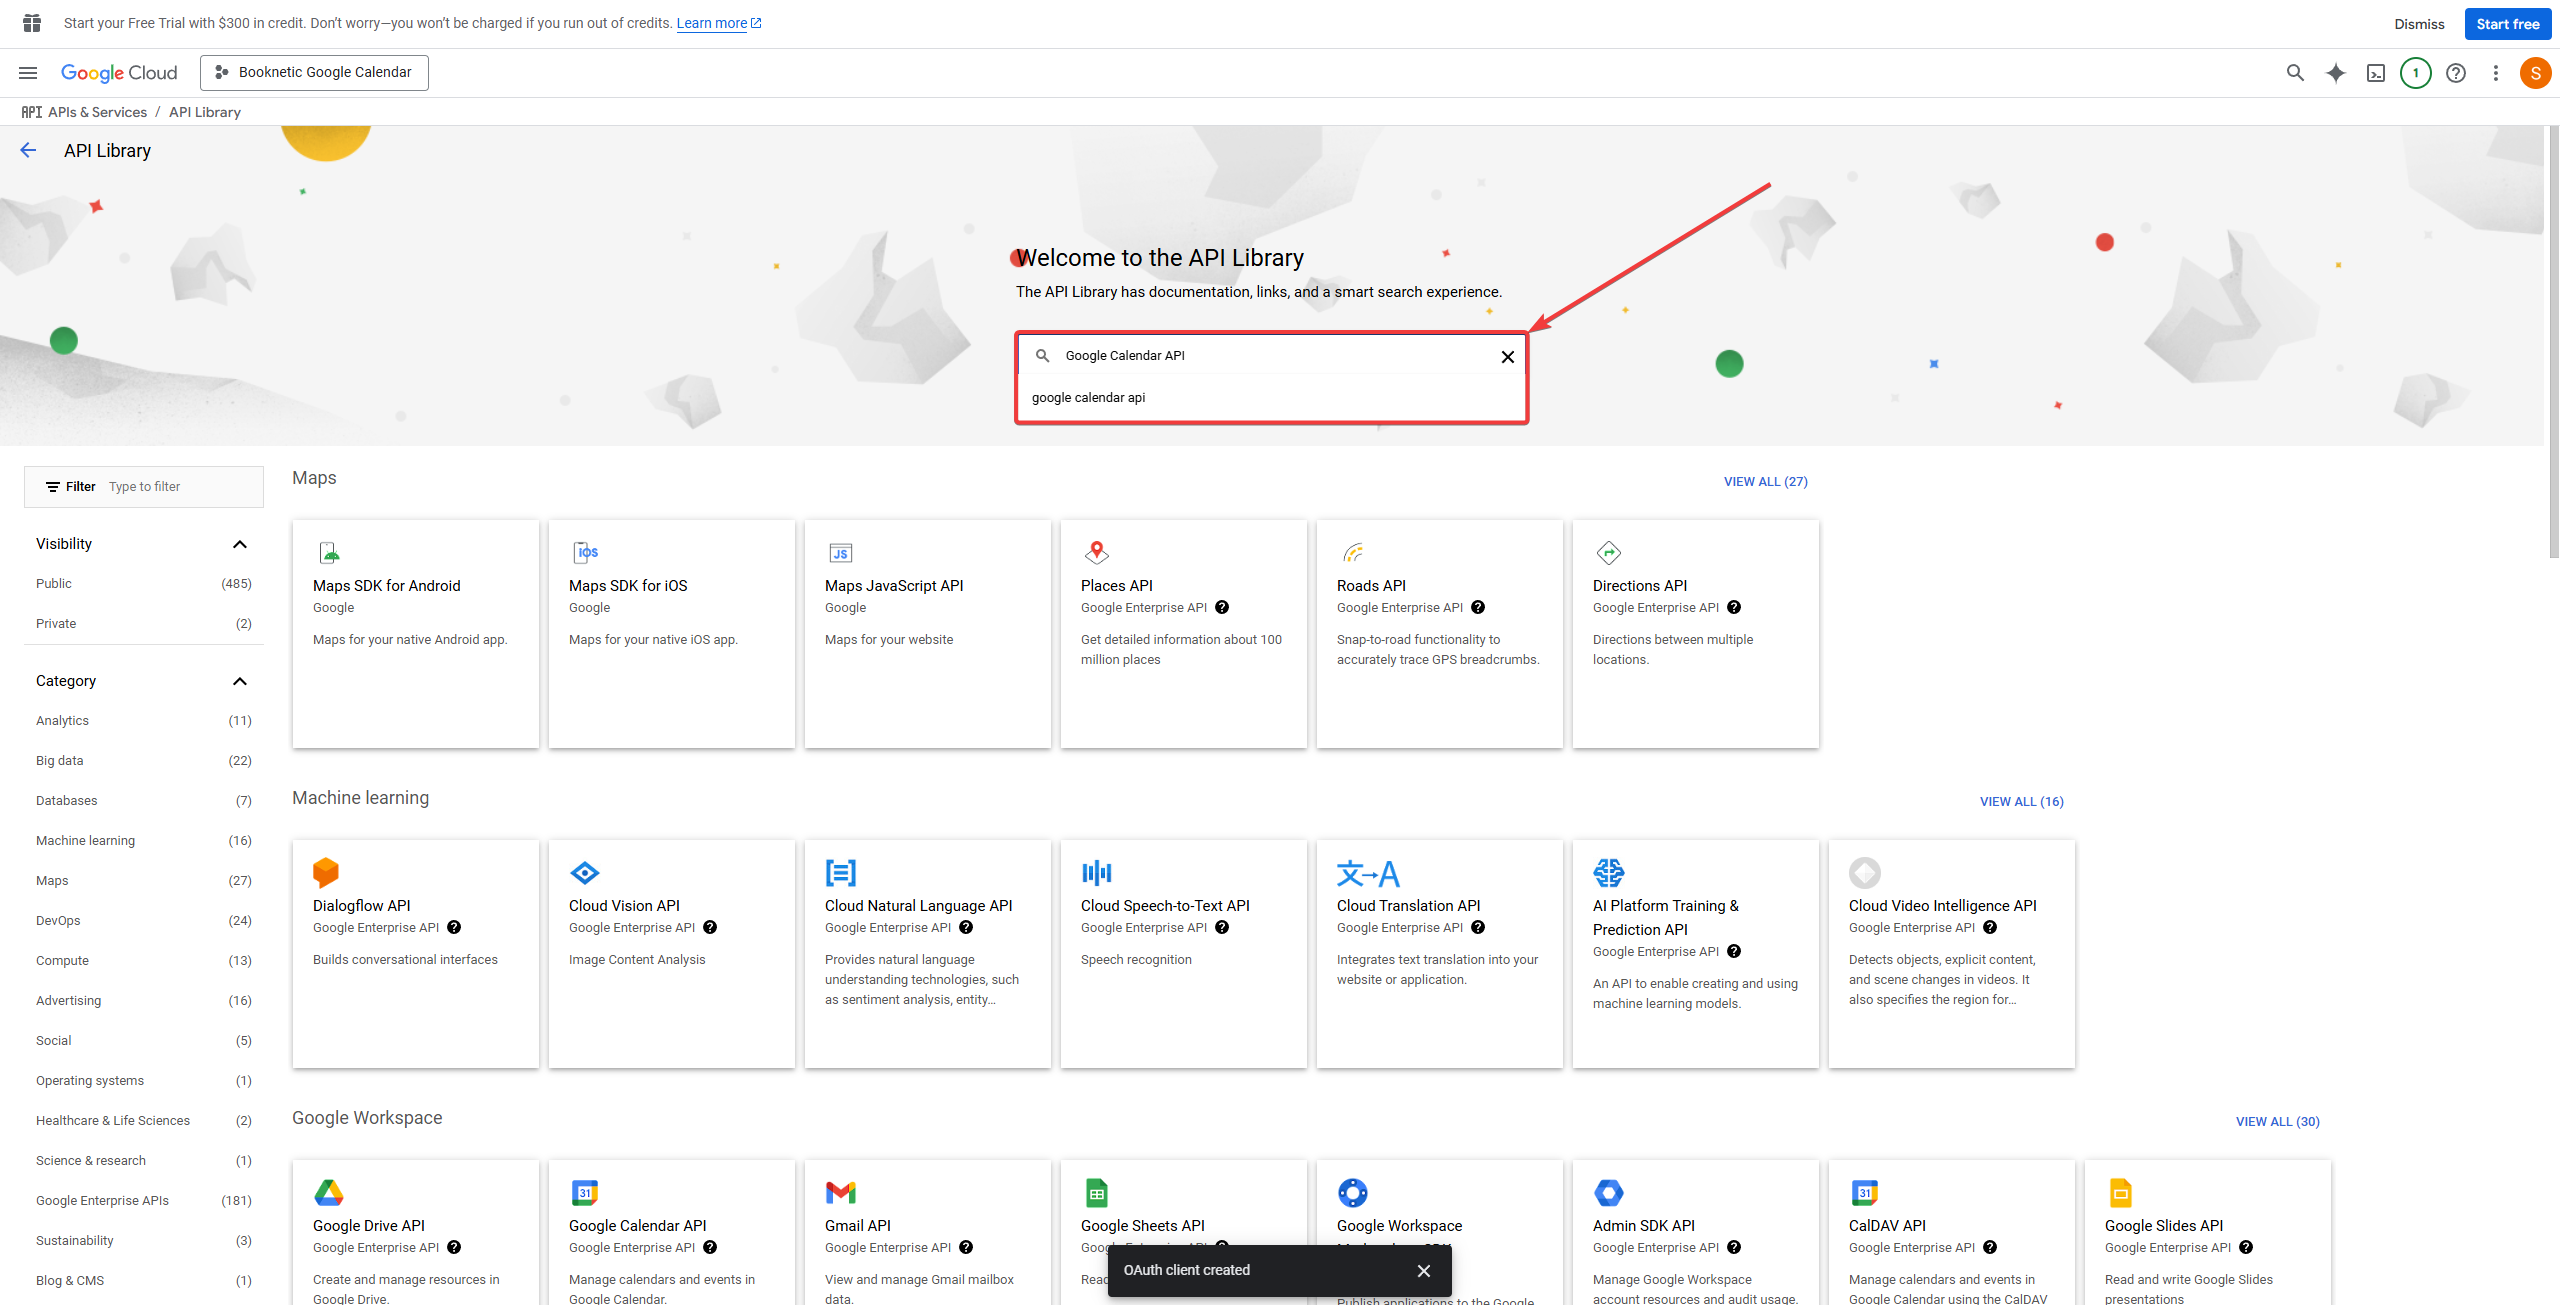
Enable the Google Calendar API.

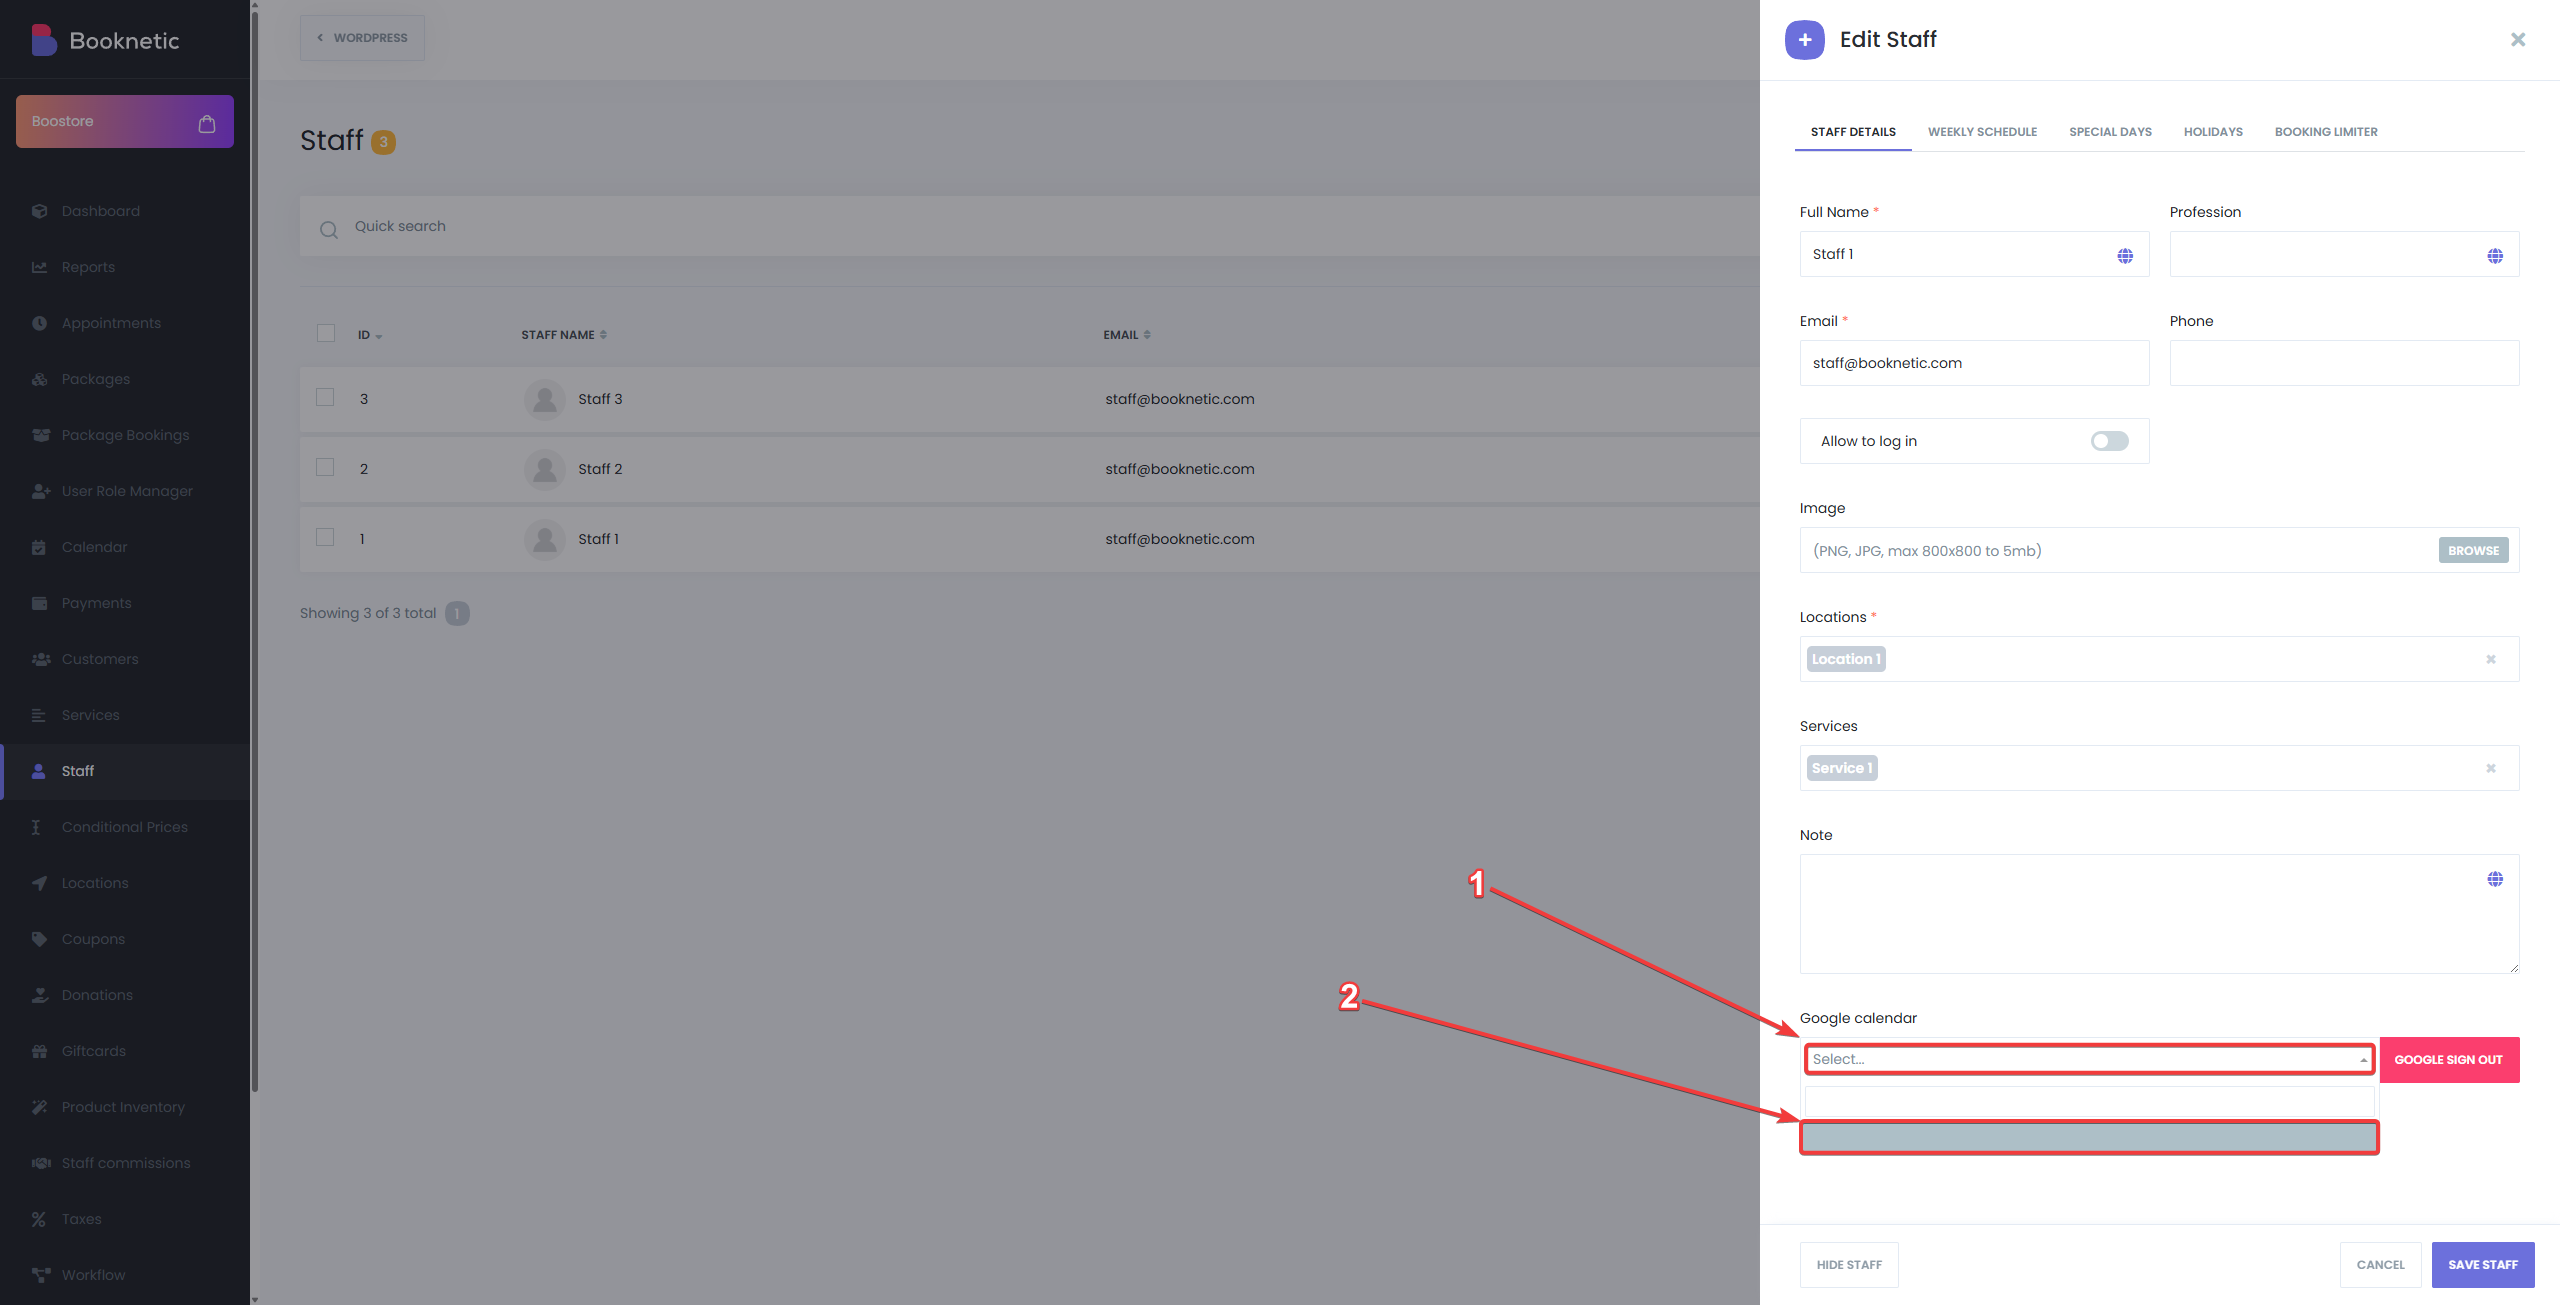
Each staff member can connect their individual Google Calendar with Booknetic to ensure availability is reflected across both platforms. This also ensures that their time is automatically updated and synced.
Staff Member Access
Each staff member needs to log into their Staff Profile in Booknetic Admin Panel.
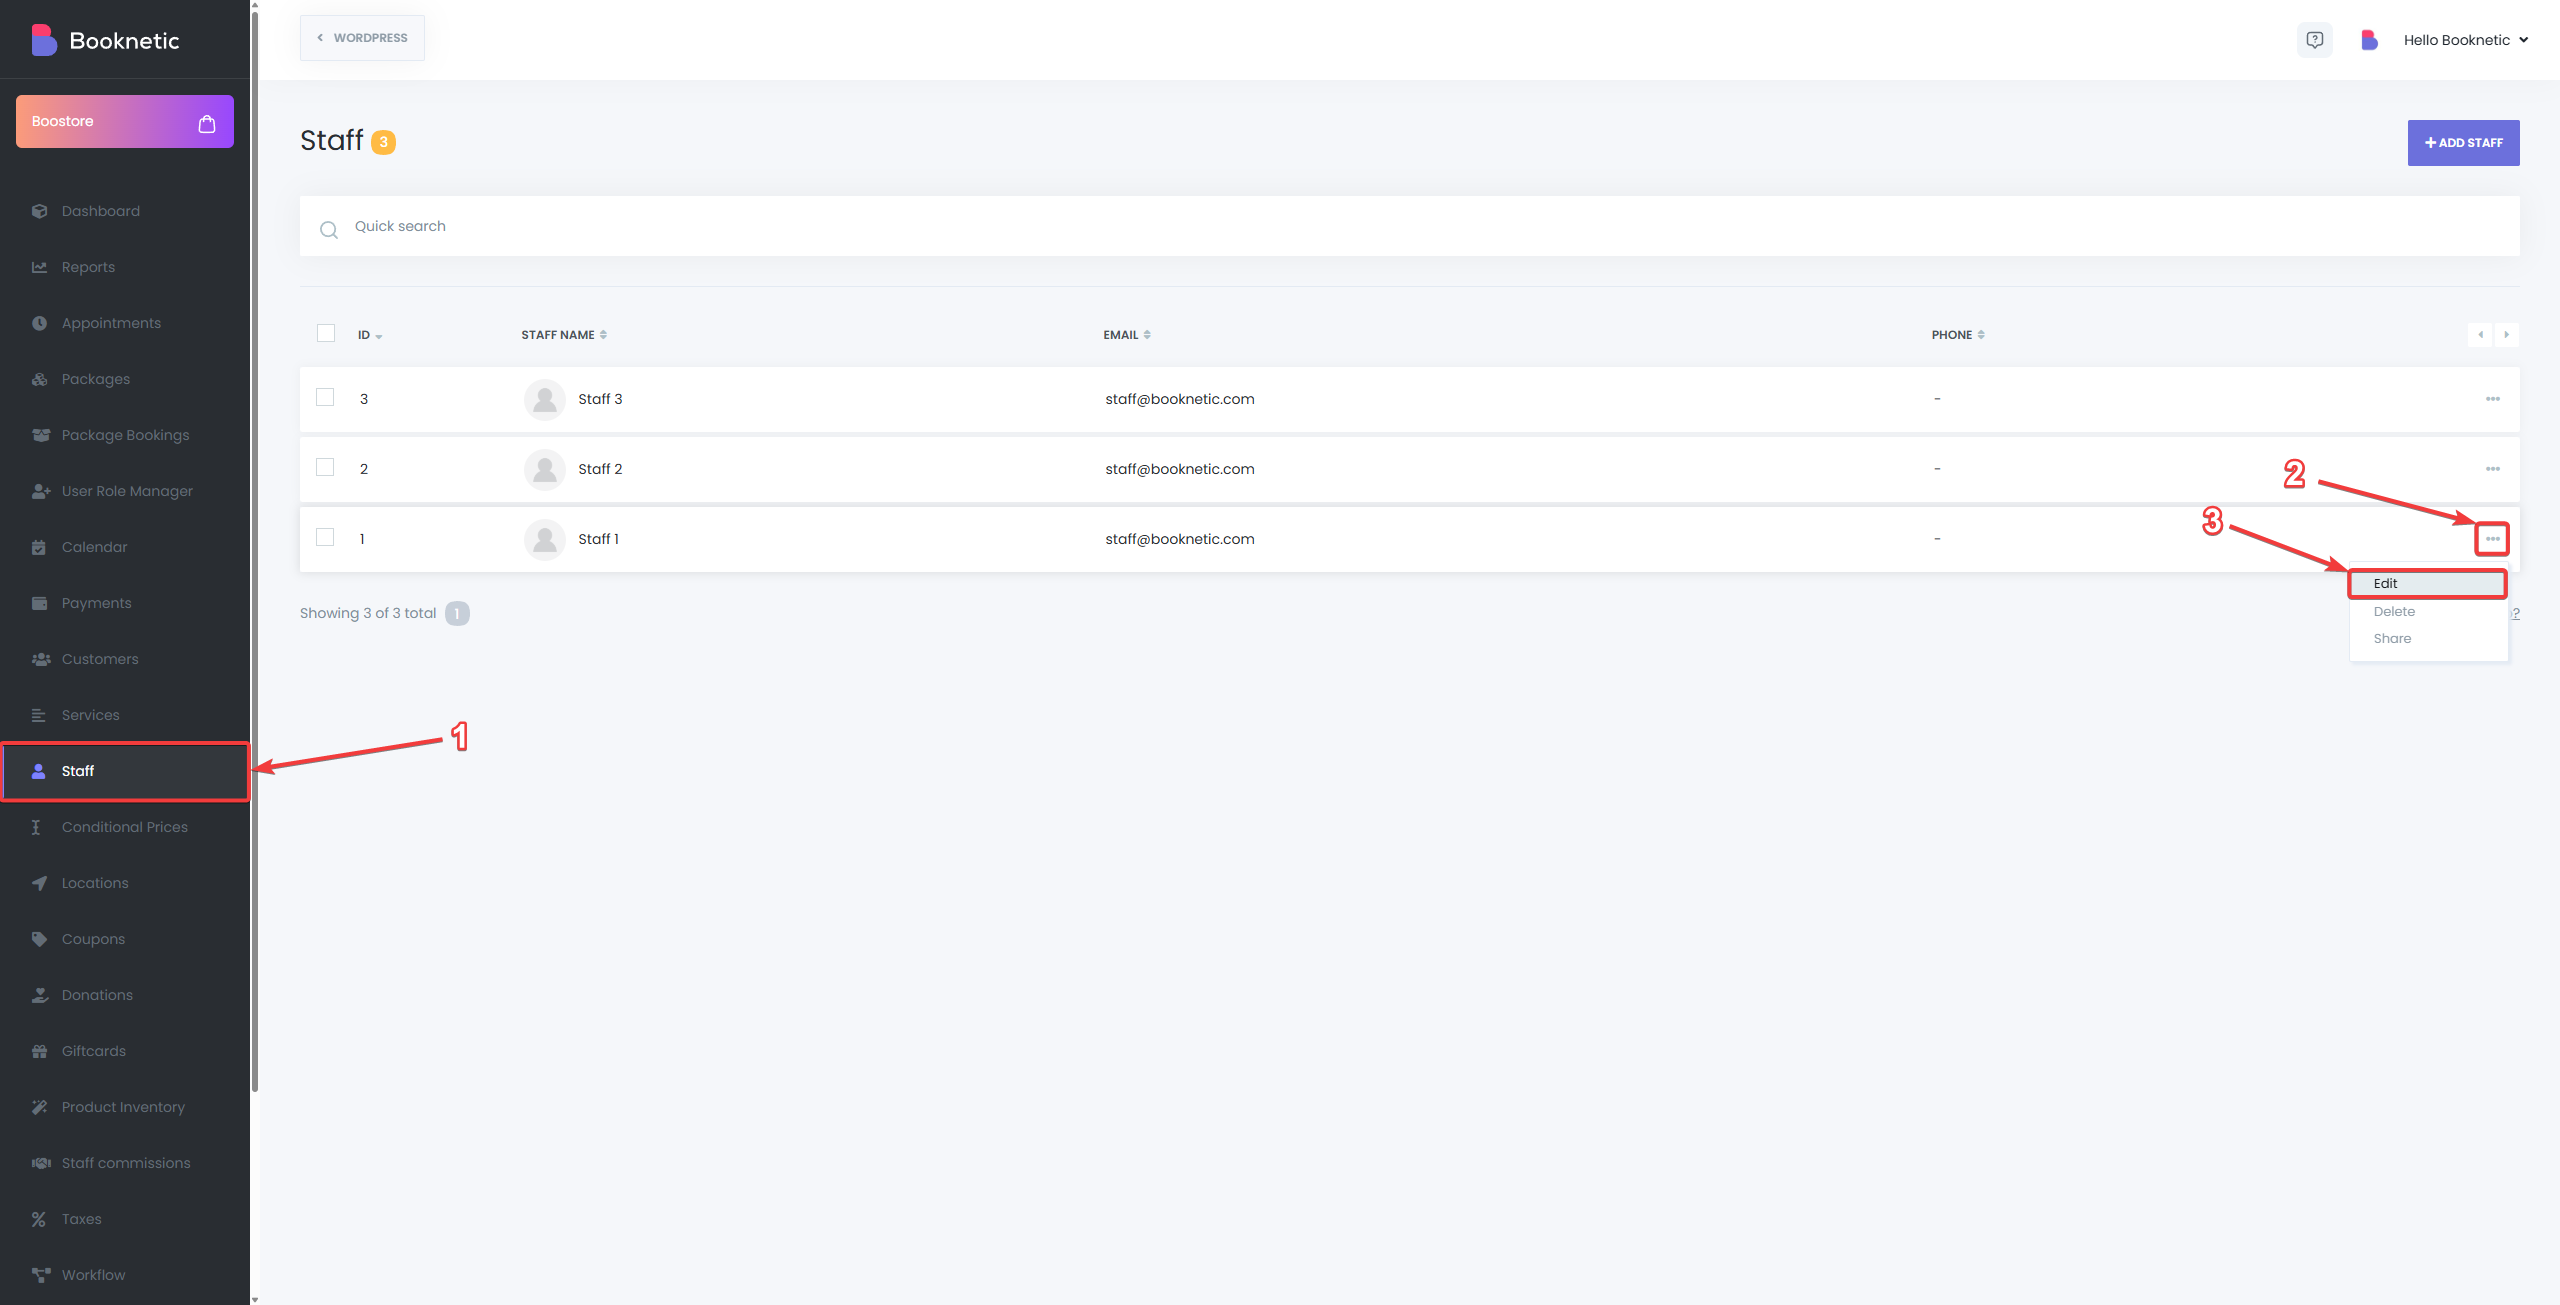
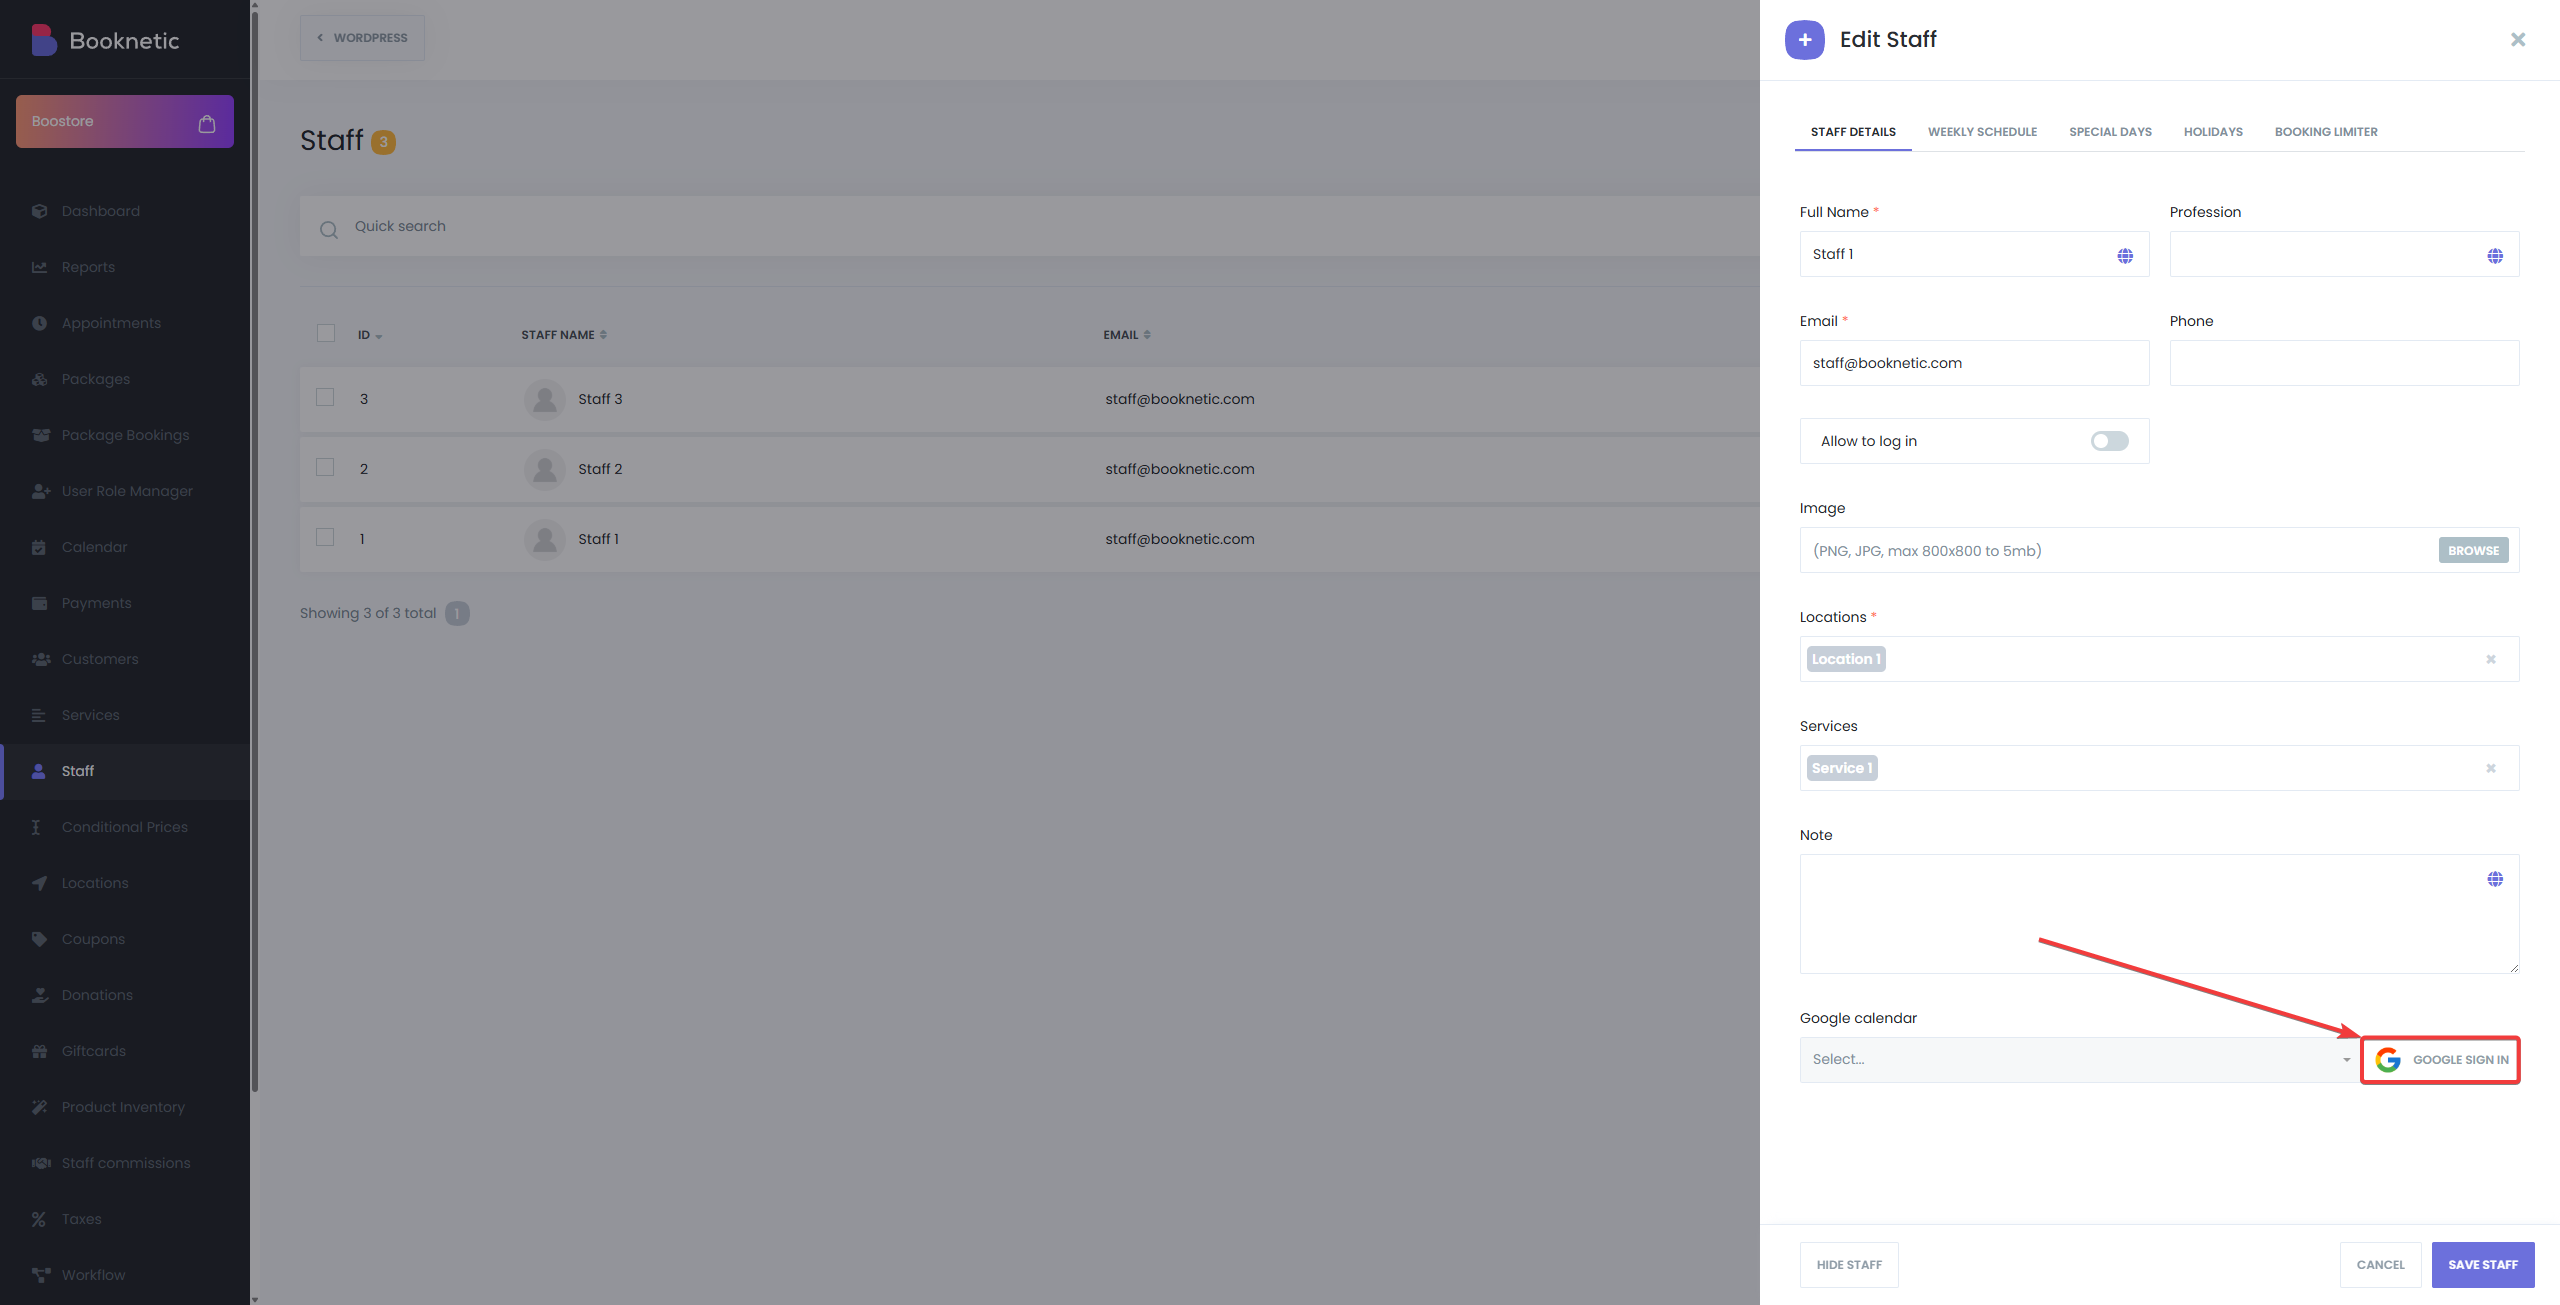
Connect Google Calendar
In the staff profile settings, there will be an option to connect Google Calendar.
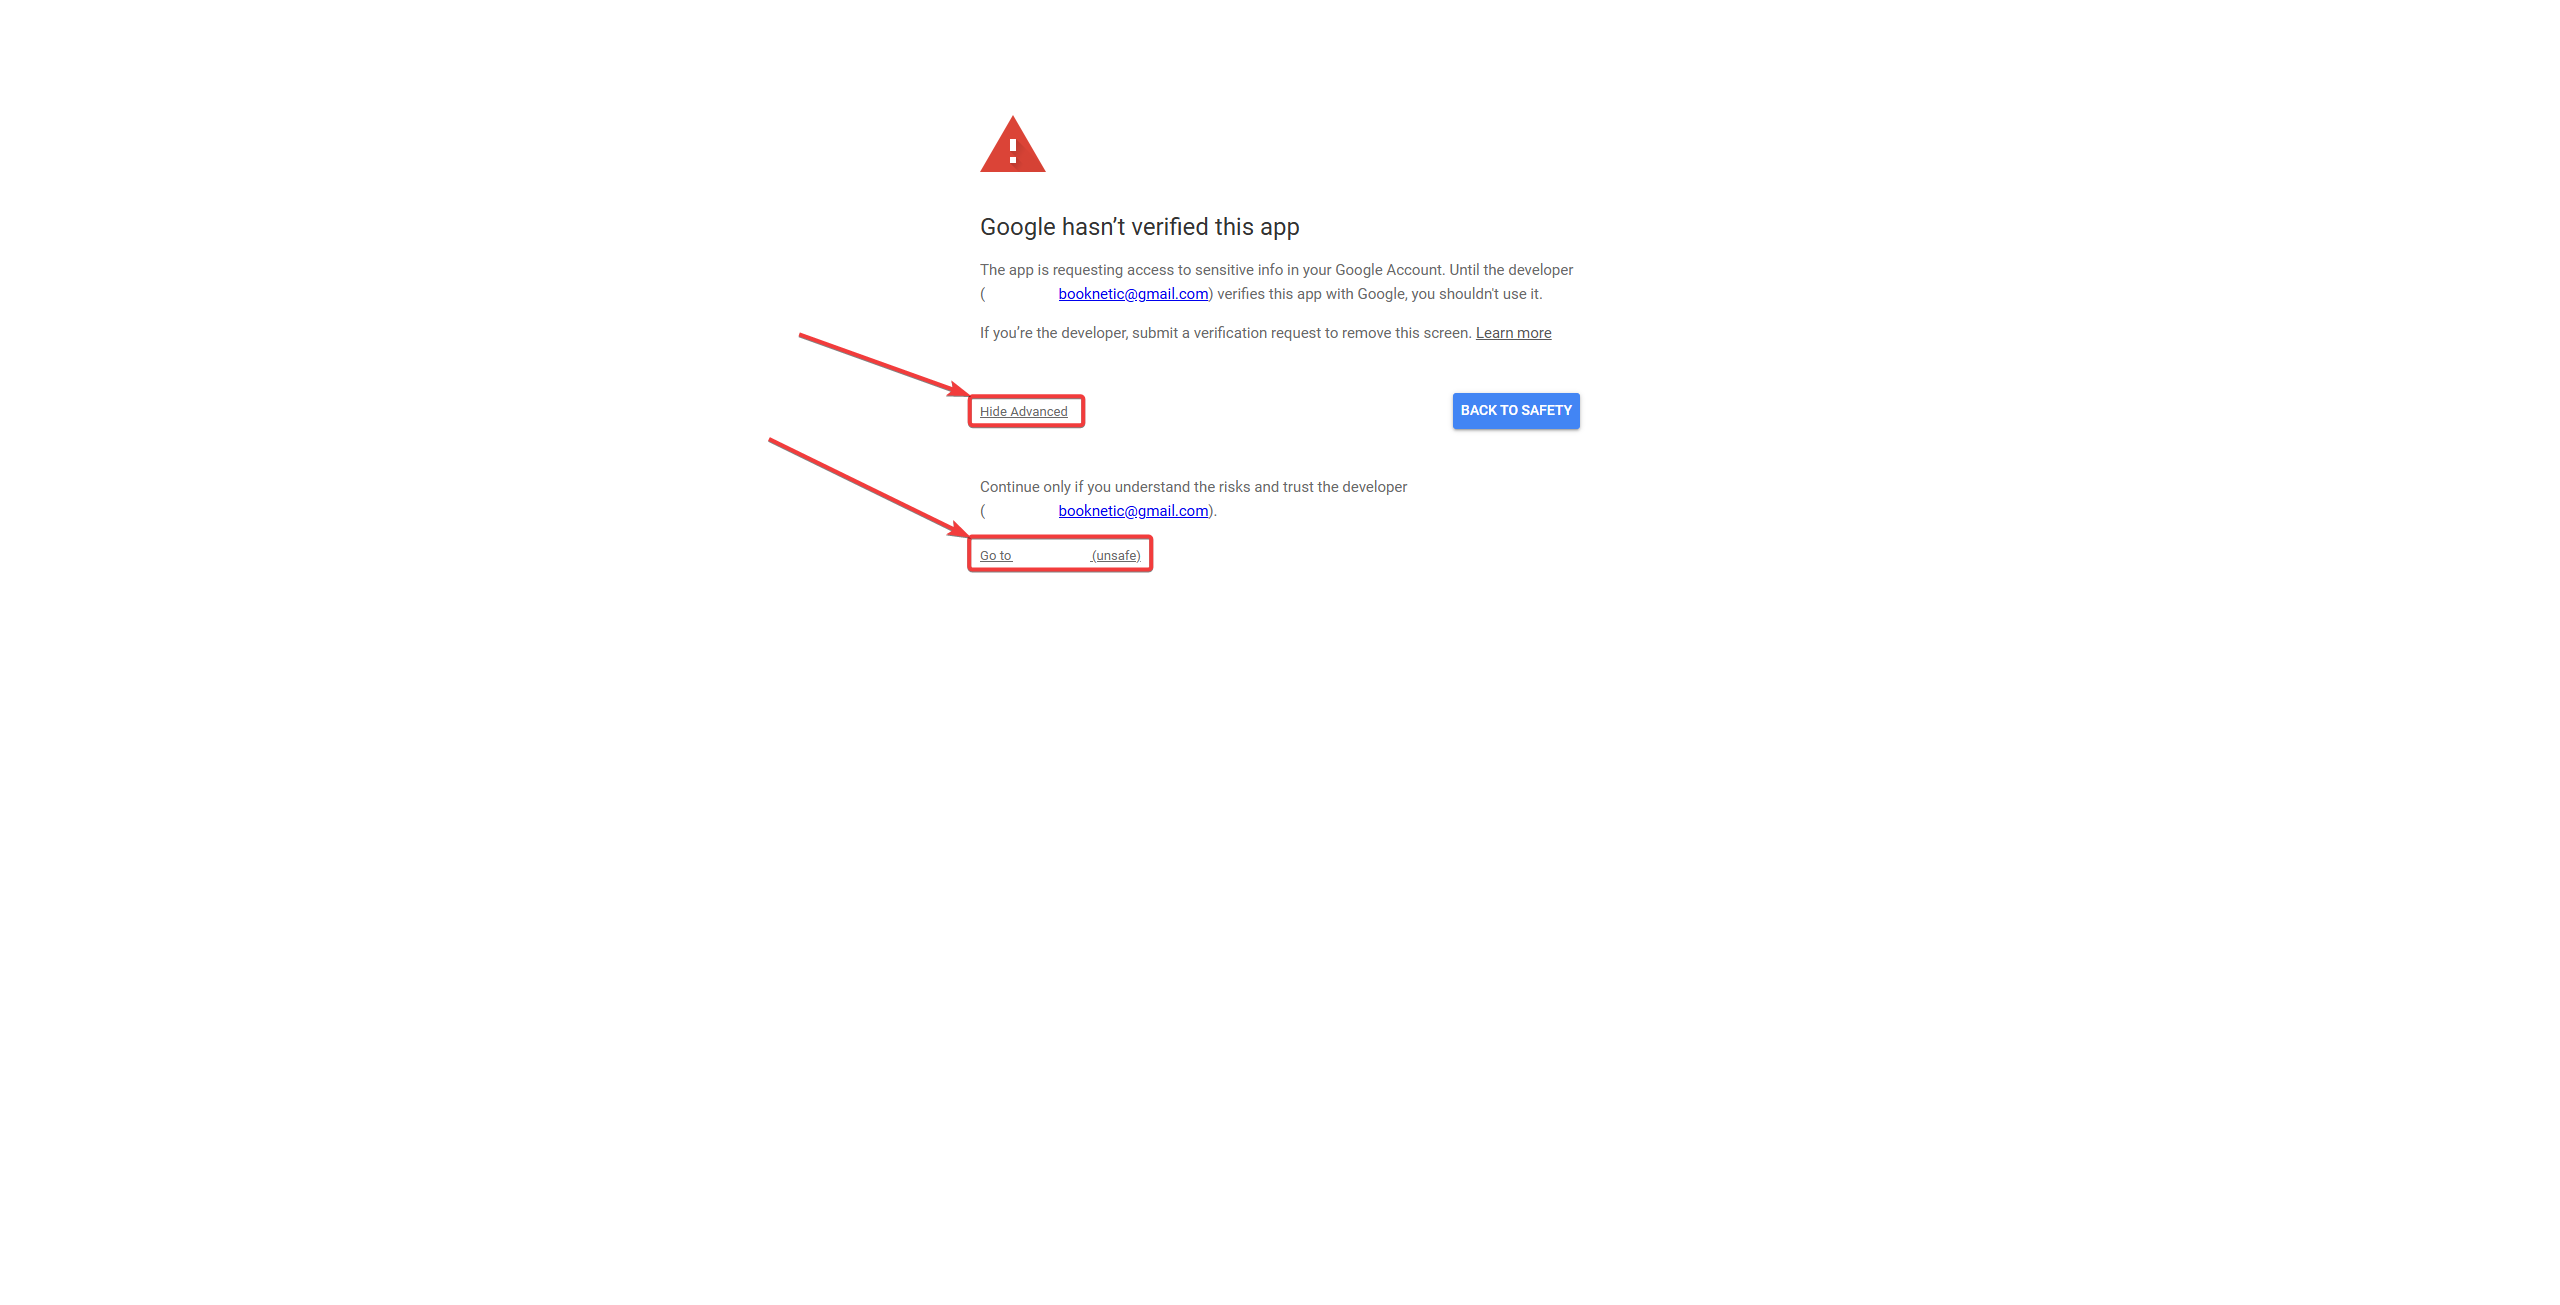
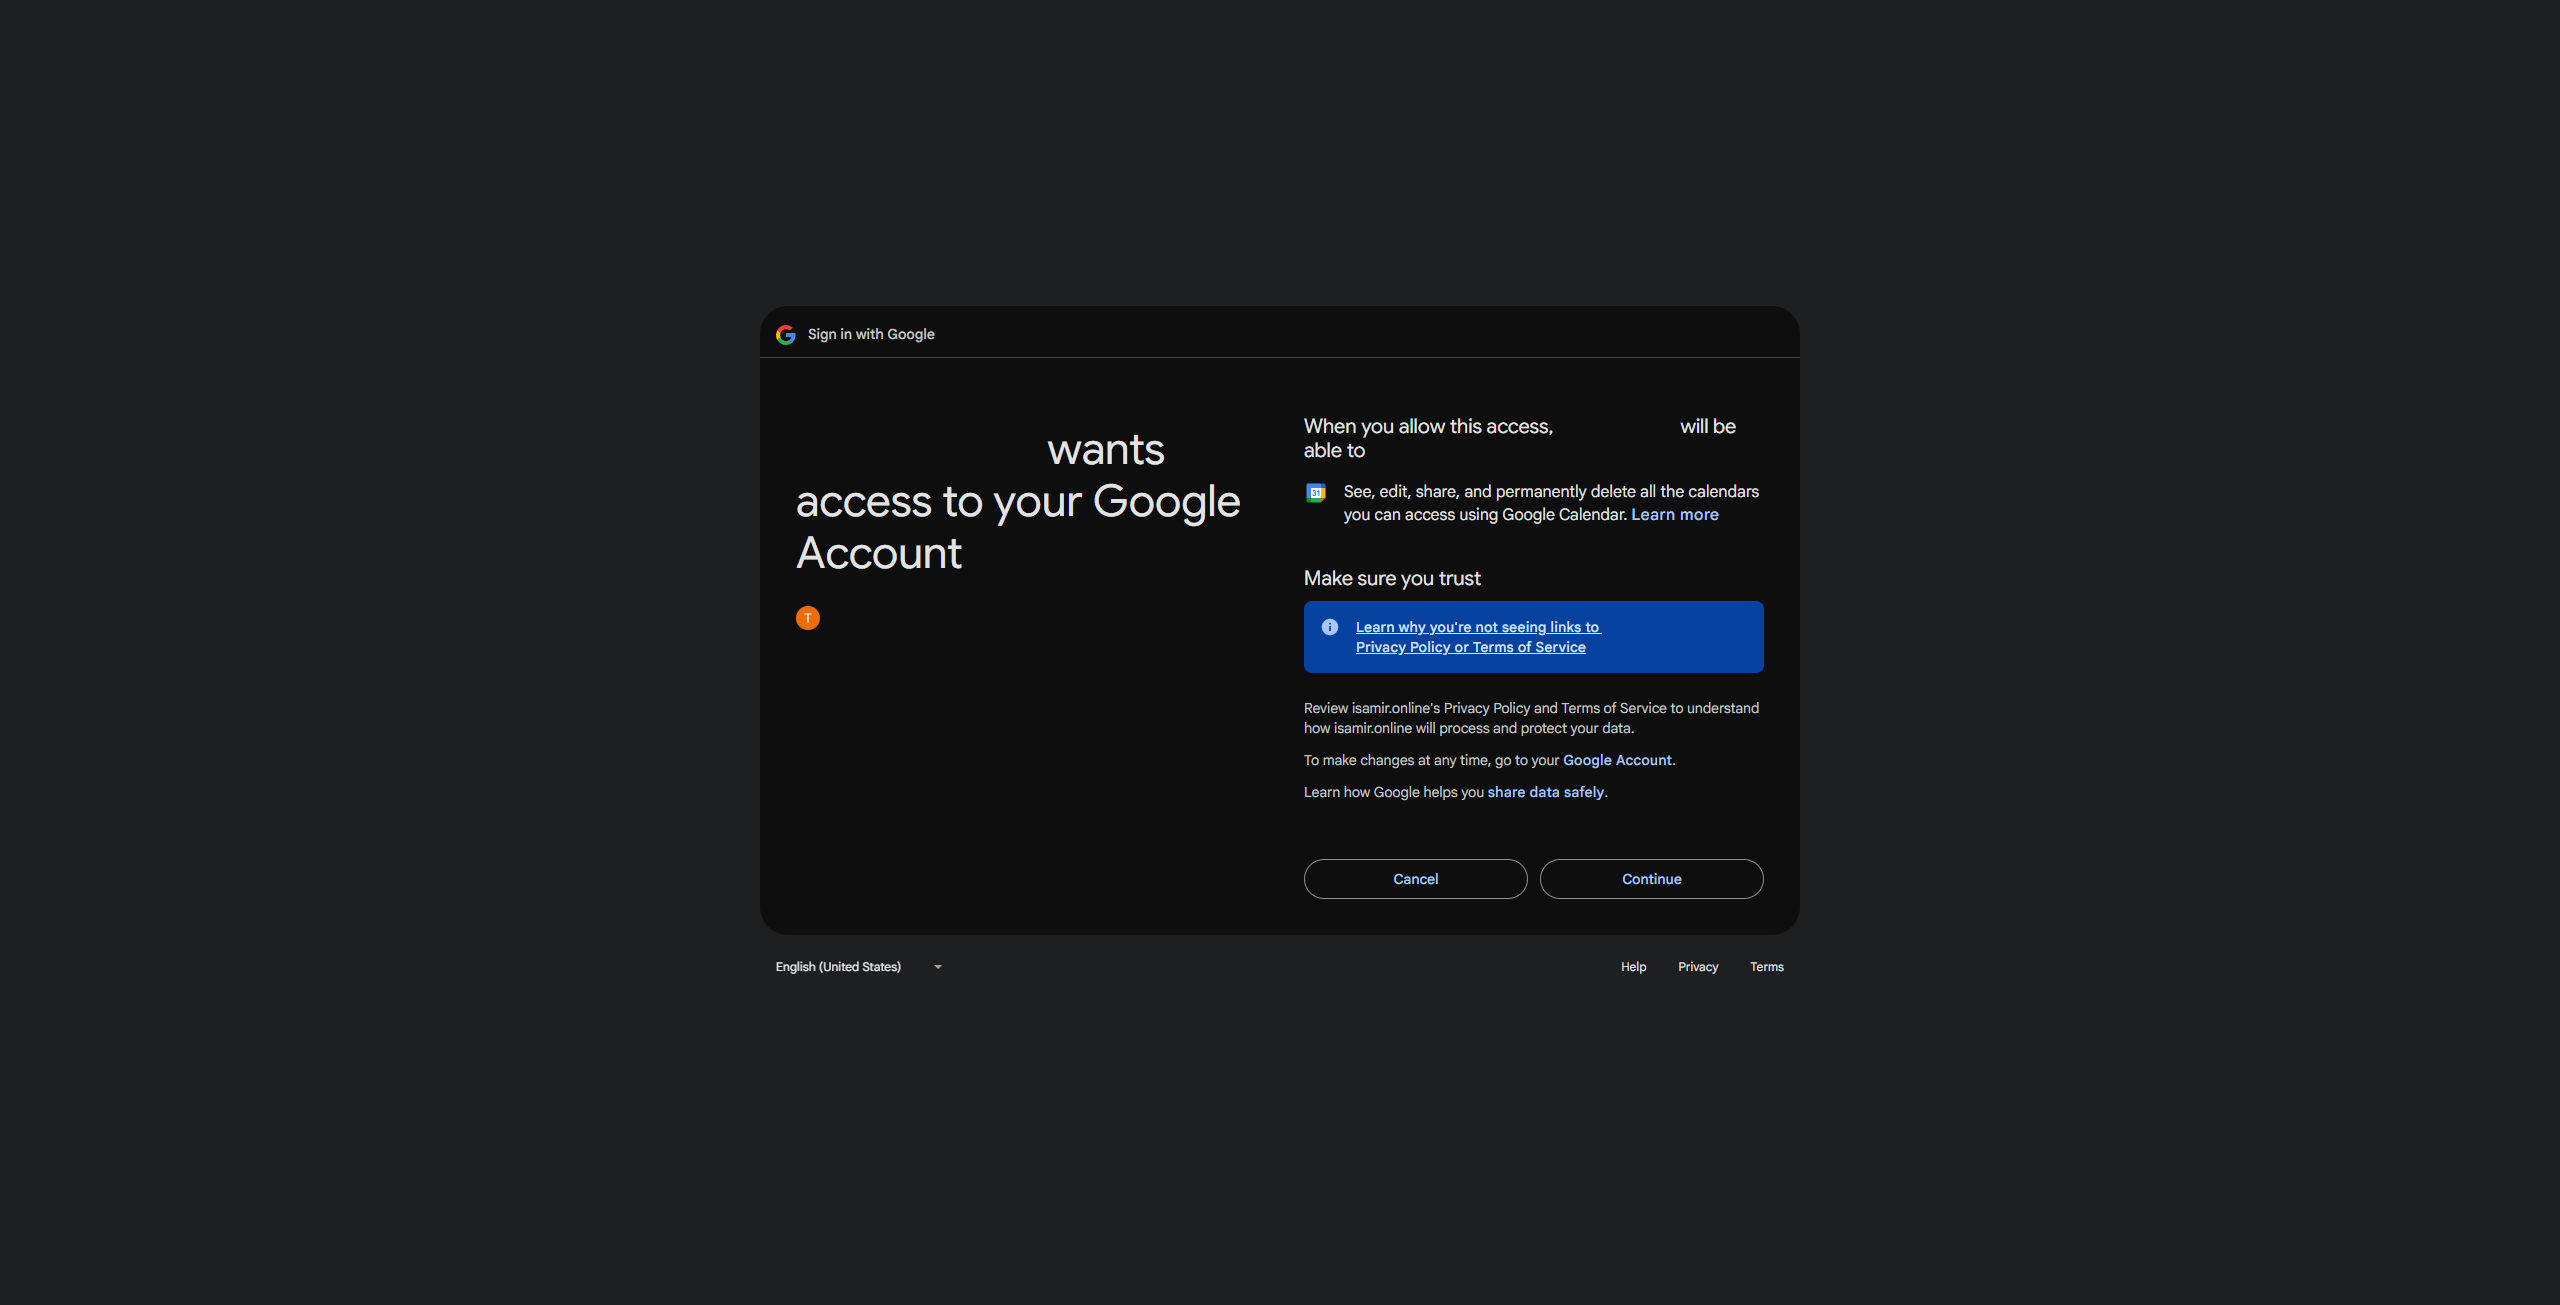
The staff member will see a warning page first, as the app hasn’t been verified. But it is completely normal as this application has been created by you and has only one purpose.
The staff member then will be prompted to authorize access to their Google Calendar.
As the final step, the staff should select their choice of calendar from their Google Calendar.
Google Calendar Sync
Once connected, the staff member’s availability will be synchronized between Booknetic and Google Calendar, and any busy events in Google Calendar will block corresponding times in Booknetic.
To display the Google Calendar events in Booknetic, users should go to the Calendar module, and enable Google Calendar option at the top of the page:
Setting for Event Title in Google Calendar, it is also possible to add keywords there, such as service name, staff name, etc.
Setting for Event Description in Google Calendar, it is also possible to add keywords there, such as service name, staff name, etc.
Live sync;
If you have a few staff, this method would be more convenient for you. When your customers are booking, the plugin will connect to the google calendar and sync busy slots in real-time.
Background sync;
For this method, first, you must configure the Cron jobs. The shorter you set the Cron jobs interval, the more accuracy you will get. This method is usually designed for businesses with a large number of employees and using the "Any Staff" option. Because in this case, when your customer selects Any staff option, it might take more than 30-60 seconds to sync all Staff busy slots with Google calendar. By choosing this method, the plugin Cron Jobs will connect to the Google Calendars in the background at the interval you set up and will store the busy slots of all your employees in your local databases. During booking, it will read the information directly from your database. Errors in this method are inevitable. For example, if you configure your cron jobs to run every 15 minutes, the busy slot you add to your Google calendar will be stored in the plugin's local database every 15 minutes. That is, within these 15 minutes, someone can book an appointment in that time slot. Therefore, the shorter you configure the Cron jobs, the less likely there will be errors.
Don't sync busy slots;
Doesn’t sync busy slots, meaning, the staff may take appointments for time slots marked as busy in their Google Calendar.
Displays the customers as attendees in your calendar appointment events.
Enables the customers to see other customers attending the same appointment in Google Calendar.
Setting for which appointment status should be synced to Google Calendar (The recommended options are Approved and Pending)
From Booknetic to Google Calendar:
Any appointments scheduled through Booknetic will automatically appear in the connected Google Calendar of the staff member and be reflected as events on the calendar. After the appointment is added as an event to Google Calendar, it also blocks any additional appointments from being added to that time slot (Warning, if you connect the same Google Calendar to multiple staff, this may cause issues with their availability). These events may include all the appointment details such as client name, time, and service booked.
From Google Calendar to Booknetic:
If a staff member’s Google Calendar is marked as "busy" for a specific time, that time slot will be unavailable for booking in Booknetic. This ensures that no appointments can be scheduled during times already marked as unavailable in Google Calendar.
Once the integration is complete:
Appointments in Booknetic will appear as Google Calendar events for staff members.
Any cancellations or reschedules made in Booknetic will be automatically reflected in Google Calendar, and vice versa.
Prevent Double Bookings: By synchronizing the available times between Google Calendar and Booknetic, you eliminate the risk of booking appointments when the staff member is already busy.
Streamlined Scheduling: Changes made in Booknetic automatically reflect in both platforms, ensuring consistency.
Better Time Management: Staff can view their bookings directly in Google Calendar, along with other personal events, providing better control over their schedules.
If you encounter any issues with Google Calendar syncing, consider the following steps:
Ensure your OAuth credentials are correctly entered in the Booknetic settings.
Double-check that the Google Calendar API is enabled in your Google Developer Console project.
Verify that the redirect URL provided by Booknetic is correctly added to your OAuth configuration in Google Developer Console.
Make sure that the application status is set to Published in Google Developer Console.