Email settings
Email settings settings of Booknetic. Multi-purpose Appointment Booking Plugin For Wordpress.
By using this site, you agree to our Cookie Policy
Email settings settings of Booknetic. Multi-purpose Appointment Booking Plugin For Wordpress.
The Email Settings section in Booknetic is where administrators configure the system's email delivery options. Proper configuration ensures that customers, staff, and administrators receive appointment notifications, reminders, and confirmations in a timely and reliable manner.
Booknetic supports two main methods for sending emails: WordPress Mail and SMTP. The choice of email method impacts how Booknetic communicates with users, including staff notifications and customer confirmations.
The default and easiest email sending method is WordPress Mail. It requires minimal configuration and works out-of-the-box on most hosting environments.
For more robust and reliable email delivery, you can configure SMTP. This method allows you to use your own mail server, offering better performance and less risk of your emails being marked as spam.
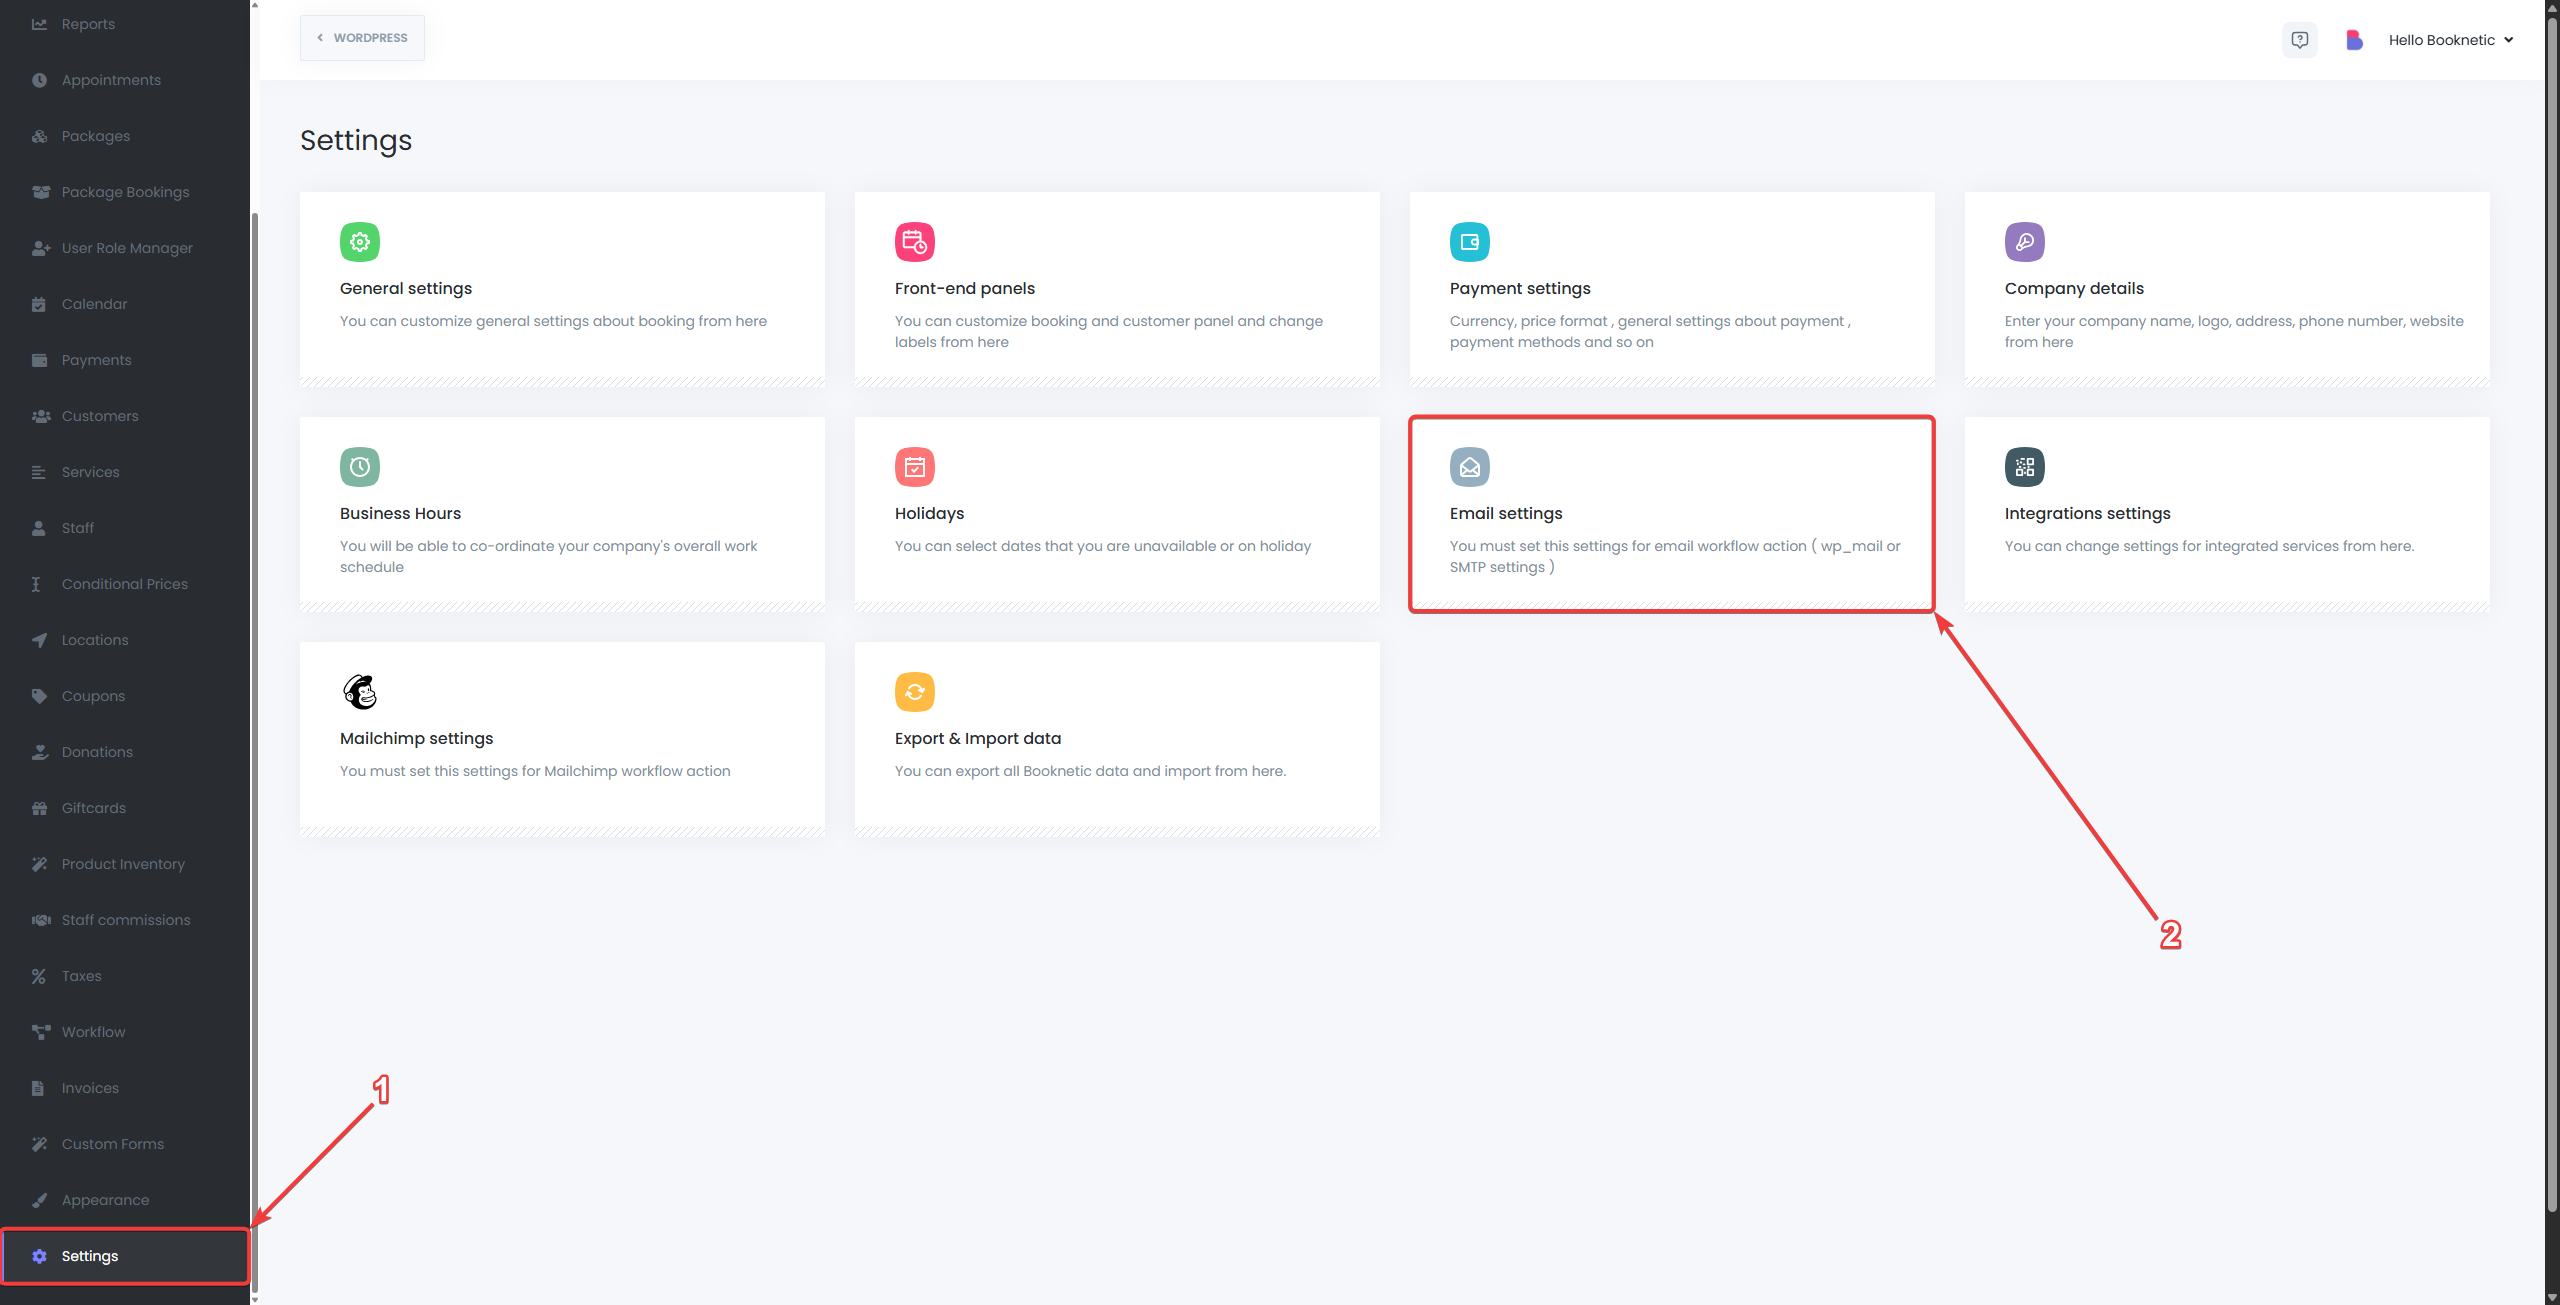
To configure your email settings, navigate to Booknetic > Settings > Email Settings. Here, you will find options to configure your email system.
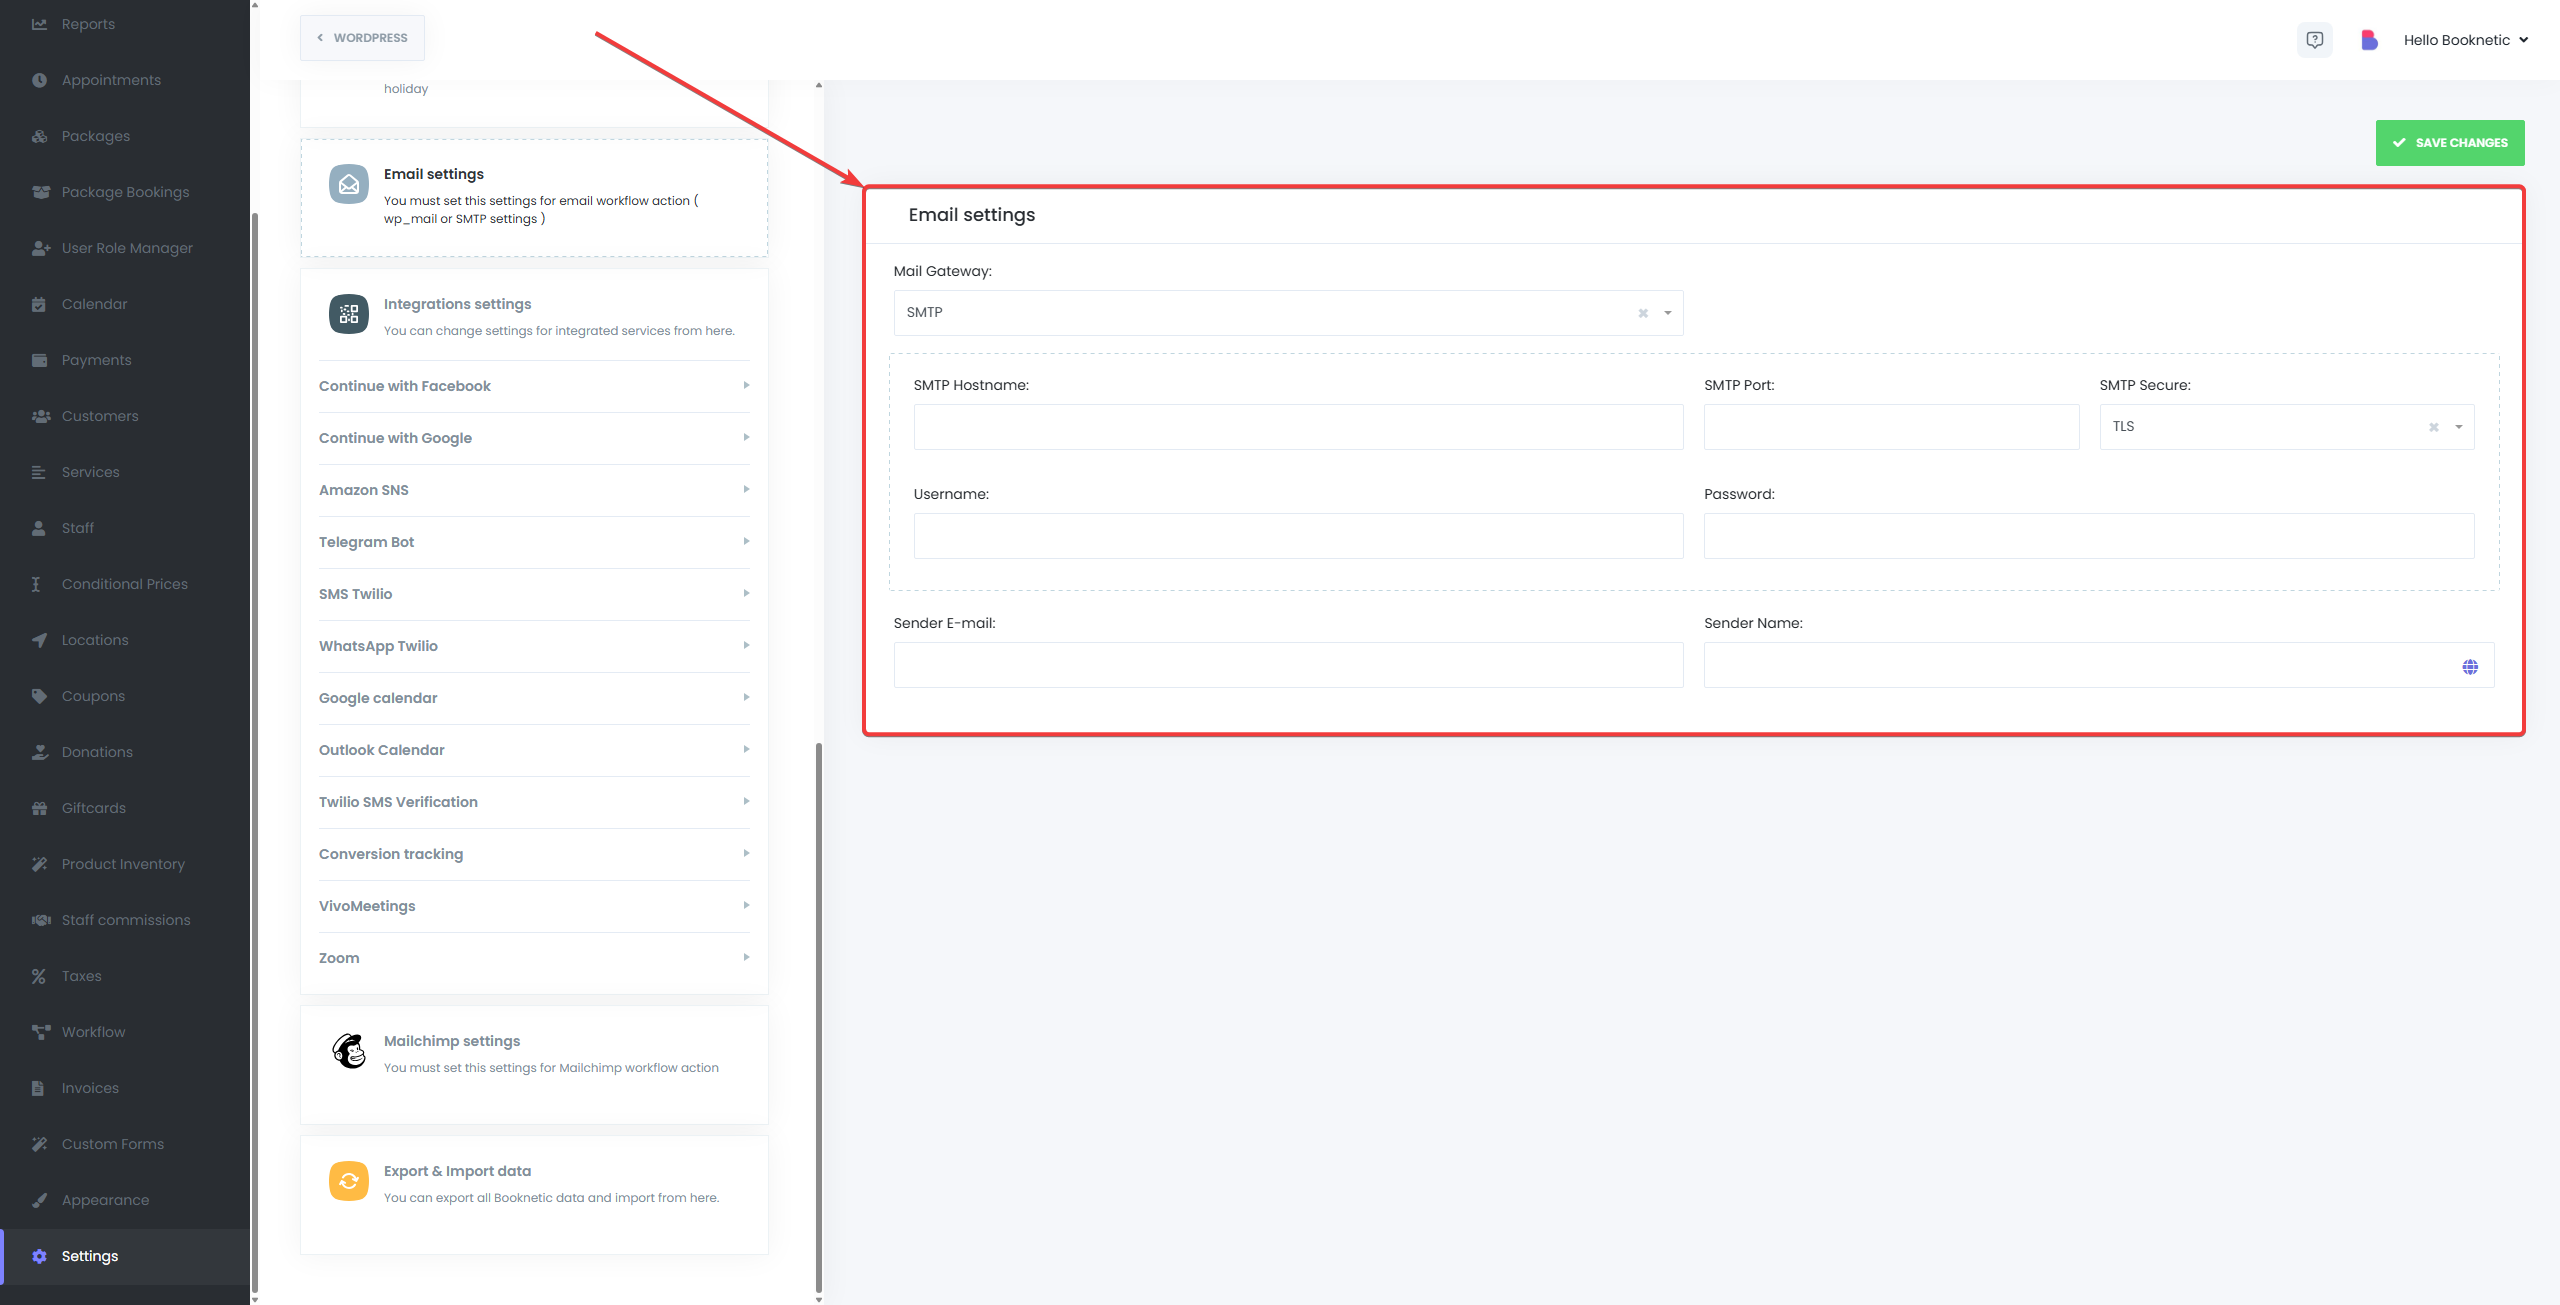
To use SMTP with Booknetic, you will need to input SMTP server details:
Note: Ensure that your SMTP server supports encryption (SSL/TLS) for secure email transmission.
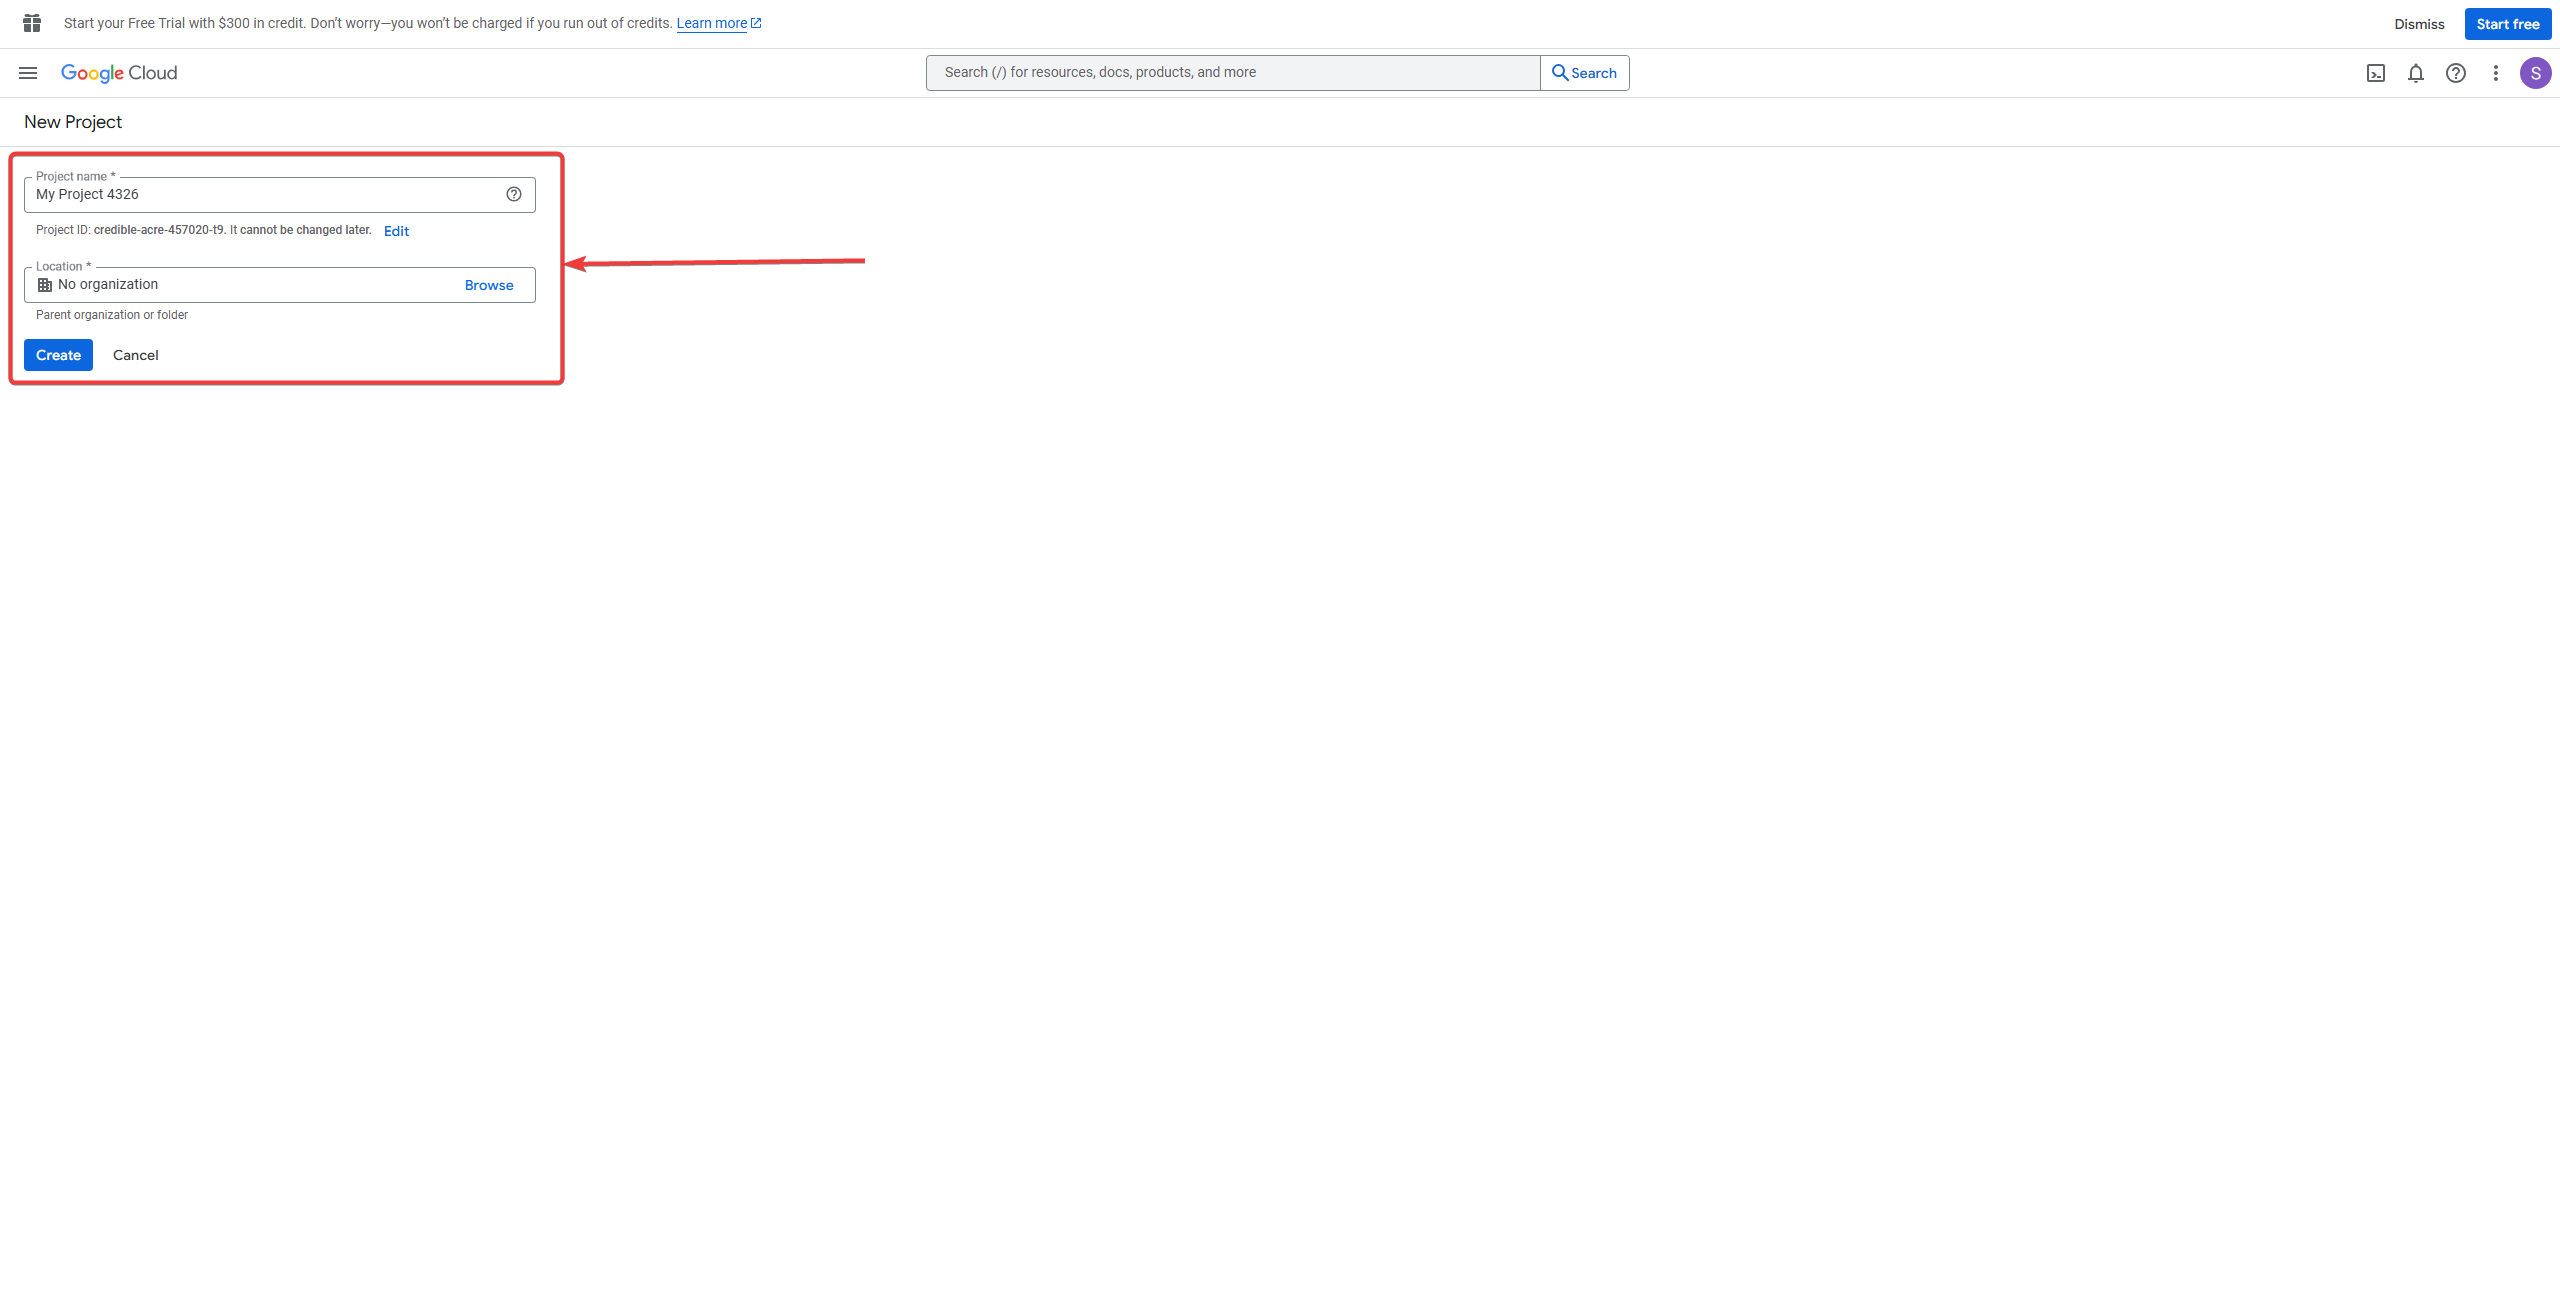
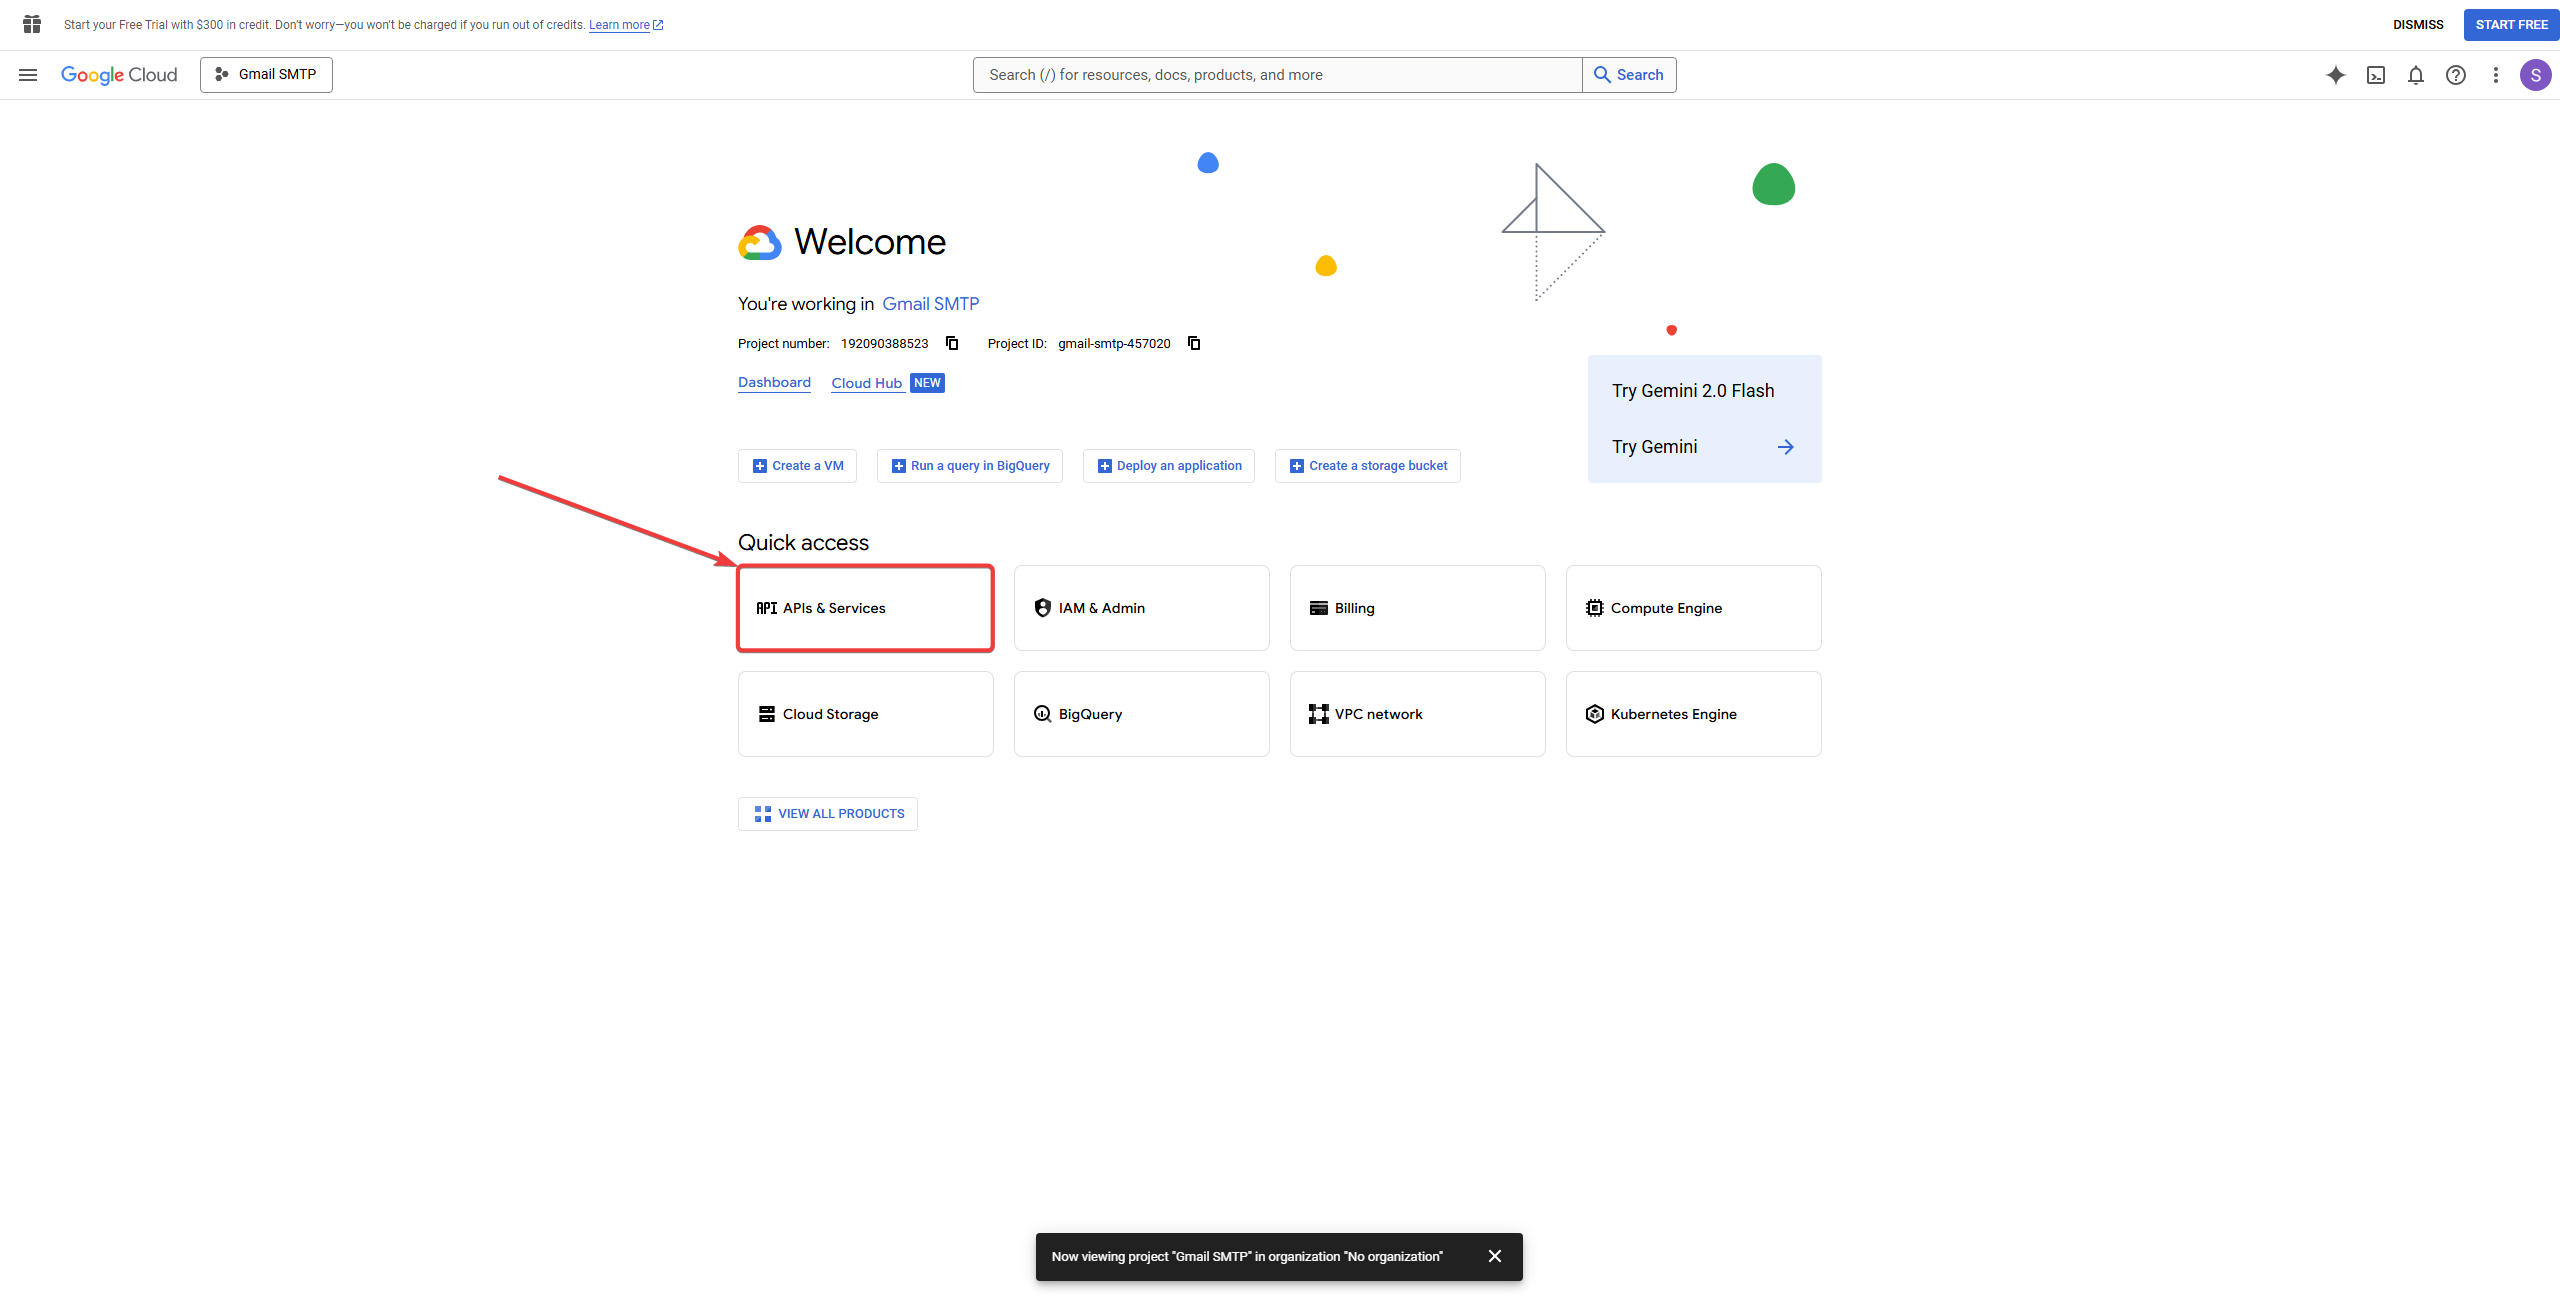
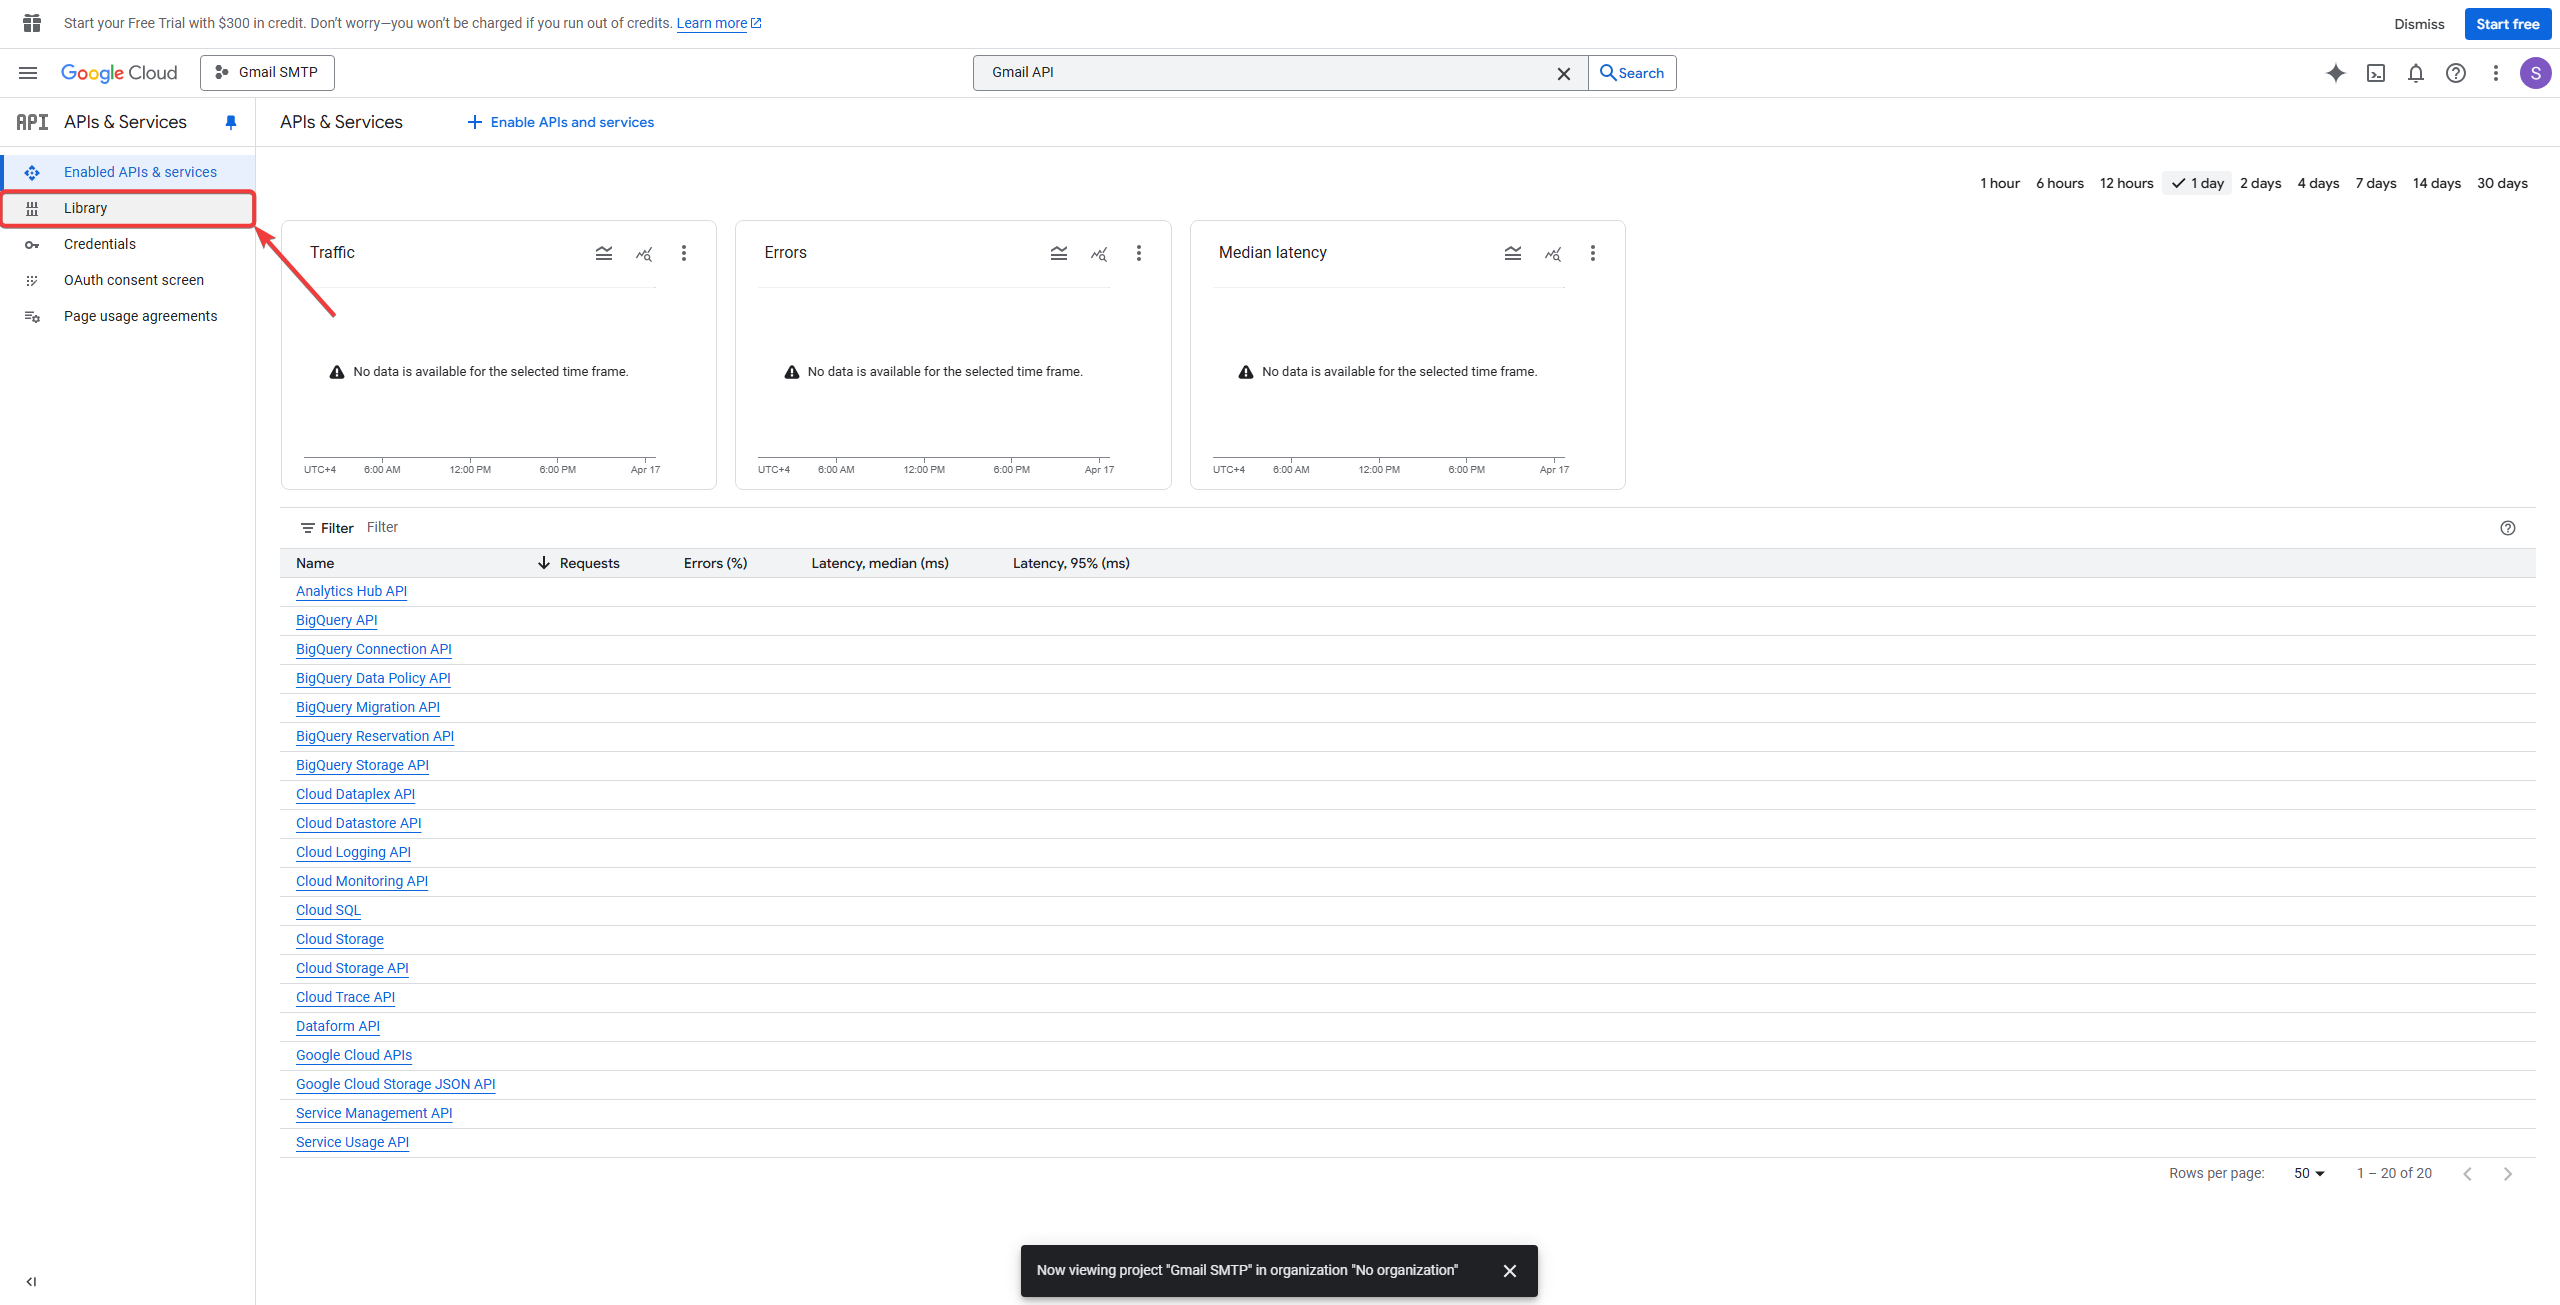
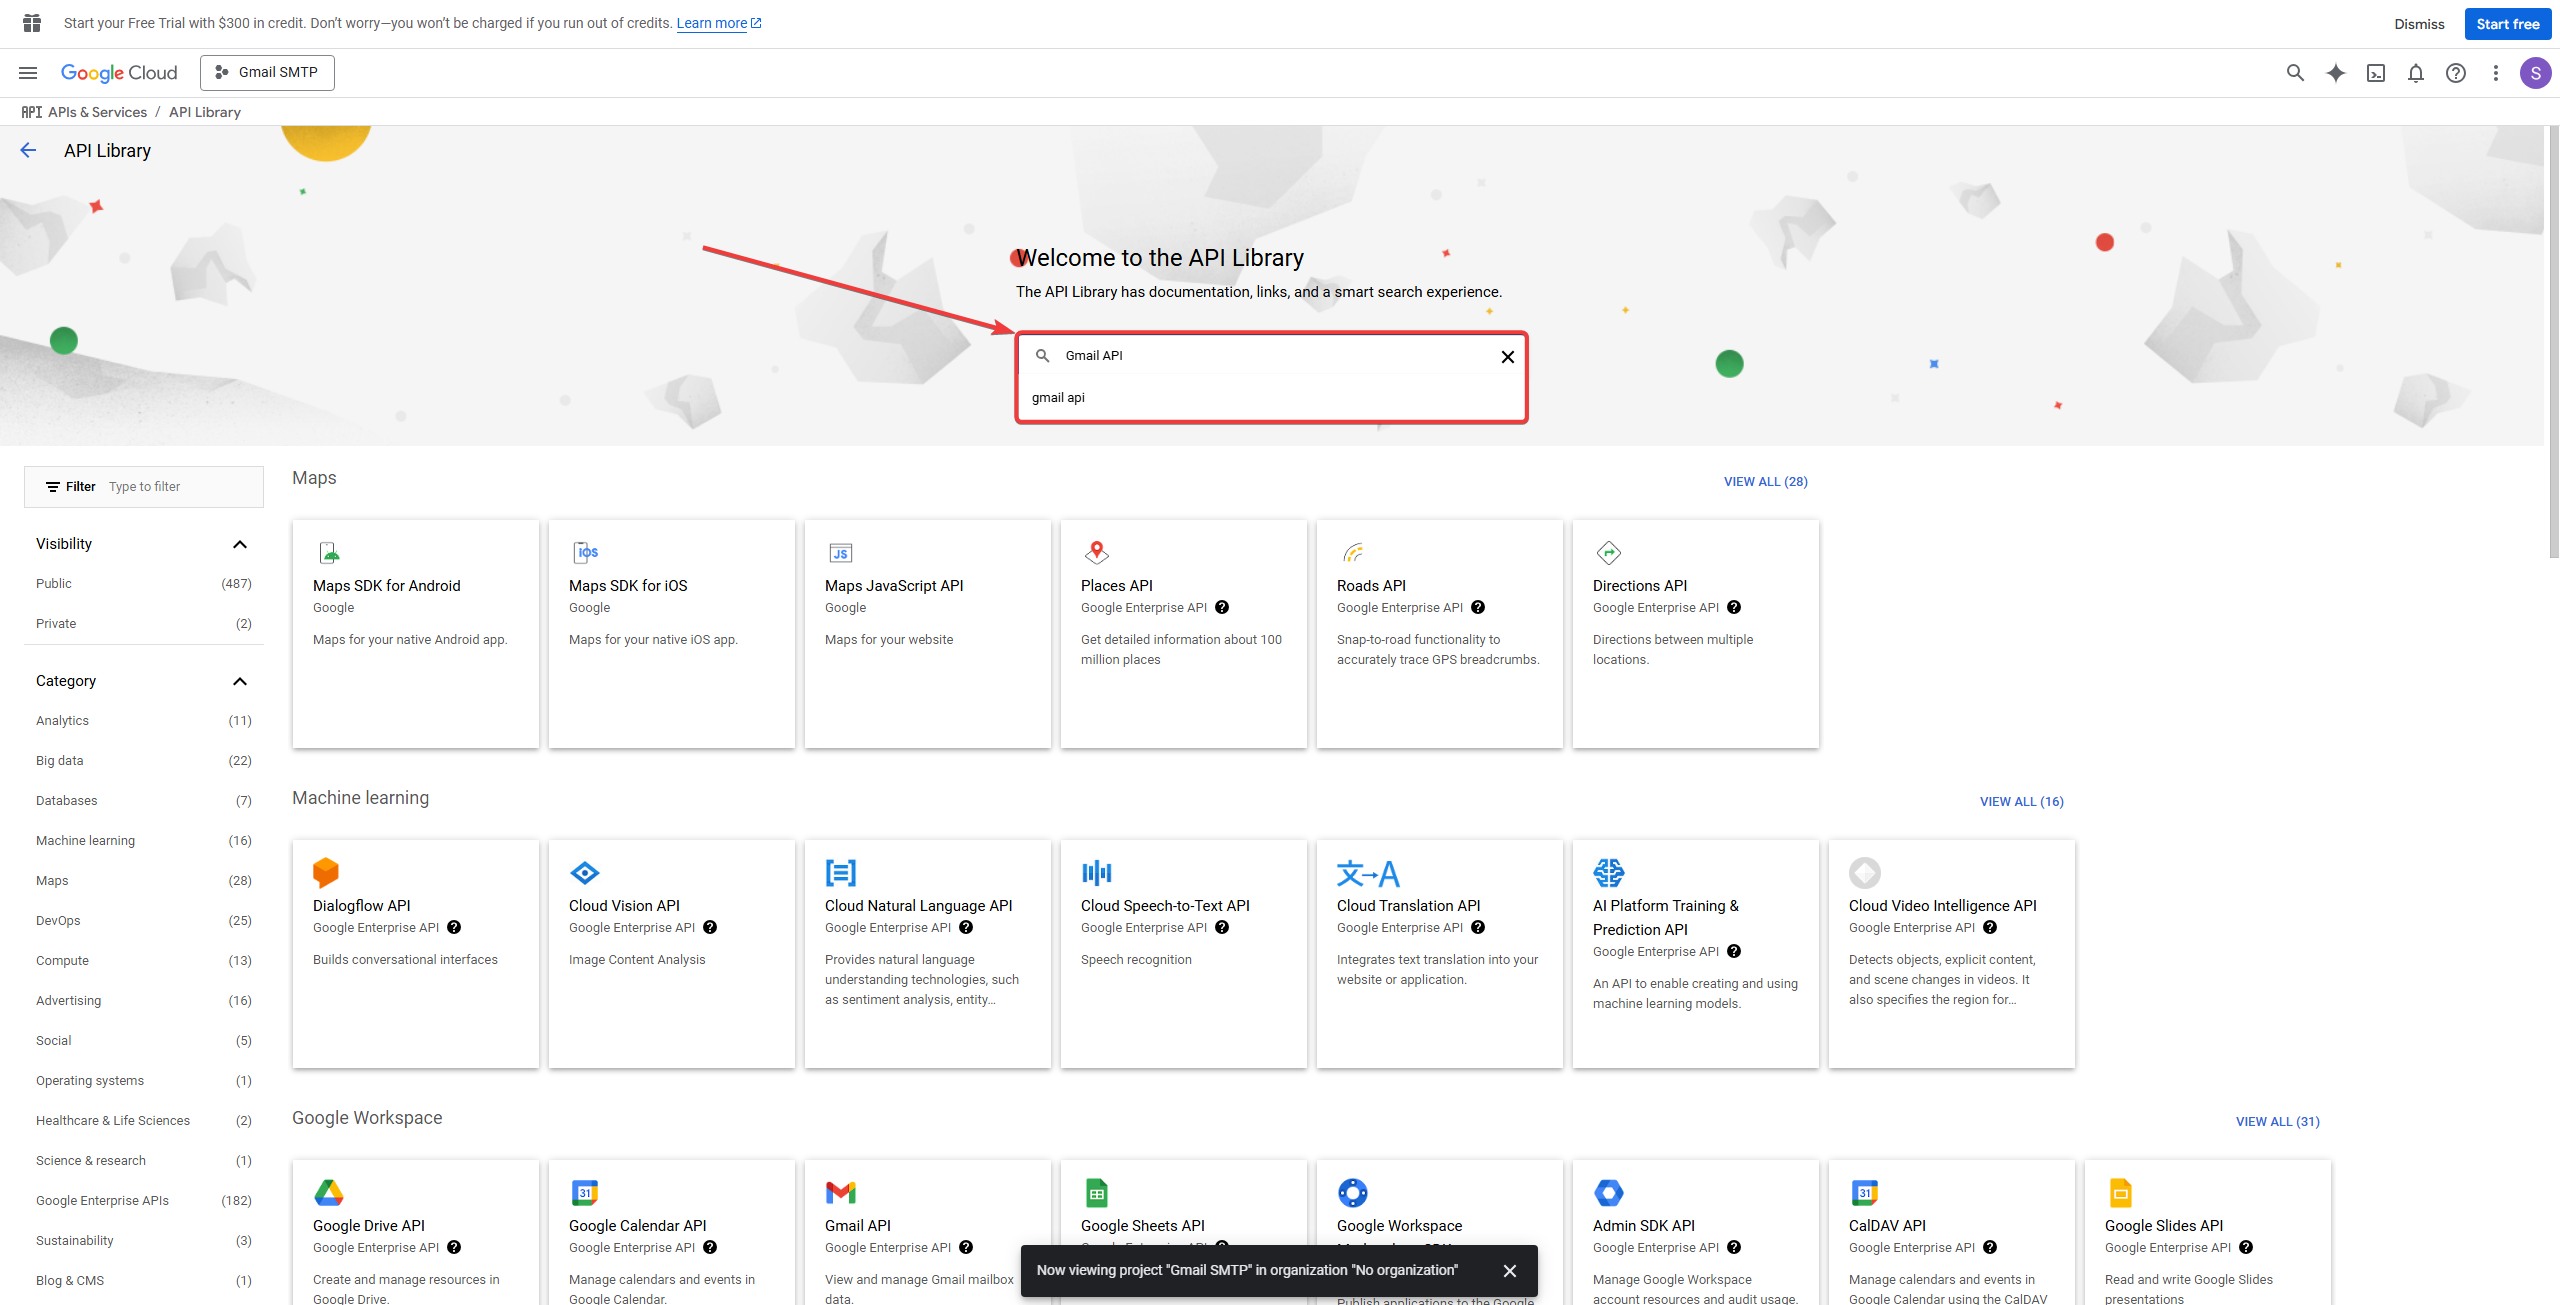
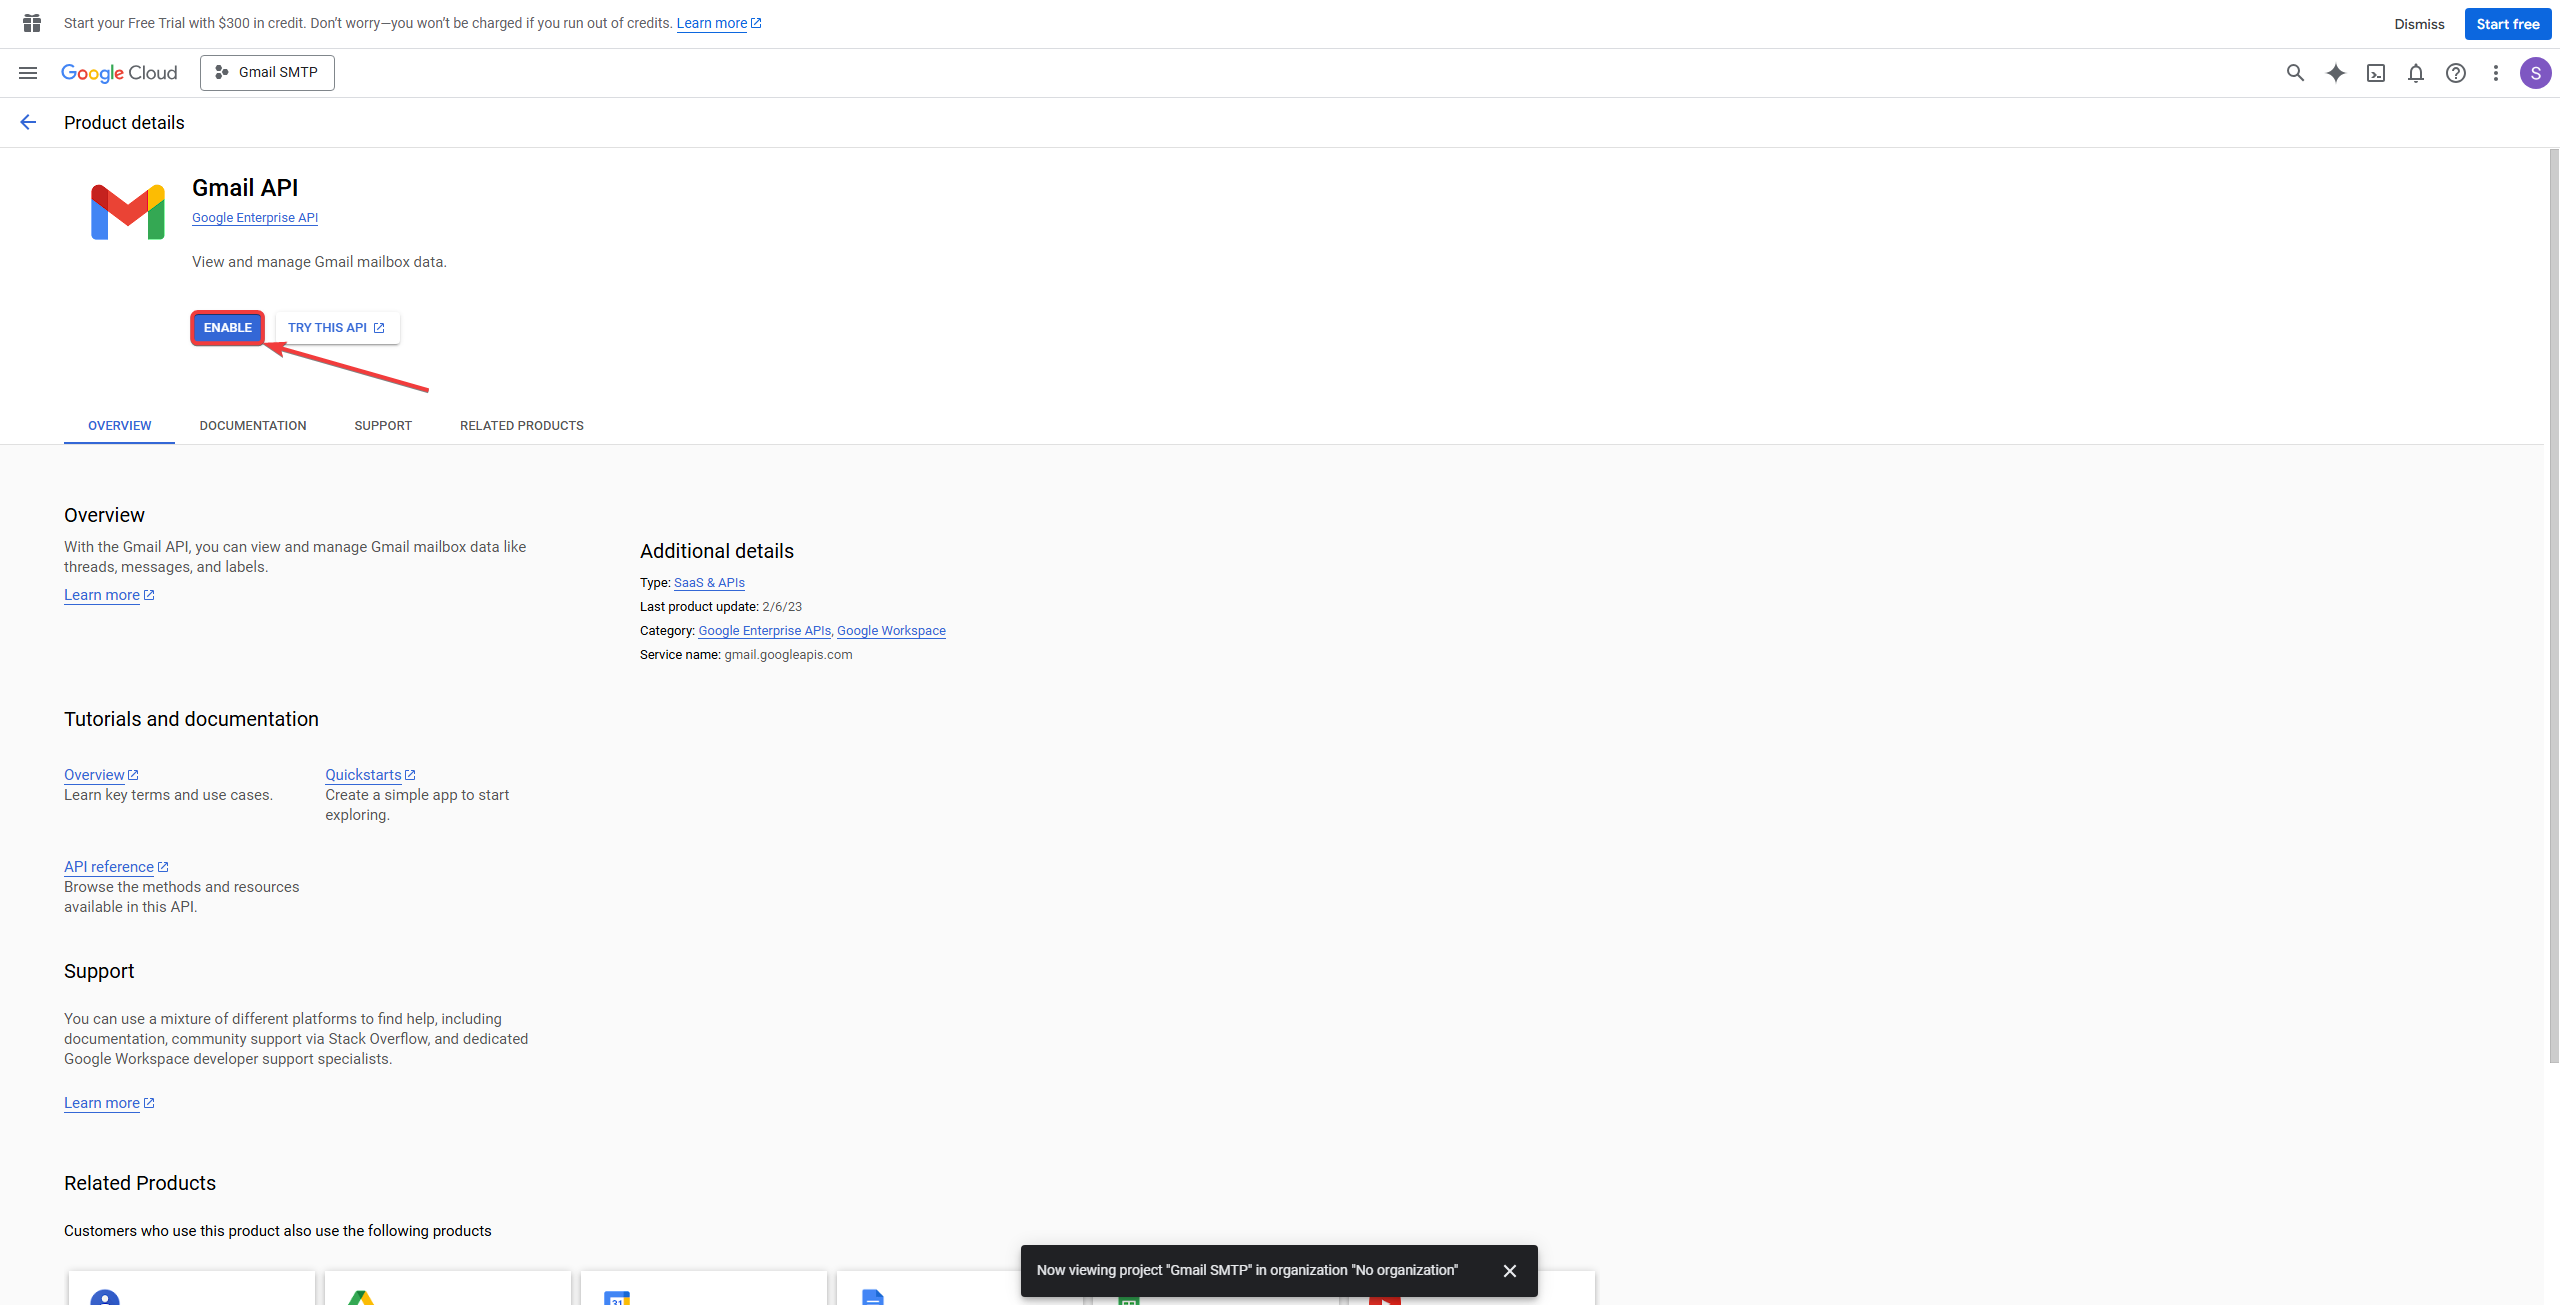
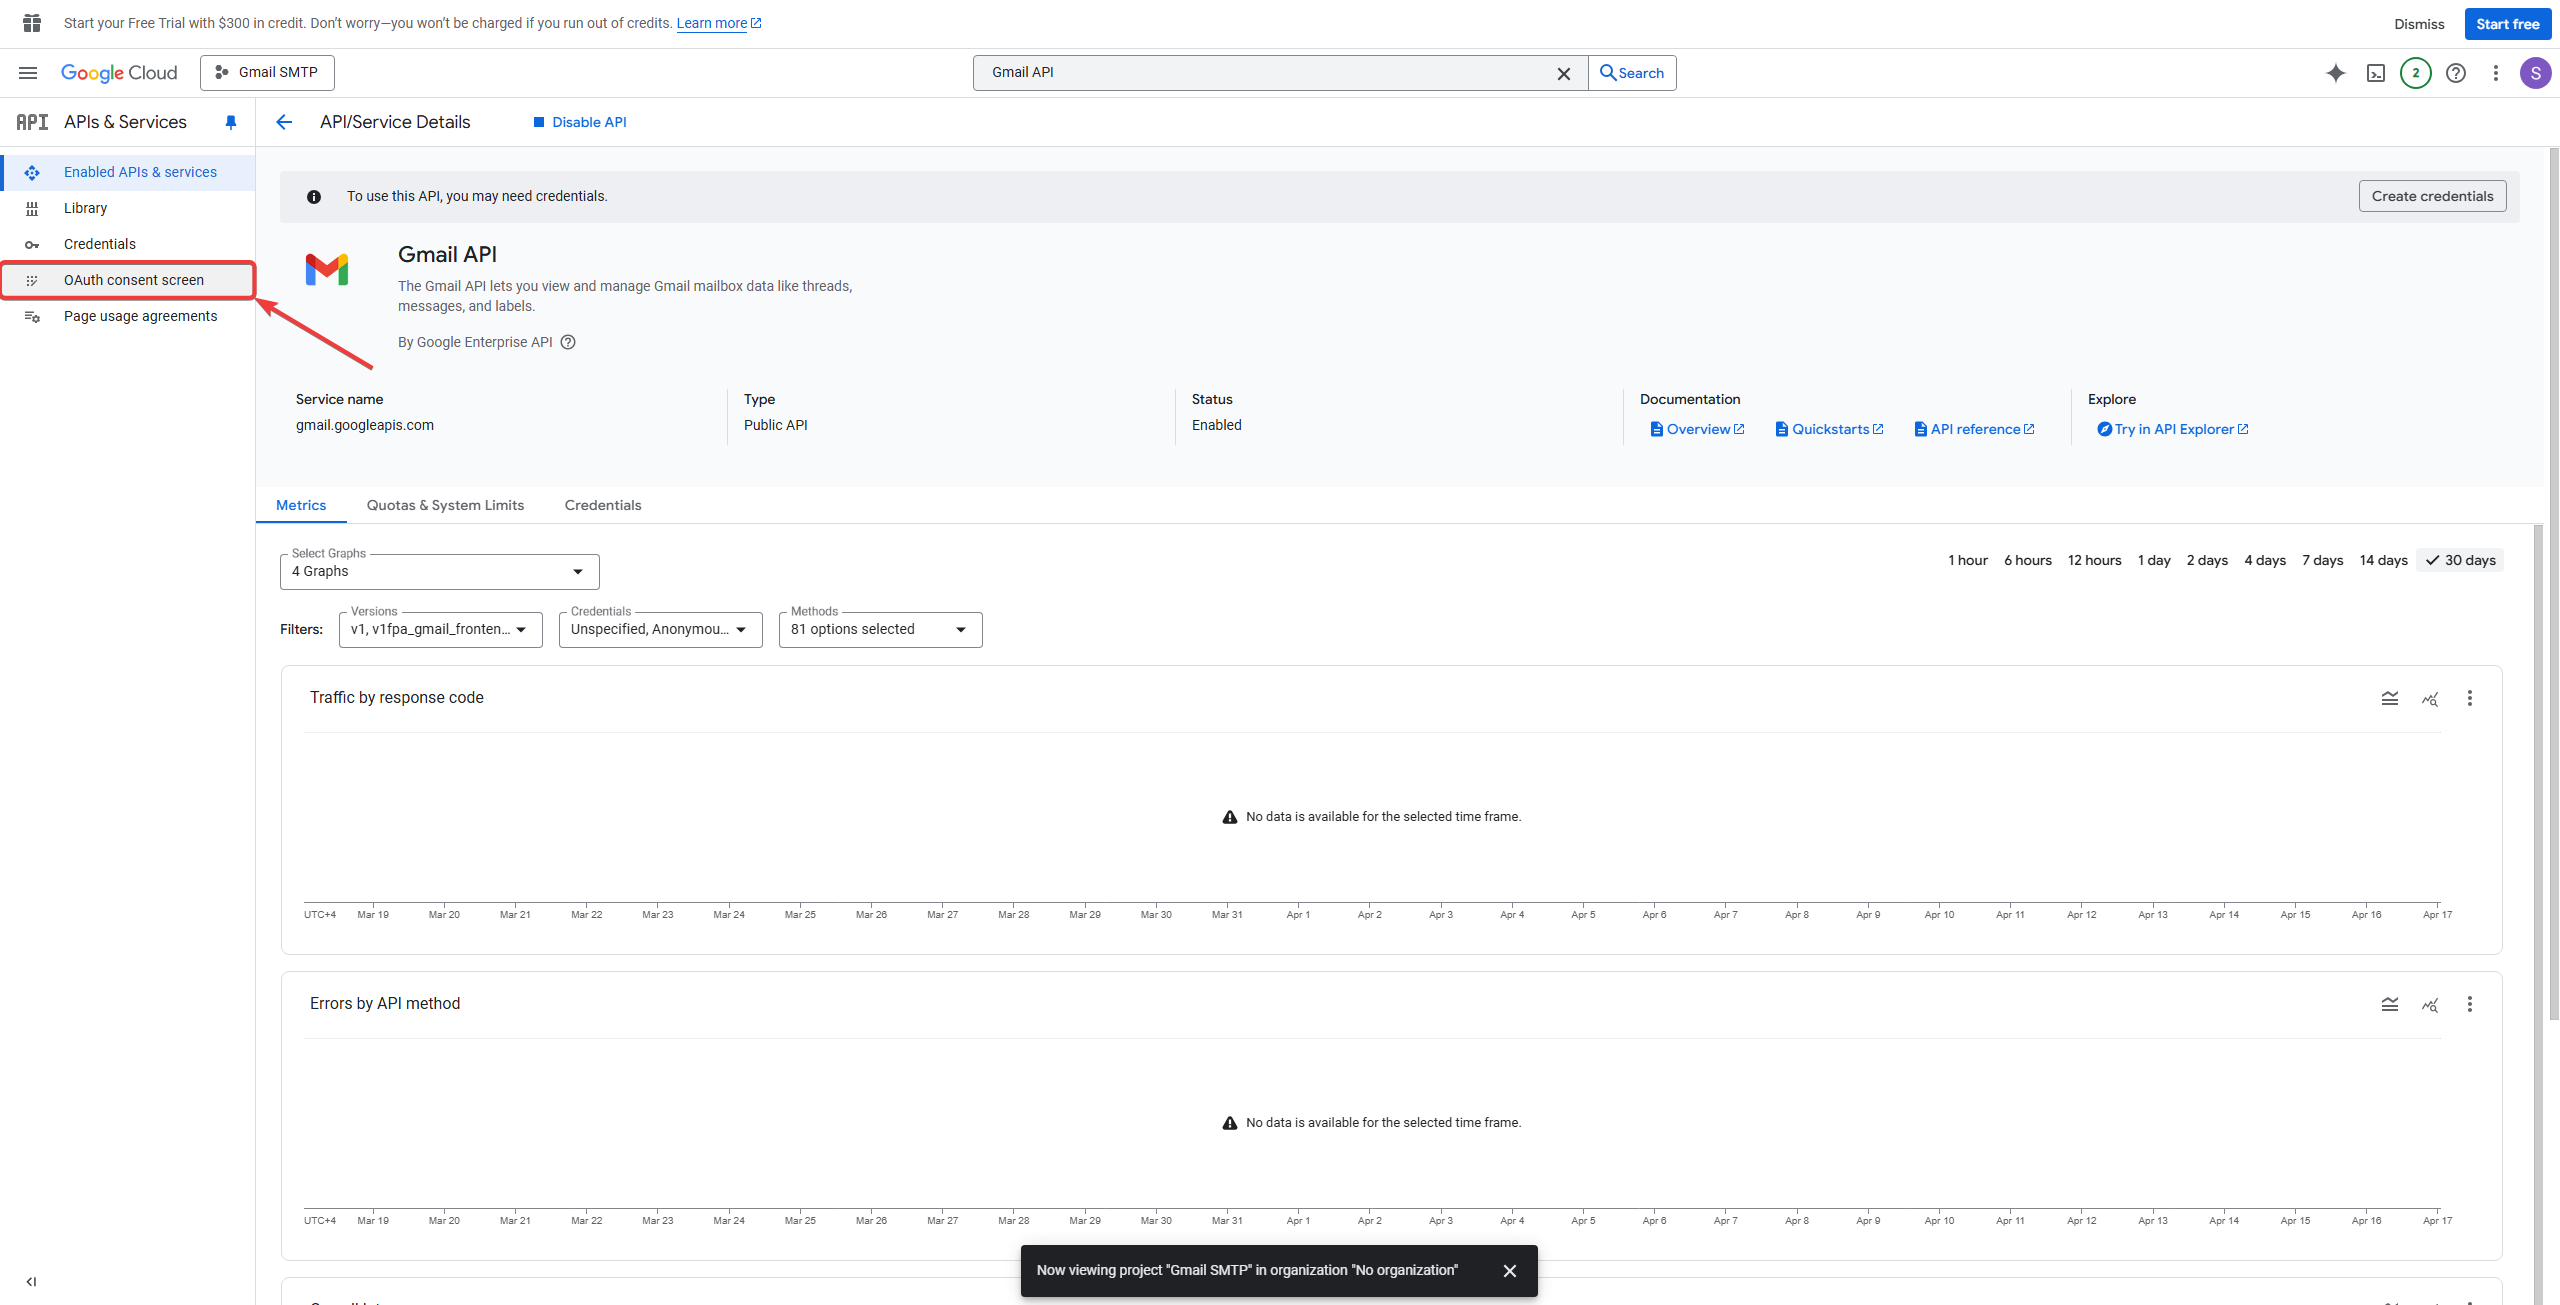
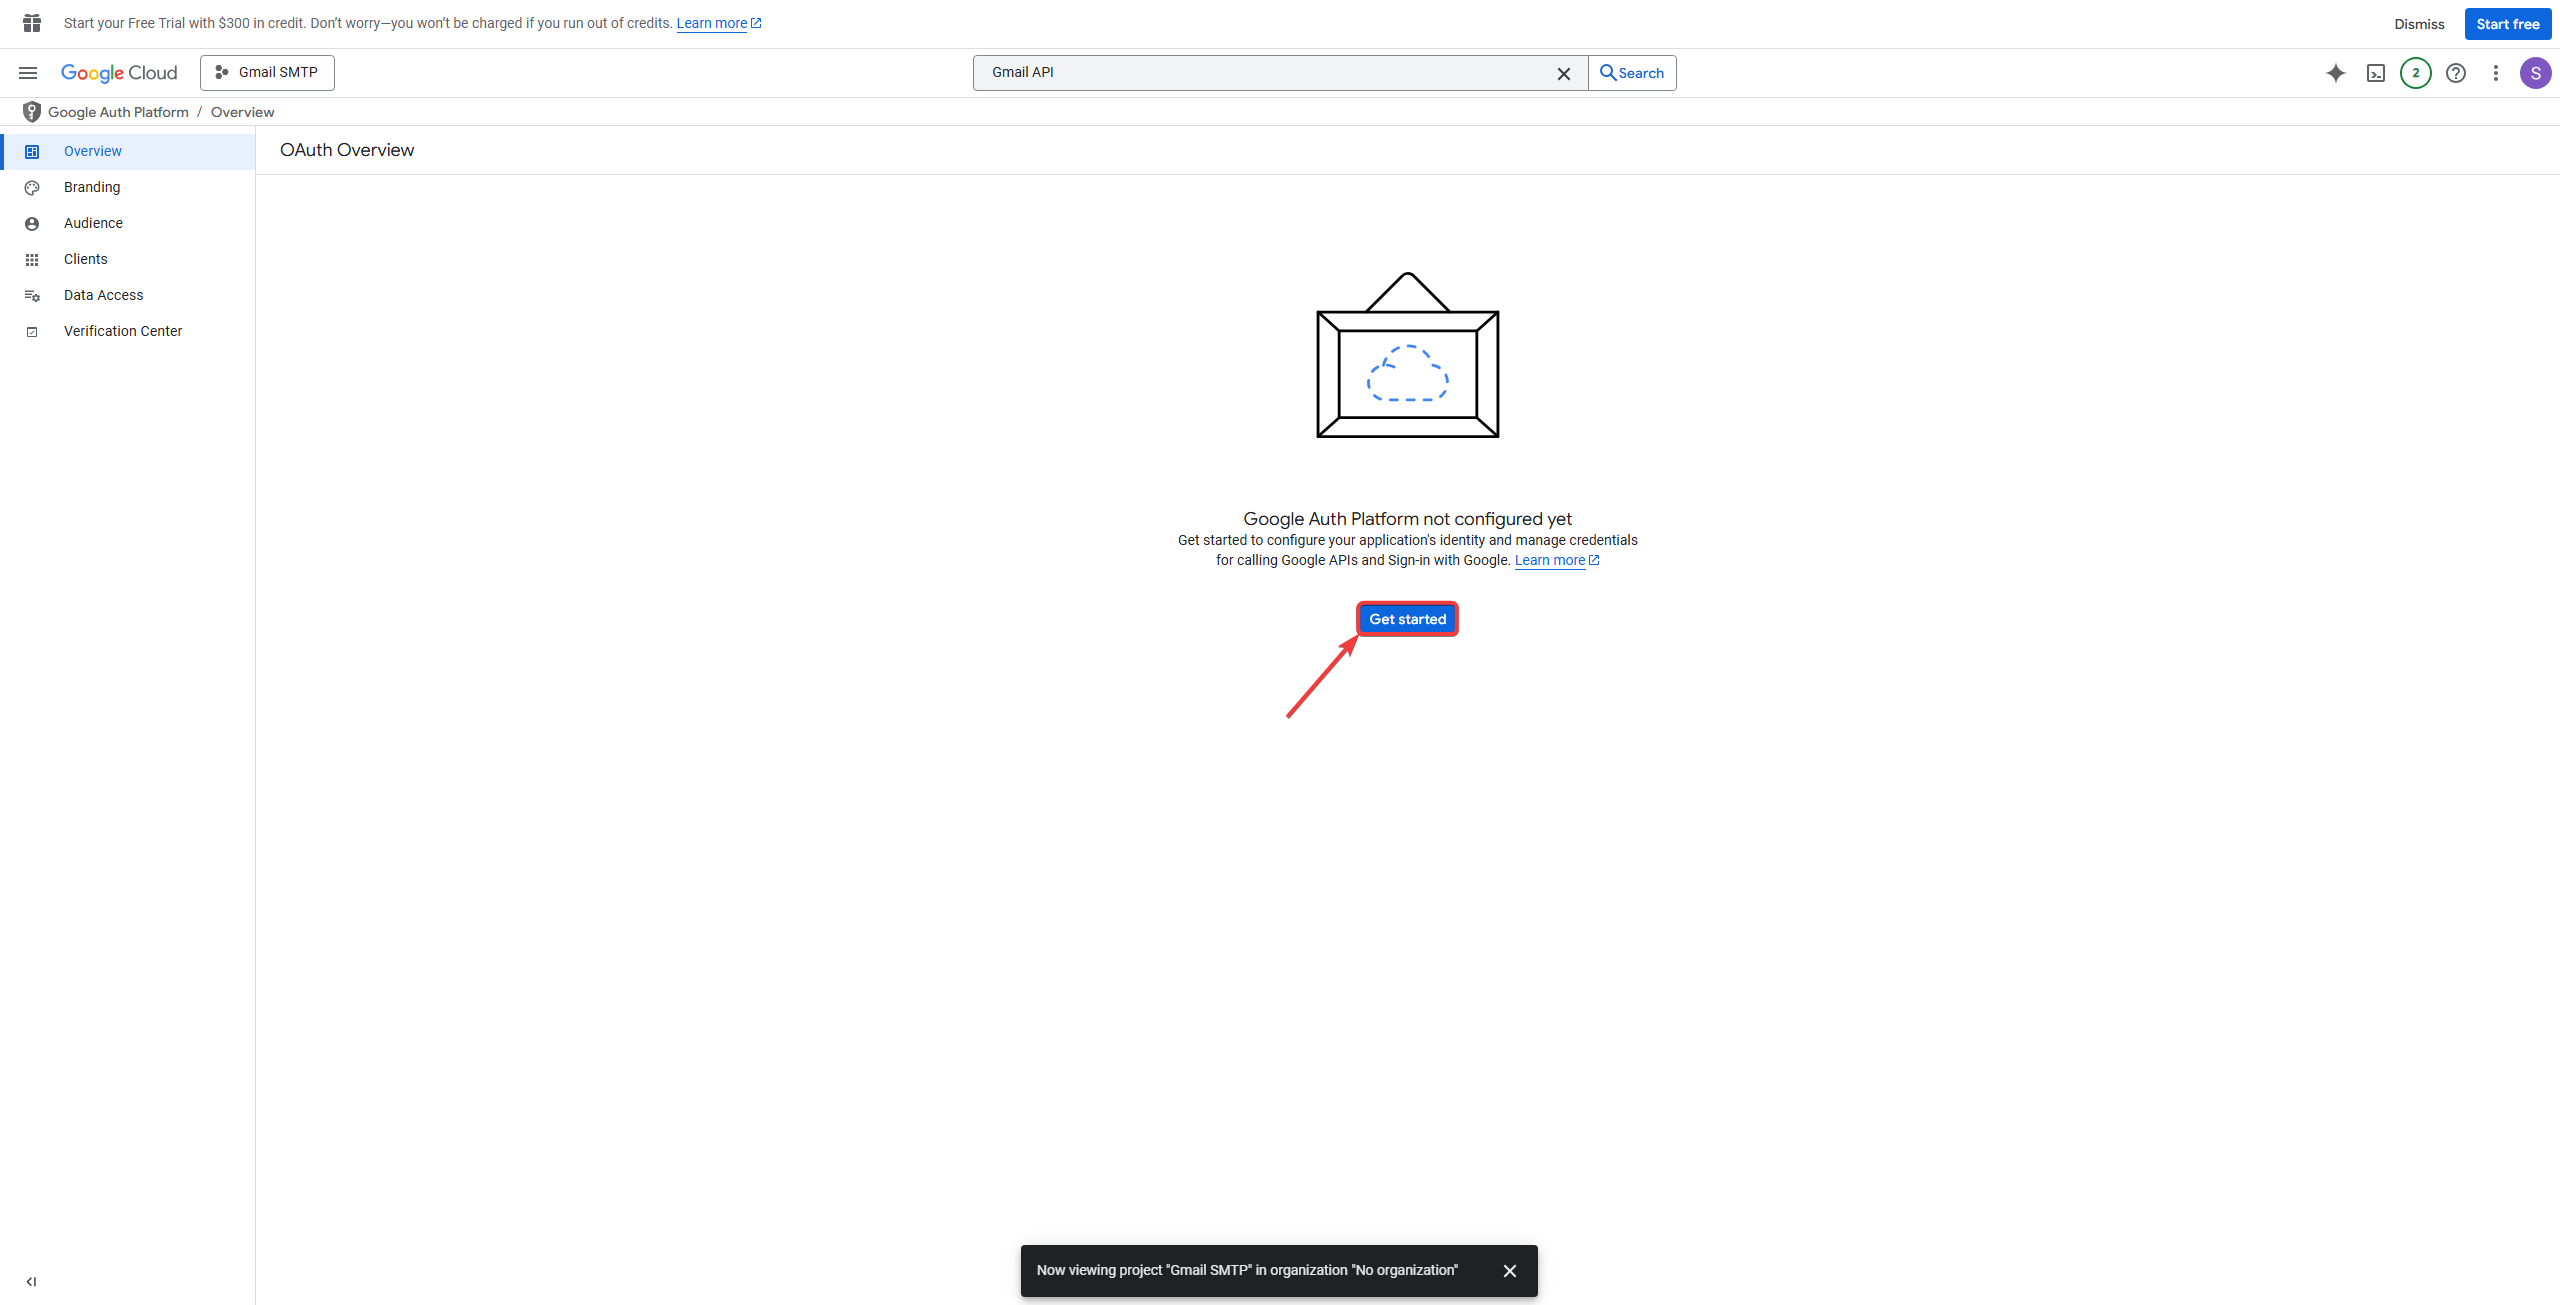
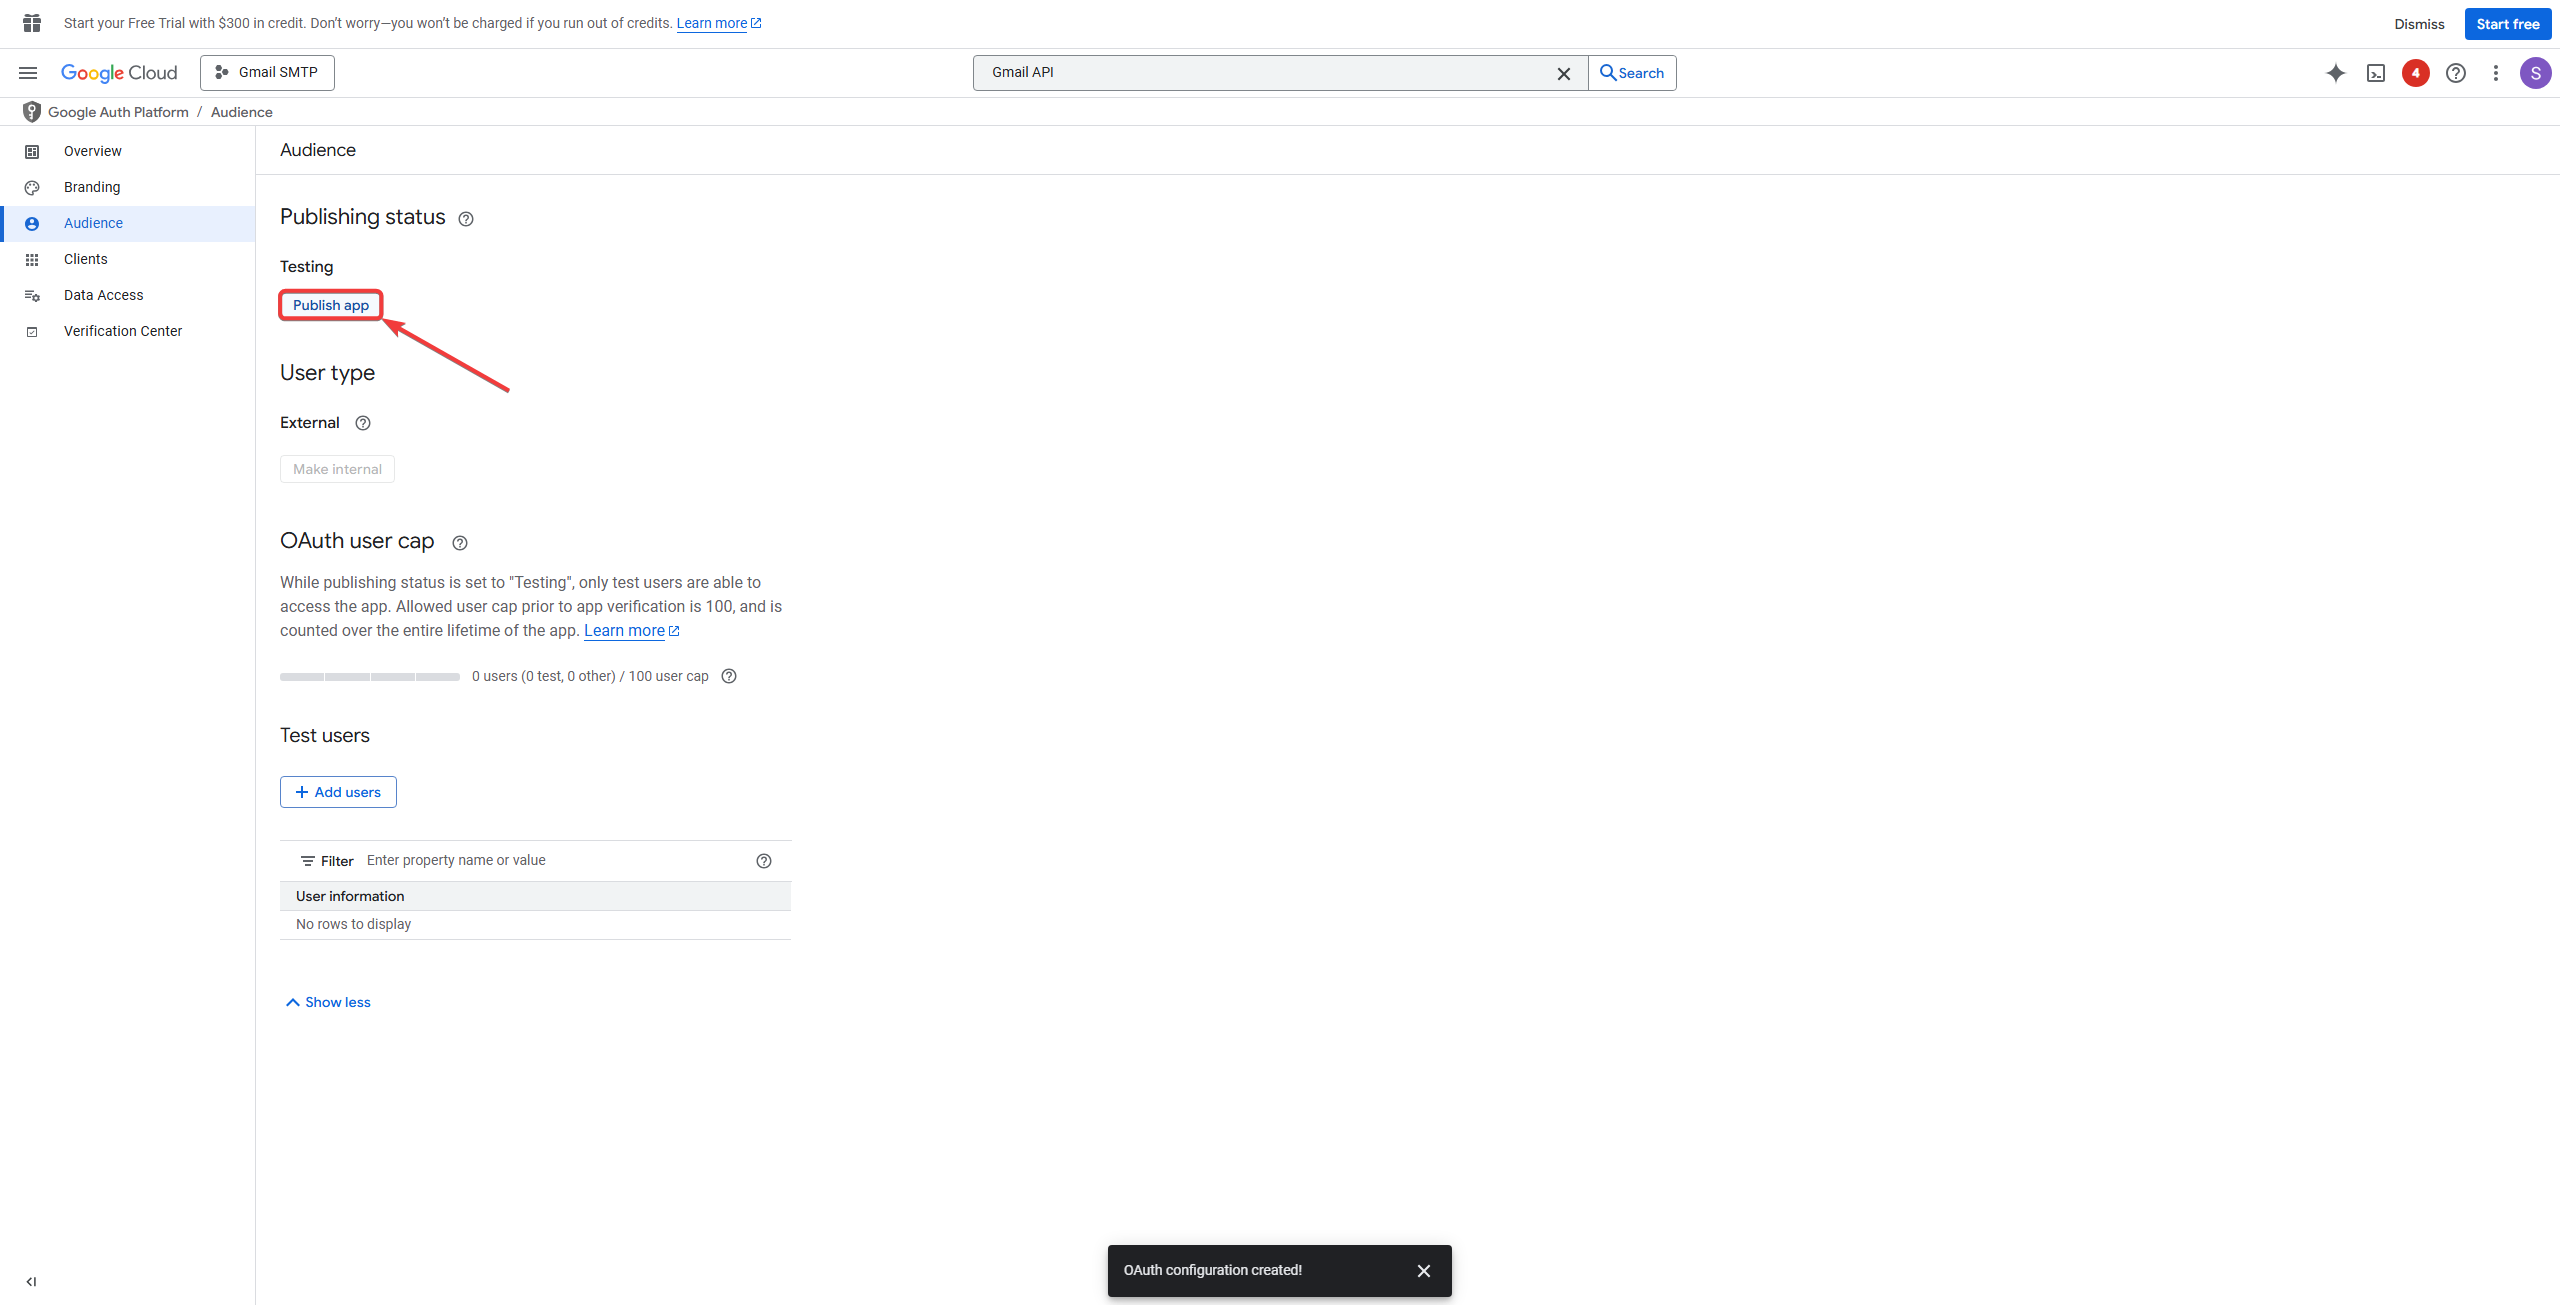
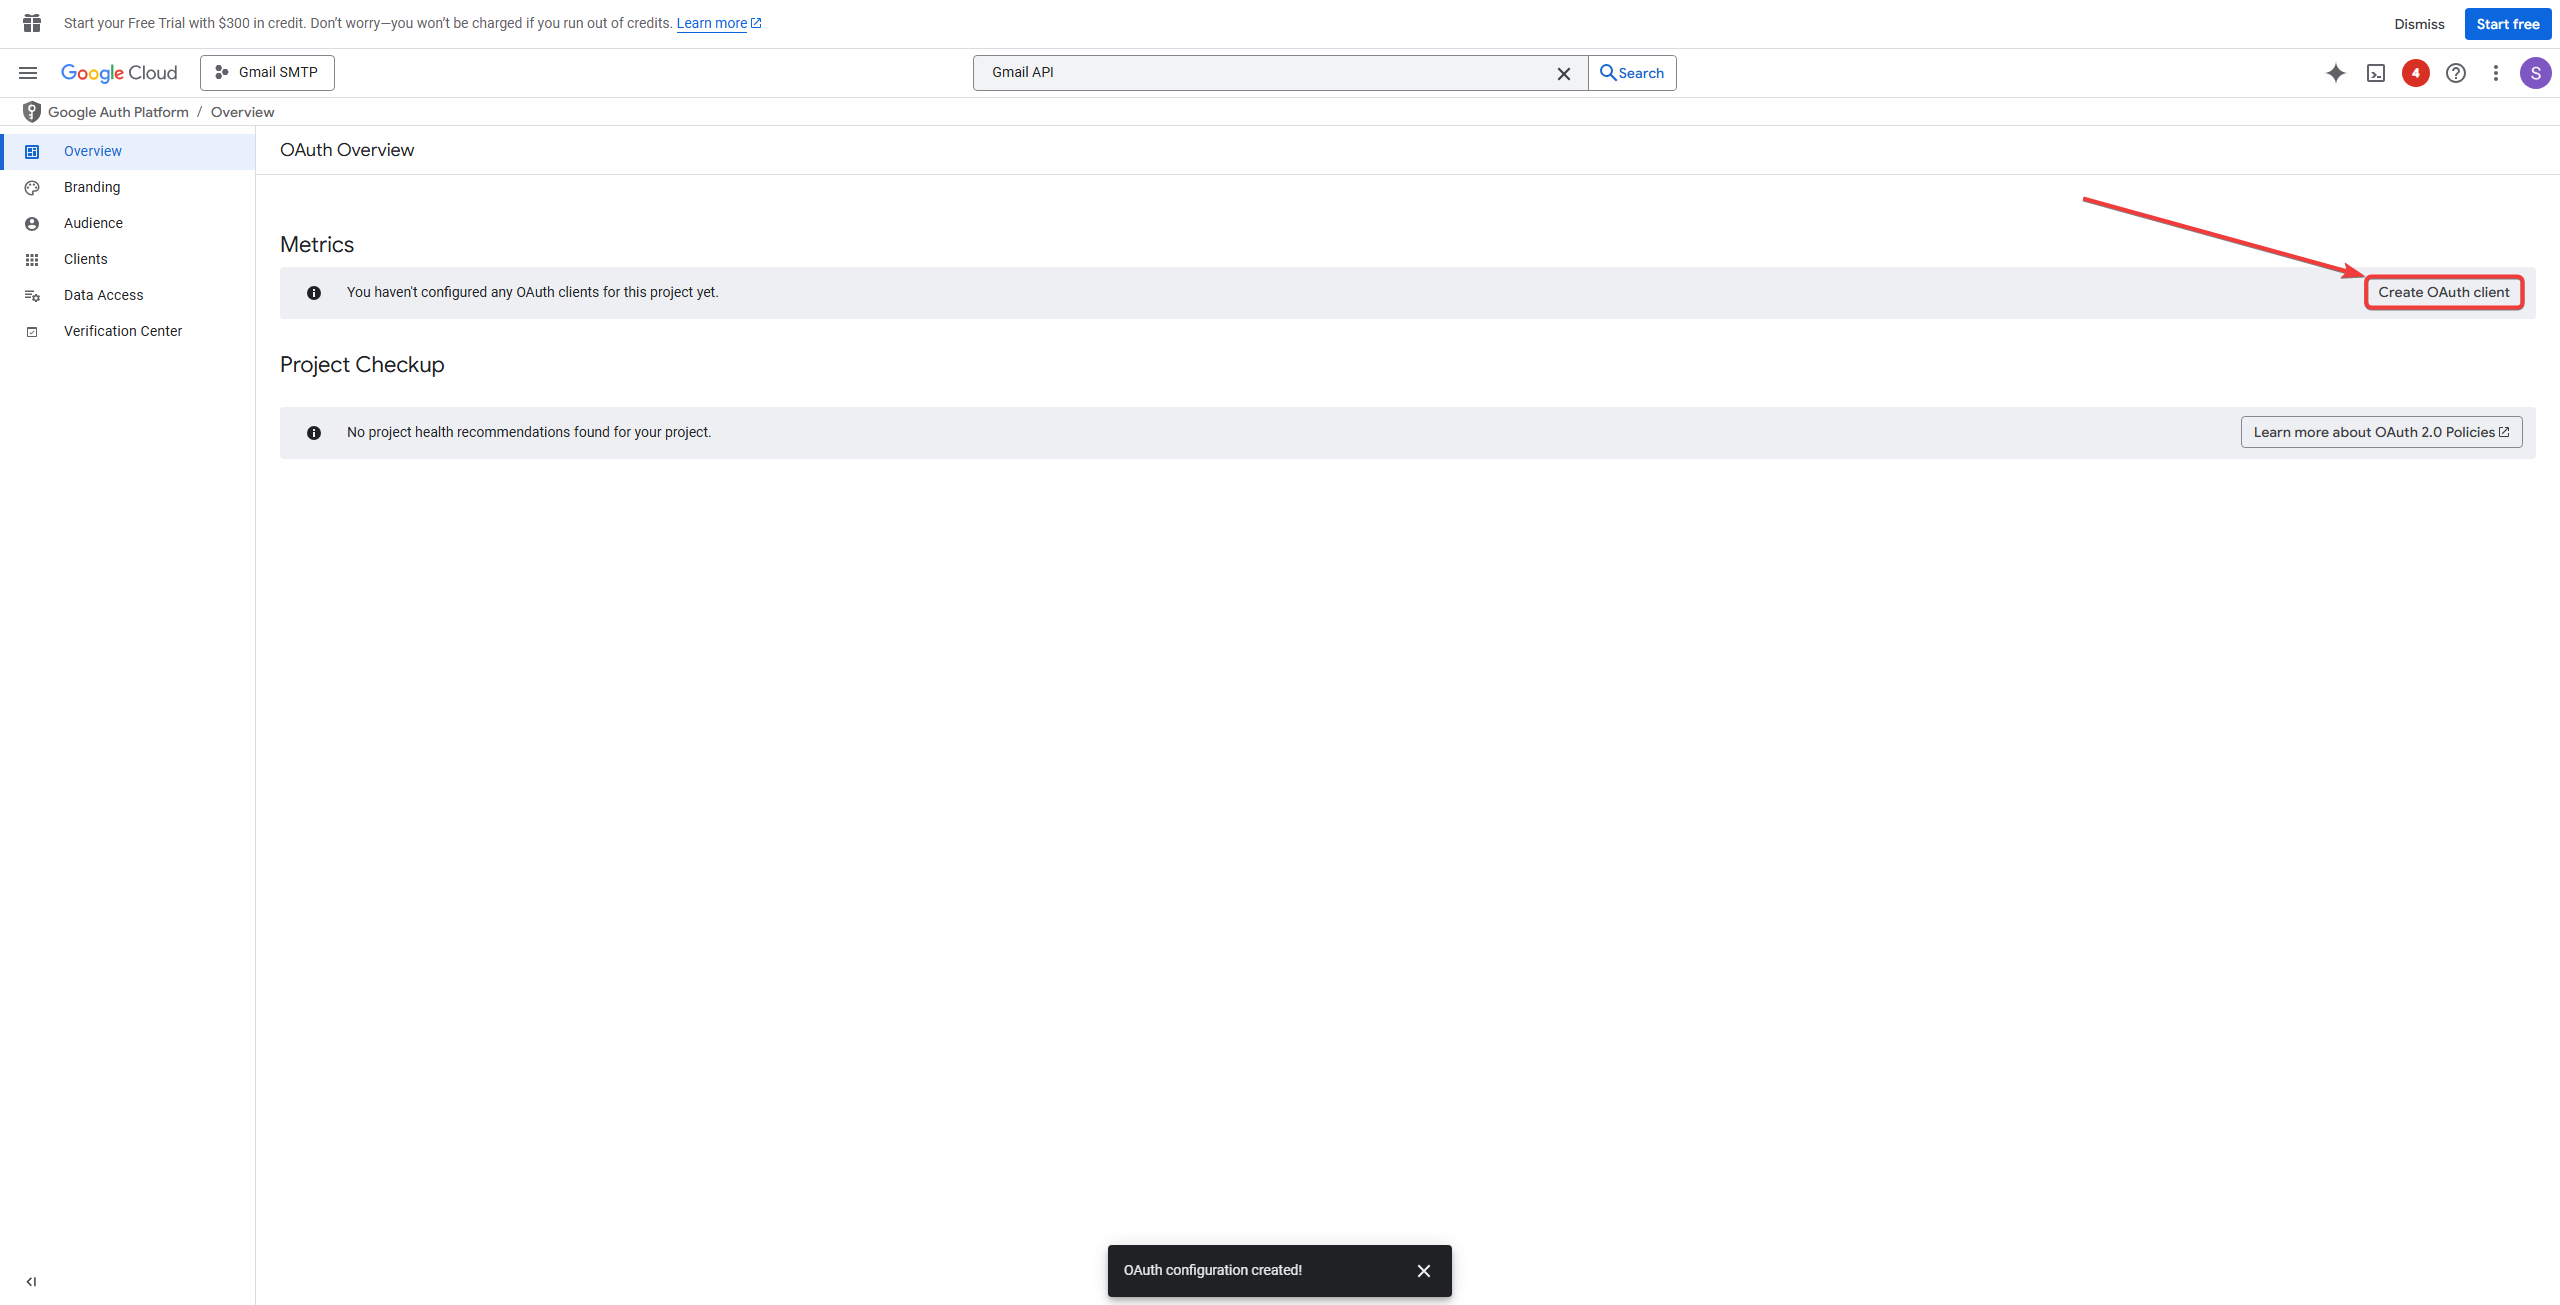
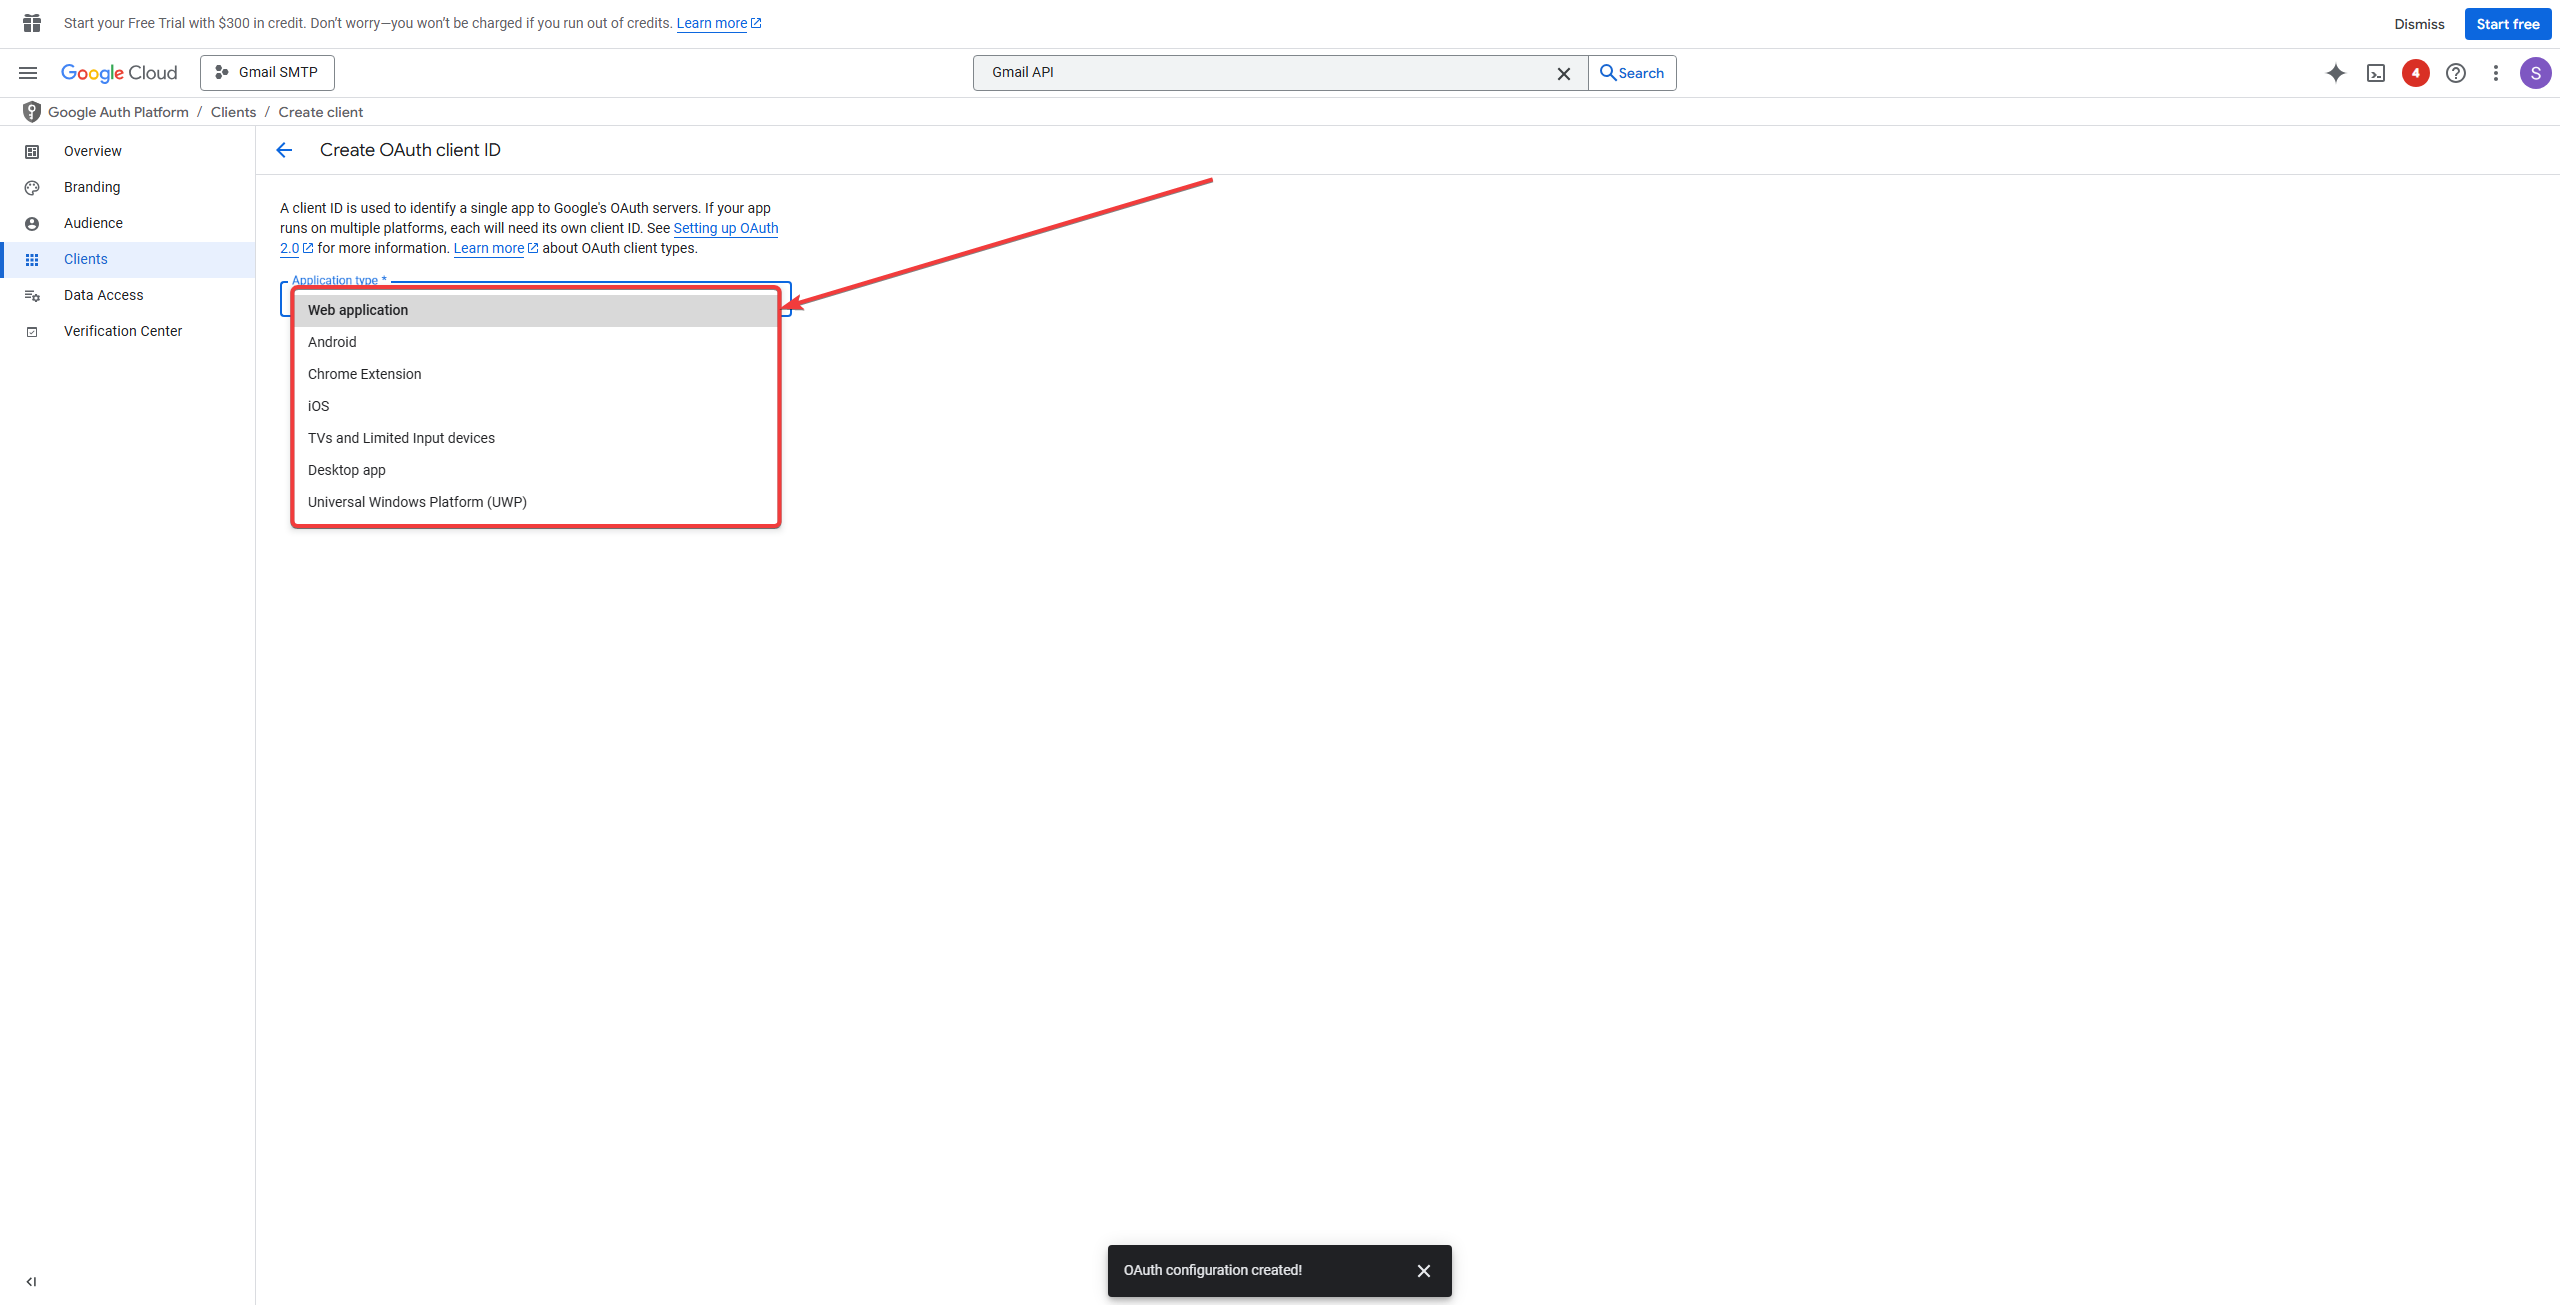
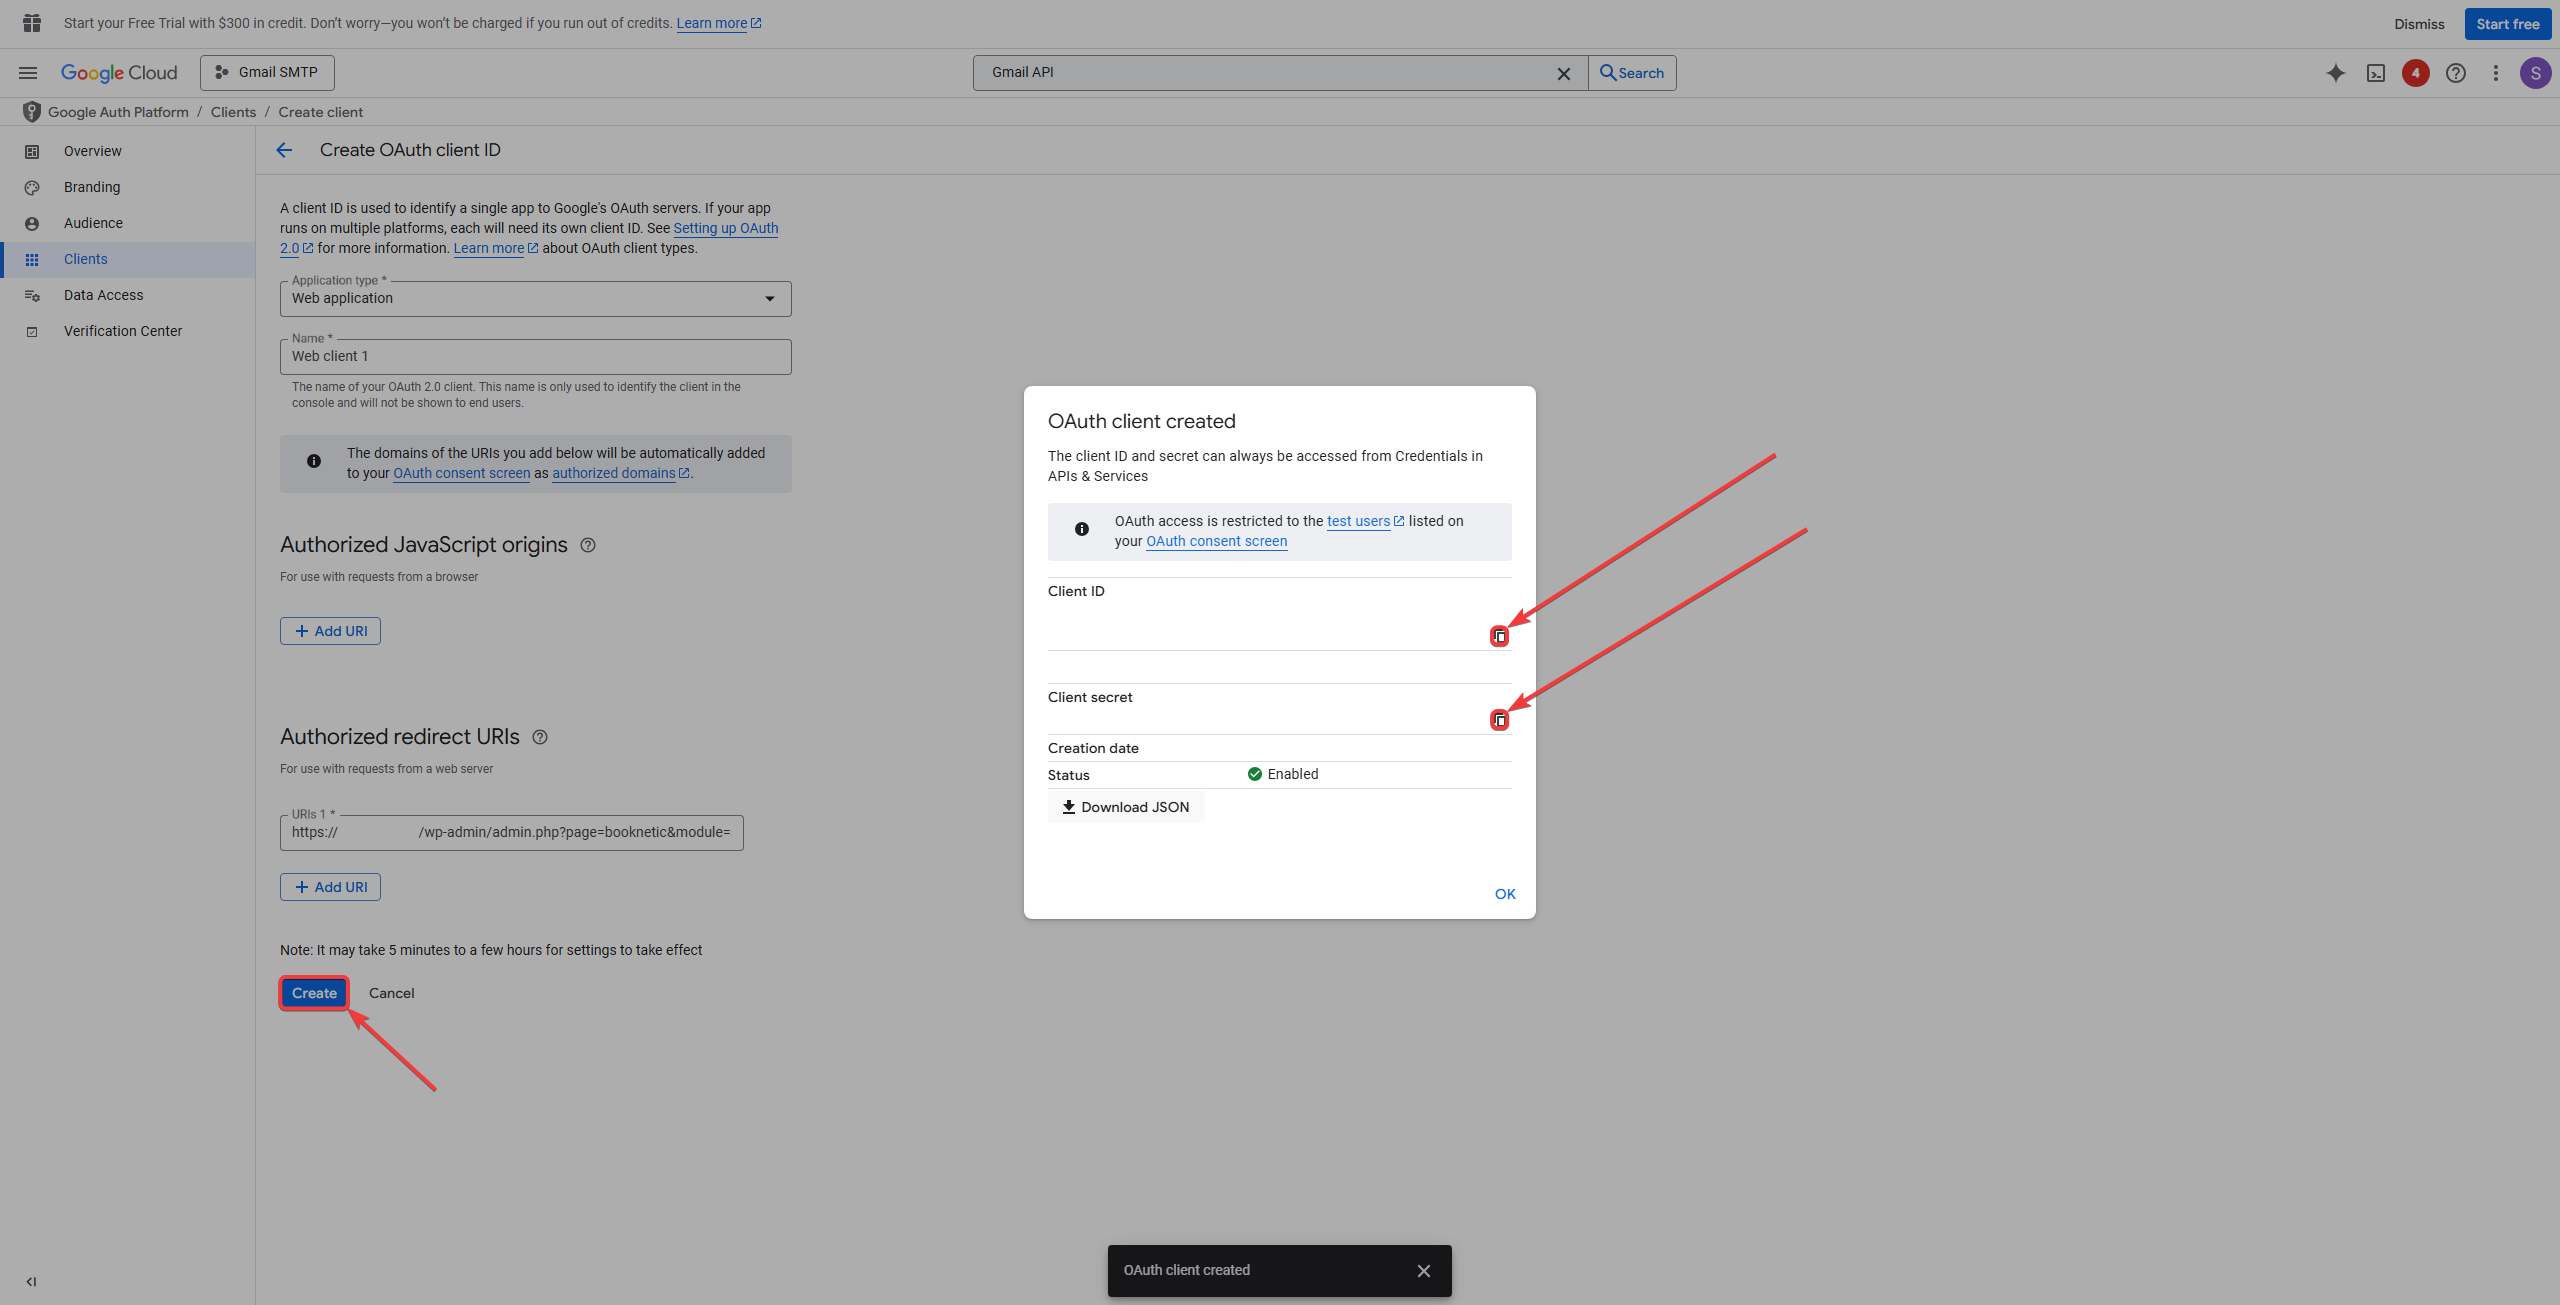
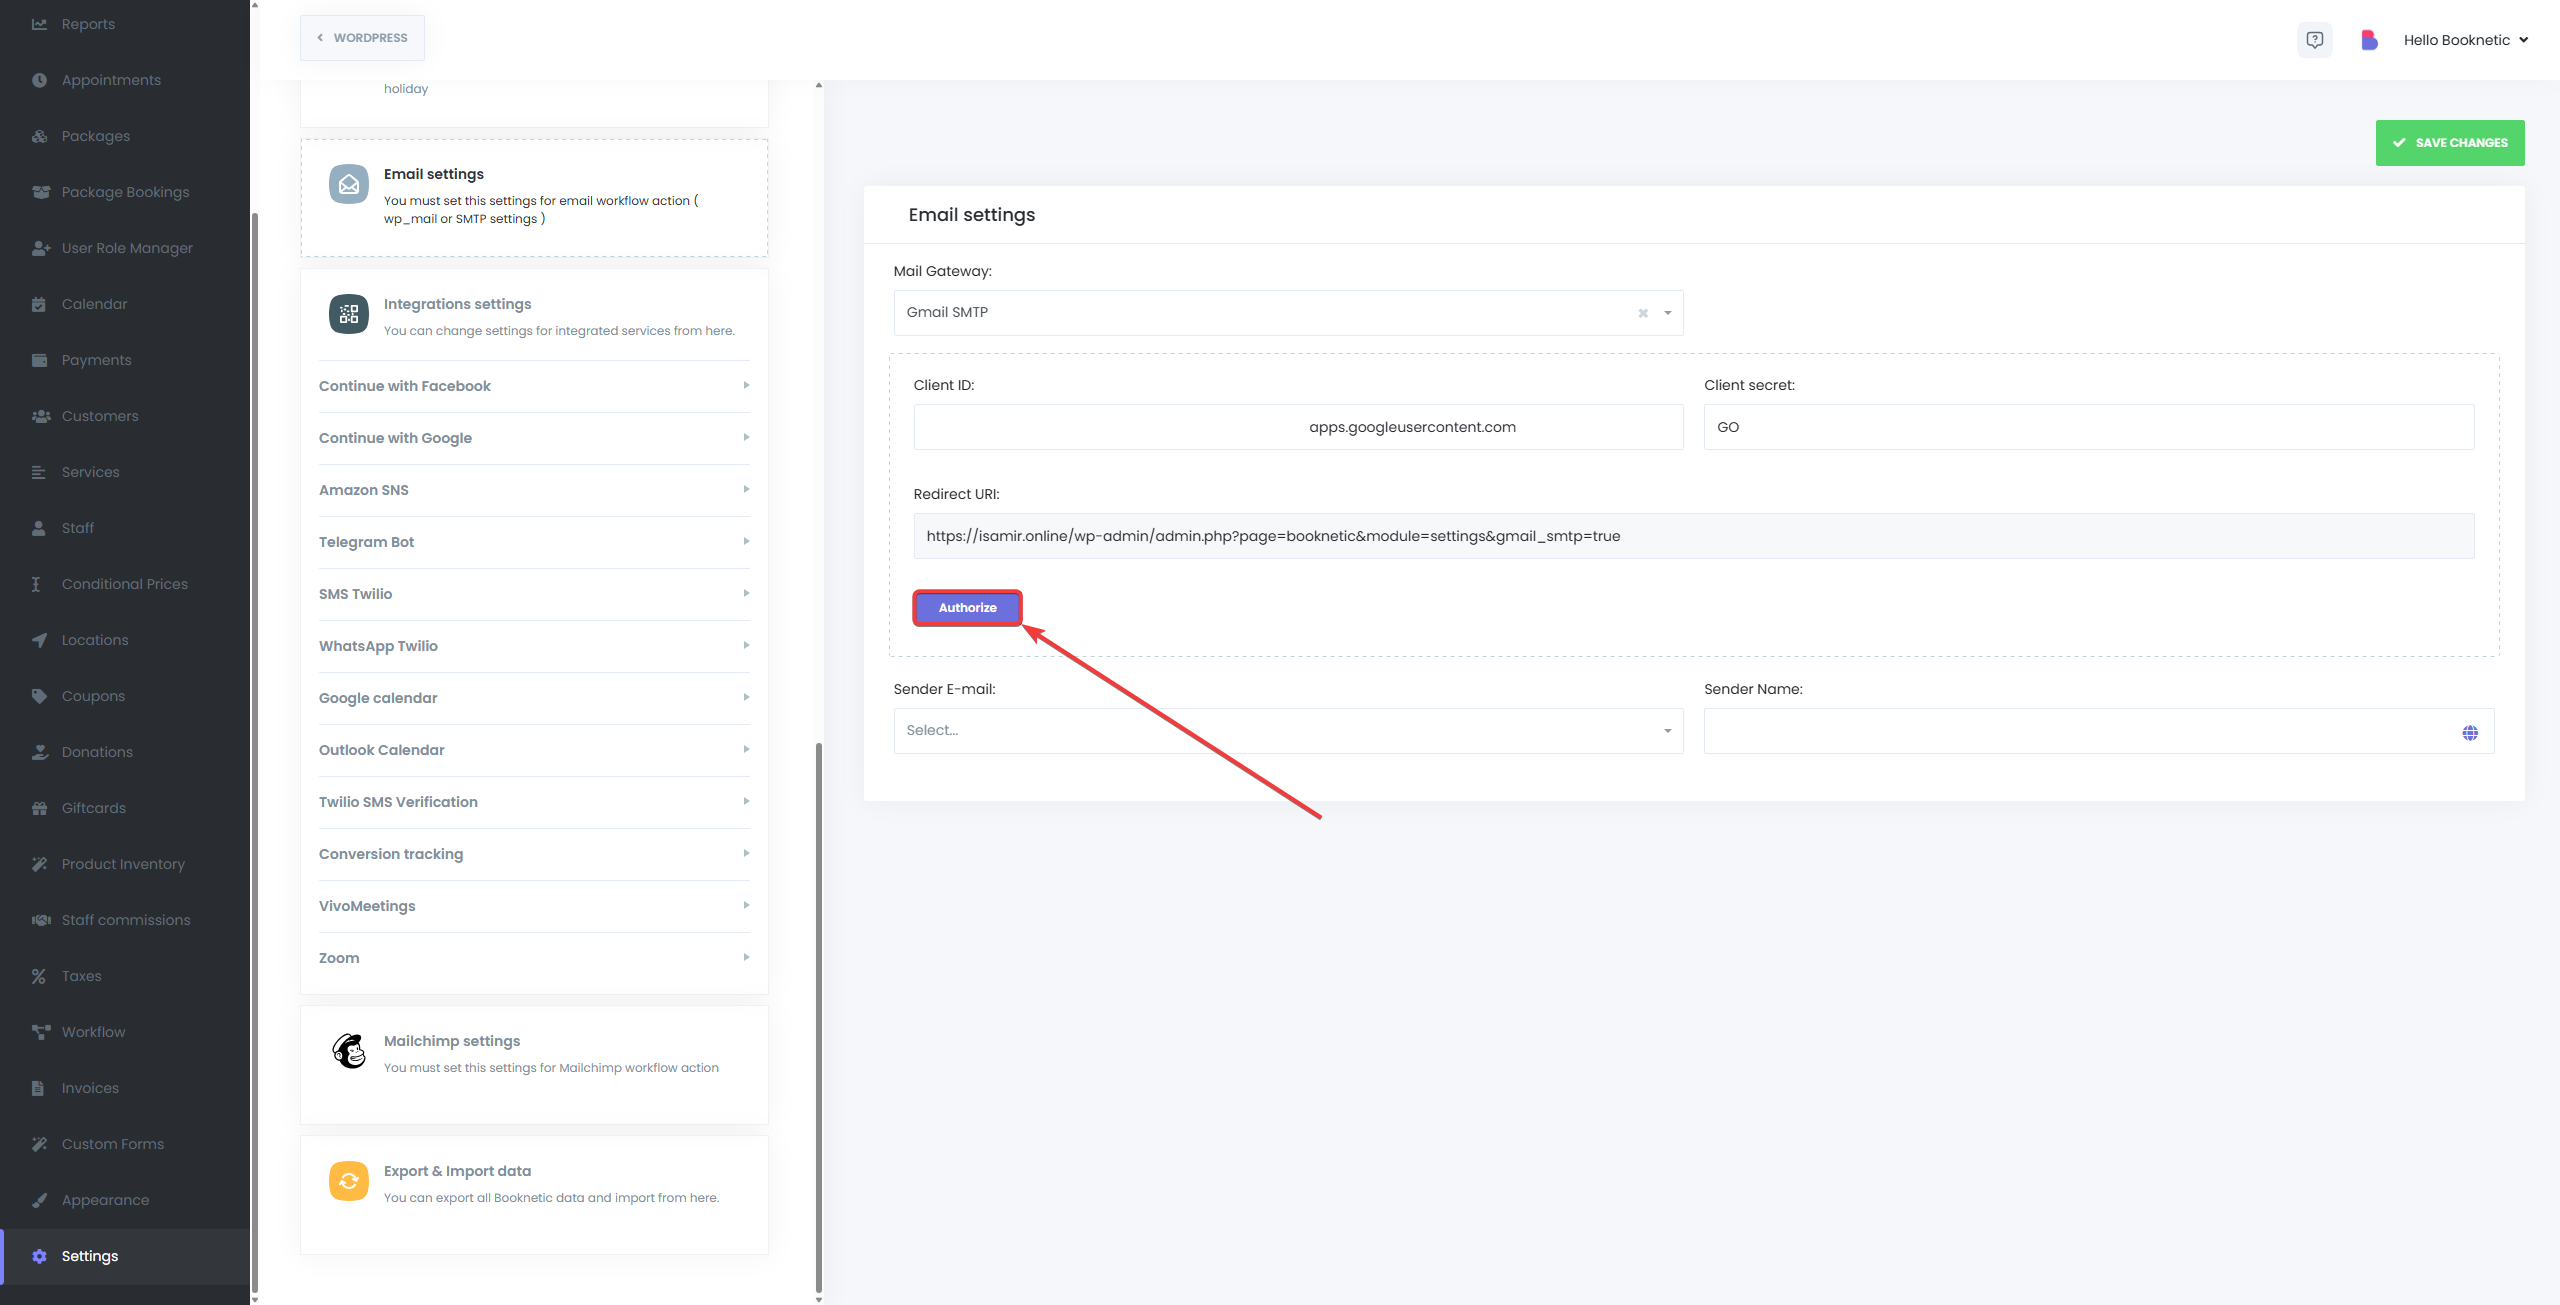
Since Google no longer supports "Less Secure Apps," you must use the Gmail API for SMTP configuration in Booknetic. Here’s how to set it up:

Booknetic allows you to customize the content and format of your email notifications. You can modify templates for:
Each email can include dynamic content like customer names, service details, and appointment times, using shortcodes.
Example: {customer_name}, {appointment_date}, {service_name}, {staff_name}.
This ensures that emails are personalized and relevant for each recipient.
By configuring your Email Settings appropriately, you ensure that your customers, staff, and admin users receive timely, relevant notifications that help improve the overall experience with Booknetic. If you need more advanced email features or encounter issues, the SMTP method provides more flexibility and reliability for businesses using custom email providers.