


One of the biggest features which comes with Booknetic V3 is the Workflow module. This module will allow you numerous opportunities through Booknetic.
What’s Workflow and what can I achieve by using it?
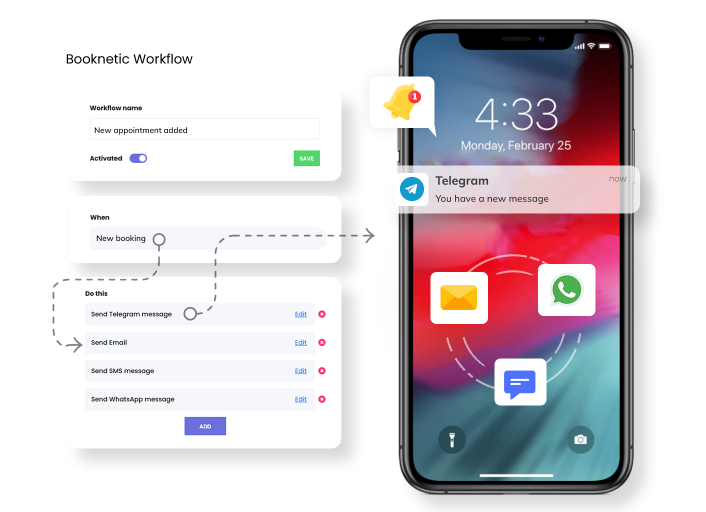
You can automate every action related to your appointments and build business processes by using Workflow. For example: When an appointment is booked it can send an email to the customer, Telegram message to the staff or admin. Sending a Zoom meeting link to staff or admin by email when there are 30 minutes left till the meeting is held. After the meeting is done send a survey form to the customer via Whatsapp and through webhook make a POST request to EXAMPLE_URL address, change the meeting status to Archived after a month has passed, etc… We can add hundreds of combinations to this list. Let us provide you with a list of supported actions. Imagine the count of possible combinations :)
- When a new appointment is added.
- When the appointment is rescheduled.
- When appointment status is changed. ( It's possible to build different set combinations based on the previous and present status of appointment )
- When appointment ends. (Also N minutes after the end of the appointment or N minutes left till the end of the appointment )
- When a new customer is created.
You can trigger different actions when the provided conditions are met. The supported list of triggers are below:
- Sending an email.
- Sending SMS. ( Using Twilio or Amazon SNS )
- Sending WhatsApp messages. ( Using Twilio )
- Sending Telegram messages.
- Changing Appointment Status.
- Sending HTTP(s) requests with Webhook.
This list continues to grow and new triggers are added similarly to the plugin.
At the same time, you can create as many Workflow algorithms as you want and inside of these Workflow algorithms, you can conjunct various triggers.
Every trigger has its own fields. For Example, the Email trigger has: To, Subject, Body, and Attachment fields. ‘To’ field can accept multiple arguments. That means you can select a customer’s email, staff’s email, and even add a custom email (for instance admin’s email) at the same time. Also, you can select the email which you added to the custom field. You can improve the Subject and Body fields by using default keywords. The attachment field also accepts multiple arguments. For instance, you can add the URL of the PDF, select the PDF which was created using the Invoice addon or select the PDF which was created using the Custom fields addon.
Thus using add-ons simultaneously you can create deep algorithms. Some Examples: 1. Using Custom forms you receive the phone number of the student's parents and send a WhatsApp message to the received number an hour early from the meeting. 2. With the help of Custom Forms you can require the scan version of its passport. When a customer reserves a new appointment he/she uploads its passport and with the Workflow module, you can send this attachment to the staff's telegram. 3. You create a PDF by using the Invoice addon and you send it to the customer's email using Workflow.
There’s also a different set of filters that you can use. For example: Using the Locale filter you can send an email in the language which the user uses on your site. Below is the full list of filters:
- Location filter
- Staff filter
- Service filter
- Locale filter
- Status filter
Also, you can delete or temporarily disable Workflow.
Below are the topics which might be useful:


