The Stripe Integration add-on for Booknetic allows you to securely accept payments from your customers directly within your booking system. By integrating Stripe, you ensure a reliable and seamless transaction process during appointment booking.
This documentation will guide you step-by-step on setting up Stripe integration in Booknetic and configuring your account to accept payments.
Prerequisites
Before beginning the integration process, ensure that:
- You have a Booknetic plugin installed and activated on your WordPress website.
- You have an active Stripe account or are ready to create one.
Step-by-Step Guide
Step 1: Creating a Stripe Account
To integrate Stripe with Booknetic, you first need a Stripe account:
-
Register for Stripe:
- Visit Stripe Registration Page.
- Complete the registration form with the required information. After that, verify your email address by using the email sent from Stripe.

-
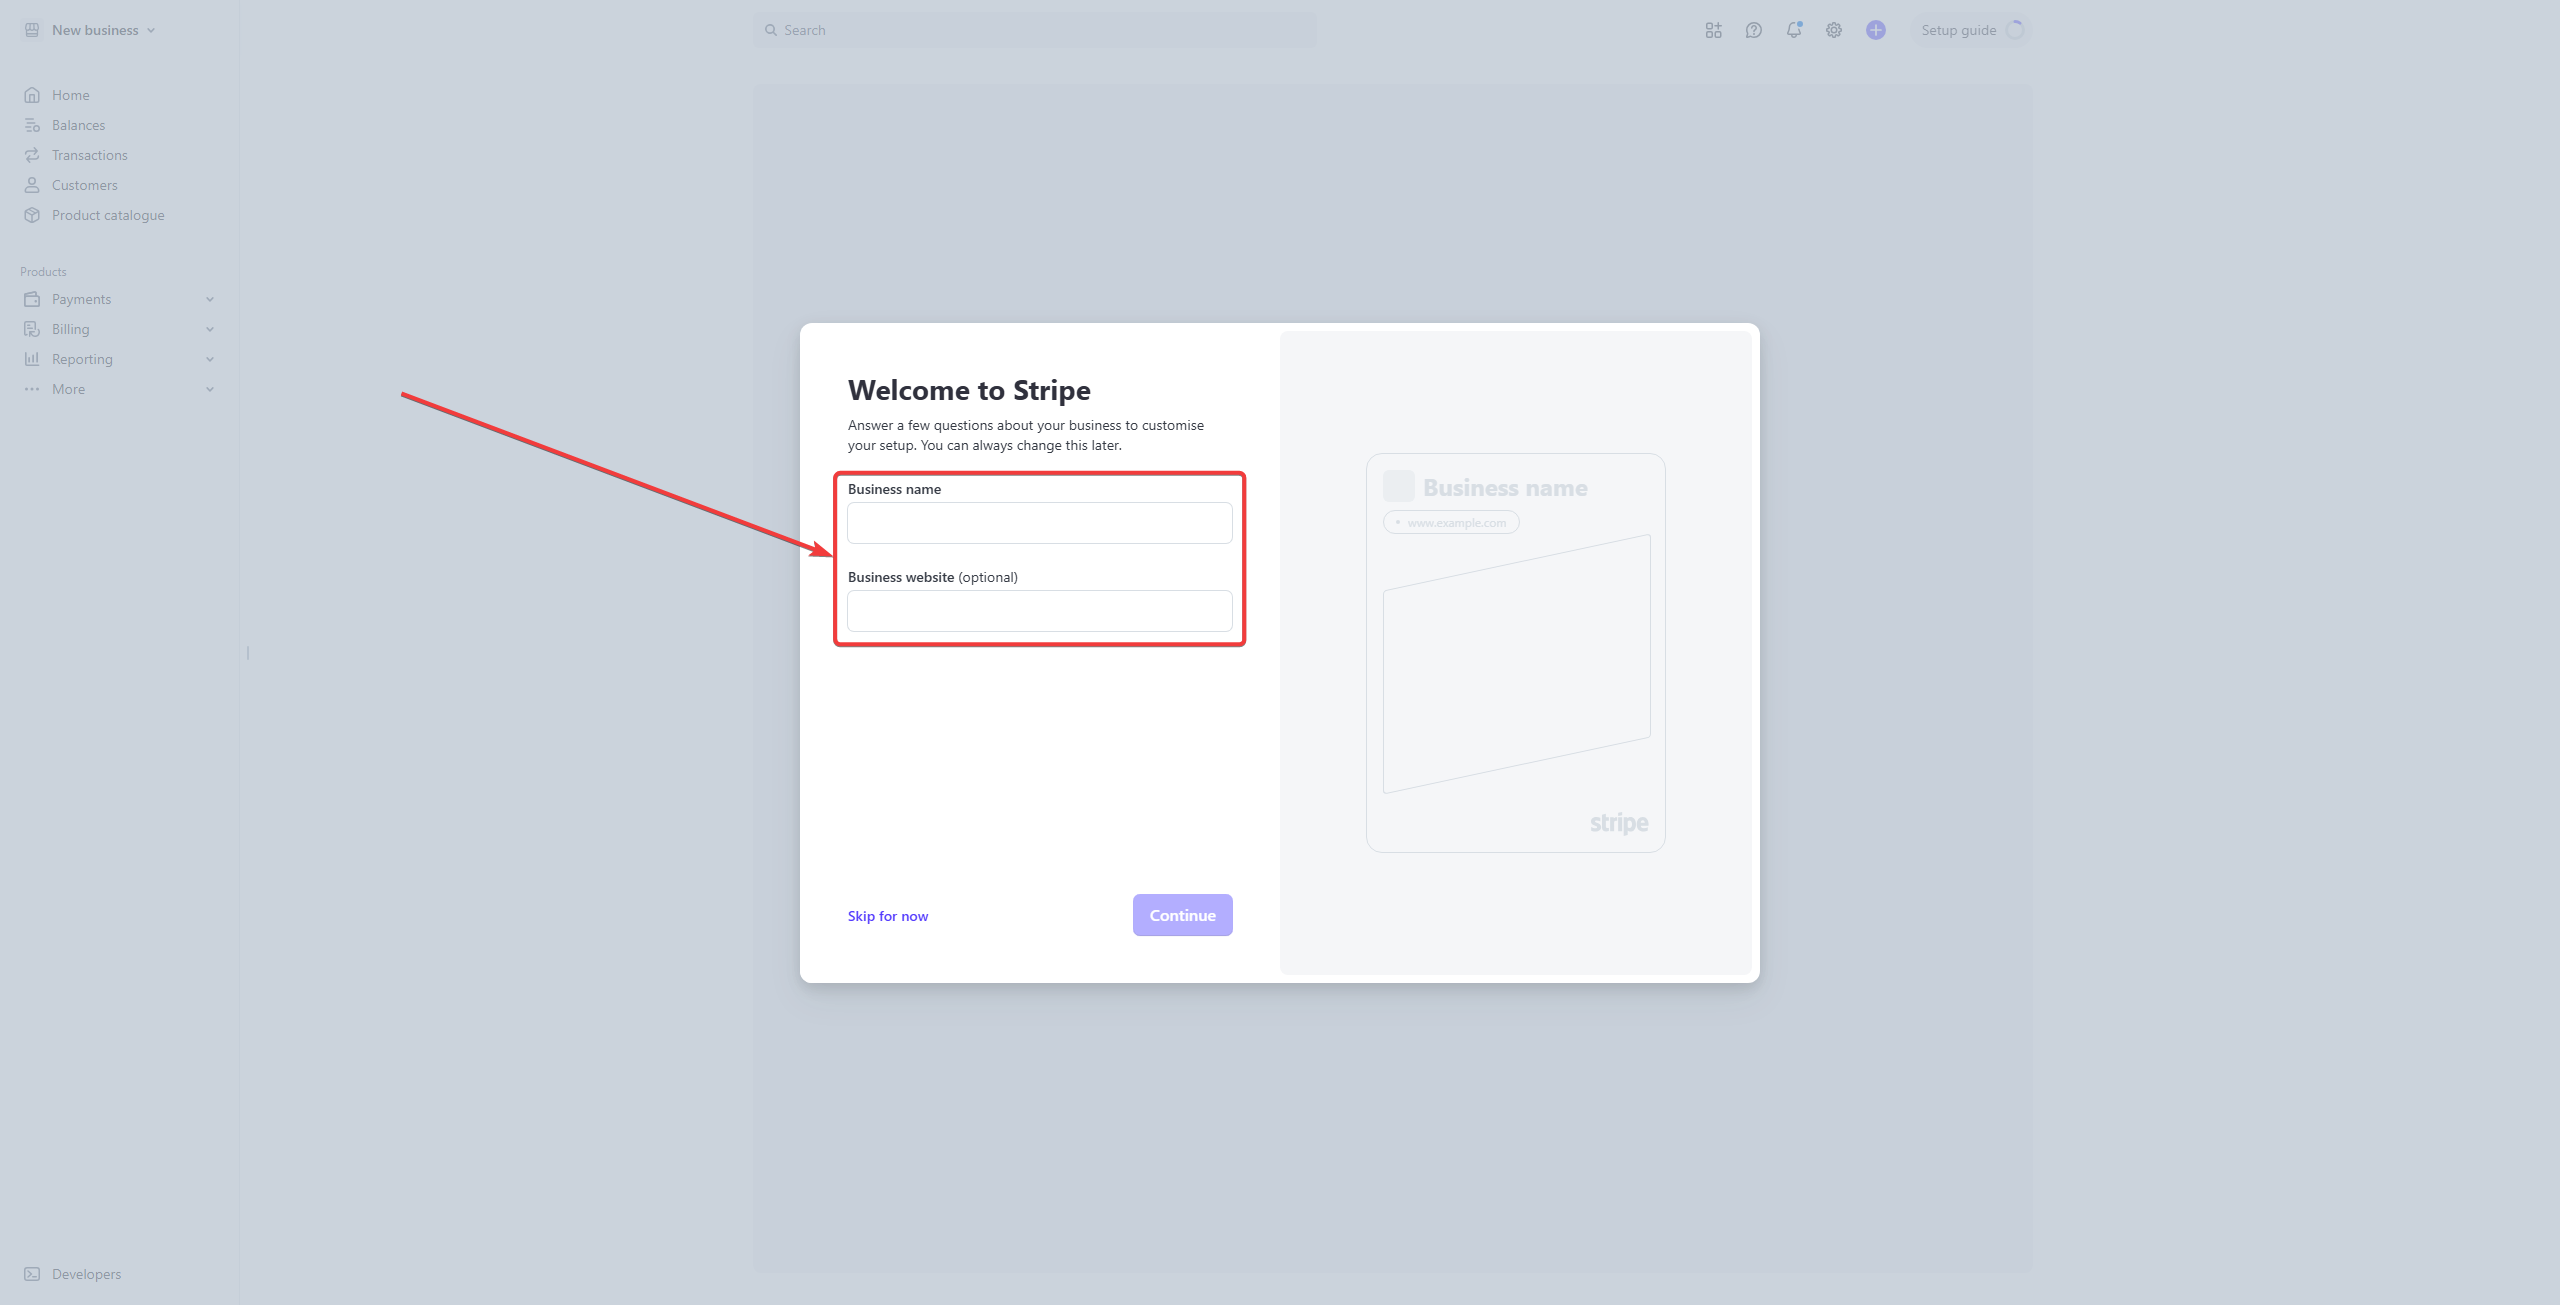
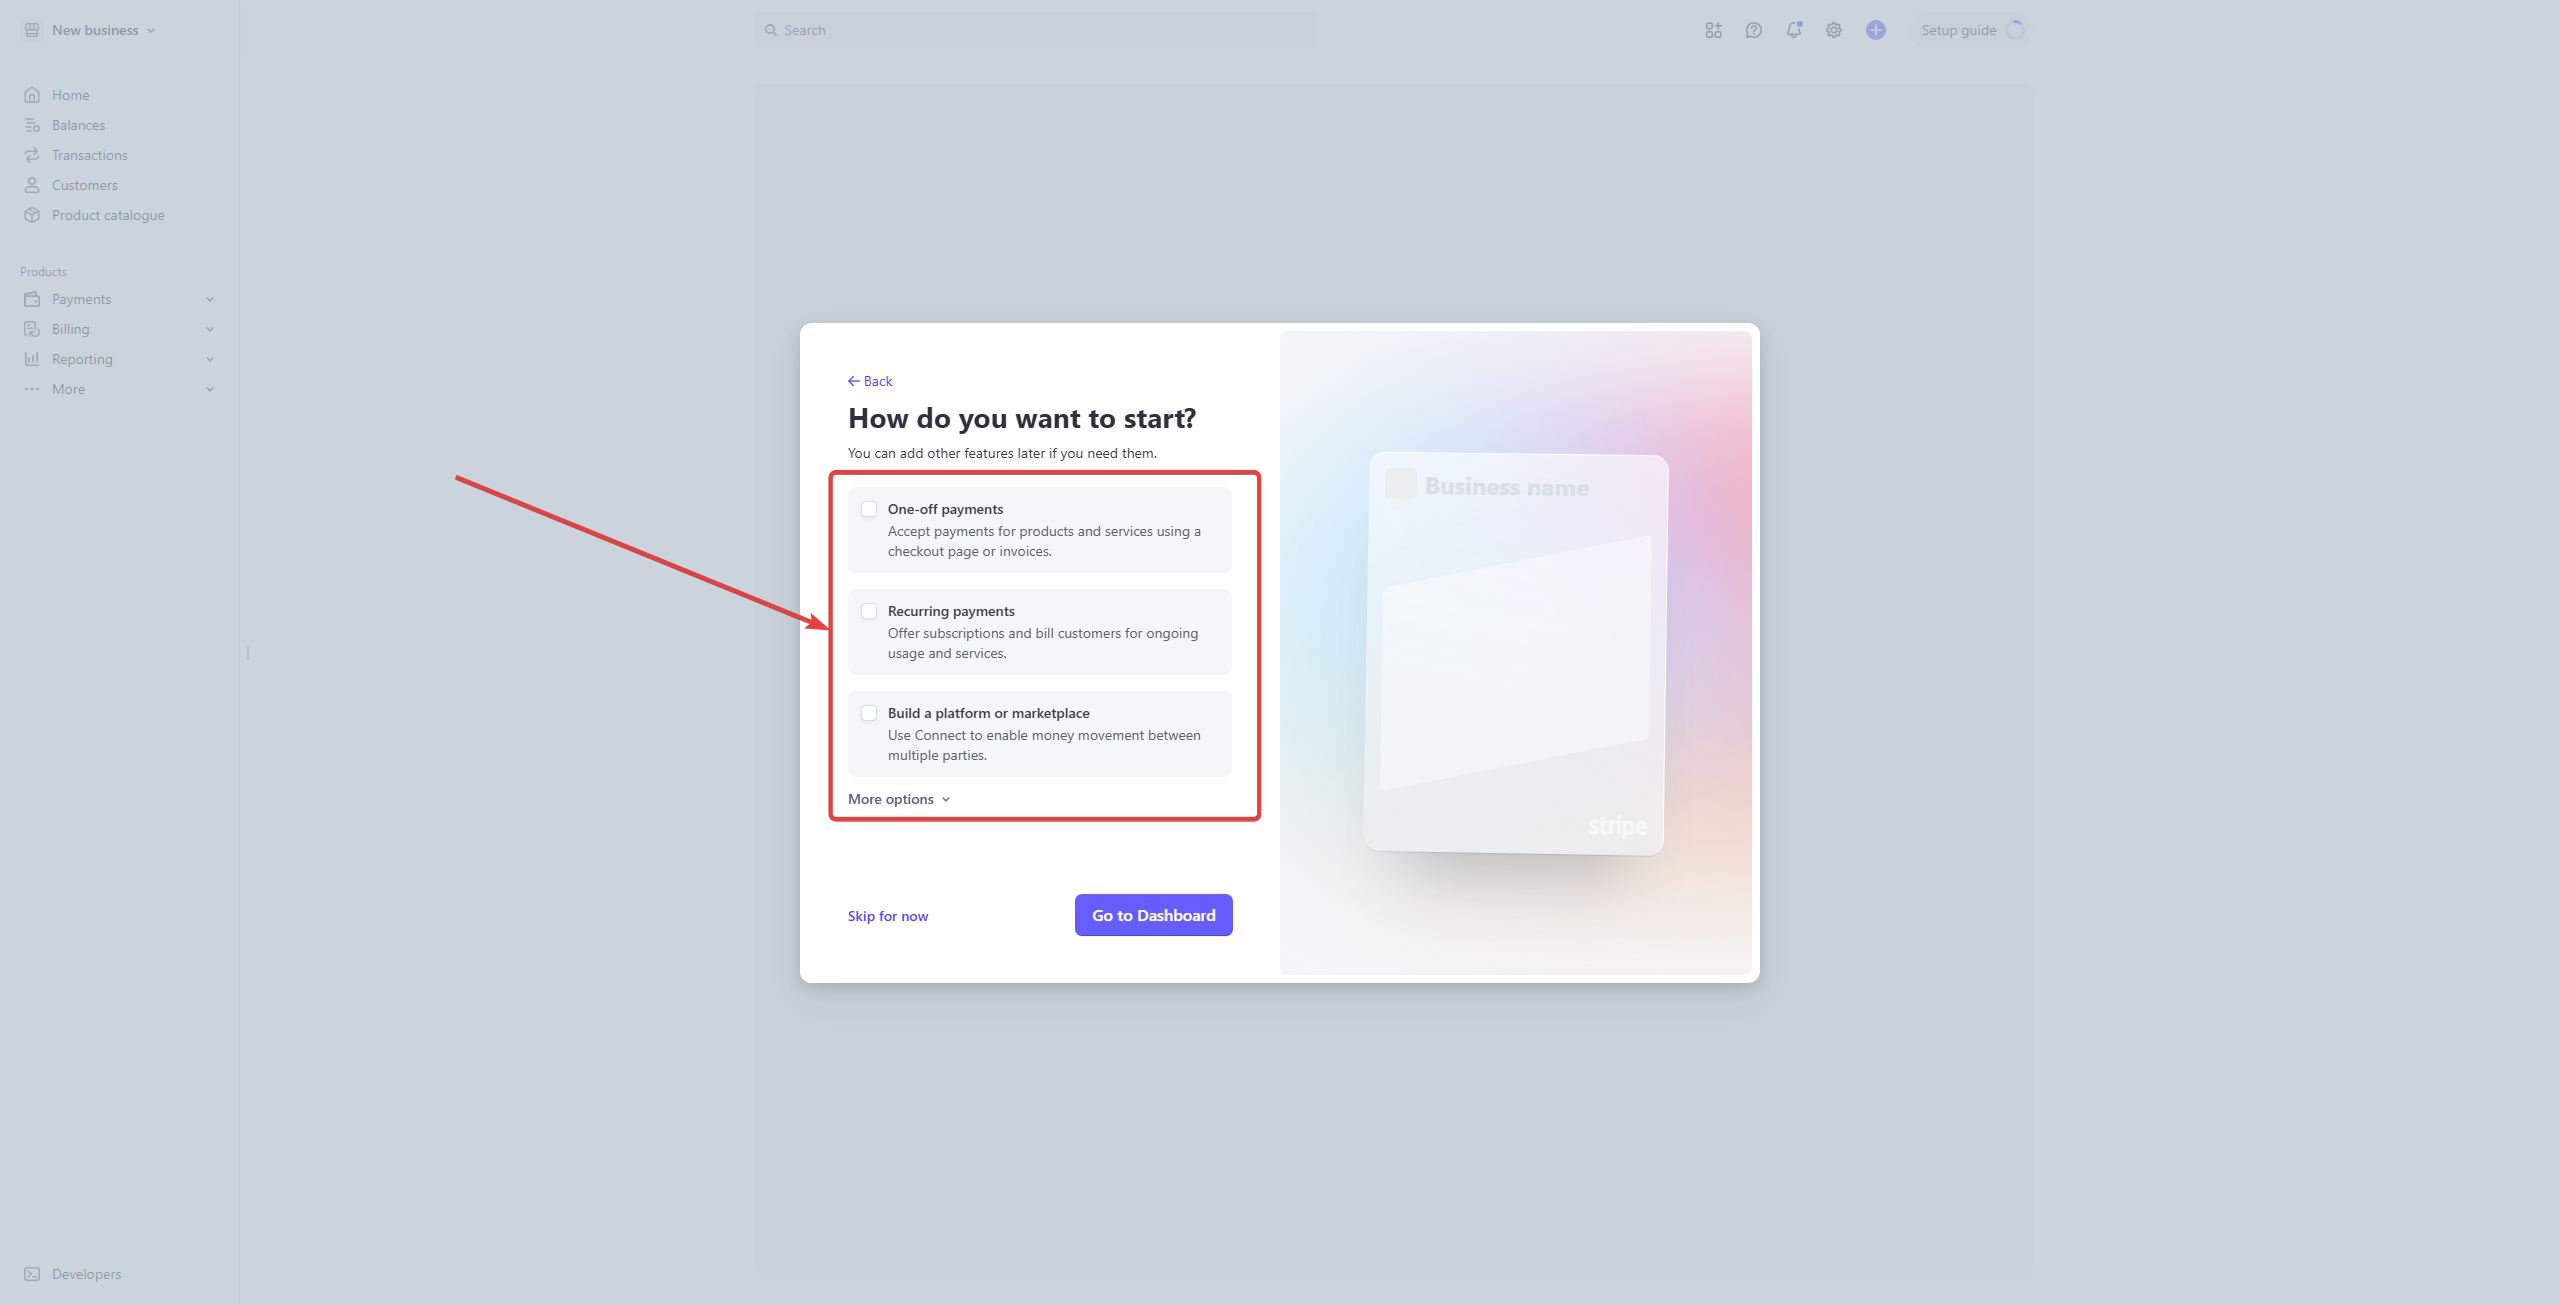
Set Up your Stripe Account:
- Stripe will ask you for your Business name and Business website (Choose “Skip for now” if you want to set it up later).
- Choose the features that you may need to use later on (If you don’t need any choose “Skip for now”).
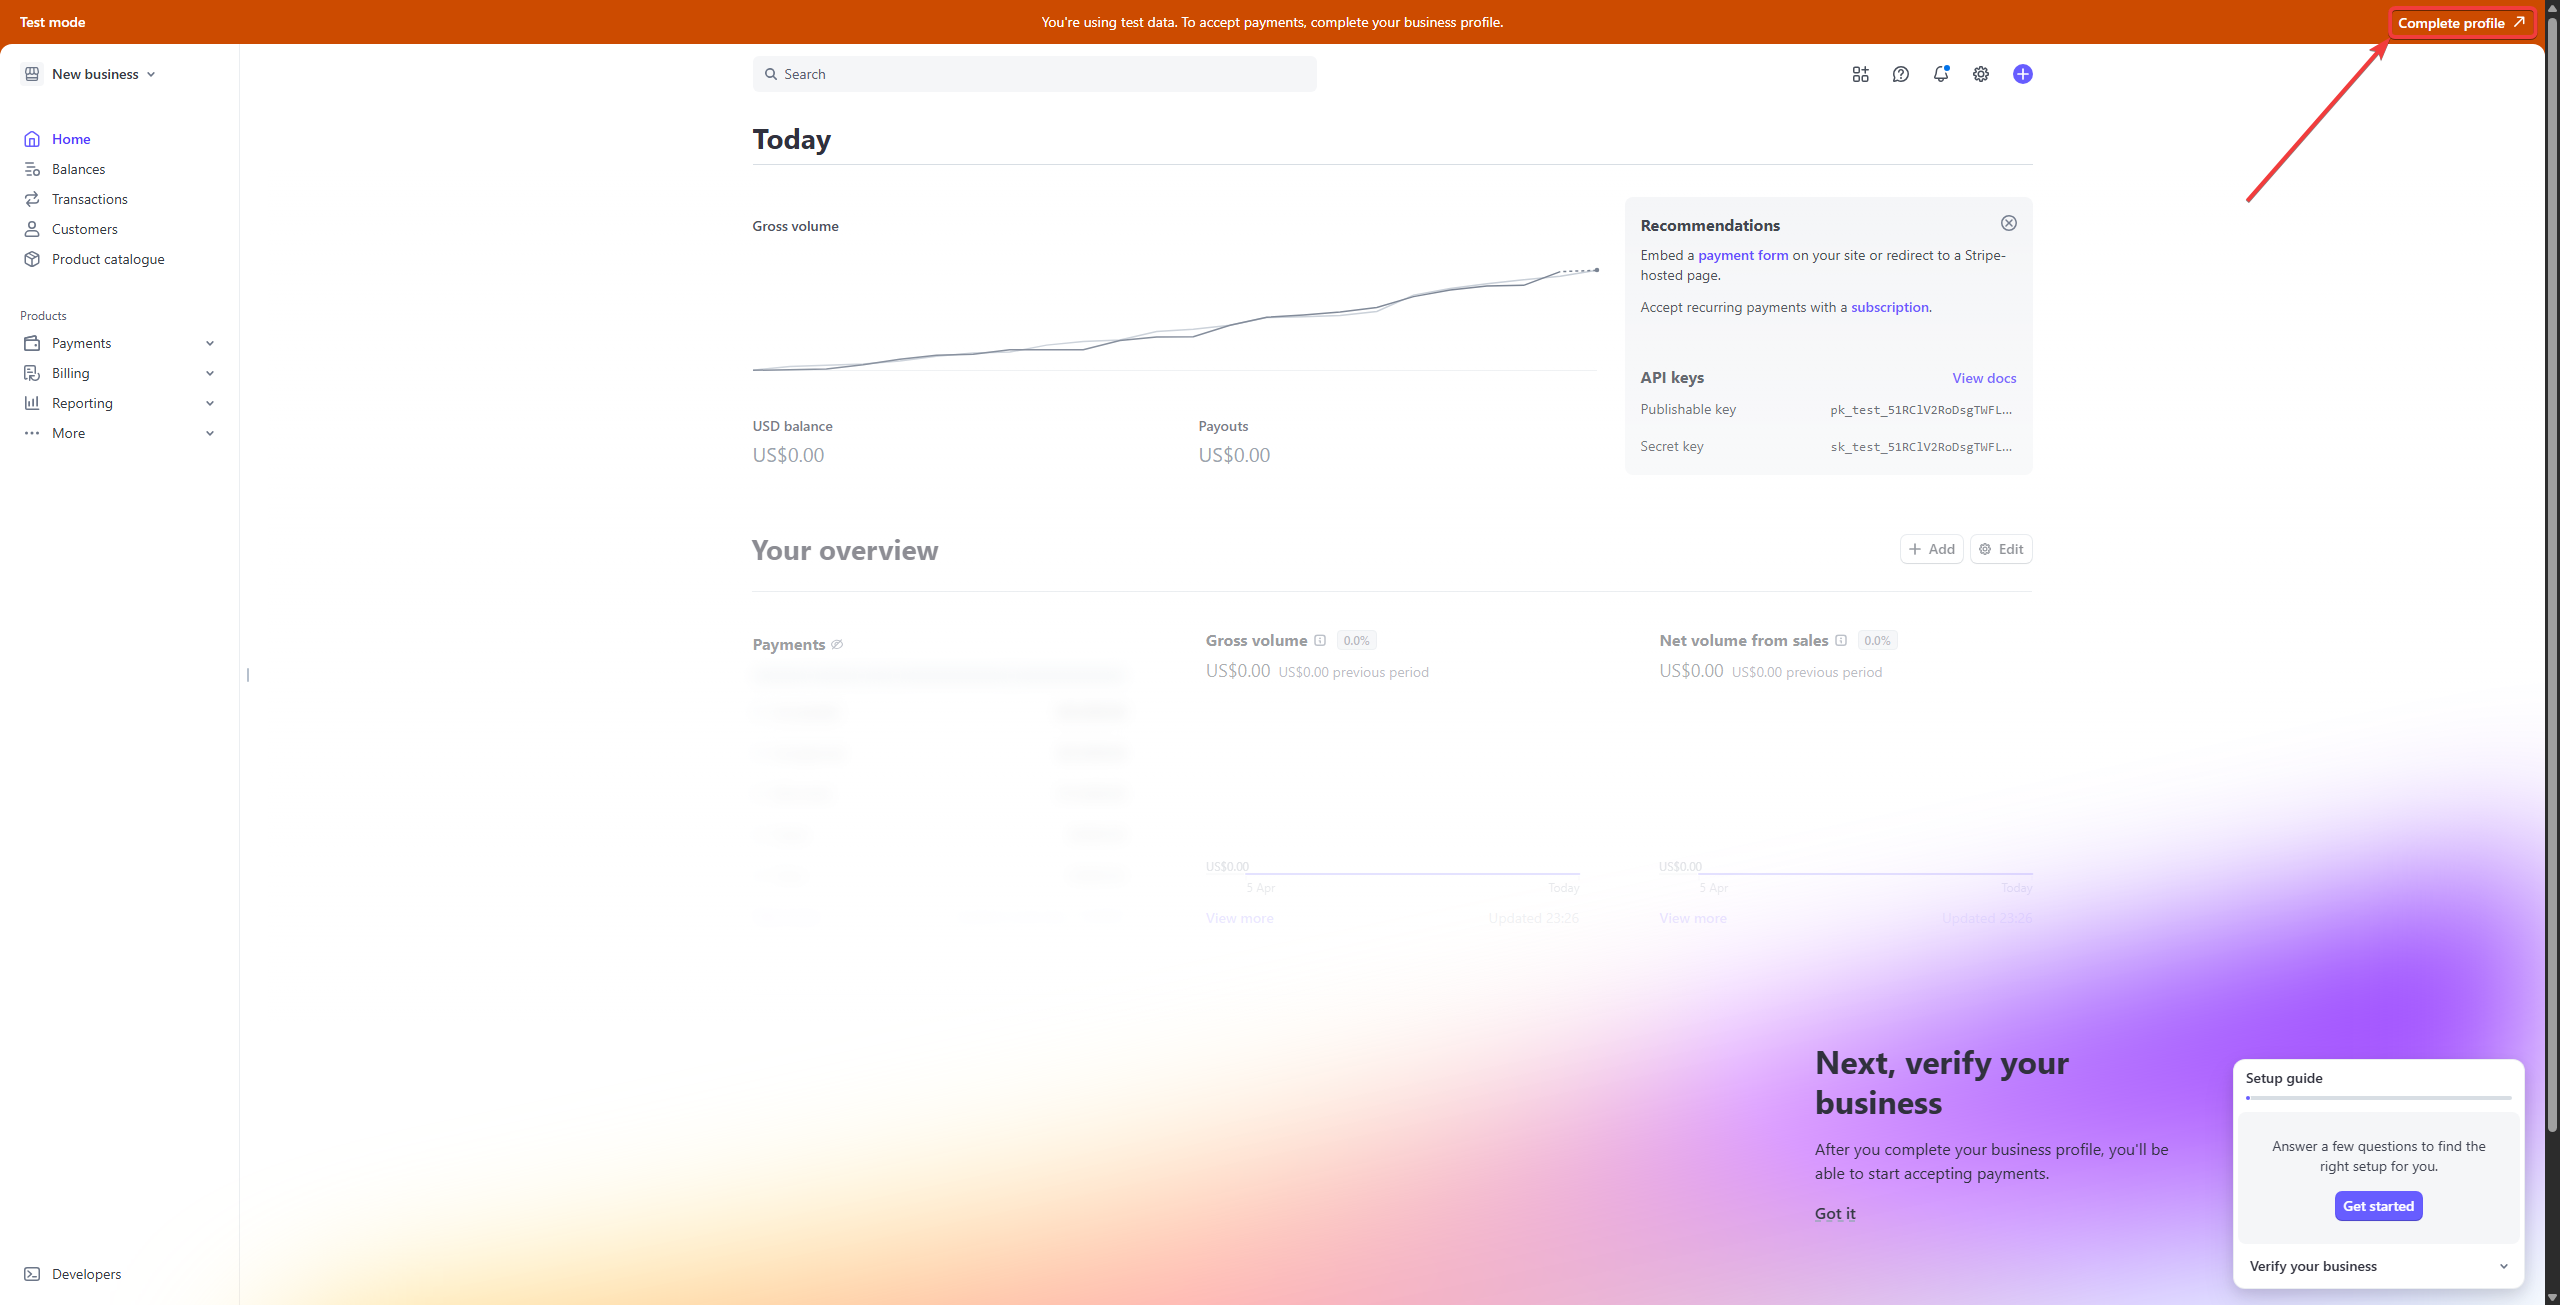
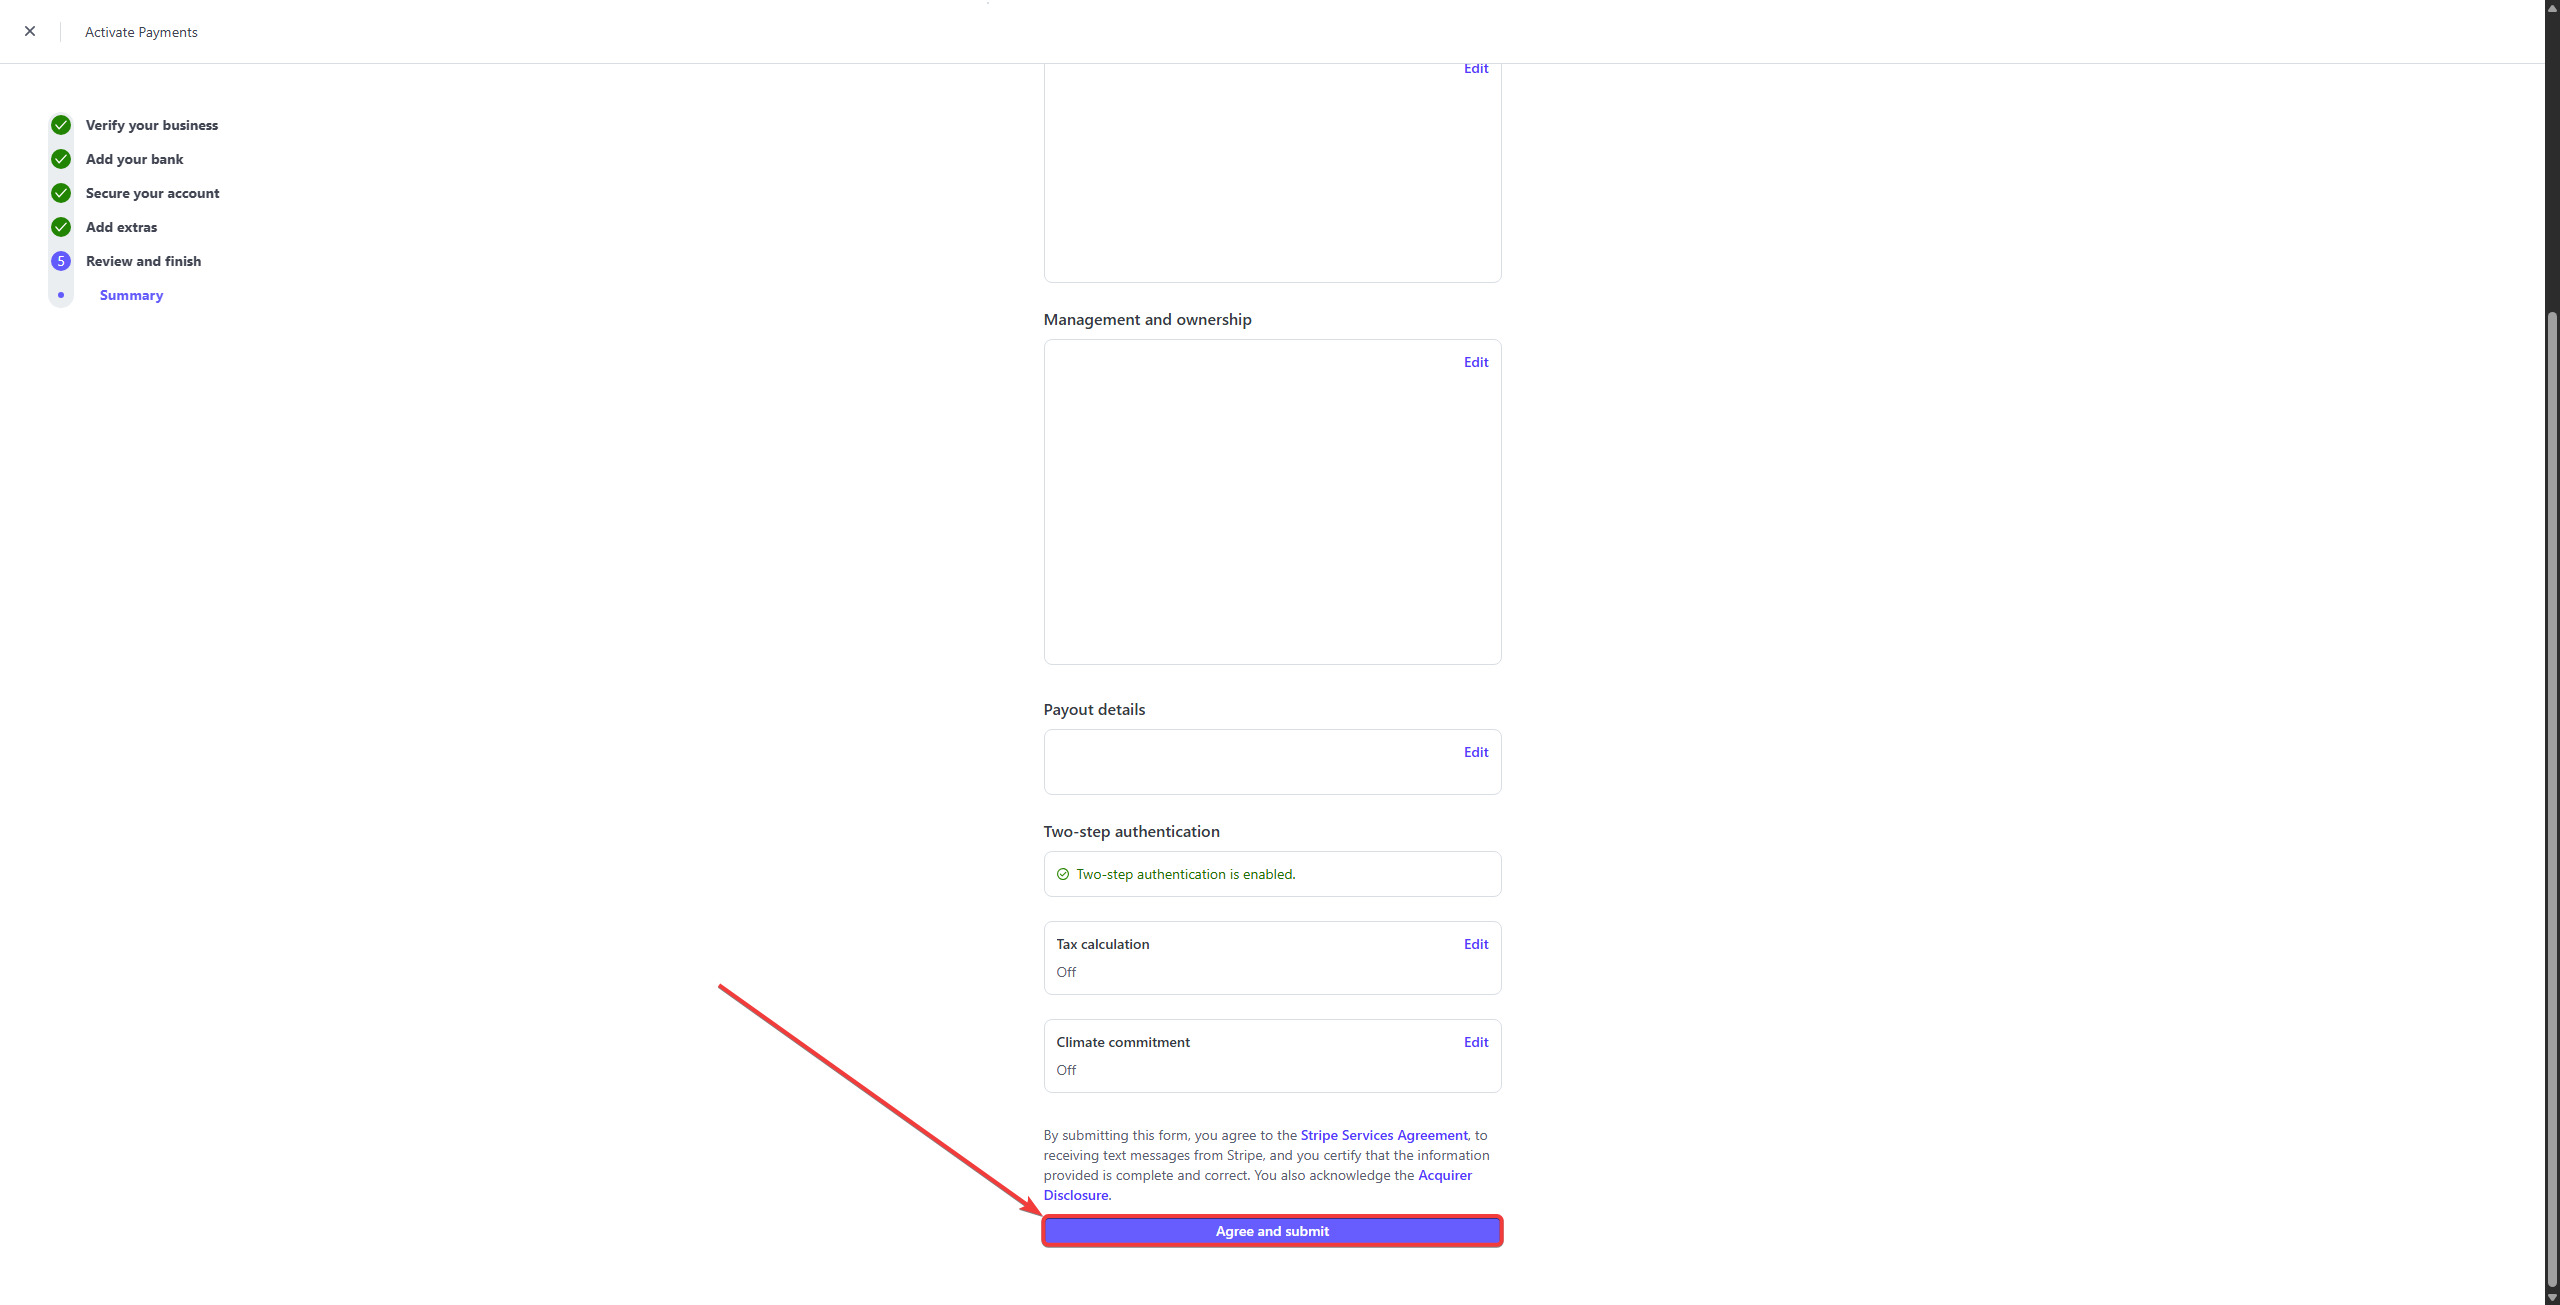
Step 2: Activating Payments on Stripe
Before you can receive actual payments, you must activate your Stripe account:
-
Activate Payments:
-
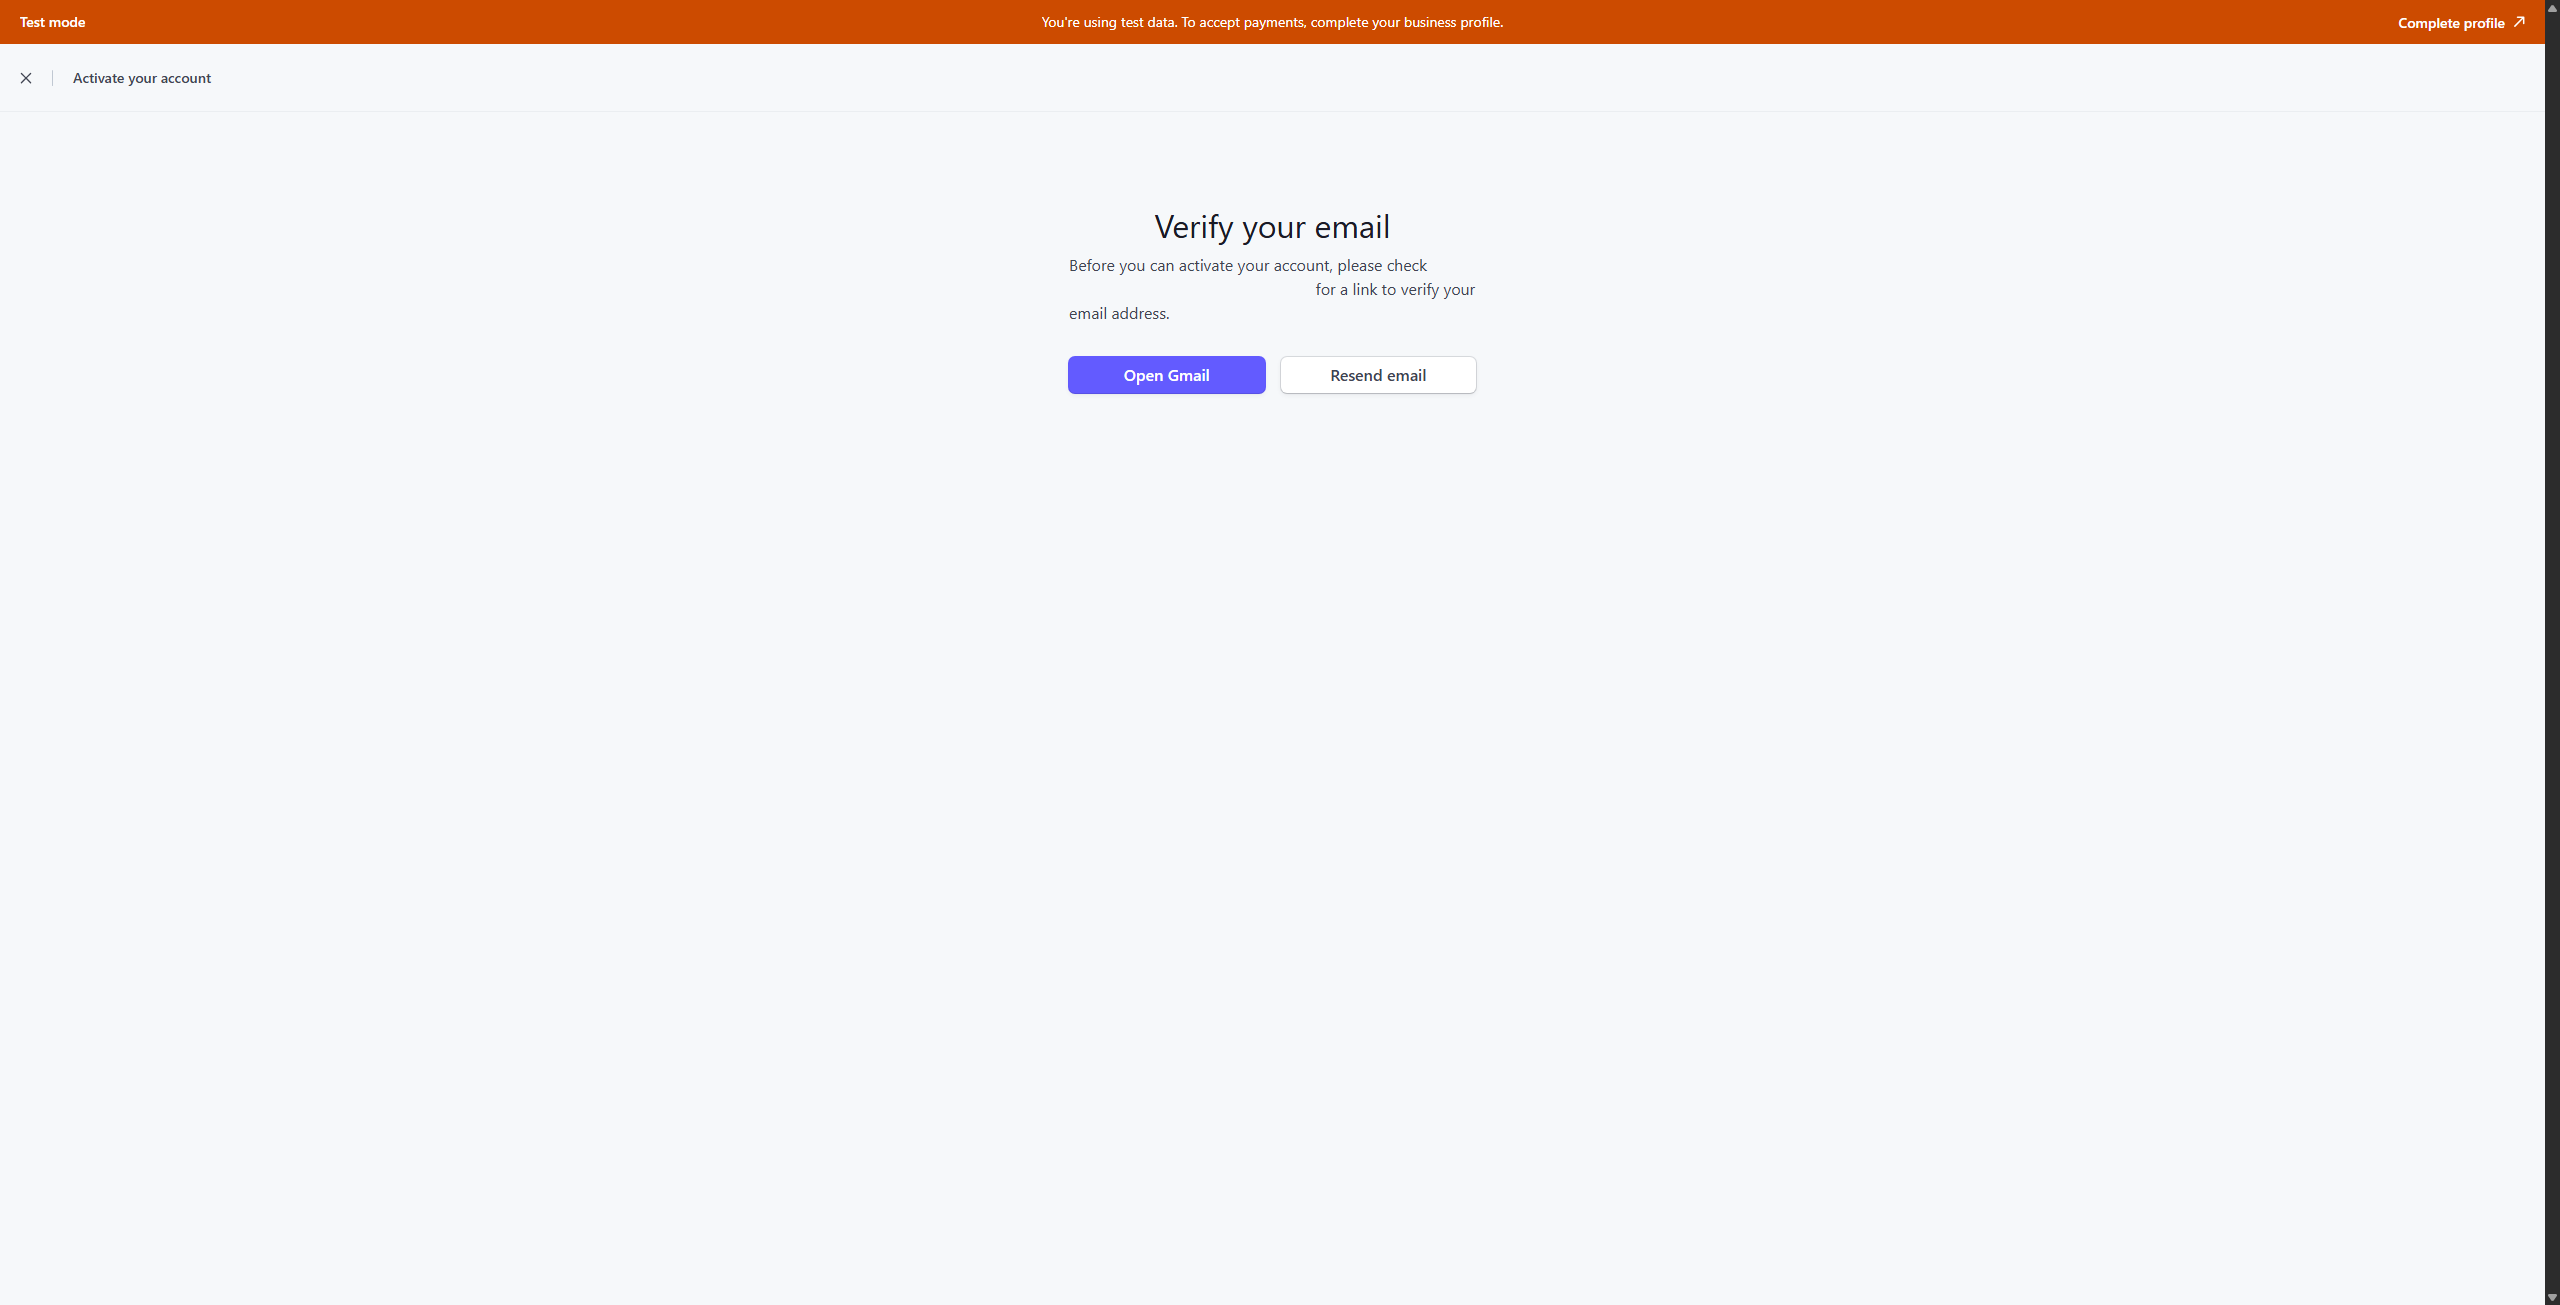
Verify your email address:
- If not done so earlier, go to your email and verify your email. If you can’t find the email, click on the “Resend email” button, and then verify your email.
-
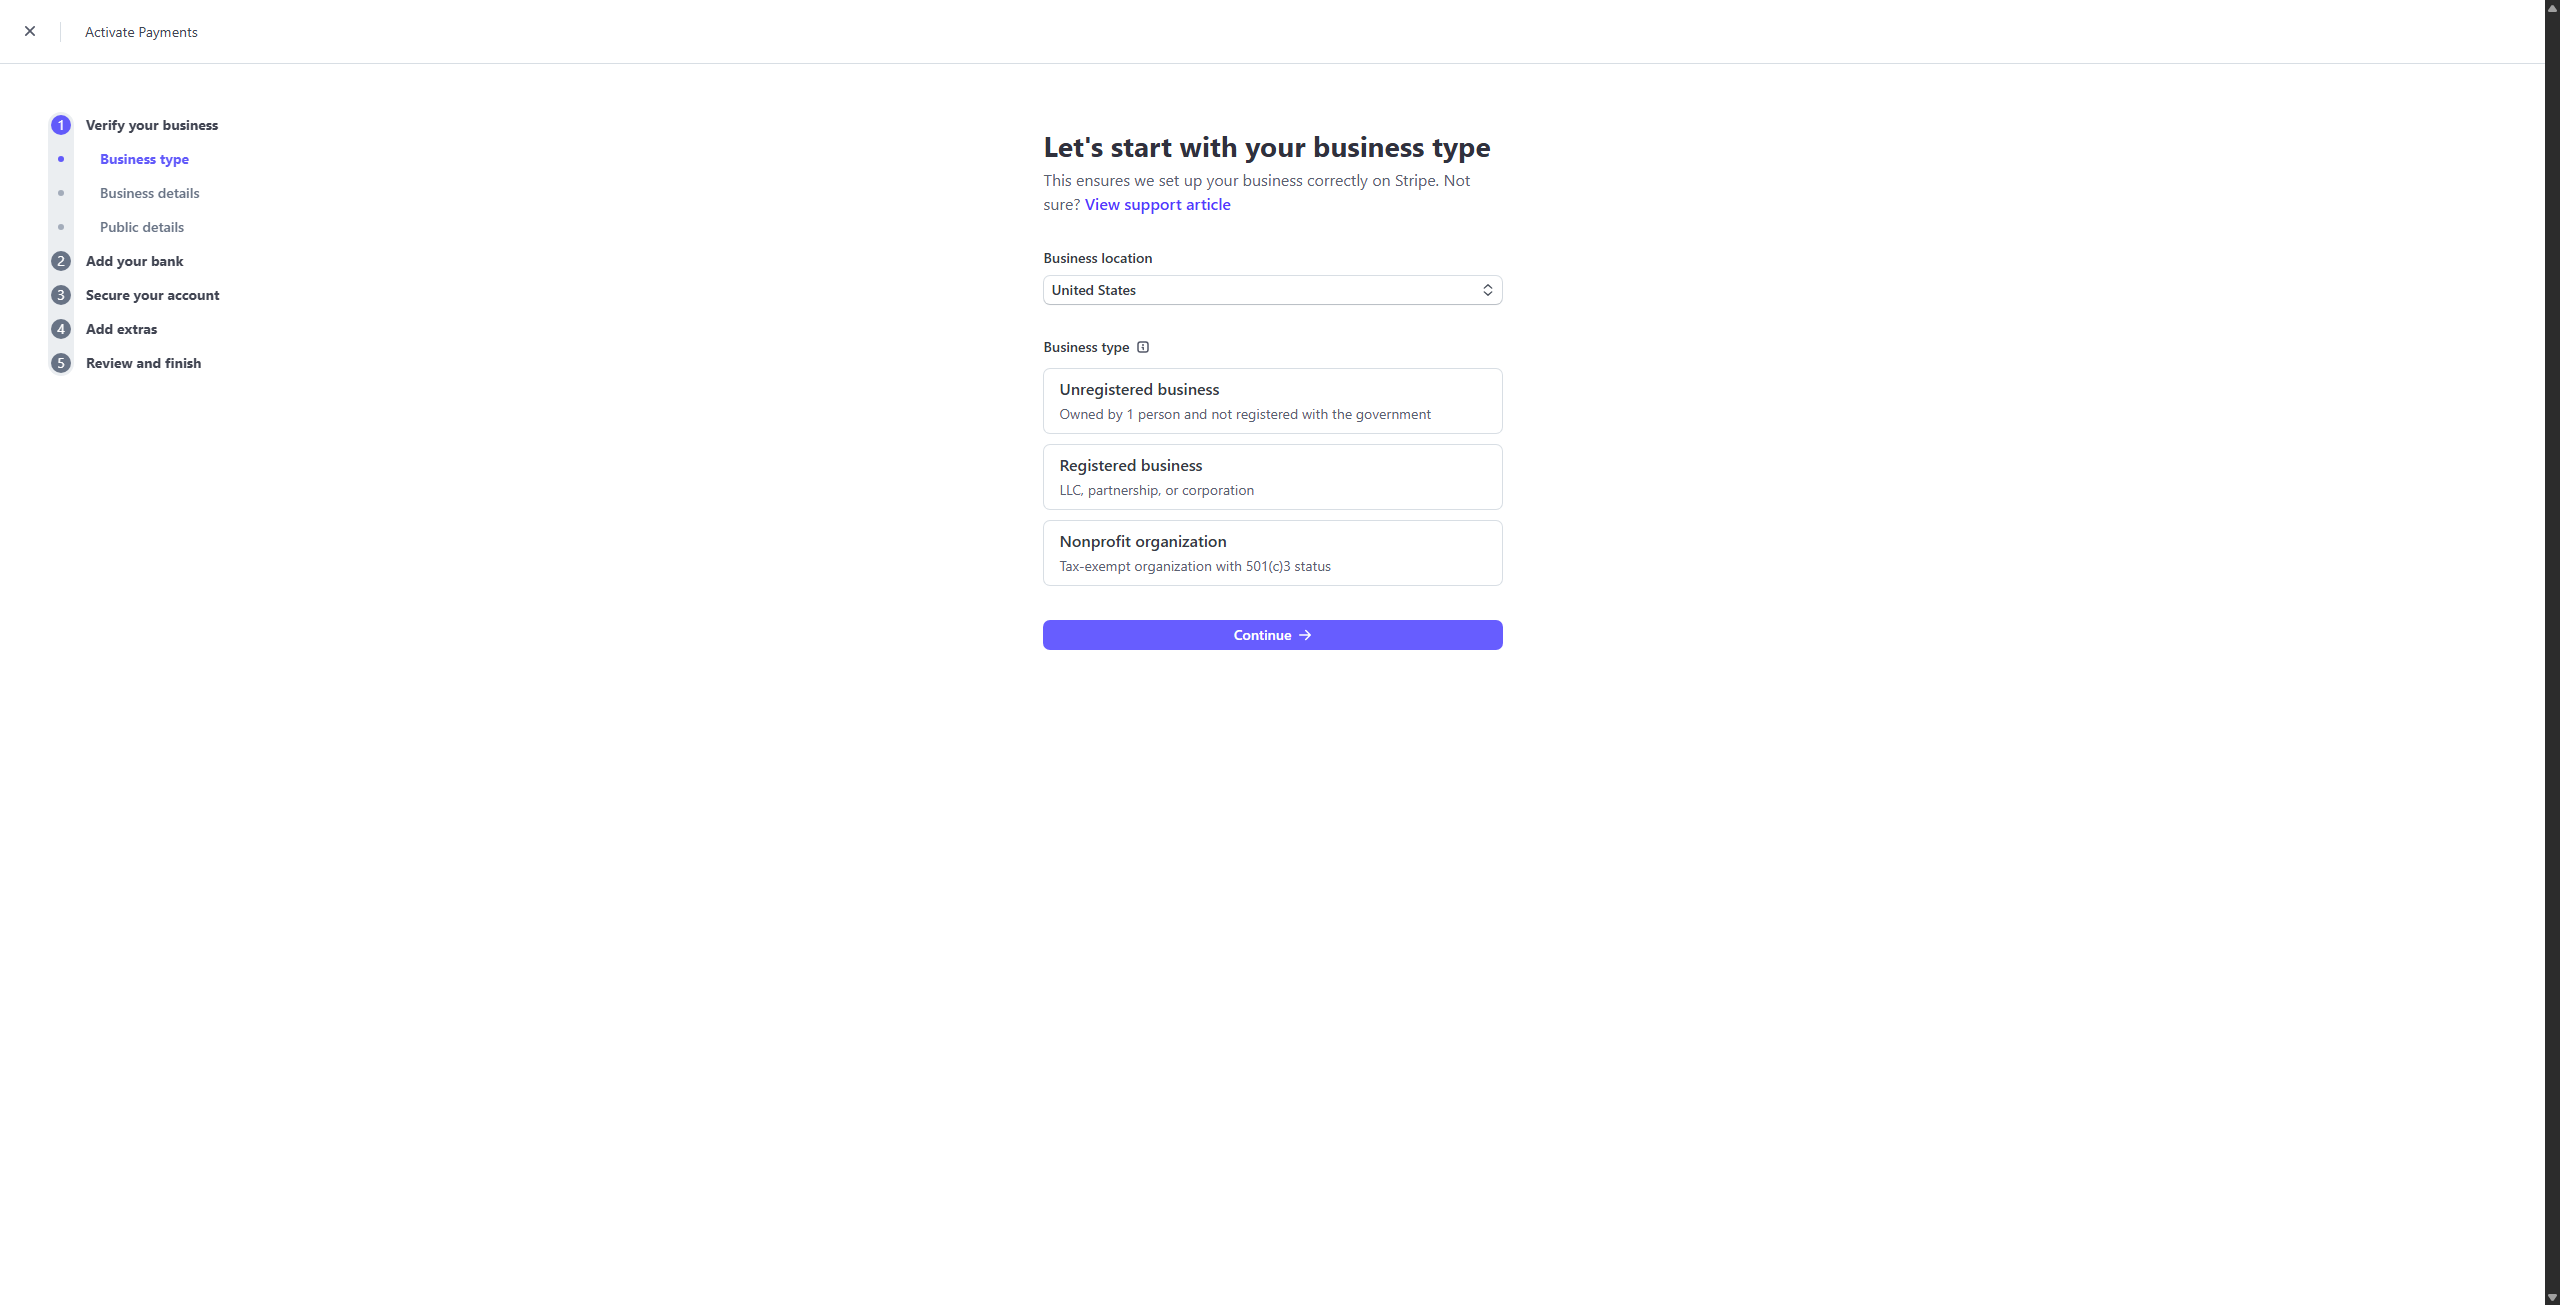
Fill Out Business Information:
- Provide the required legal details, business information, and bank account details for payouts.
-
Review and Submit:
- On the summary step, review all provided information carefully.
- Click “Agree and submit” to activate your Stripe account fully.
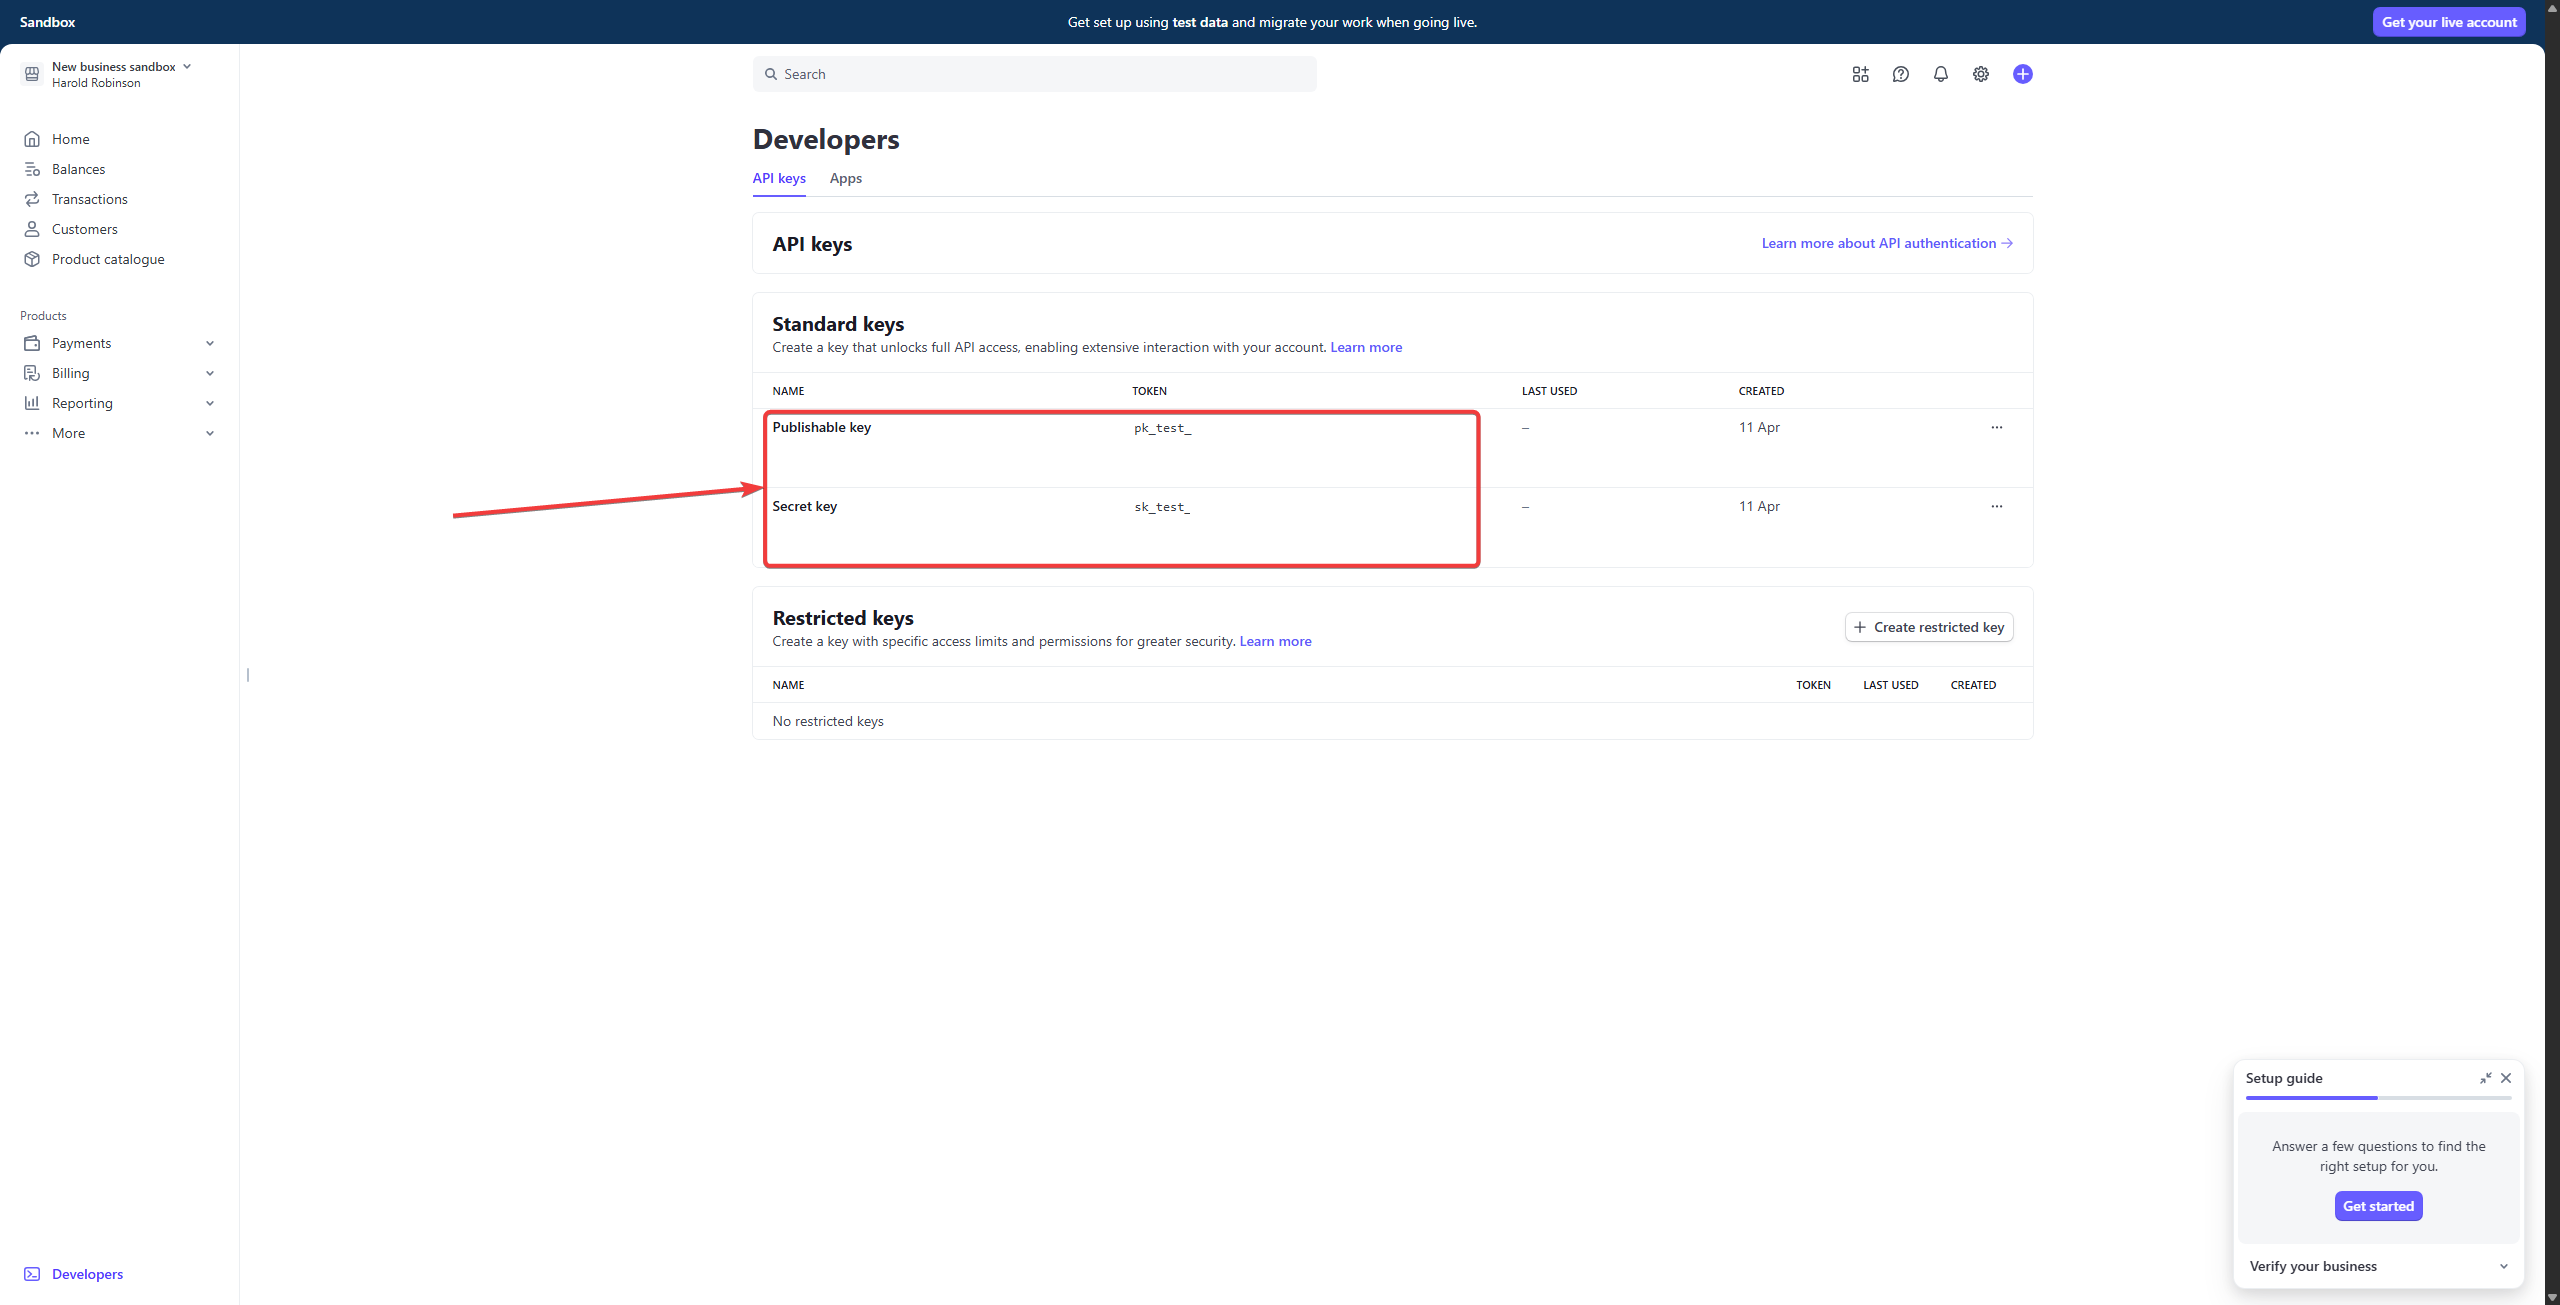
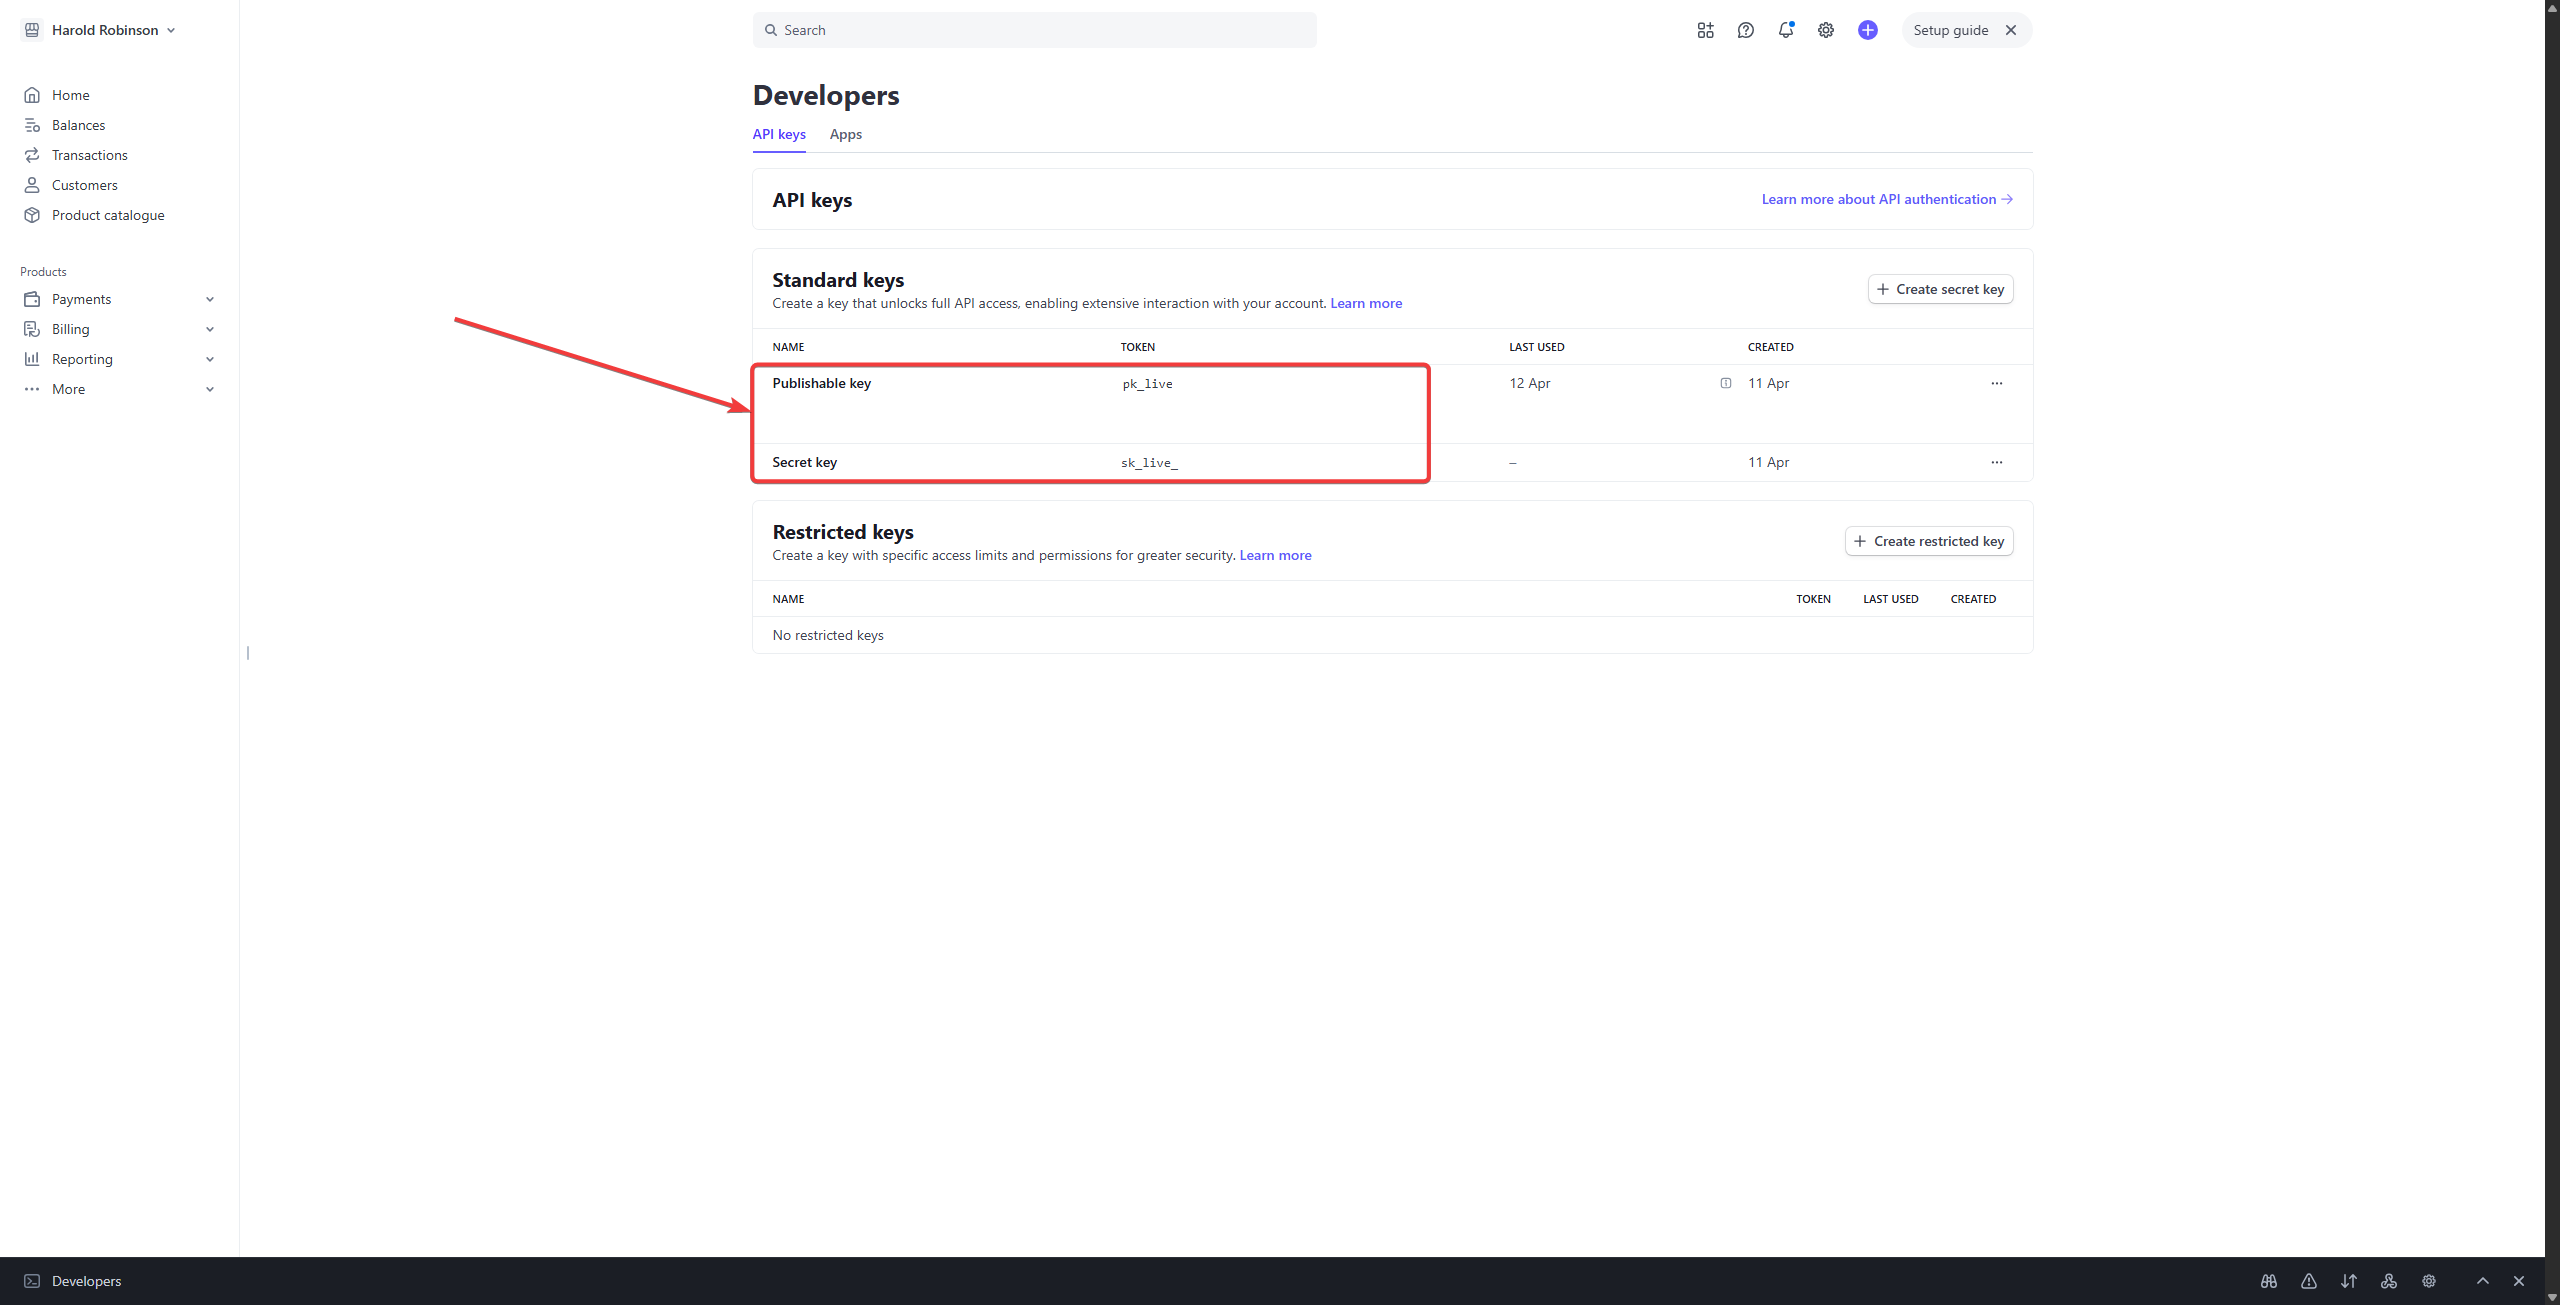
Step 3: Obtaining Stripe API Keys
Once your Stripe account is activated, you need the API keys to link it with Booknetic:
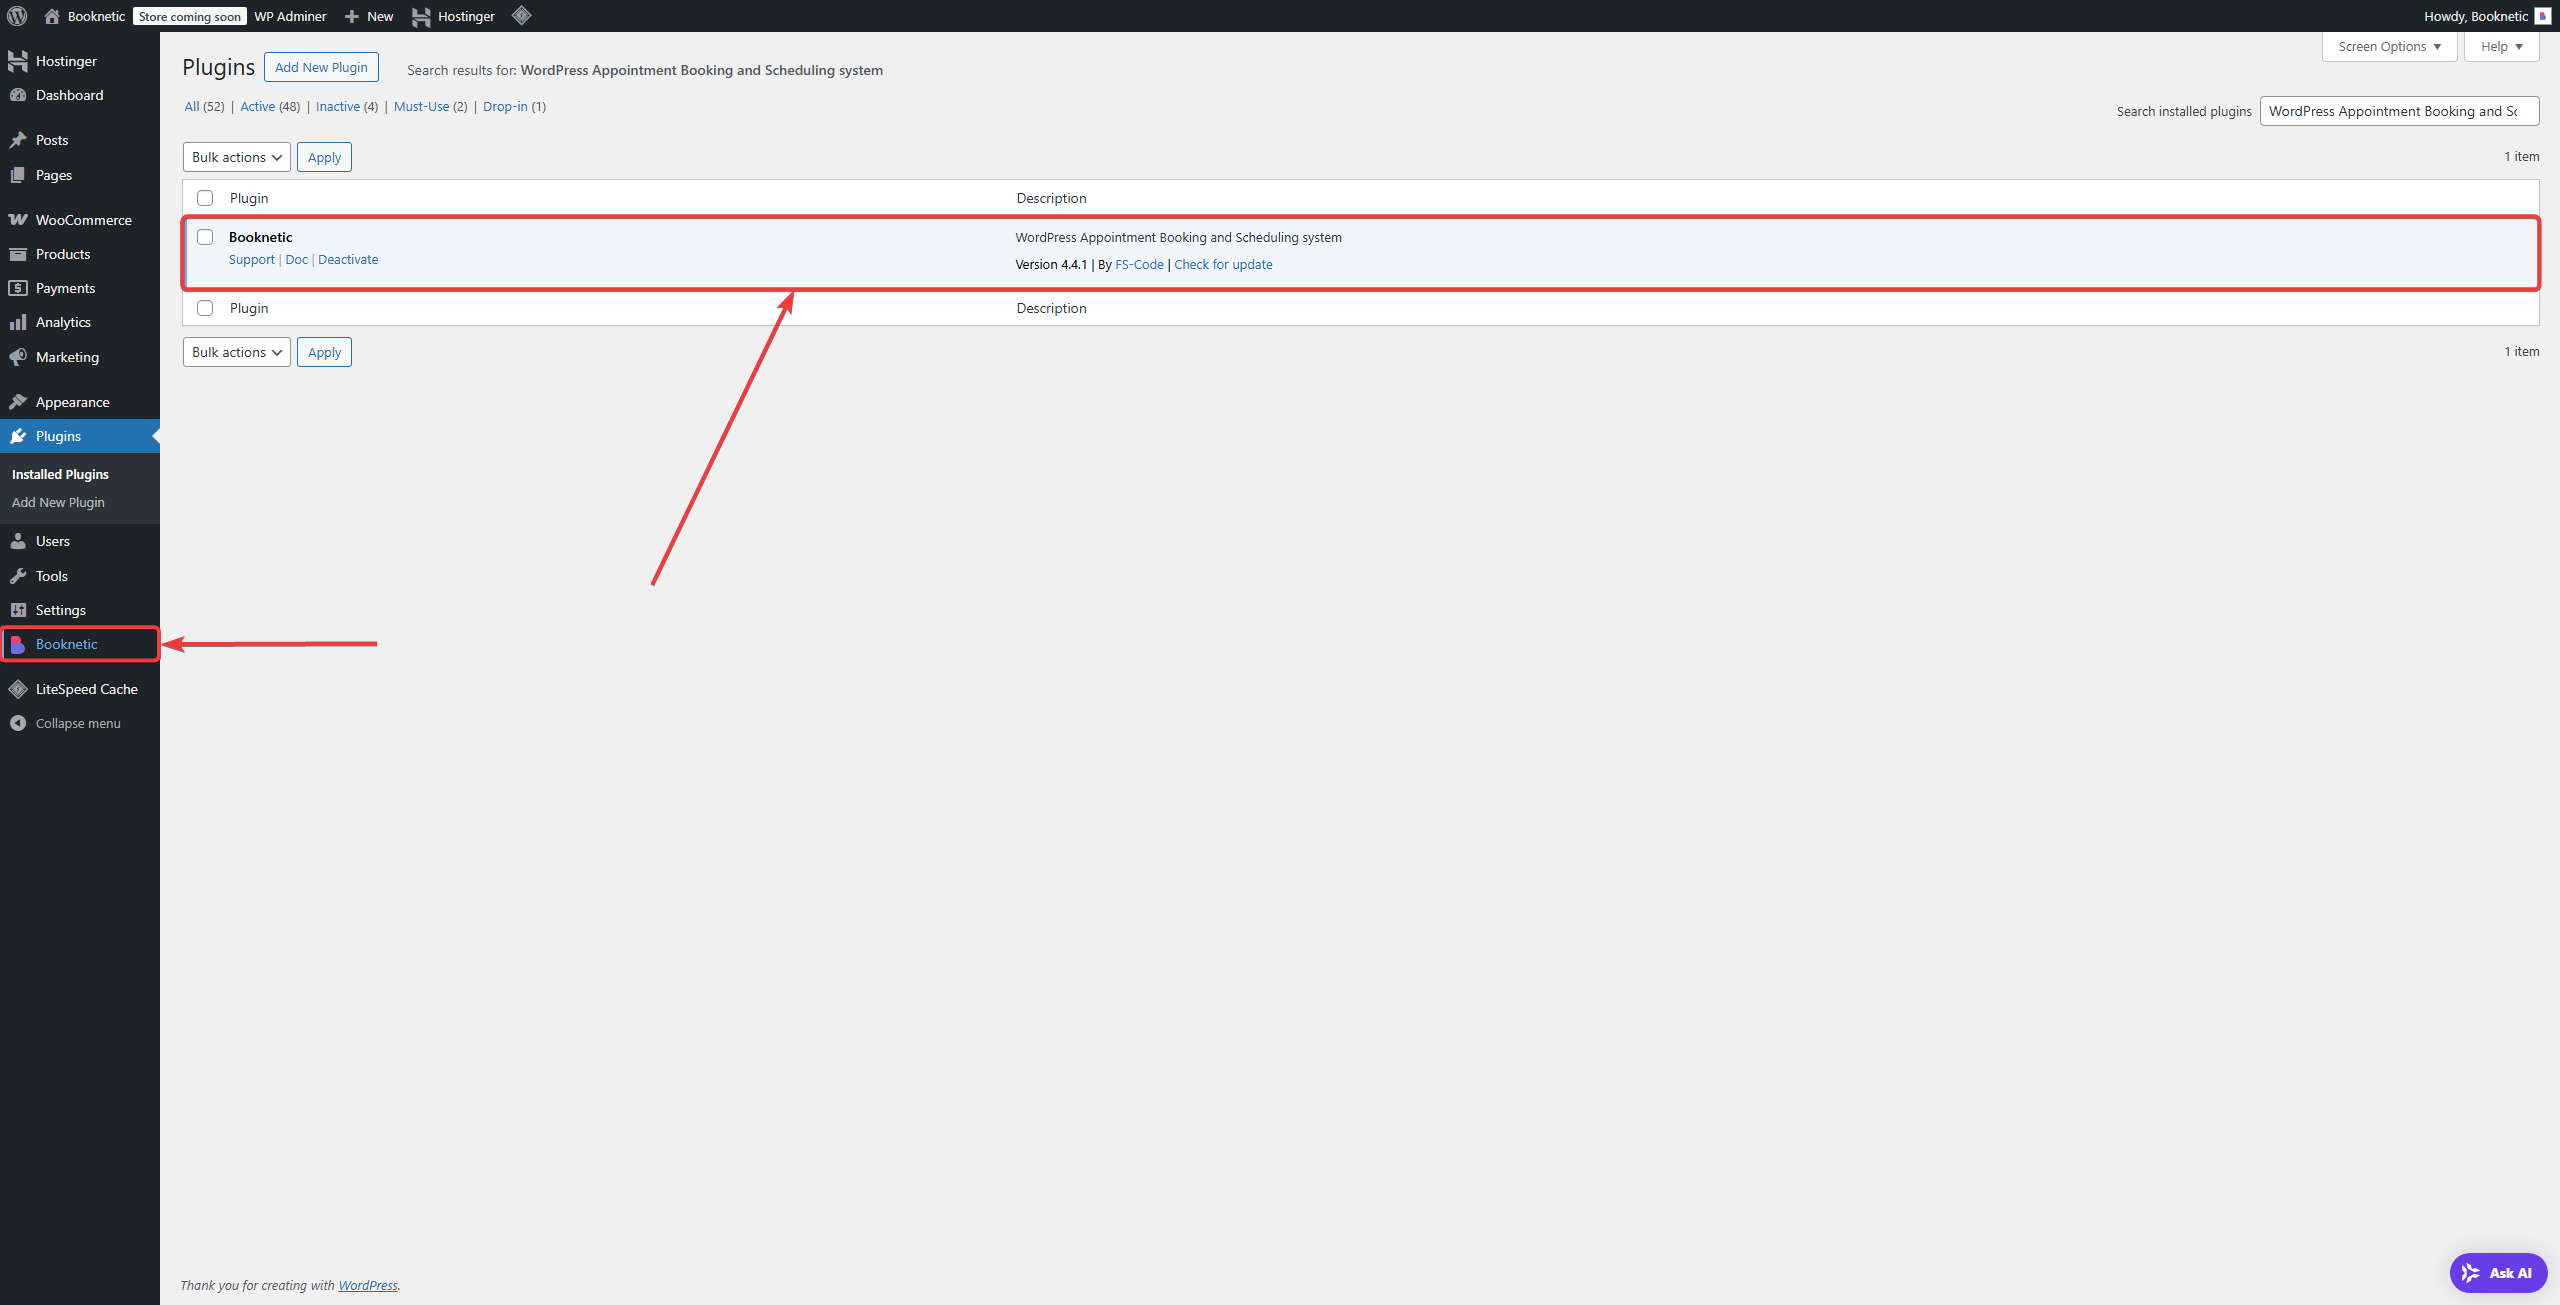
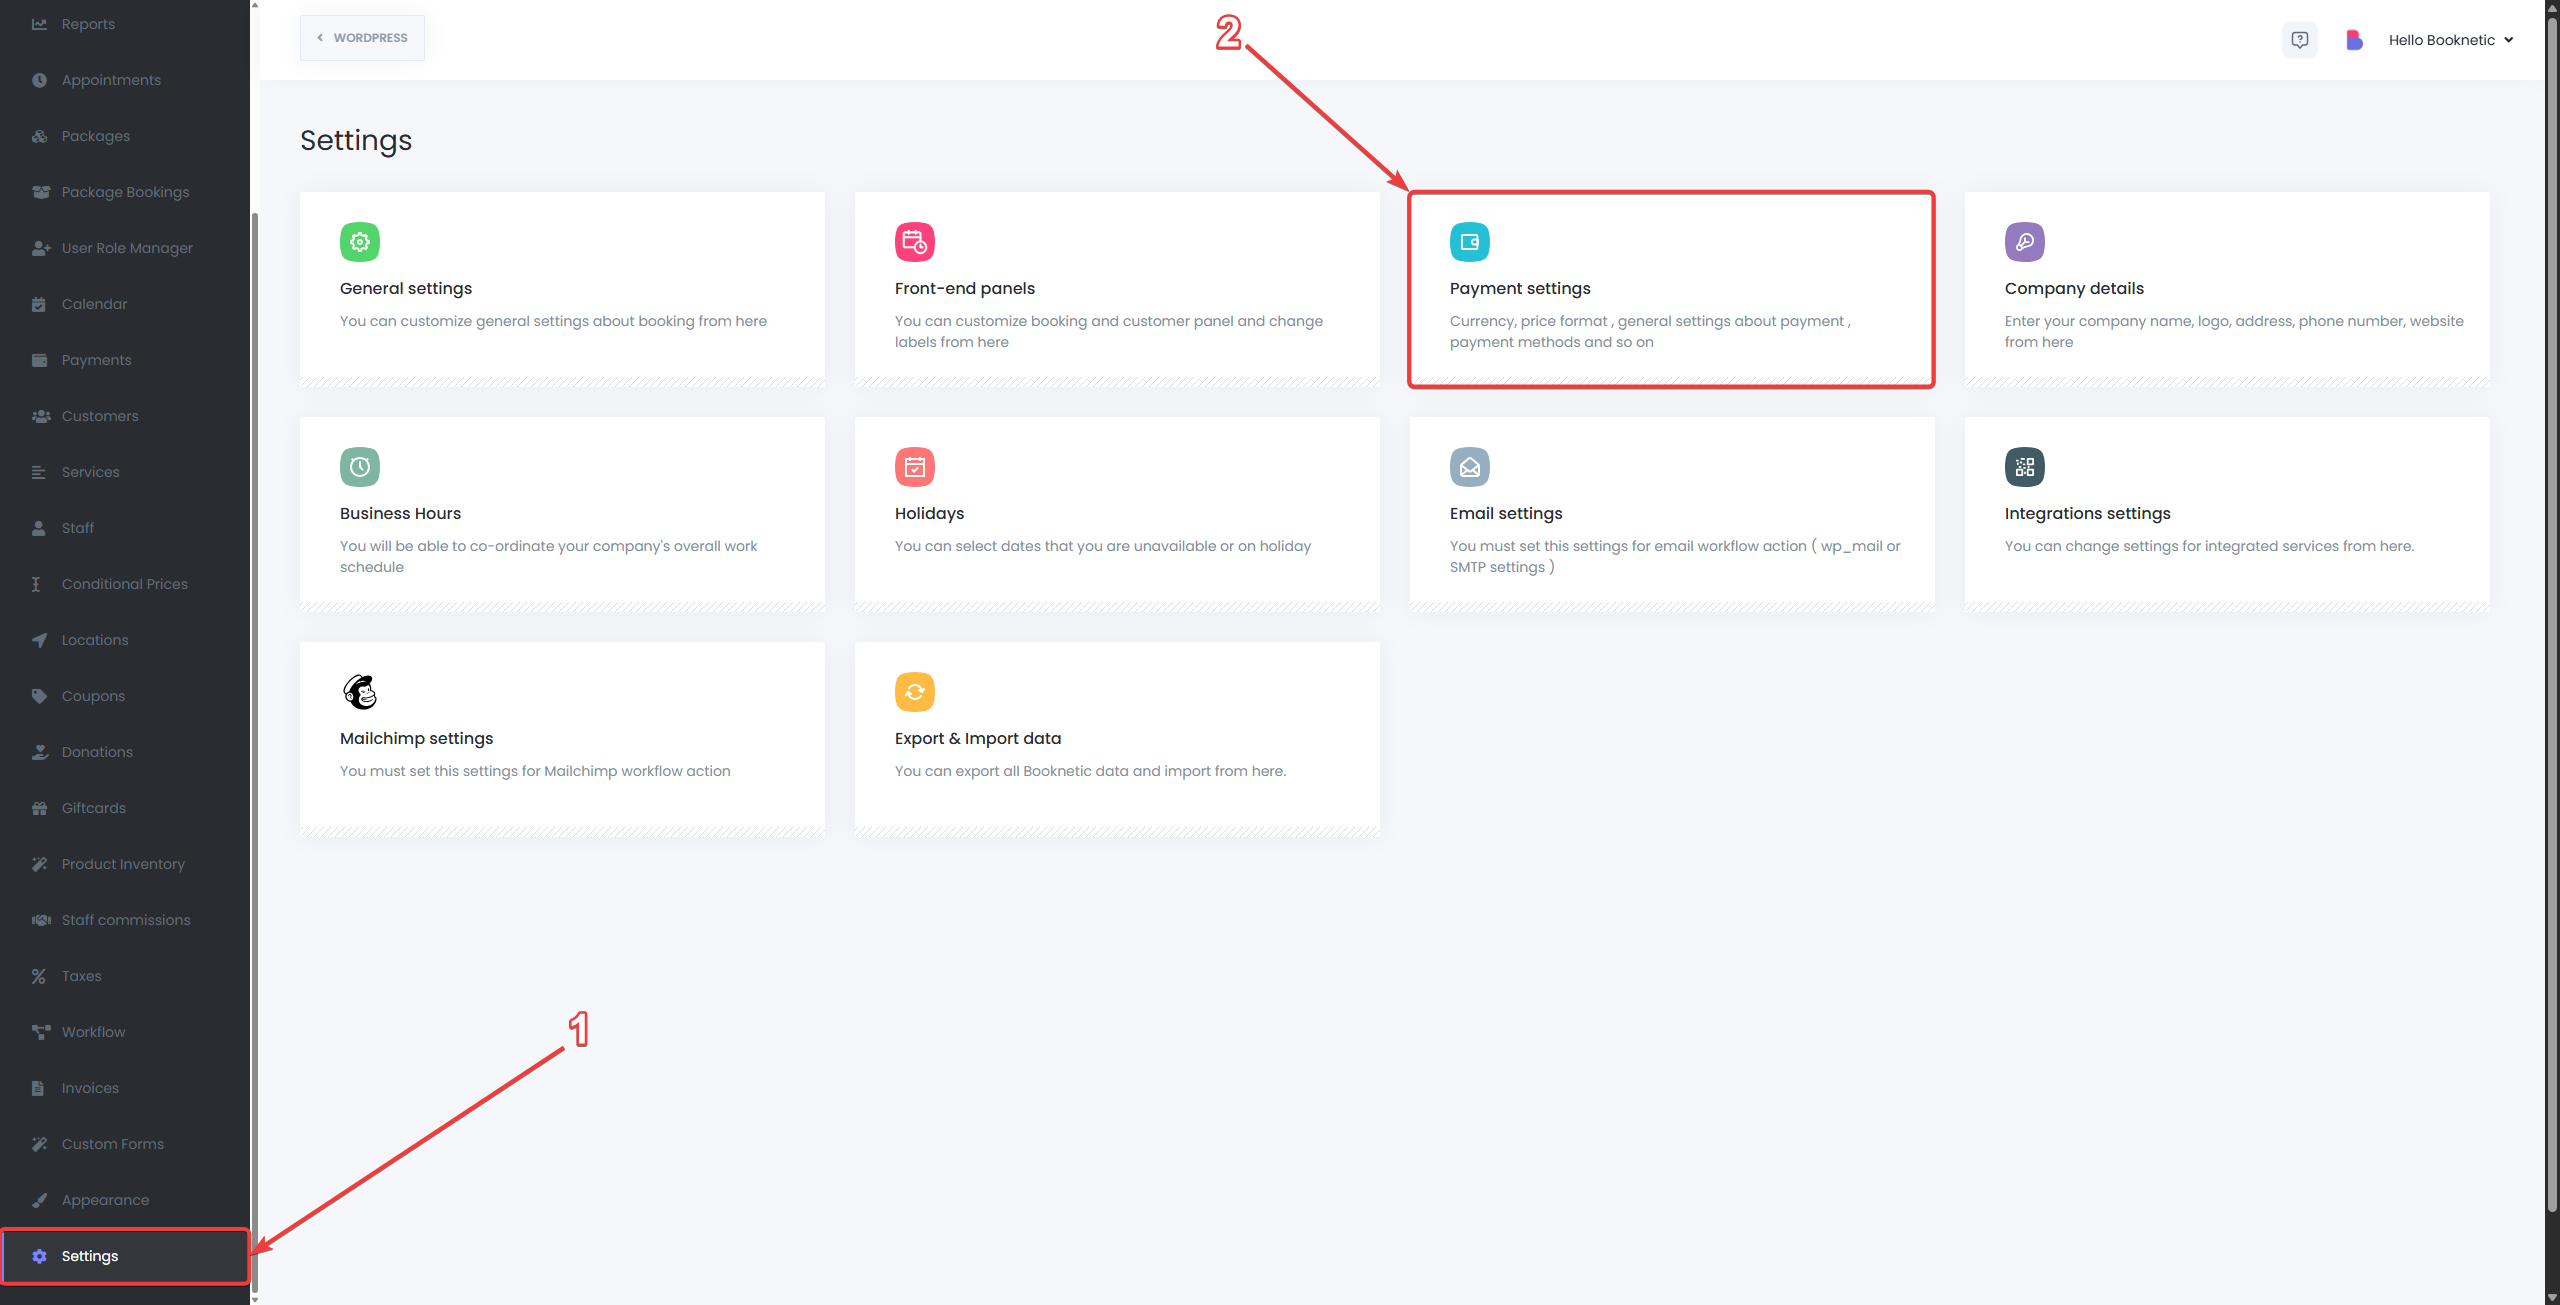
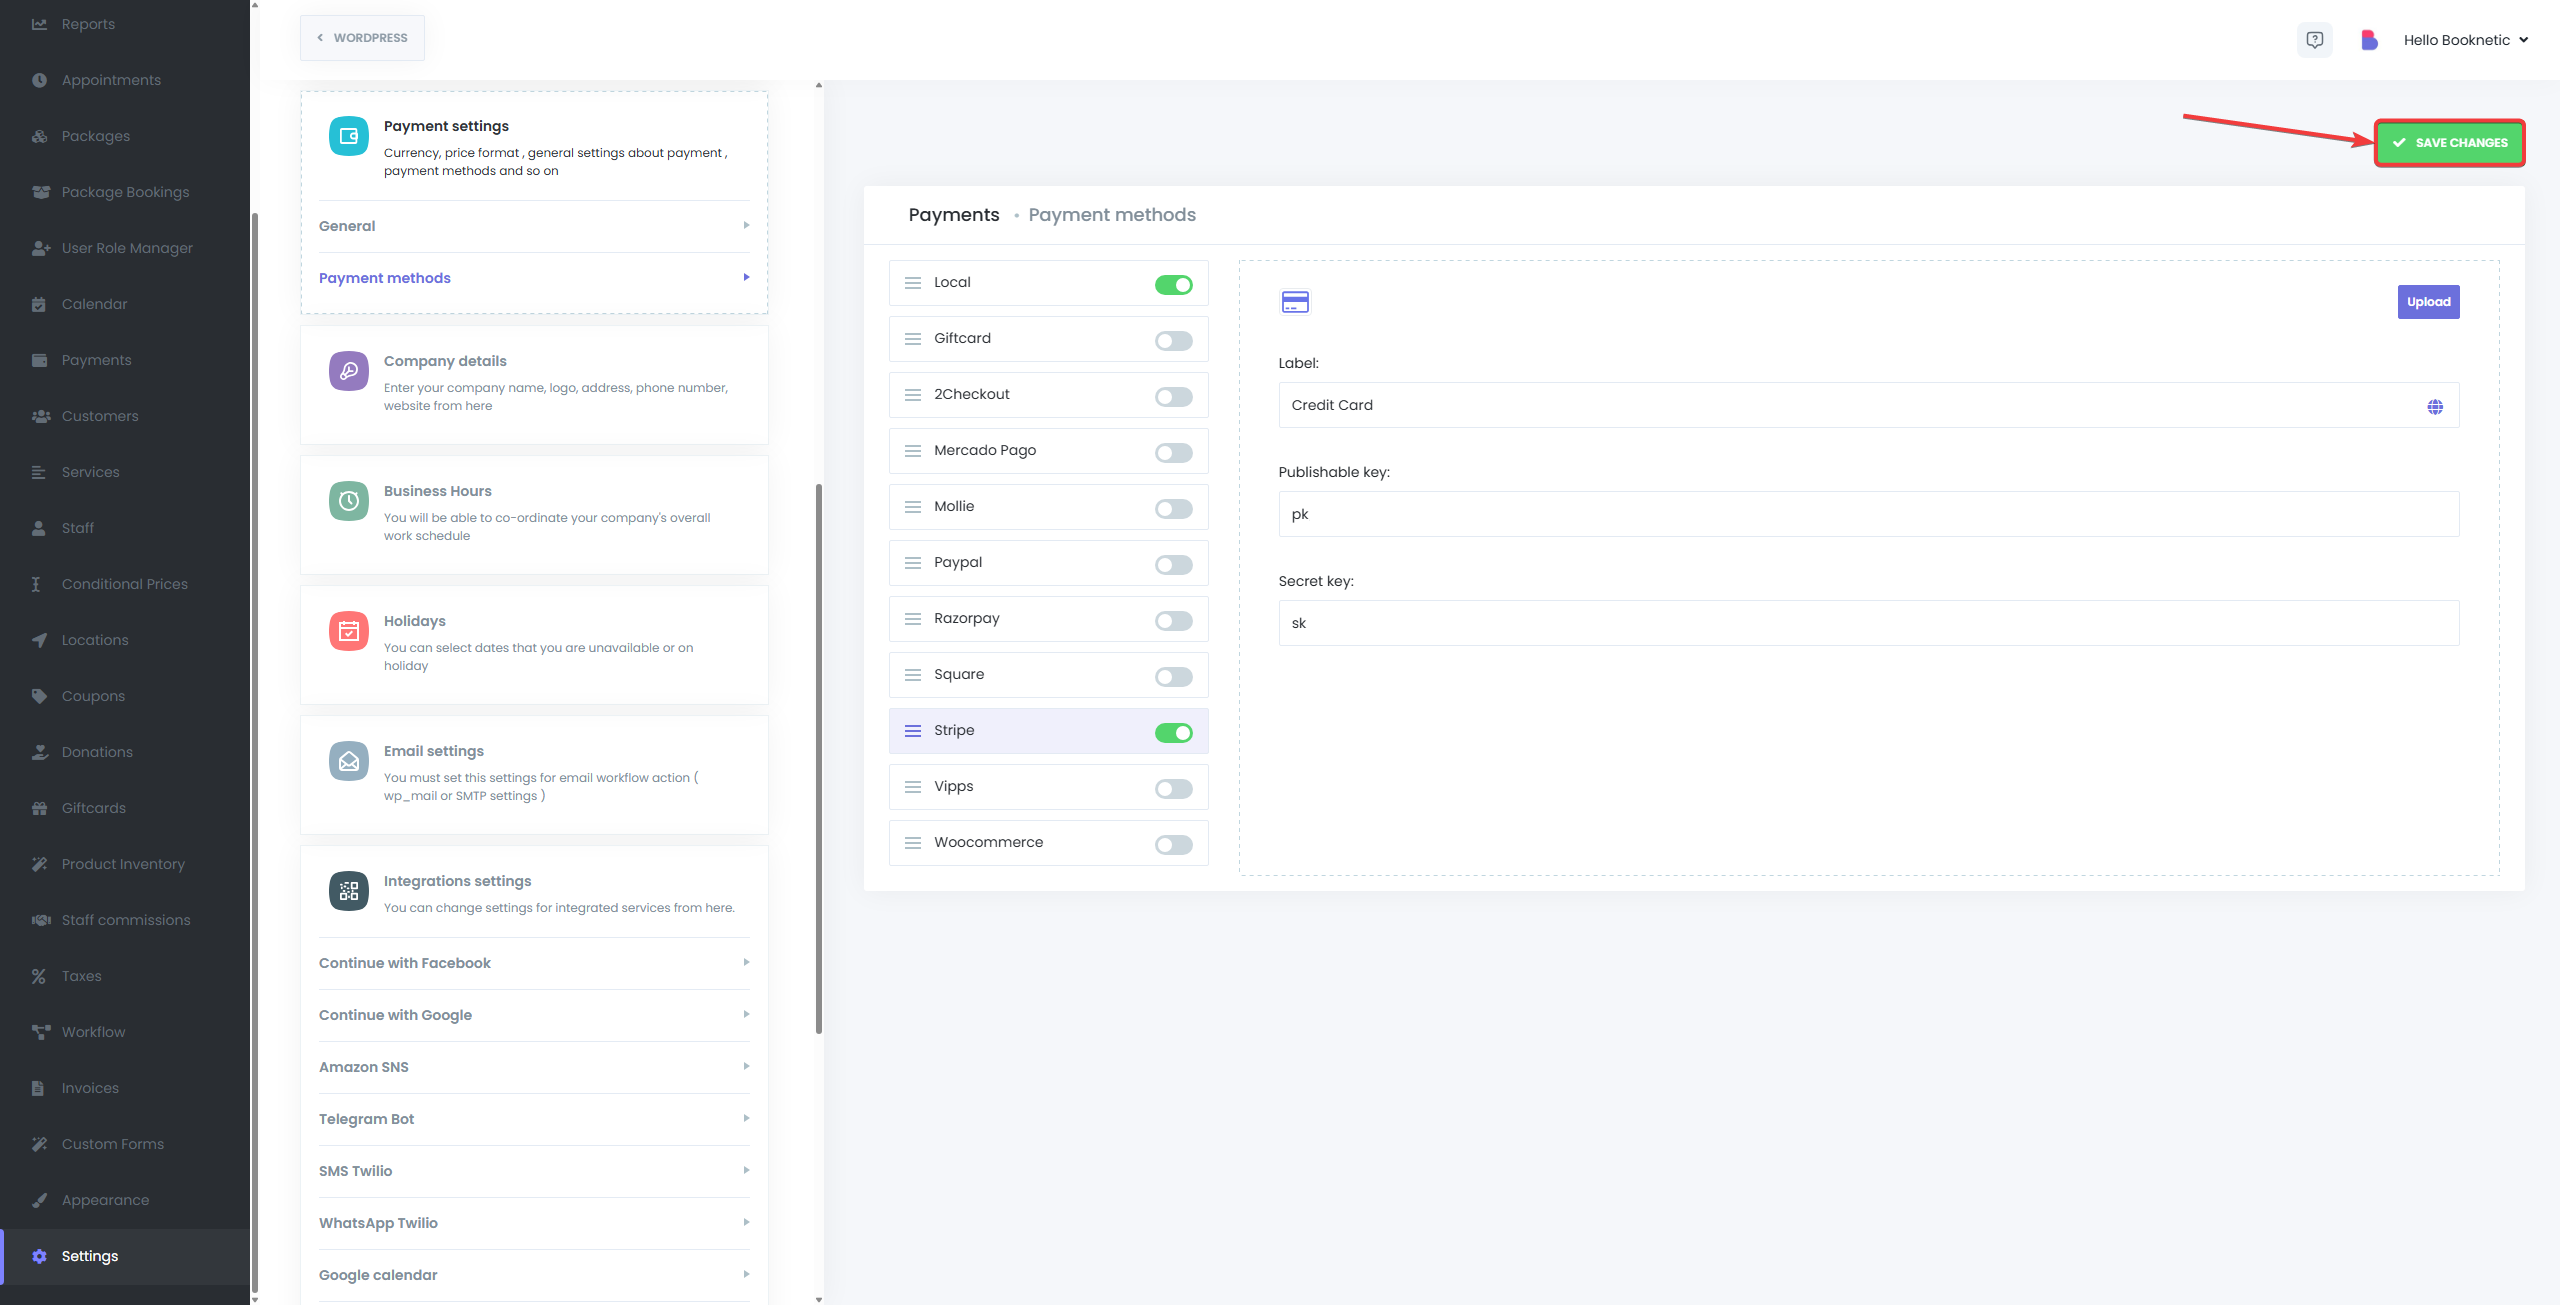
Step 4: Configuring Stripe in Booknetic
Now you need to integrate these keys into Booknetic:
-
Navigate to Booknetic Payment Settings:
- Log into your Booknetic Admin Panel.
- Go to Settings > Payment Methods.
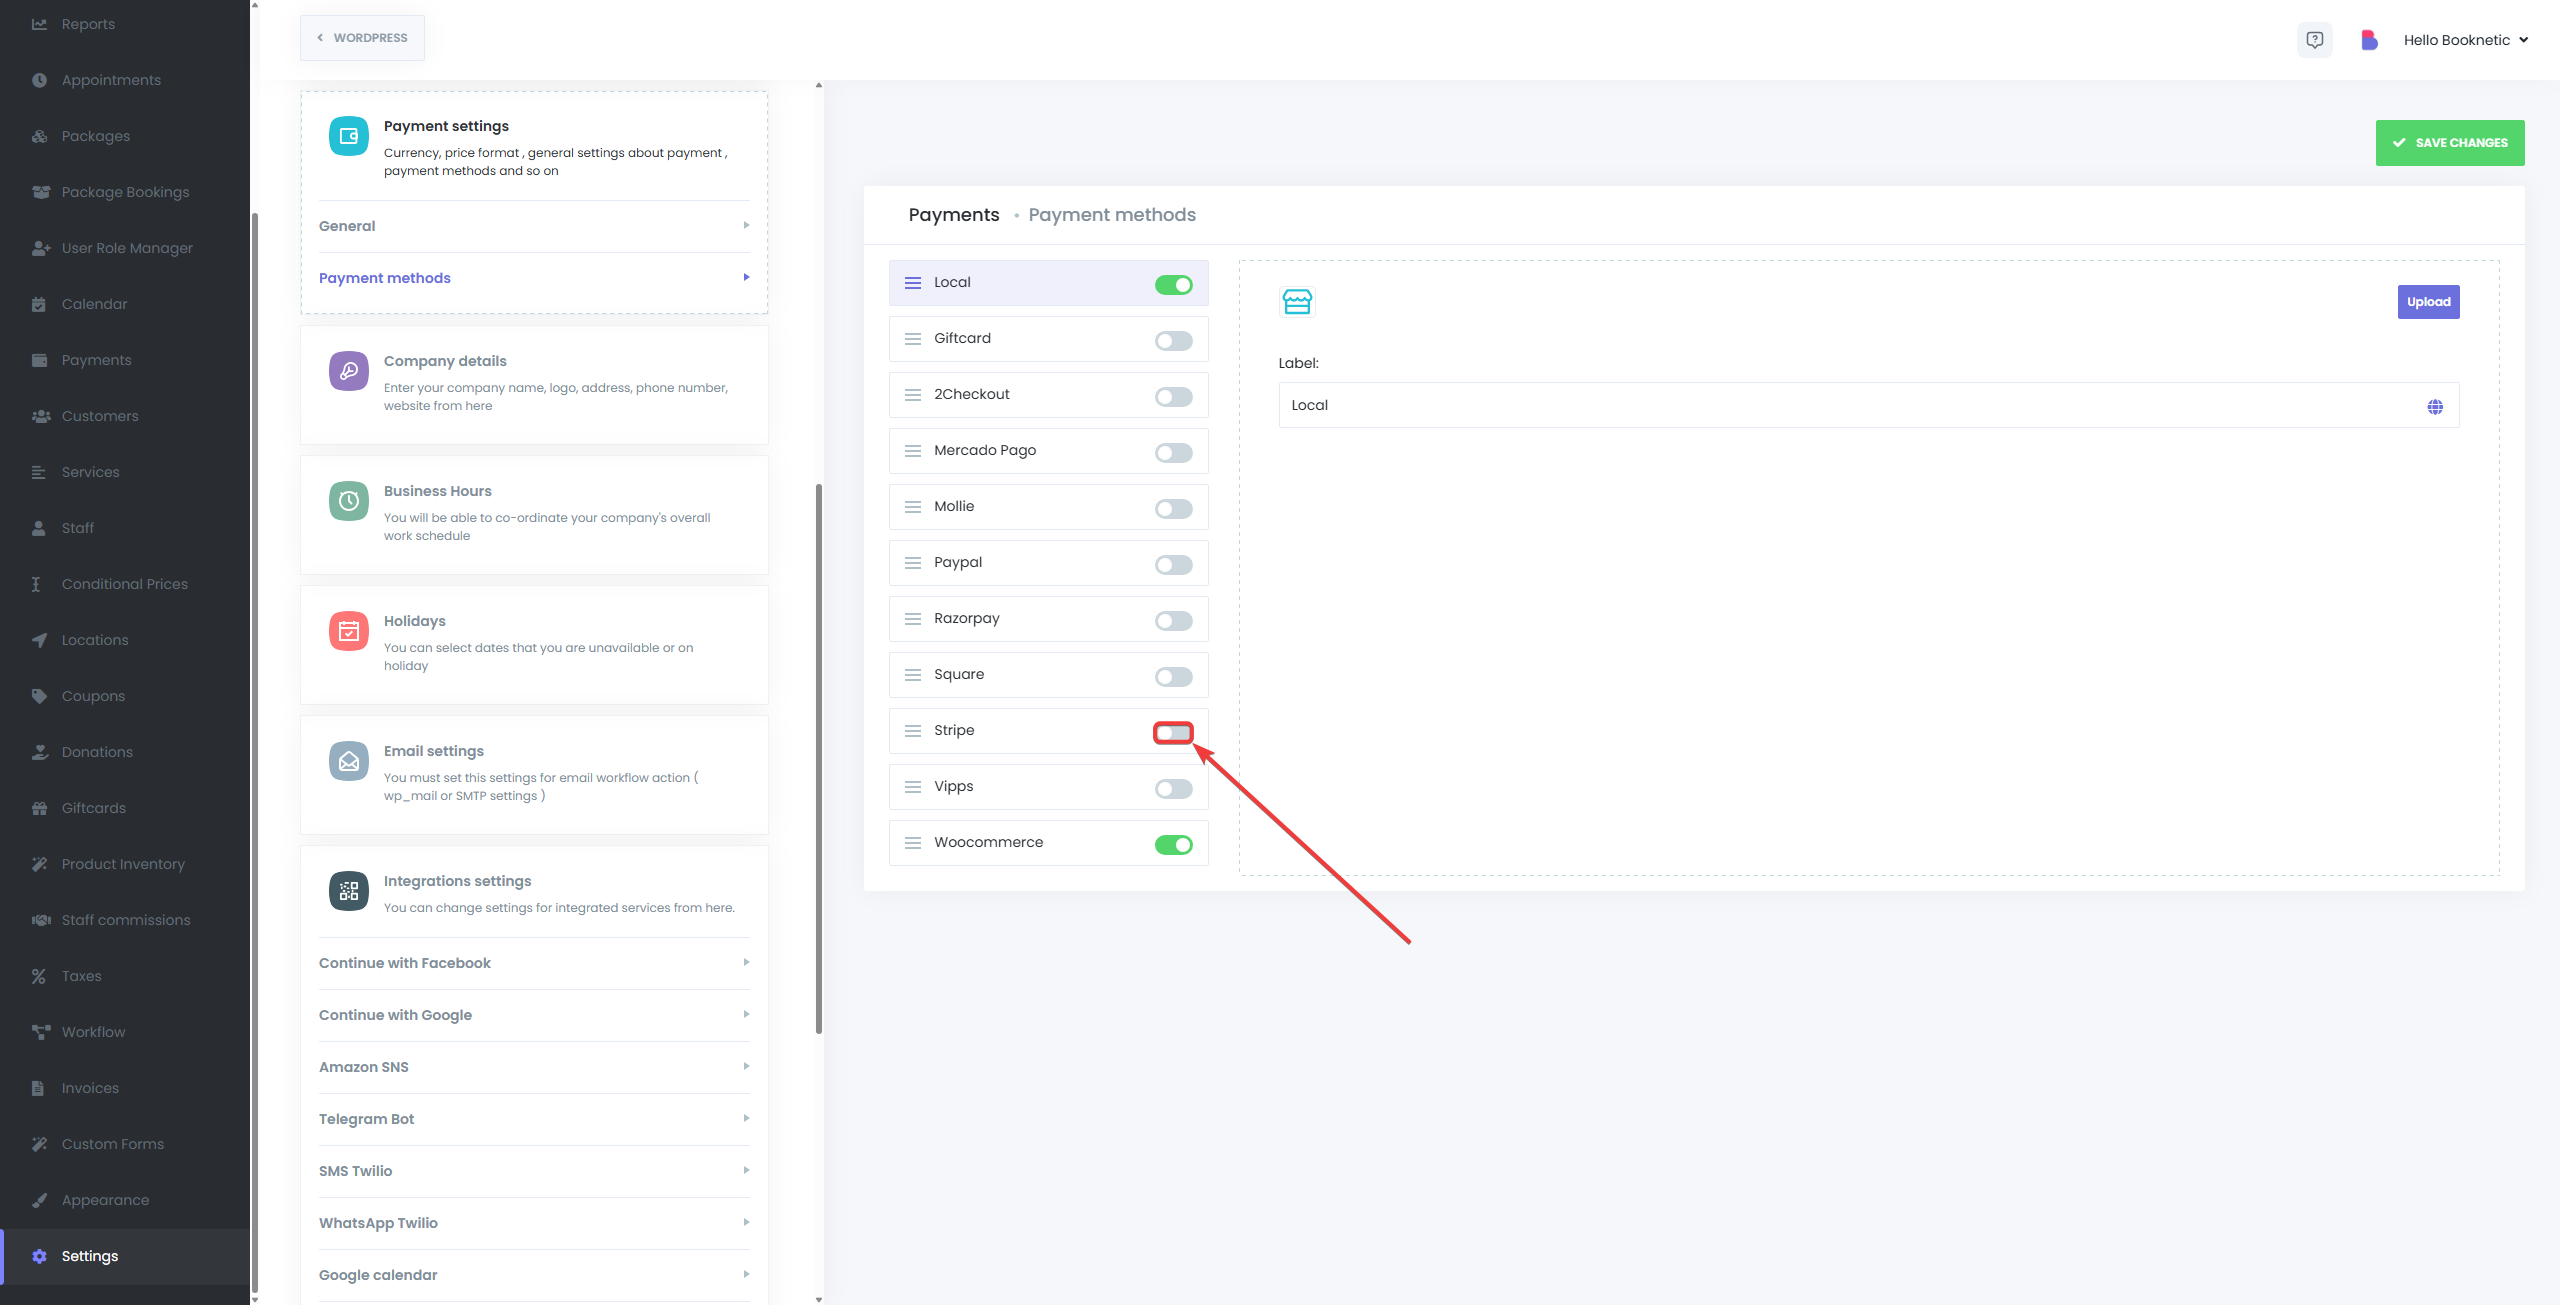
-
Enable Stripe:
- Locate the Stripe option and toggle it ON to enable.
-
Paste Stripe API Keys:
- Paste the copied Publishable Key and Secret Key from your Stripe Dashboard into the corresponding fields in Booknetic.
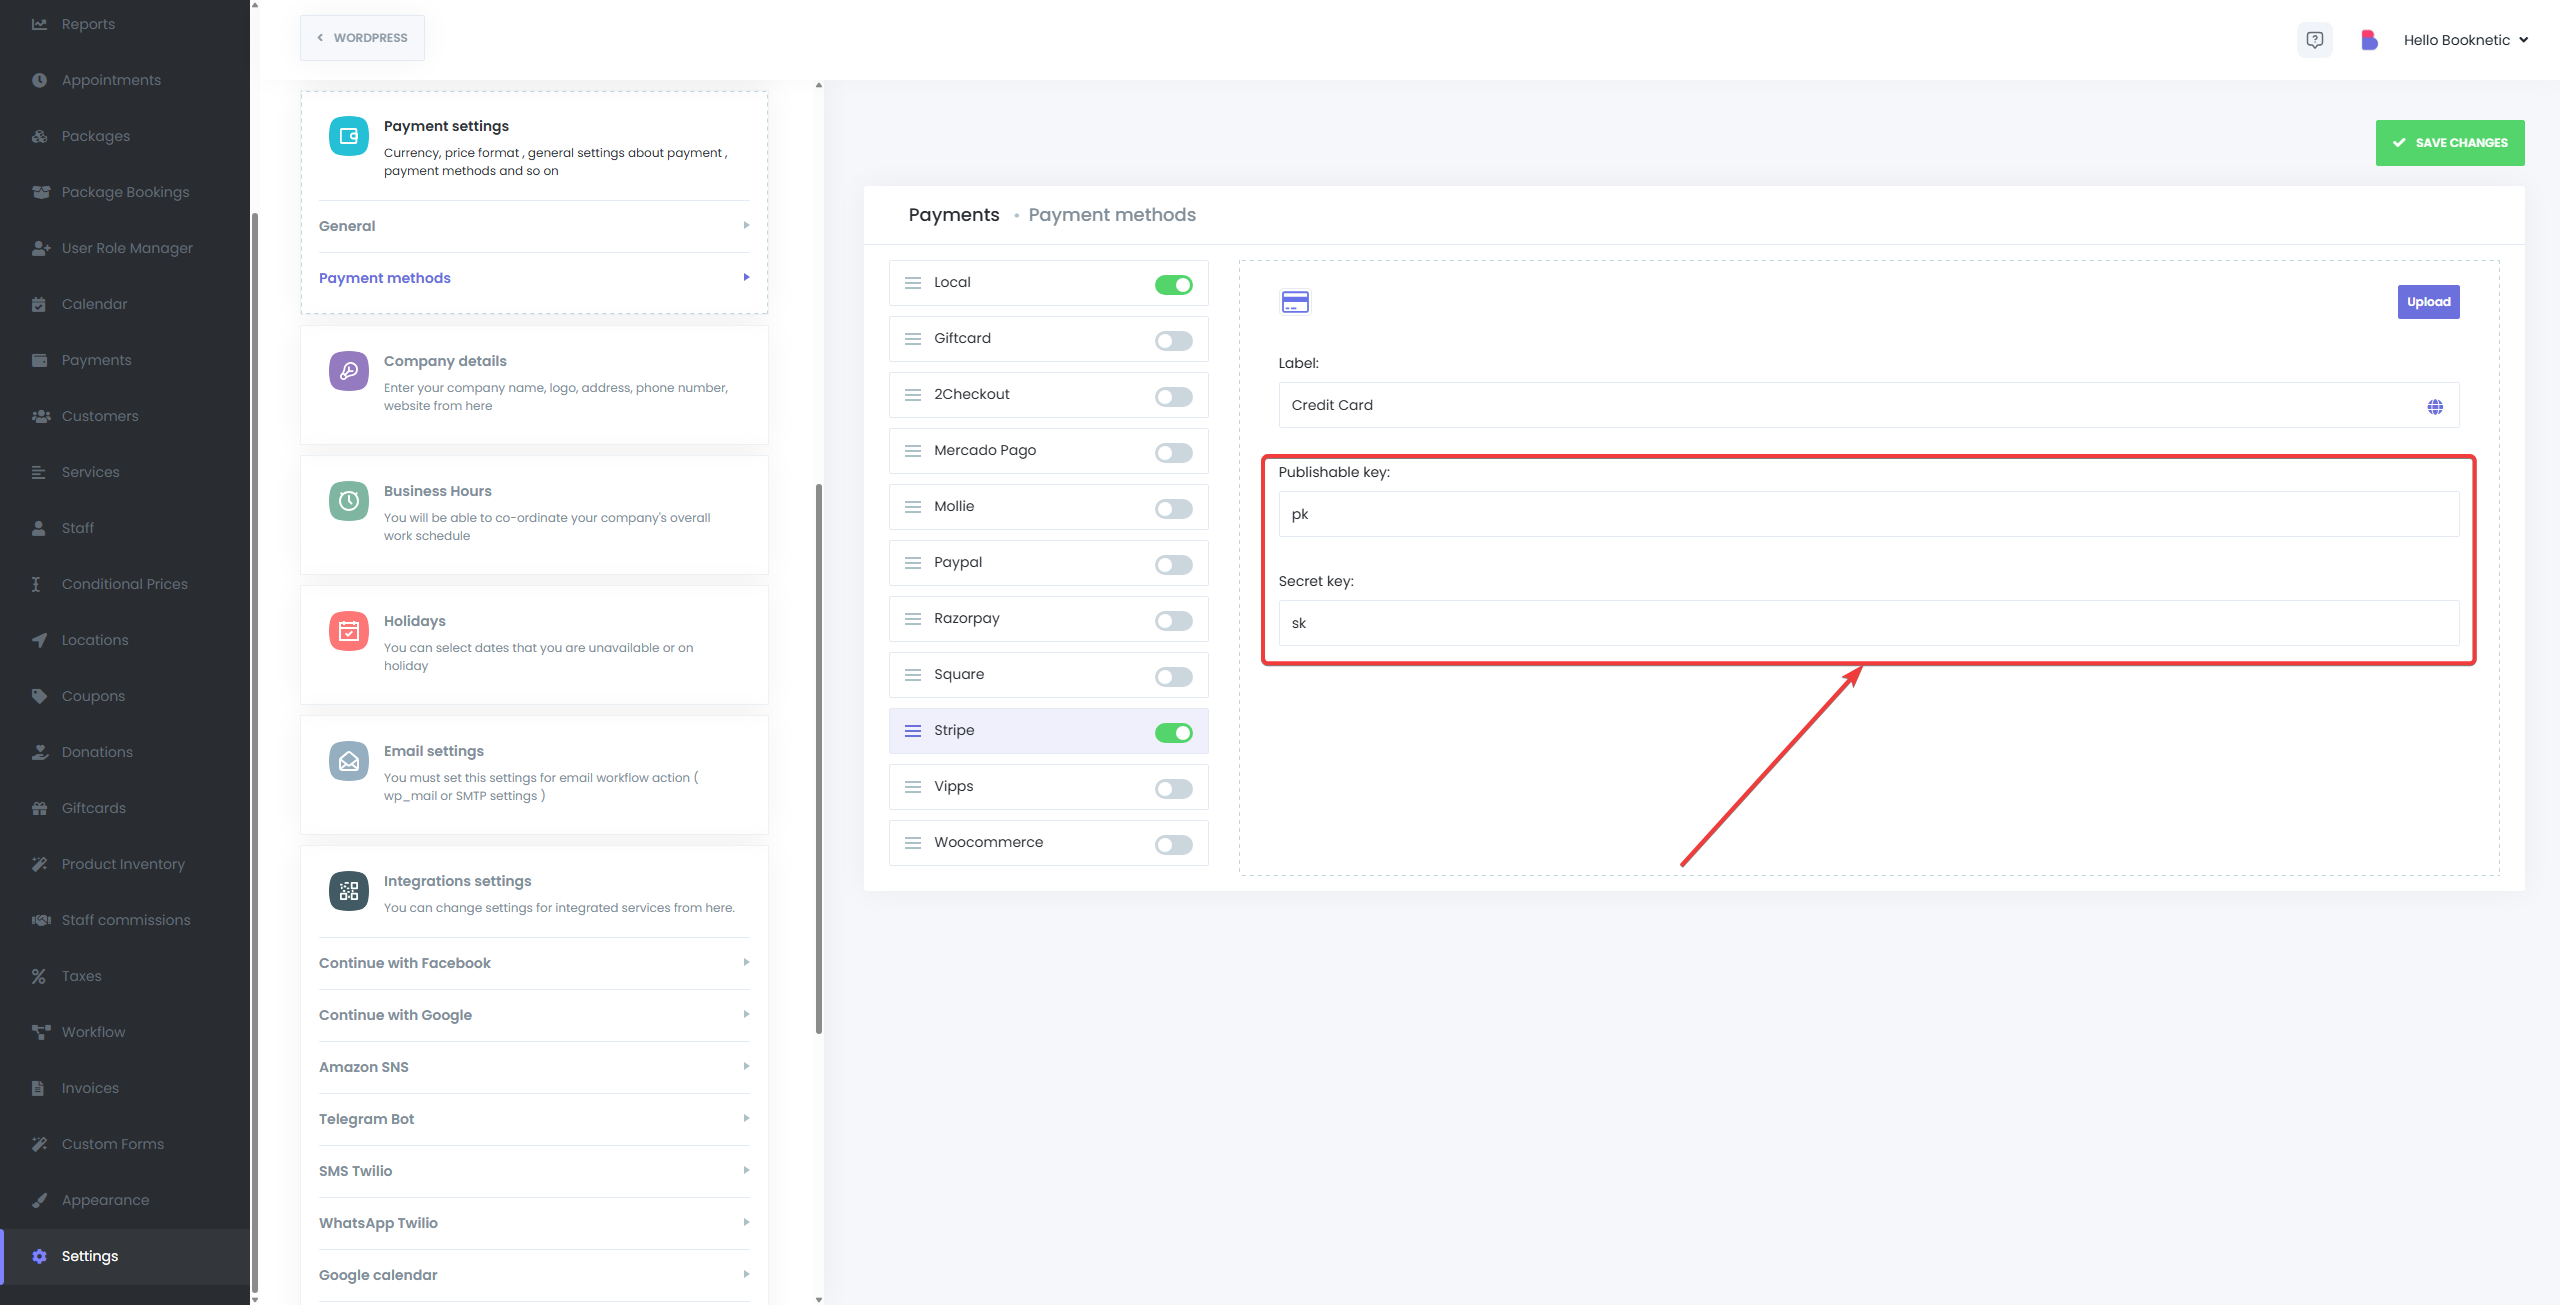
-
Save Your Settings:
- Click “Save” to apply your configuration.
Testing Stripe Payments
To ensure your integration works correctly, consider testing with Stripe's test mode:
- Use Stripe Test Credentials in your Booknetic settings.
- Make a test appointment booking and select Stripe for payment.
- Stripe provides test card numbers (view here) to simulate successful or failed payments.
Managing Stripe Payments
Once integrated, payments are processed and recorded automatically. Here’s how to manage payments:
- View Transactions in Stripe:
- Log into your Stripe Dashboard.
- Navigate to Payments to review completed or failed transactions.
- Refunds and Chargebacks:
- Process refunds or handle disputes directly through your Stripe Dashboard under Payments.
- Booknetic Appointment Status:
- Payment statuses automatically update corresponding appointments in Booknetic:
- Successful payments typically set appointments to Approved status.
- Failed payments result in appointments being marked as Pending or Rejected.
Common Issues and Troubleshooting
- Incorrect API Keys:
- Ensure the correct keys (test or live) are used depending on your mode.
- Payments Not Processing:
- Check Stripe's Dashboard for payment issues and ensure your Stripe account is active and verified.