The Zoom Integration add-on for Booknetic allows you to seamlessly schedule Zoom meetings when appointments are booked. This integration ensures that every appointment scheduled through Booknetic is automatically linked to a Zoom meeting, making it simple for businesses to host virtual appointments without manual intervention.
This documentation will guide you through the steps to integrate Zoom with Booknetic, configure the integration, and start managing Zoom meetings directly from the Booknetic platform.
Overview
The Zoom Integration enables a smooth workflow where each scheduled appointment creates a Zoom meeting. This feature is ideal for businesses offering virtual appointments, consultations, and remote services. The integration helps reduce manual work by automating the creation of Zoom meetings whenever an appointment is scheduled through Booknetic.
Setting Up Zoom Integration
Step 1: Create a Zoom App in the Zoom Marketplace
To integrate Zoom with Booknetic, you first need to create an app in the Zoom Marketplace:
-
Sign in to Zoom
Go to the Zoom Marketplace and sign in with your Zoom account.

-
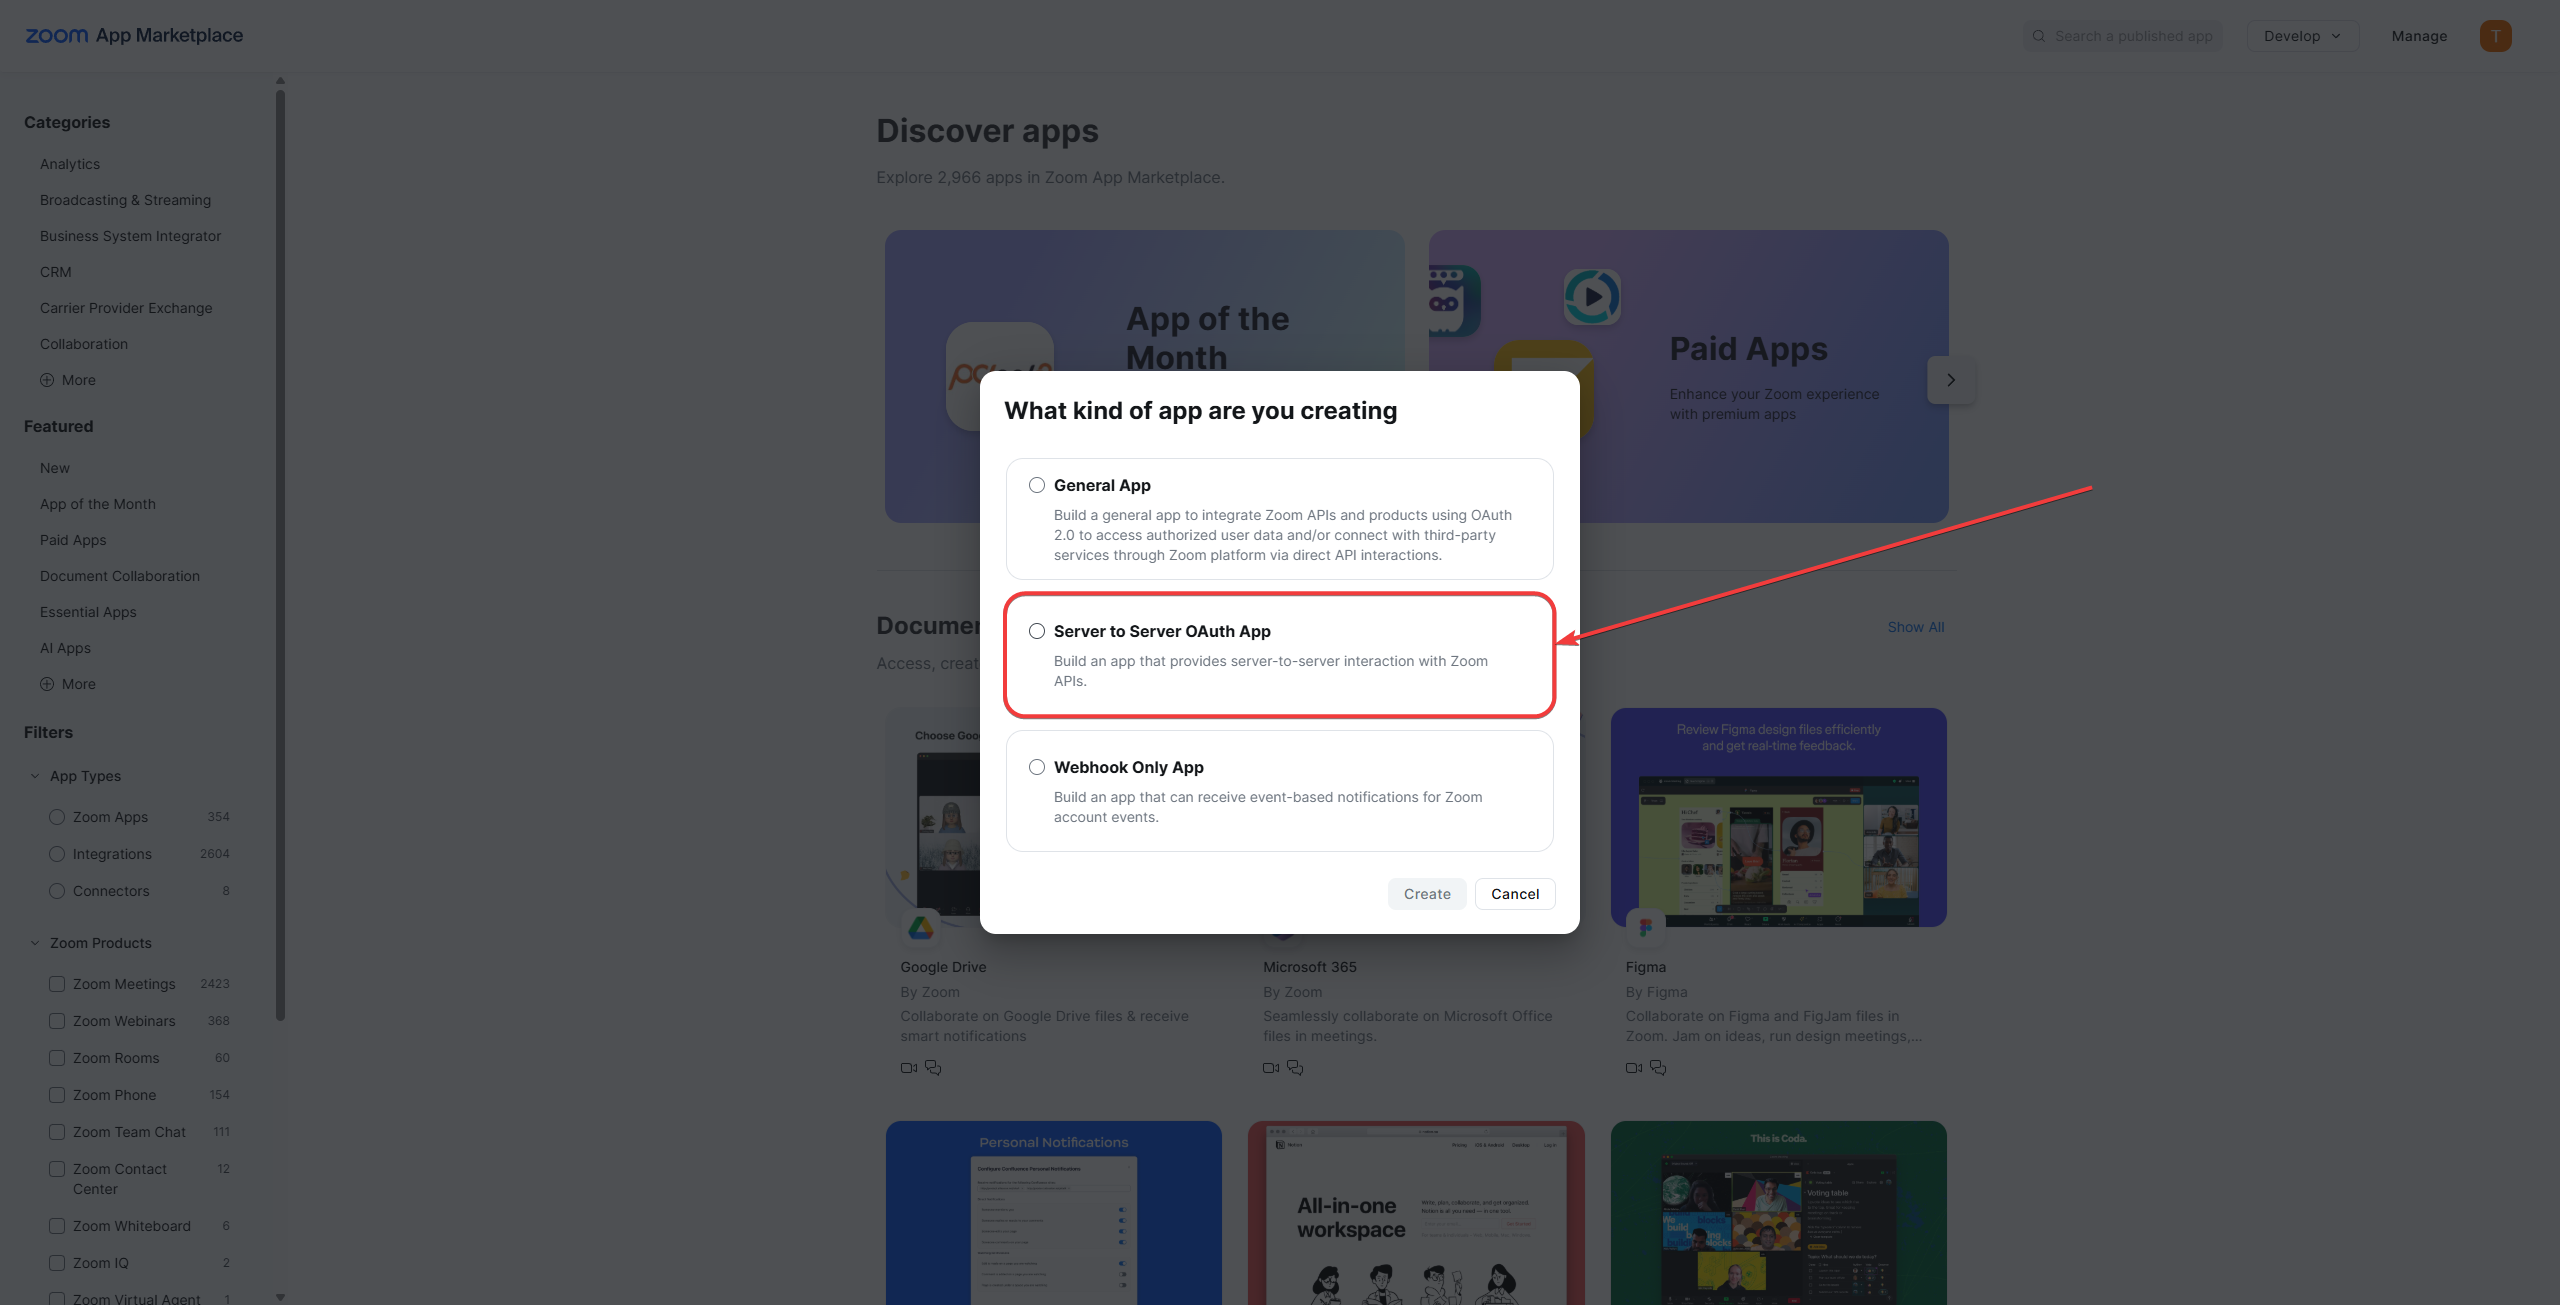
Create a New App
- Select Develop in the top menu and click on Build App.

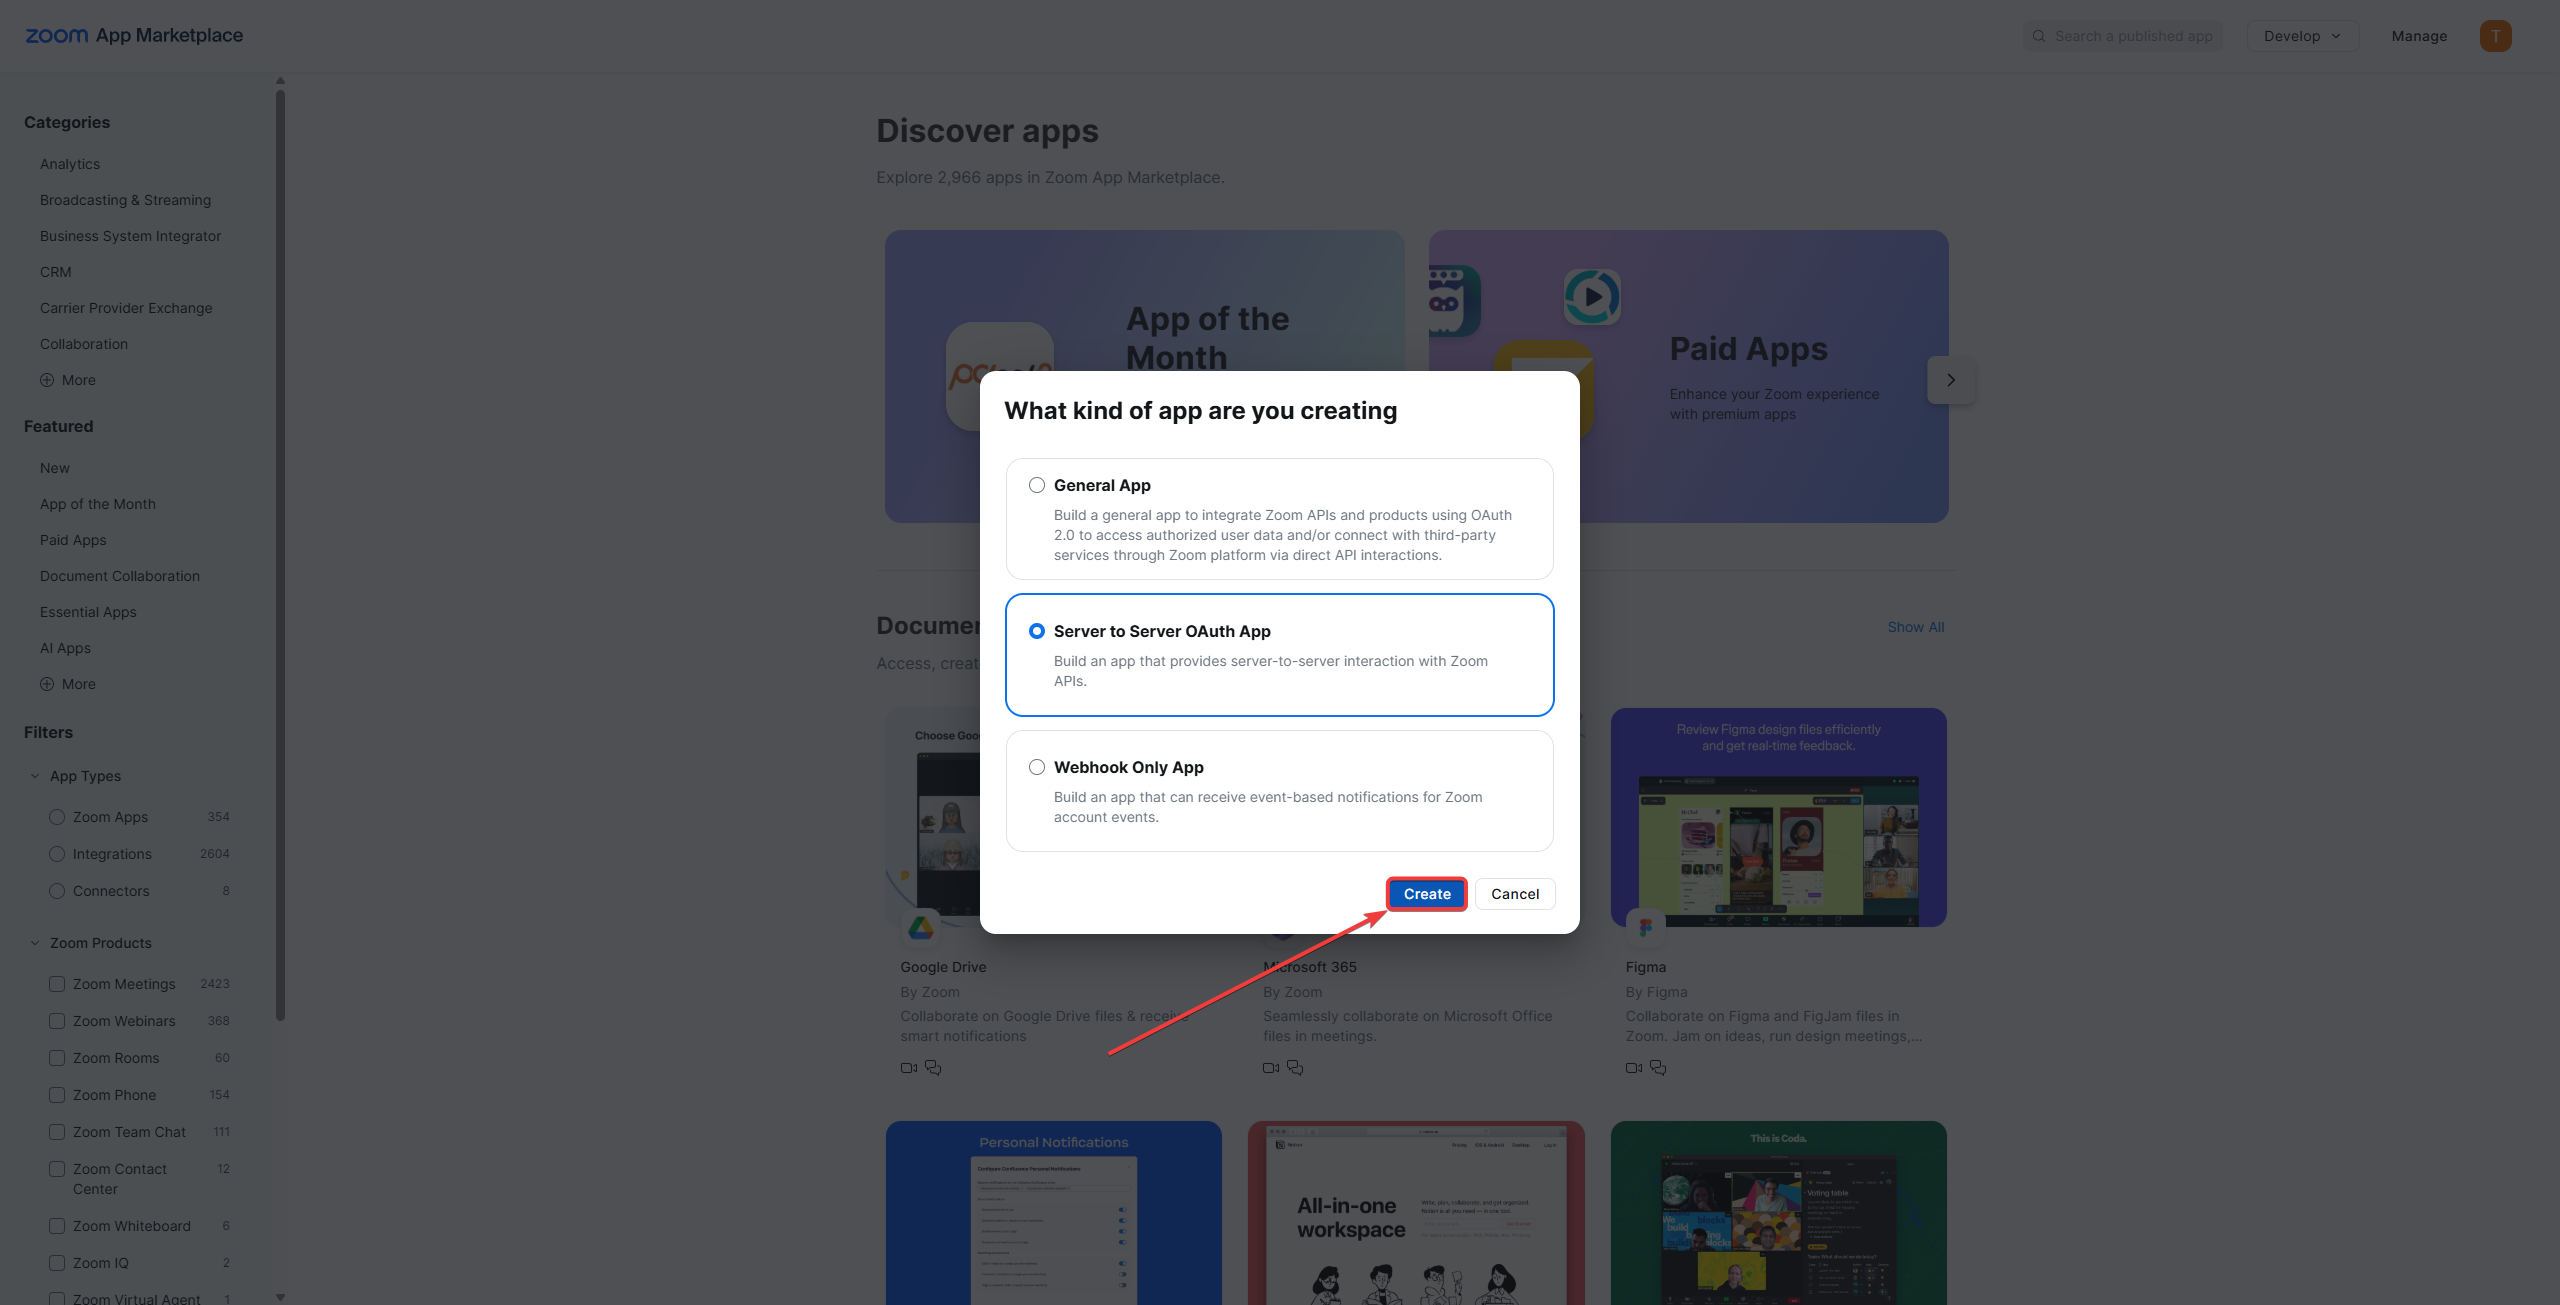
- Choose OAuth App (Server-to-Server OAuth).
-
Fill in App Details
- Enter a name for your app (e.g., Booknetic Integration).
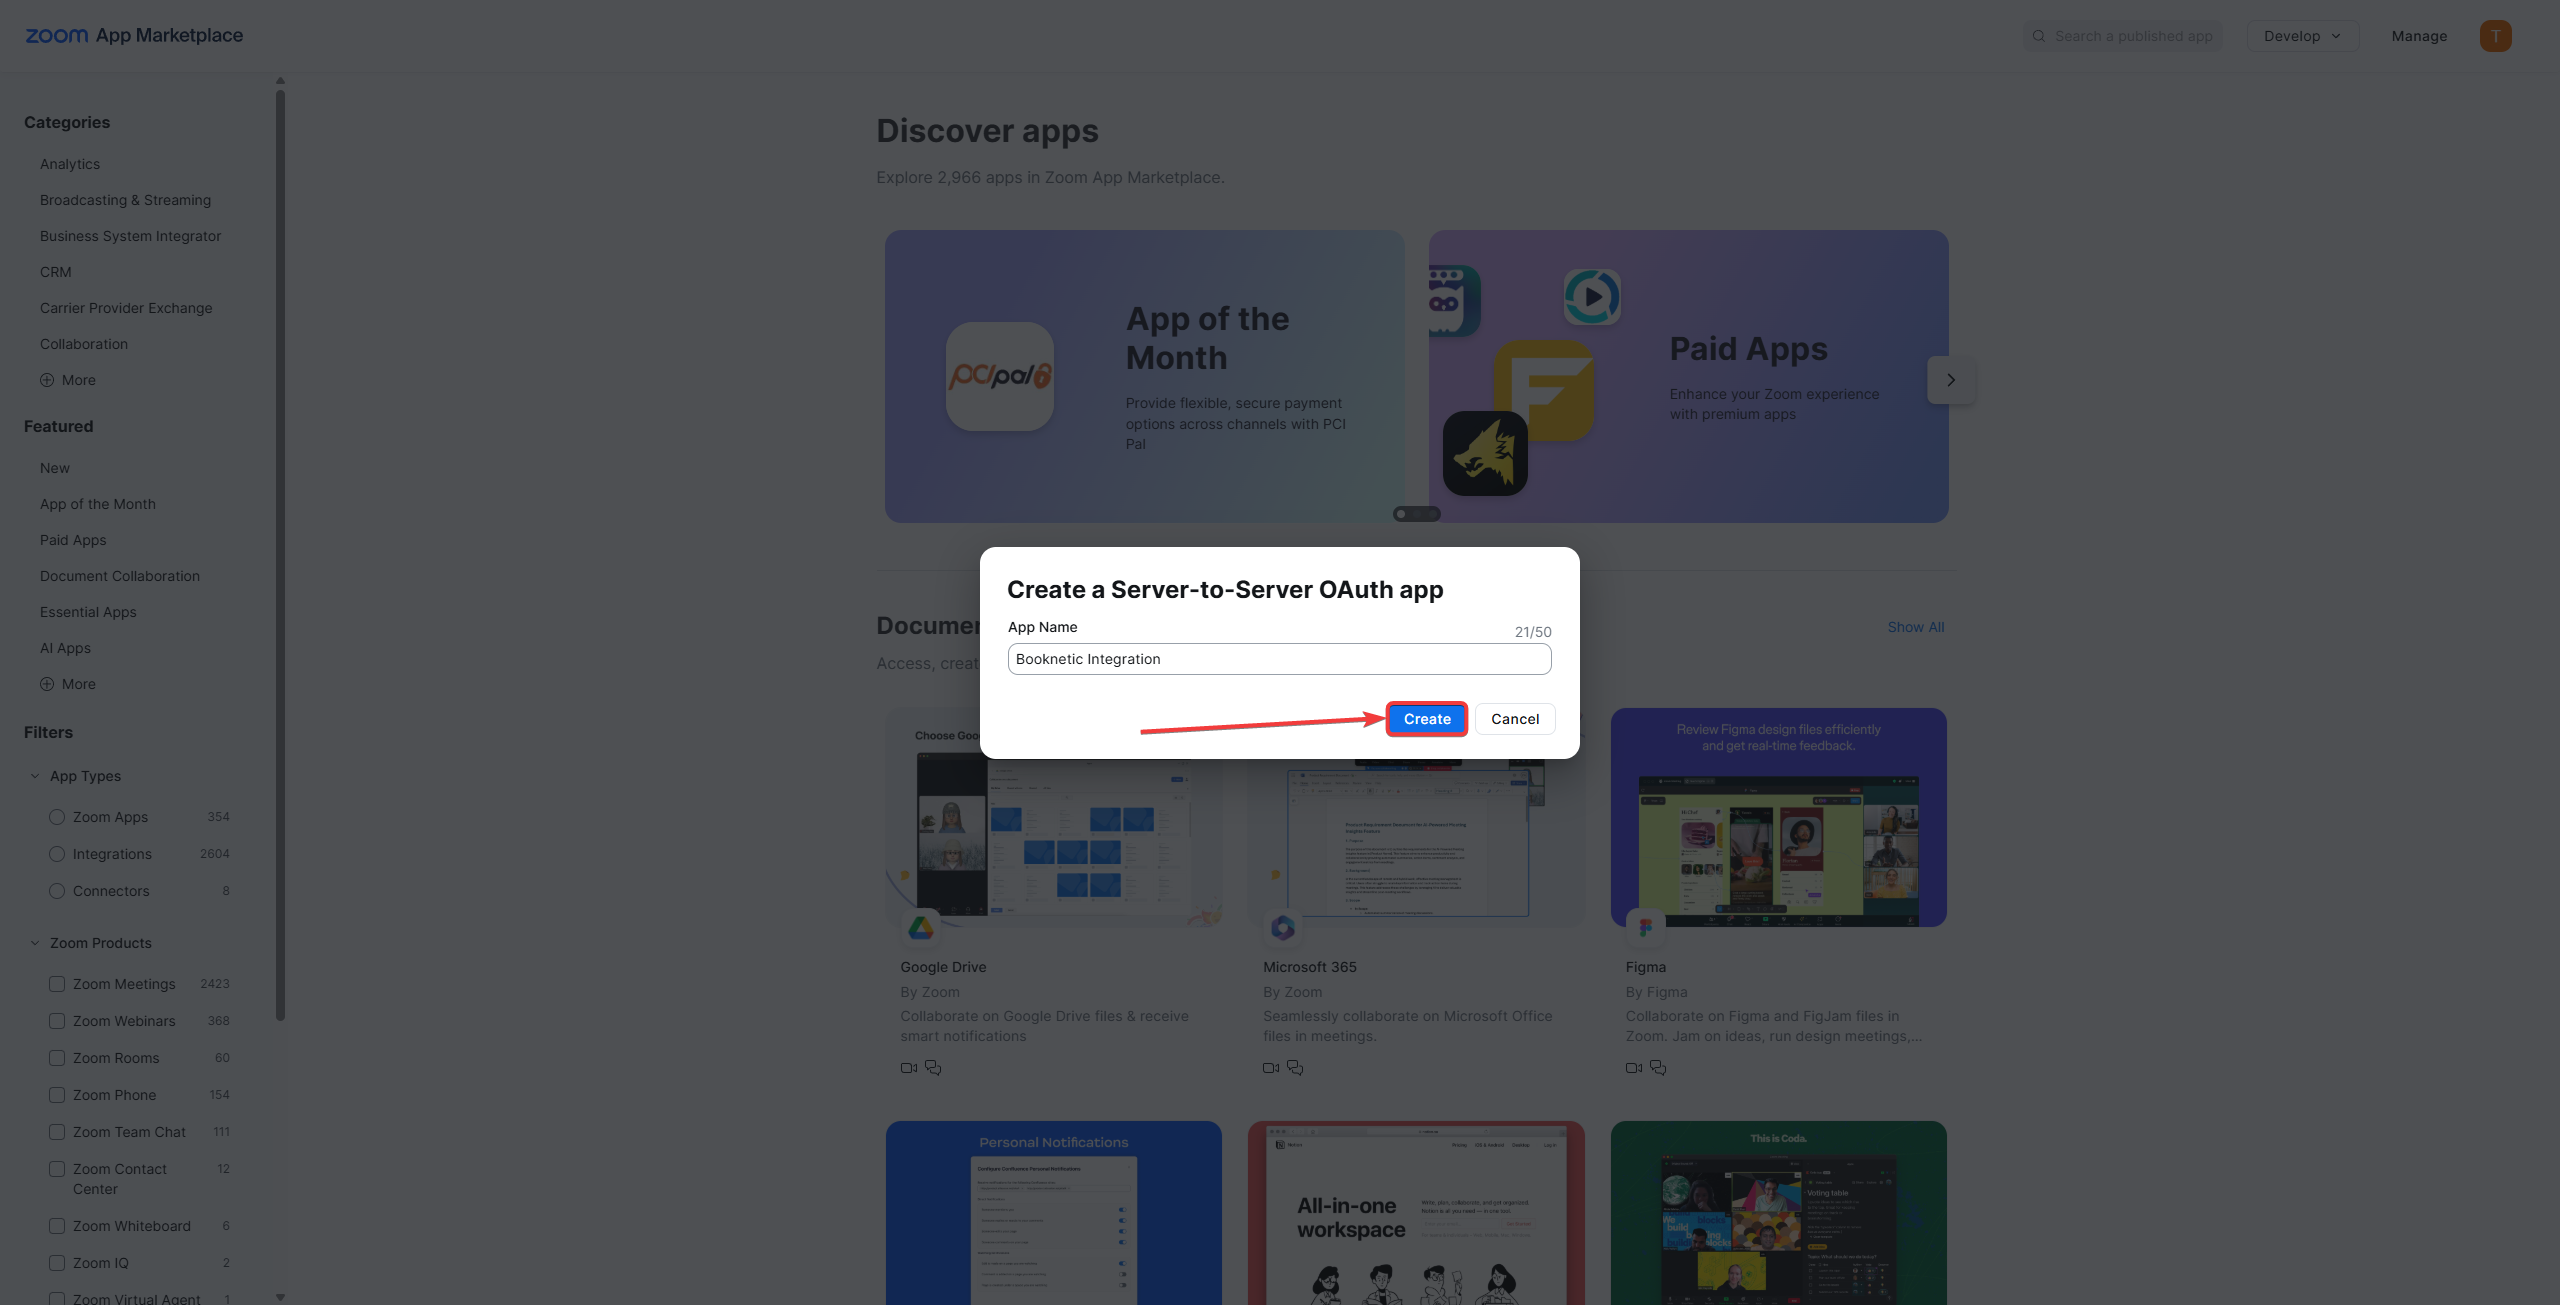
- After naming your app, you’ll be taken to the app settings page where you can configure the app permissions.
-
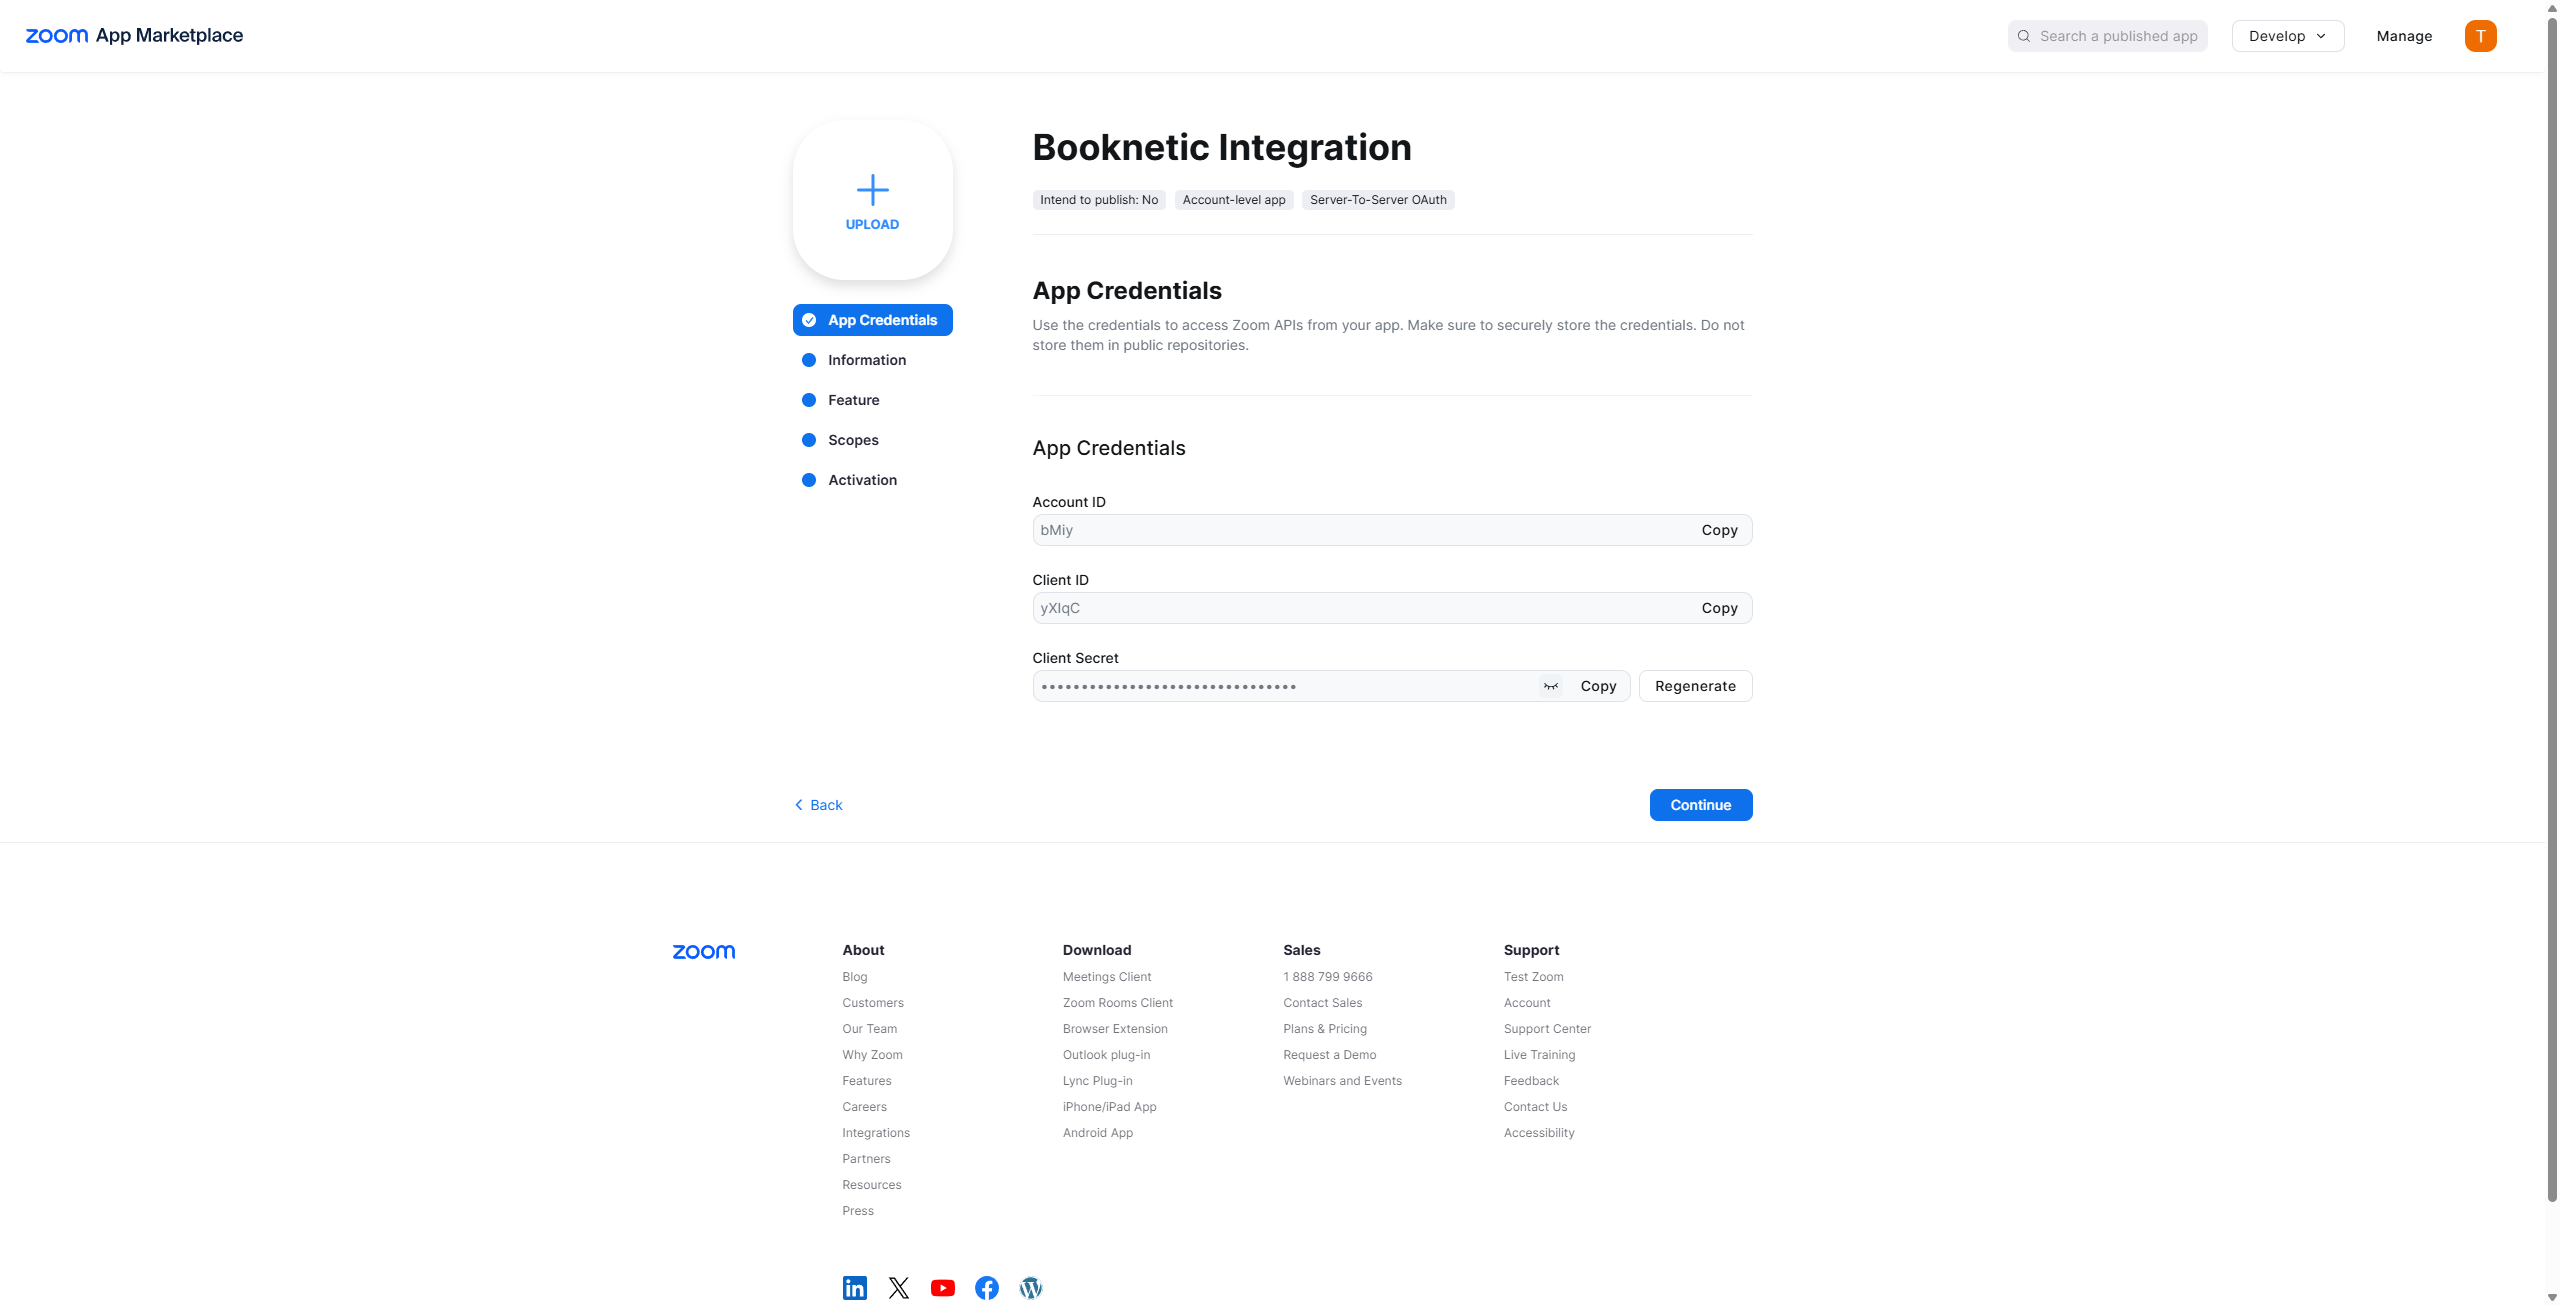
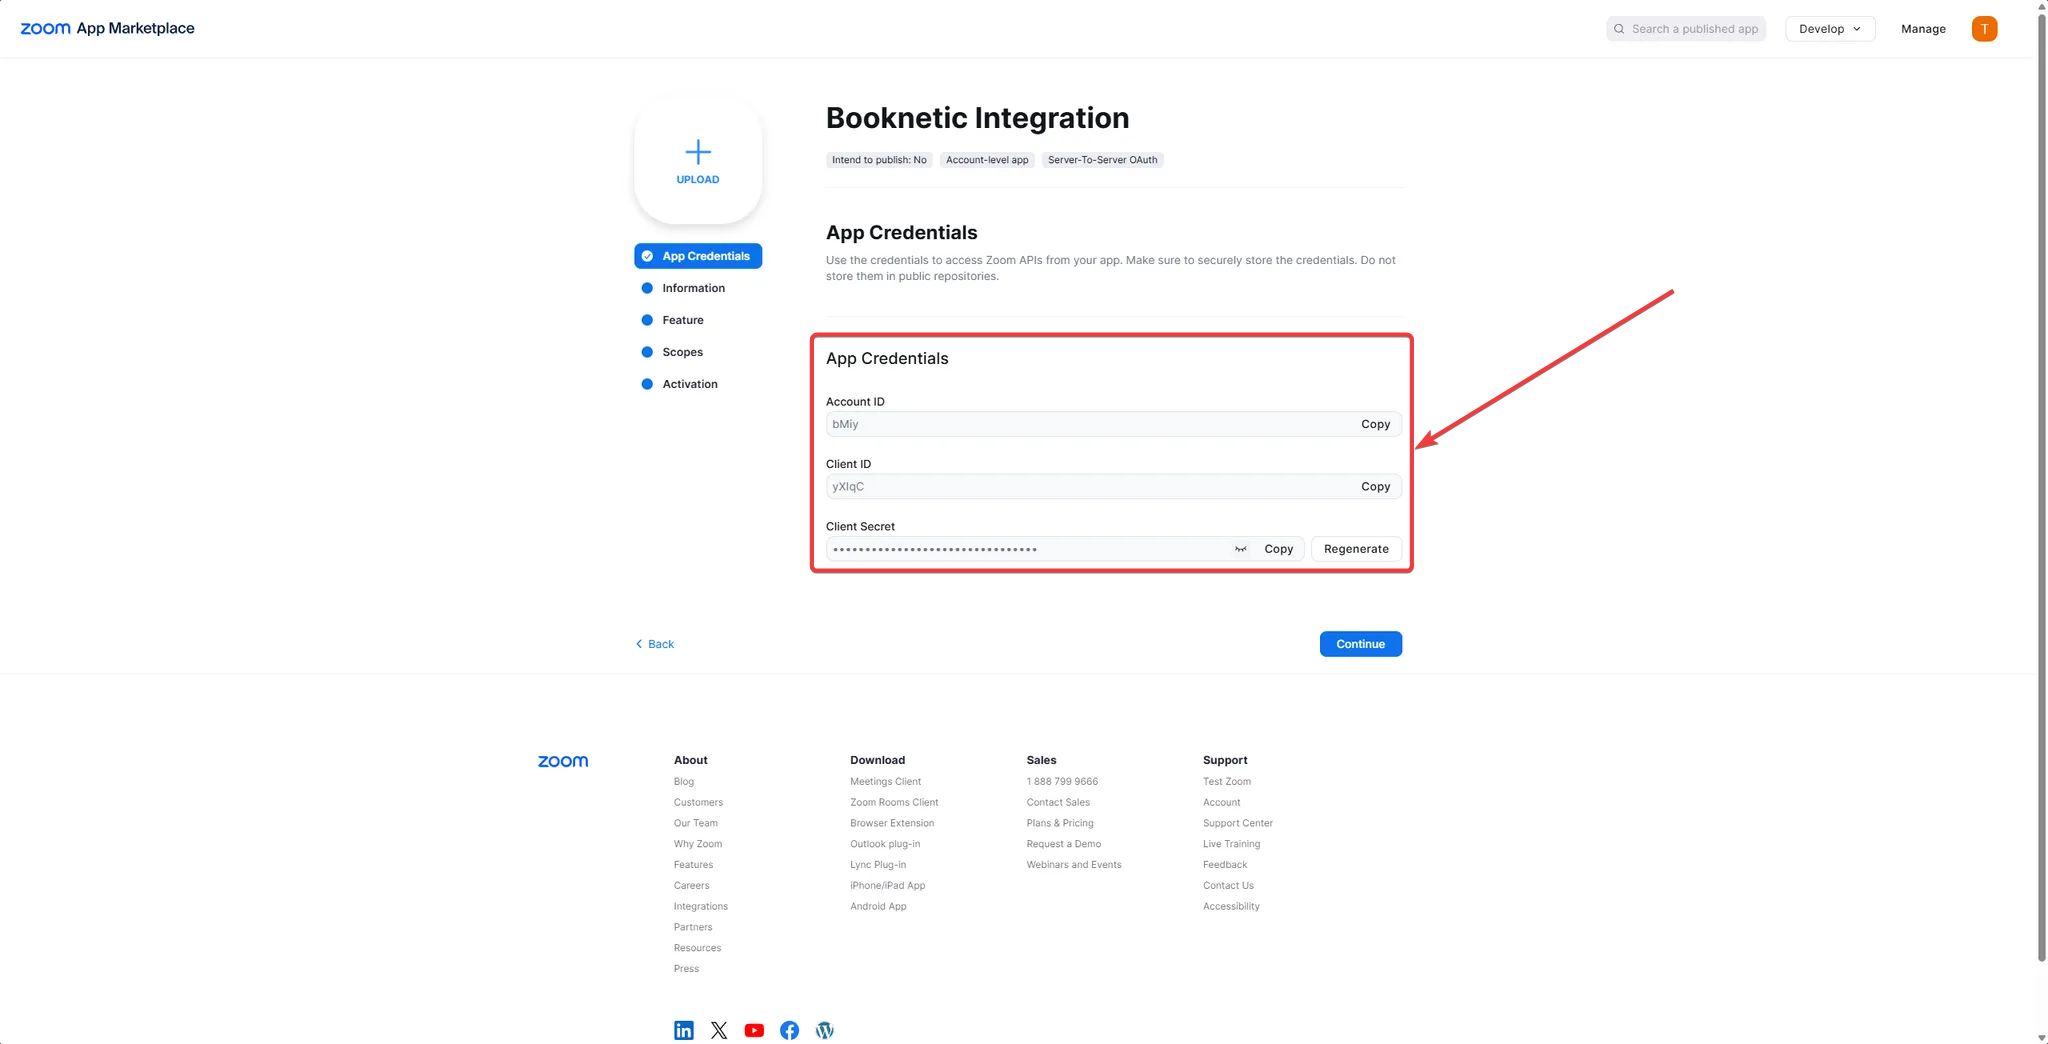
Obtain Credentials
- Once the app is created, note the Client ID, Client Secret and Account ID. These credentials are required for connecting Zoom with Booknetic.
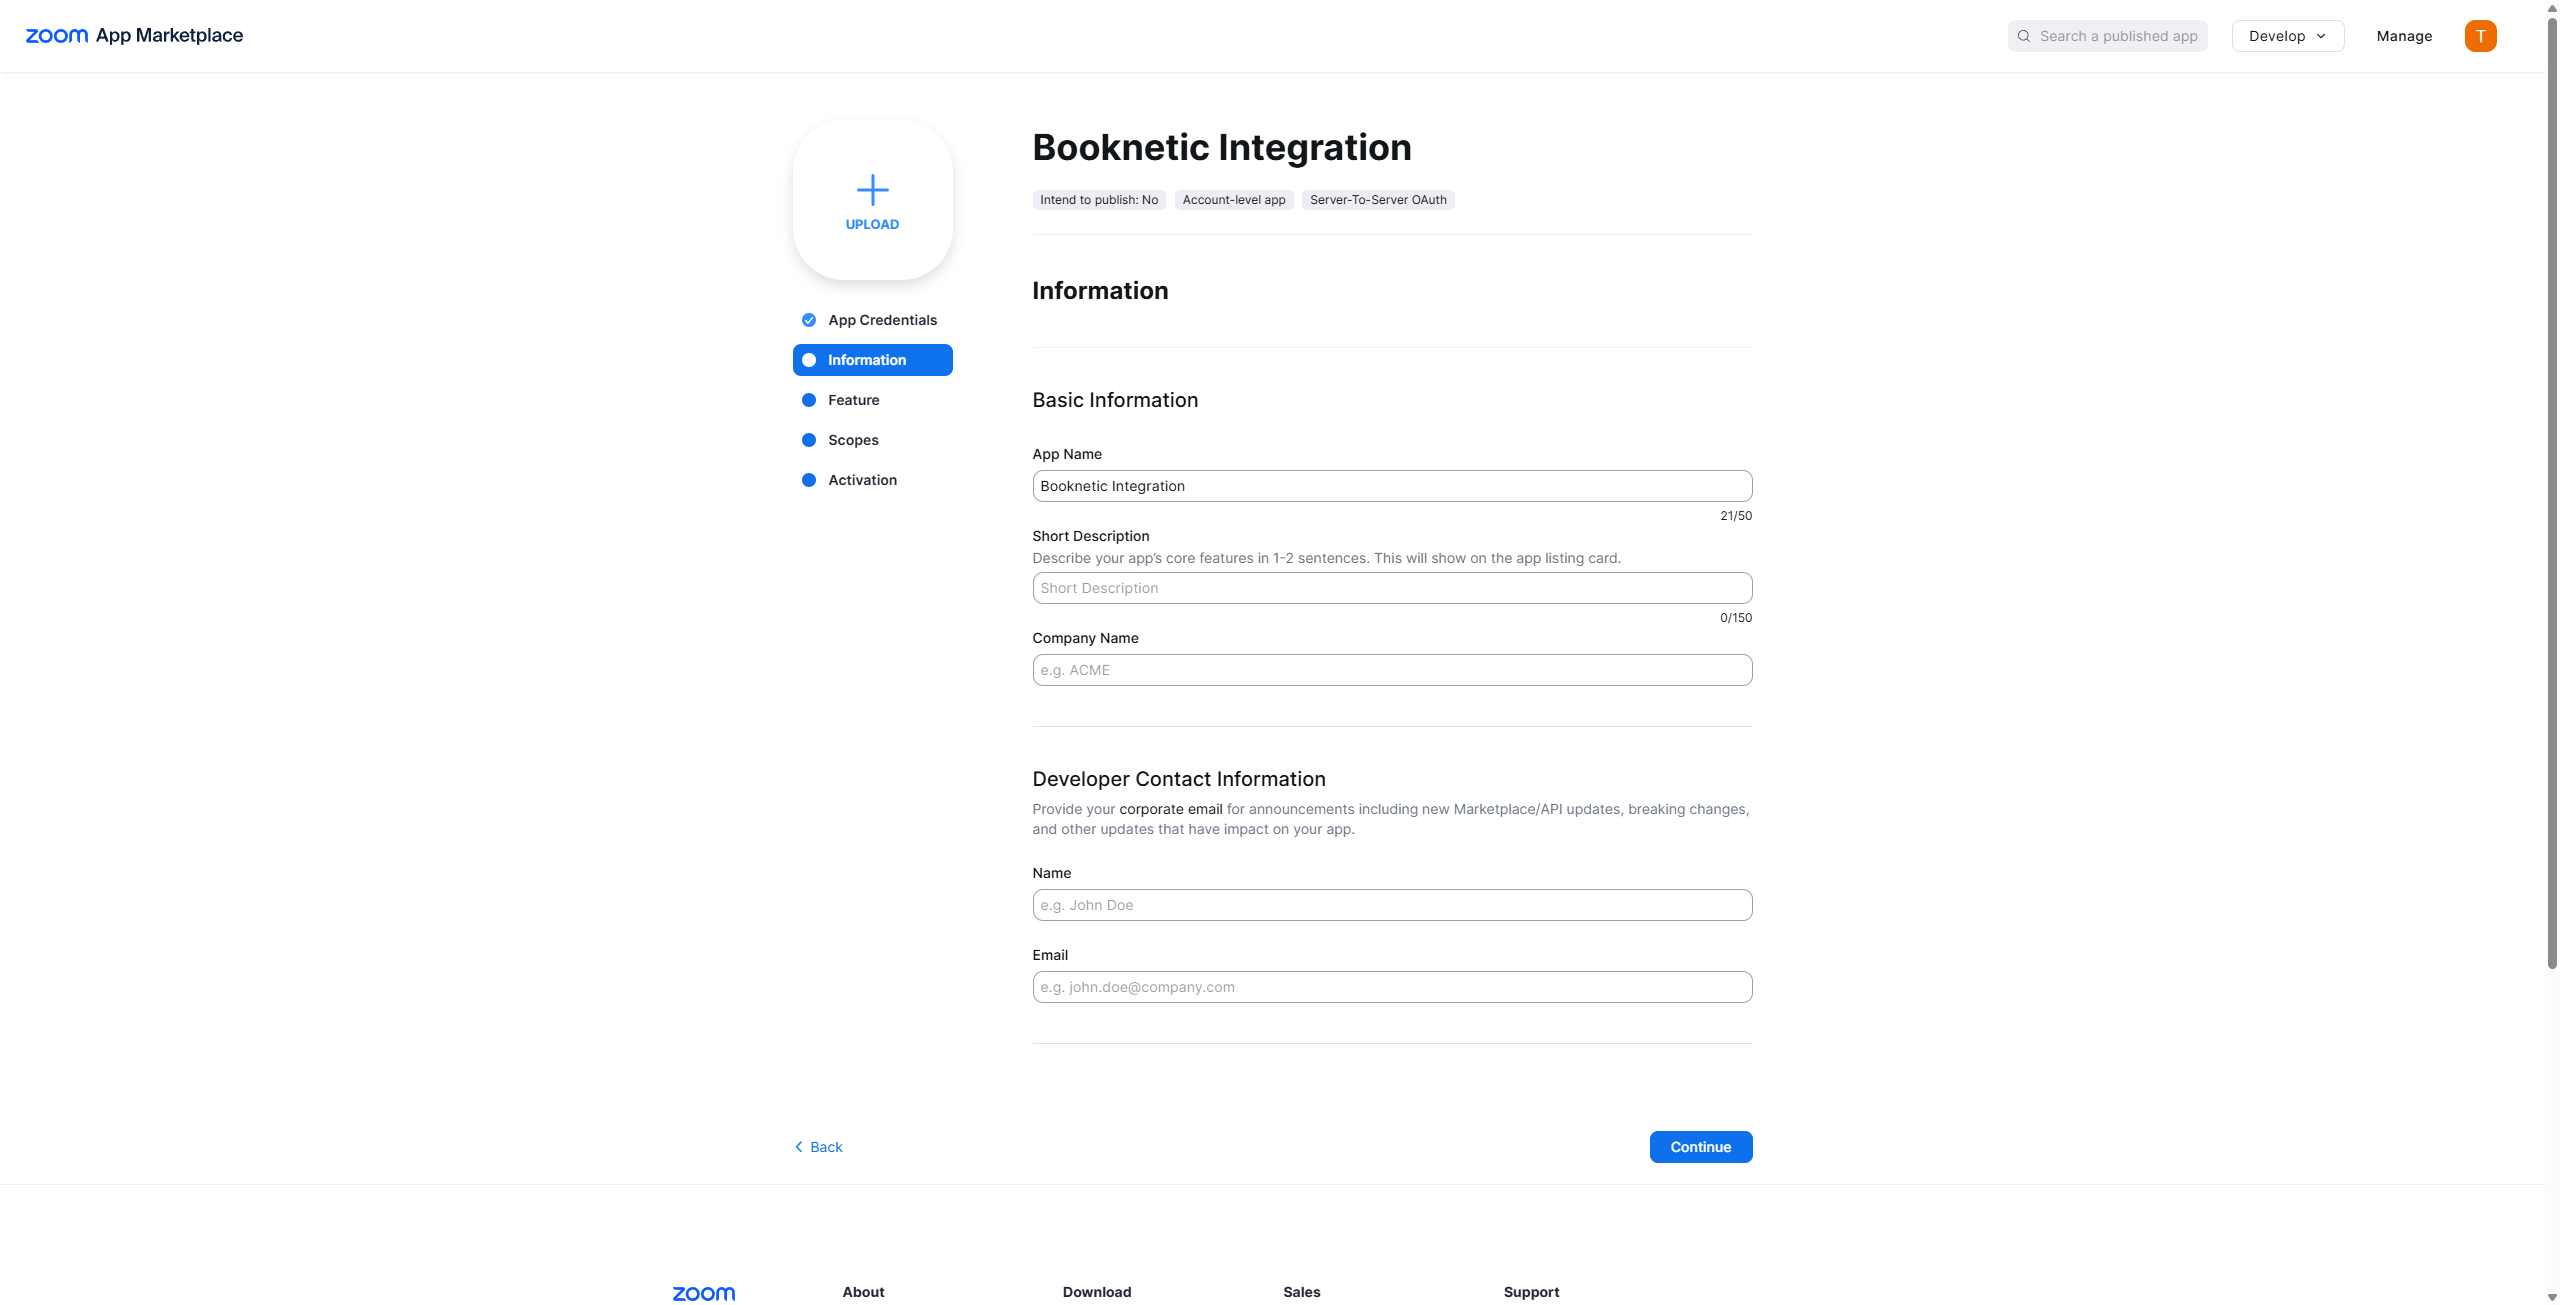
Step 2: Add App Information and Configure Zoom App Permissions
First, you should add information about your Zoom application, in the Information tab (There’s nothing to do in the Feature tab so skip it):
After that, you must configure the necessary app permissions to allow the integration to function correctly.
-
In the Zoom app settings, under the Scopes section, add the following permissions:
- meeting:write:meeting:admin: For creating and updating meetings.
- meeting:update:meeting:admin: For updating meetings.
- meeting:delete:meeting:admin: For deleting meetings.
- user:read:user:admin: For reading user information.
- user:write:user:admin: For writing user information.
- user:read:list_users:admin: For listing users and getting information about all users, including admins.
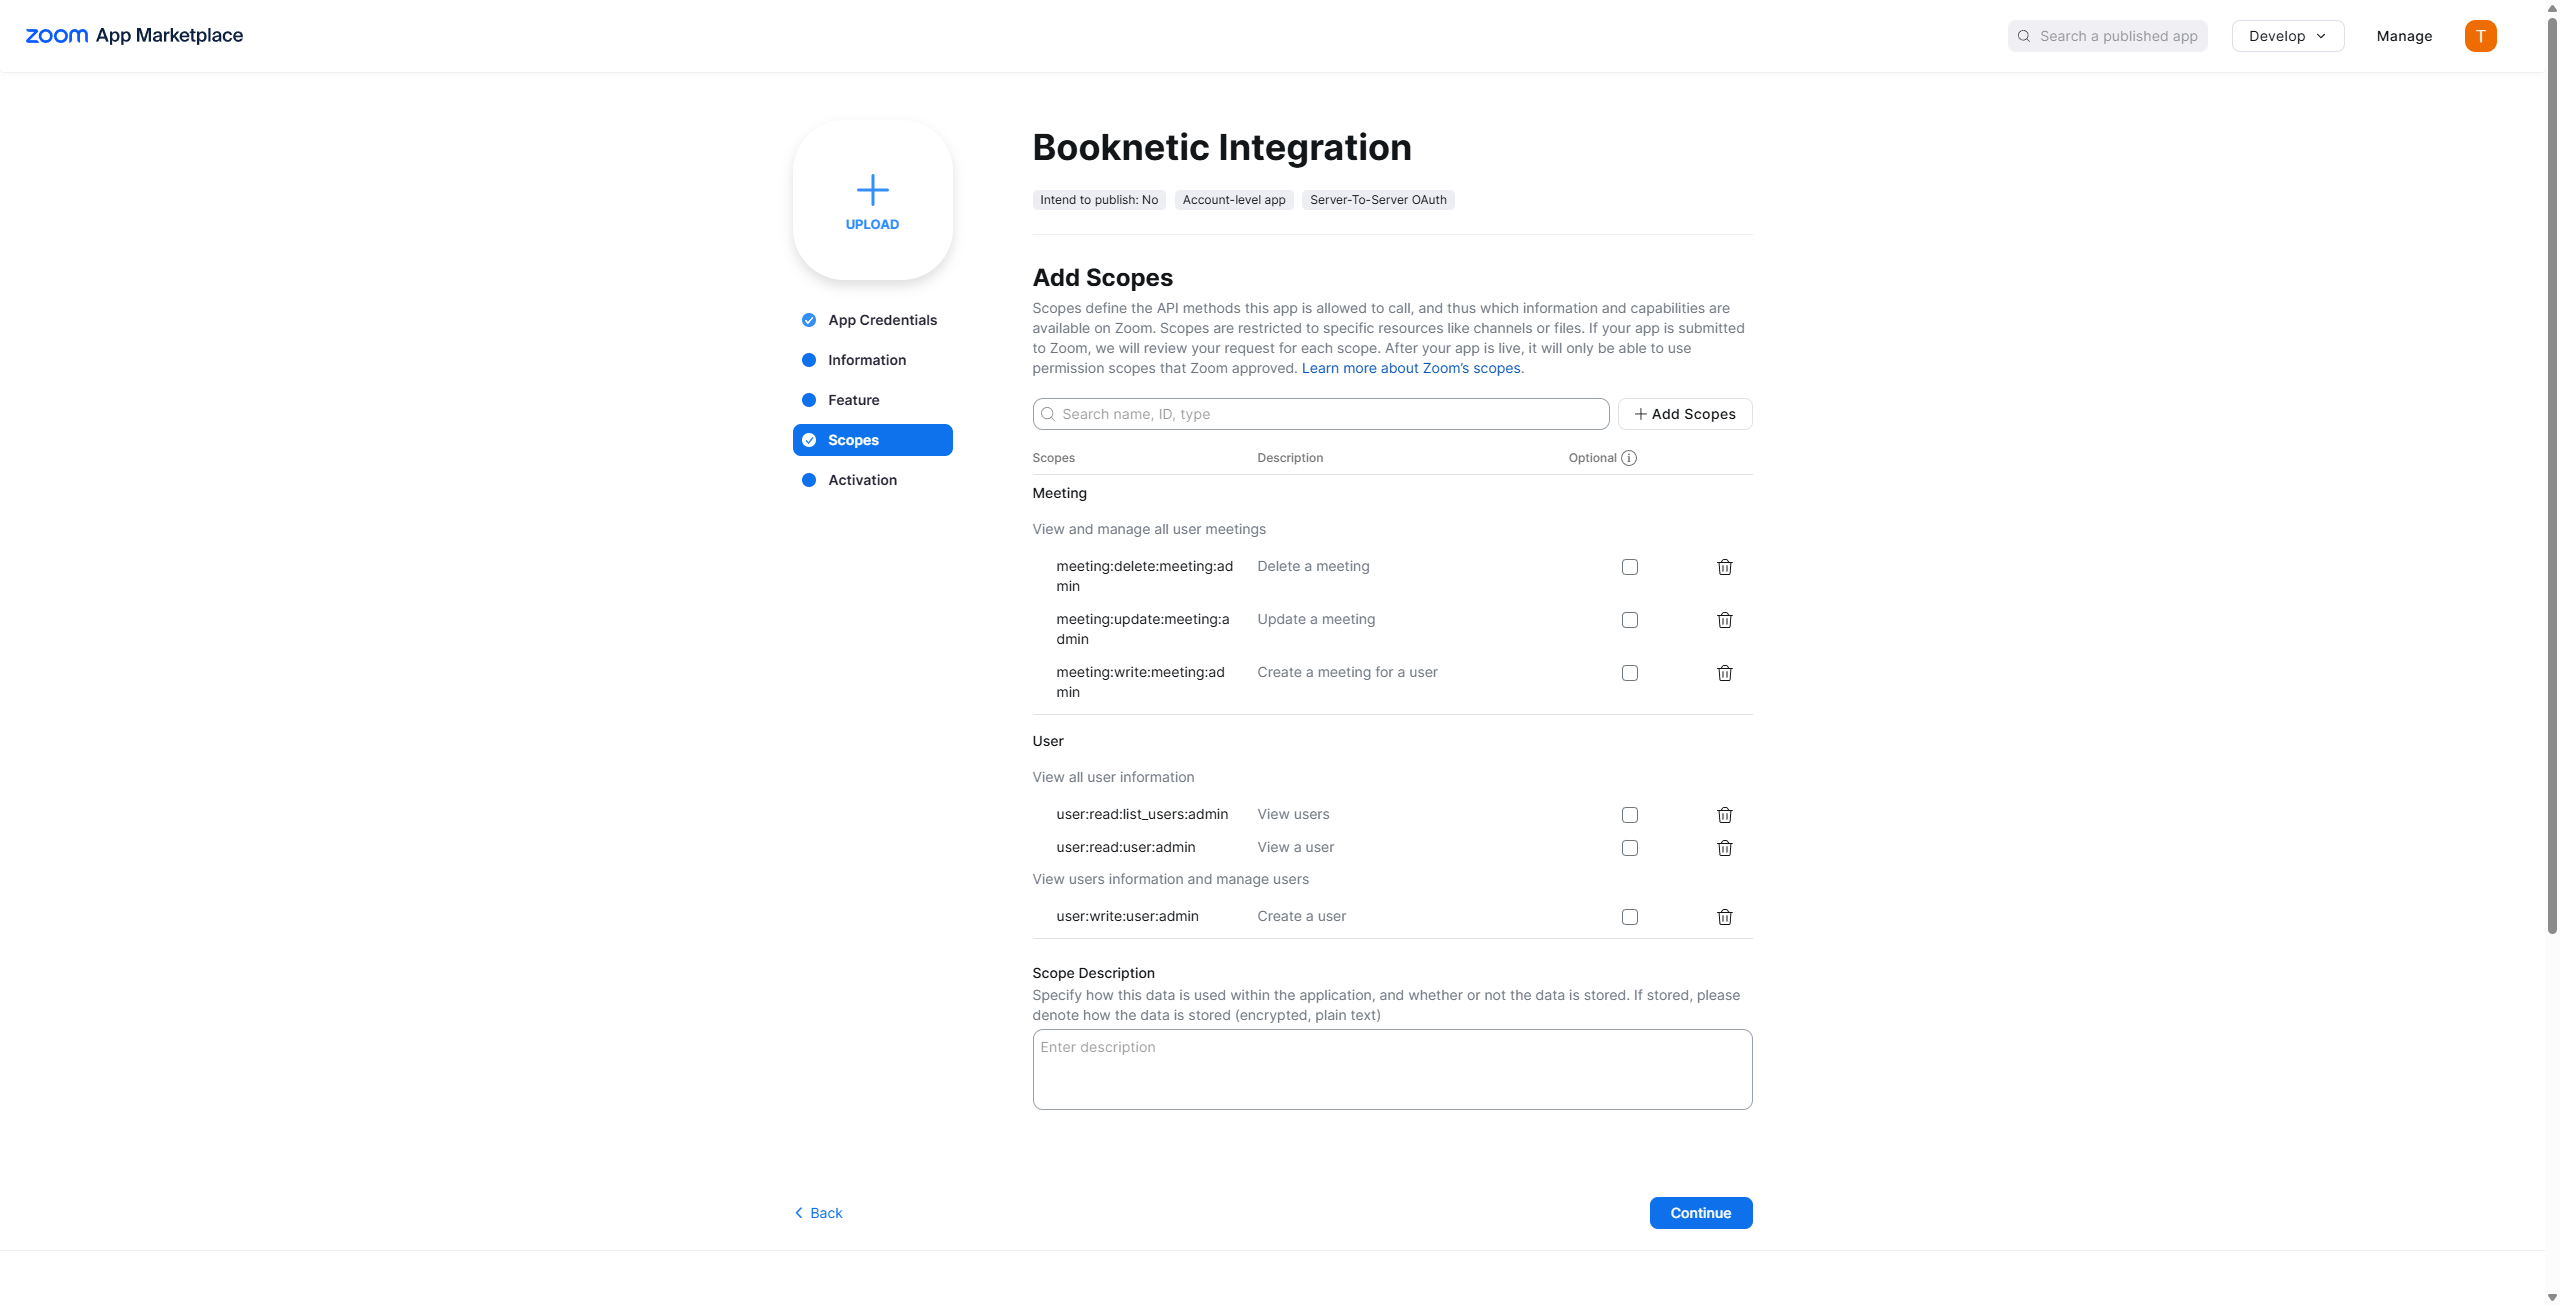
-
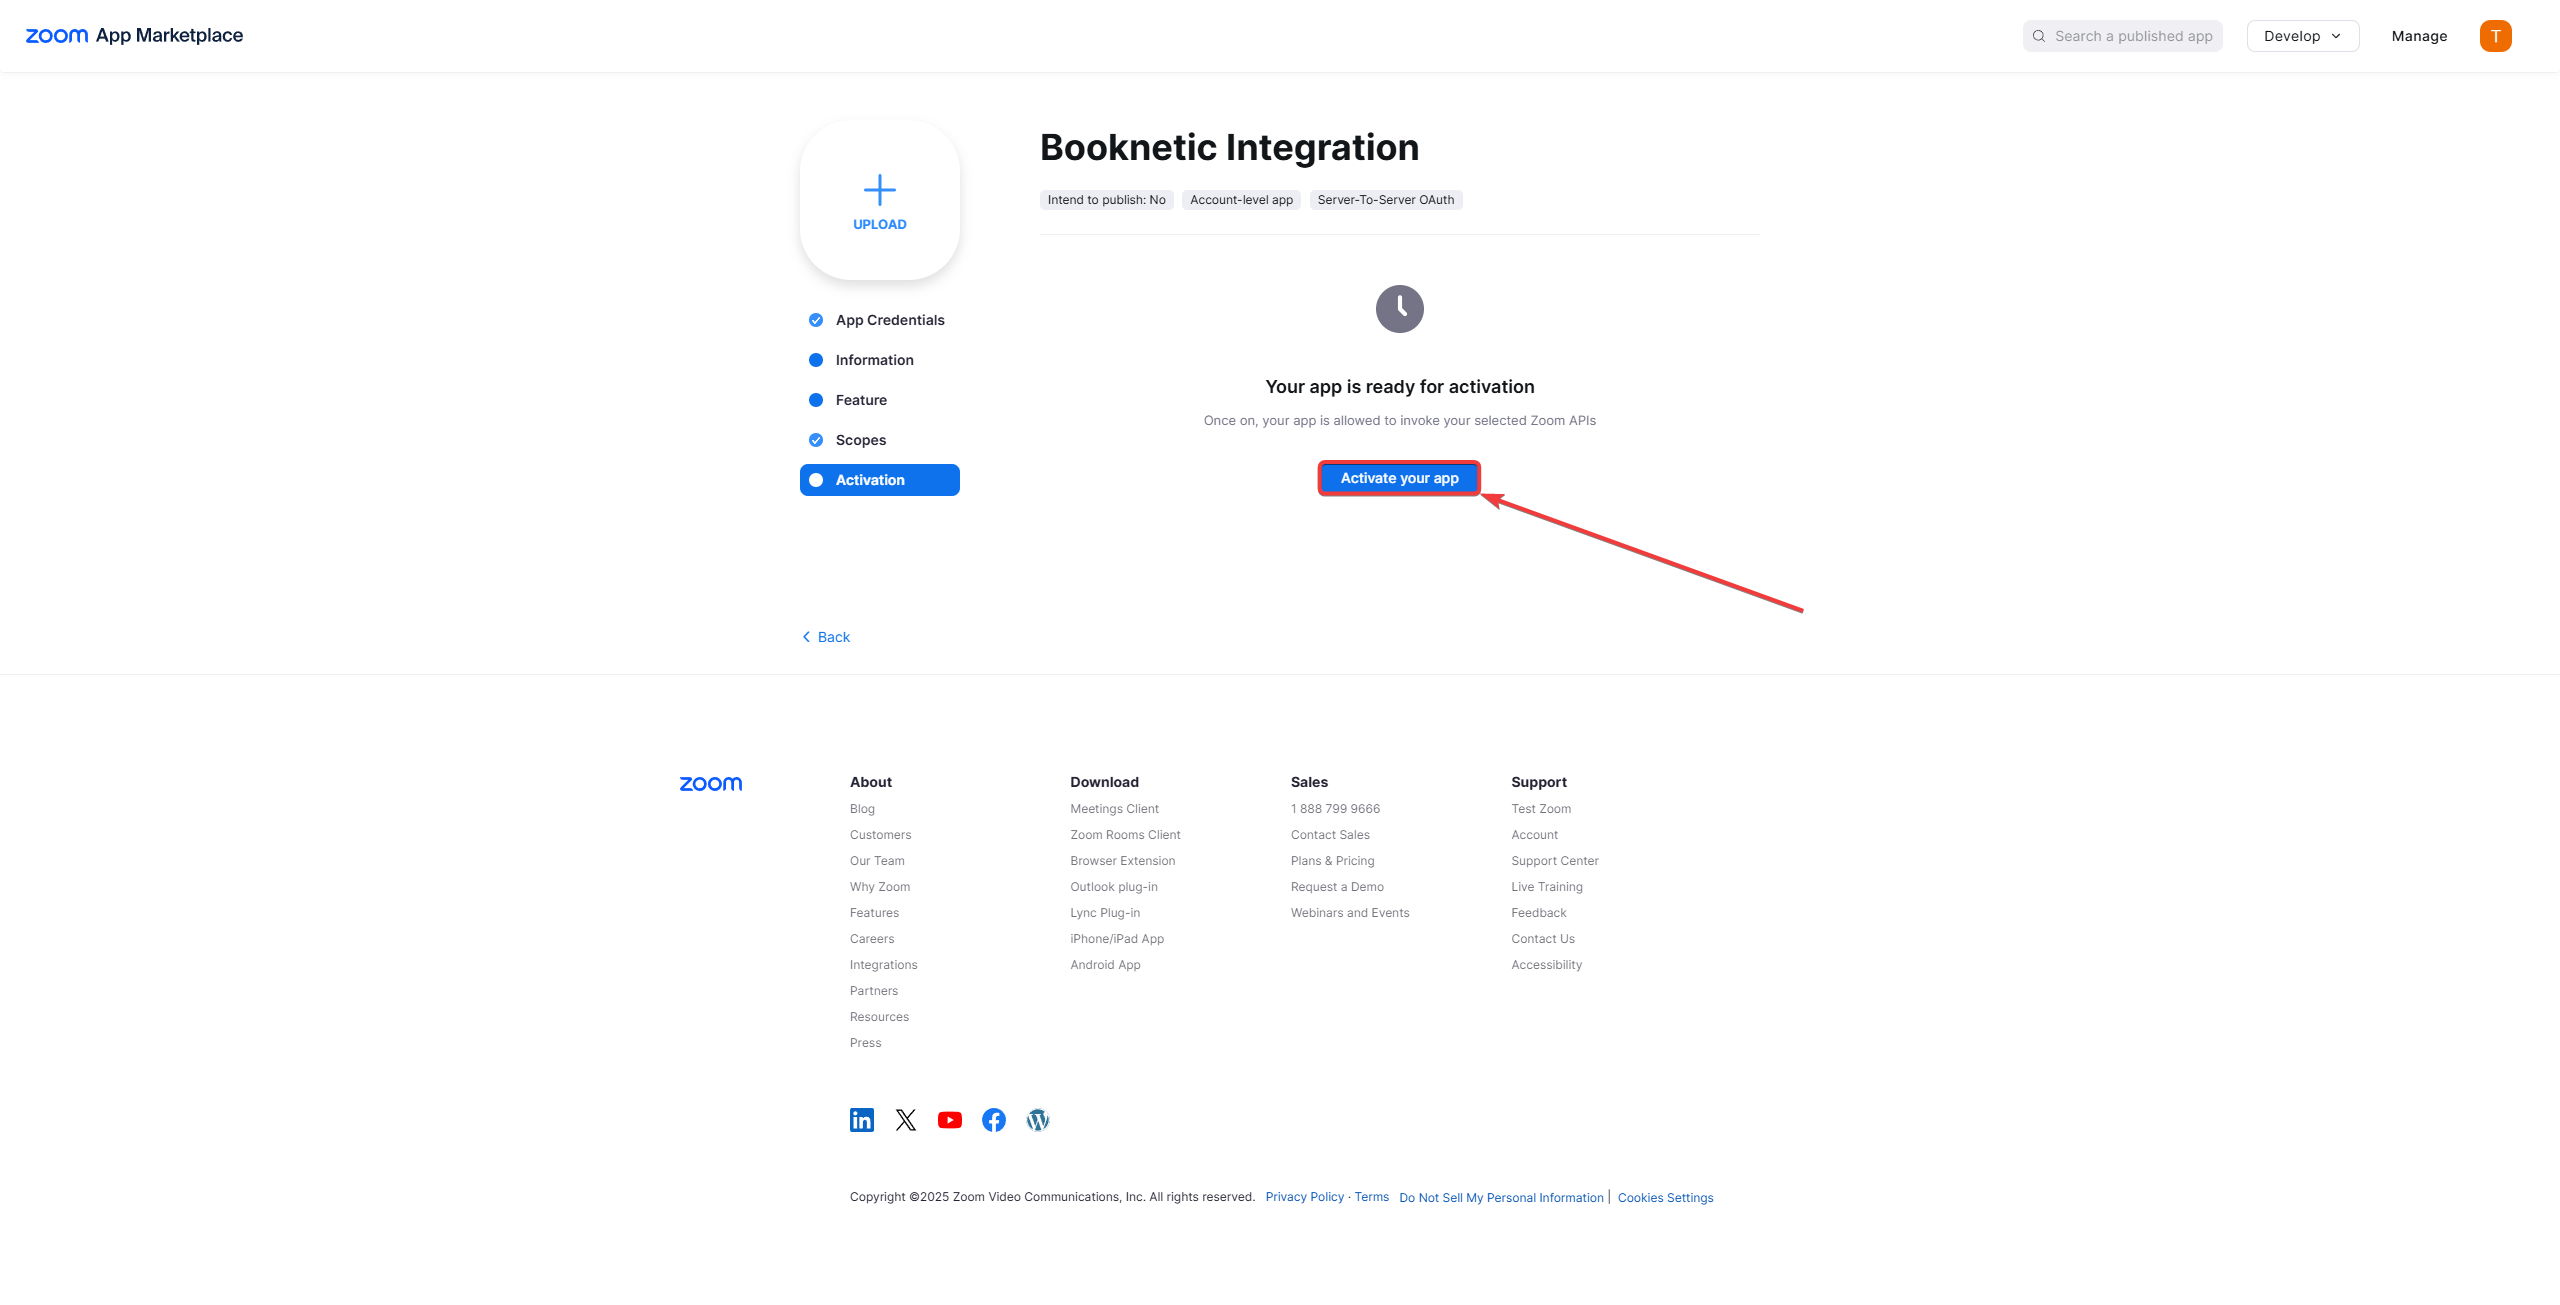
After adding the scopes, go to the next step and click Activate your app to enable the app.
Step 3: Connecting Zoom with Booknetic
Now that you have created the Zoom app, it’s time to connect it with Booknetic.
-
Go to Booknetic Admin Panel
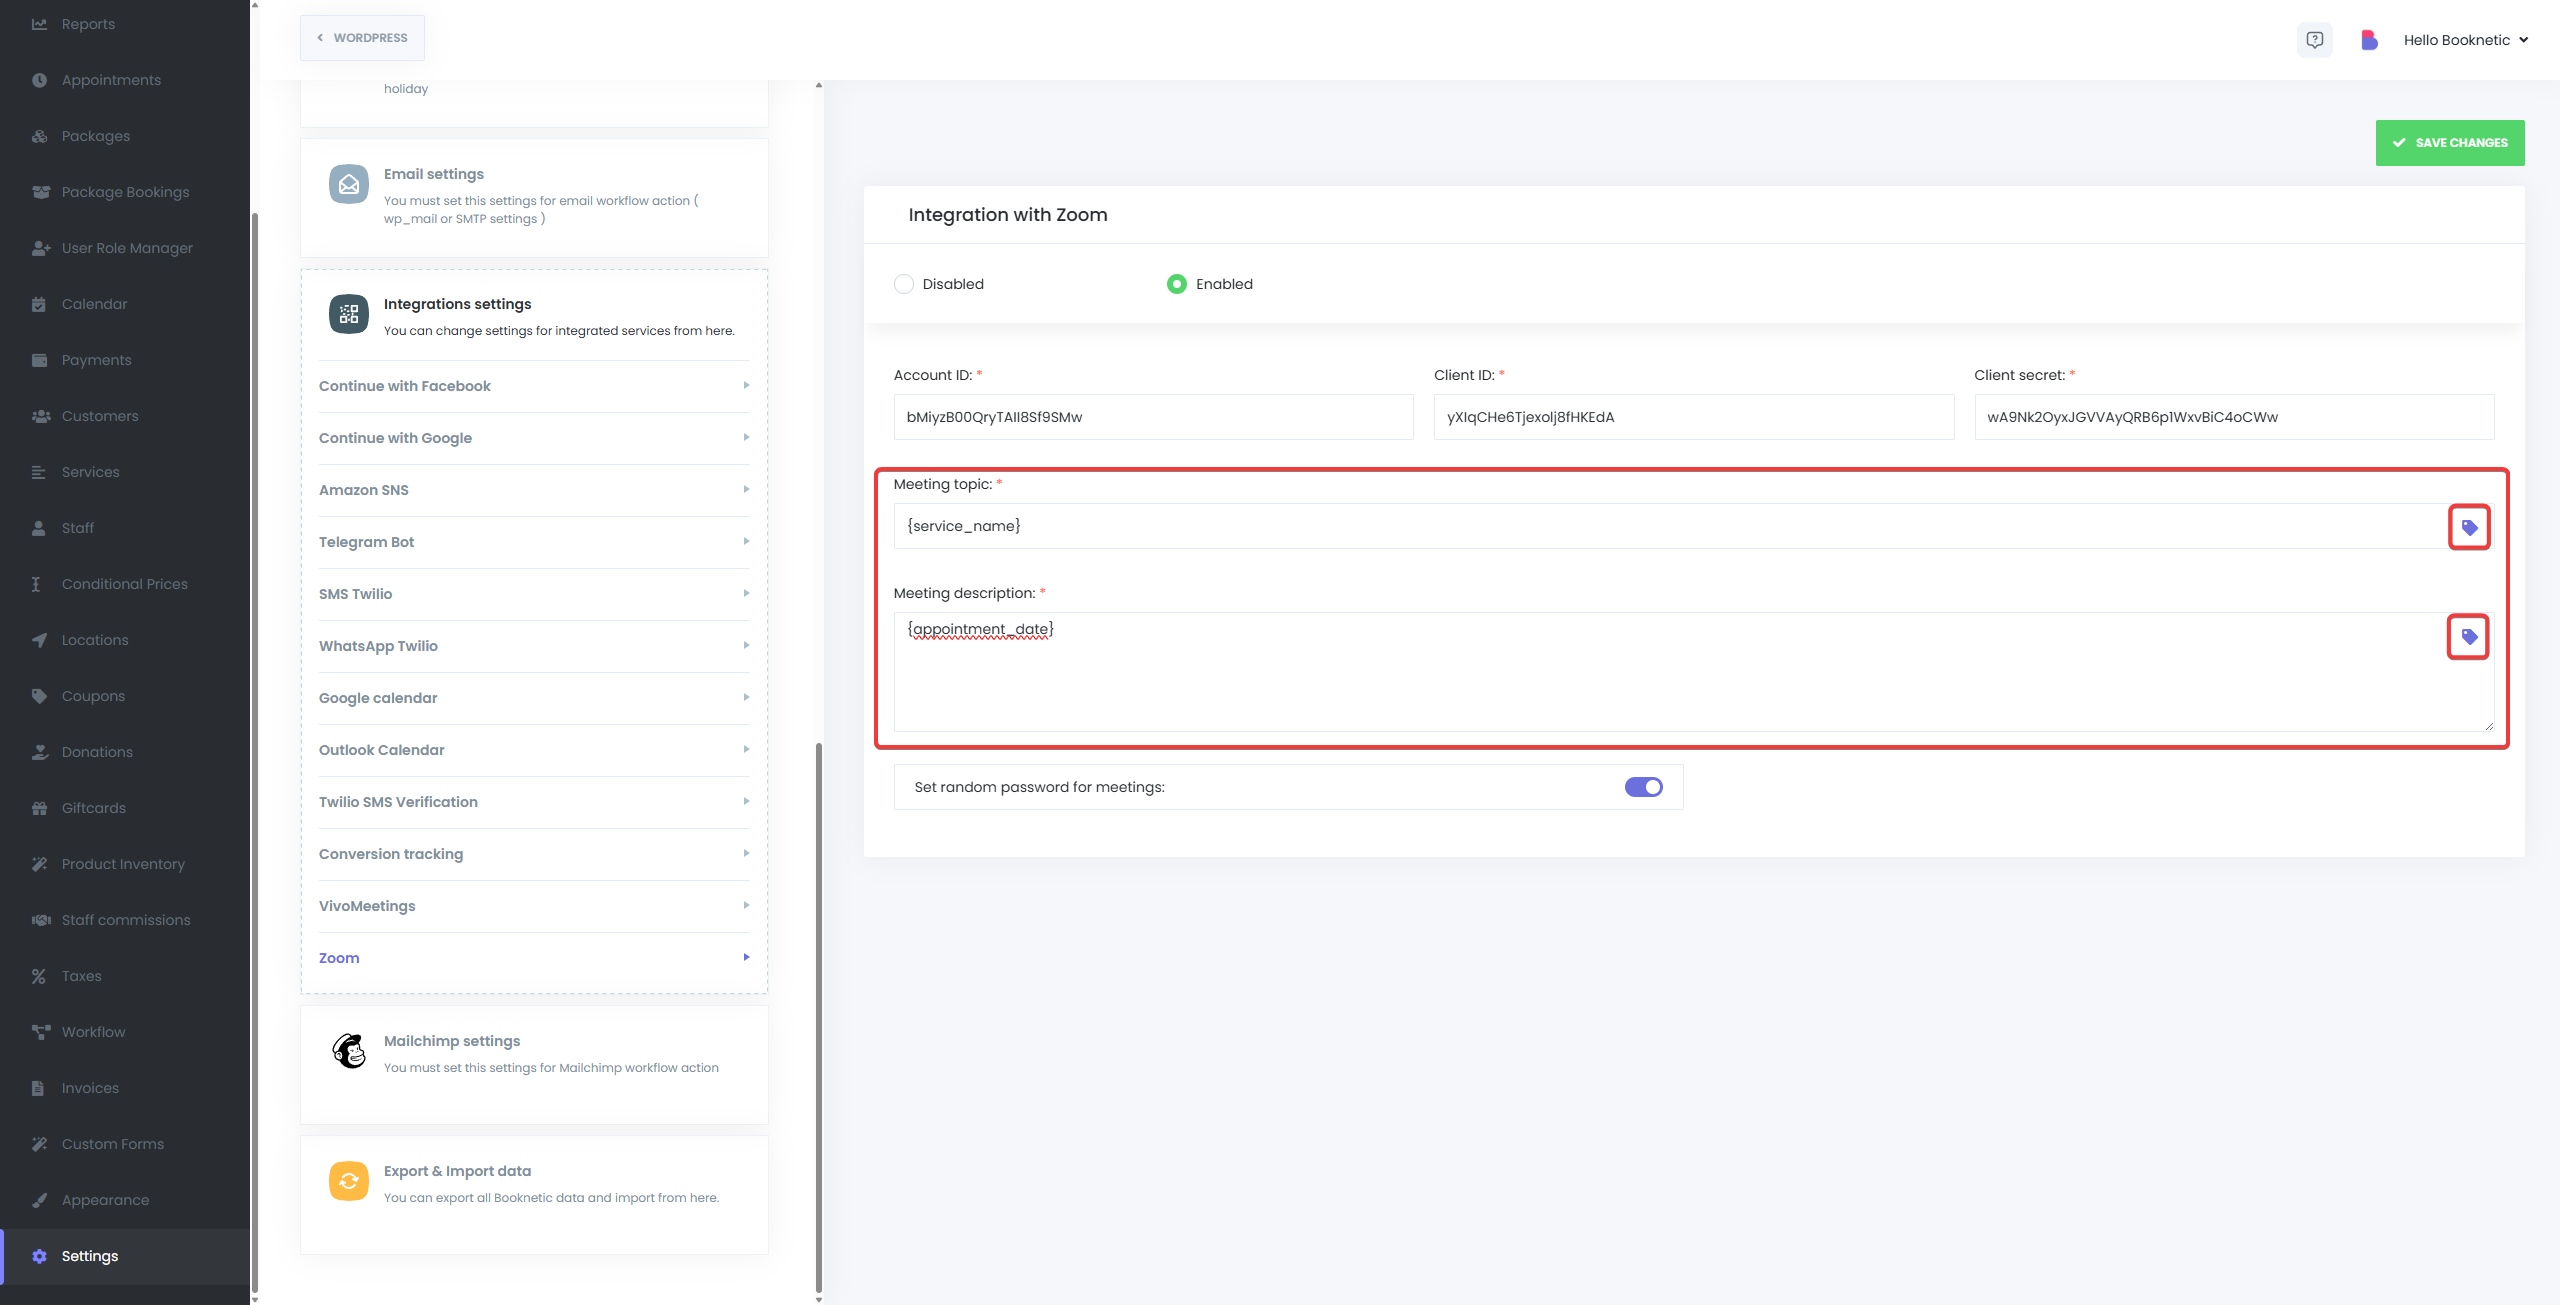
In the Booknetic Admin Panel, navigate to Settings > Integrations > Zoom.

-
Enter Zoom API Credentials
- In the Zoom integration section of Booknetic, enter the Account ID, Client ID and Client Secret from your Zoom app.
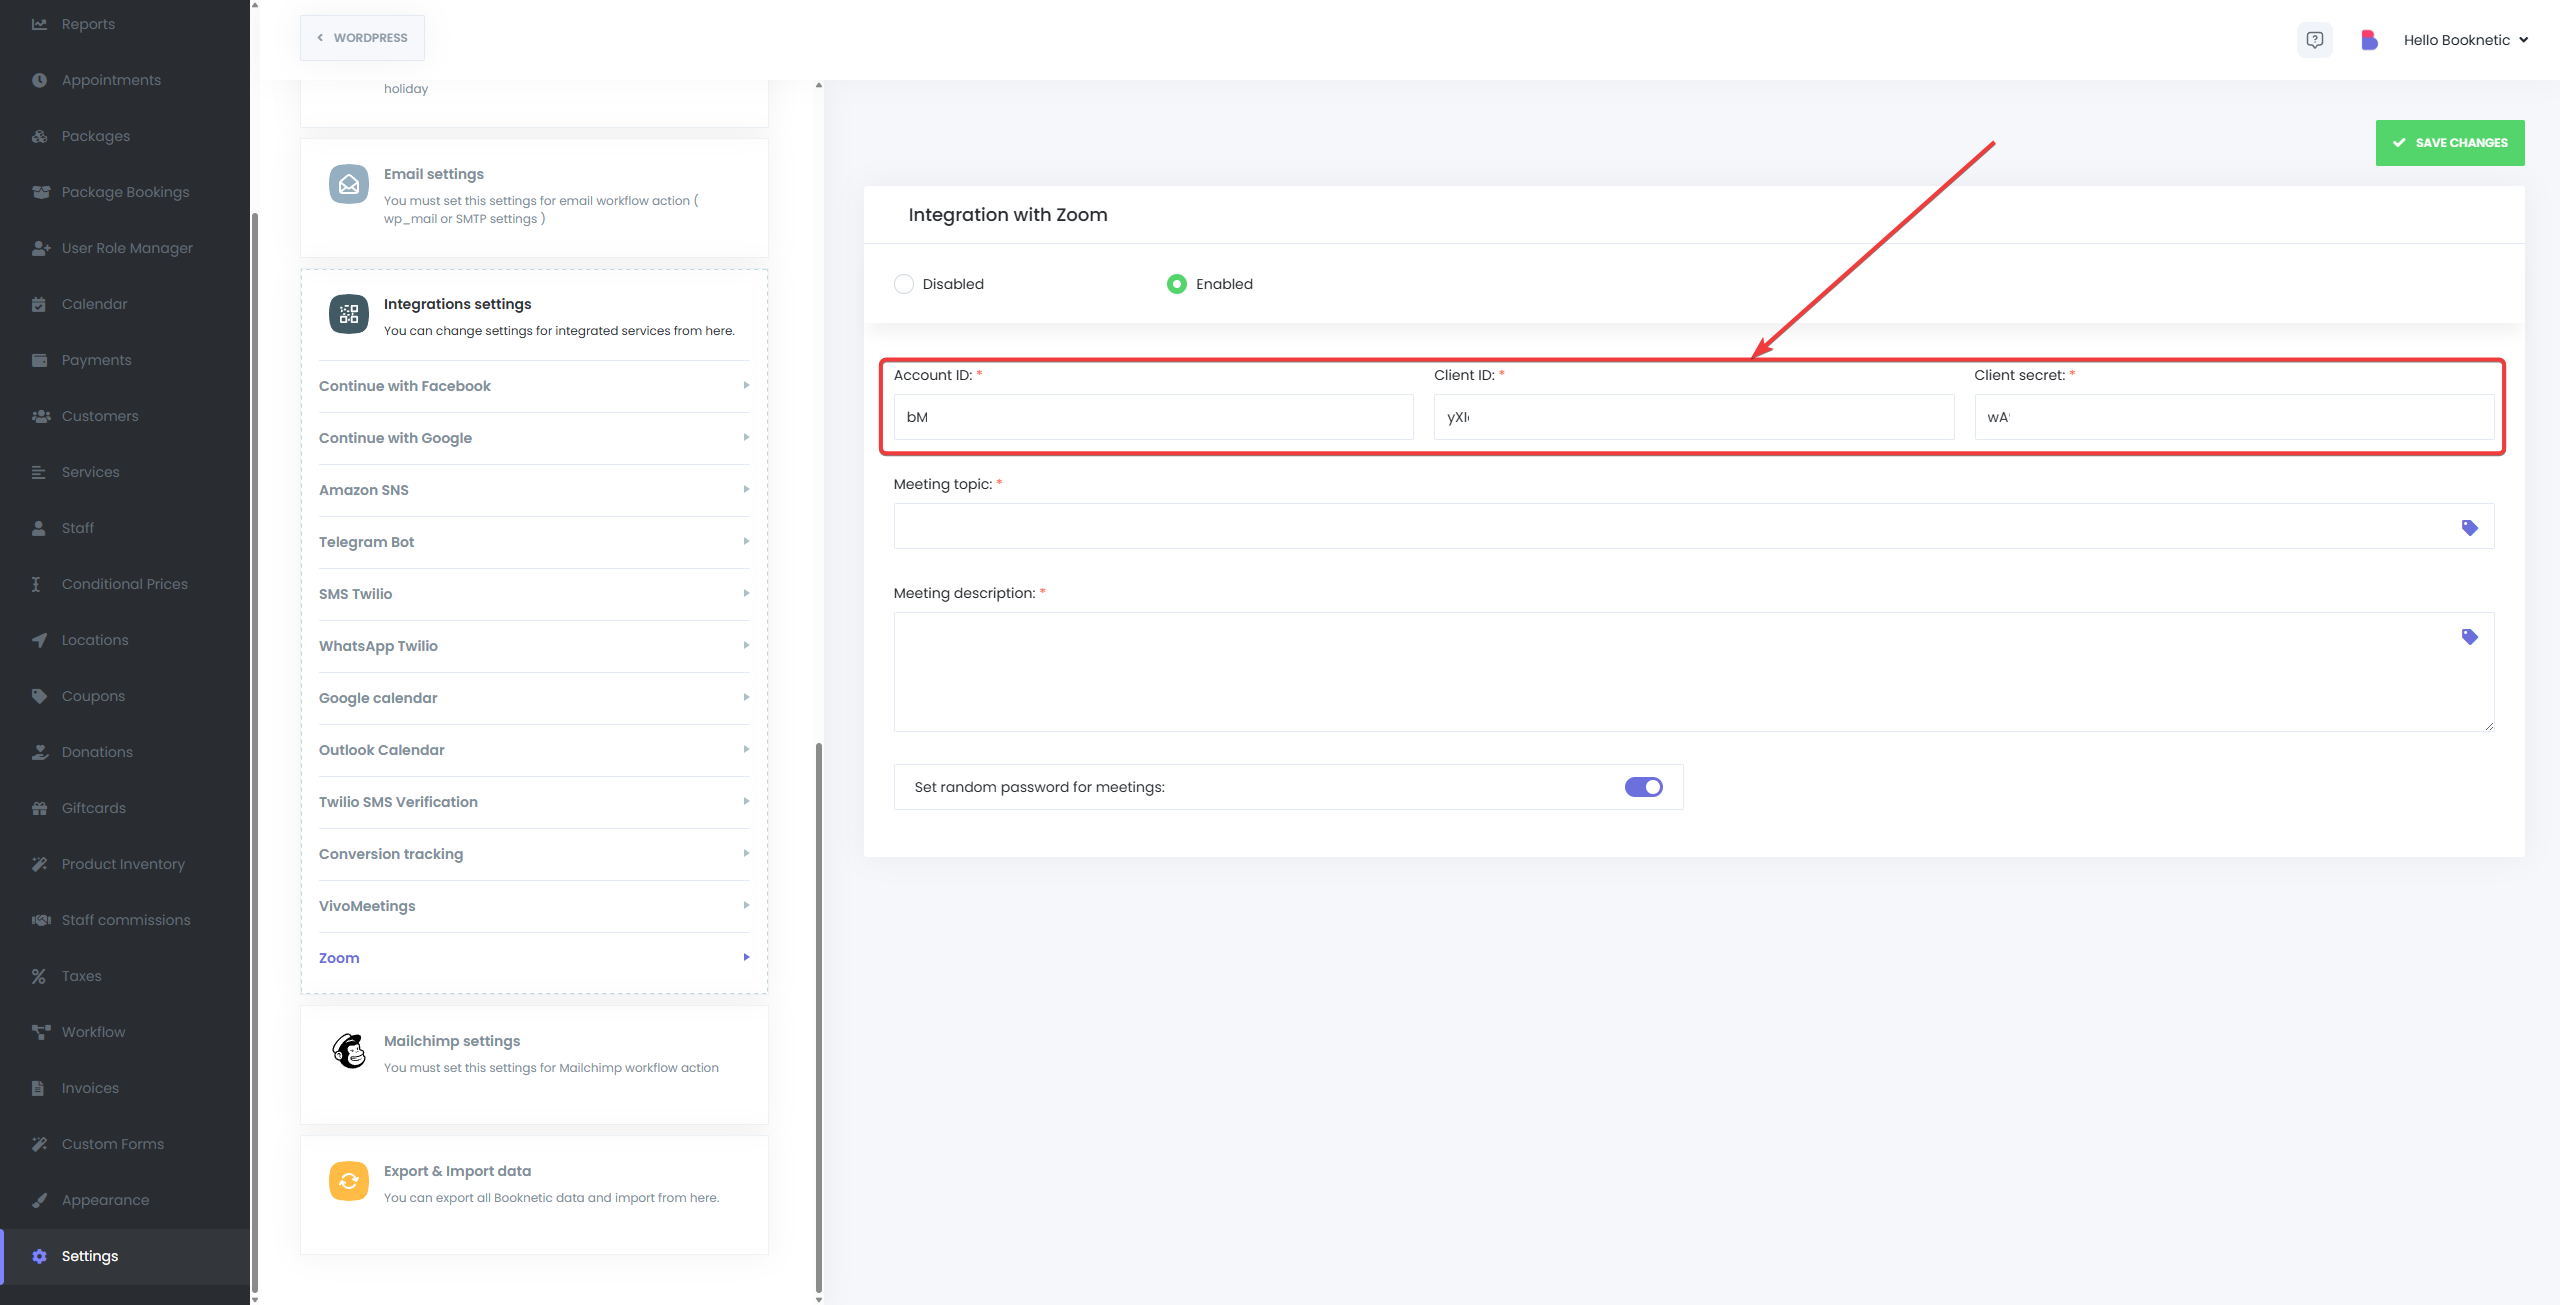
- After that, fill the Meeting topic and Meeting Description fields. You can use Booknetic’s keywords in the Meeting topic and Meeting Description fields. To get a list of ready keywords, click on the Keywords icon. Additionaly, you can enable random passwords for your Zoom meetings, by enabling the option Set random password for meetings. After all of the mandatory fields are filled, save the credentials.
-
Complete Authorization
After saving, go to Staff page, edit the staff which will need to connect to a Zoom profile, and then select the Zoom profile in that staff’s profile:

How Zoom Integration Works
Once the integration is complete, Zoom meetings will be automatically created for appointments booked in Booknetic. Here’s how it works:
- Booking a Service: When a customer books an appointment through Booknetic, the system will automatically generate a Zoom meeting linked to that appointment.
- Confirmation Emails: Both the customer and the staff member will receive a confirmation email with a link to the Zoom meeting.
- Virtual Appointments: When the scheduled time arrives, both the customer and the staff member can join the Zoom meeting via the provided link.
Managing Zoom Meetings
Editing an Appointment
- If changes are made to the appointment, such as rescheduling, Booknetic will automatically update the Zoom meeting time and send out new notifications to the customer and staff.
Cancelling a Zoom Meeting
If an appointment is canceled in Booknetic, the Zoom meeting will also be canceled automatically. Both the customer and staff will be notified of the cancellation, if the Workflows are set up correctly.
Best Practices for Using Zoom Integration
- Double-check Credentials: Ensure your Client ID, Client Secret and Account ID are correctly entered in the Booknetic settings to avoid issues with syncing.
- Test Before Going Live: Perform a test booking to ensure that the Zoom meetings are created successfully and that the integration is working as expected.
Troubleshooting
If you encounter any issues with the Zoom integration, consider the following troubleshooting tips:
- Check API Credentials: Ensure that the Client ID, Client Secret and Account ID are correctly entered in the Booknetic integration settings.
- Zoom Permissions: Verify that the app permissions (scopes) in your Zoom app are properly set to allow meeting creation and updates.
- Reauthorize Integration: If the integration is not functioning correctly, try creating a new zoom app and reconnecting the Zoom integration to refresh the authorization.