The Customers module in Booknetic acts as a centralized hub for managing all client-related information, ensuring a seamless and efficient booking experience. It allows businesses to store, track, and update customer data, making it easier to manage appointments, streamline communication, and build long-term client relationships. By keeping all customer details organized in one place, businesses can enhance service quality and improve customer satisfaction.
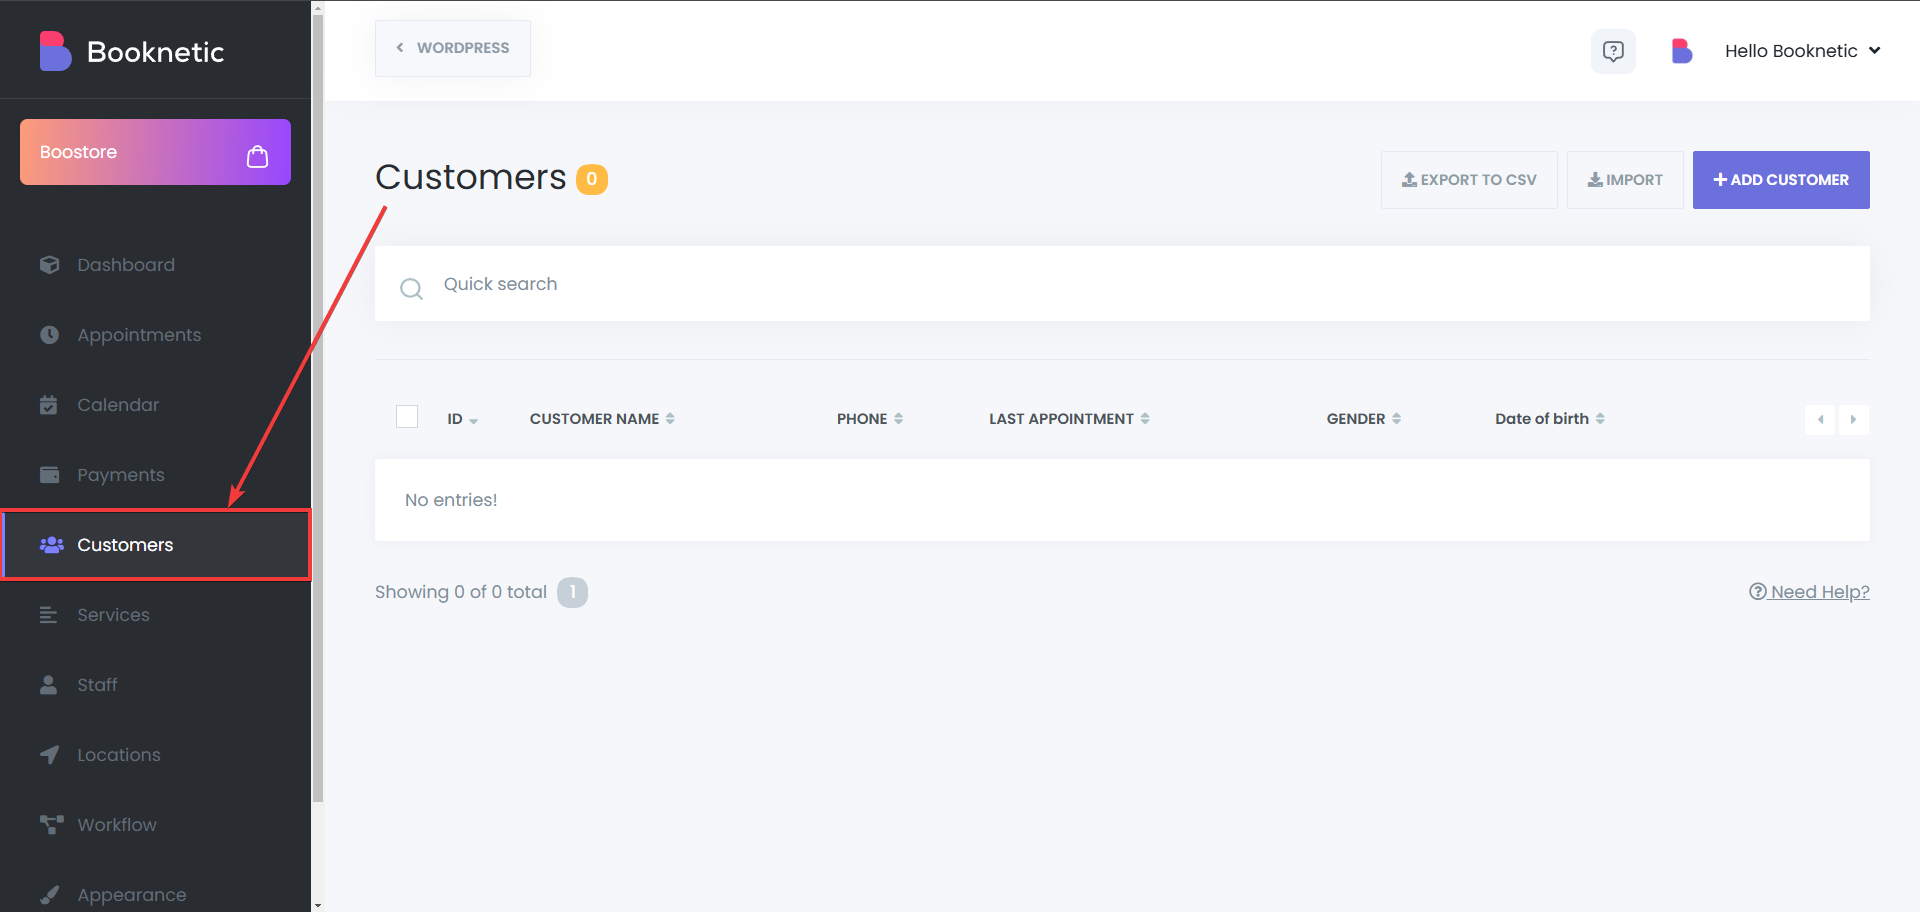
Accessing the Customers Module
- Navigate to the Dashboard:
- Log in to your WordPress admin panel.
- Locate and click on the Booknetic plugin in the sidebar.

- Open the Customers Section:
- Within the Booknetic menu, select Customers to access the module.
Adding Customers
Booknetic offers multiple ways to add and manage customers, giving businesses the flexibility to build and maintain their client database with ease. Customers can be added manually, allowing for precise data entry when handling individual clients, or imported in bulk using a CSV file, making it simple to transfer existing customer lists into the system. Additionally, Booknetic provides an export function, enabling businesses to back up or migrate their customer data whenever needed. These options ensure that all businesses can efficiently manage customer records without hassle.
Manual Addition
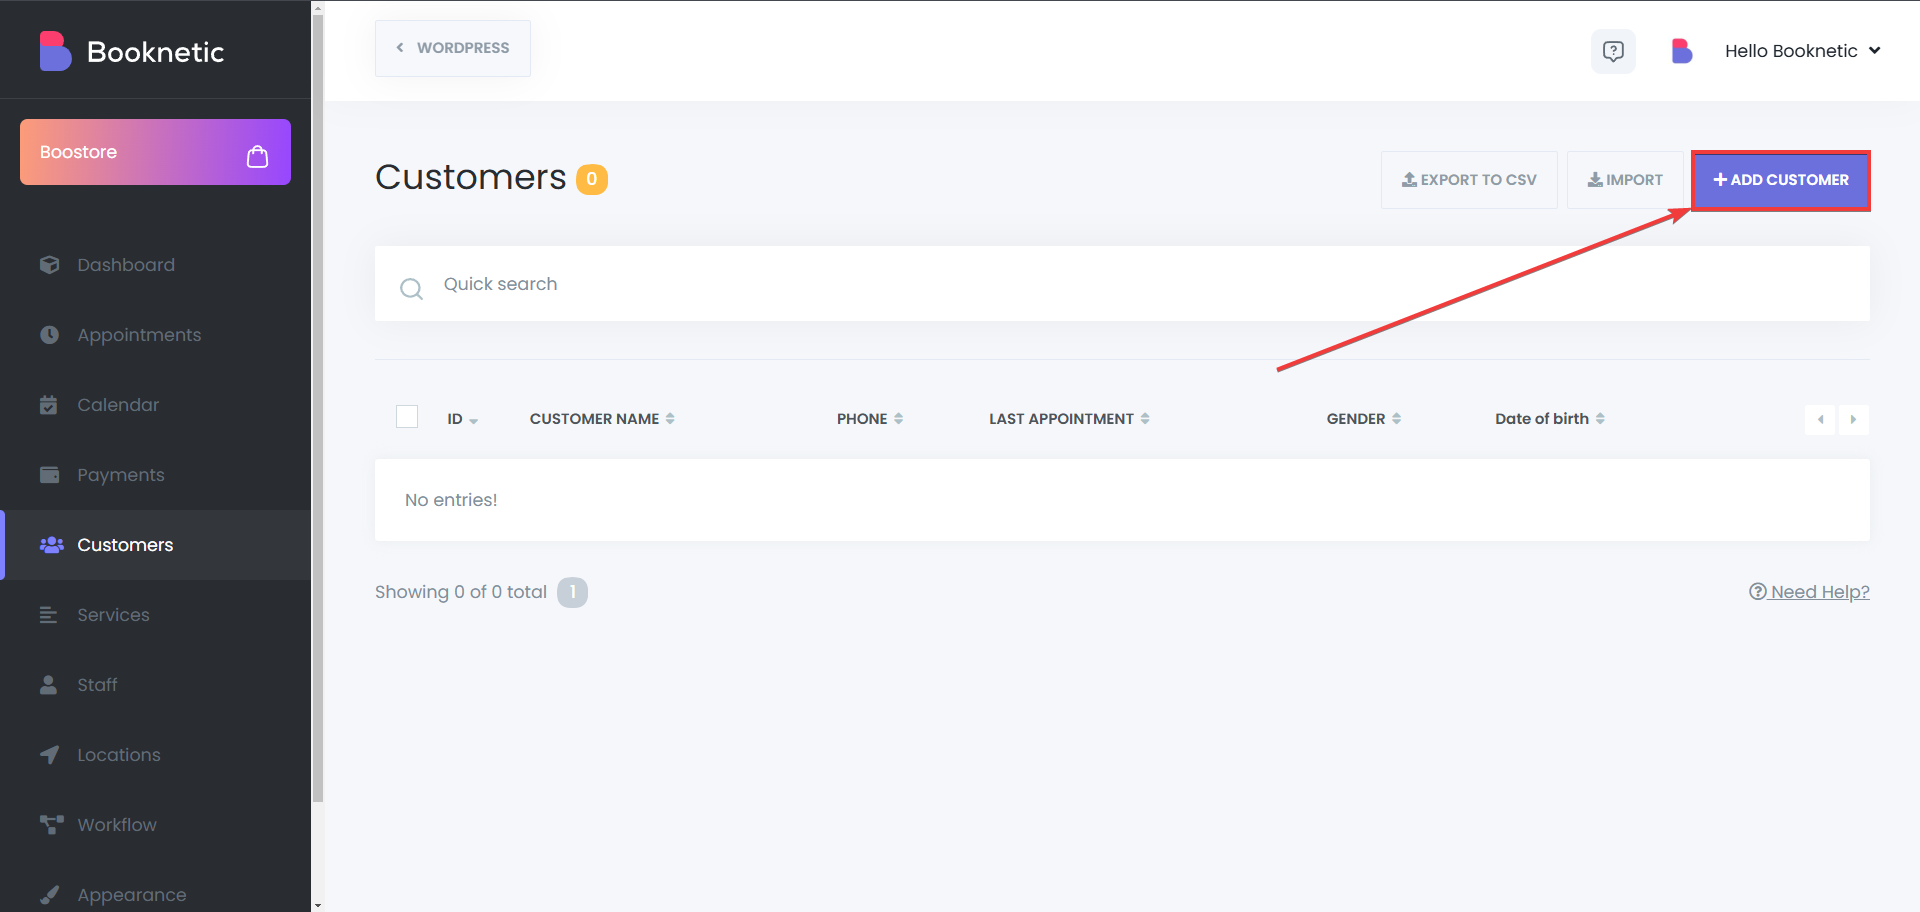
- Initiate the Process:
- Click the "ADD NEW" button at the top of the Customers page.
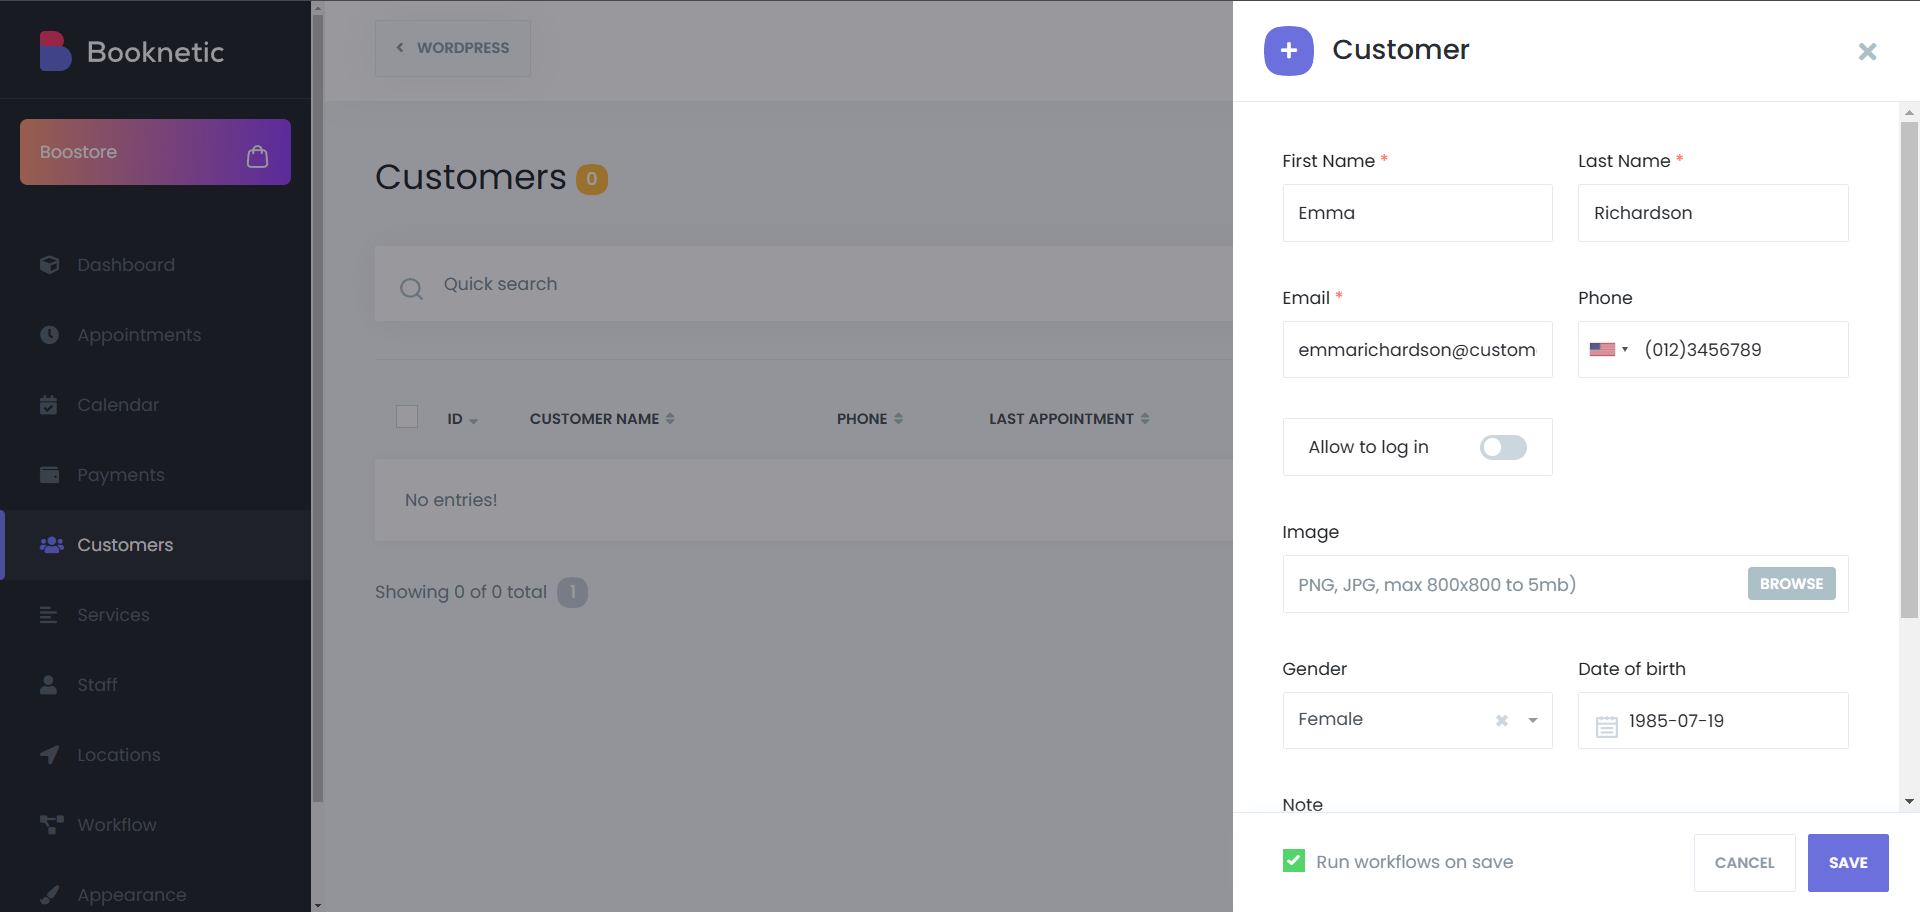
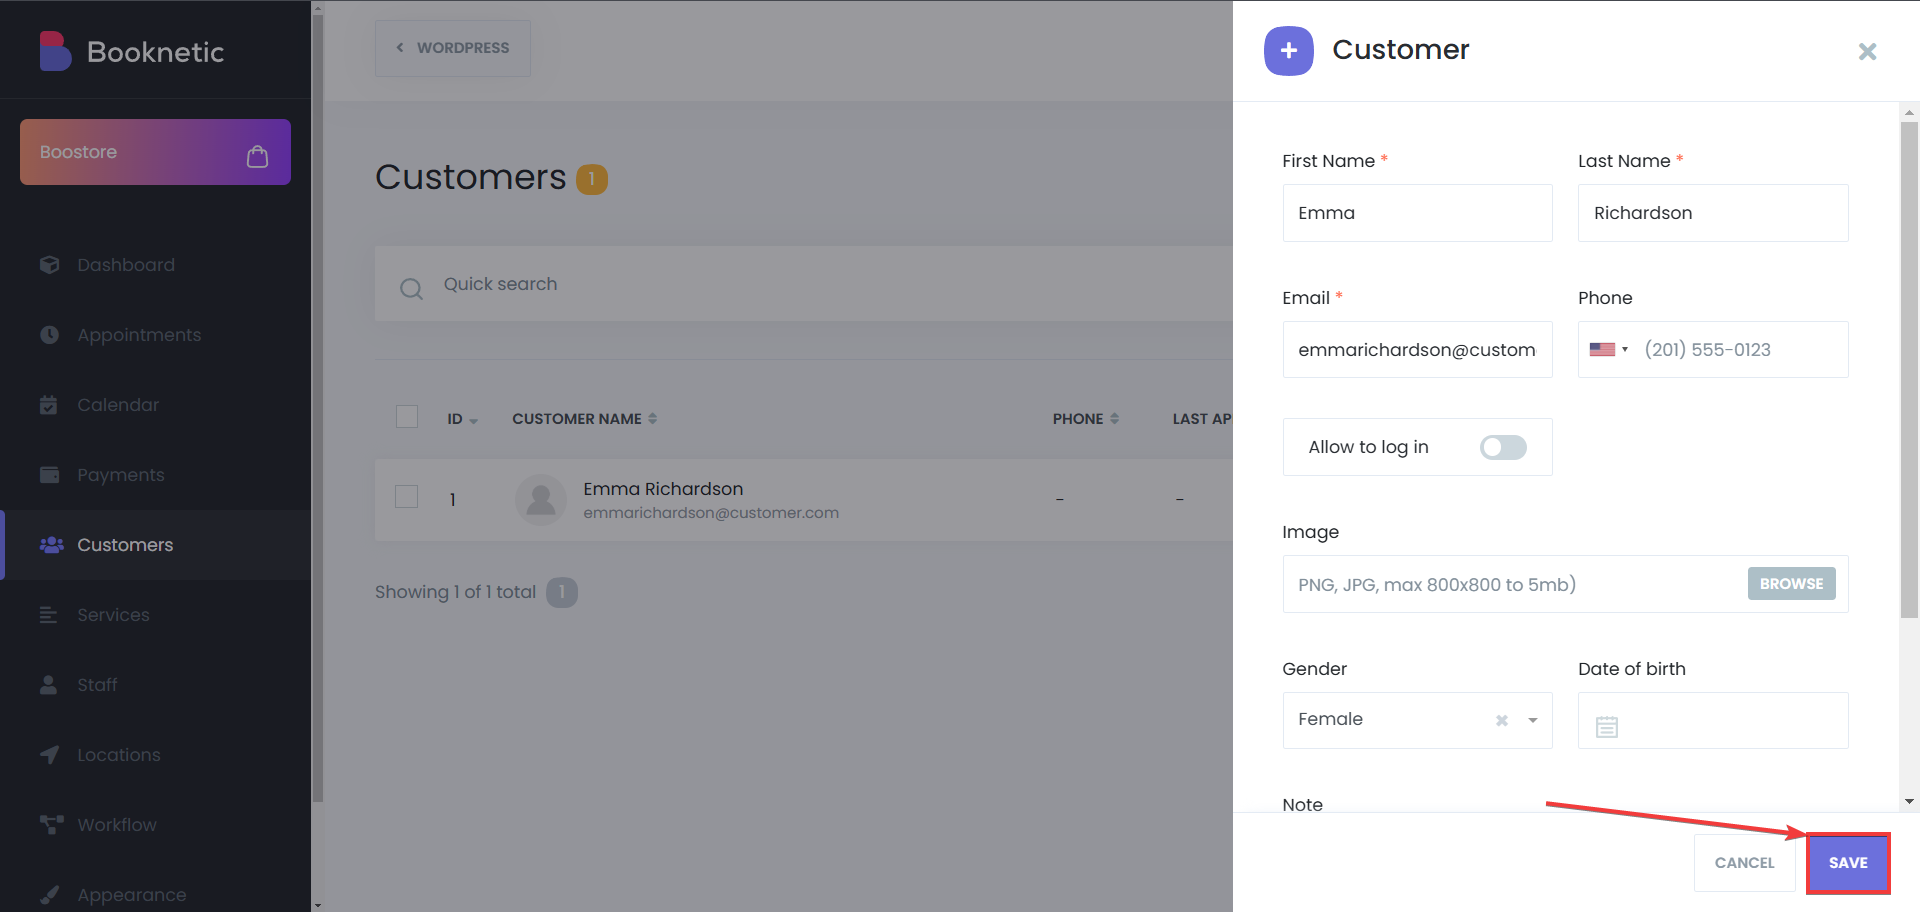
- Enter Customer Details:
- Name and Surname: Input the customer's full name.
- Email: Provide a valid email address.
- Phone Number: Enter the contact number.
- Profile Picture: Upload an image if available.
- Gender: Select the appropriate option.
- Date of Birth: Specify the birth date.
- Note: Add custom notes about the customer.
- Allow the customer to log in:
- When the “Allow to log in” option is enabled, you can connect the customer profile to an existing WordPress profile, or create a new WordPress profile for that customer from Booknetic directly. This will allow your customers to save their information on booking panel if they log in to their account, and if you have the customer panel add-on, they will be able to manage their bookings by logging in to their account and using the customer panel.
- Run workflows on save:
- If you have any workflows related to customer creation, like sending email to the customer email, or the phone number, or any other type of workflow that runs when a new customer is created, it will work if this toggle is kept on. Otherwise, if the toggle is turned off, the workflow action will also not start. If you’d like to learn more about workflows, you can check the workflow module of Booknetic.
- Save the Information:
- After filling in the details, click the "SAVE" button to add the customer to your database.
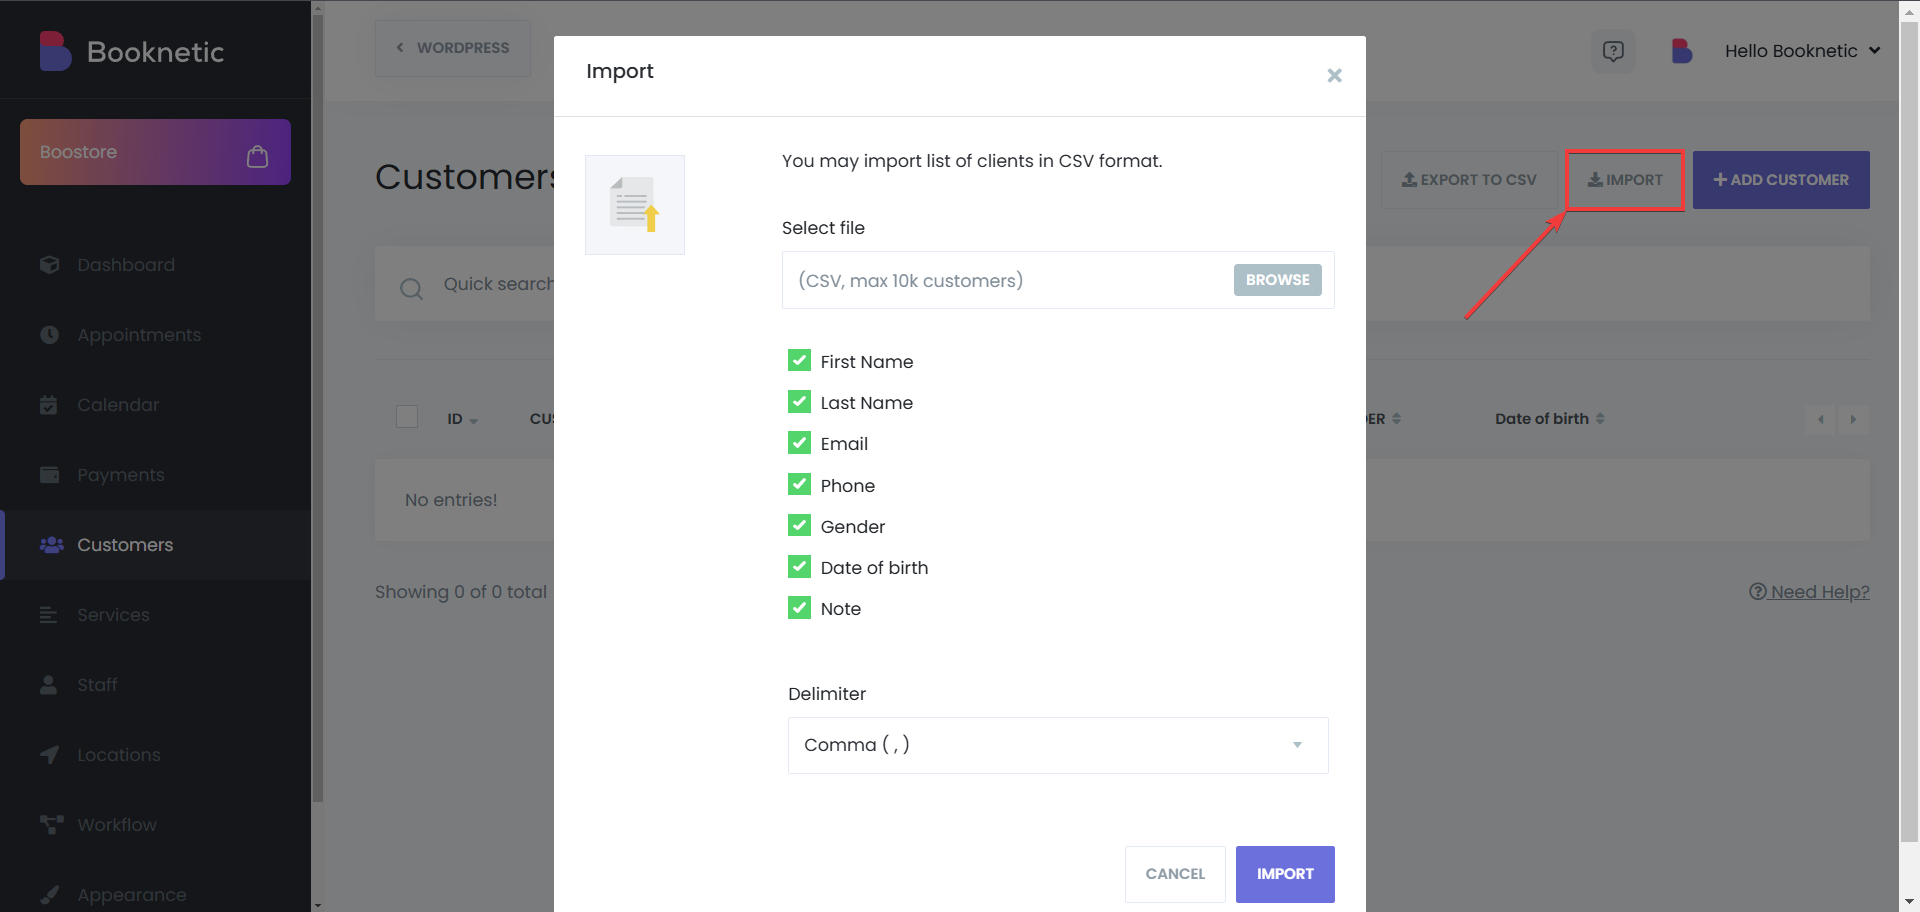
Importing Customers via CSV
- Prepare the CSV File:
- Ensure your CSV file is formatted correctly with appropriate headers matching the required customer fields.
- Import Process:
- In the Customers module, look for the "Import" option.
- Upload your CSV file and follow the on-screen instructions to map fields and complete the import.
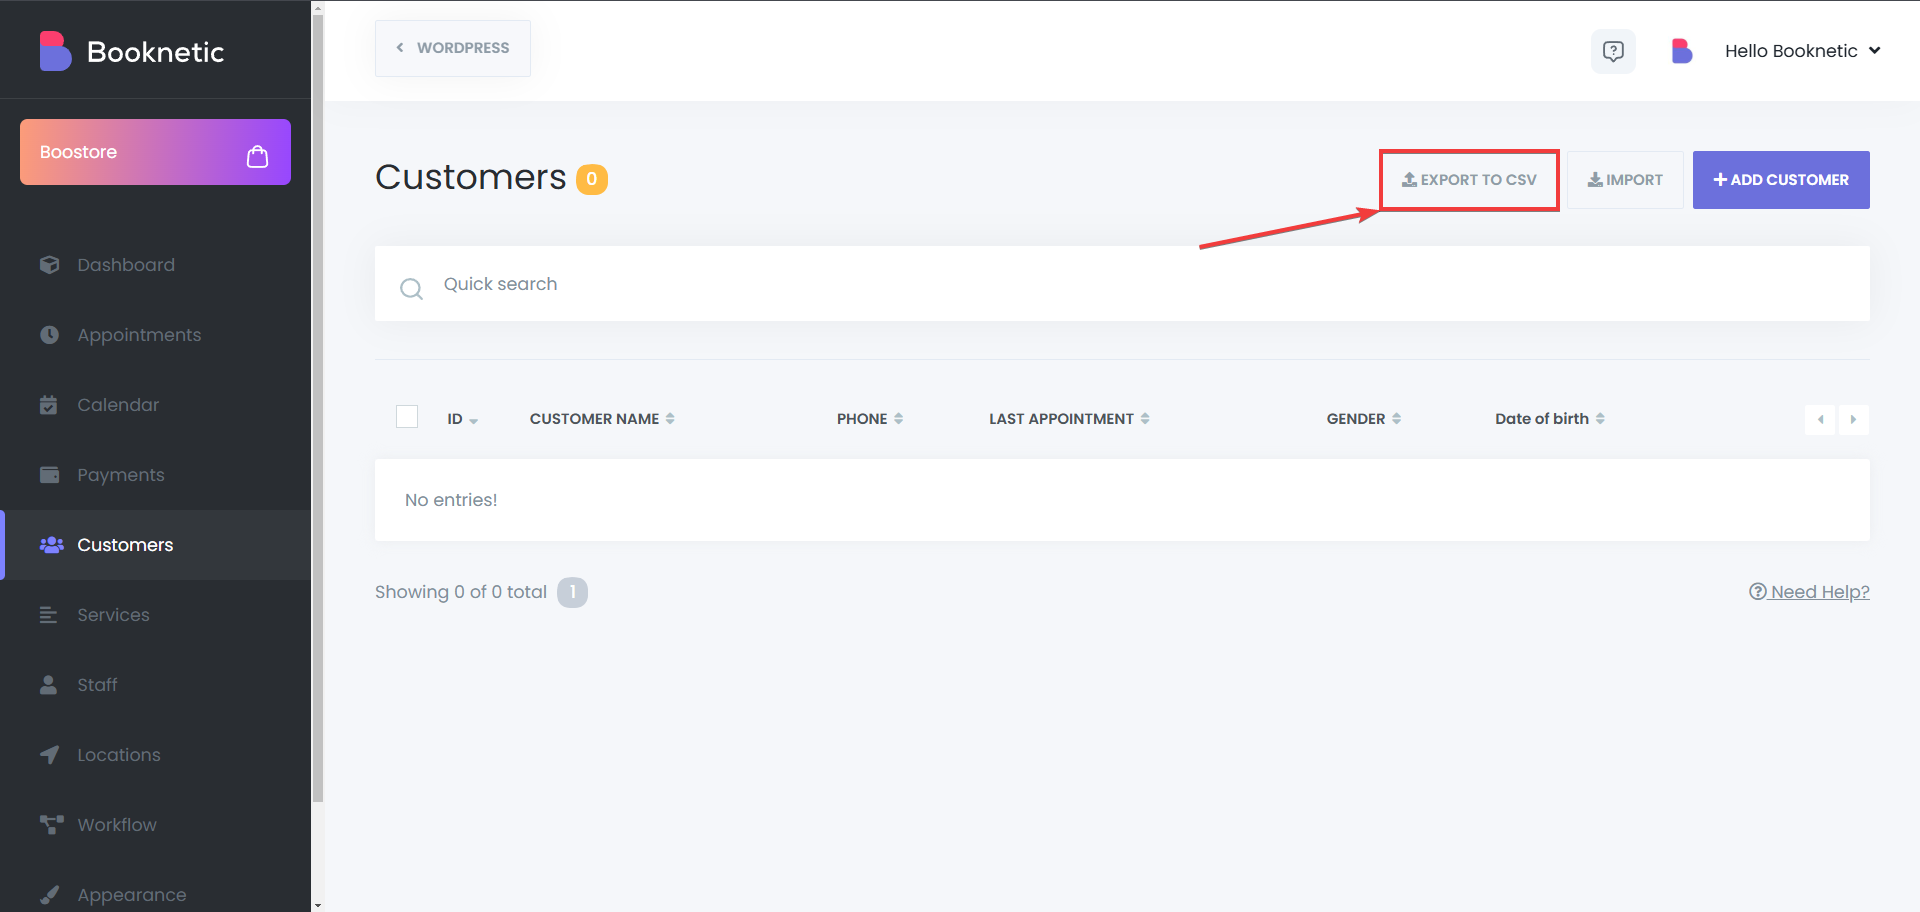
Exporting Customer Data
- Initiate Export:
- Click on the "Export" button within the Customers module.
- Download the File:
- The system will generate an Excel file containing your customer data, which you can save for backup or analysis purposes.
Managing Customer Information
Efficient management of customer data is essential for improving customer relationships and ensuring a smooth booking experience. By maintaining up-to-date customer profiles, businesses can personalize services and communicate effectively with clients. Well-organized customer data also helps reduce scheduling errors and improve overall customer satisfaction. Keeping records current ensures that every interaction with a client is informed, professional, and seamless.
Editing Customer Details
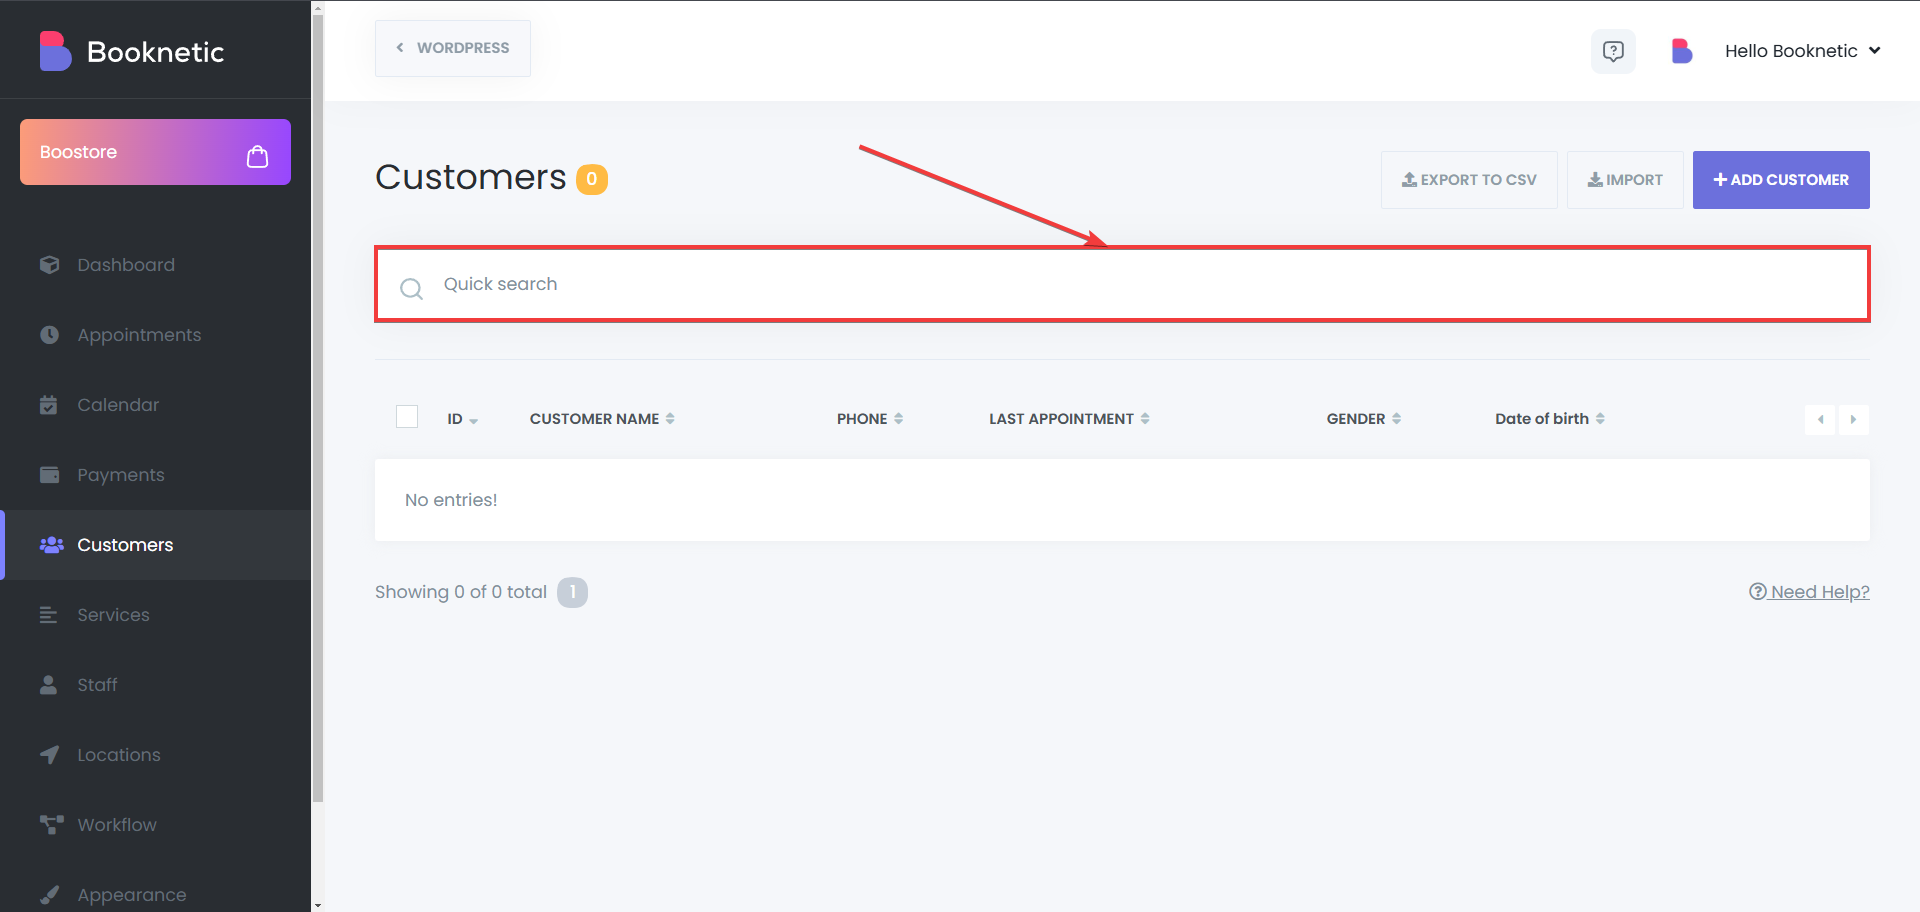
- Locate the Customer:
- Use the search bar to find the customer by name, email, or phone number.
- Edit Process:
- Click the "Edit" button next to the customer's name.
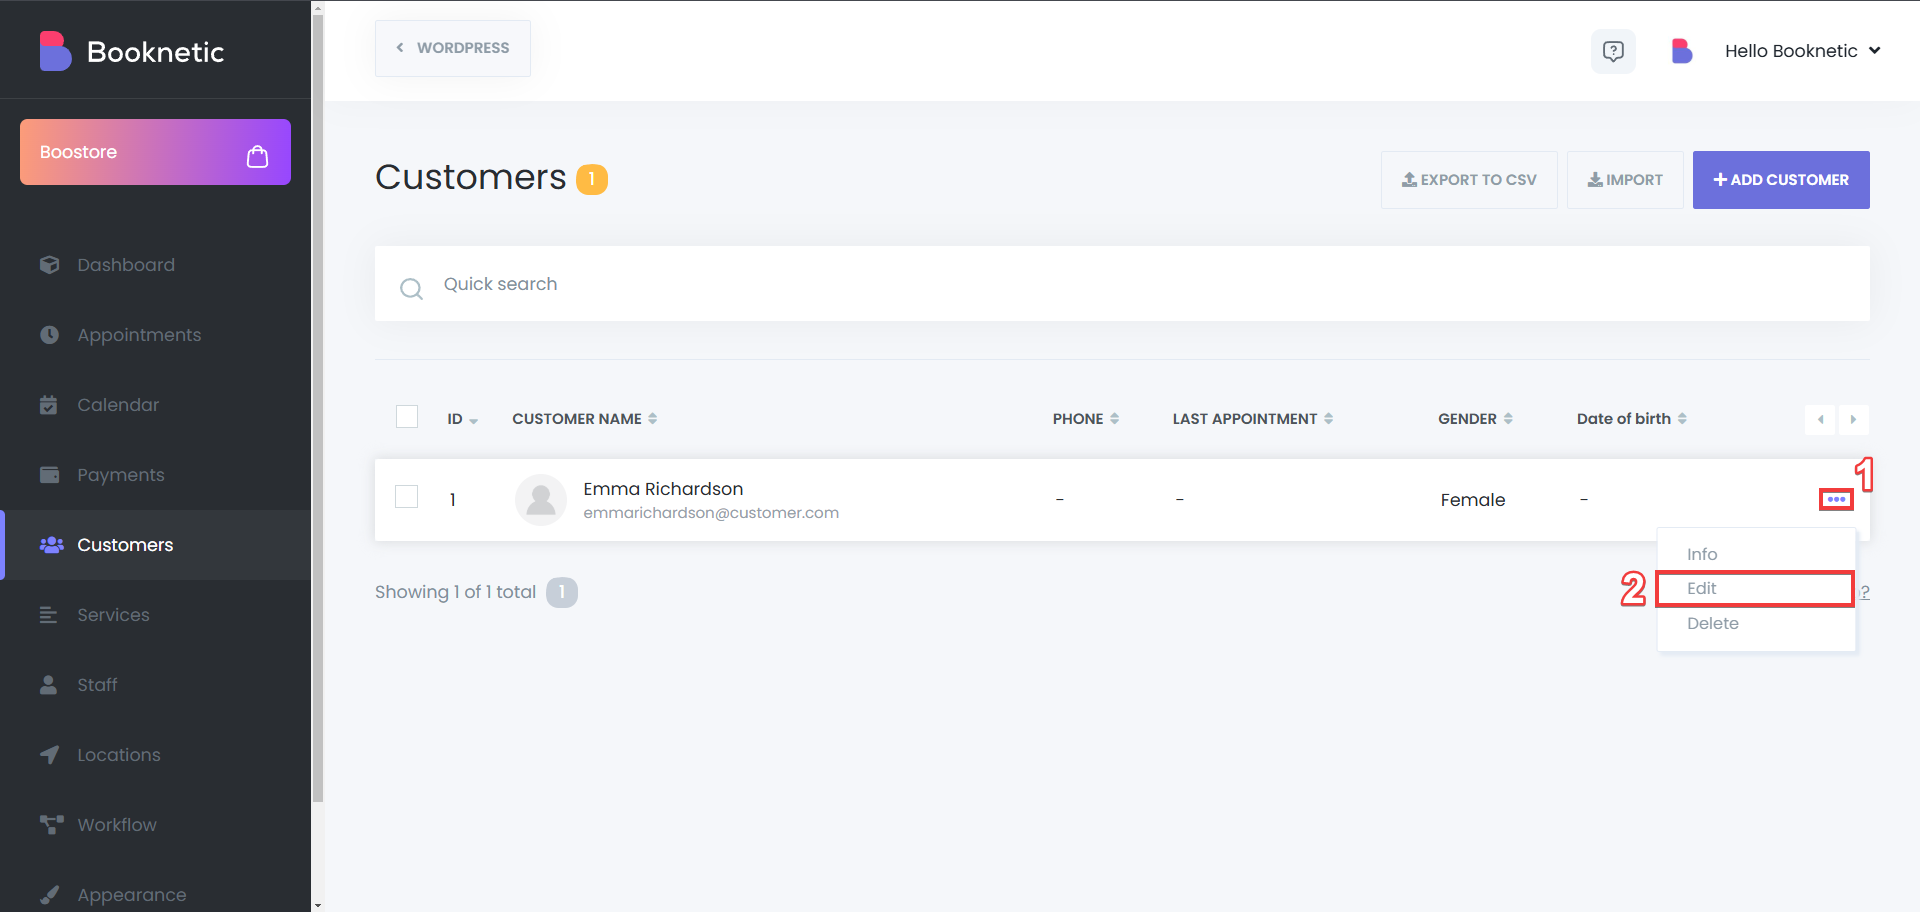
- Update the necessary information in the provided fields.
- Save the changes to update the customer's profile.
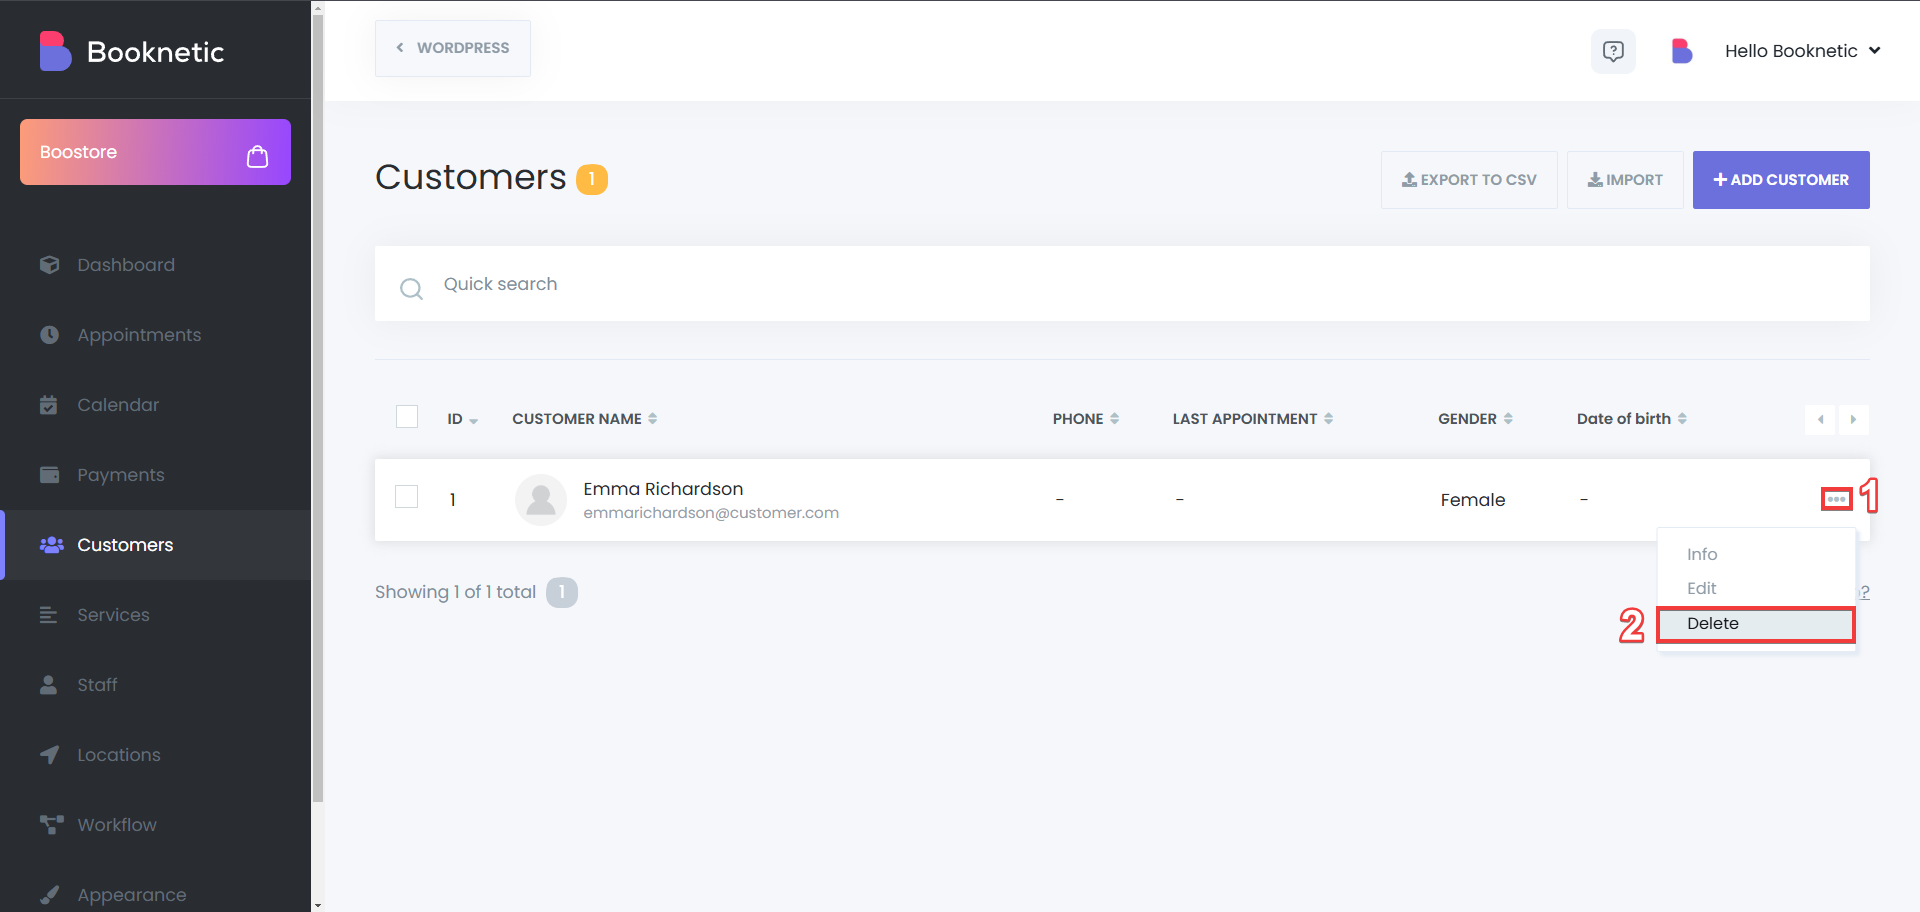
Deleting Customers
- Single Deletion:
- Click the "Delete" button corresponding to the specific customer.
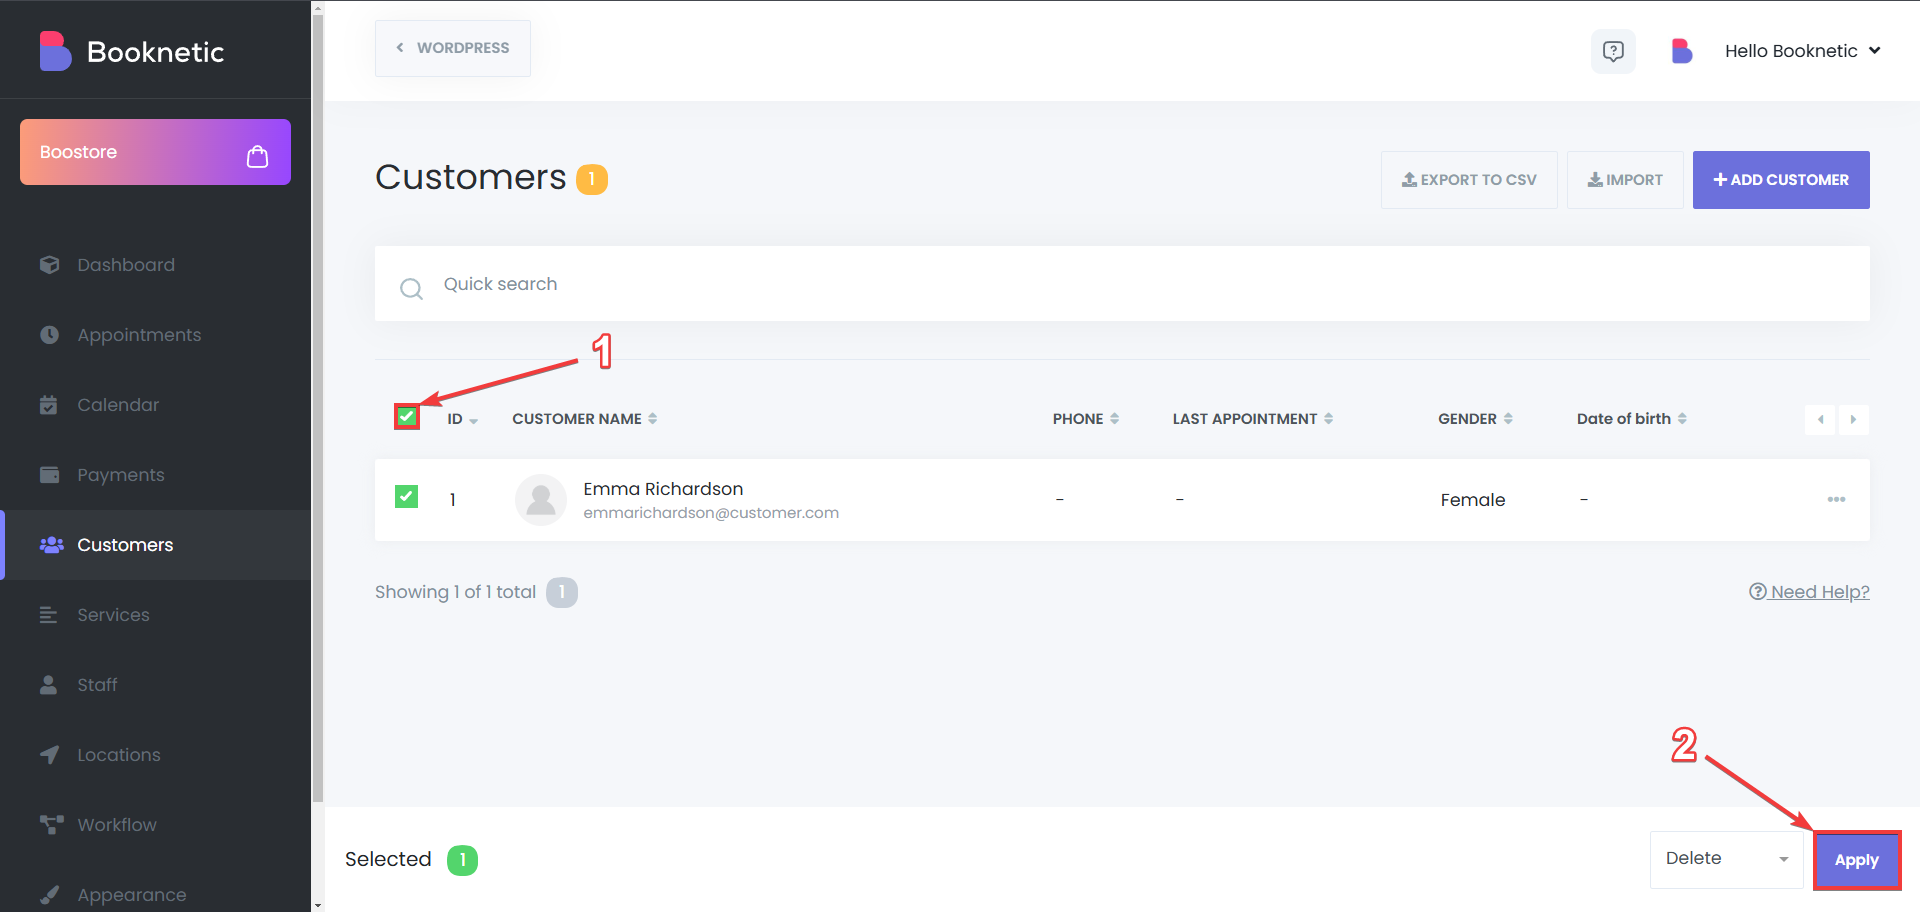
- Bulk Deletion:
- Select multiple customers using the checkboxes.
- Click the "Delete" button at the bottom to remove the selected entries.
Managing Customer Information
Your customers have two ways for signing up and having their own customer profile. One of them is, having an account created for your customer automatically, when they book their first appointment, and the other one is using the sign-up panel of Booknetic. Here’s how you can set them up:
Booking for the first time
When a customer books an appointment for the first time, Booknetic automatically creates a profile for them.
- Profile Creation:
- Upon the initial booking, a customer profile is generated in the system.
- Credentials Notification:
- A password is automatically generated and sent to the customer via email notification.
- Important Consideration:
- This registration process occurs only once. The password is encrypted after creation and cannot be resent. Ensure customers are aware to save their credentials for future reference.
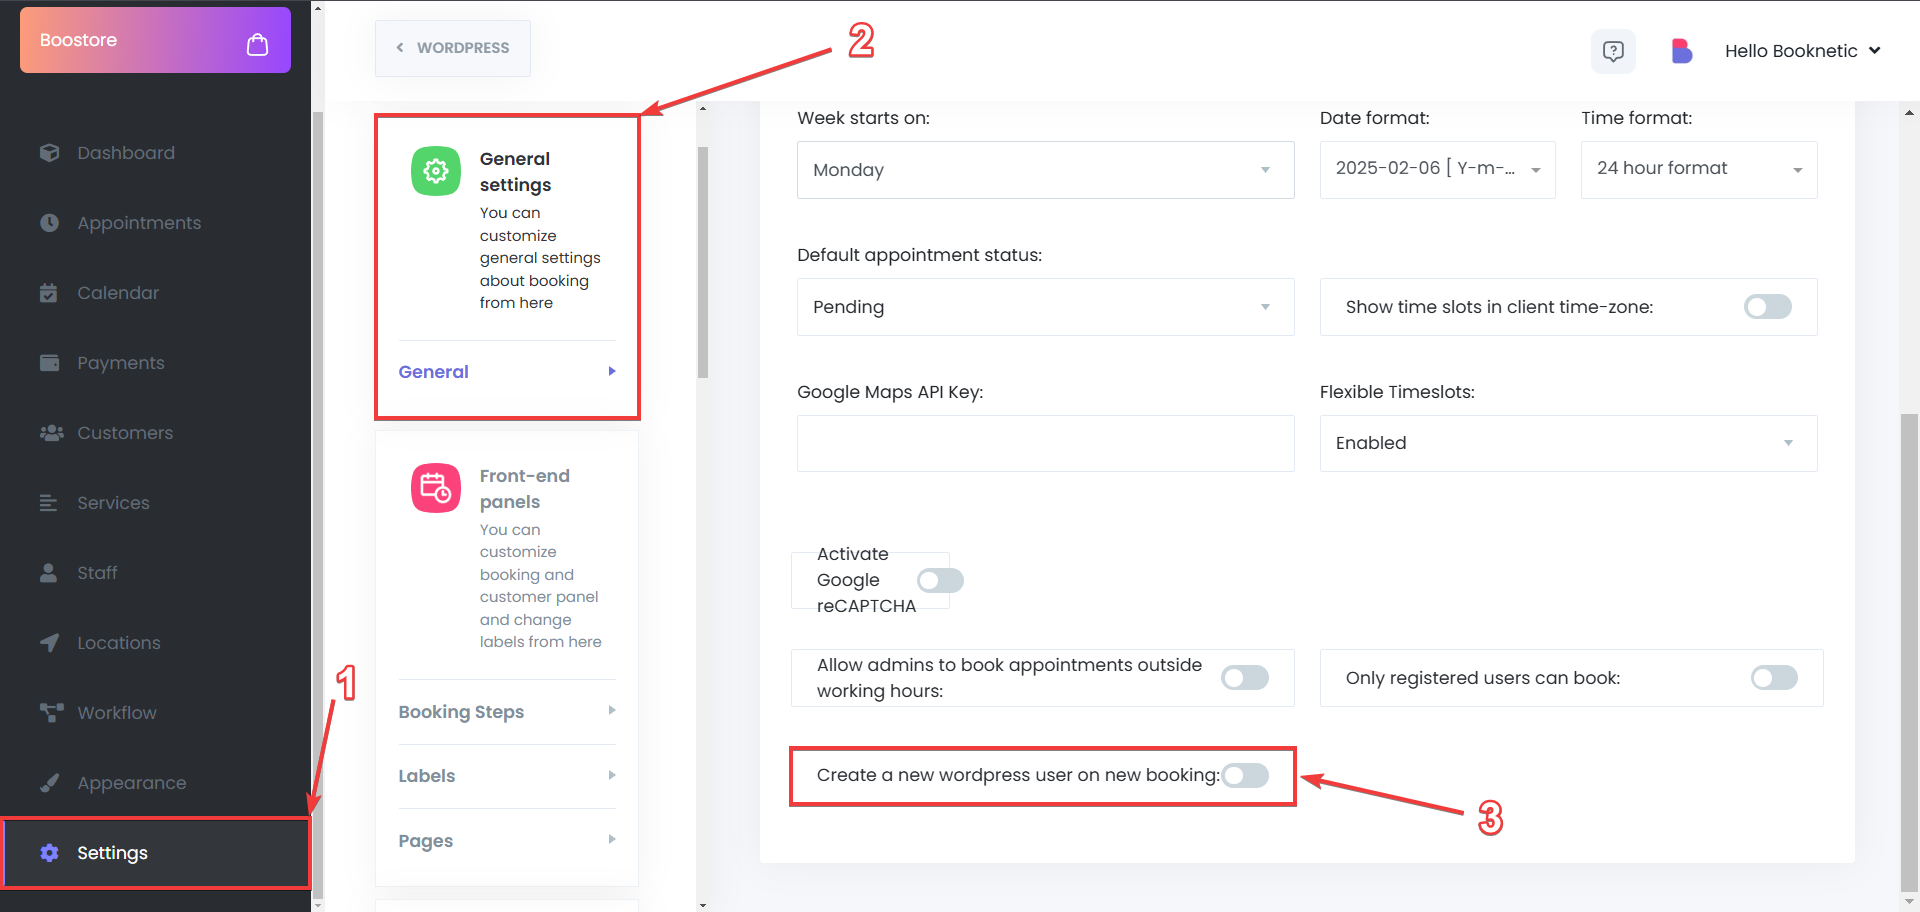
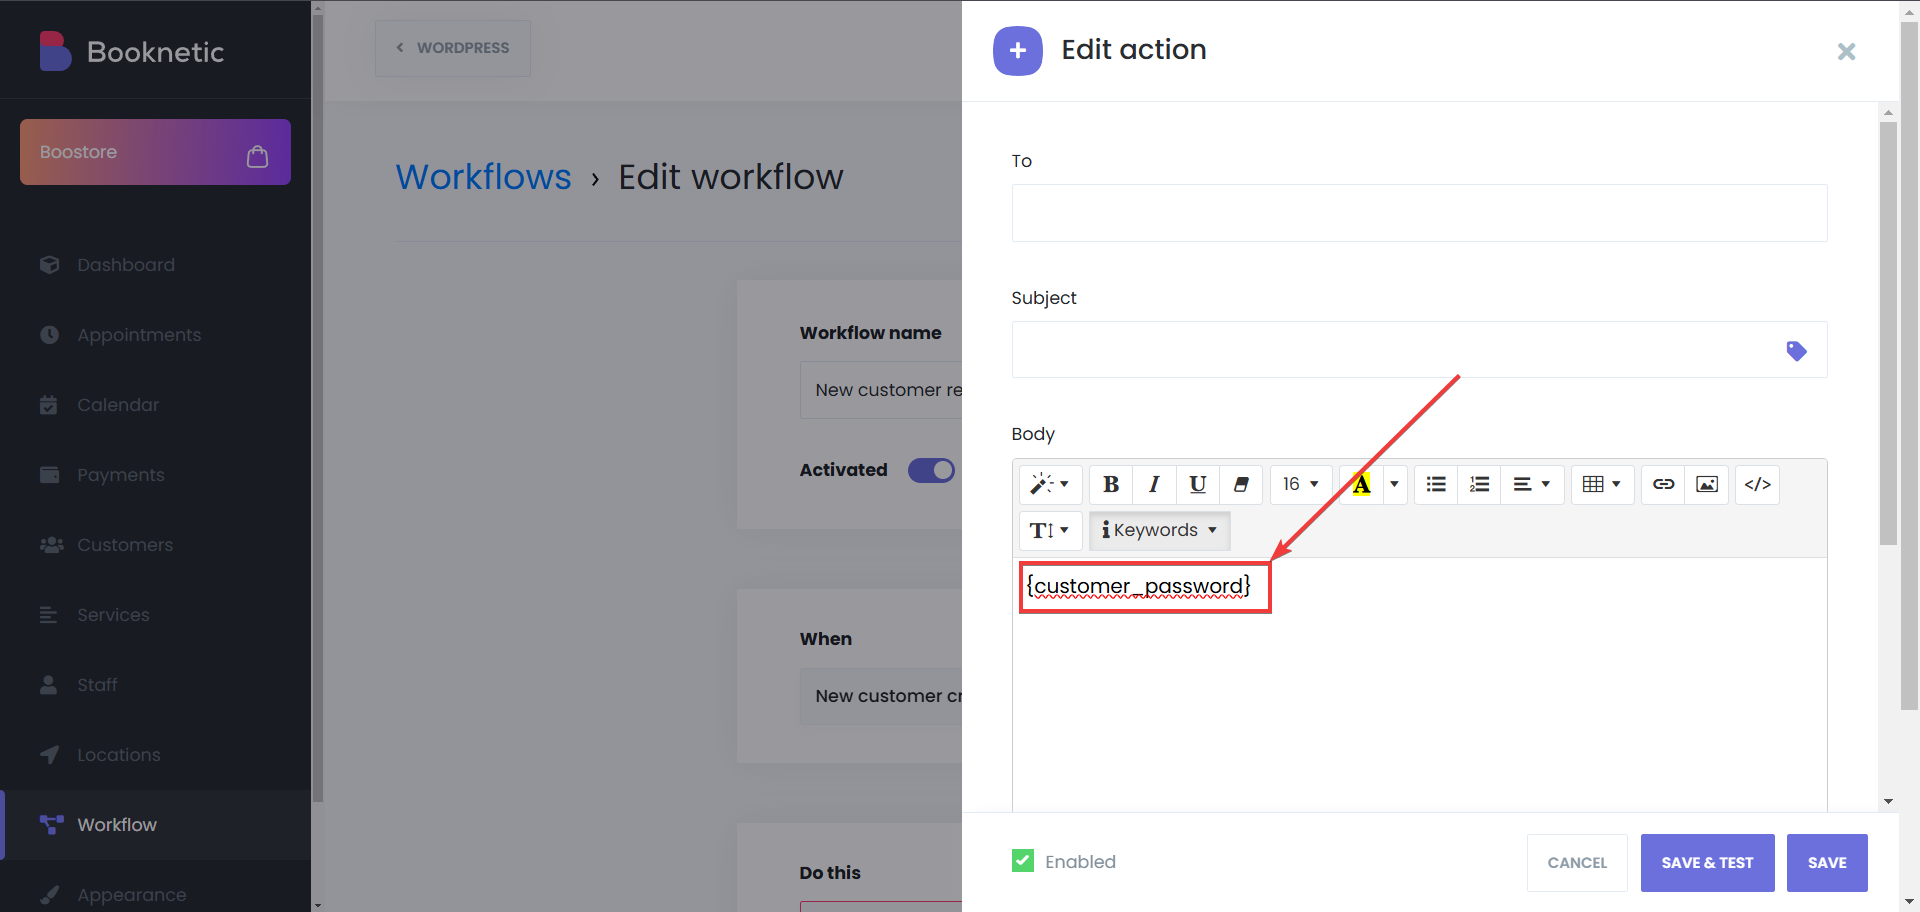
Here’s how to set it up:
- Go to Settings
- Click on General Settings
- Enable the option “Create a new wordpress user on new booking”
- Go to Workflows tab
- Create a new workflow
- Set the trigger as “New customer created”

After that, edit the contents of the sent notification, and add the {customer_password} keyword to the notification, to make sure that the customer does get their password generated and sent to them automatically. You can set up the notification content as you’d like, but the {customer_password} keyword is needed to be included in that notification for your customers to receive their passwords.
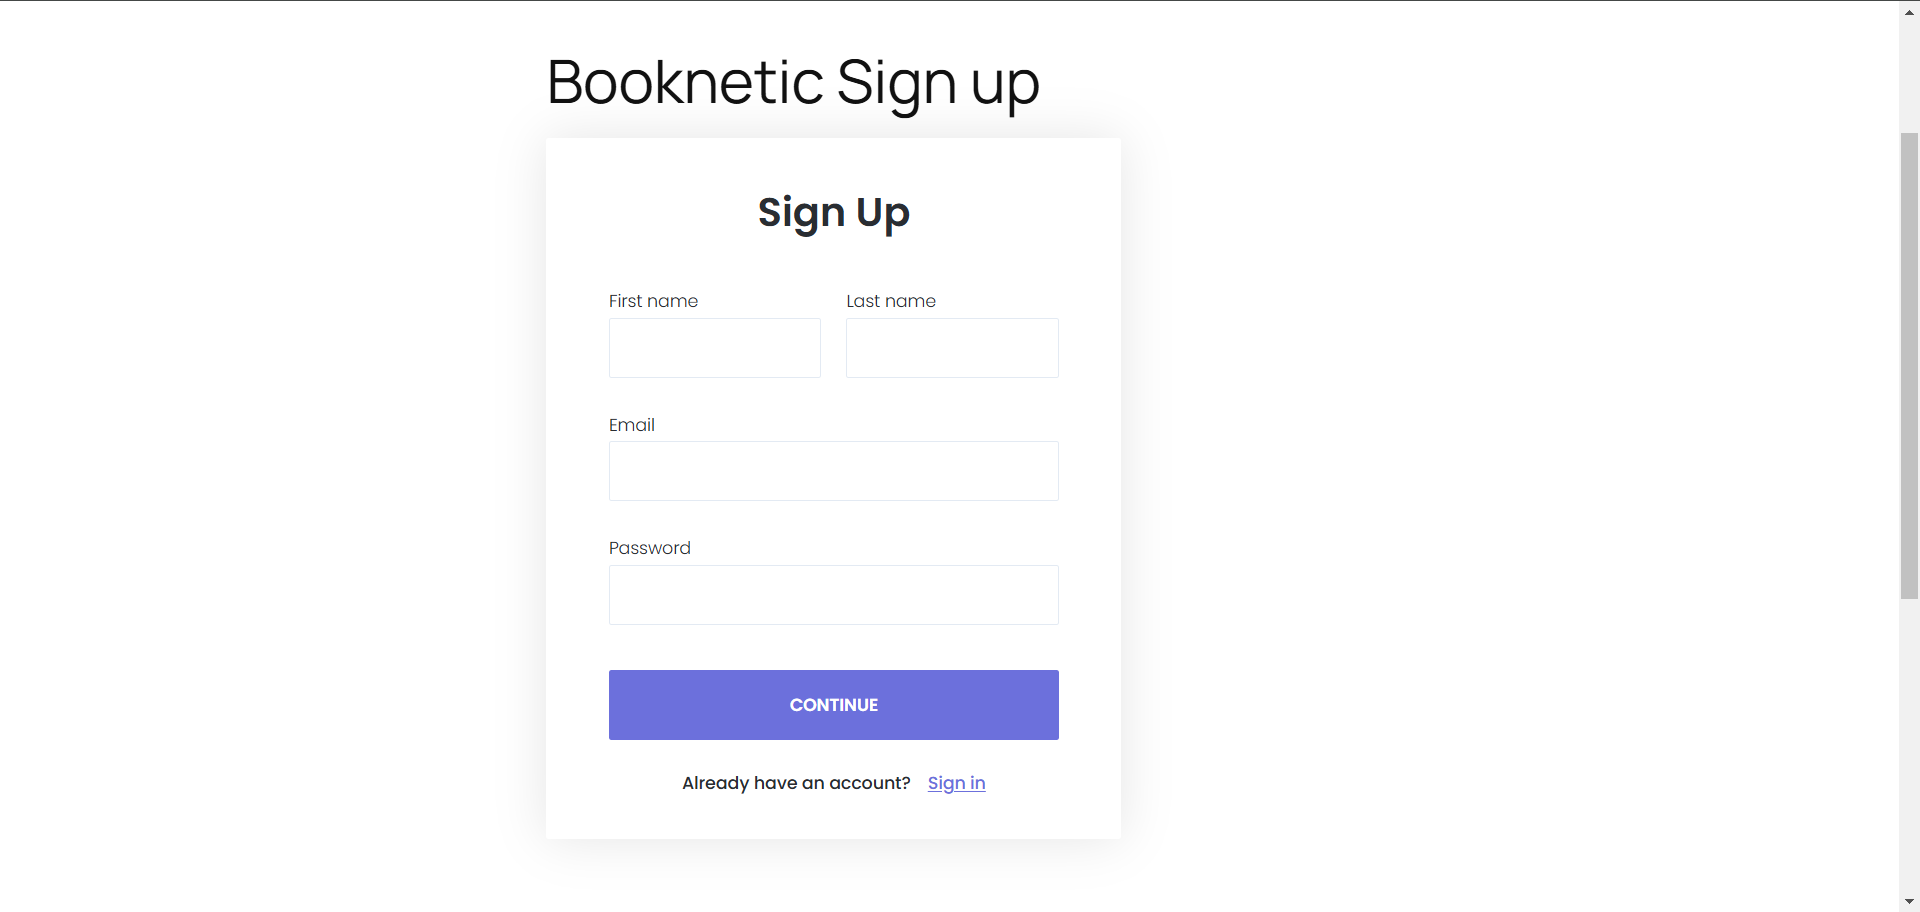
Using the sign-up panel of Booknetic
Booknetic provides a dedicated sign-up panel that allows customers to register their accounts before making an appointment. This feature ensures a smoother booking experience by letting clients manage their appointments, update personal details, and access their booking history from their customer panel.
Access the Sign-Up Panel
- Customers can visit the dedicated Sign-Up Page, where they will be prompted to create an account.
- This page is typically linked to the Customer Panel and can be placed on any page using the [booknetic-cp] shortcode.
- Filling Out the Registration Form
- Customers are required to enter key information, including:
- Full Name – Used to personalize the booking experience.
- Email Address – Required for confirmations and notifications.
- Password Creation – Customers set a secure password for their accounts.
After finishing the sign-up process, customers can also sign in to their Booknetic accounts, using the Sign-in panel,: