Custom Appointment Statuses
Custom Appointment Statuses
By using this site, you agree to our Cookie Policy
Custom Appointment Statuses
The Custom Appointment Statuses add-on in Booknetic allows businesses to create personalized appointment statuses to suit different business needs. This feature enhances appointment management by providing flexibility beyond the default statuses. Now, businesses can fully customize the appointment lifecycle.
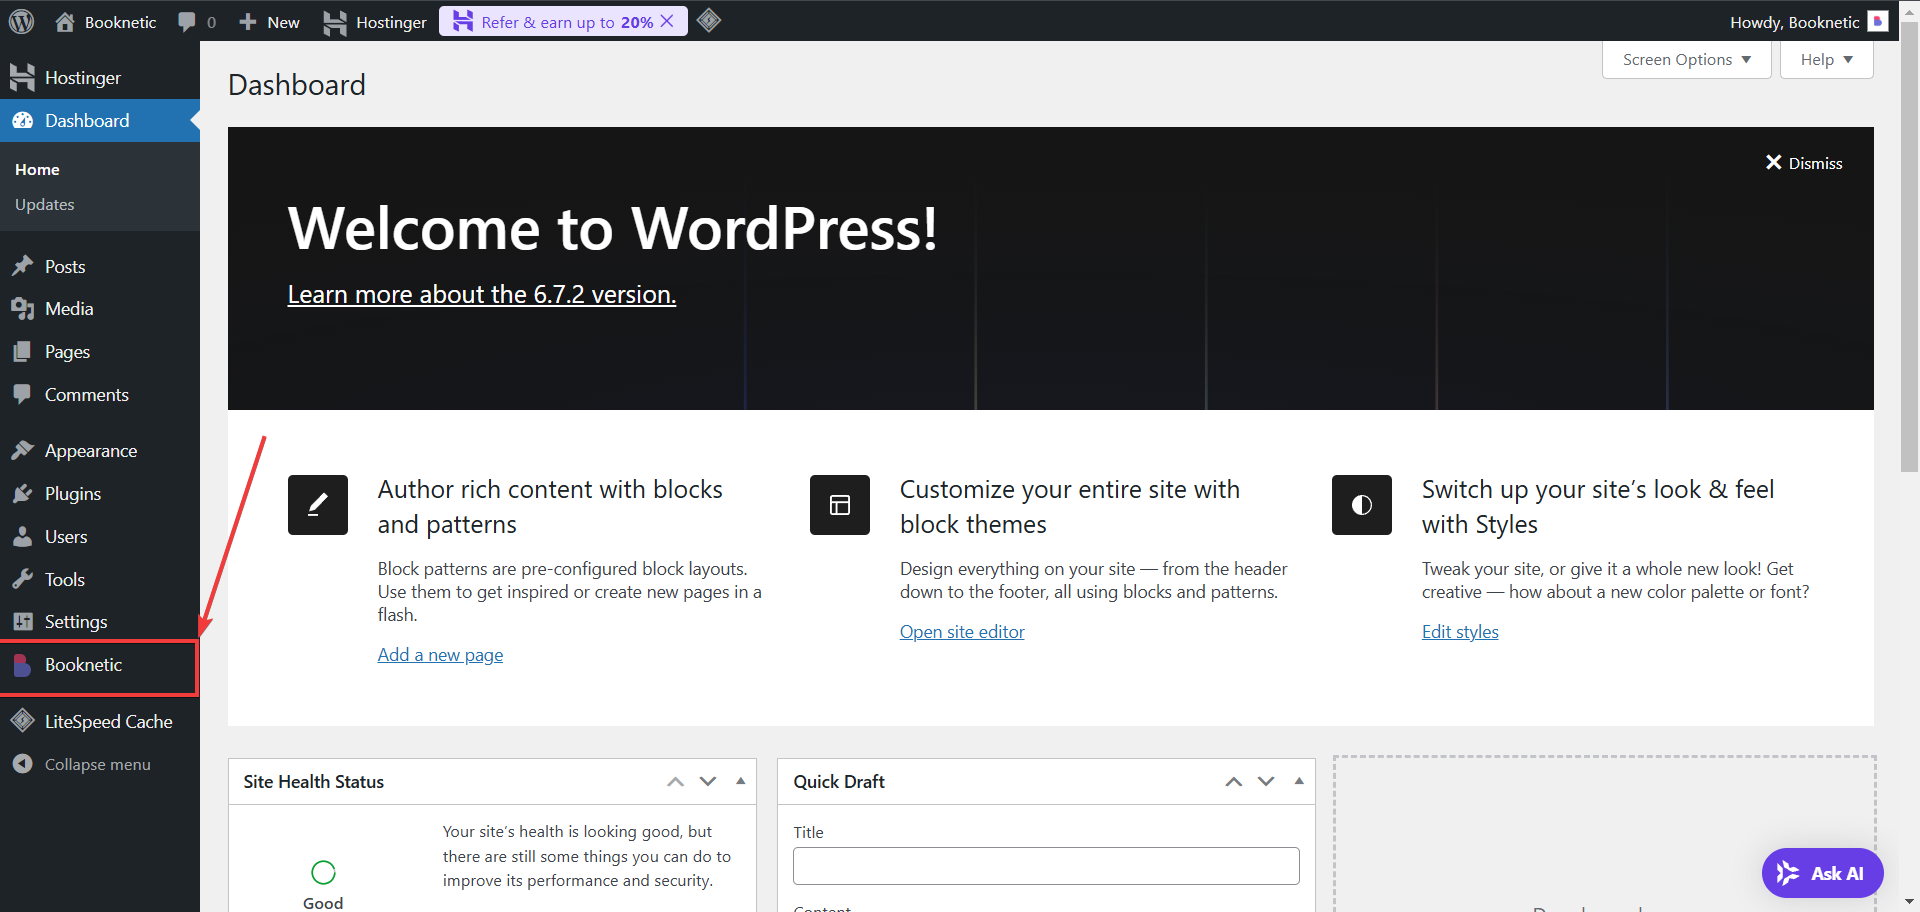
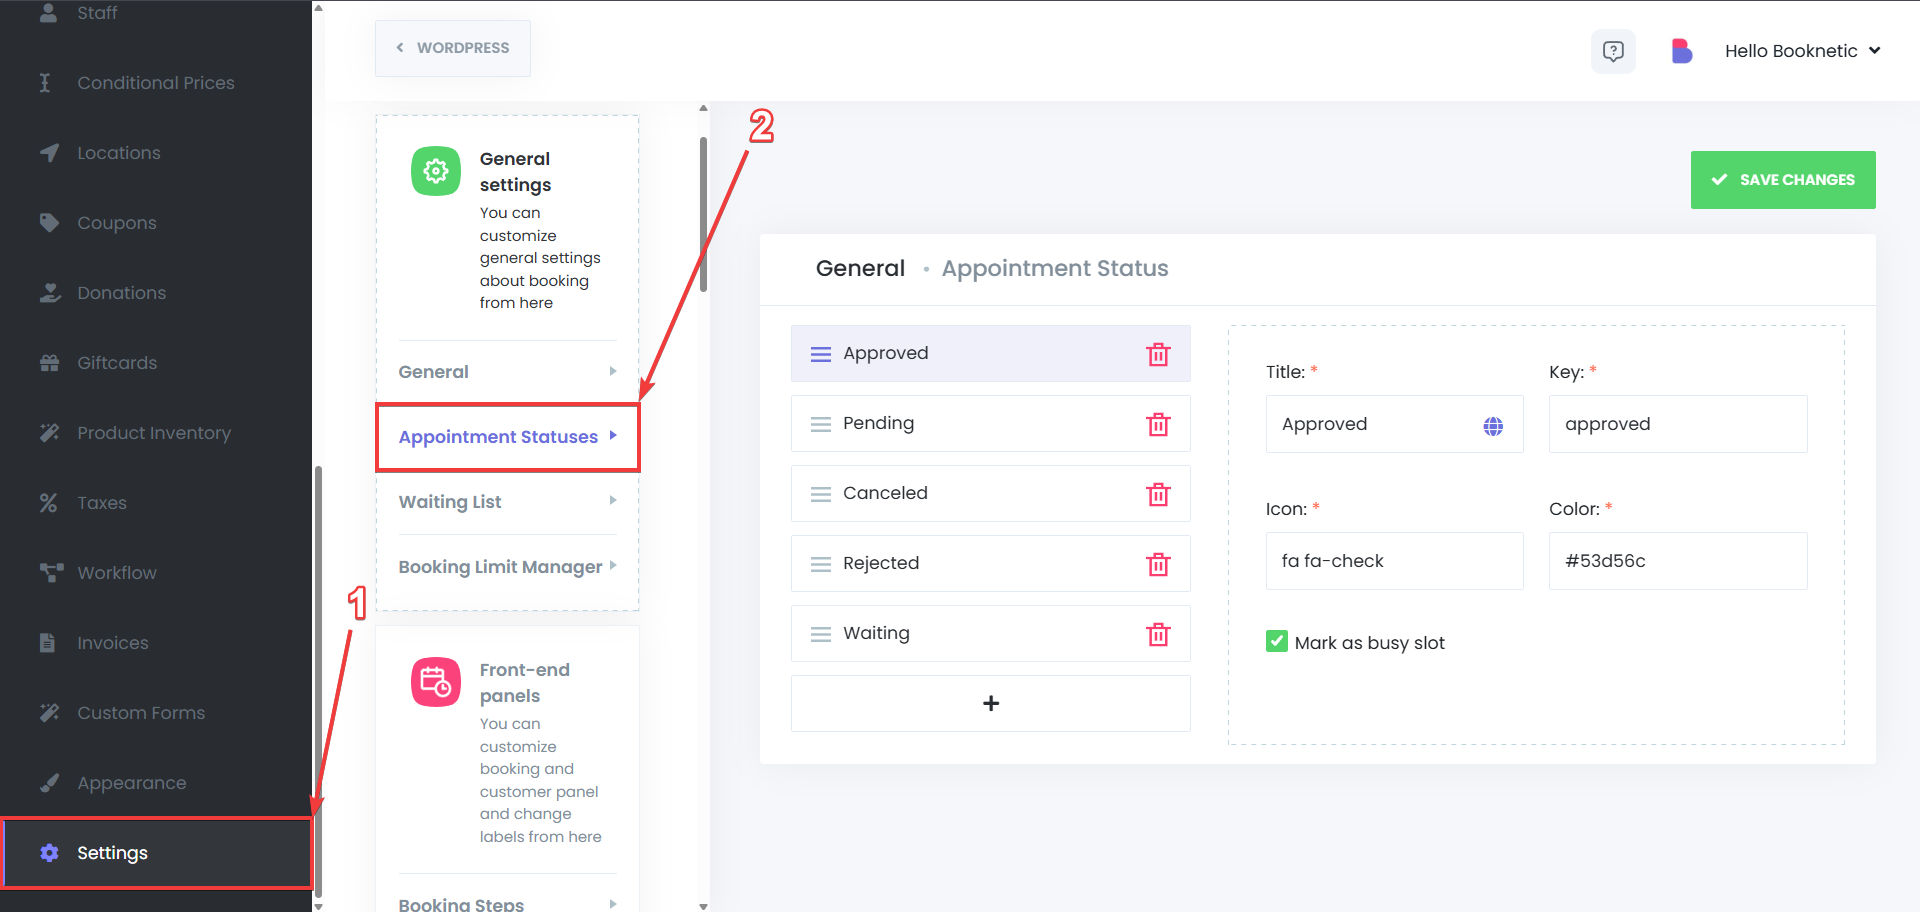
Log in to Your WordPress Dashboard
Open your WordPress Admin Panel and navigate to Booknetic in the sidebar.
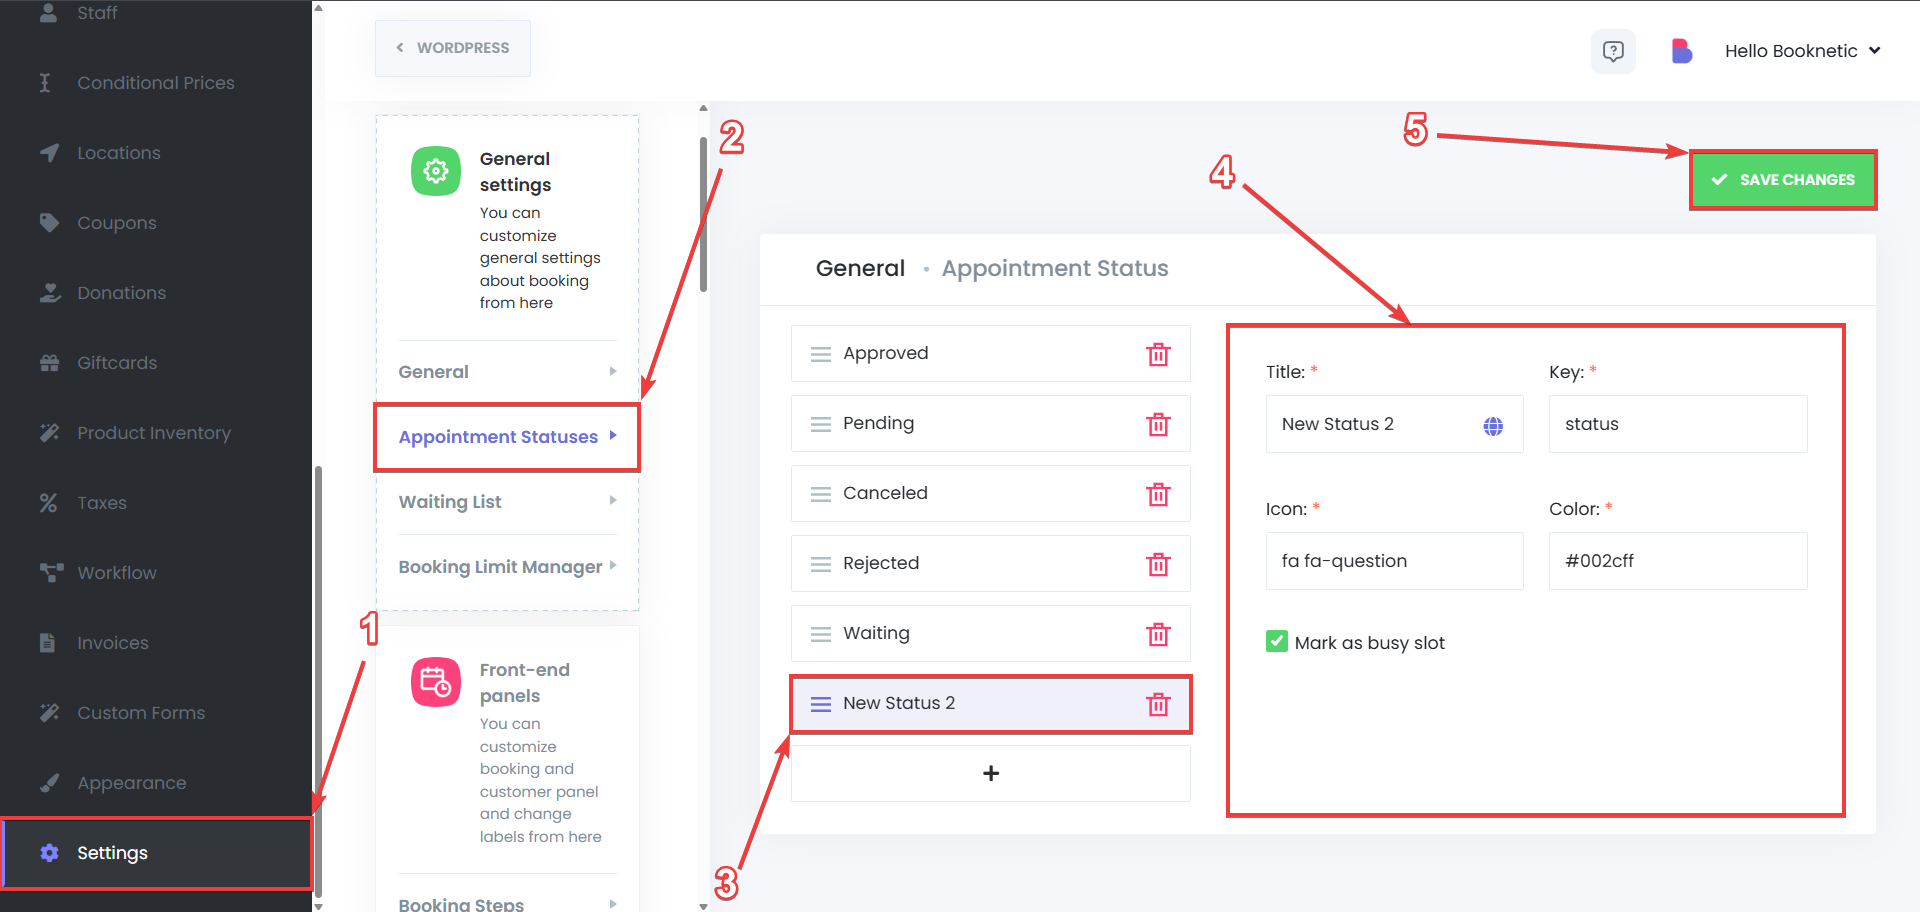
Navigate to the Custom Appointment Statuses section
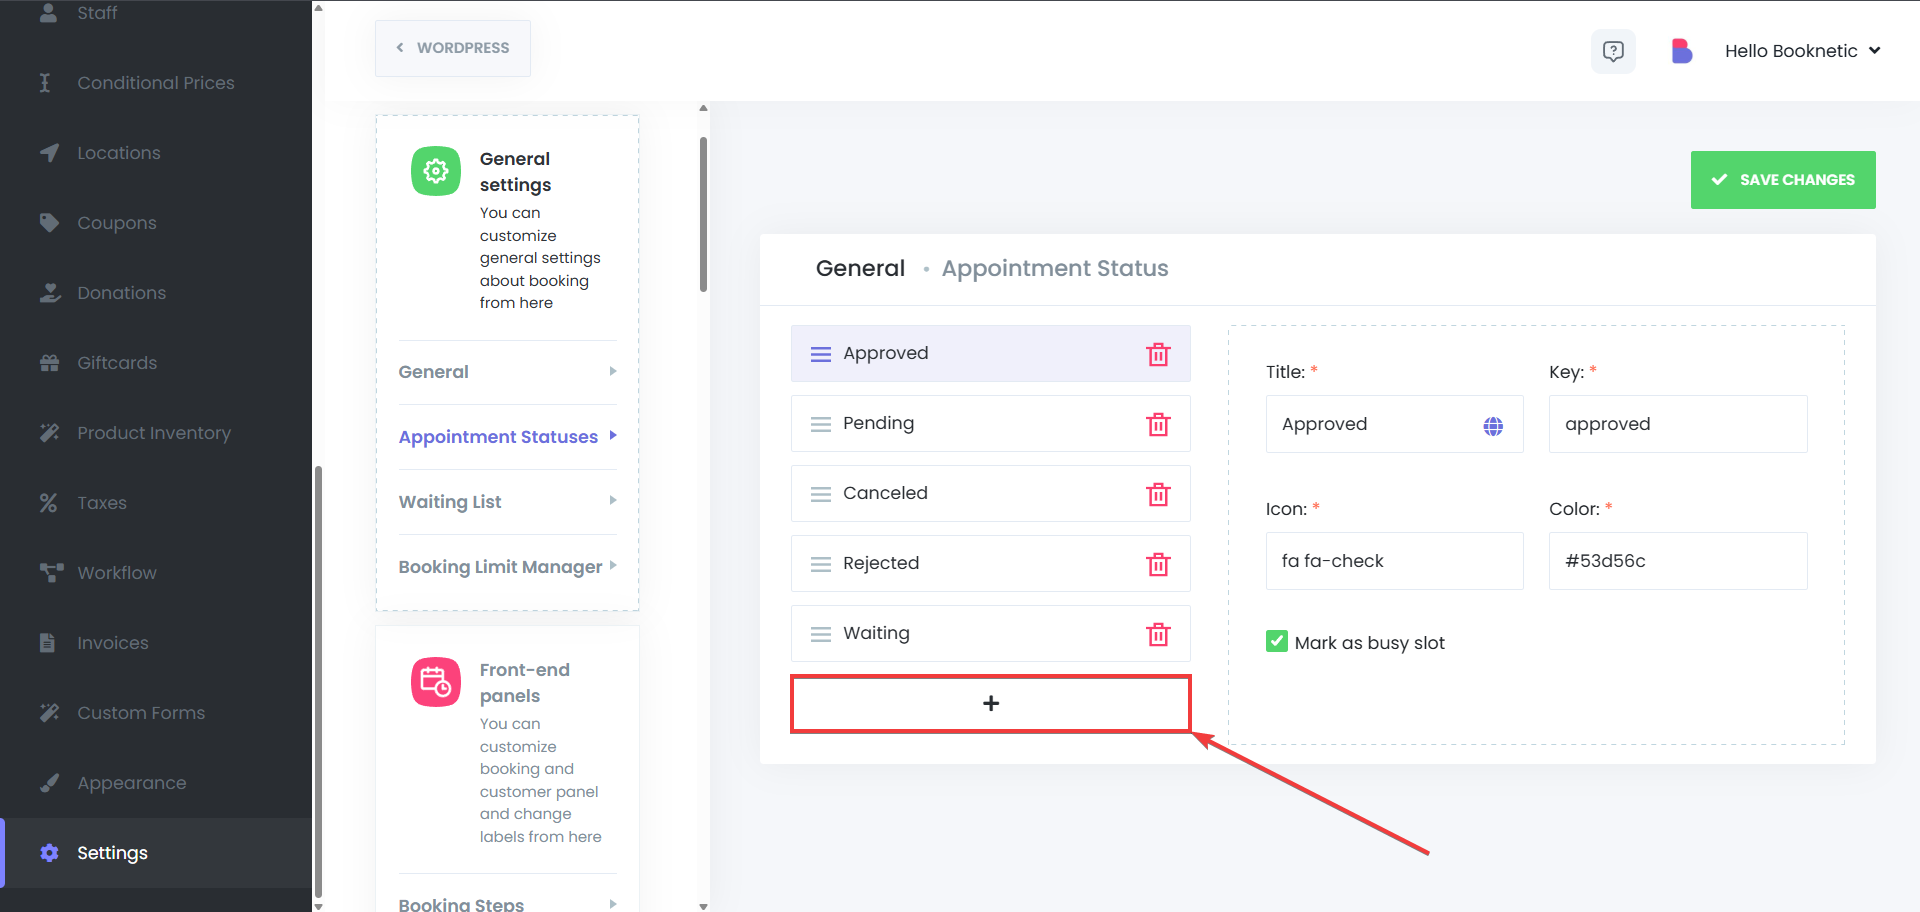
Add a New Appointment Status
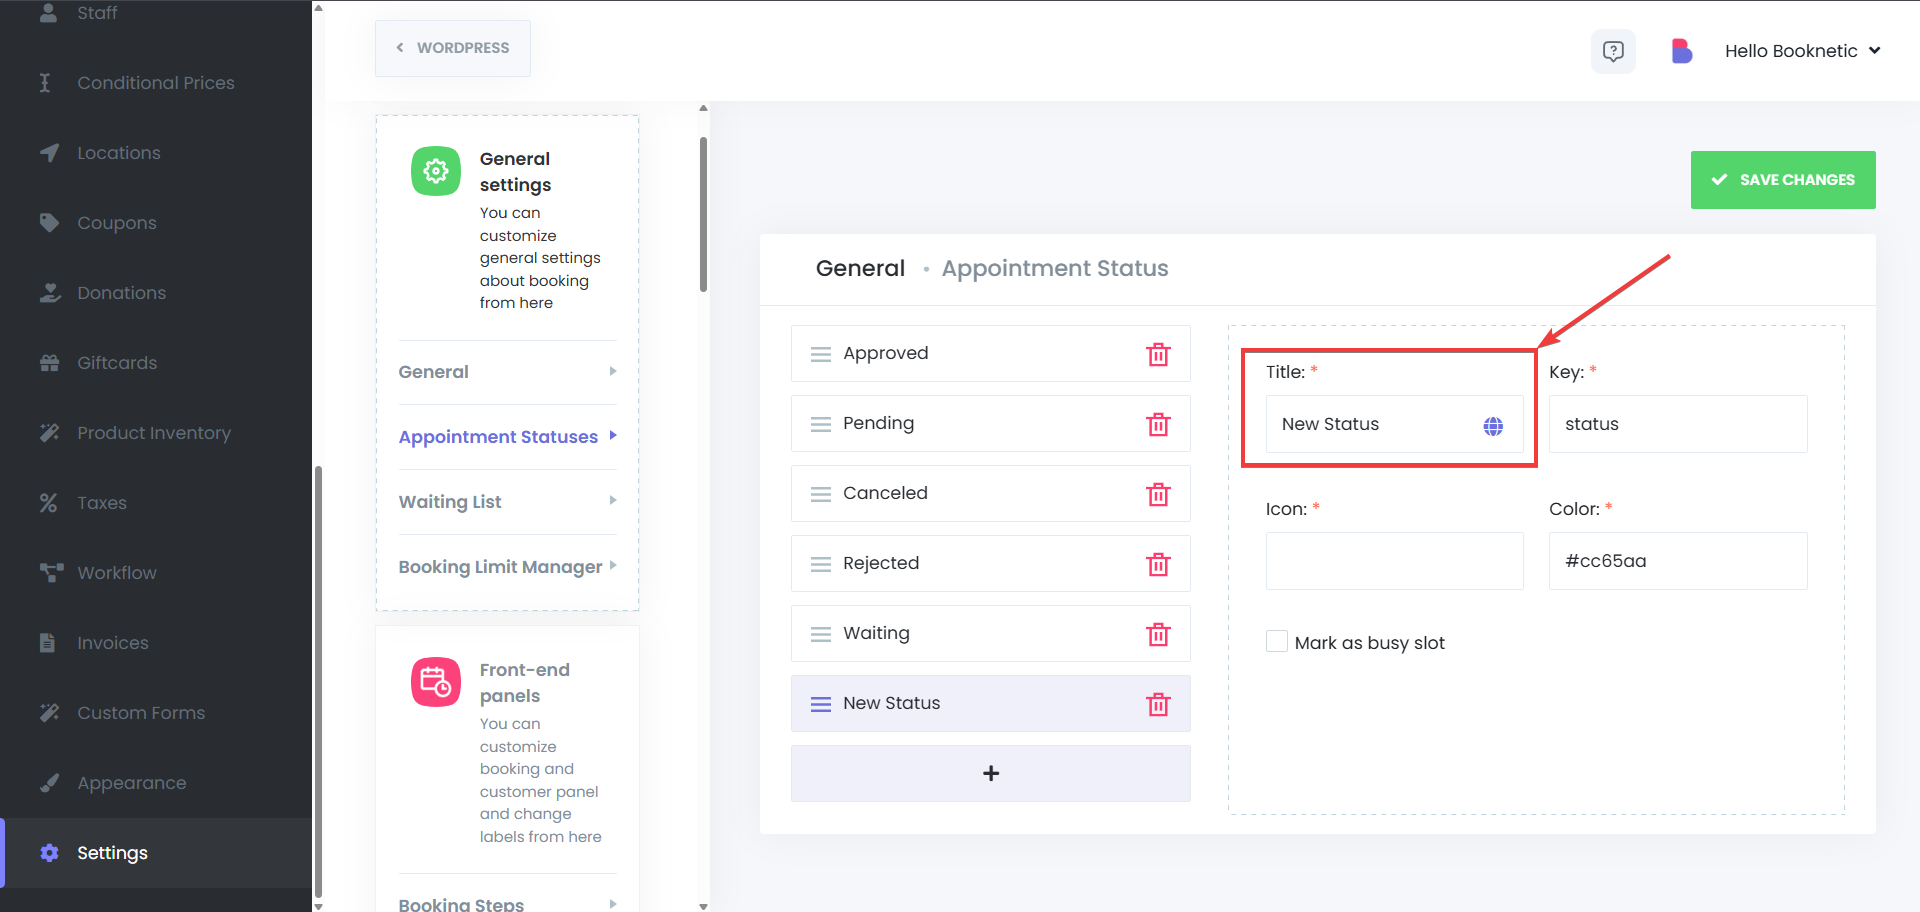
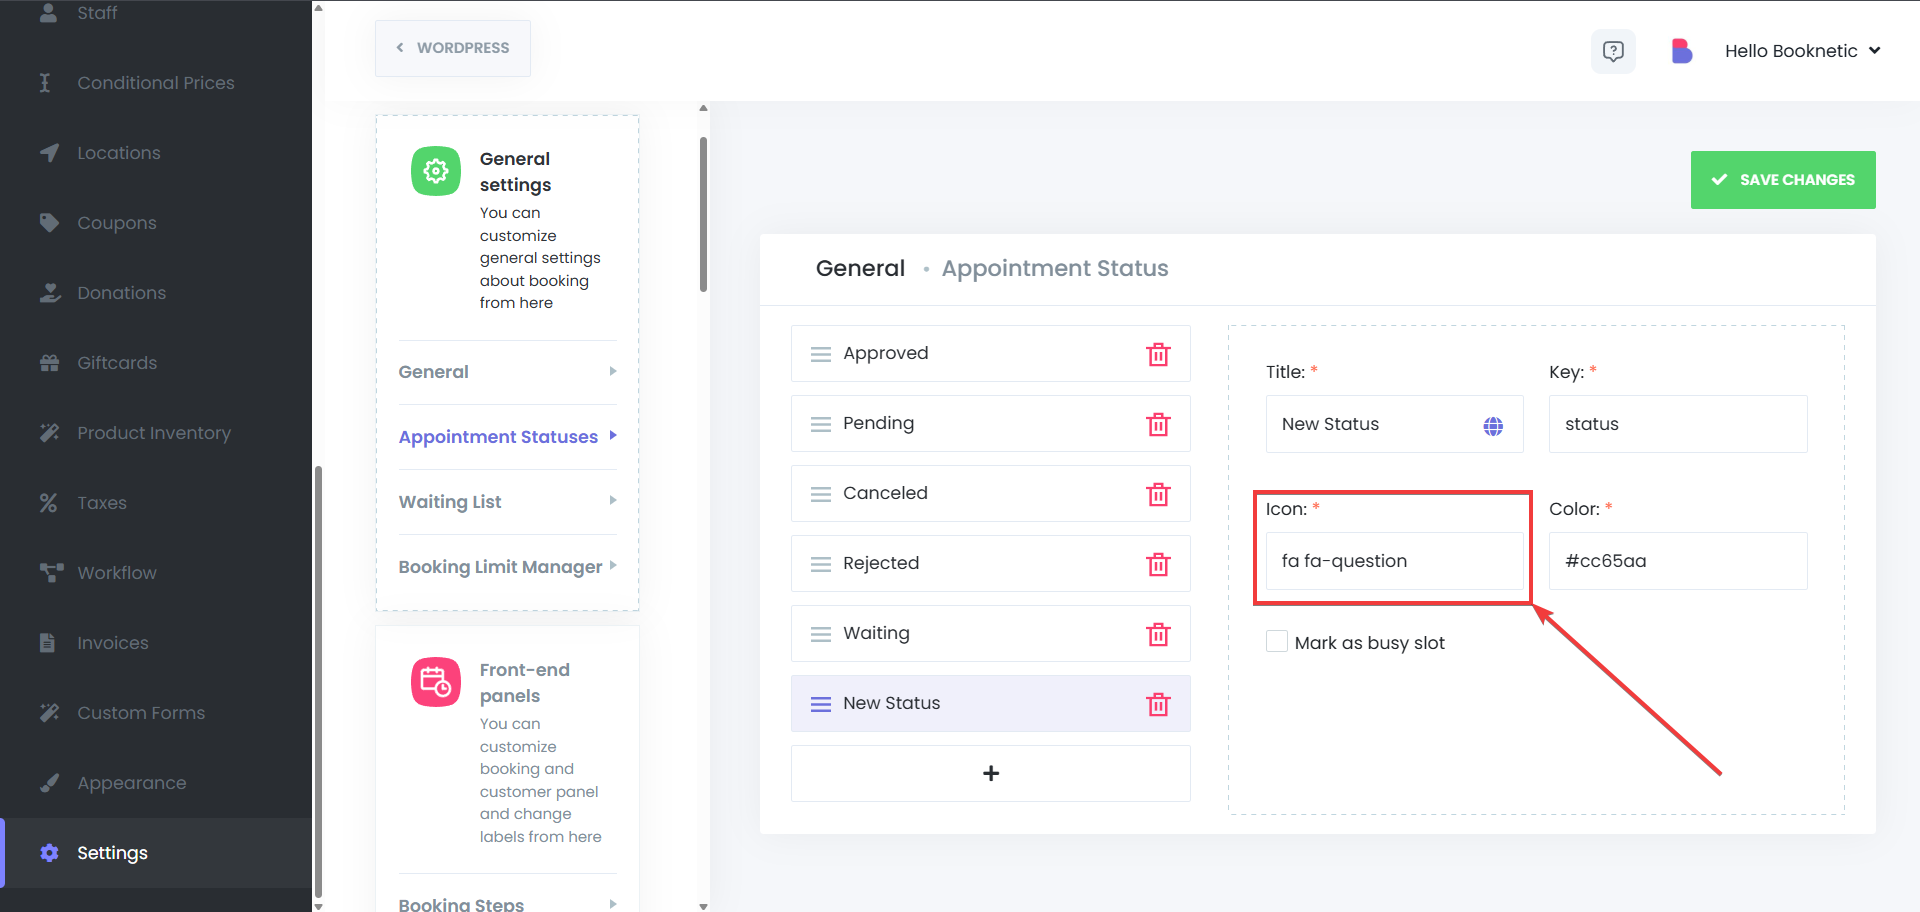
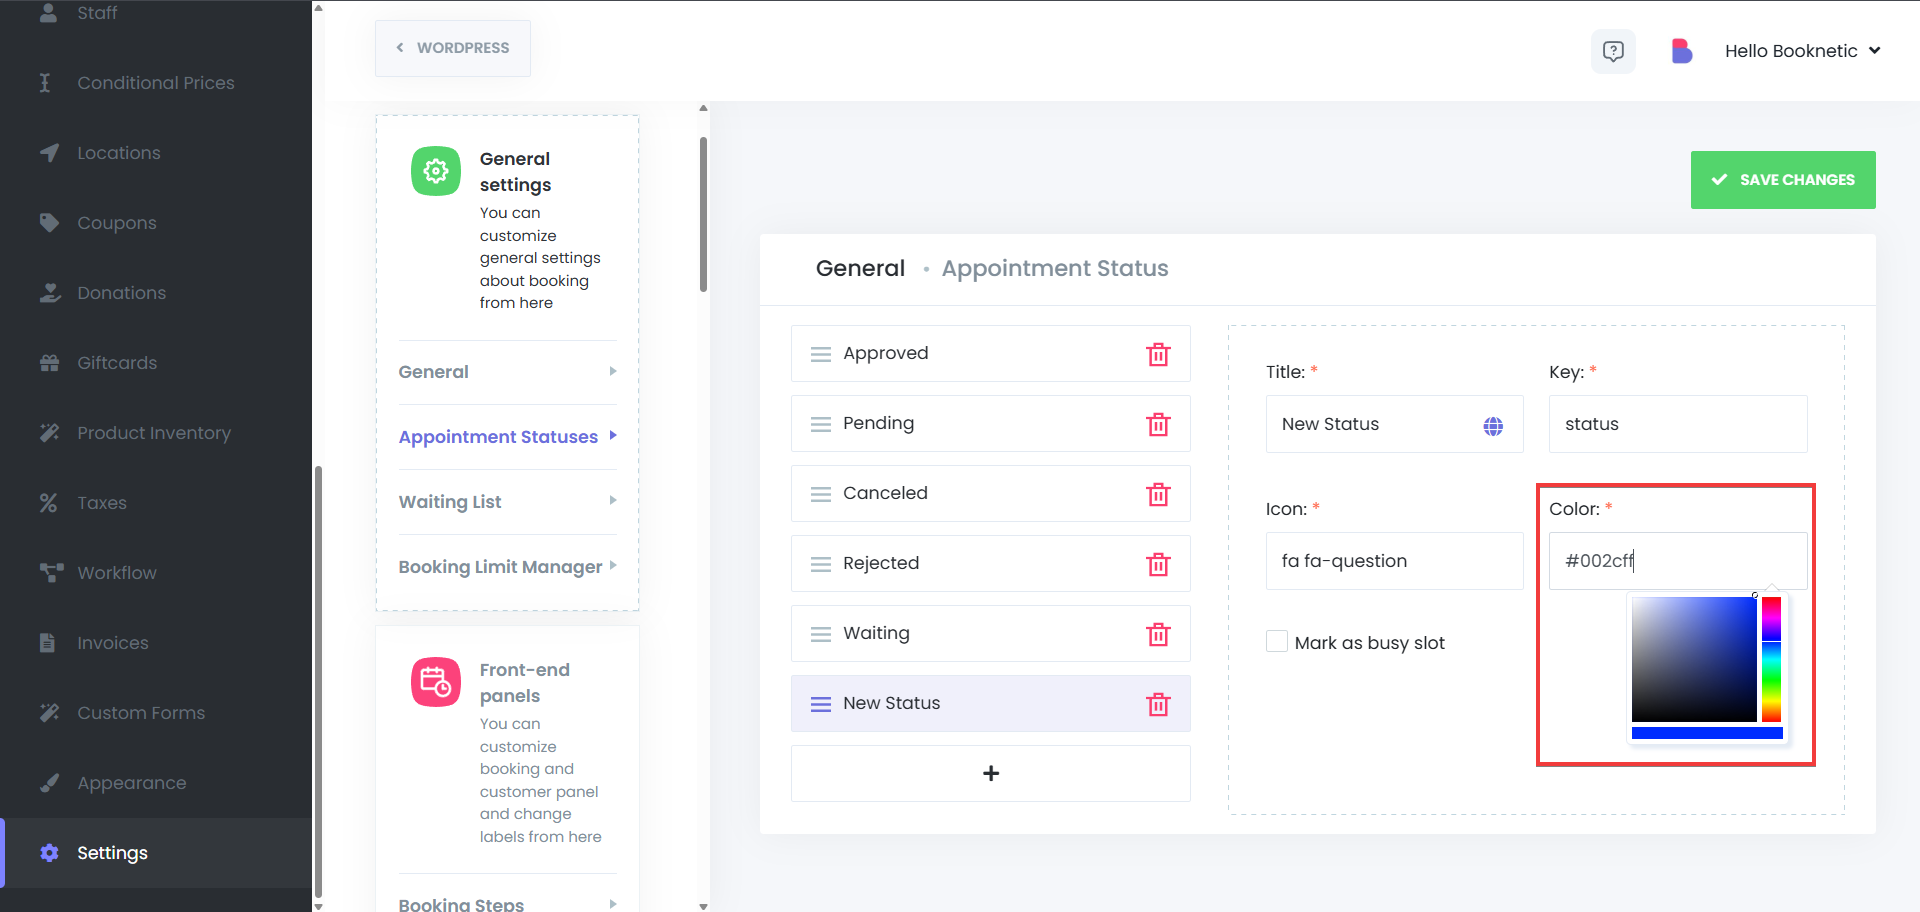
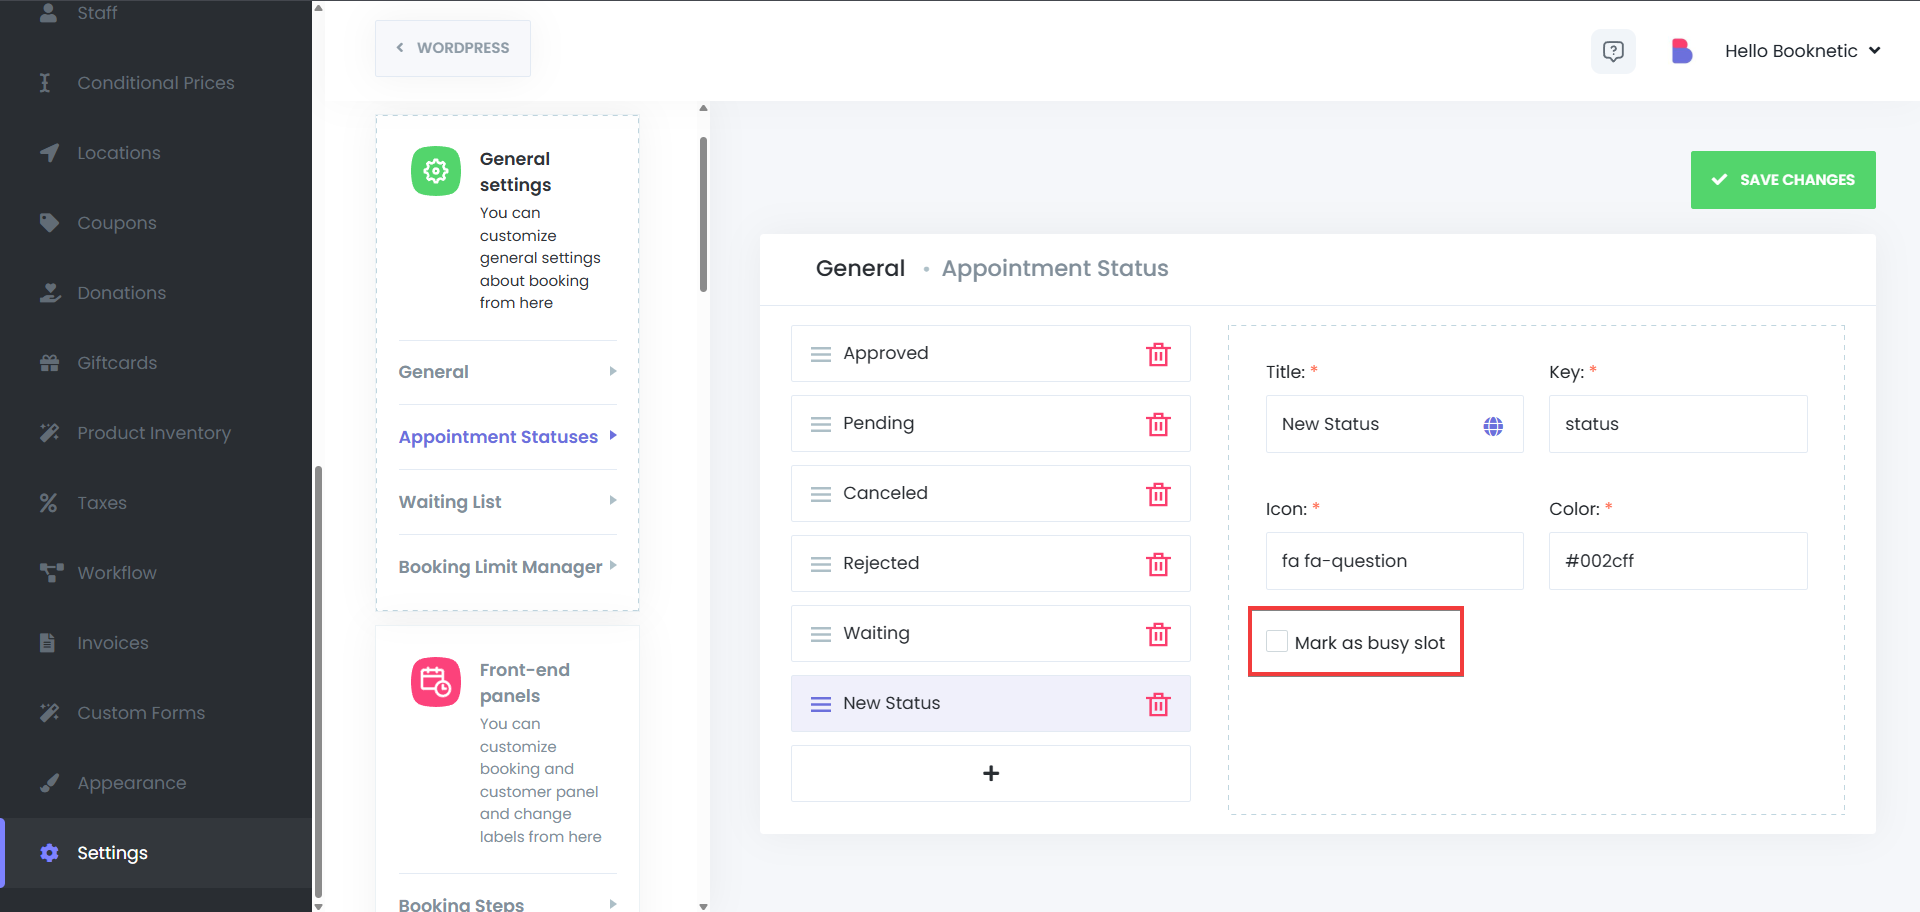
Customize the Status Appearance
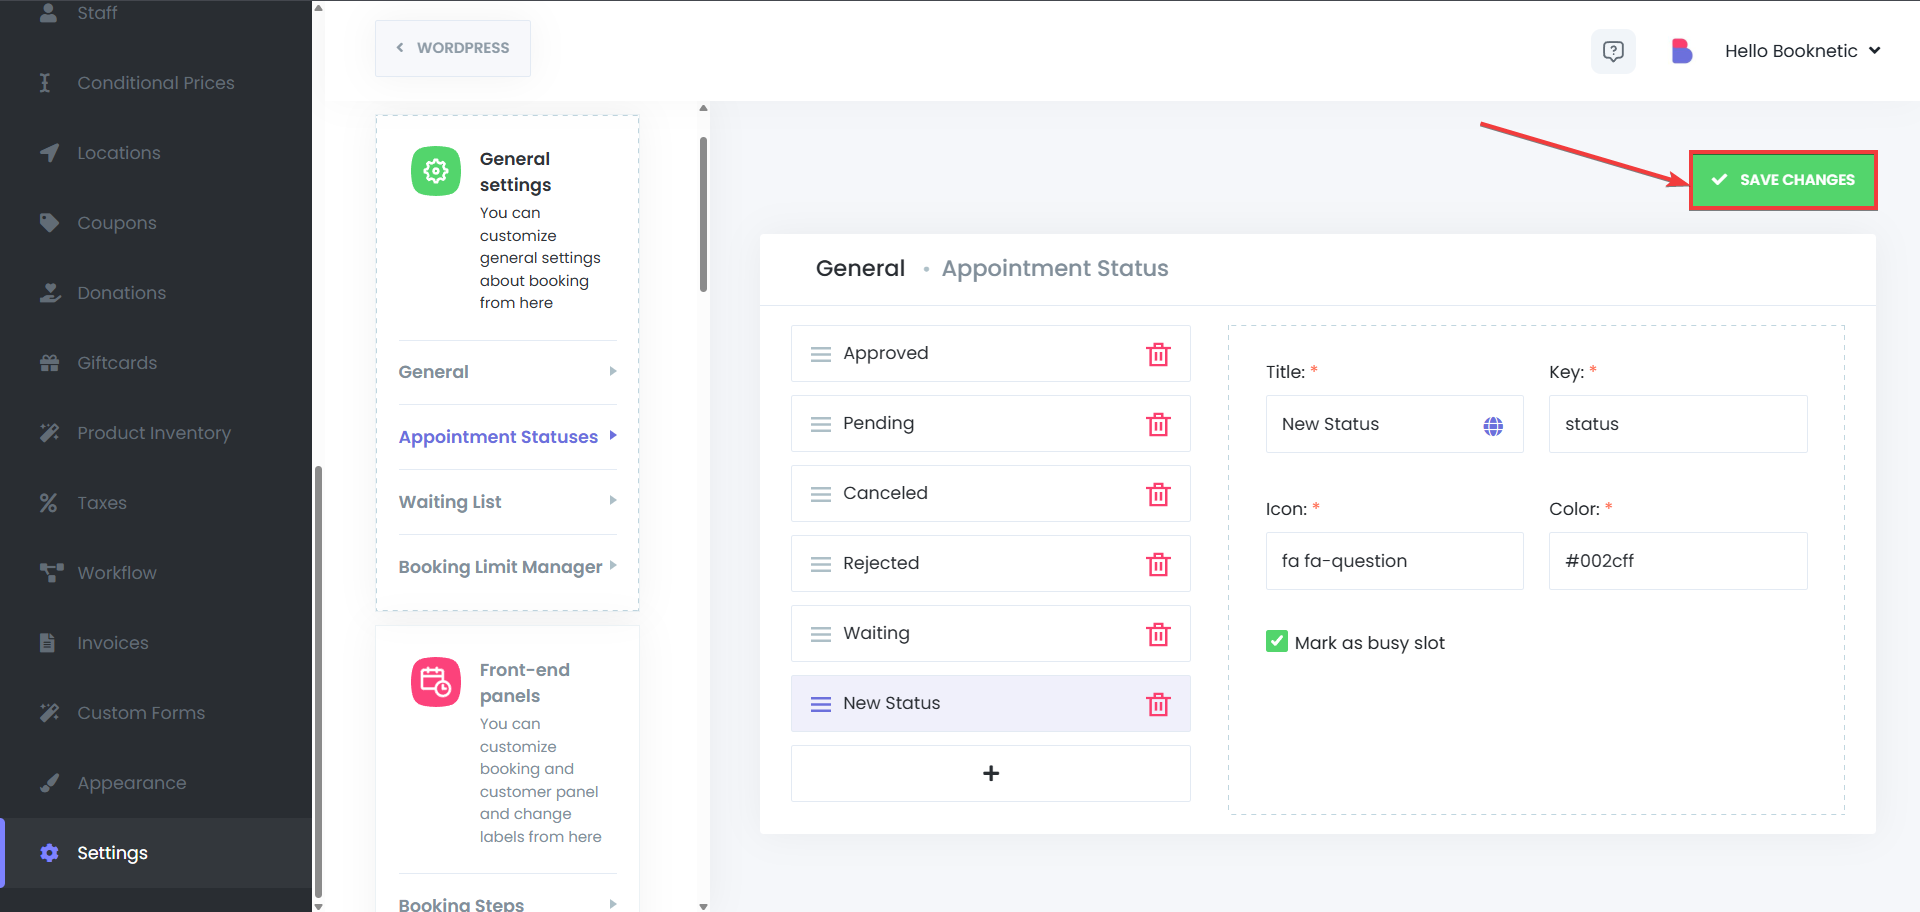
Save the New Status
After configuring the status, click Save to finalize.
Edit an Existing Status:
To modify a status, go to the ”Appointment Statuses” menu in the settings and then select the status that you want to edit. After making the changes, click Save.
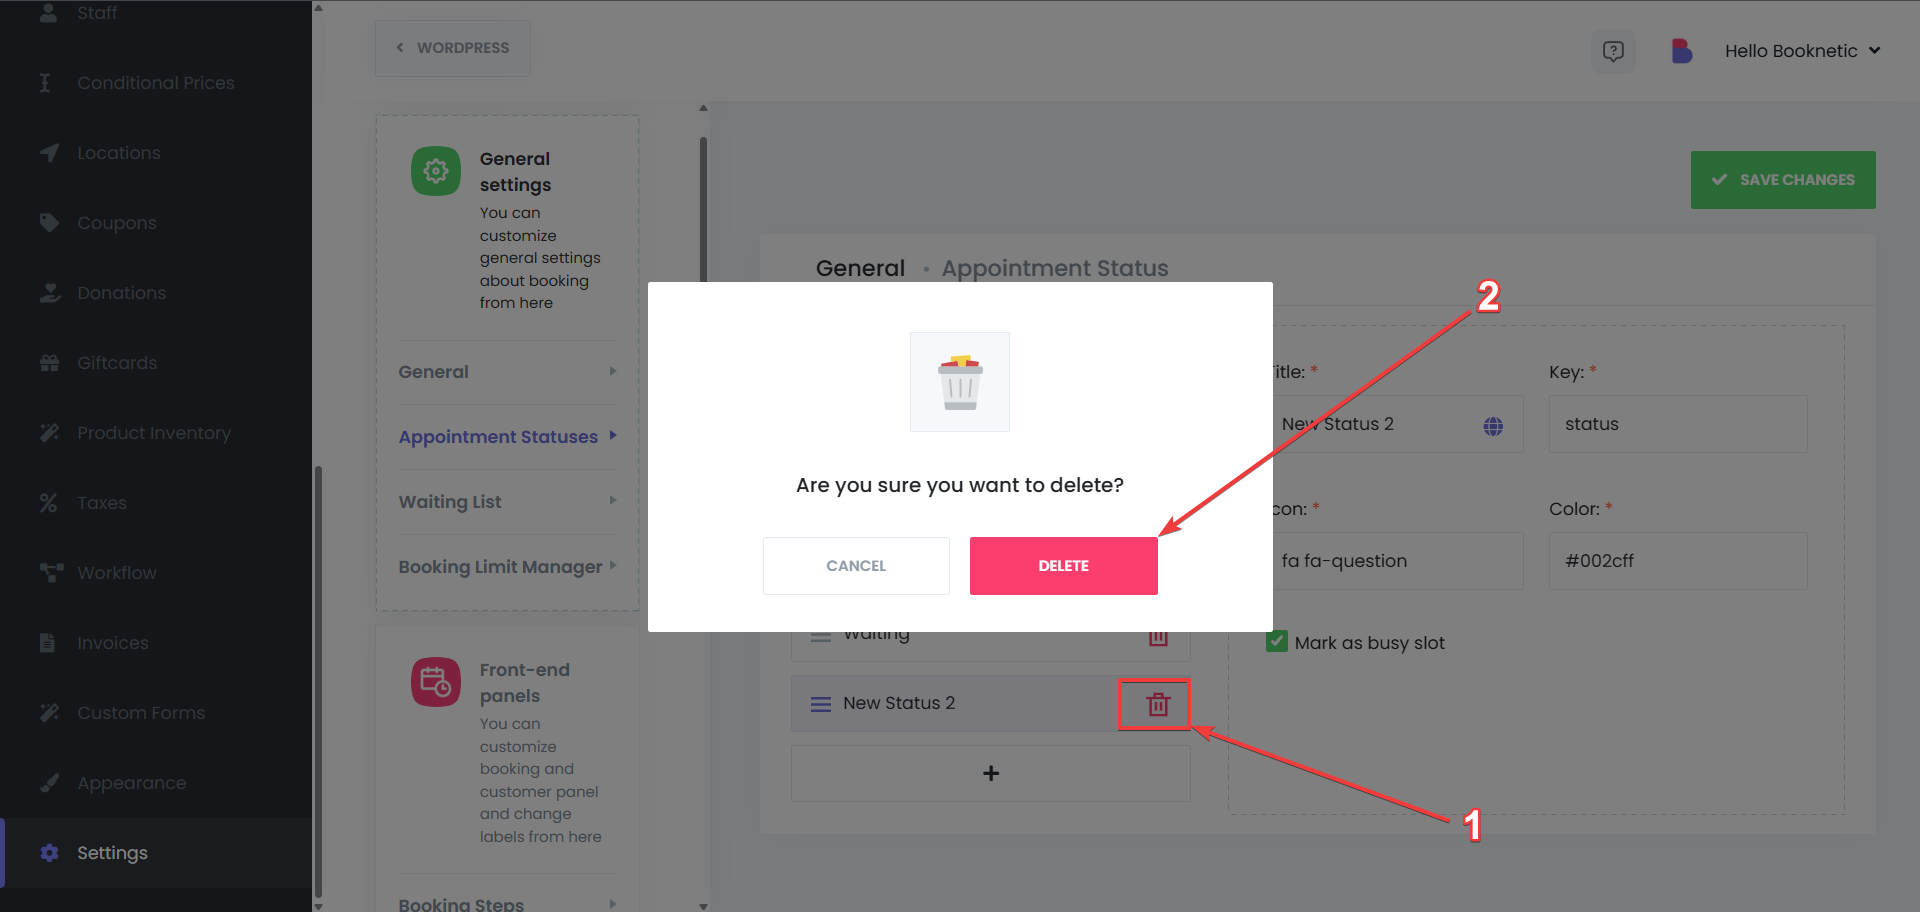
Delete a Status:
To remove a status, click the trash bin icon and select Delete. Confirm the deletion to remove the status from your system.
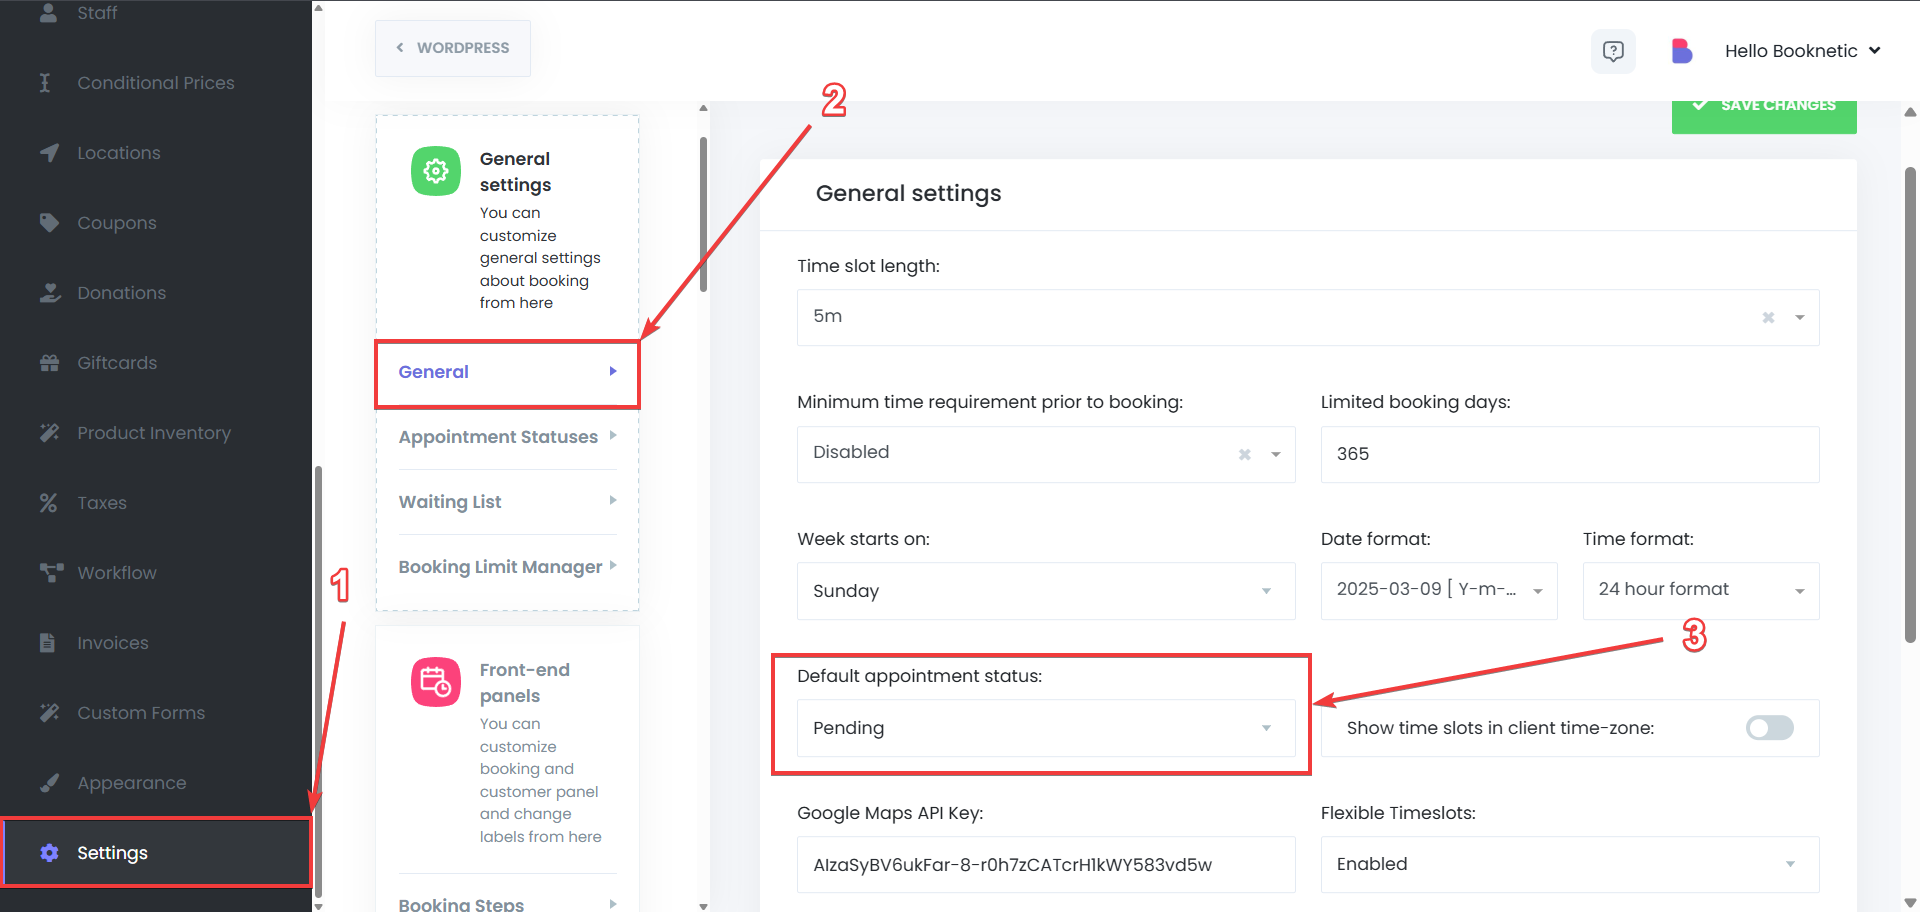
Previously, there were only four default appointment statuses in Booknetic. With the Custom Appointment Statuses add-on, you now have the ability to modify, delete, or completely replace those default statuses to better fit your business needs. You can use your custom appointment status as default appointment status by going to Settings > General Settings > General > Default appointment status:
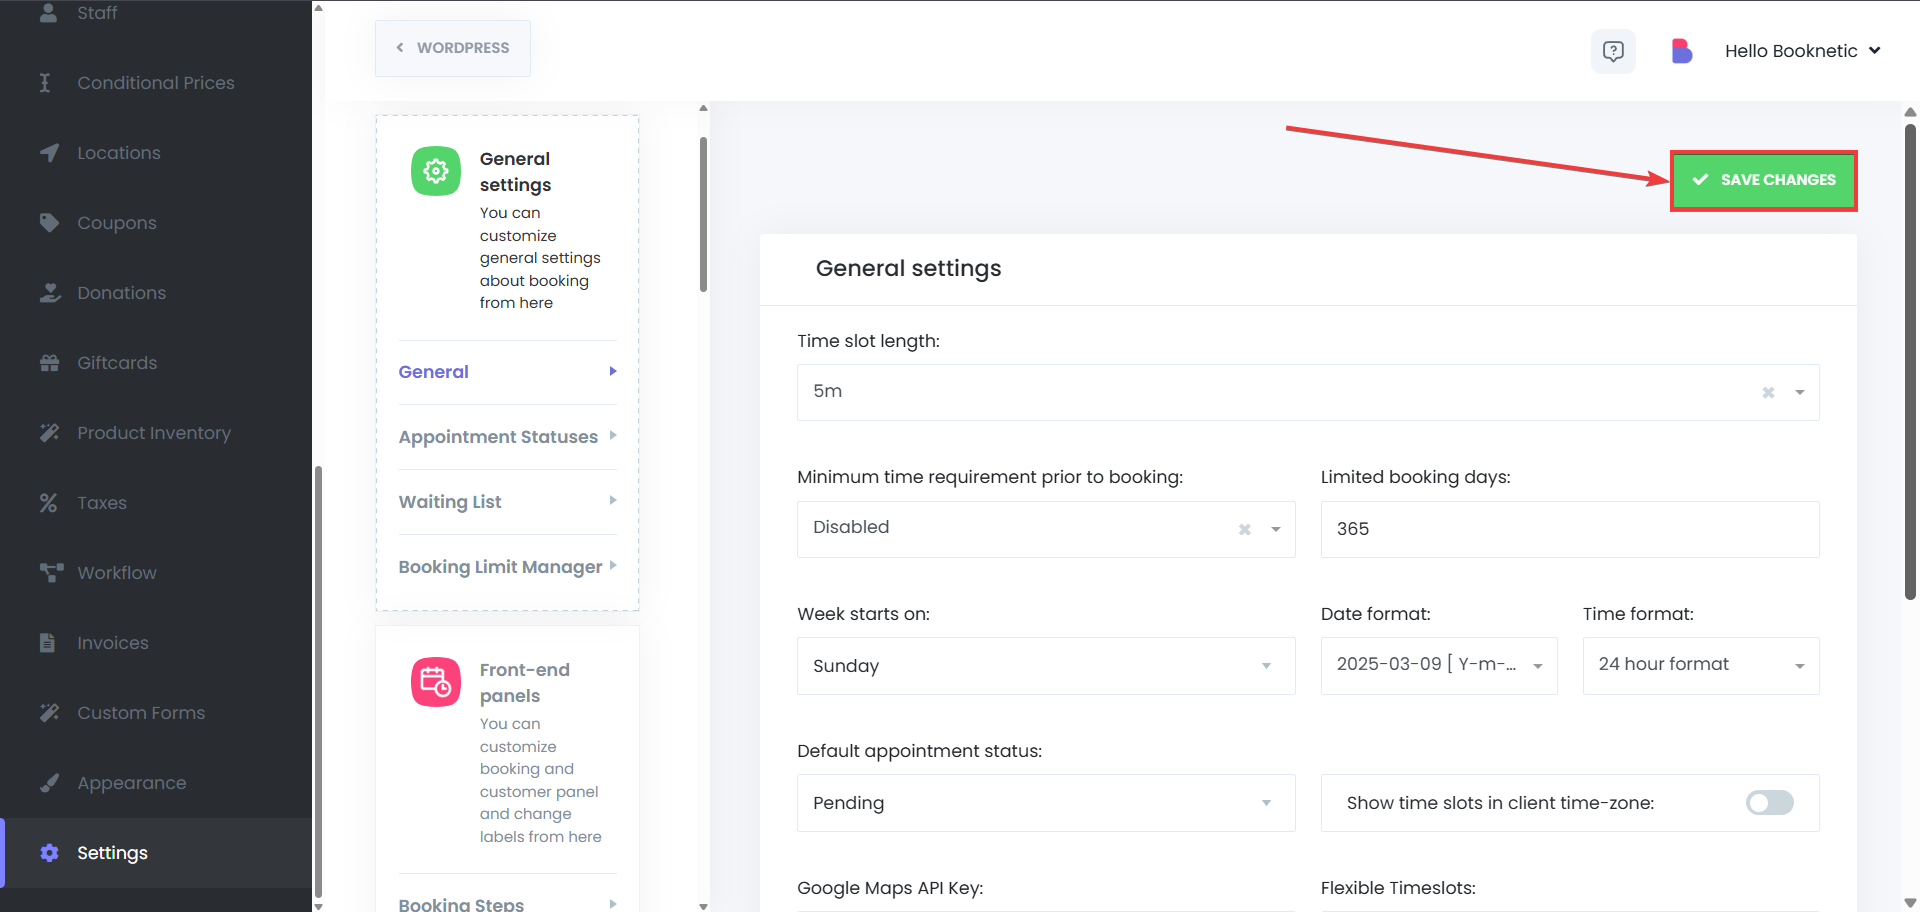
After doing so, click on the Save changes button on the top-right side to save your new default appointment status change
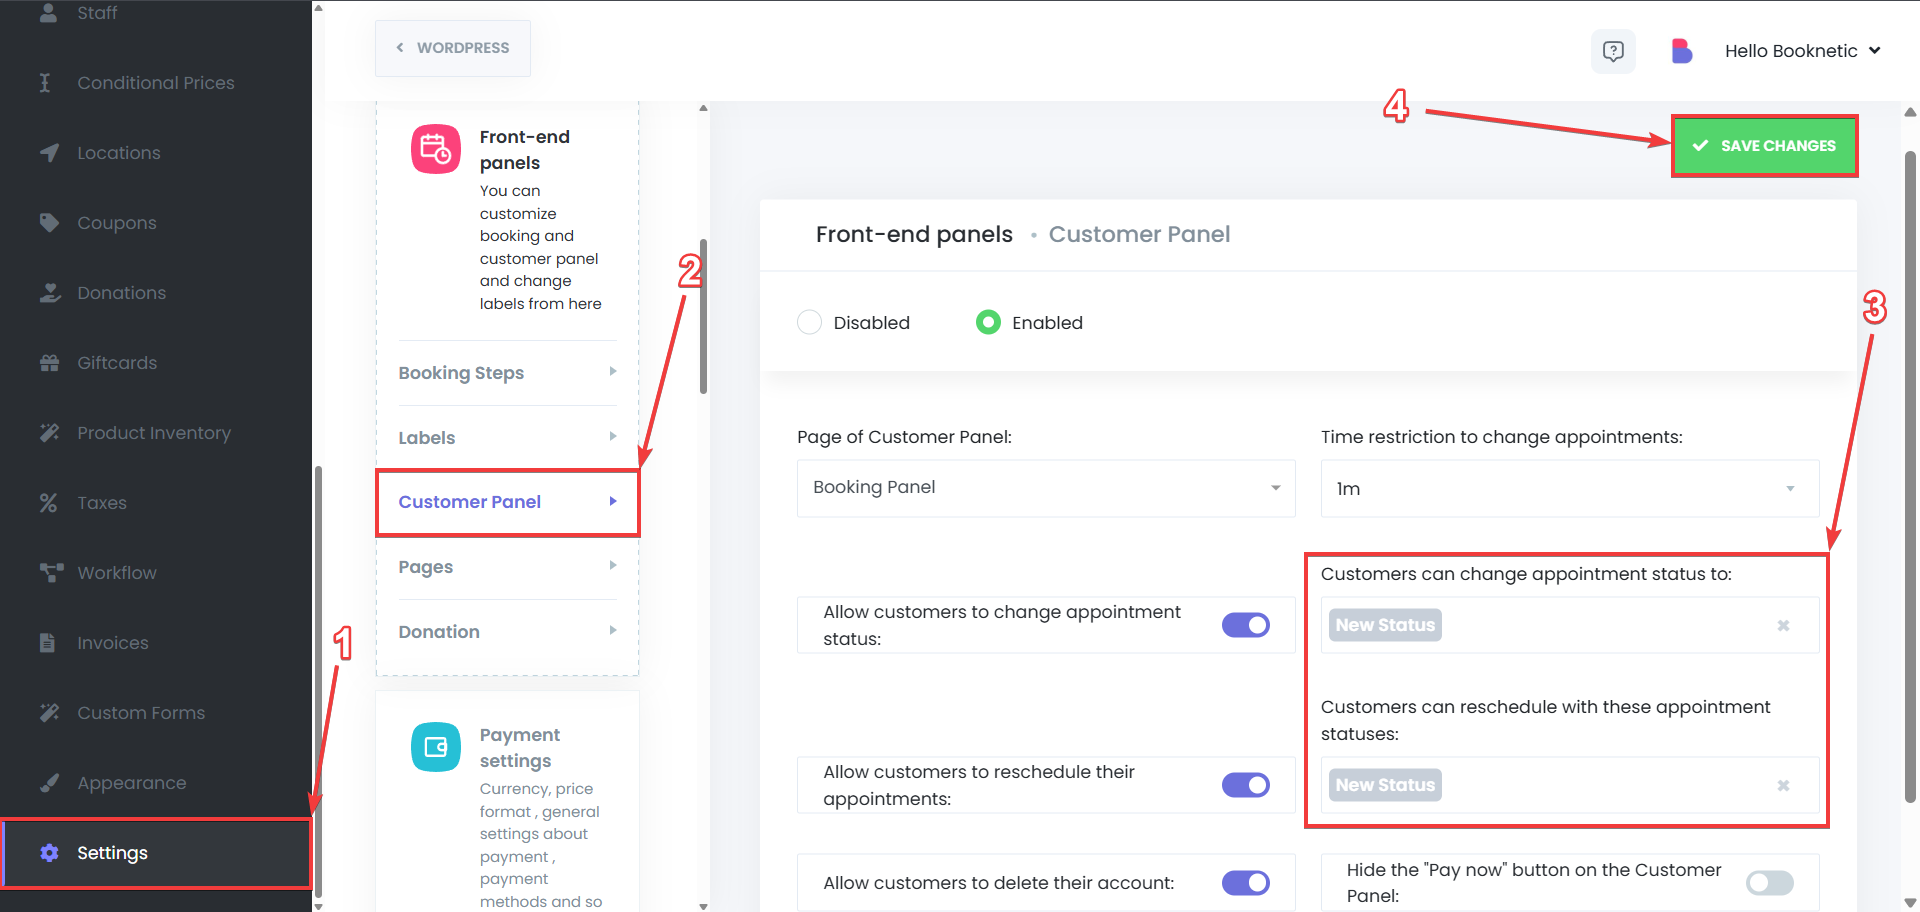
It is also possible to use your custom statuses for the customer panel, to determine the rules for your customers based on the appointment statuses. To use the custom statuses in the customer panel settings, go to Settings > Front-end panels > Customer Panel > then select the custom status for “Customers can change appointment status to” option, or the “Customers can reschedule with these appointment statuses” option based on your preferences. After that, click on the Save Changes button on the top-right side of the page to save your changes.
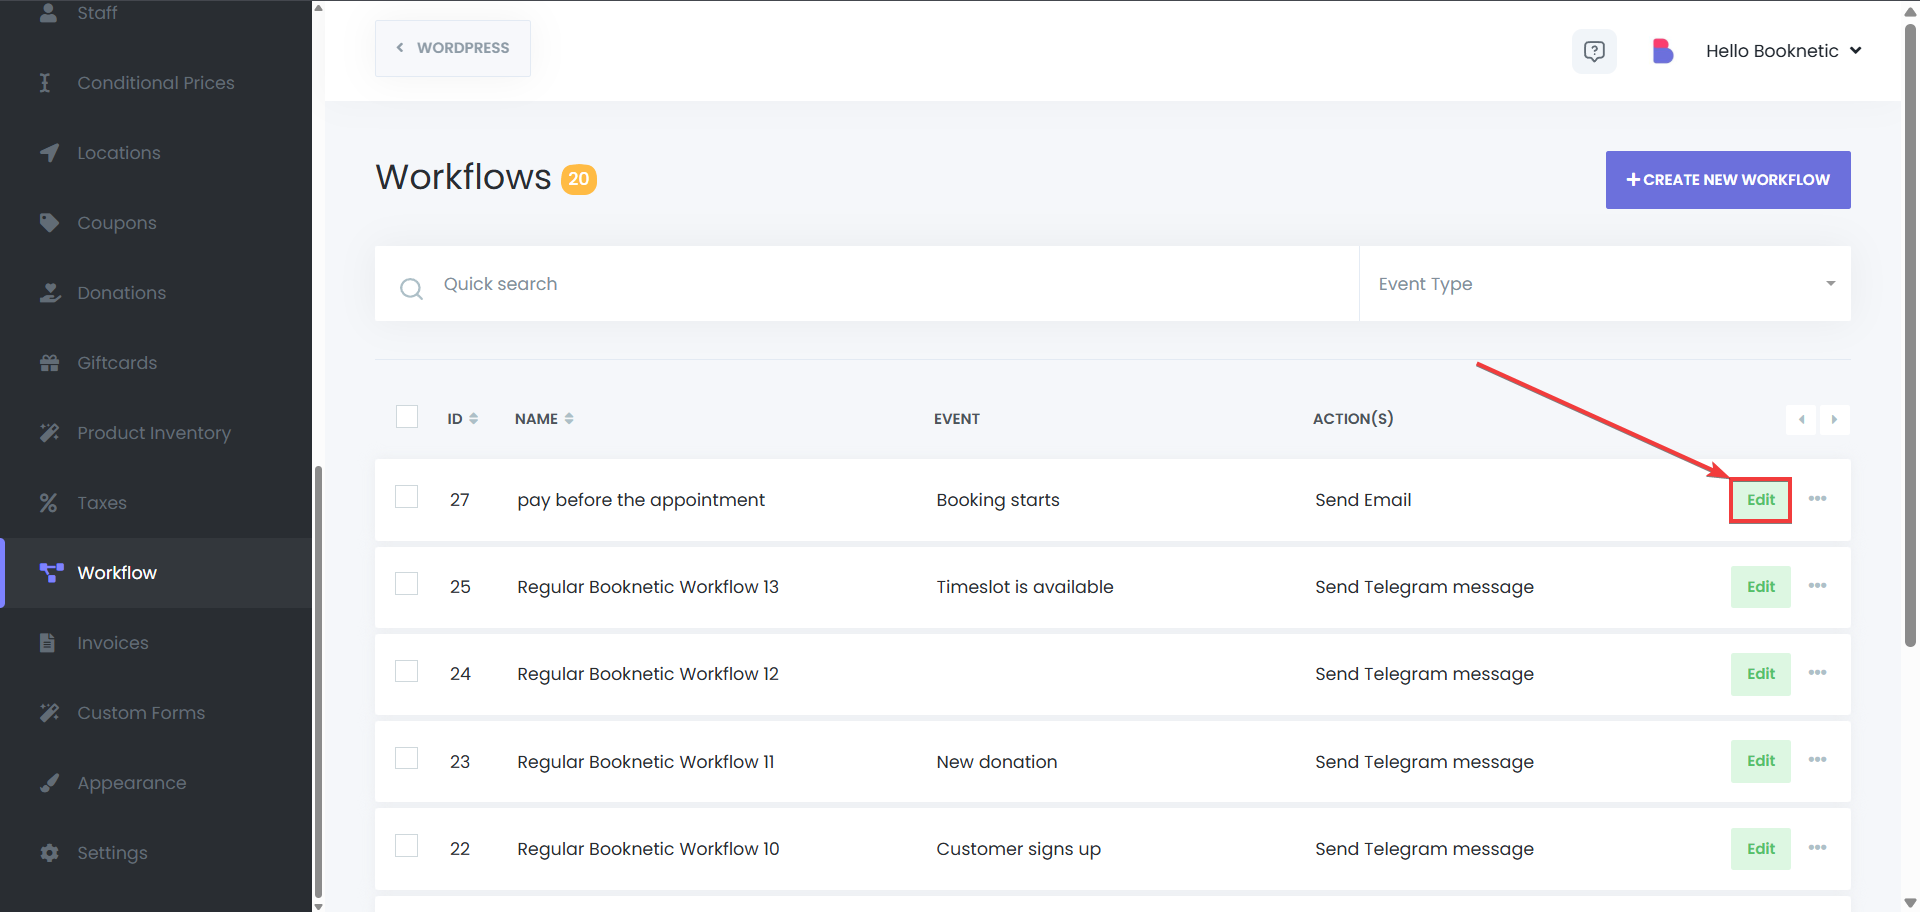
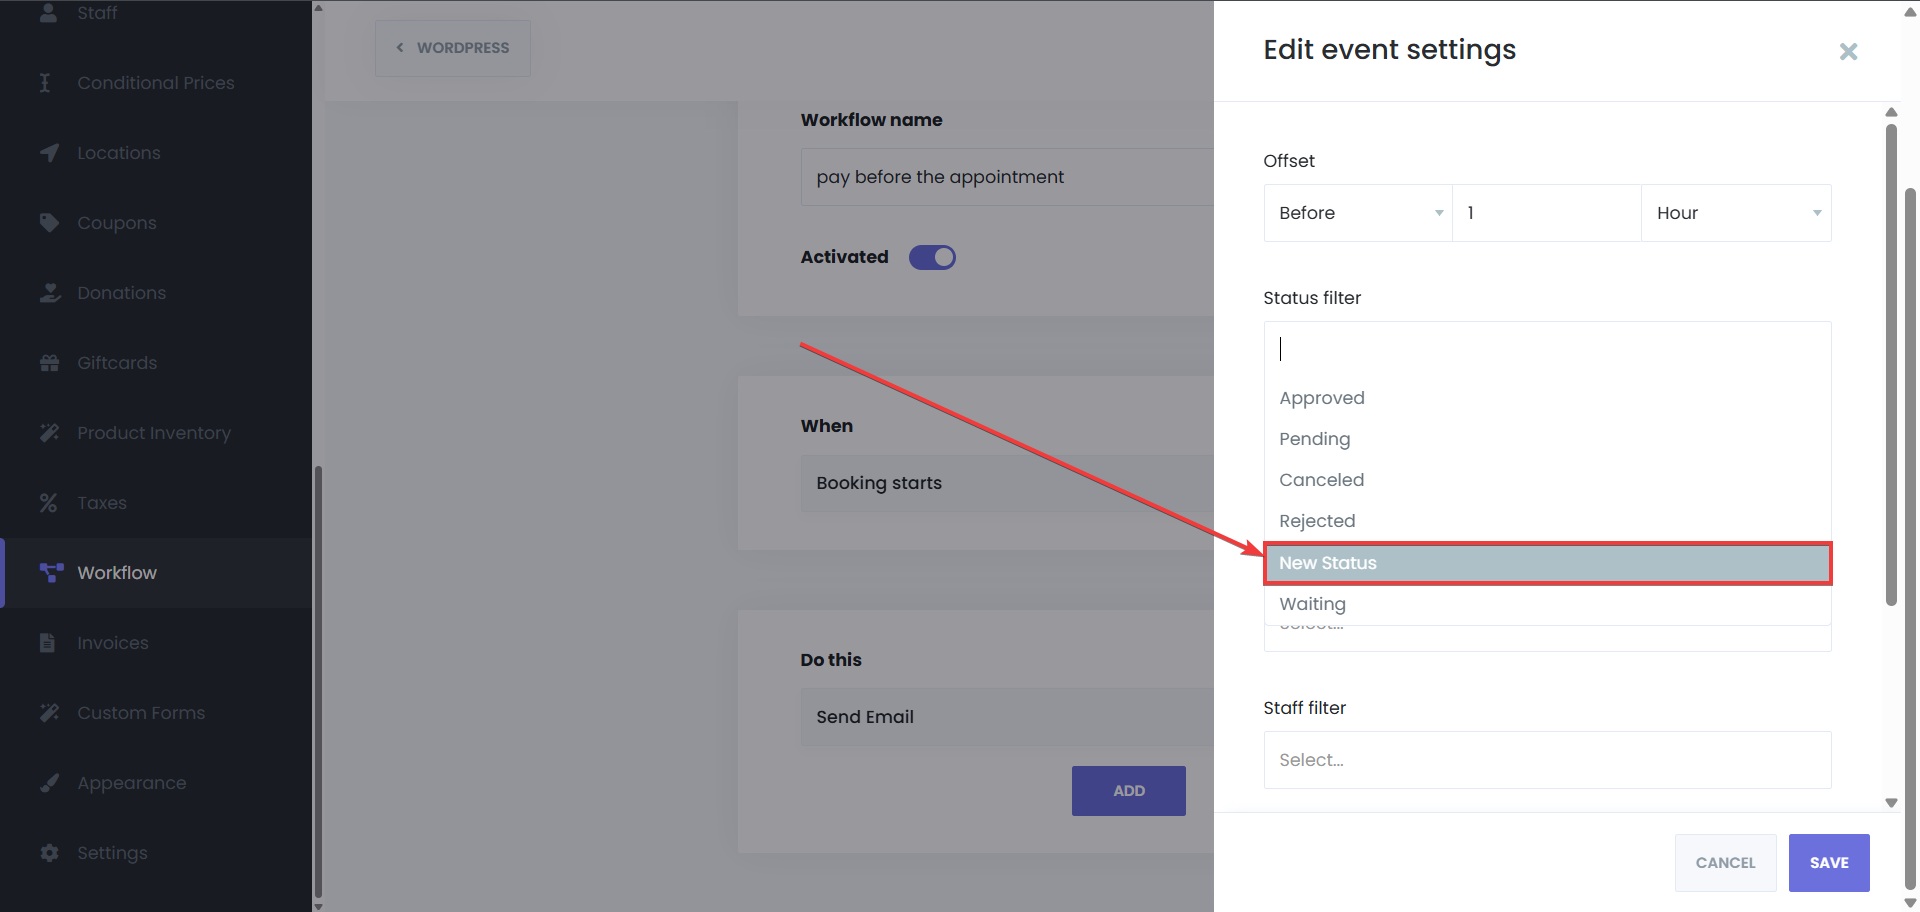
As it is possible to use the default appointment statuses for filtering the workflows (to determine of the workflow will be used based on the appointment status), it is also possible to do so with the custom appointment statuses. To set it up:


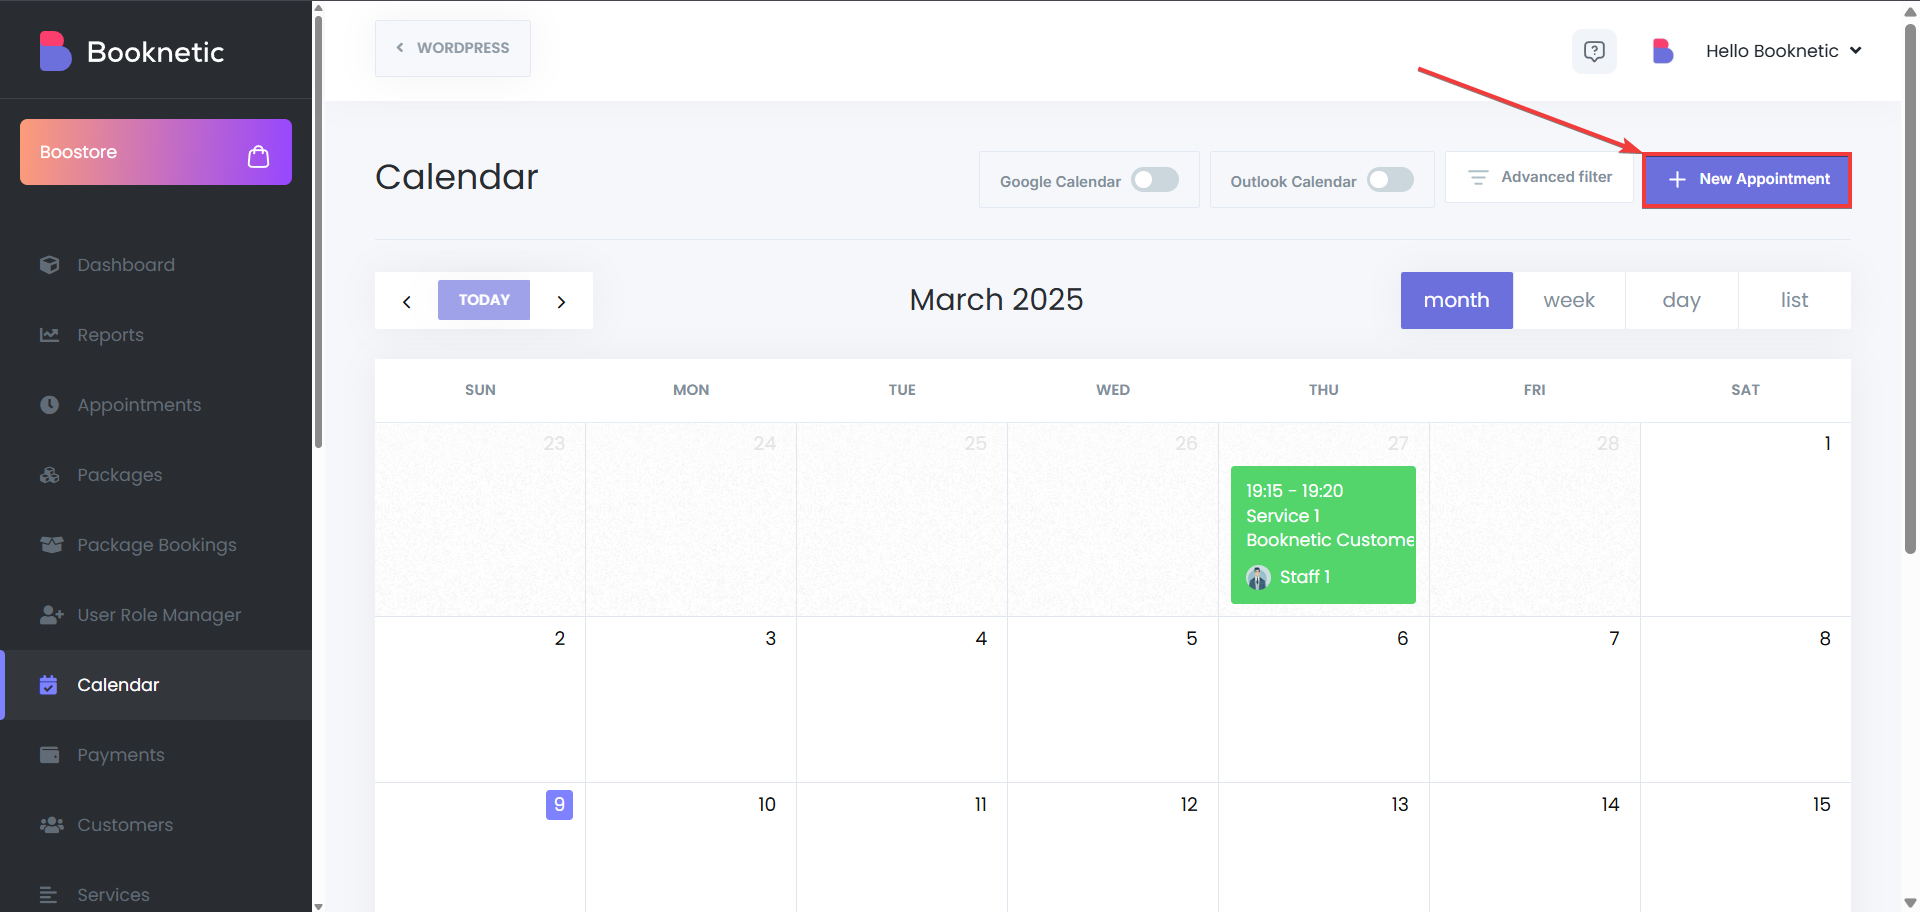
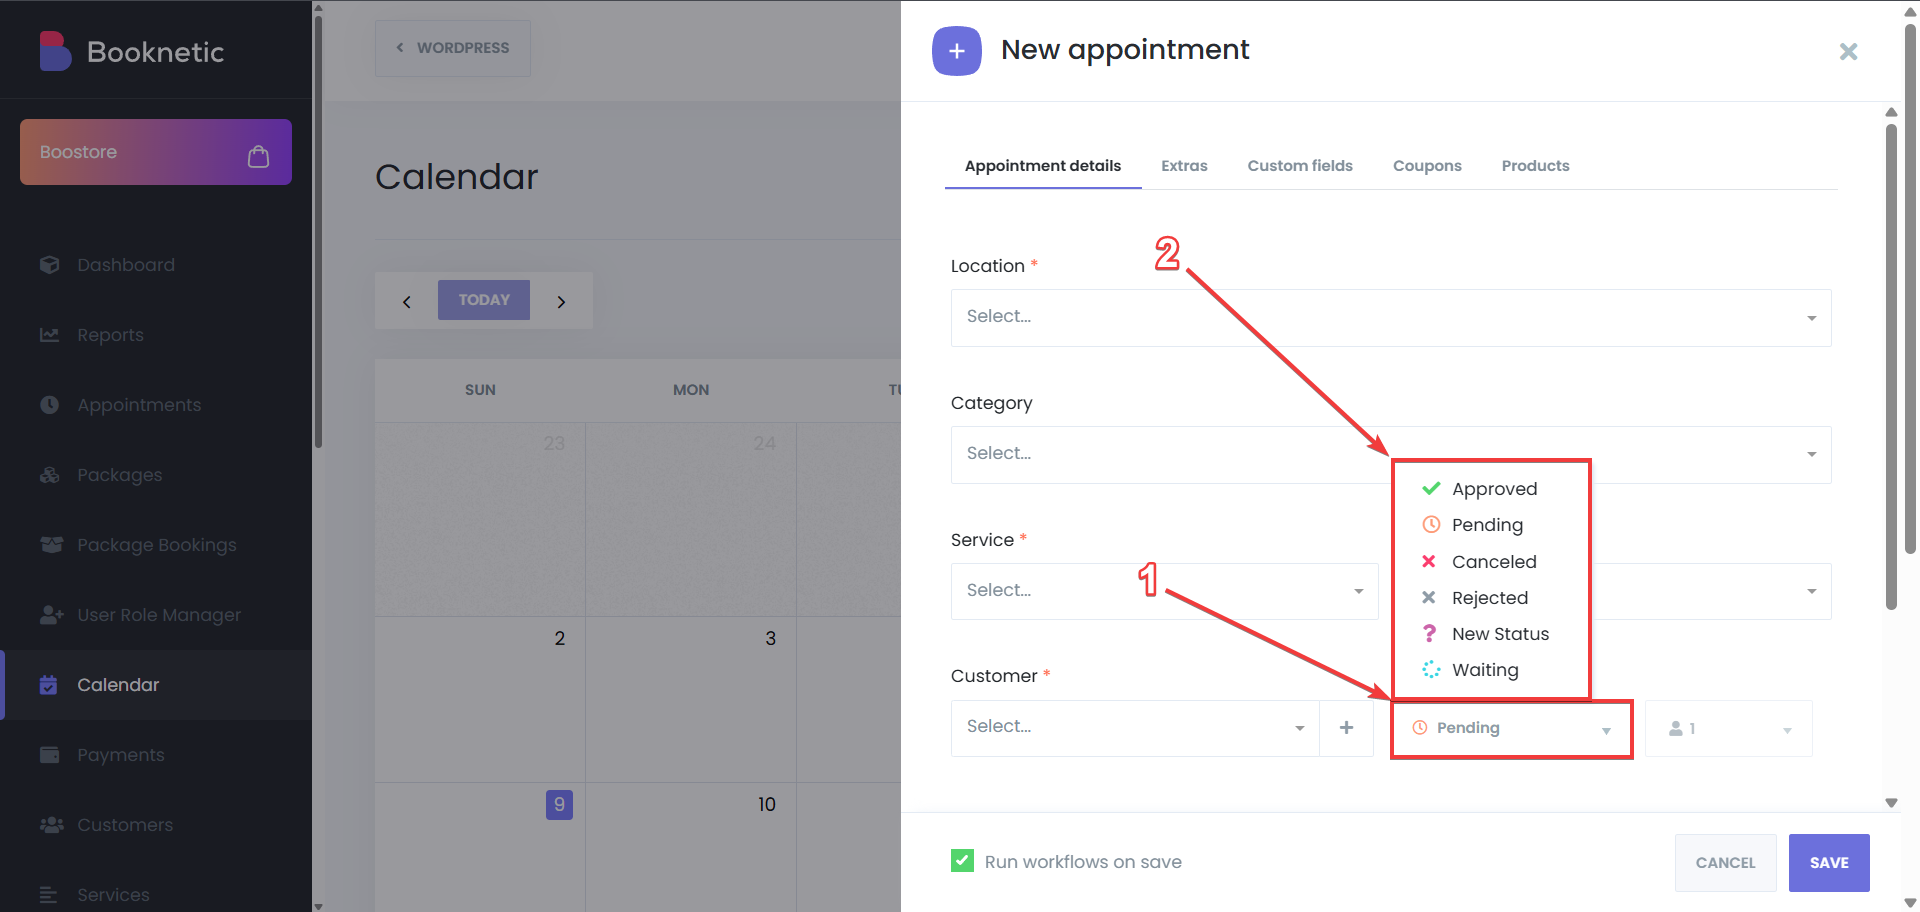
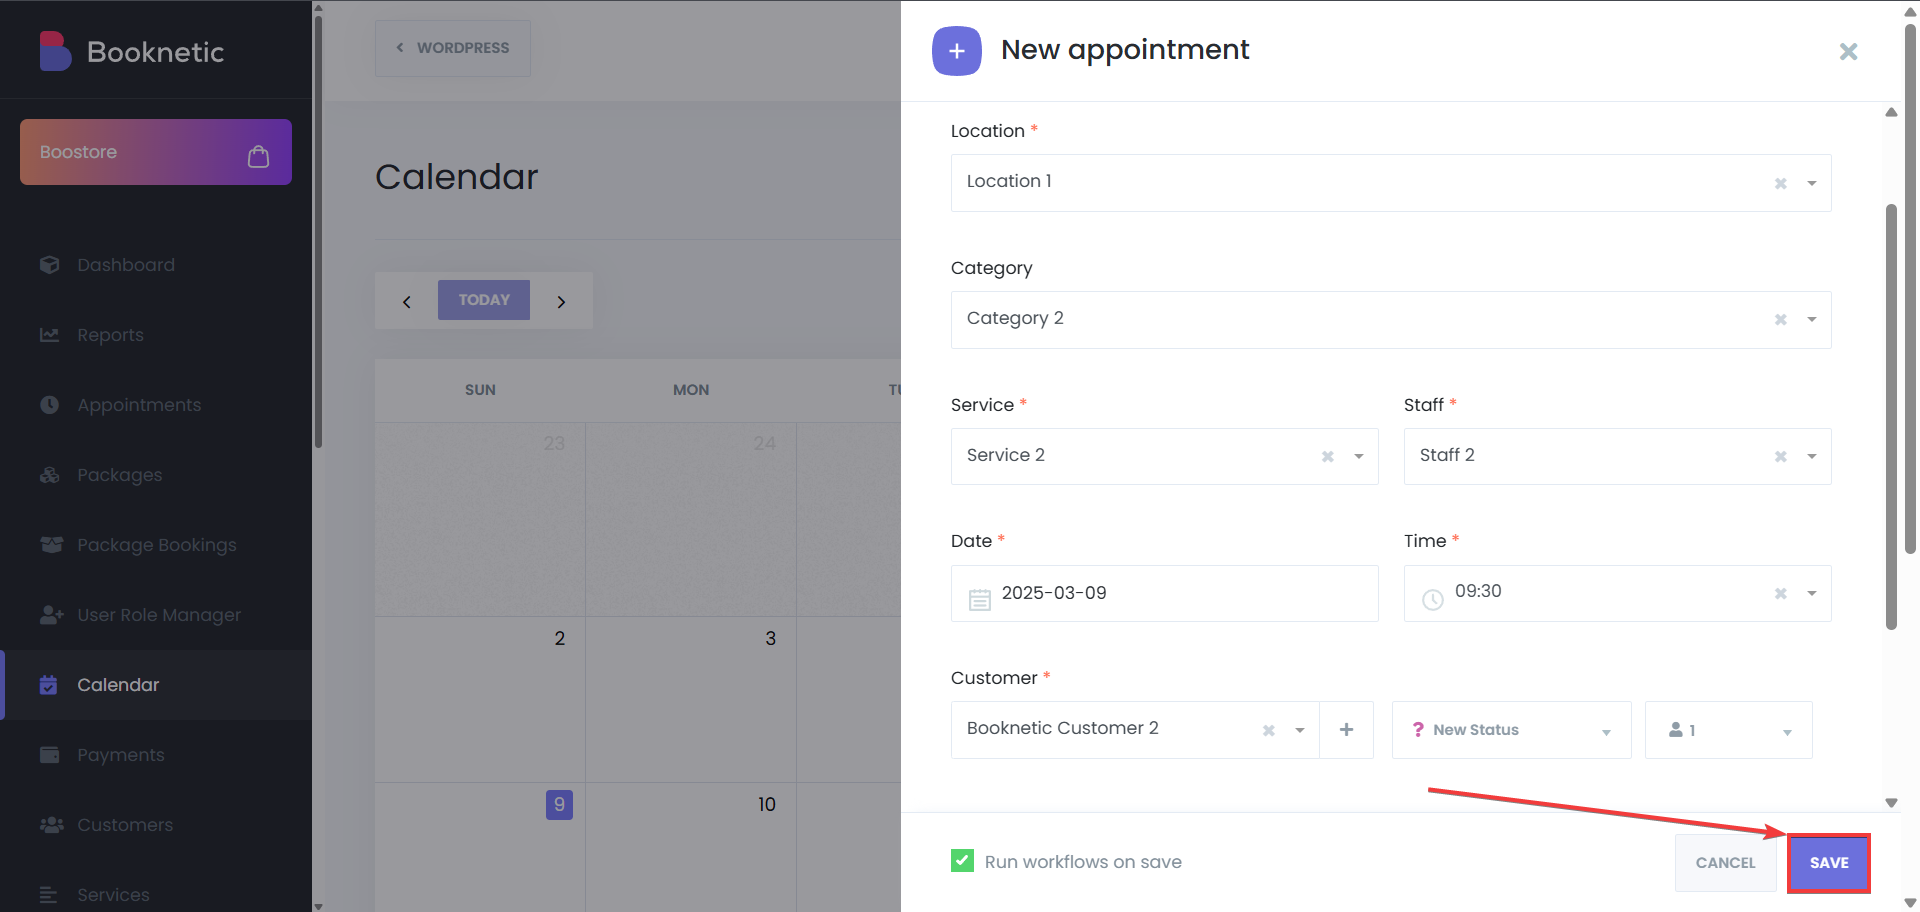
When your customers use the booking panel to book an appointment, their appointment will get a status based on your settings, however, when you add a new appointment using the Appointments menu, or the Calendar module, you will be able to use any of the statuses you have for that appointment. To use the custom statuses in the mentioned way: