V5 is live

UP TO

60% OFF
Hot December Sale
Launch Sale
0 DAYS
:
0 HOURS
:
0 MINUTES
:
0 SECONDS
GET NOW percent icon

Setting up Loyalty Points

Loyalty Points in Booknetic lets you reward customers for bookings, define earning and tier rules, track points and redemptions, and let clients redeem points for discounts directly during checkout.

Version:
Categories

The Loyalty Points module allows you to reward customers for bookings, automatically assign loyalty tiers, and let customers redeem points for discounts during checkout.

All point calculations, tier upgrades, and redemptions are handled automatically based on the rules you define.

Accessing Loyalty Points

After enabling the feature, a new menu item becomes available in the admin panel:

Booknetic → Loyalty Points

The module consists of five sections:

  • Earning Rules
  • Tier Rules
  • Customer Points
  • Reports
  • Settings

Earning Rules

Earning Rules define how and when customers earn points when they make bookings.

You can create multiple rules and use them together.

Creating an Earning Rule

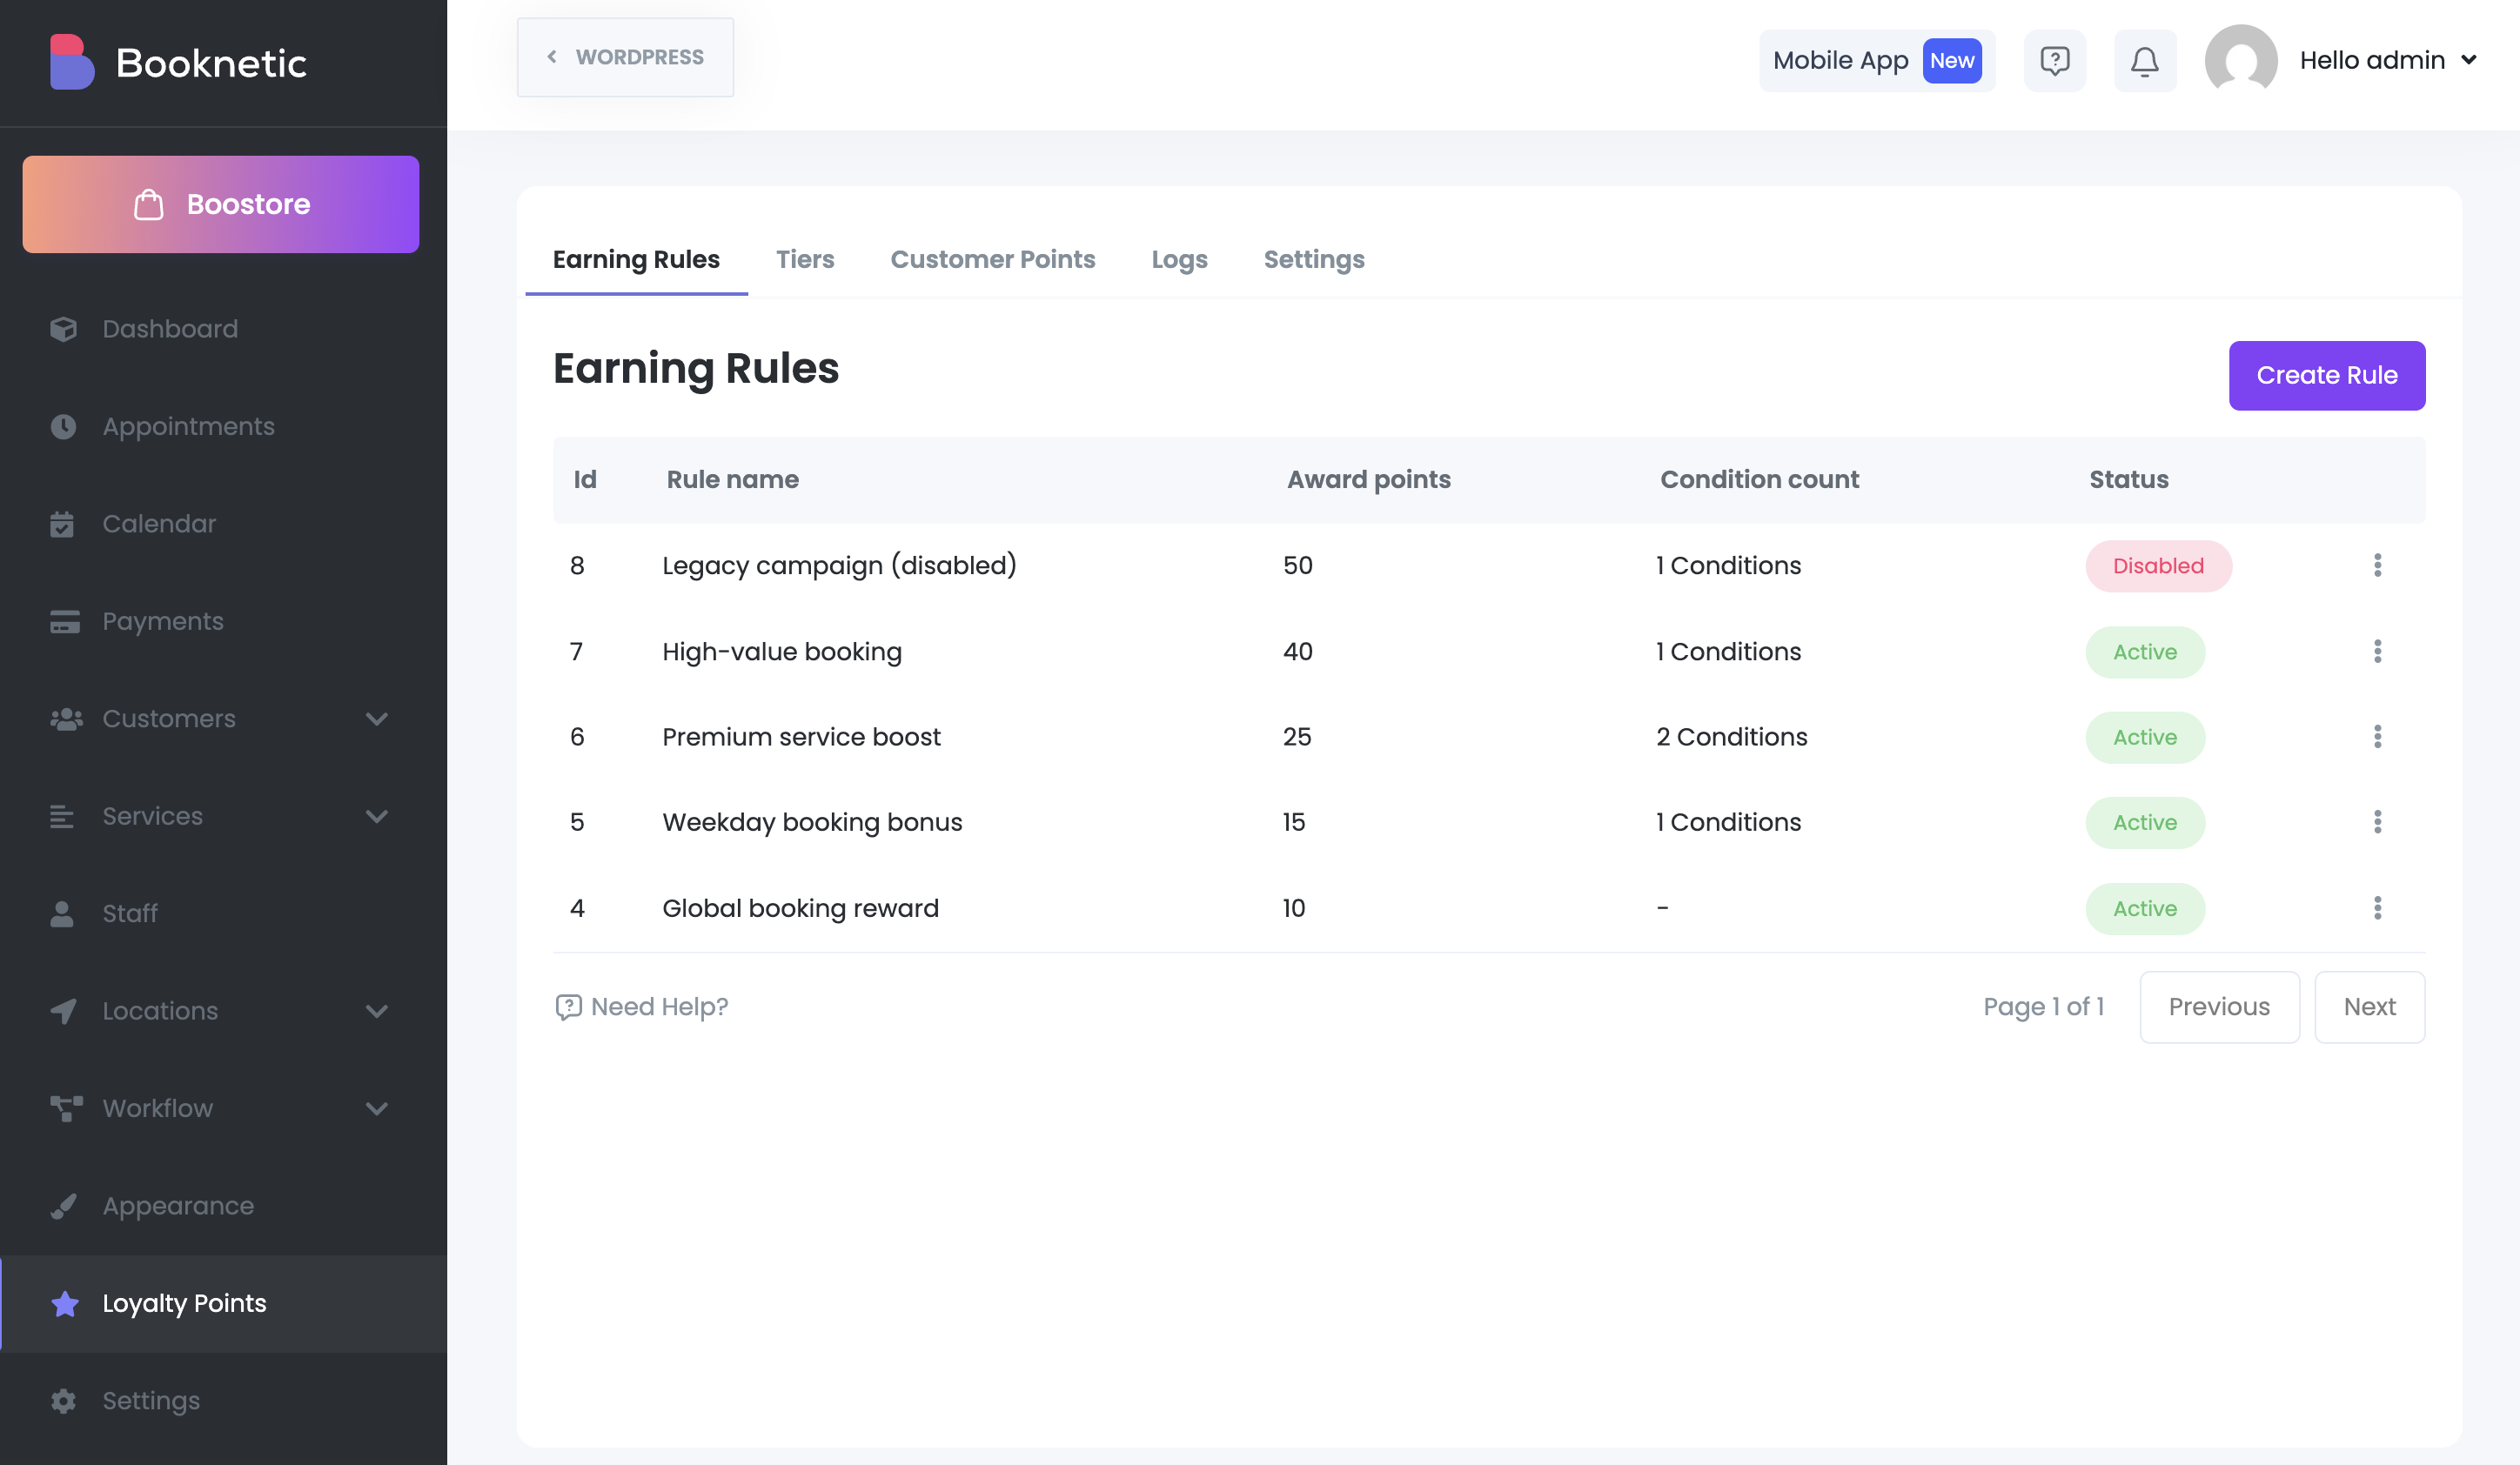
Go to Loyalty Points → Earning Rules and click Create new rule.
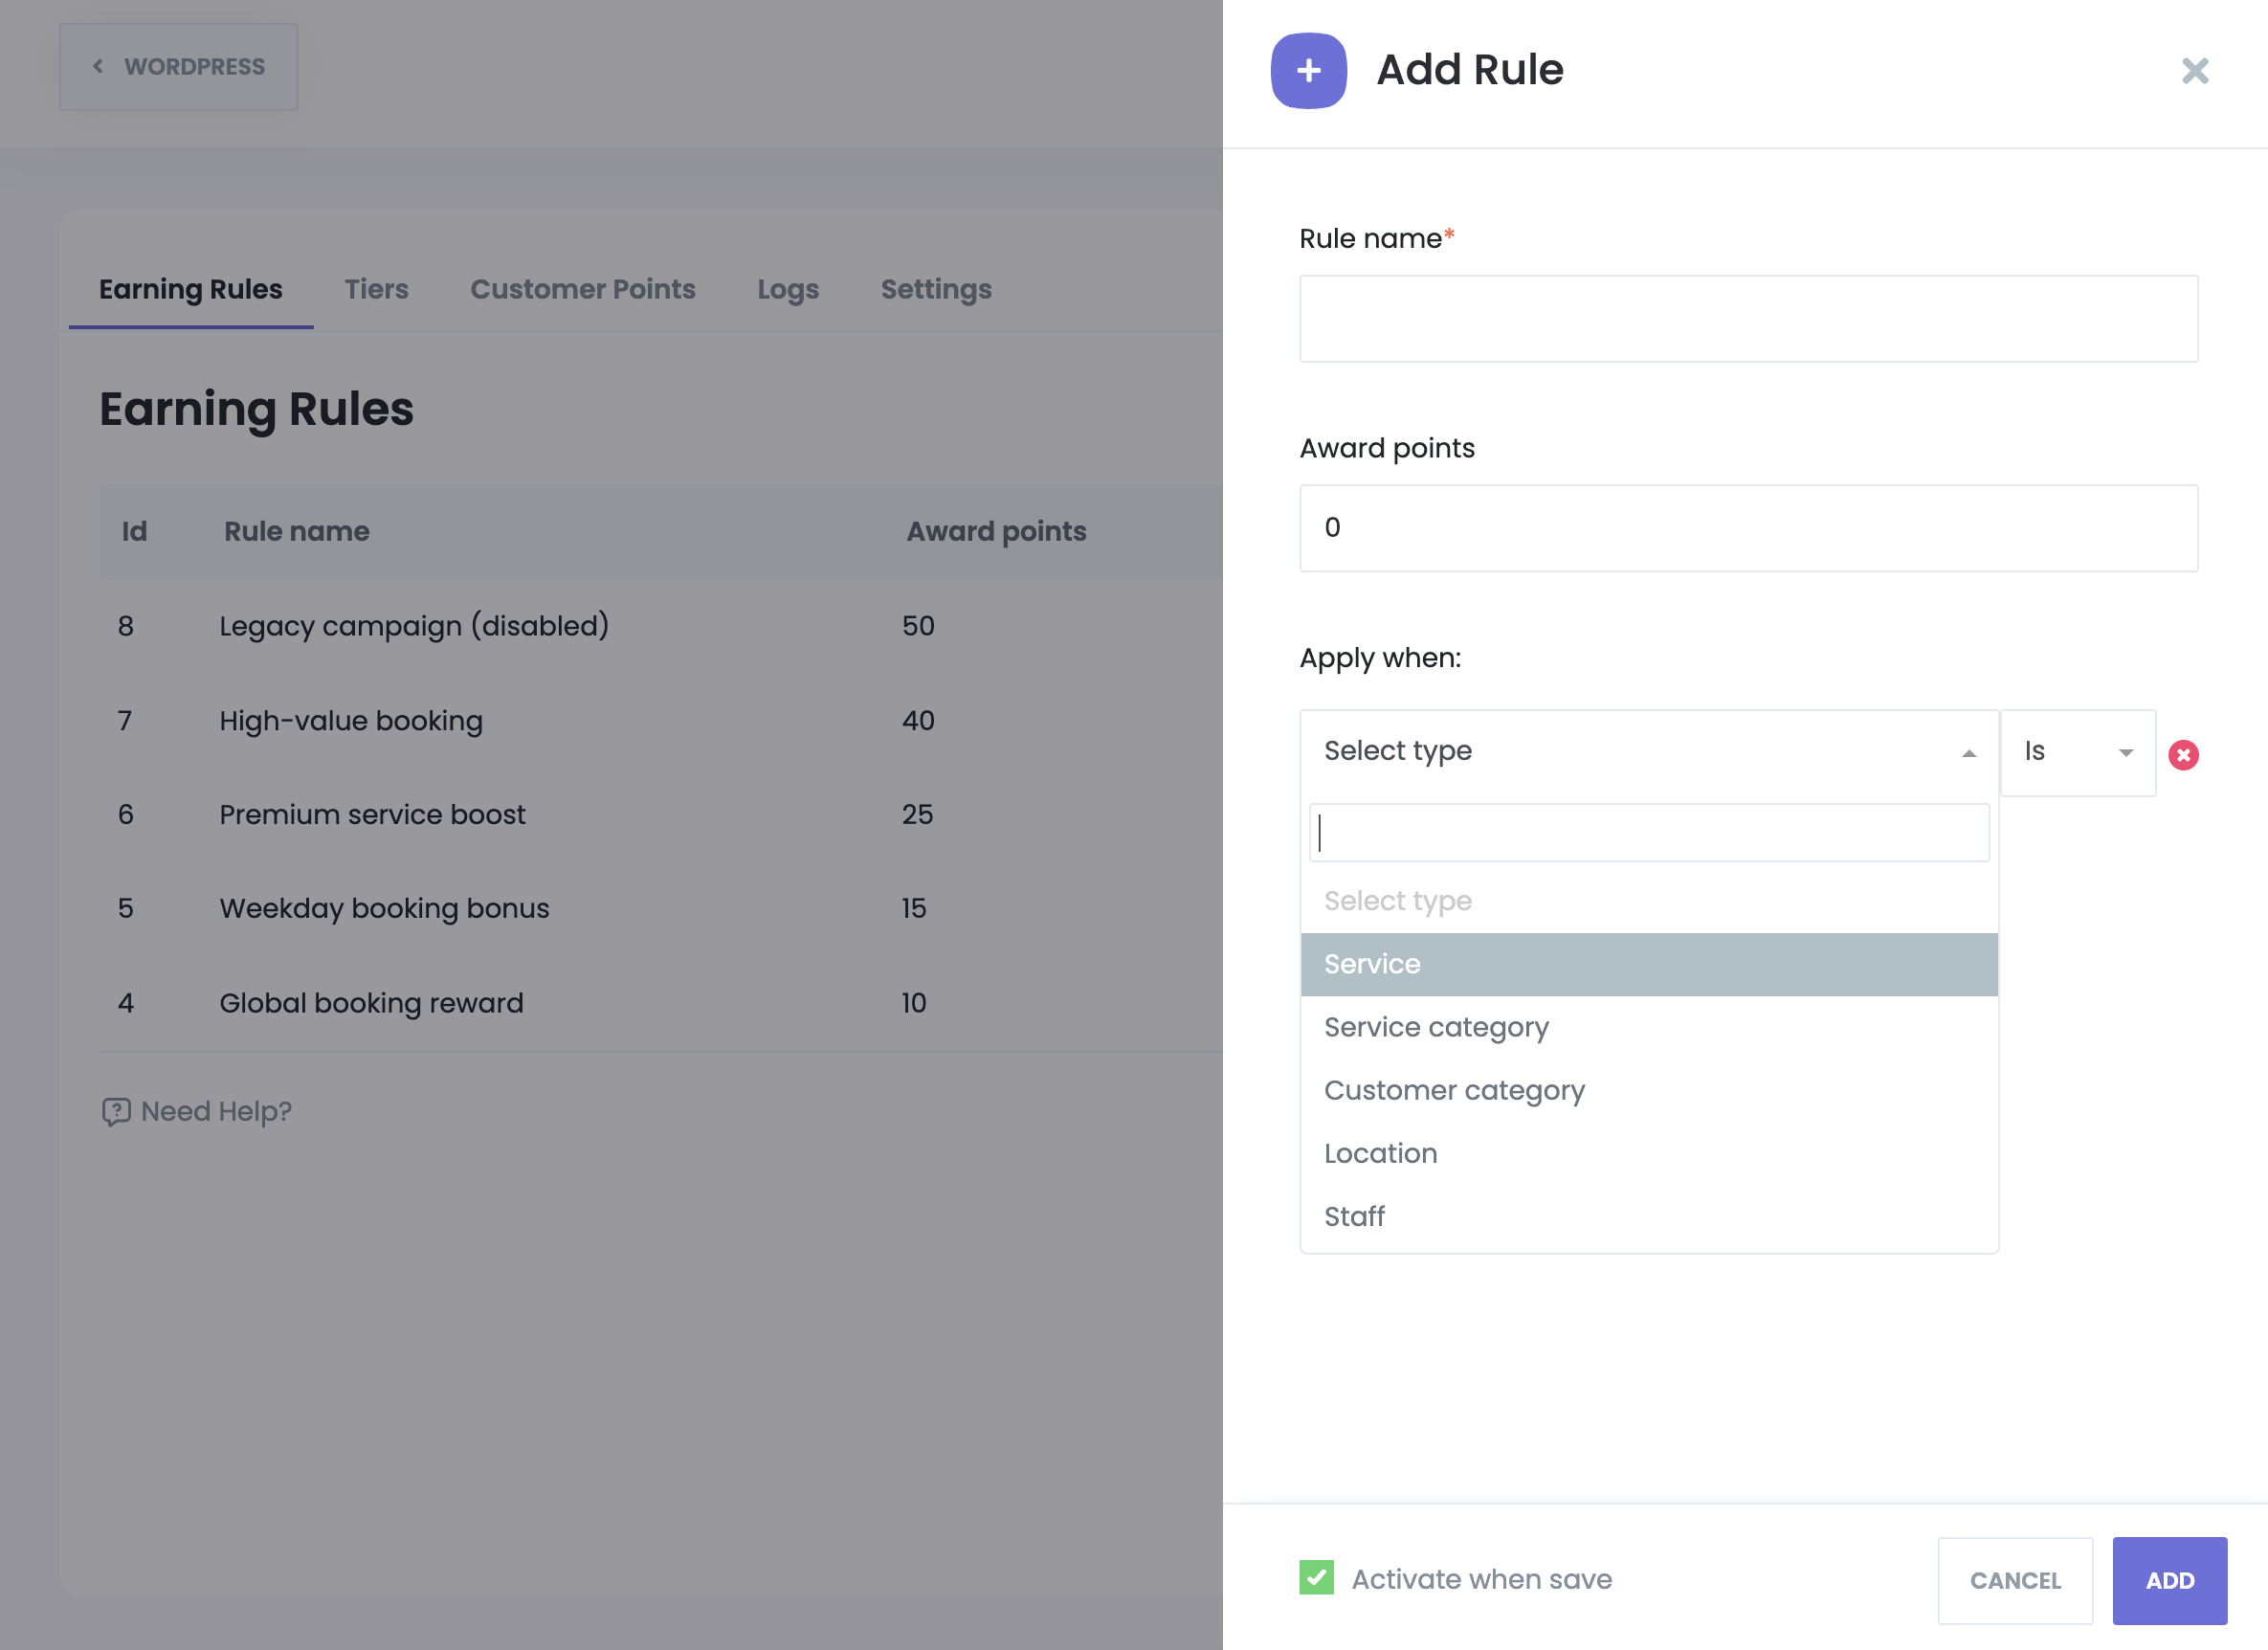
Available fields:

  • Rule name – Internal name for the rule
  • Award points – Number of points to be granted
  • Apply when – Conditions that must be met for the rule to apply:
    • Service category
    • Service
    • Customer category
    • Location
    • Staff
    • Weekday
    • Appointment total (greater than / less than a specific amount)
  • Is active – Enable or disable the rule without deleting it

If no conditions are selected, the rule applies globally.

Managing Rules

The Earning Rules table displays:

  • Rule name
  • Awarded points
  • Applied conditions
  • Active status
  • Actions (Edit / Delete)

There are no bulk actions or imports. Rules are evaluated automatically during booking creation.

Tier Rules

Tier Rules define customer loyalty tiers based on total accumulated points.

When a customer reaches the required number of points, their tier is upgraded automatically.

Creating a Tier Rule

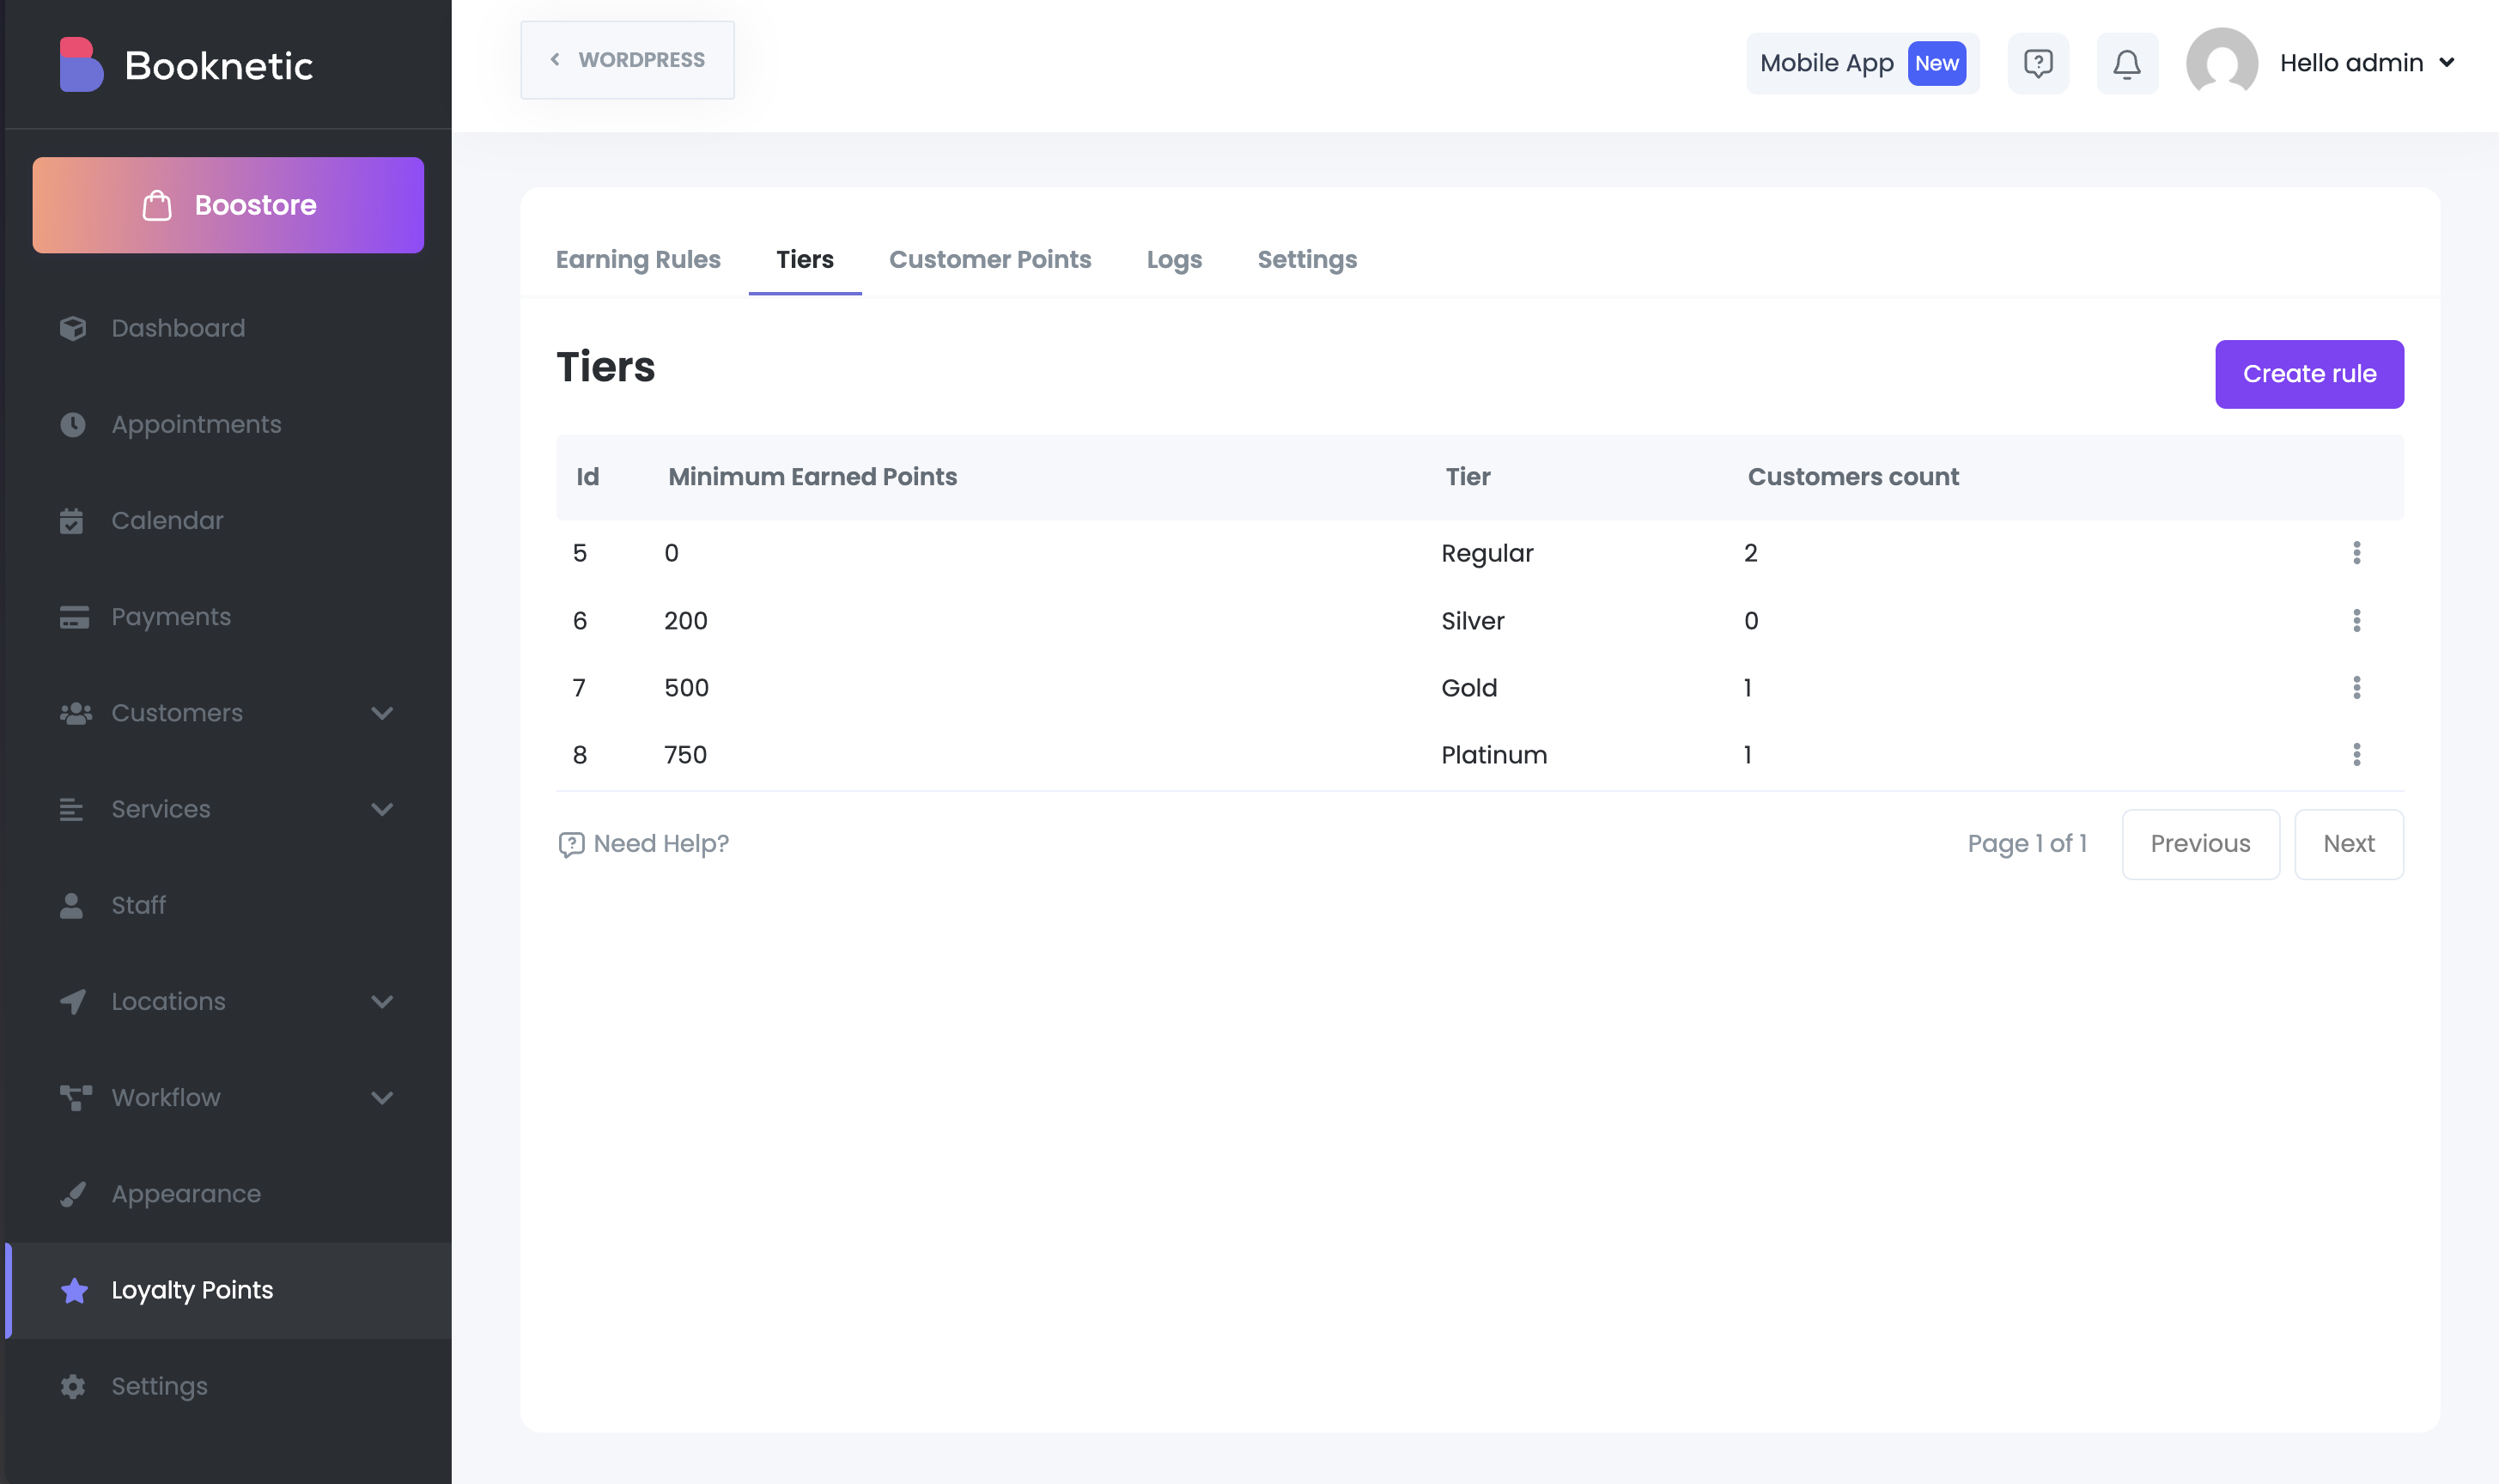
Go to Loyalty Points → Tier Rules and click Create new rule.
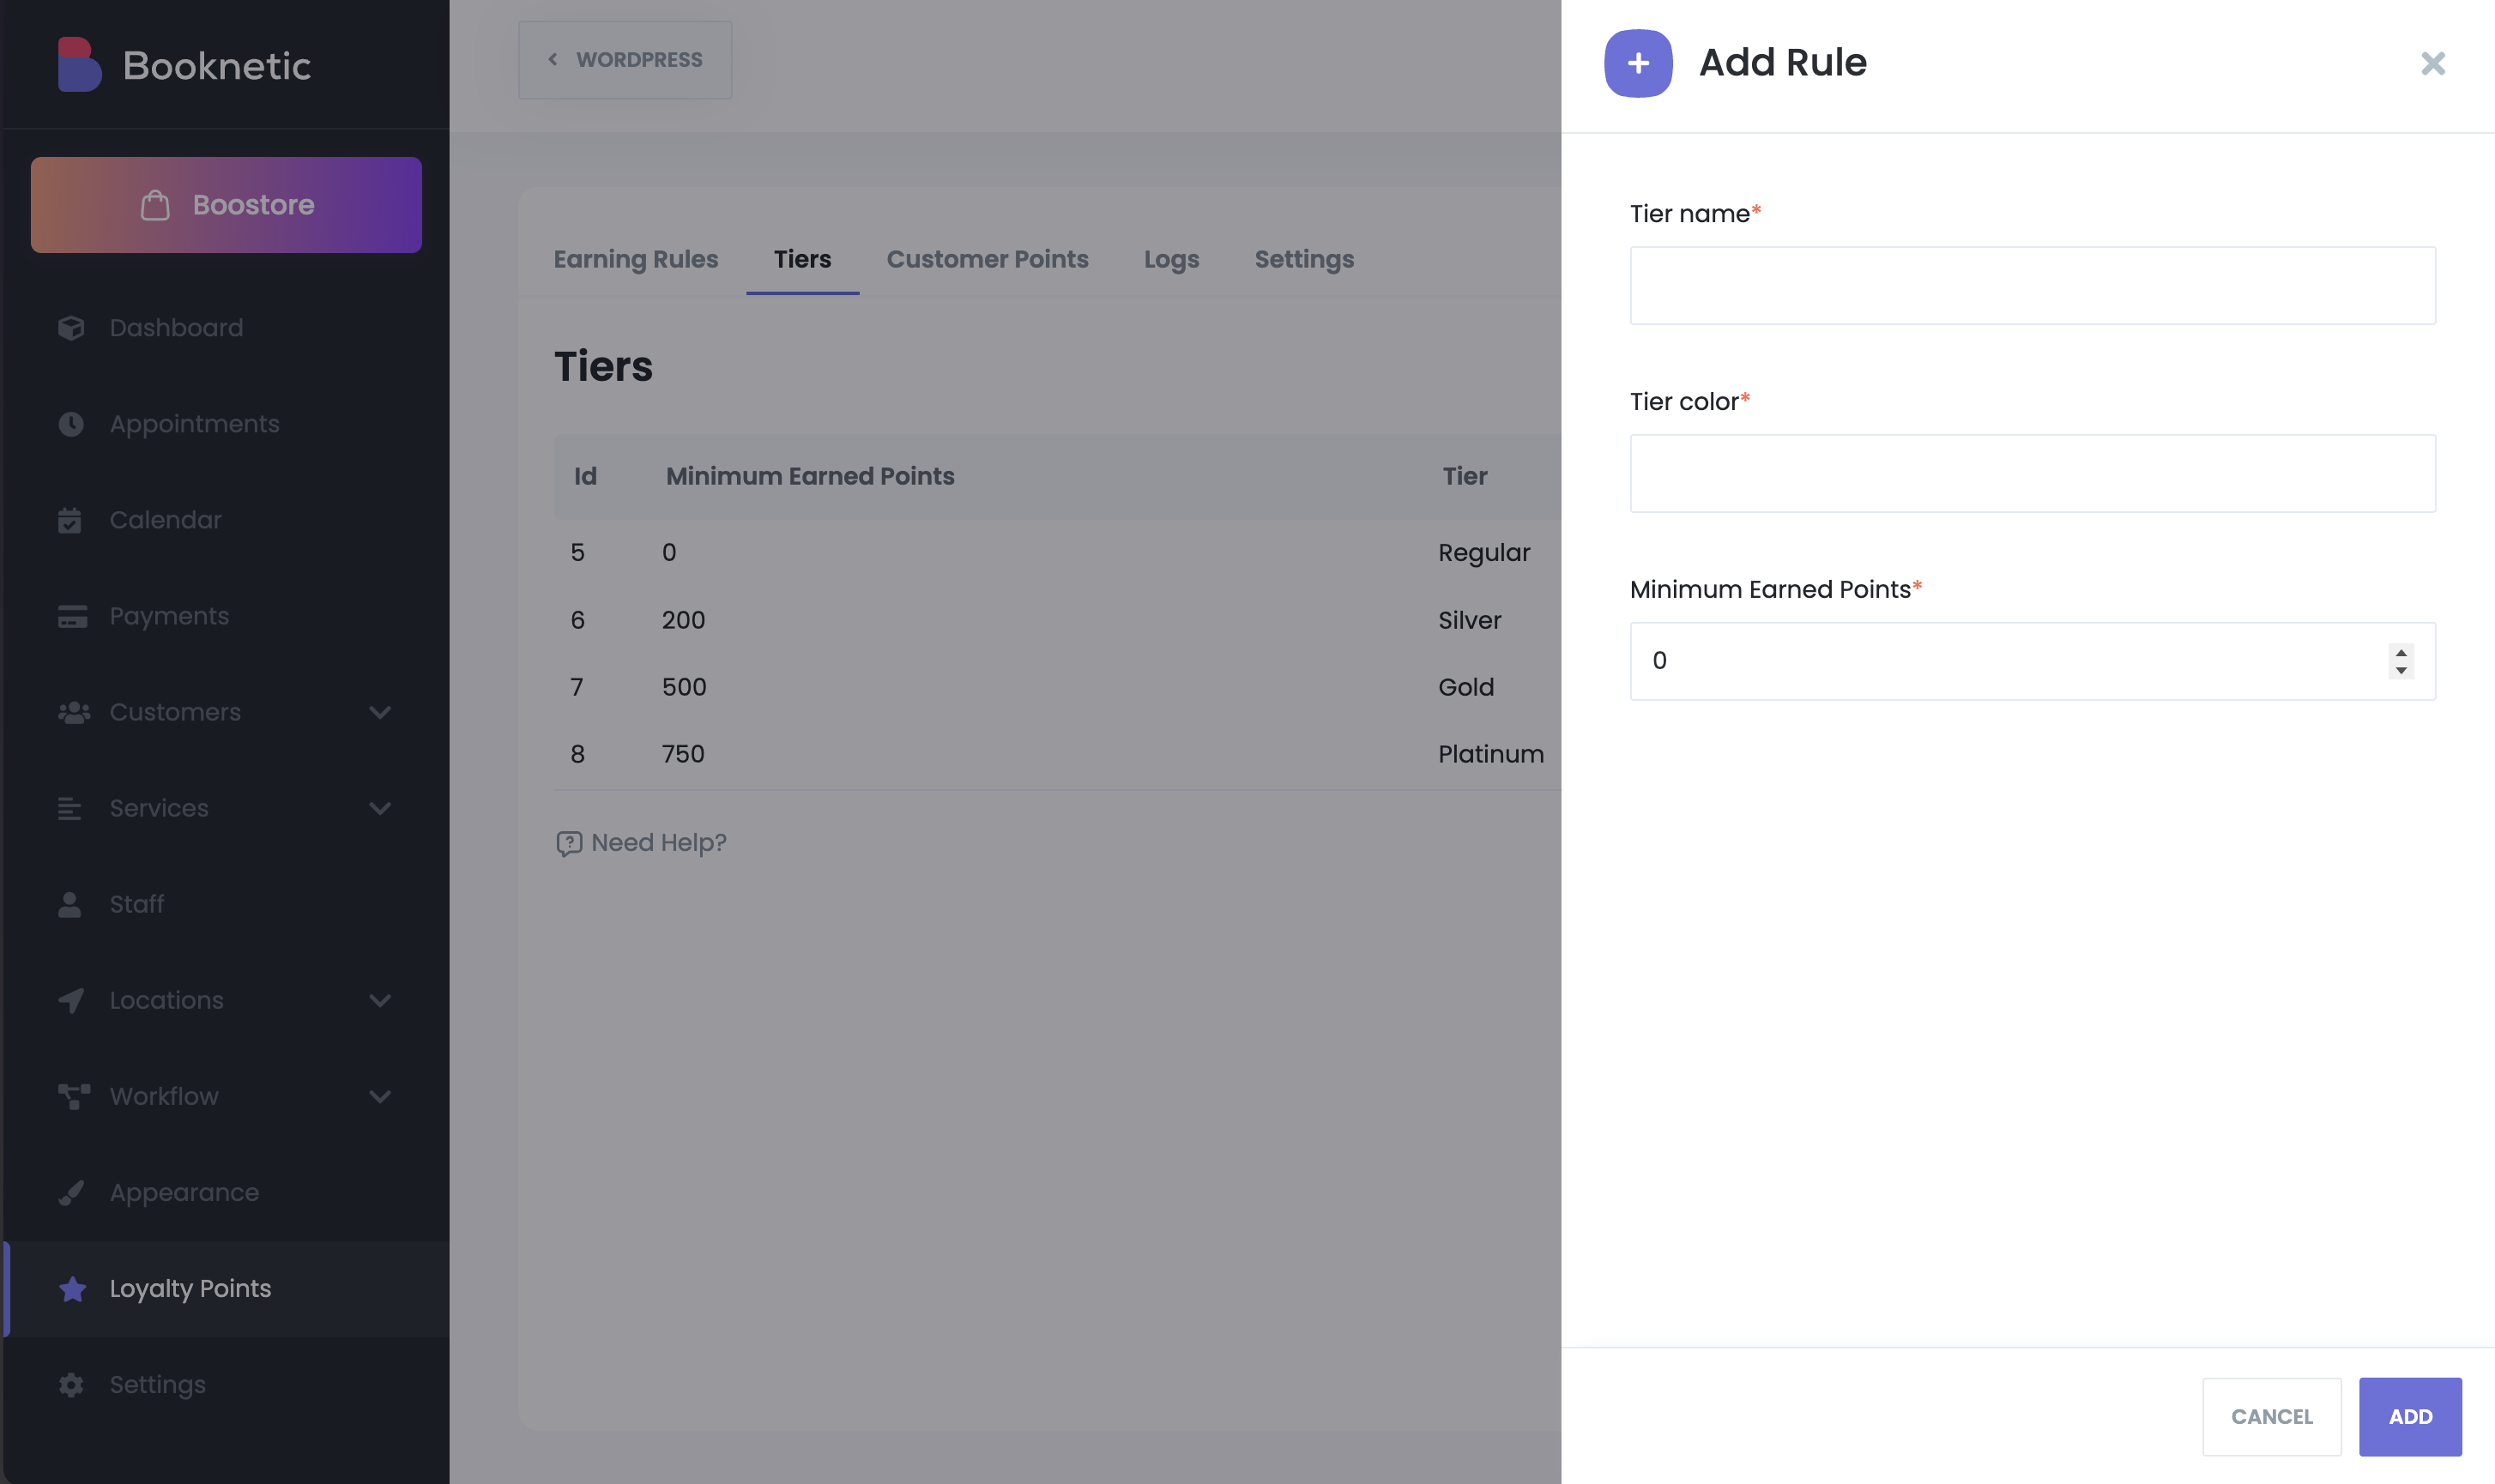
Fields:

  • Tier name – Custom tier label (e.g., Regular, Silver, Gold)
  • Tier color – Visual identifier for the tier
  • Minimum earned points – Required points to reach this tier

Tier Assignment Logic

  • Customers are always assigned the highest tier they qualify for.
  • Tier changes are automatic and require no manual action.

The Tier Rules table shows:

  • Minimum earned points
  • Tier name
  • Number of customers in the tier
  • Actions (Edit / Delete)

Customer Points

The Customer Points section lists only customers who currently have points.

Customer Overview

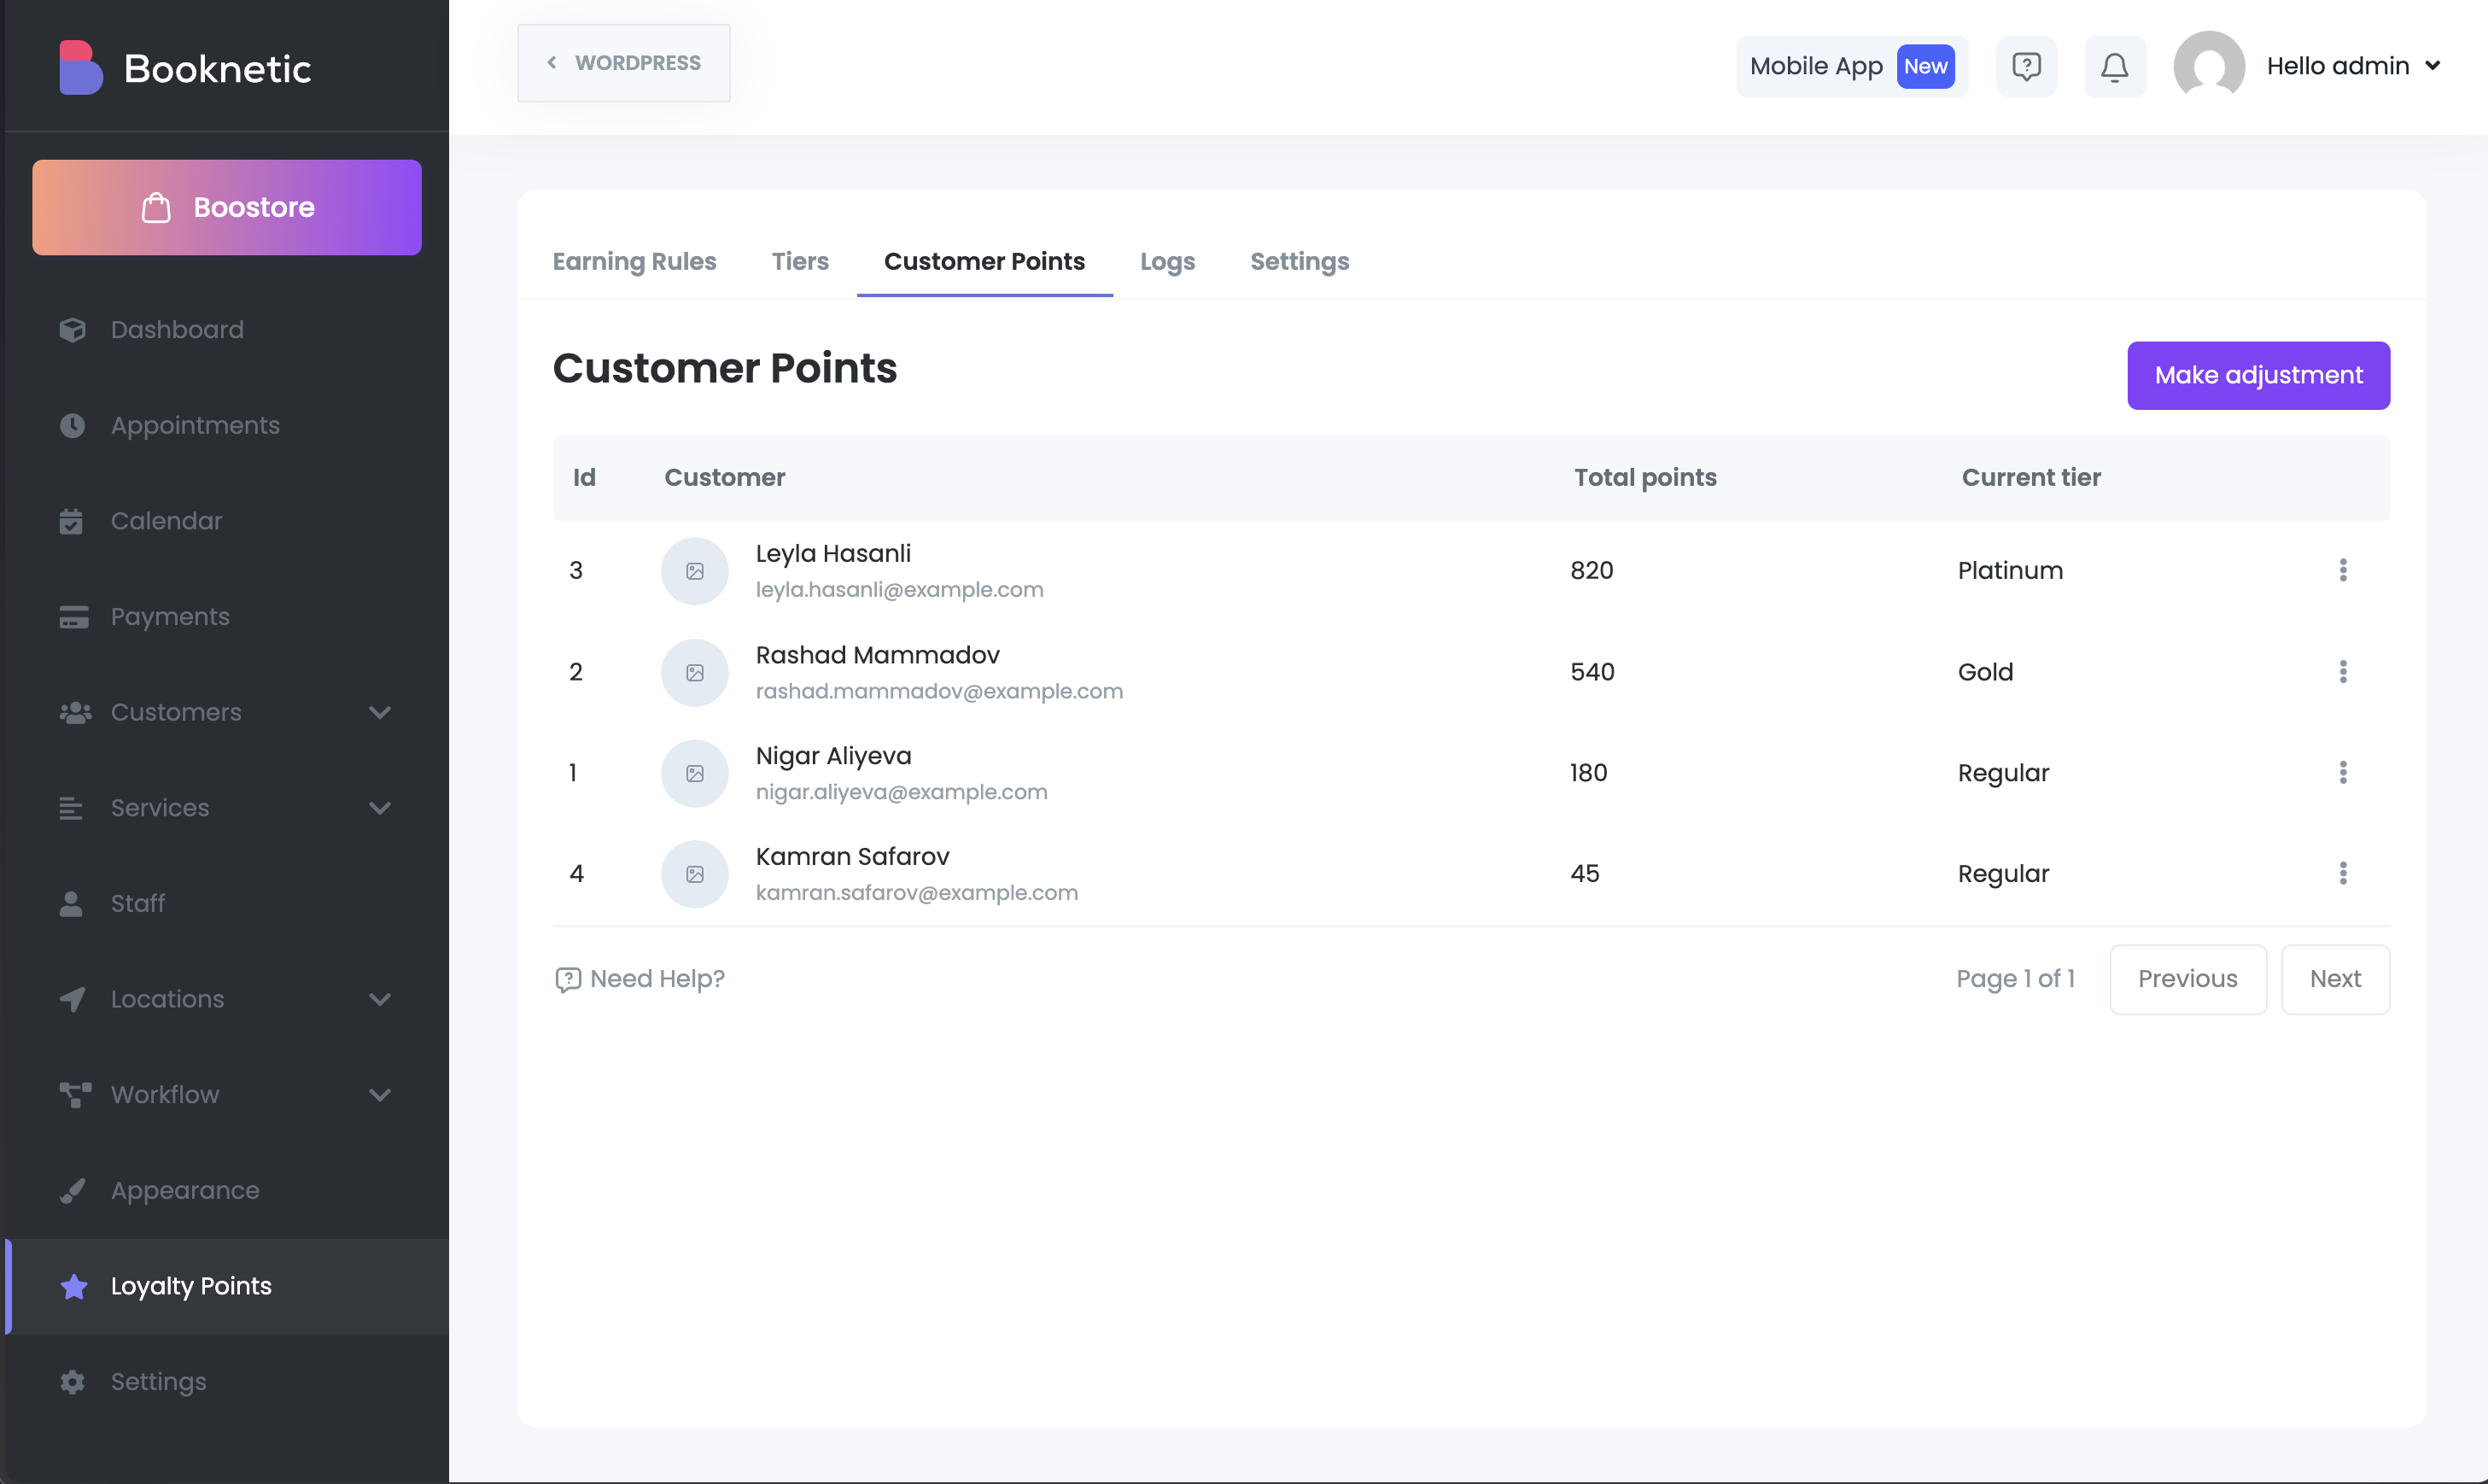
For each customer, you can see:

  • Full name, email, and profile image
  • Total points
  • Current loyalty tier

Adjusting Points Manually

Admins can manually add or remove points if needed.

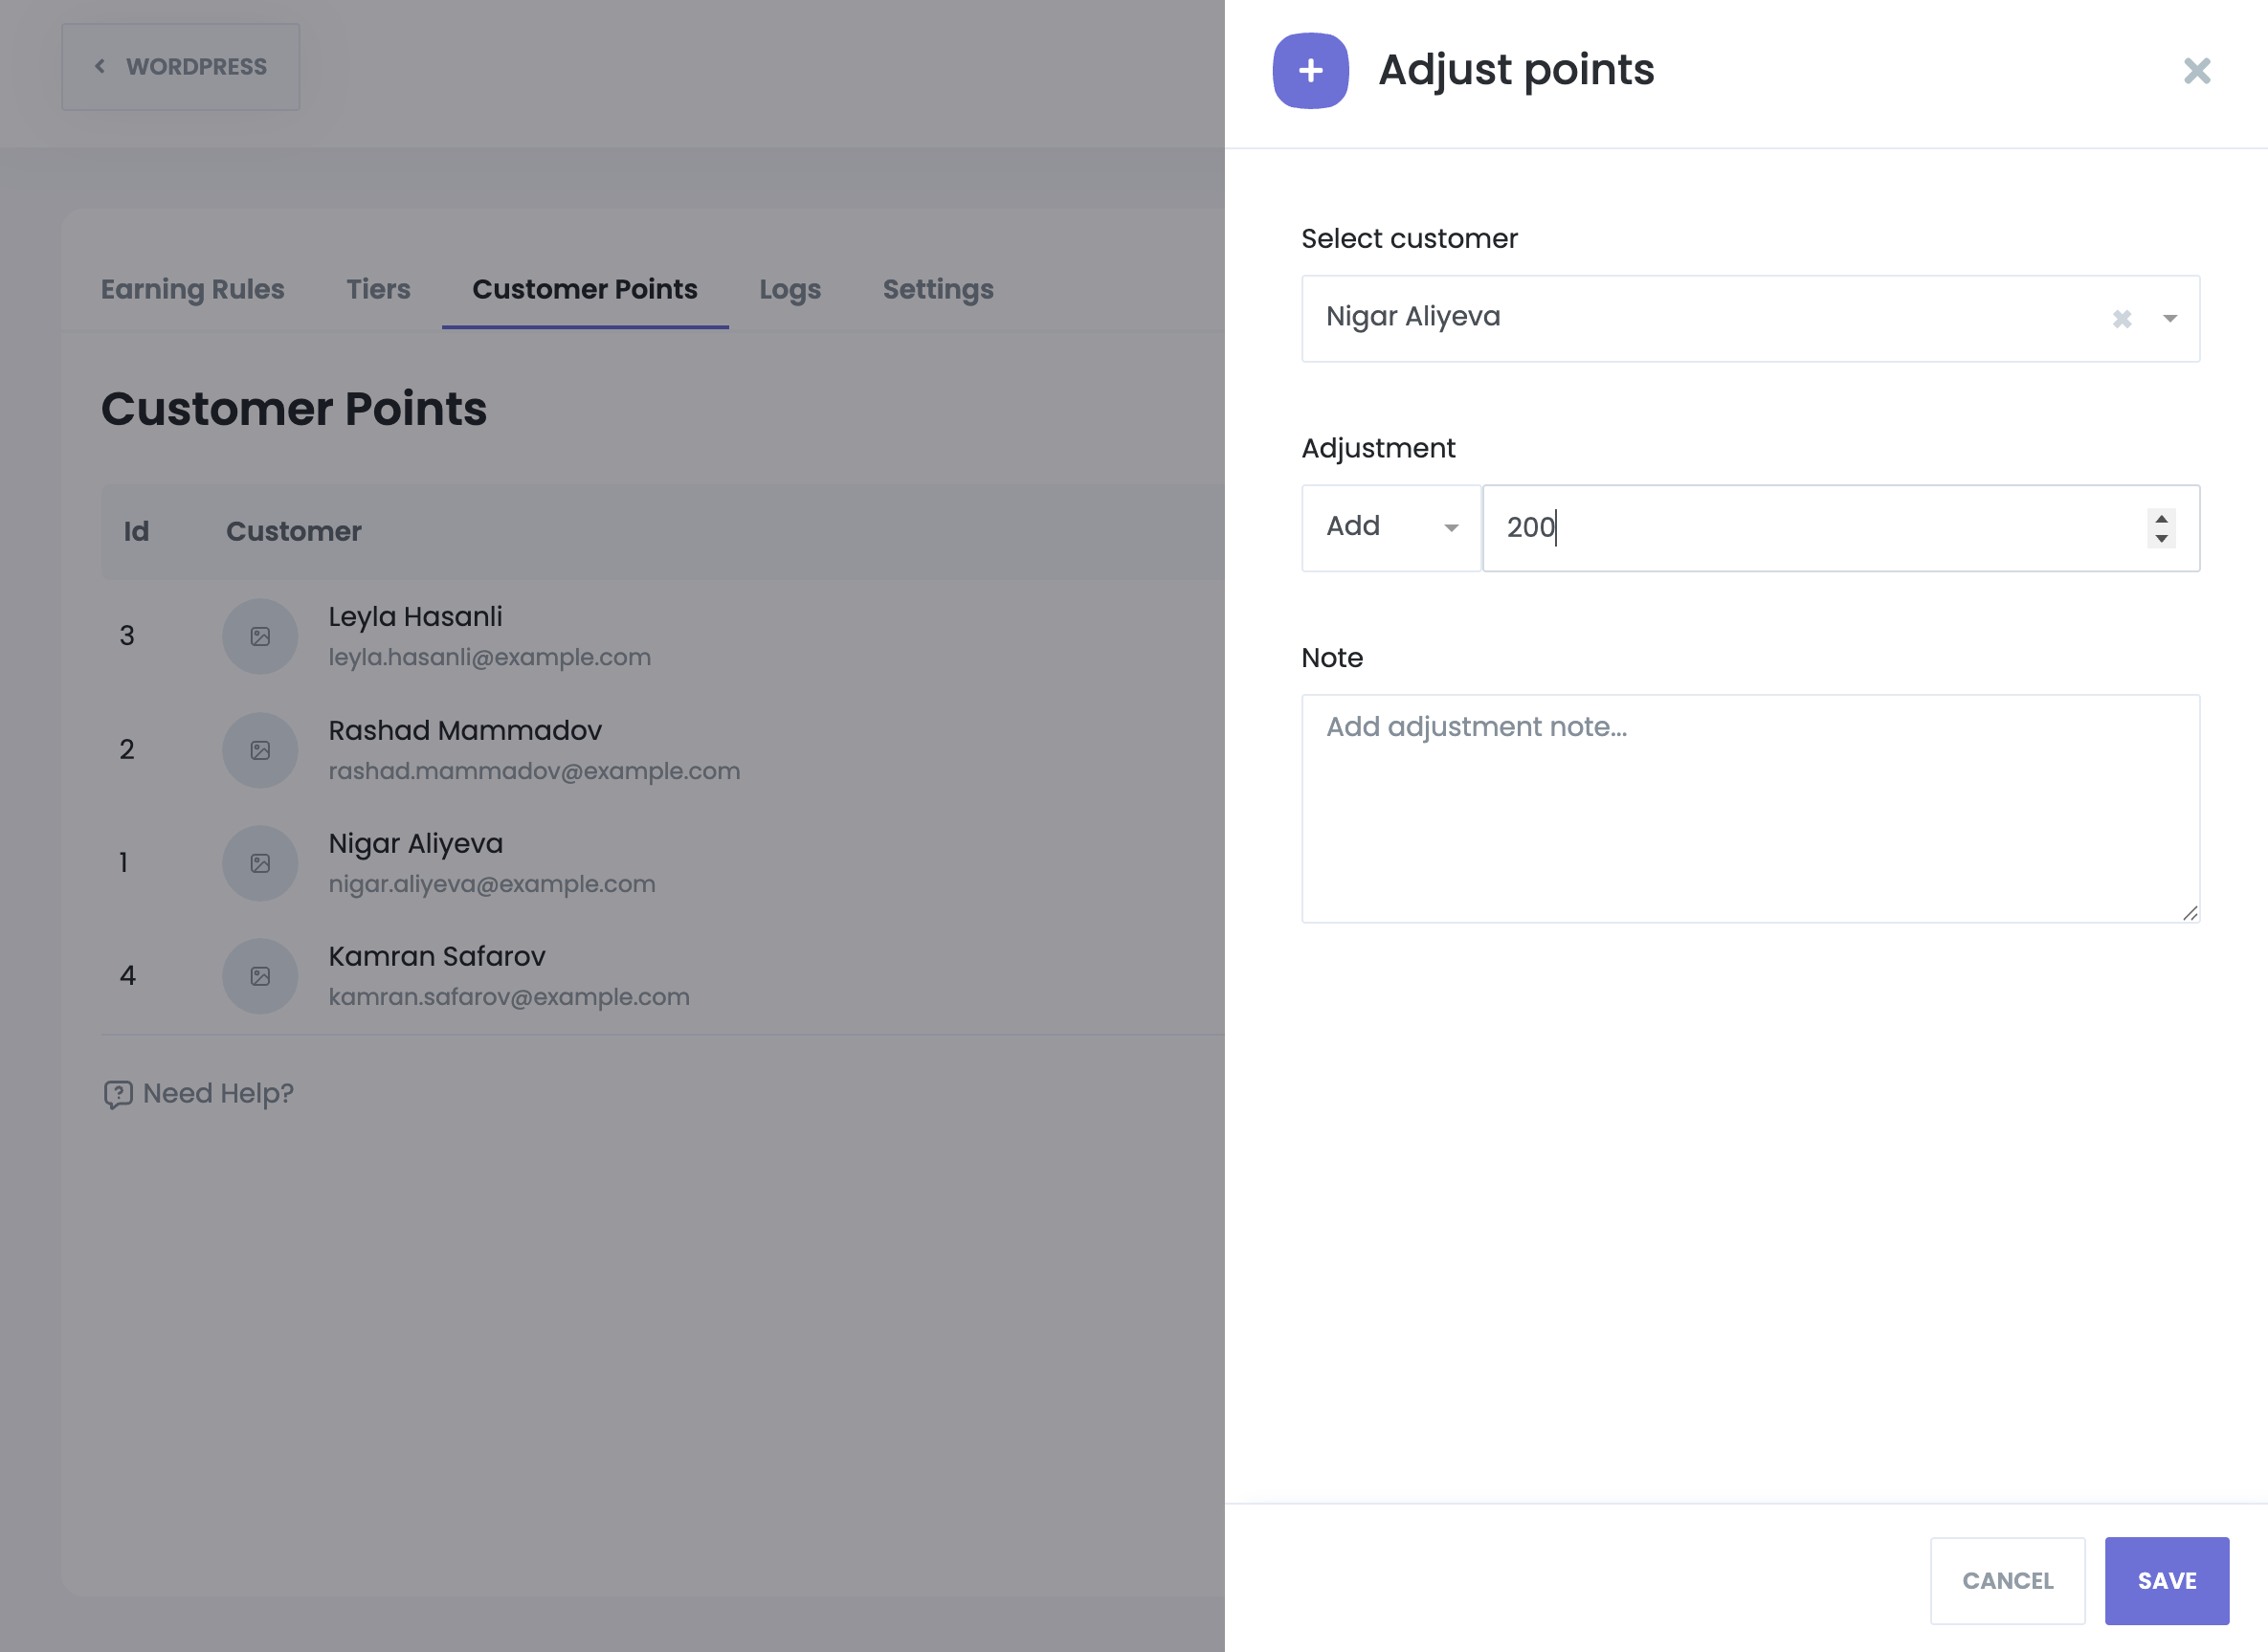
You can open the adjustment modal from:

  • The Make adjustment button (top-right), or
  • The Adjust points action next to a customer

Adjustment fields:

  • Customer (auto-selected if opened from customer row)
  • Adjustment type (add or remove)
  • Points value
  • Optional note

Adjustment History

Each adjustment has a dedicated info view displaying:

  • Adjustment ID
  • Customer details
  • Adjustment value
  • Note

Reports

The Reports section provides insights into loyalty activity and customer engagement.

Summary Widgets

At the top, you will see:

  • Total points earned
  • Total points redeemed
  • Redemption rate

(Redeemed points ÷ Earned points × 100, rounded up)

  • Active loyalty customers

A global date range filter applies to all report data.

Activity Log

Below the widgets is a detailed log table showing:

  • Date & time
  • Customer details
  • Points change
    • Earned (green)
    • Redeemed (red)
    • Admin adjustment (purple)
  • Action type
  • Reference
    • Appointment ID or Adjustment ID (clickable for details)

Filters are available for:

  • Customer
  • Action type

Reports can be exported for external analysis.

Settings

The Settings tab controls how points are redeemed and applied during checkout.

Redeeming Points

  • Allow customers to redeem points – Enables point usage during booking checkout

When enabled, the following options become available:

  • Point value

Defines the monetary value of one point

Example: 1 point = 0.01

  • Discount application method
    • Automatically apply discount during checkout
    • Let customers choose whether to use their points
  • Maximum discount per appointment
    • Fixed amount (e.g., $10)
    • Percentage of appointment total (e.g., 50%)
  • Minimum points required to redeem

Customers must have at least this many points to use them

These limits apply per booking to prevent excessive discounts.

Booking Panel Integration

During checkout, if a customer has available points:

  • Their total points balance is displayed
  • The point-to-currency value is shown
  • Customers can choose how many points to redeem
  • A discount row appears in the price breakdown
  • Points can be applied or removed before confirmation

If a customer has zero points, no loyalty information is shown.

Customer Panel Integration

In the Customer Panel, customers can view:

  • Total earned points
  • Current loyalty tier

Hovering over the tier shows a progress bar indicating how close they are to the next tier.

Progress Logic

  • Progress is calculated between the current tier and the next tier
  • If the customer is in the highest tier, progress is shown as unlimited (∞) with 100% completion

This helps customers clearly understand their loyalty status and incentives.

Workflow Integration

Loyalty Points integrates with Booknetic workflows.

Available Workflow Event

  • Tier upgraded

Triggered when a customer’s tier changes due to earned points

Filters

  • Upgraded tier
  • Locale

Available Keywords

  • Customer earned points (appointment-based)
  • Customer tier
  • Customer total points

These can be used in notifications, emails, or automation actions.

Permissions (SaaS & User Roles)

  • Tenant permission: Loyalty Points
  • User role permission: Loyalty Points

Granting this permission allows access to the entire Loyalty Points module.