Mobile App
This guide walks you through setting up and activating the Booknetic Mobile App step by step.
By using this site, you agree to our Cookie Policy
This guide walks you through setting up and activating the Booknetic Mobile App step by step.
This guide walks you through setting up and activating the Booknetic Mobile App step by step. Follow the instructions below to purchase a plan, manage seats, add team members, and log in to the mobile app.
Before you begin, make sure that:
You have the latest version of Booknetic installed on your website.
Your website is publicly accessible (HTTPS recommended).
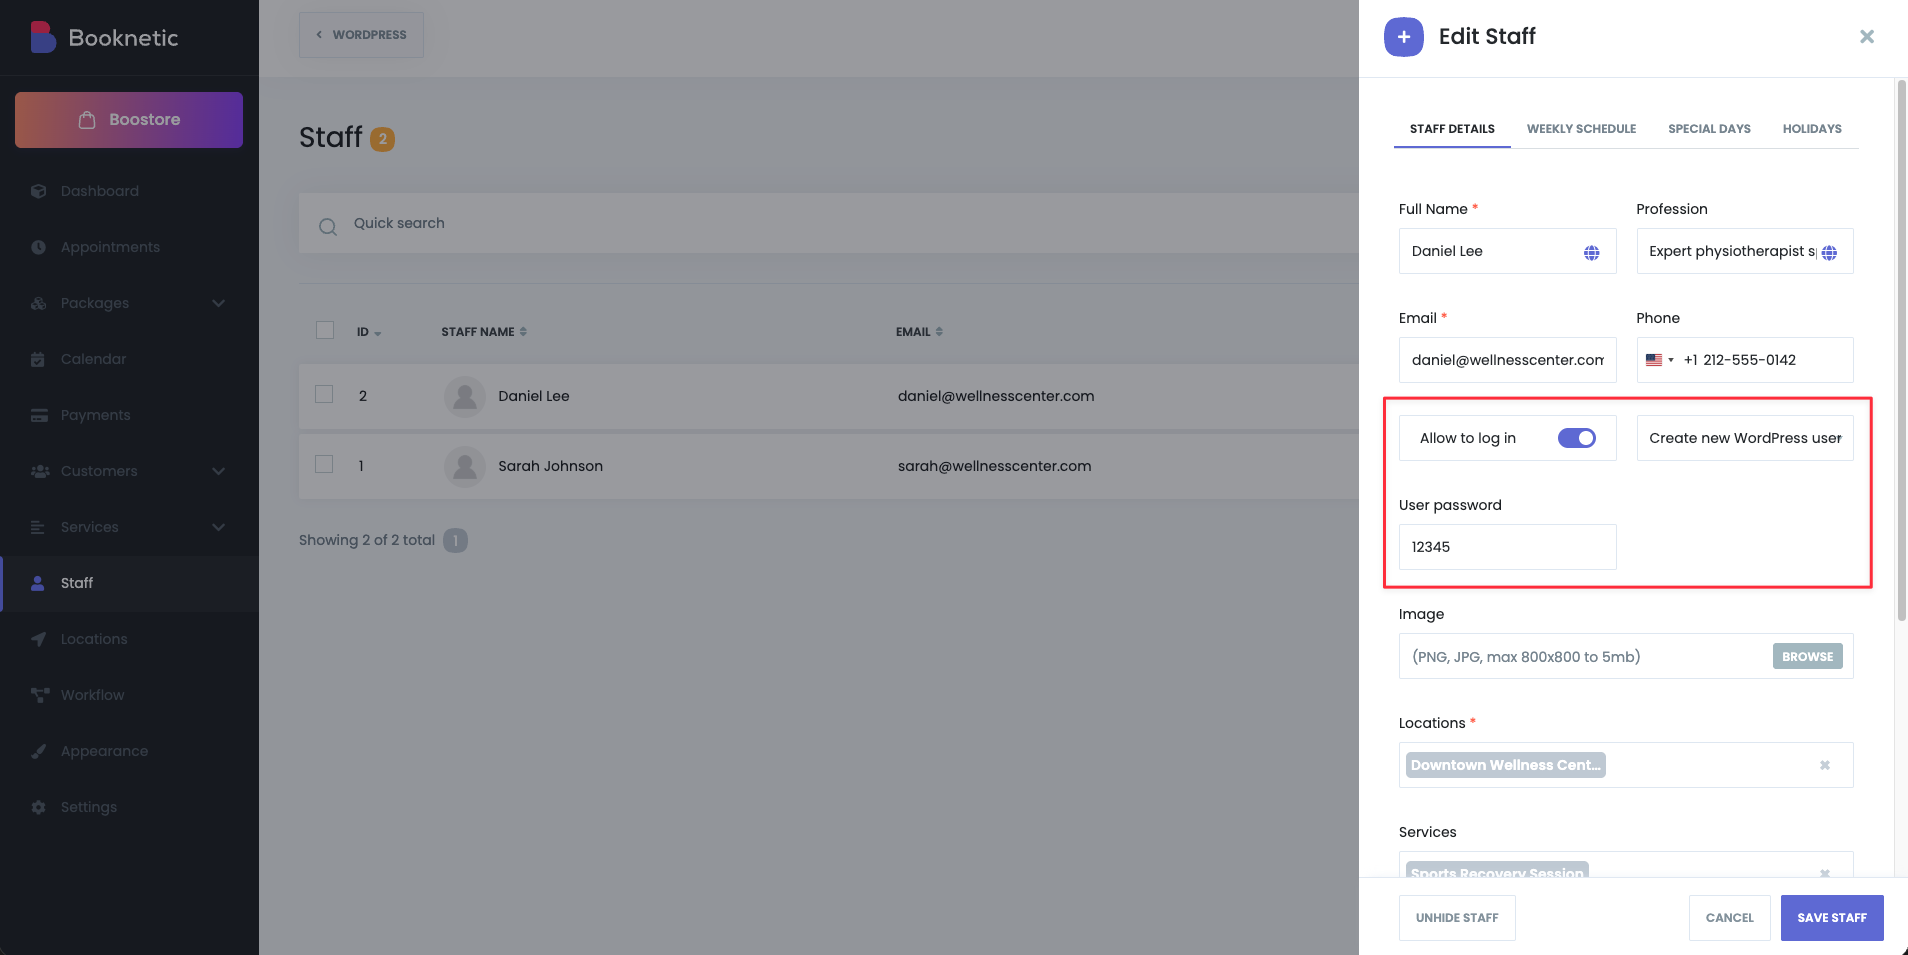
You should enable the “Allow to log in” option for your staff profile.
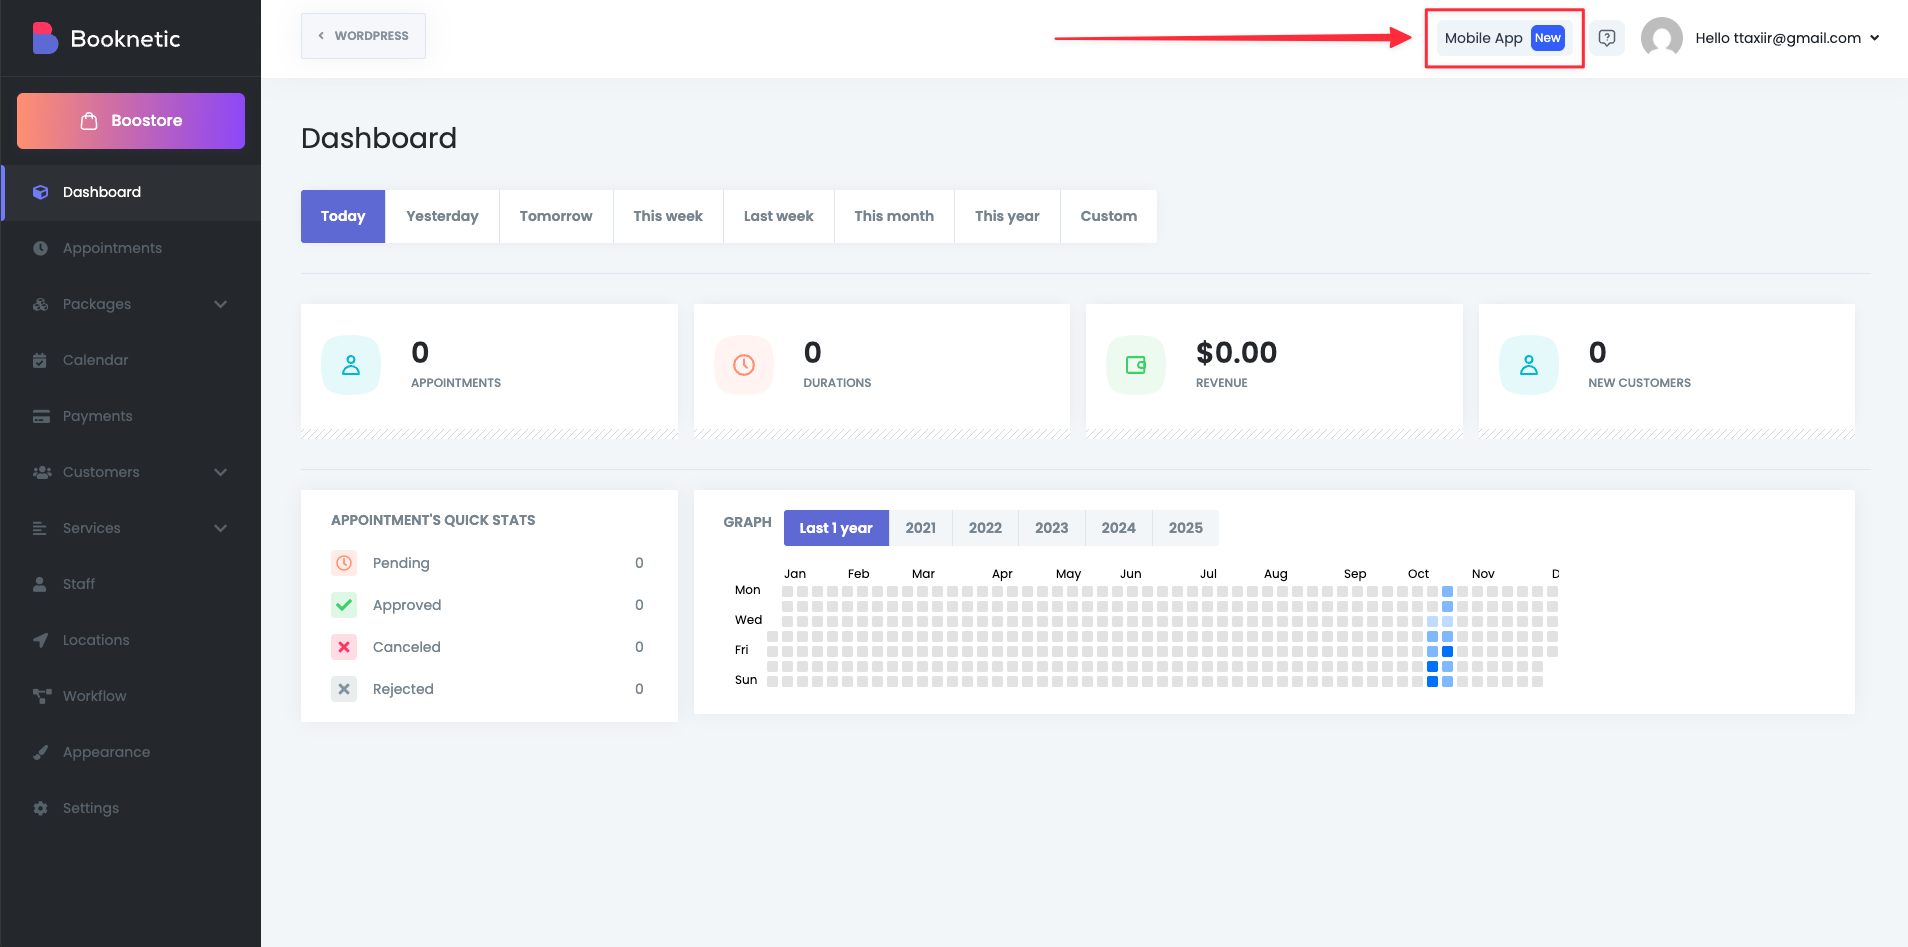
Log in to your WordPress admin panel.
Open Booknetic from the left sidebar.
Navigate to Mobile App.
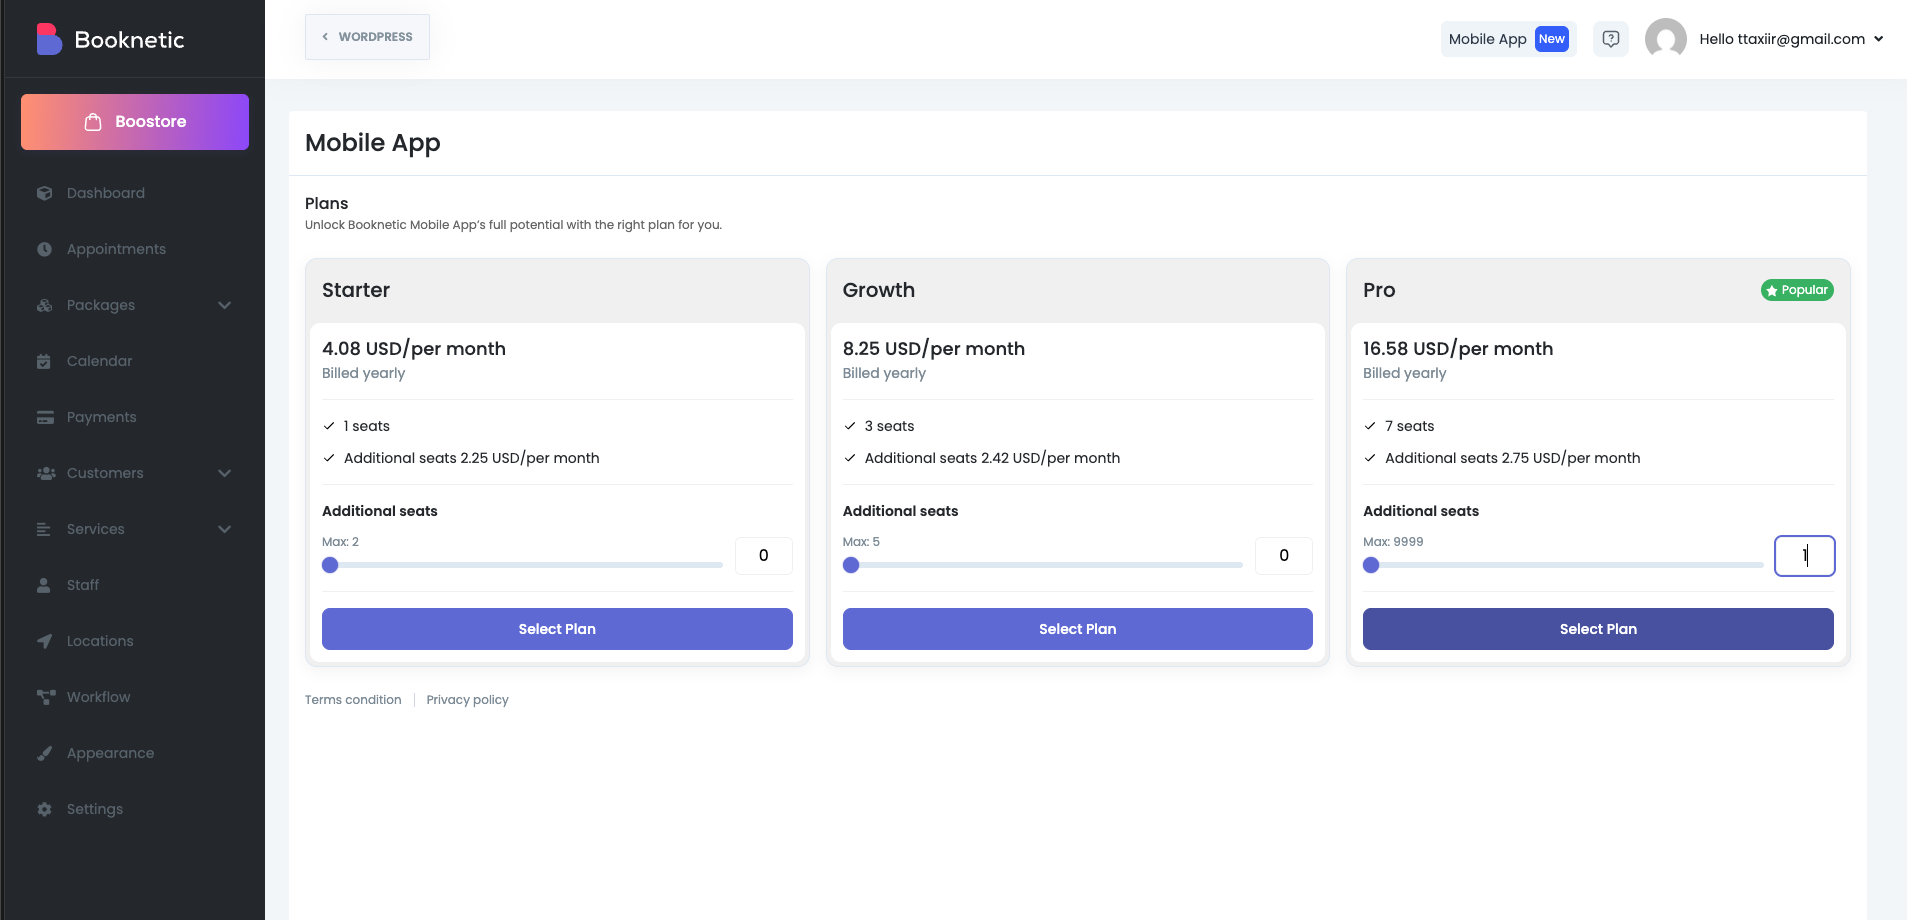
Here you will see the available Mobile App subscription plans.
Booknetic Mobile App is offered as a seat-based yearly subscription.
Available plans:
Starter – Ideal for individual business owners.
Growth – Suitable for small teams.
Pro – Best for growing businesses with multiple staff members.
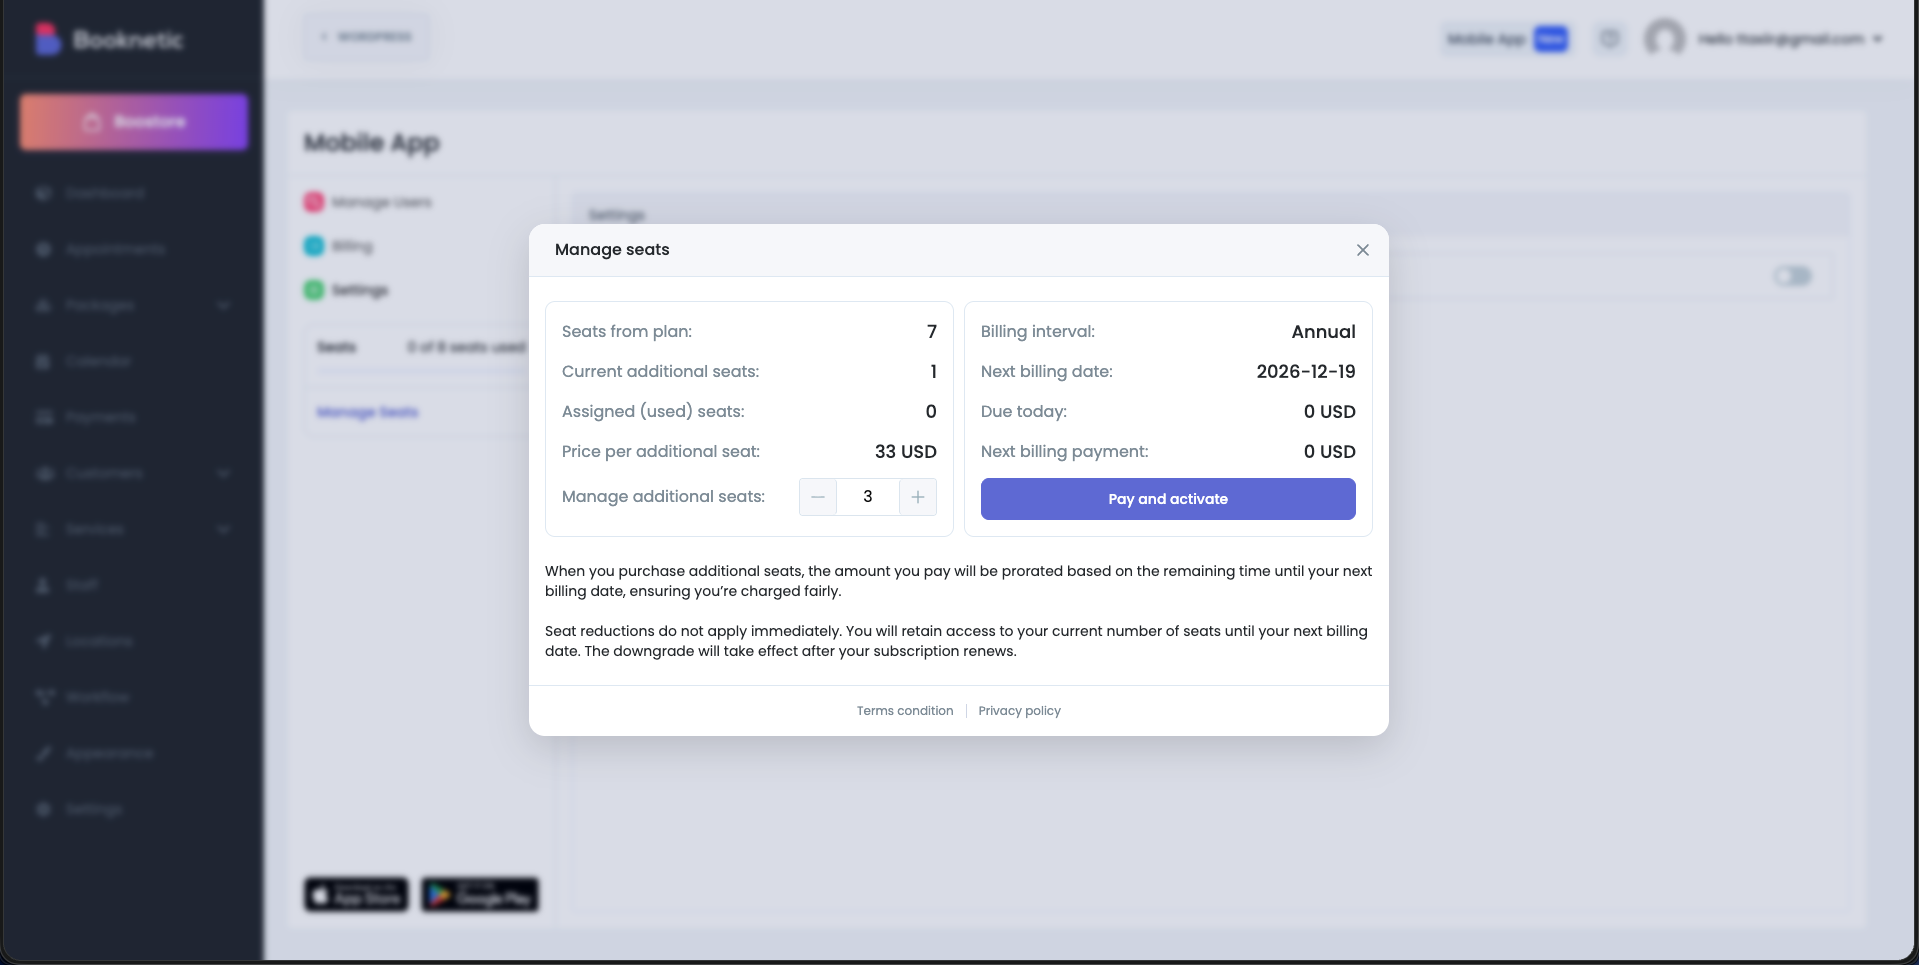
Each plan includes a predefined number of seats. You can also add extra seats if needed.
Review the plan details.
Adjust the Additional seats slider if required.
Click Select Plan on your preferred plan.
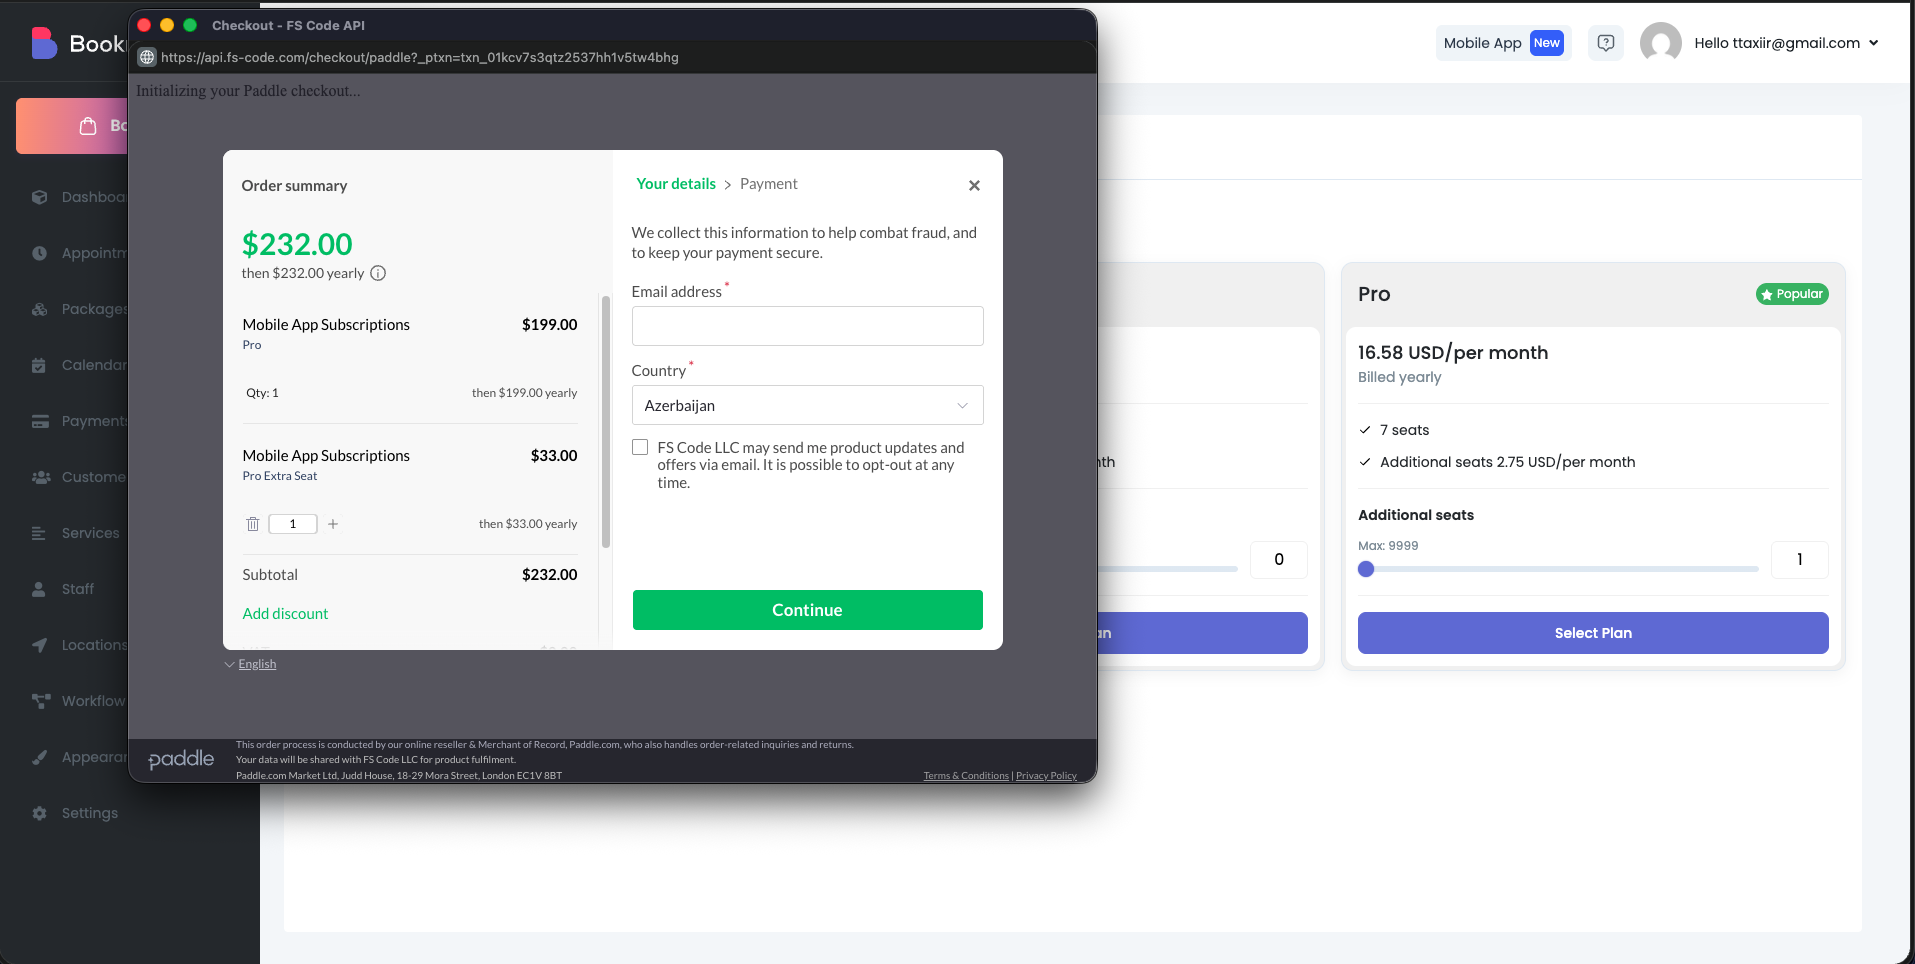
After selecting a plan, you will be redirected to the secure checkout page.
Enter your email address.
Select your country.
Review the order summary.
Click Continue and complete the payment using your preferred payment method.
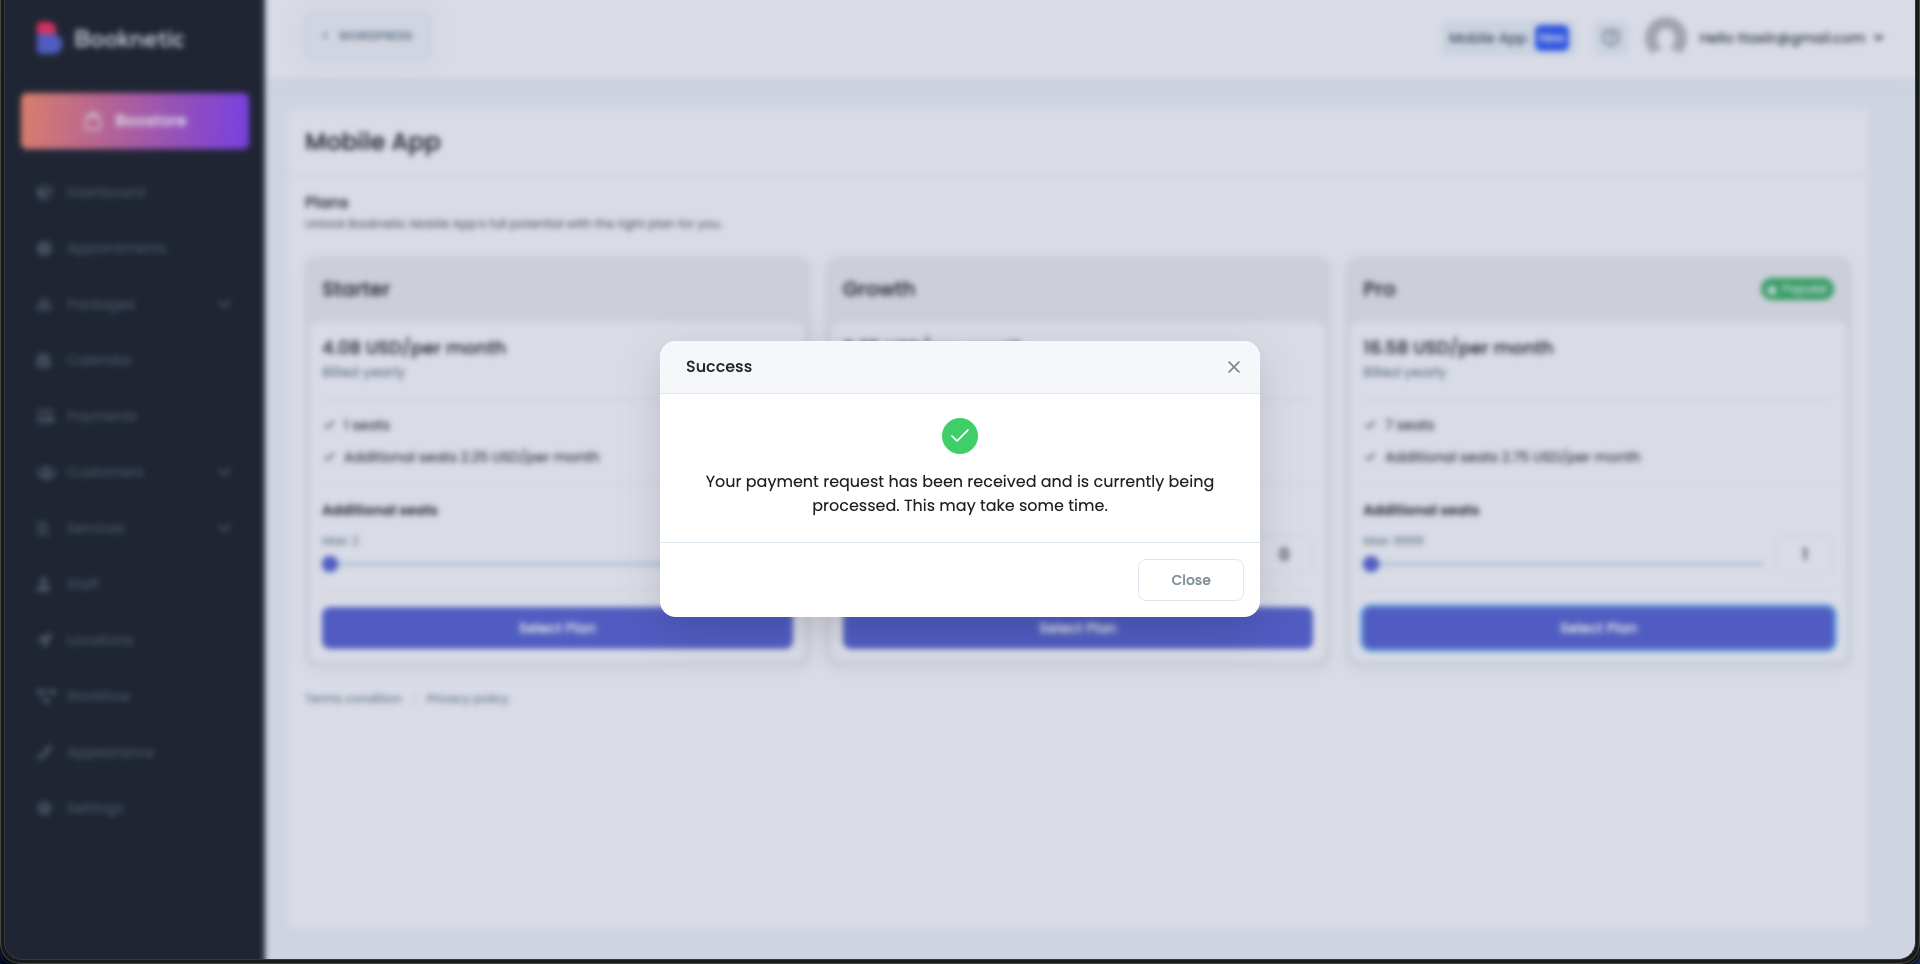
Once payment is completed, your request will be processed automatically.
After successful payment, you will see a confirmation message indicating that your payment request has been received and is being processed.
Once activated:
The Mobile App section becomes fully available.
Your selected number of seats is assigned to your account.
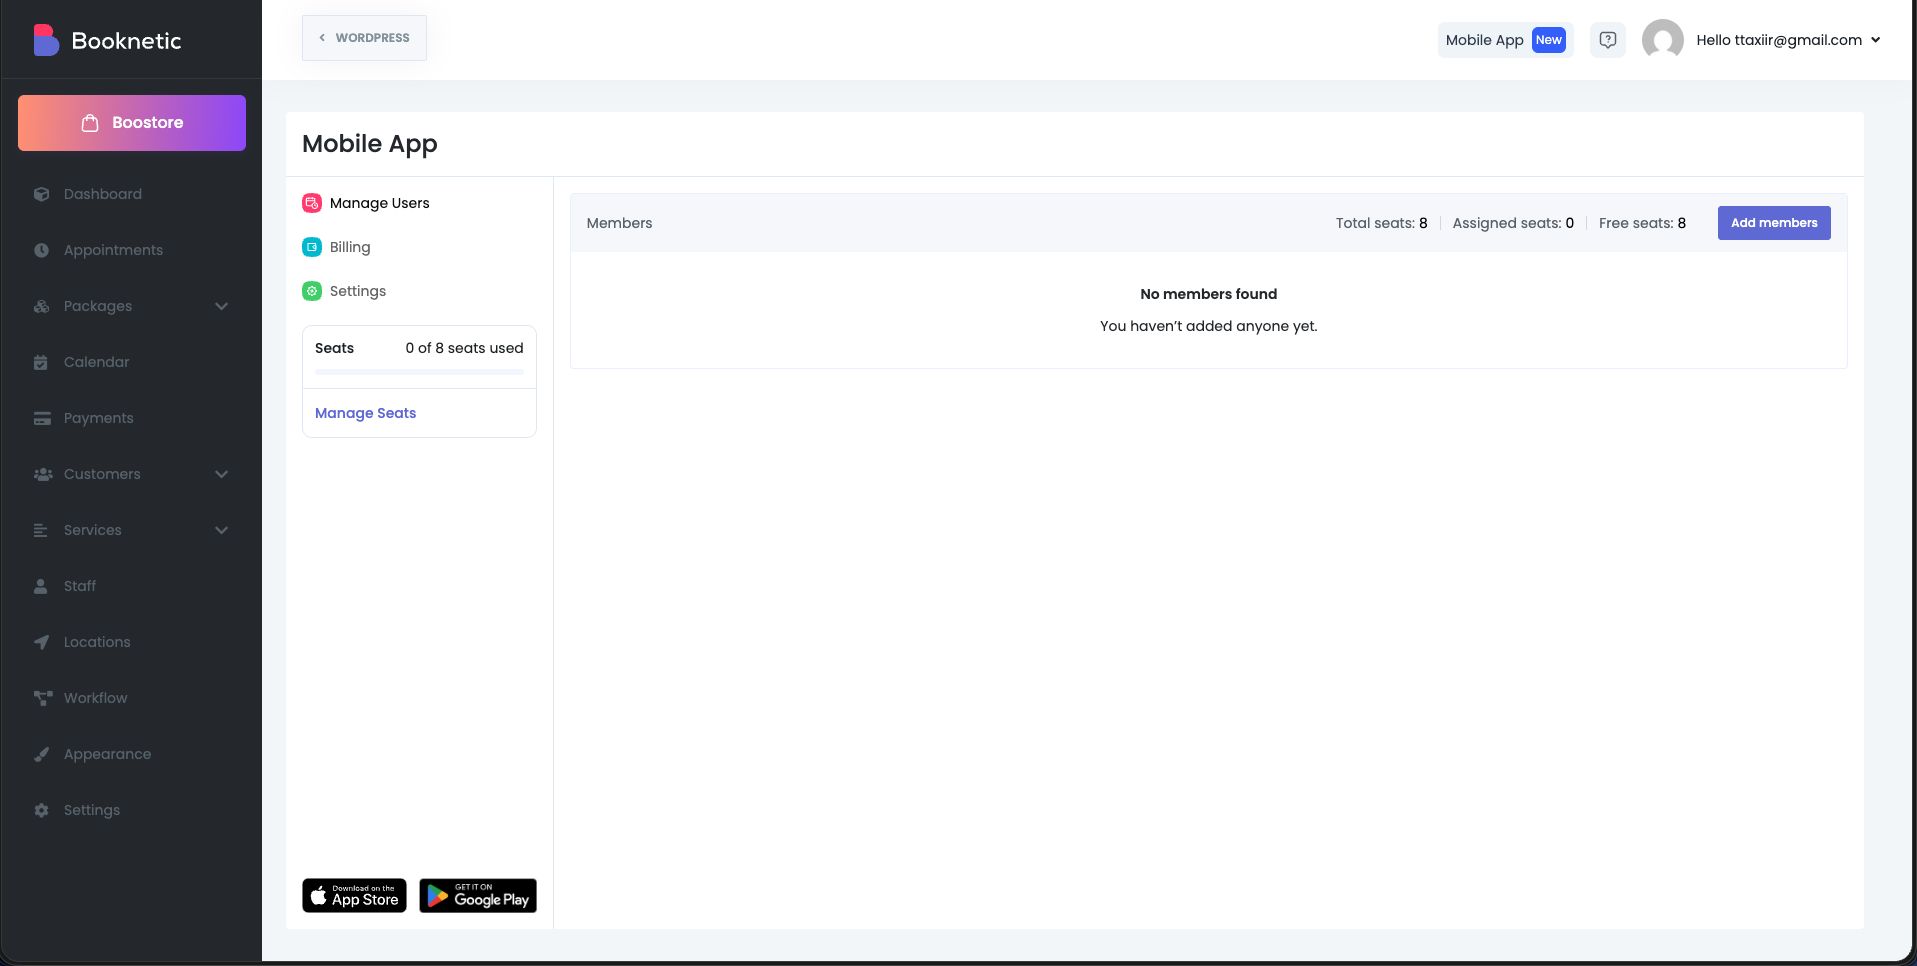
Go back to Booknetic → Mobile App.
You will now see three sections:
Manage Users
Billing
Settings
A seat usage indicator shows how many seats are used and how many are still available.
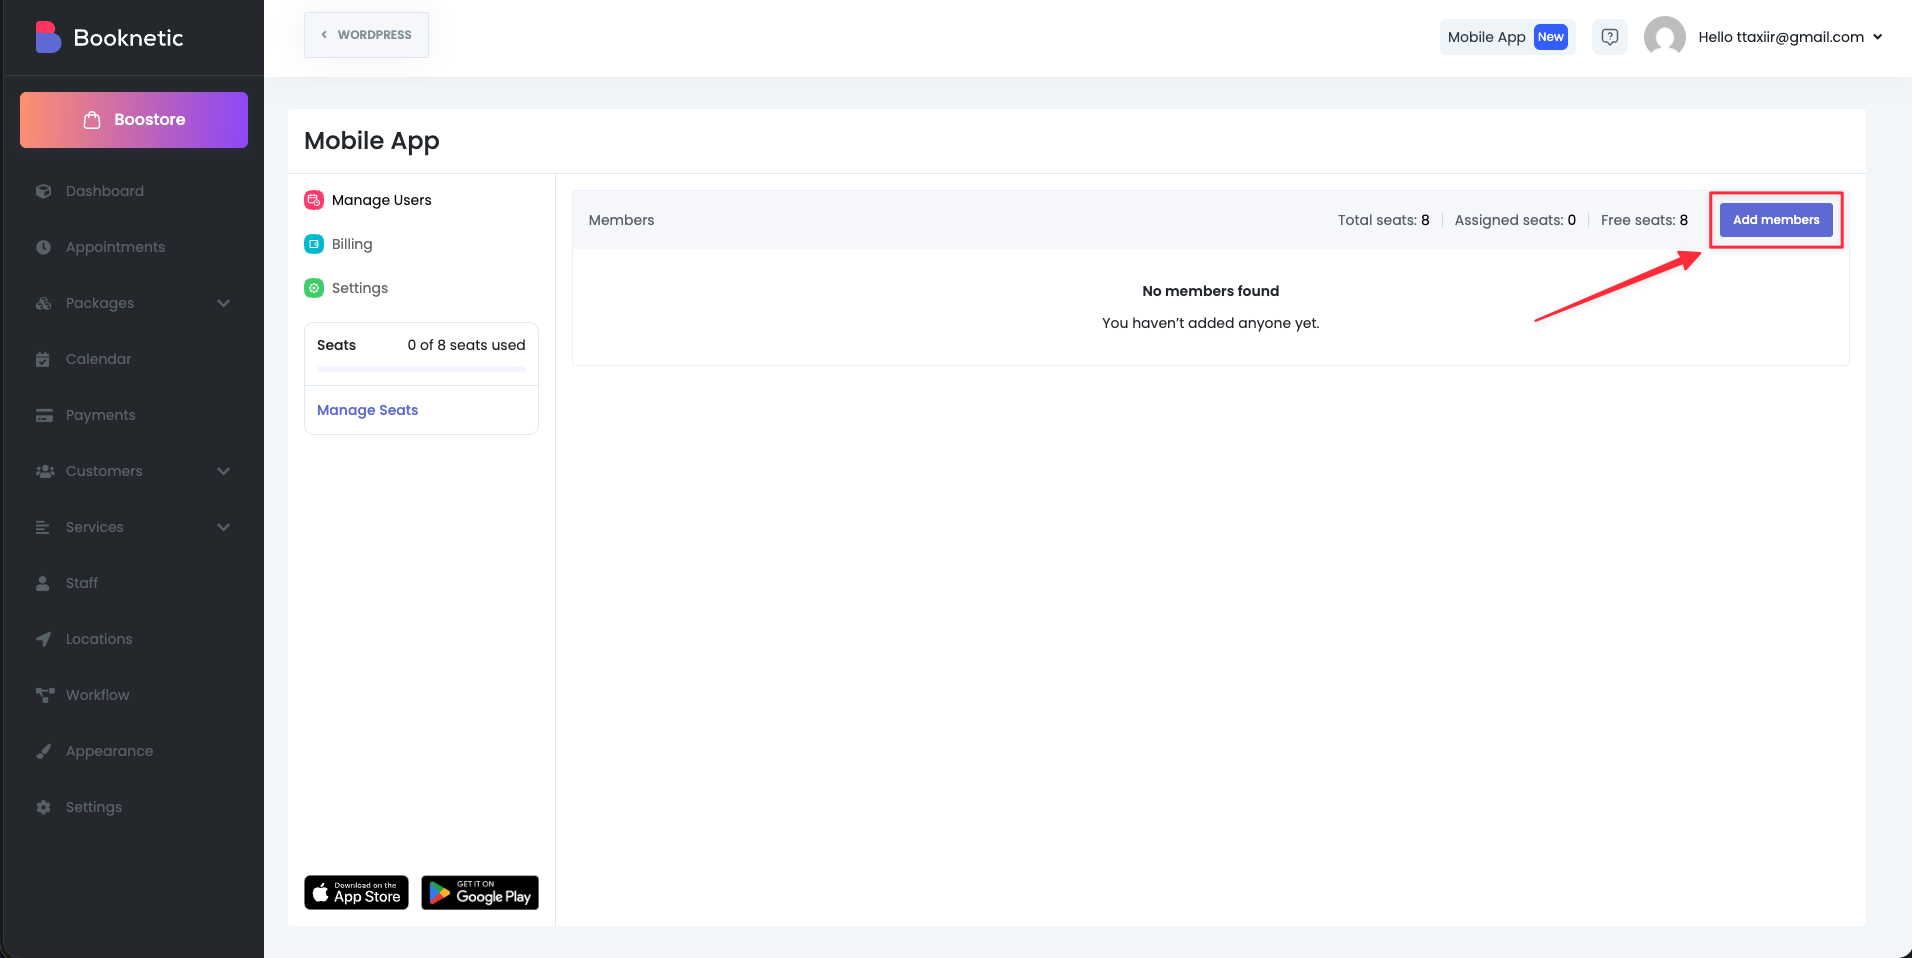
To allow staff members to use the mobile app, you must assign them a seat.
Open Manage Users.
Click Add members.
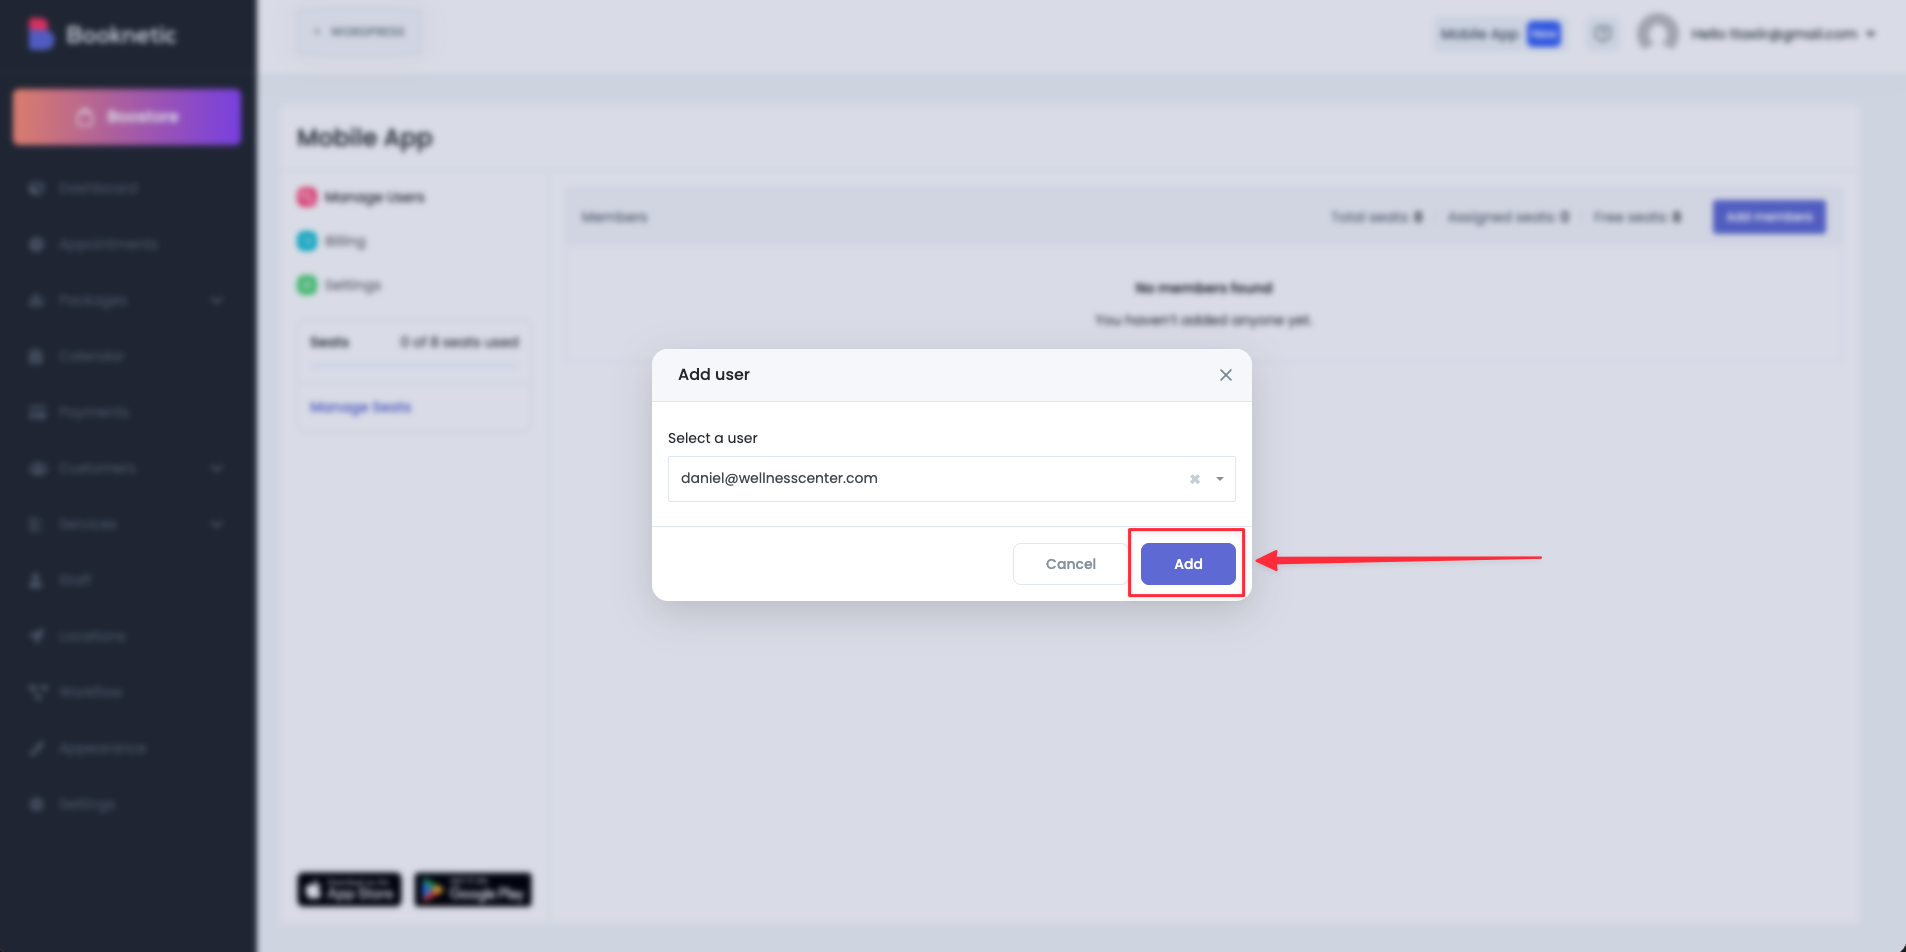
Select an existing Booknetic staff user from the list.
Click Add to assign a seat.
Each added user occupies one seat from your subscription.
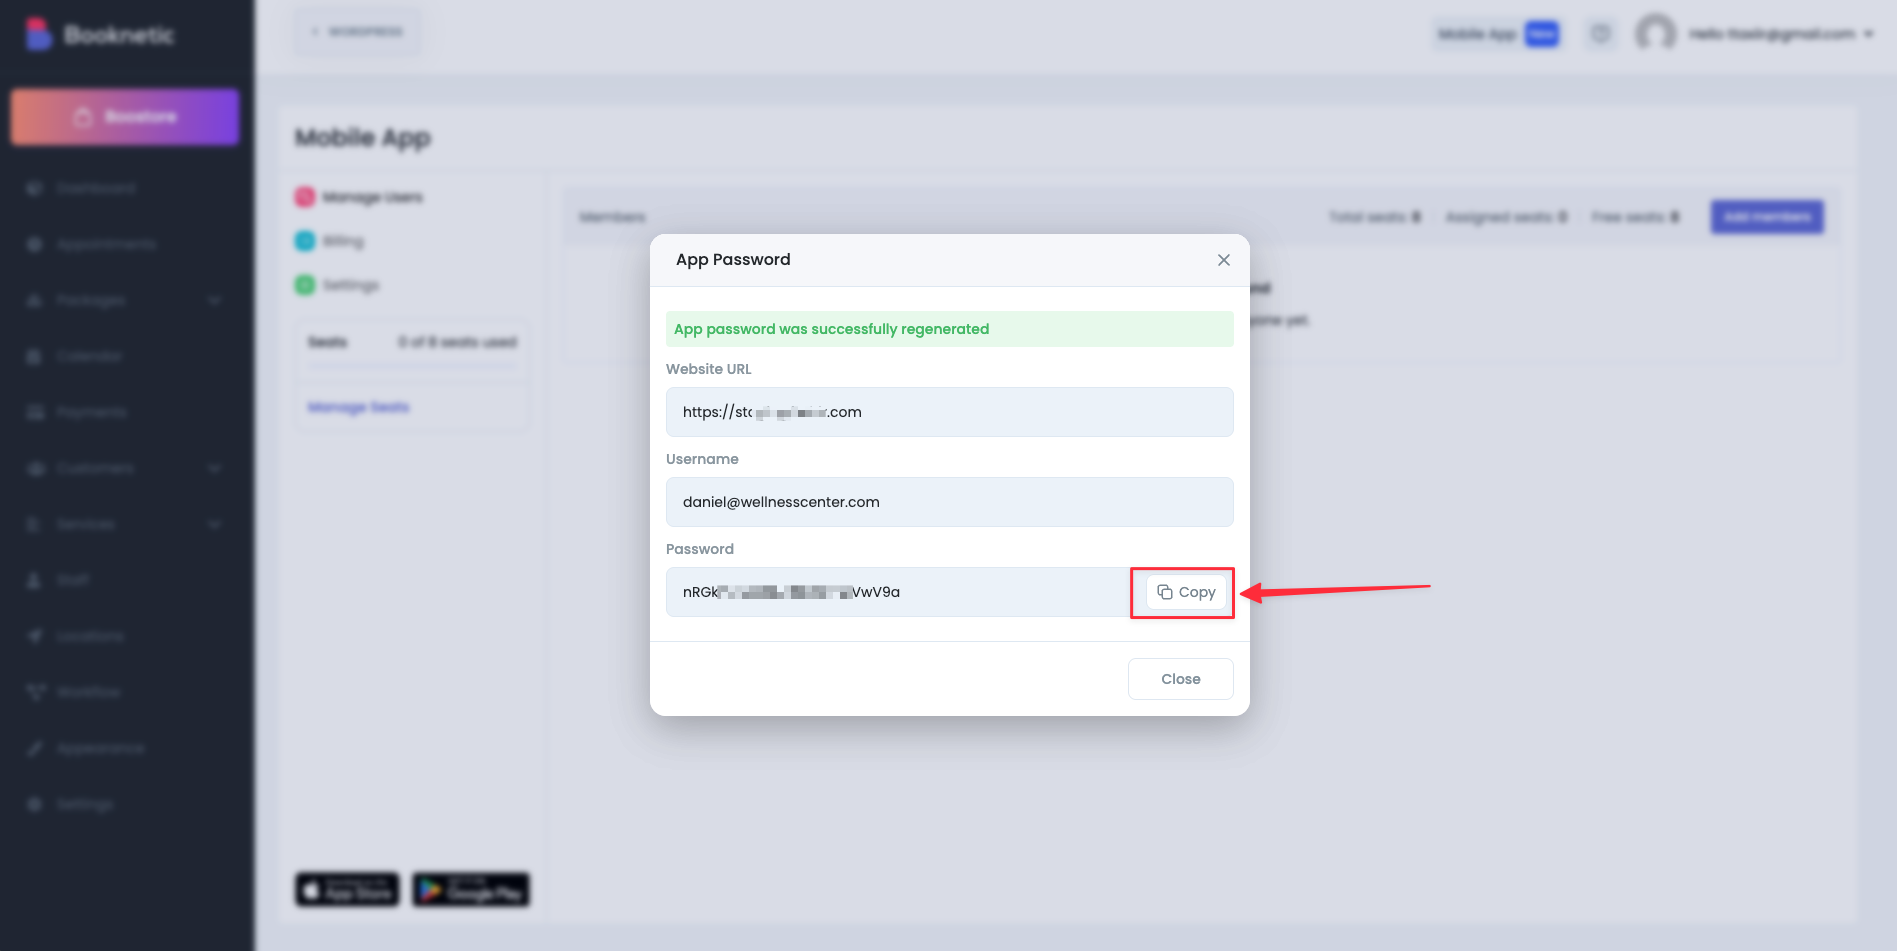
After adding a user, you will see the credentials.
Copy the credentials:
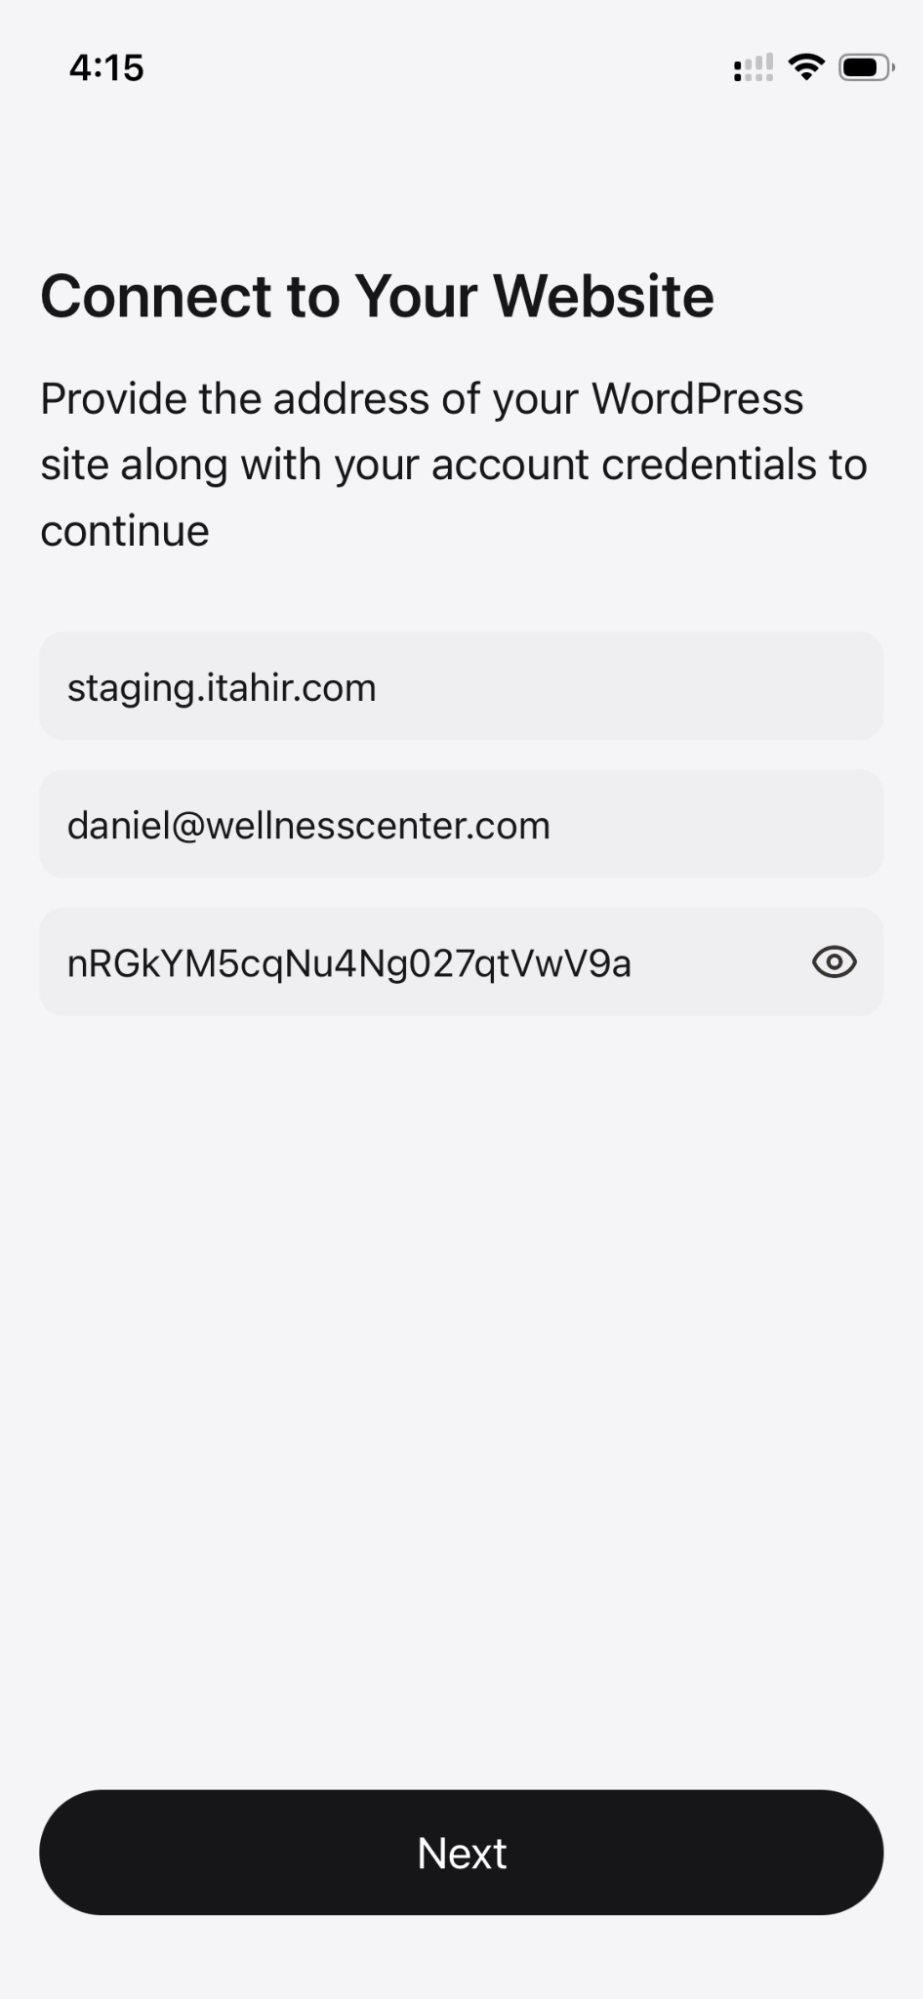
Website URL
Username
Password
⚠️ The password should be shared securely with the user. It is required for the first login.
The Booknetic Mobile App is available on both platforms:
Apple App Store (iOS)
Google Play Store (Android)
Download the app on the user’s device.
On the mobile device:
Open the Booknetic Mobile App.
Enter the Website URL, Username, and Password provided.
Complete the login process.
Once logged in, the user can immediately start managing appointments and customers.
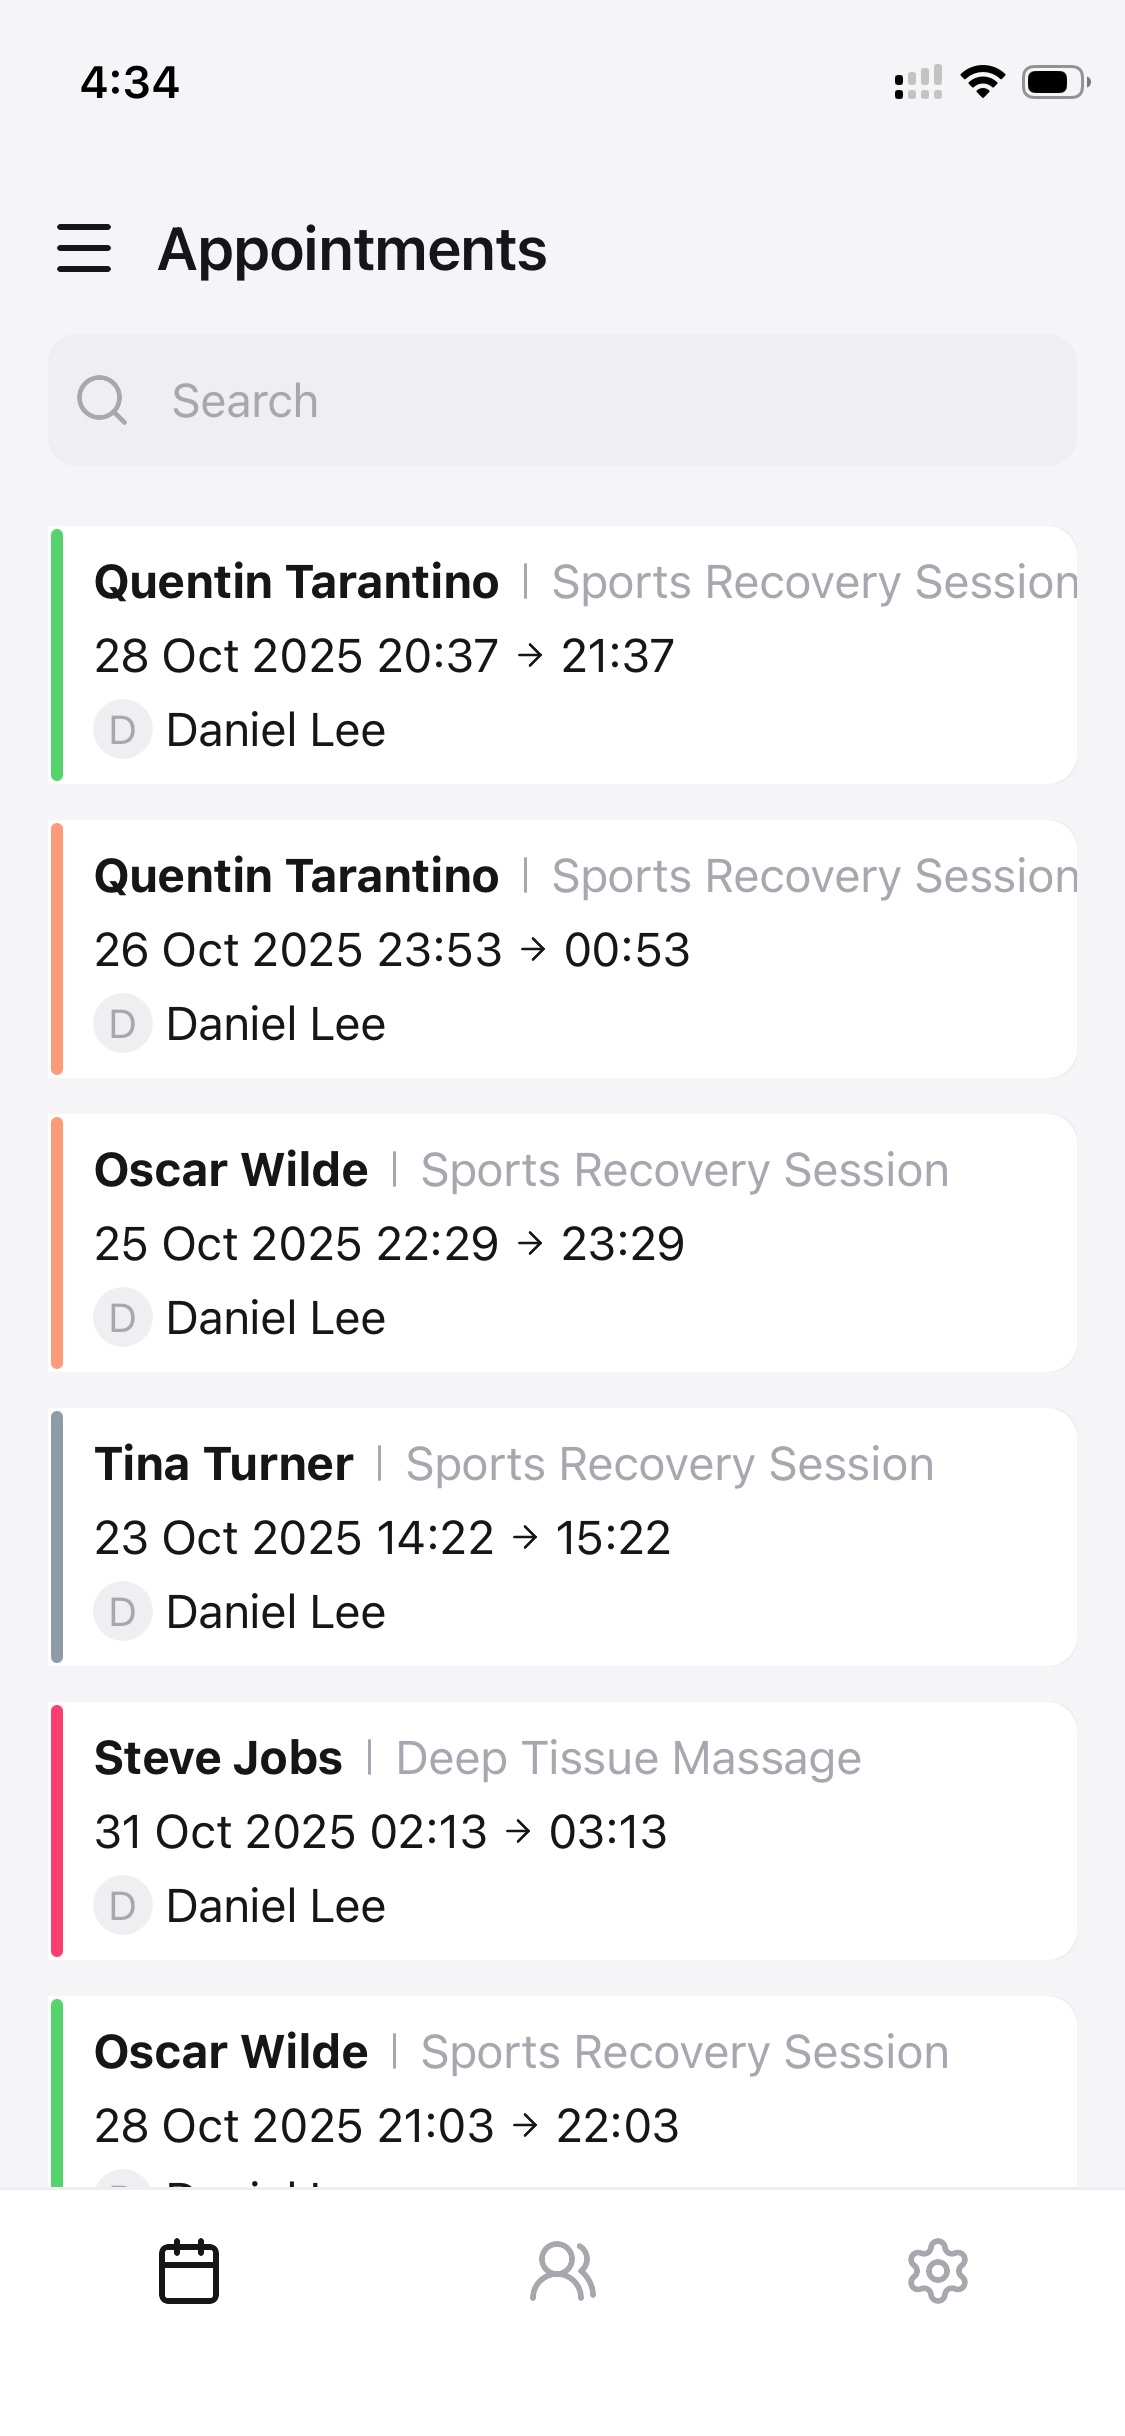
The Appointments screen displays all scheduled appointments assigned to the logged-in staff member.
Each appointment card shows:
Customer name
Service name
Date and time
Assigned staff
A color indicator representing the appointment status
You can scroll through the list or use the search bar to quickly find a specific appointment.
Tap on any appointment to open its detailed view.
The General tab includes:
Appointment ID
Date & time
Location
Assigned staff member
Service name
Customer name
Current appointment status
Additional tabs may include:
Extras – Selected extra services (if any)
Payment – Payment-related information

From the appointment details screen:
Tap Change status.
Select one of the available statuses:
Pending
Approved
Canceled
Rejected
(Optional) Enable Run workflows on save to trigger related automations.
Tap Save.
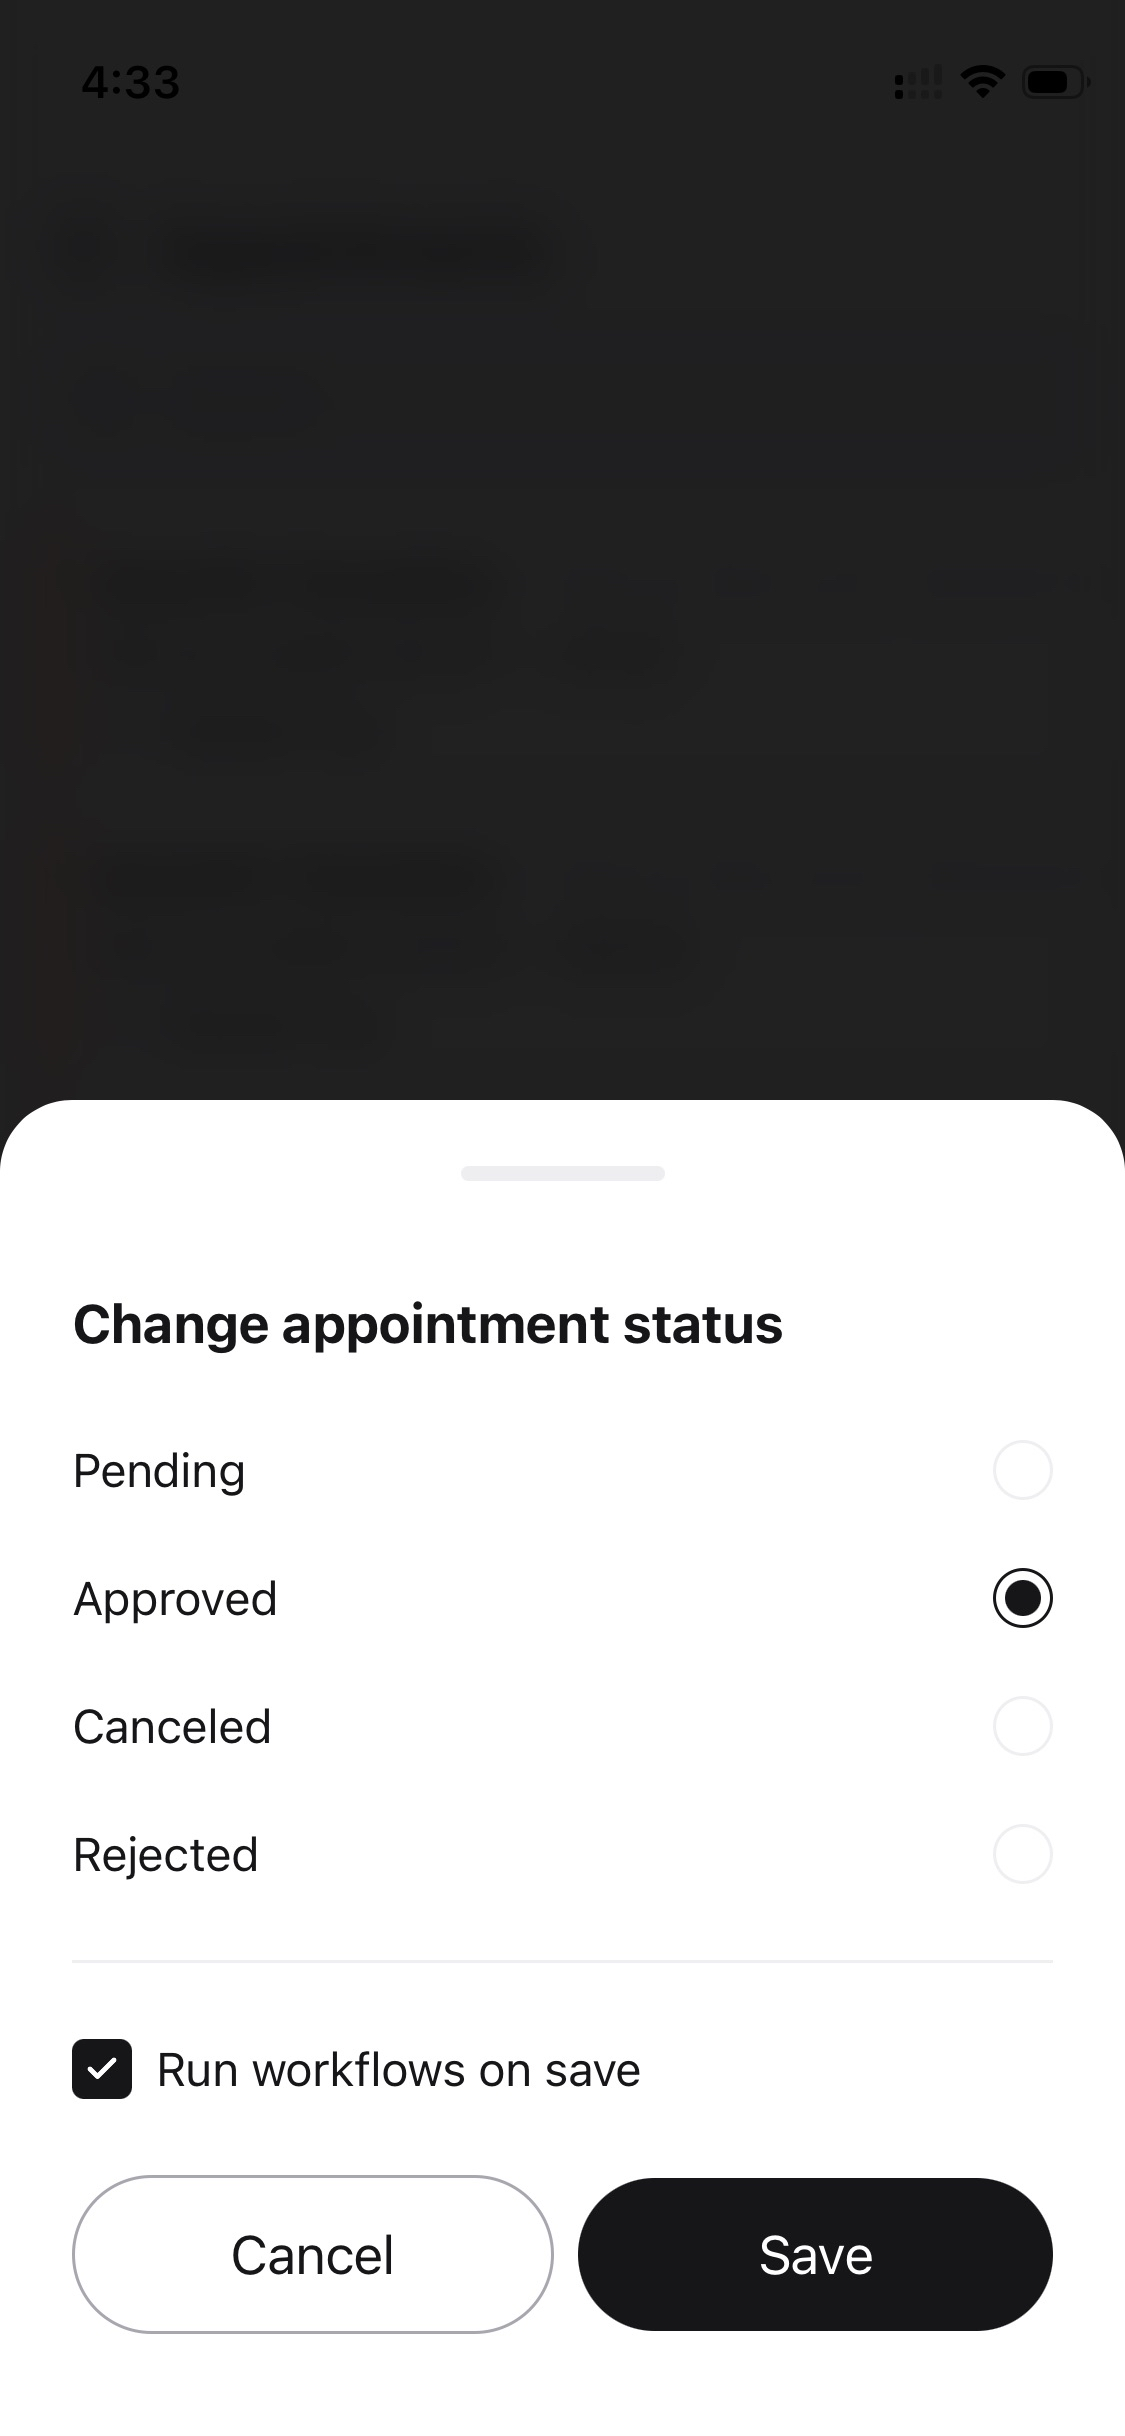
A confirmation message will appear once the status is updated successfully.
⚠️ Status changes may trigger notifications or workflows configured in your Booknetic admin panel.
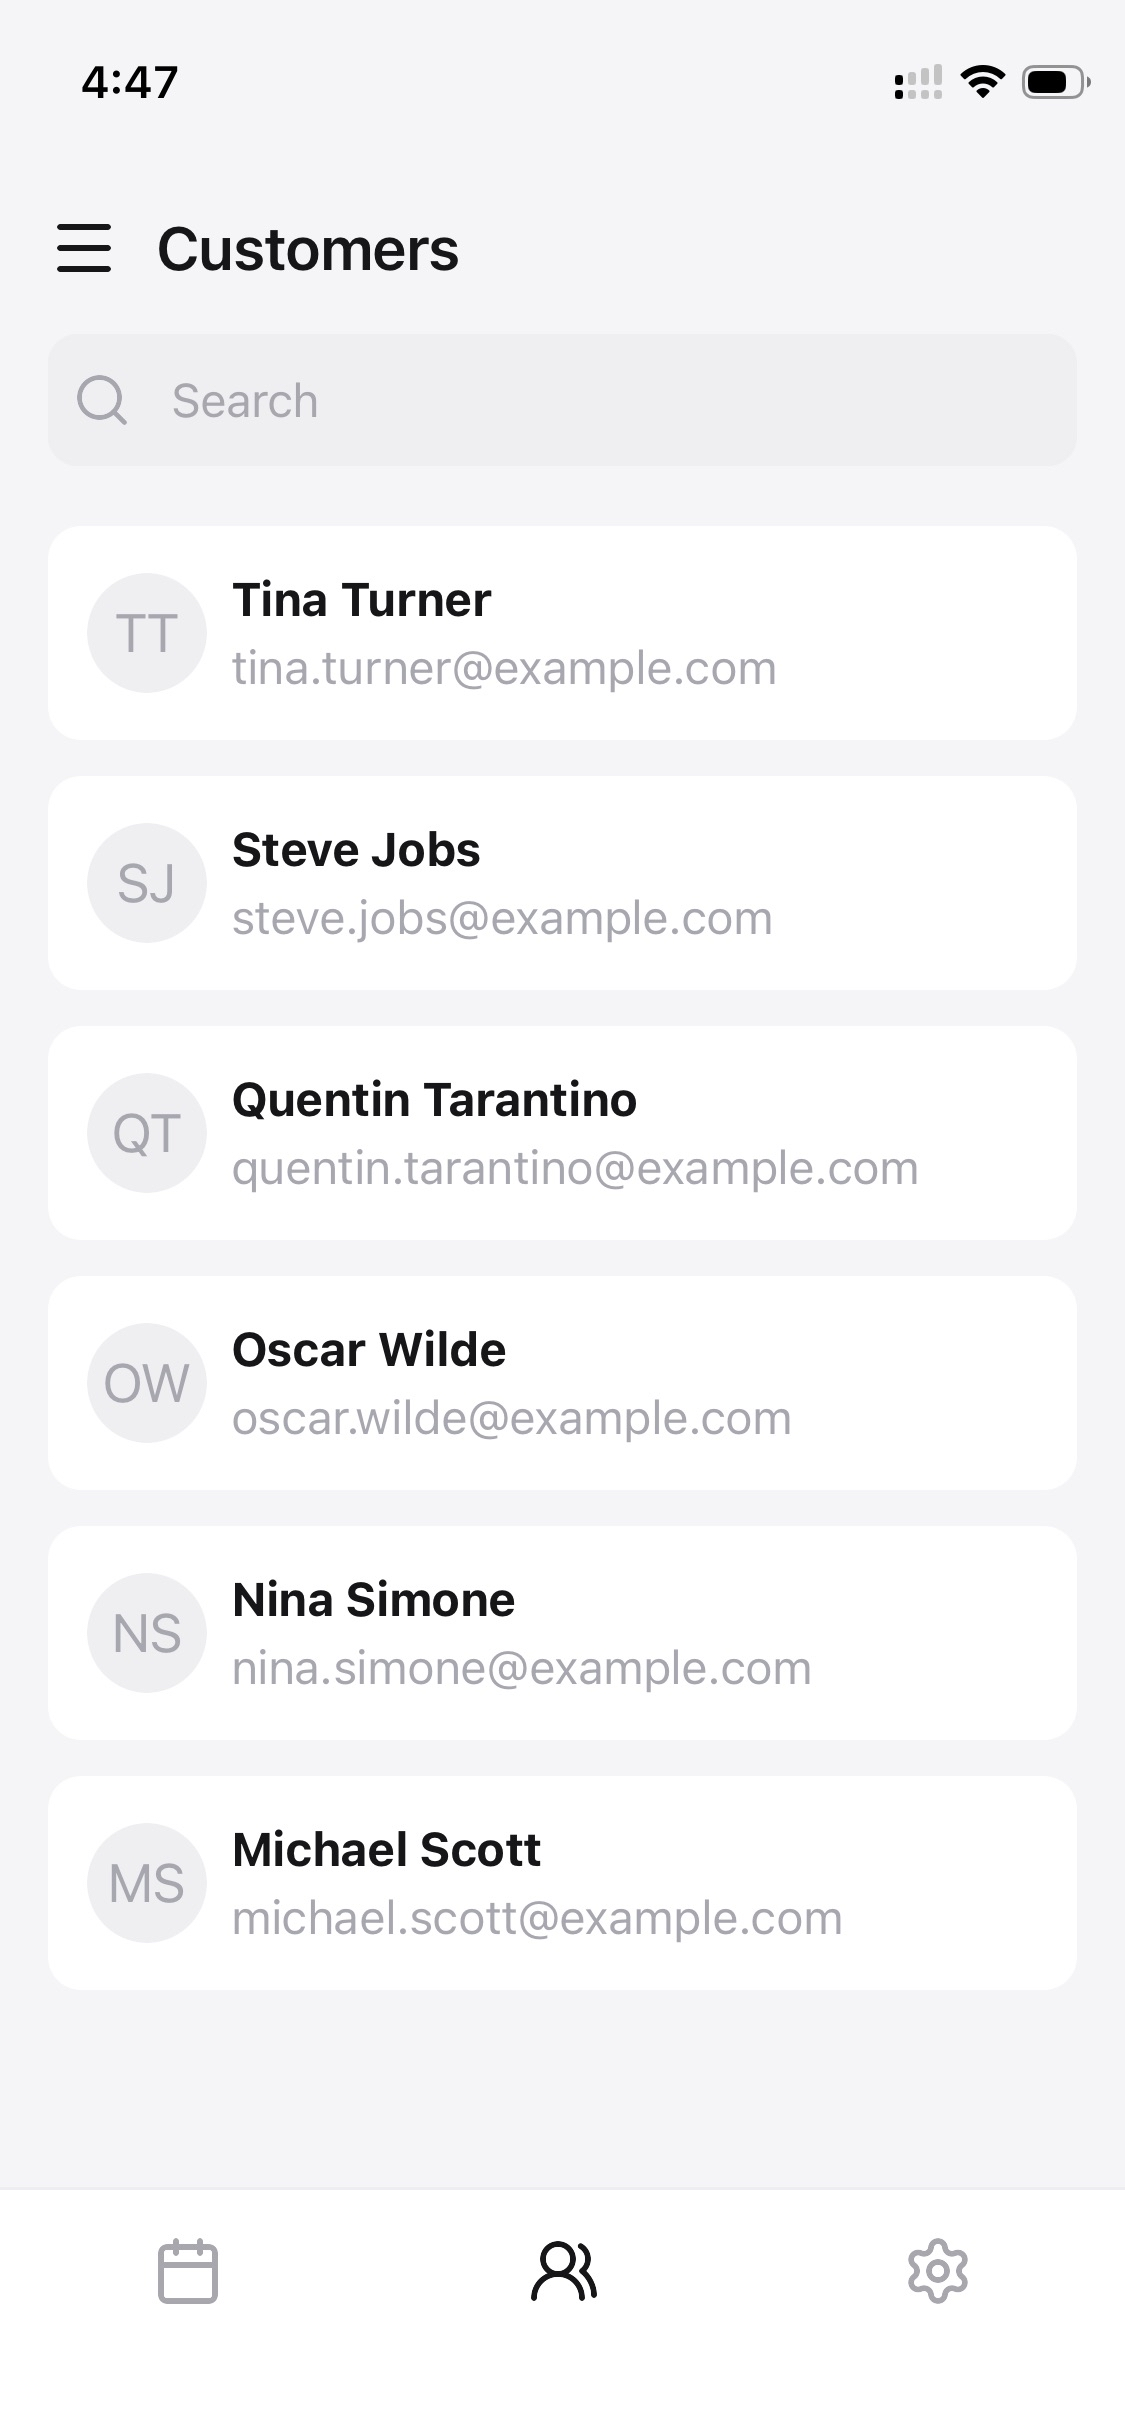
Open the Customers tab to view all customers associated with your bookings.
Each customer entry displays:
Name
Email address
You can:
Scroll through the list
Use the search bar to find a customer quickly
Tap on a customer to view more details if available.
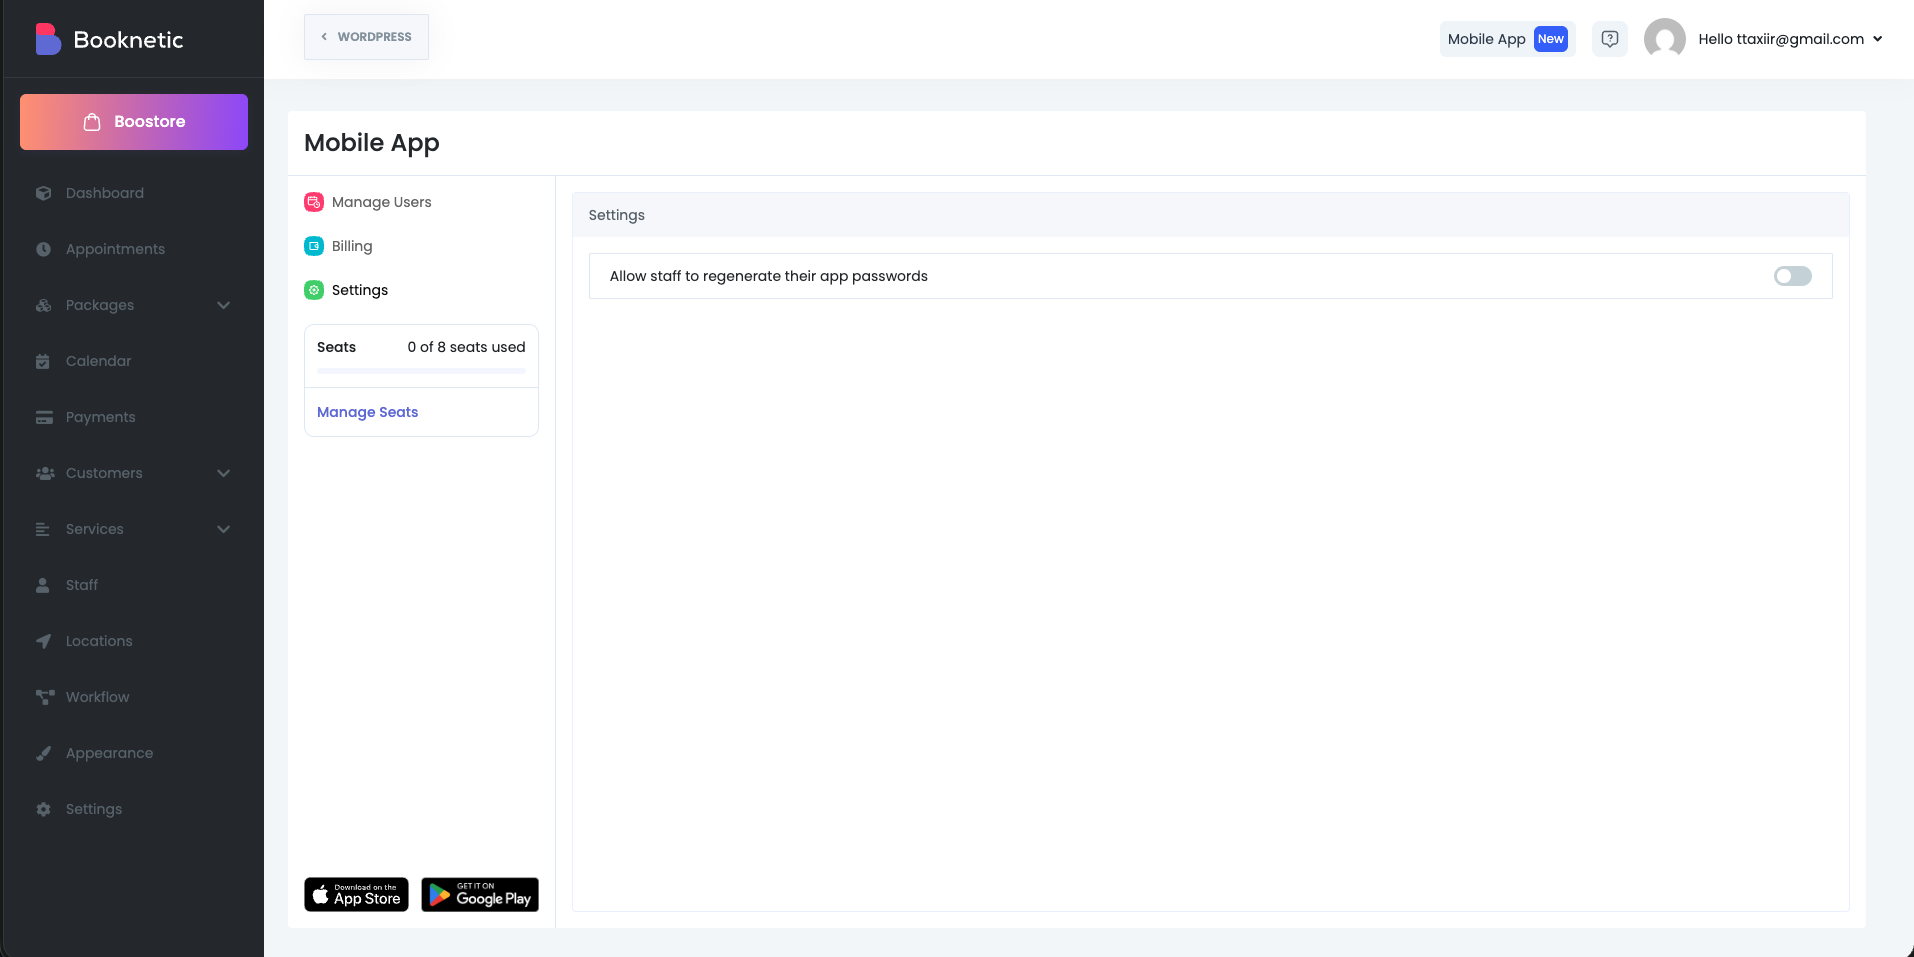
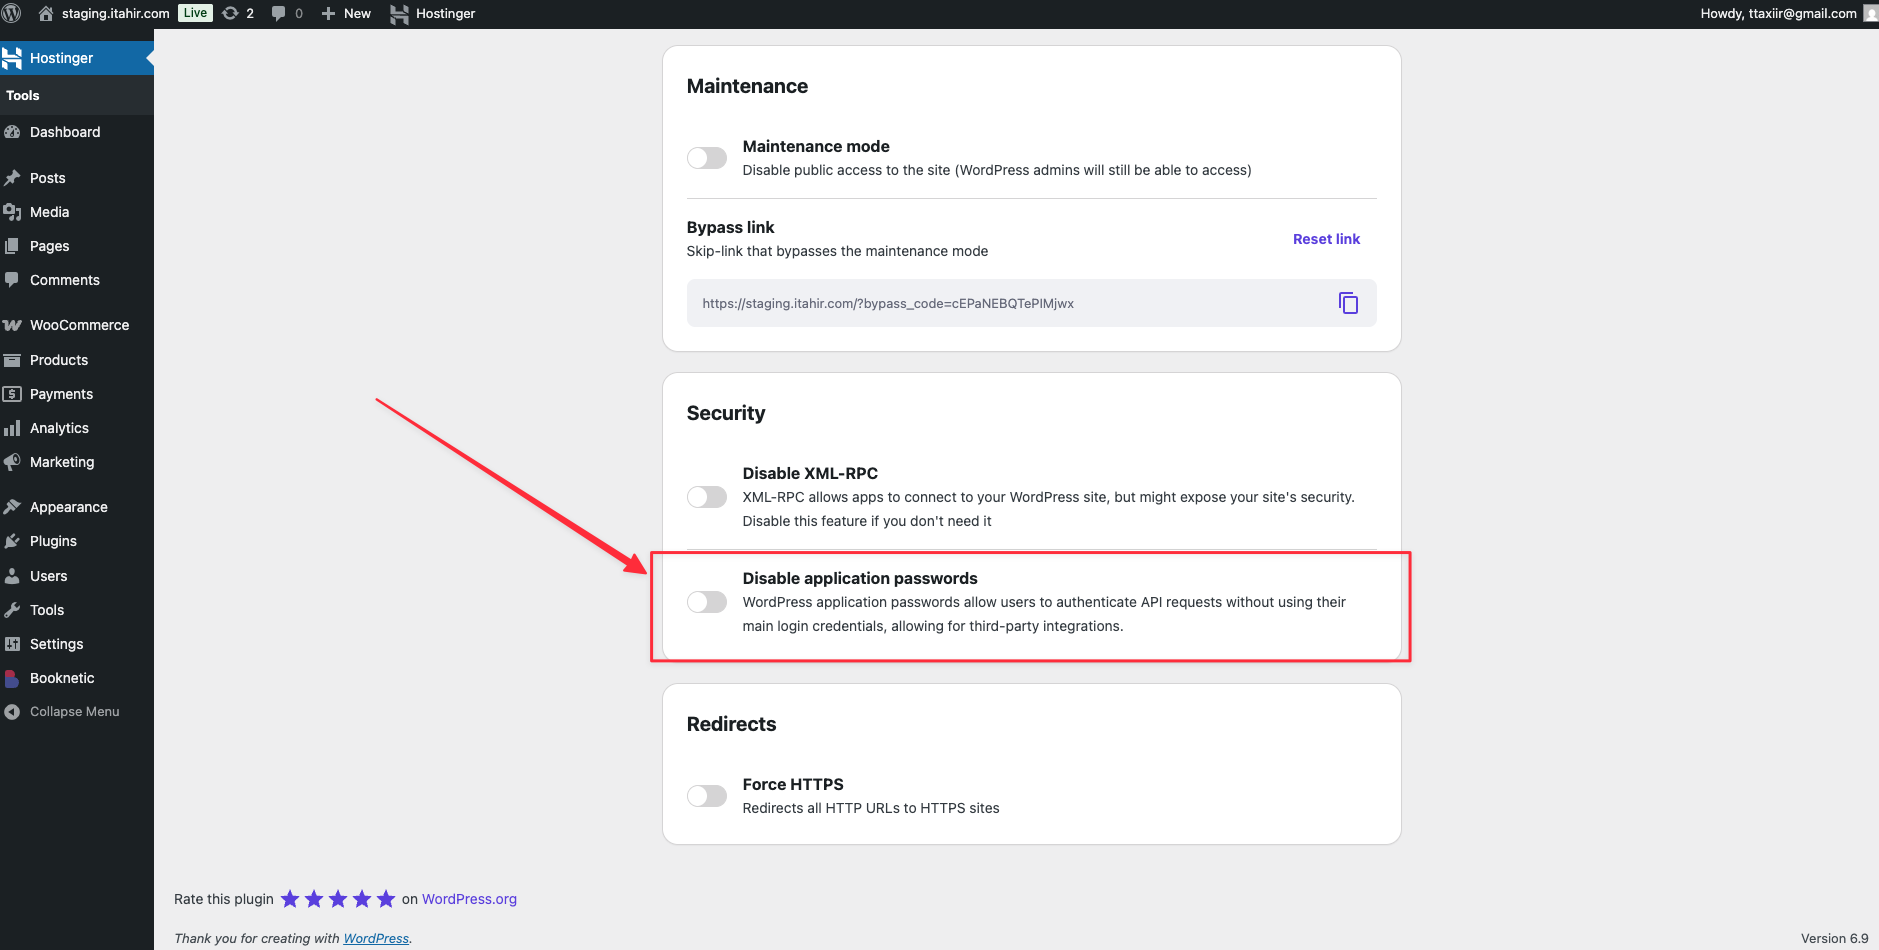
From Mobile App → Settings, you can:
Allow or restrict staff from regenerating their own app passwords.
This helps you control access and improve account security.
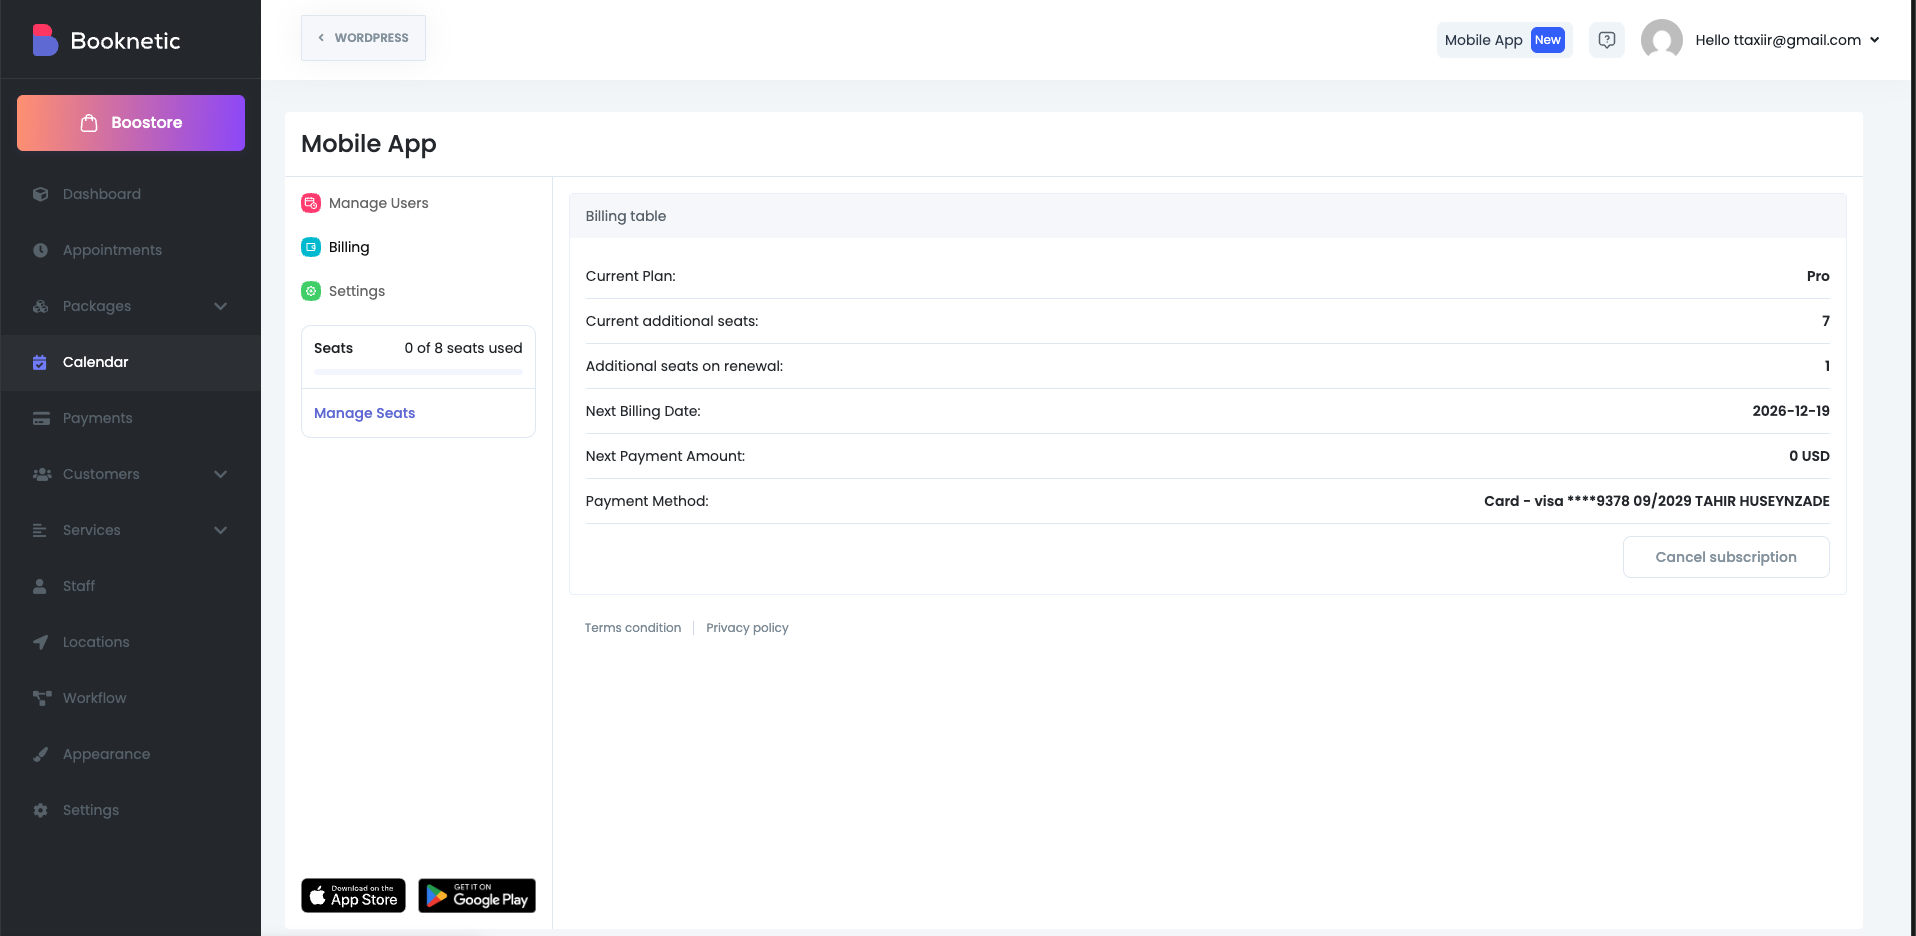
Under the Billing section, you can:
View your current plan.
See assigned and available seats.
Check renewal date and payment details.
Cancel the subscription if needed.
Verify the website URL includes HTTPS.
Regenerate the app password and try again.
Make sure that the "application password" has not been disabled for your website.
Upgrade your plan or add extra seats from the Billing section.
Your Booknetic Mobile App is now fully set up.
Your team can manage appointments, customers, and schedules anytime, anywhere — directly from their mobile devices.