Ready-Made Tenant Templates Add-on for Booknetic offers an effective solution for businesses aiming to duplicate successful setups across multiple tenants. With this add-on, you can create custom templates from an existing tenant configuration, which other tenants can then use. This streamlines the setup process and ensures consistency across your booking system.
How It Works:
Create a Template from an Existing Tenant (or create and set up a new one):
- Select one of your tenants and use the add-on to create a template based on its configuration. This captures their settings, services, staff, and customizations.
Apply the Template to Other Tenants:
- Other tenants can then select and apply this template to their own setup, replicating the original tenant's configuration and providing a ready-to-use booking system. It is also possible to apply the template automatically by setting the template as a default template.
Customize as Needed:
- Once a template is applied, tenants can further customize the setup to better suit their specific needs. This ensures flexibility while maintaining a standardized base configuration.
Below is a step-by-step tutorial on how to set up the “Ready-made Tenant Templates”:
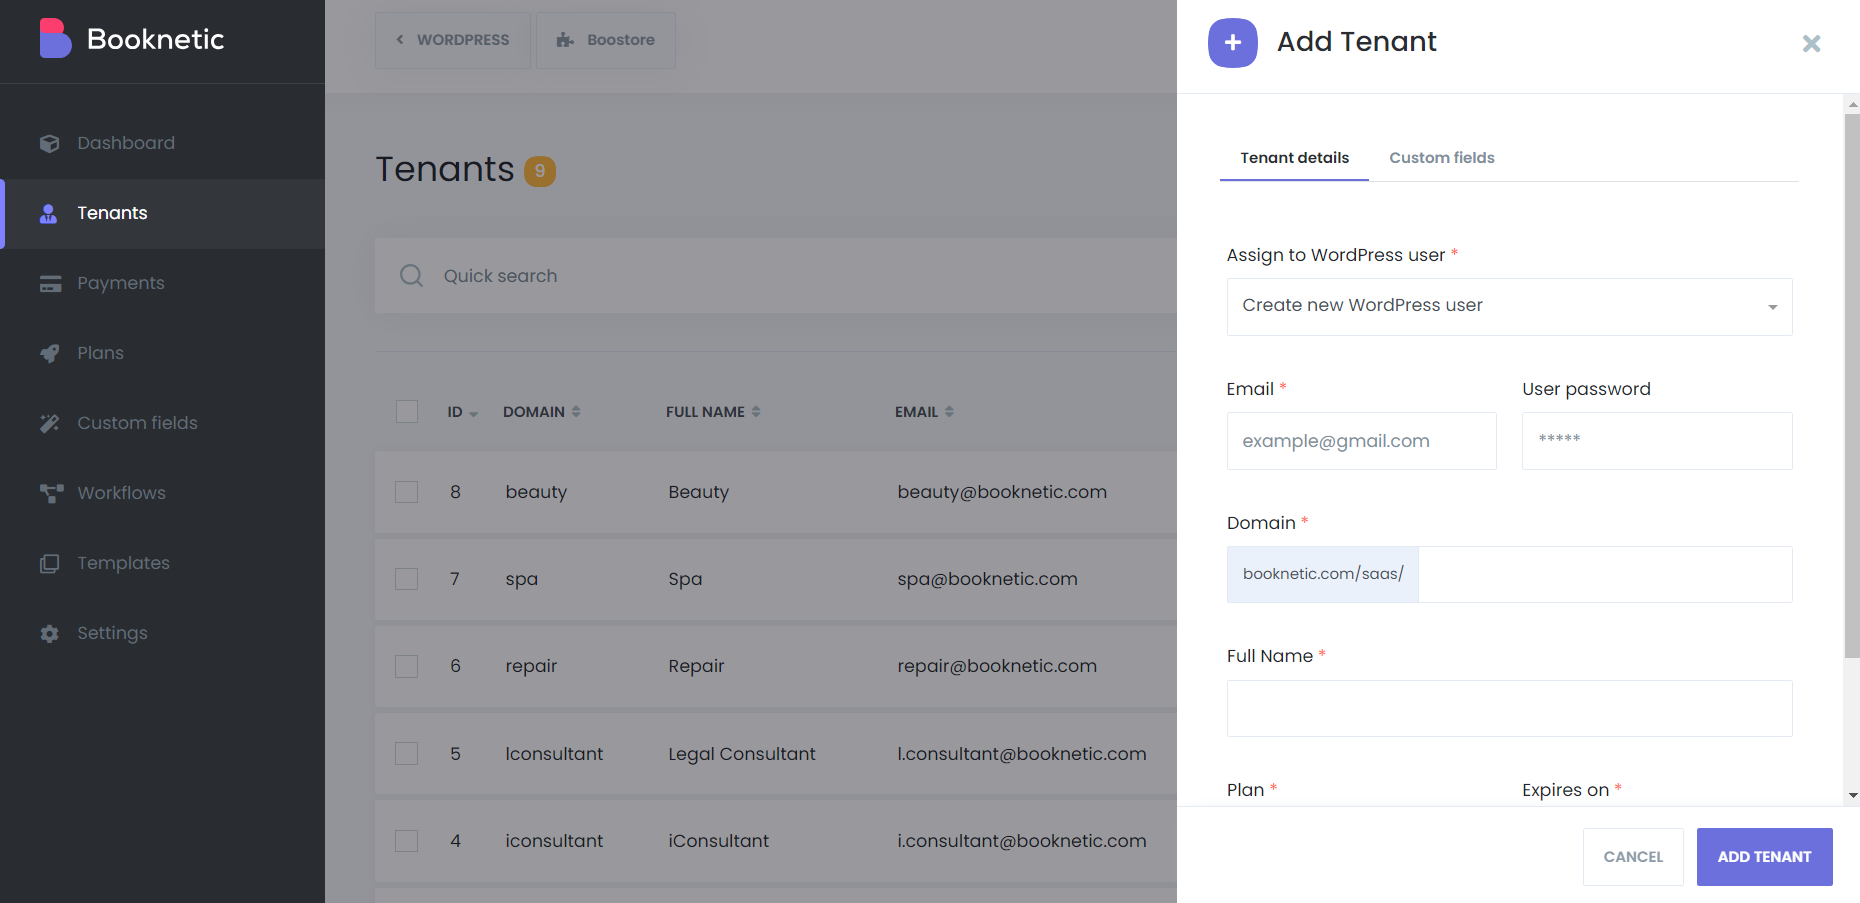
1. Create a Tenant with Desired Configurations:
- From your Booknetic SaaS admin dashboard, navigate to the "Tenants" section.
- Click on "Create New Tenant" to create a new tenant.
- Access to the dashboard of this tenant
- Configure the desired settings, including services, locations, staff members, workflows, and general settings for this tenant.
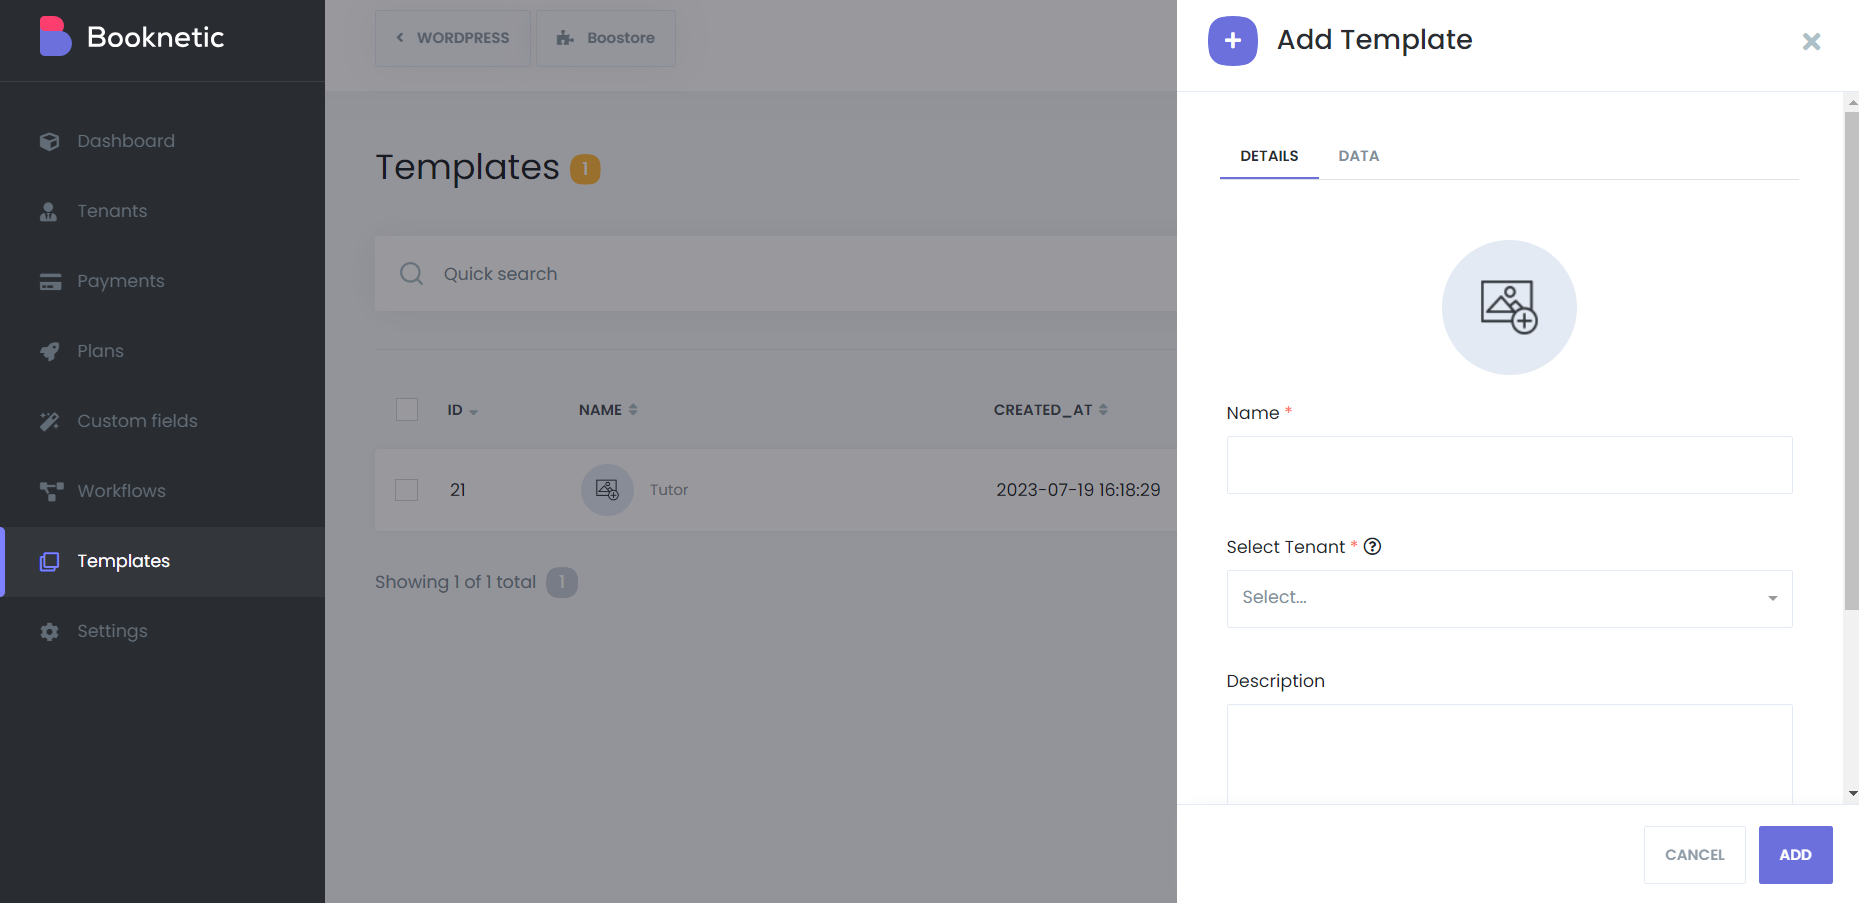
2. Add a New Template:
- In the Booknetic SaaS admin dashboard, locate and click on the "Templates" module.
- Within the Templates module, click on the "Add Template" button to create a new template.
- Set a cover photo and name for the template.
- Select the tenant you created in Step 1 as the source/template tenant for this template.
- Optionally, provide a description for the template.
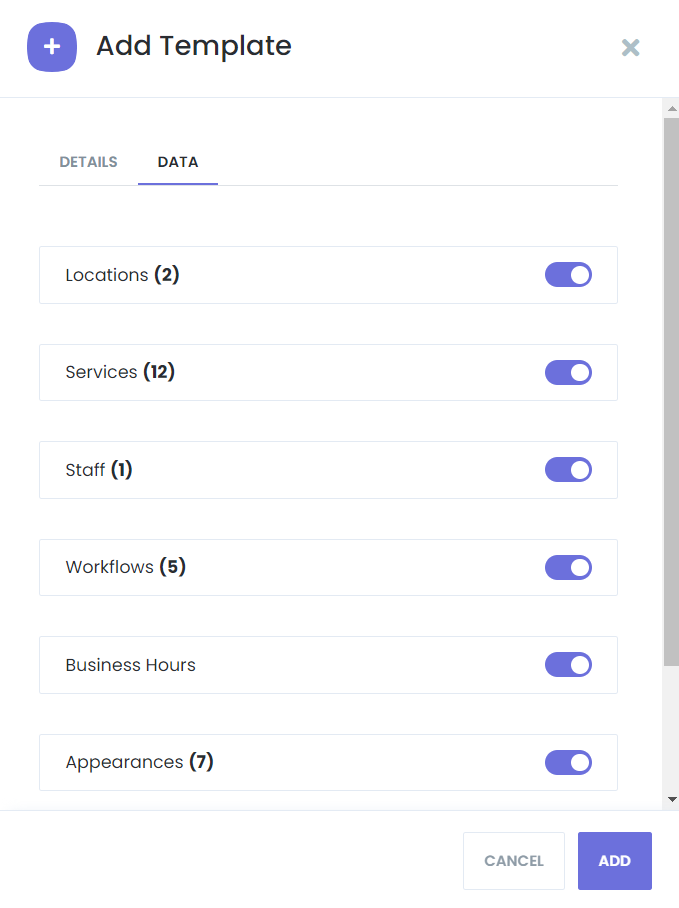
3. Configure Template Elements:
- In the "Data" tab of the template creation process, you will find the template elements imported from the selected tenant.
- Review the elements and enable/disable any specific elements based on your preferences.
4. Create Multiple Templates:
- Repeat steps 2 and 3 to create additional templates with different configurations.
- Each template can have its own cover photo, name, and source/template tenant.
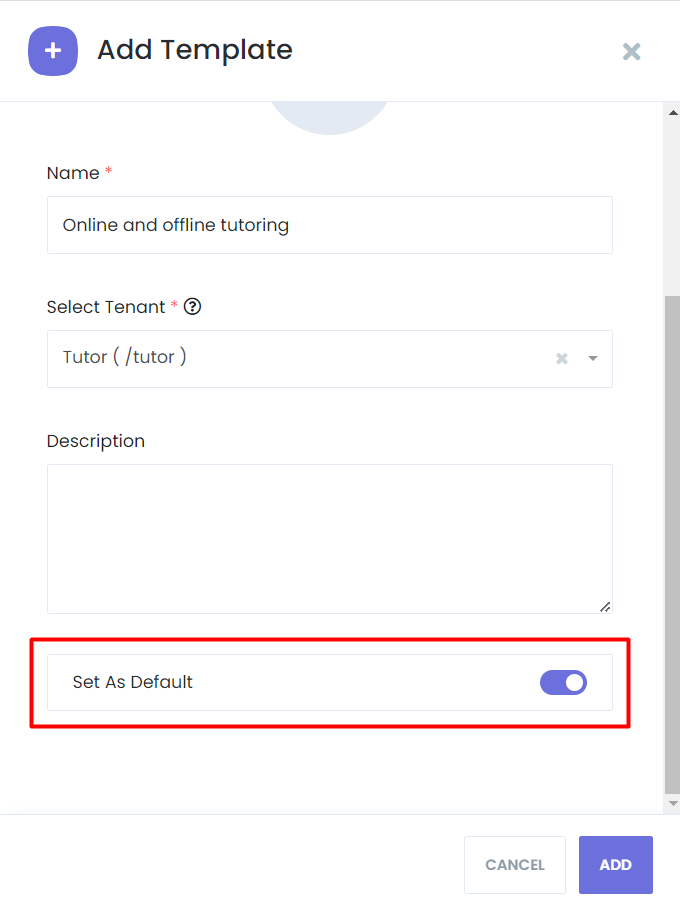
5. Set a Template as Default:
- To designate a template as the default option for new tenants, enable the "Set As Default" option for that template.
- When tenants register on your platform, this default template will be automatically applied to them.
6. Offer Templates to Tenants:
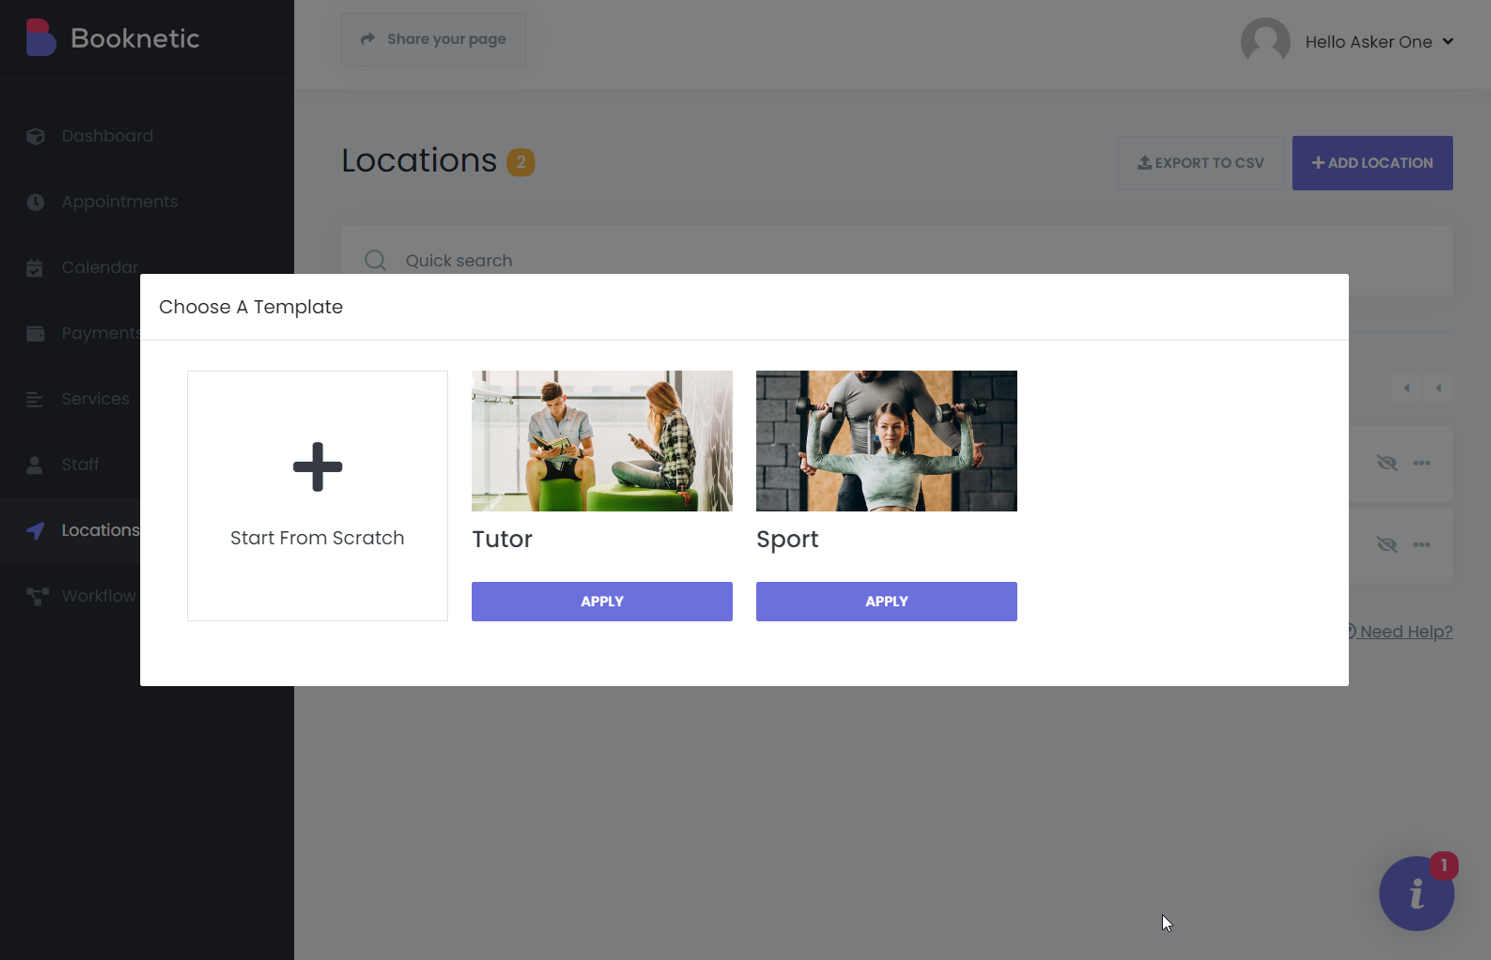
- When tenants sign up on your platform, they will be presented with the available templates to choose from during the onboarding process.
- Tenants can select the template that closely matches their requirements and preferences.
Note: It's important to ensure that the template tenant you created in Step 1 contains the desired ready-made elements to serve as the source for your templates.
By following these steps, you can create multiple tenant templates using pre-configured settings and elements, allowing tenants to choose a template that best fits their needs when signing up on your platform.