Tenant Business Directory
Booknetic SaaS is a WordPress Appointment Booking Plugin with Tenant Business Directory module
By using this site, you agree to our Cookie Policy
Booknetic SaaS is a WordPress Appointment Booking Plugin with Tenant Business Directory module
The Tenant Business Directory feature in Booknetic enables businesses to organize and display a list of tenants, their services, and business details in an accessible and user-friendly format. This feature enhances the functionality of Booknetic by providing a central location for users to find, search, and interact with various tenant listings. Tenants can be displayed in a searchable directory, categorized by business type, and shown on a map for location-based searches.
The Tenant Directory add-on provides powerful shortcodes to integrate tenant listings and search functionality into any WordPress page:
[booknetic-saas-tenant-list]:
Displays a list of all tenants in the directory. You can customize the display by specifying different view options like grid or list view.
Example: [booknetic-saas-tenant-list view="grid"].
[booknetic-saas-tenant-search-form]:
Displays a search form that allows users to filter tenants by business type and location, improving the search experience for customers.
Example: [booknetic-saas-tenant-search-form].
These shortcodes allow you to easily embed the Tenant Directory and search options anywhere on your WordPress site, giving you flexibility in how and where the directory is displayed.
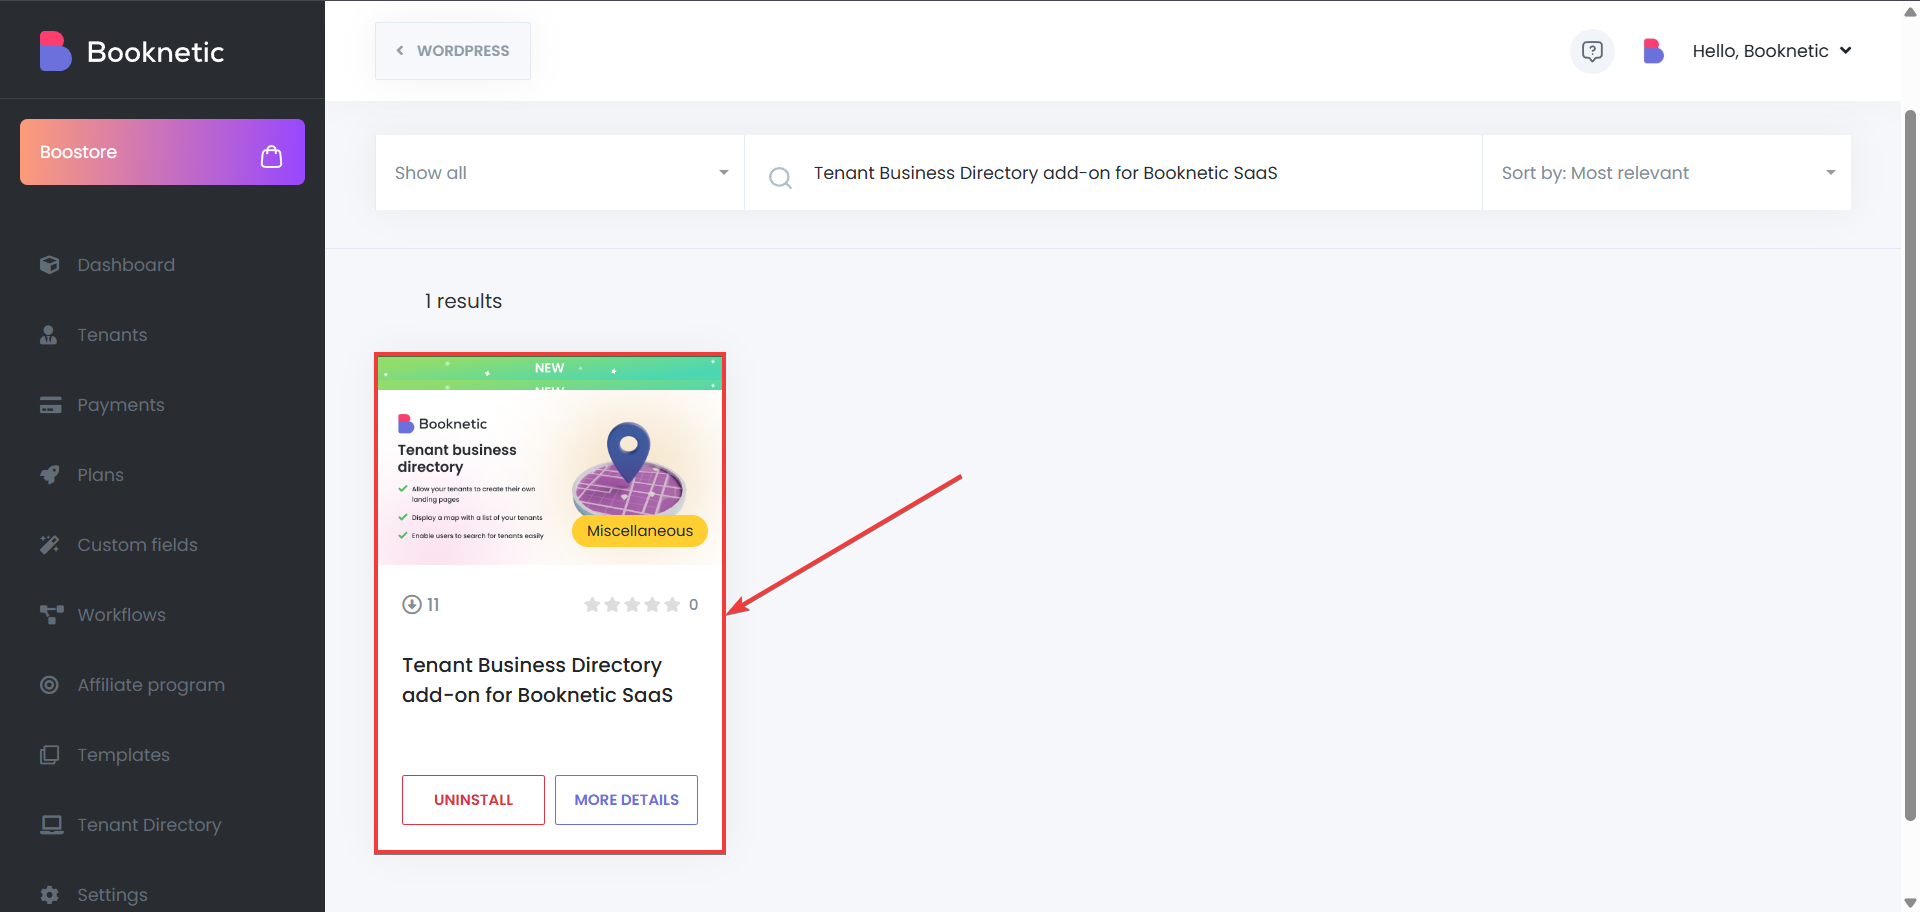
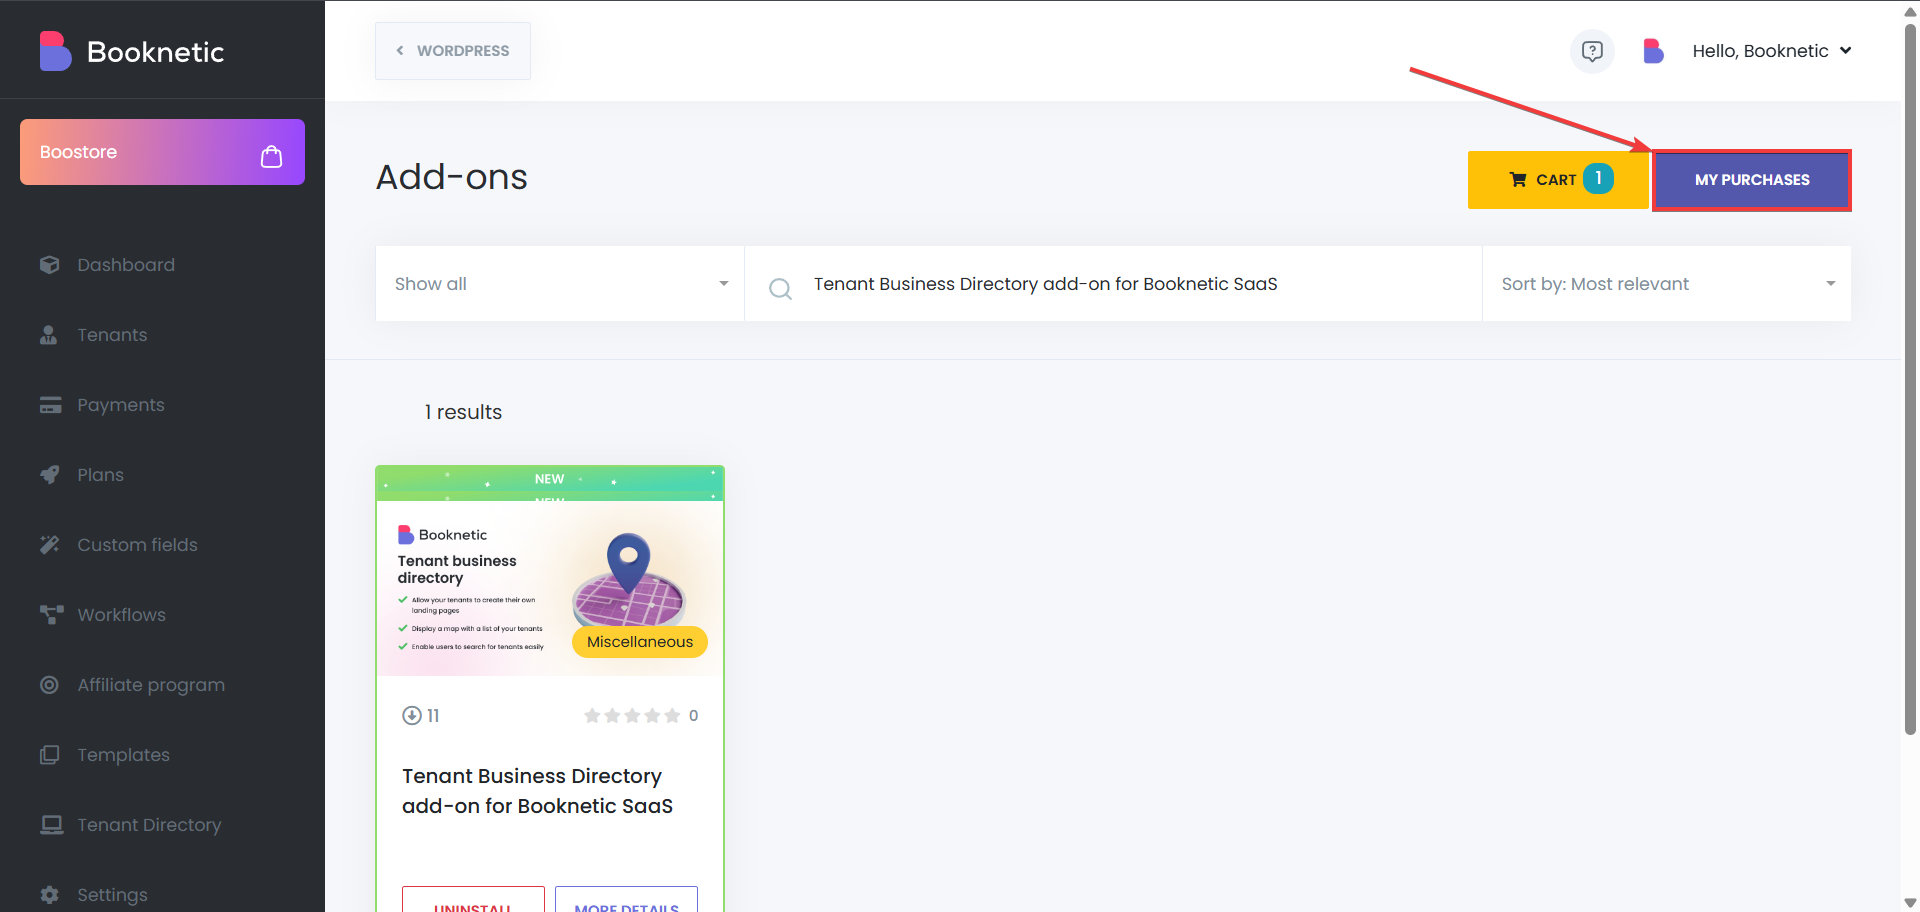
Purchase and Download the Add-On
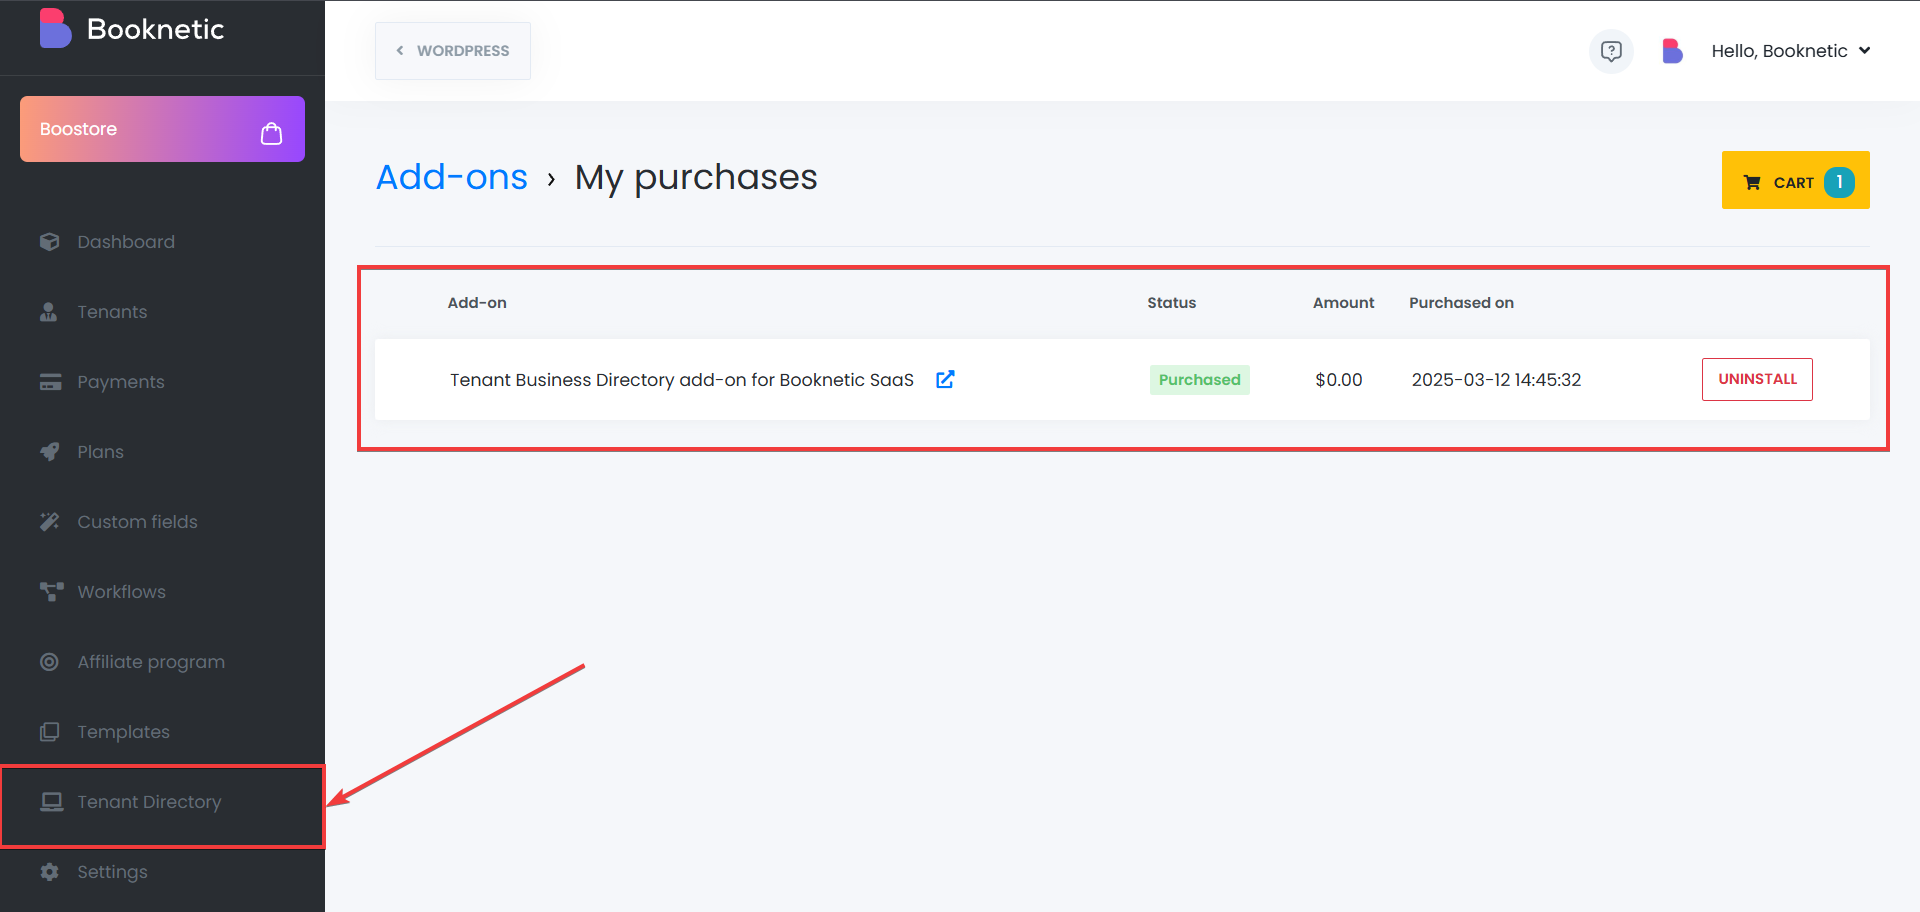
Install the Add-On
Activate the Add-On
To use the Tenant Business Directory add-on on your WordPress site, tenants need to complete their landing page form and submit a request for publishing. Before this, the administrator needs to set up business types and keywords, which tenants will use when adding their business information to the landing page.
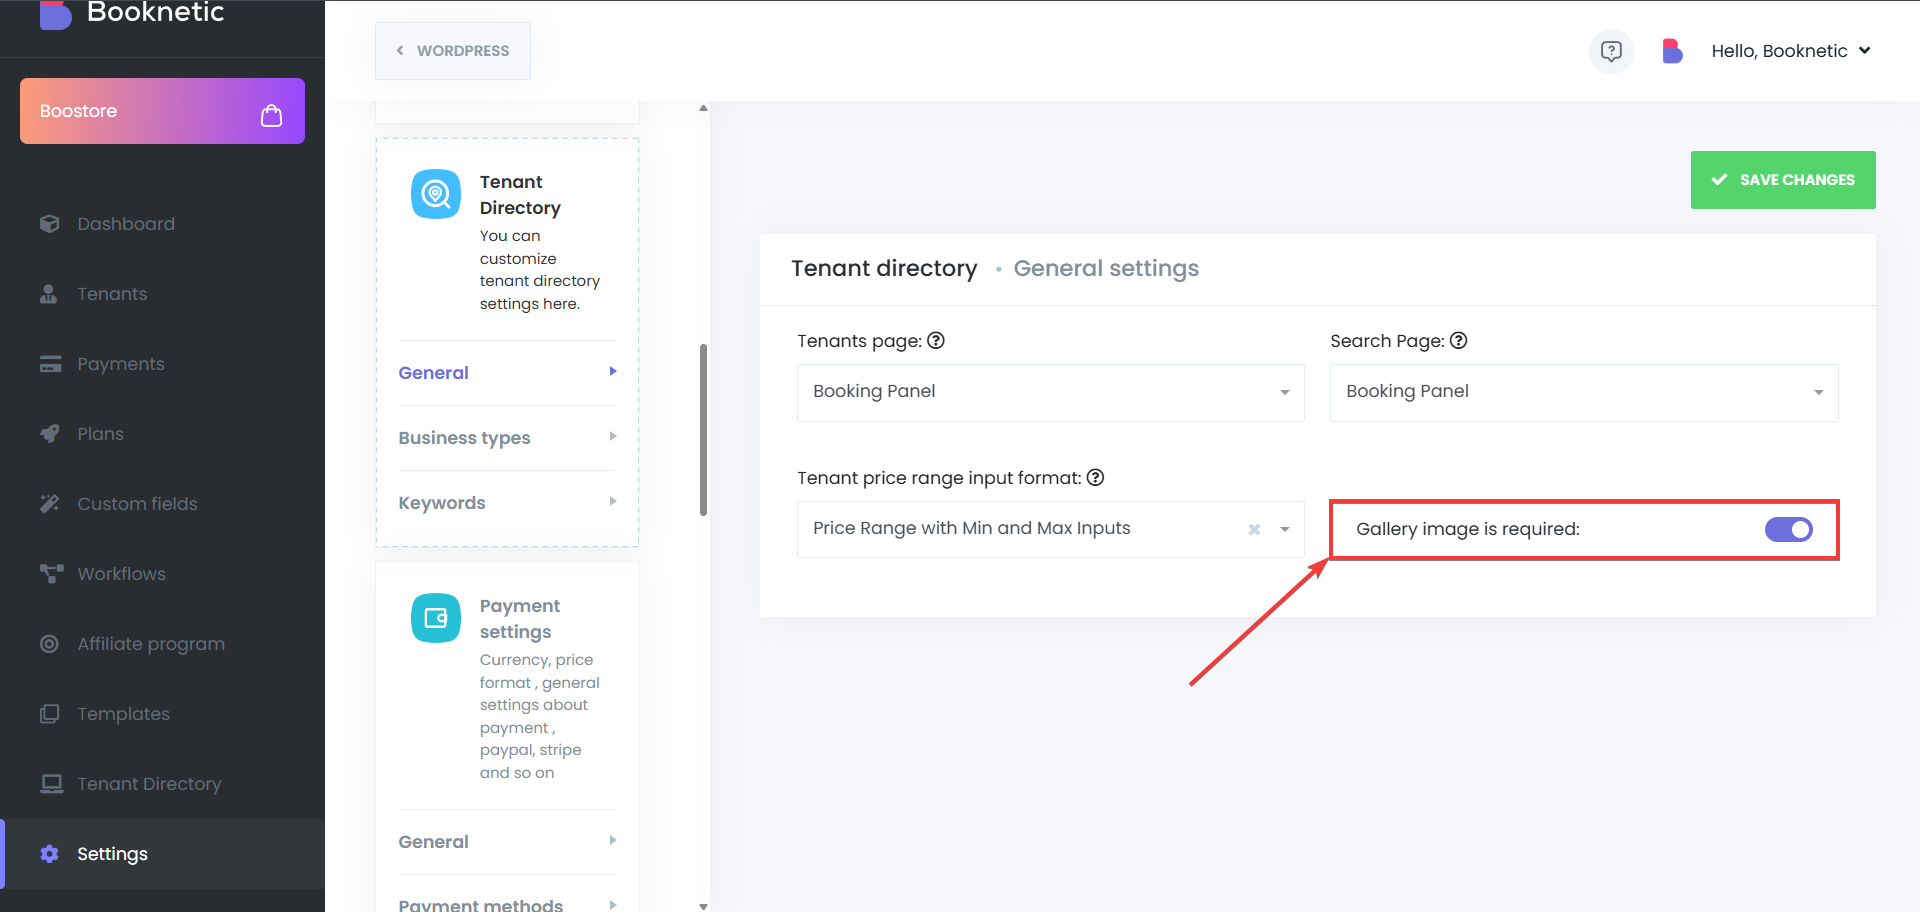
Administrators have access to various configuration options to manage tenant profiles effectively:
Gallery Image Requirement:
Admins can configure whether a gallery image is mandatory for tenants before they can submit their request for review.
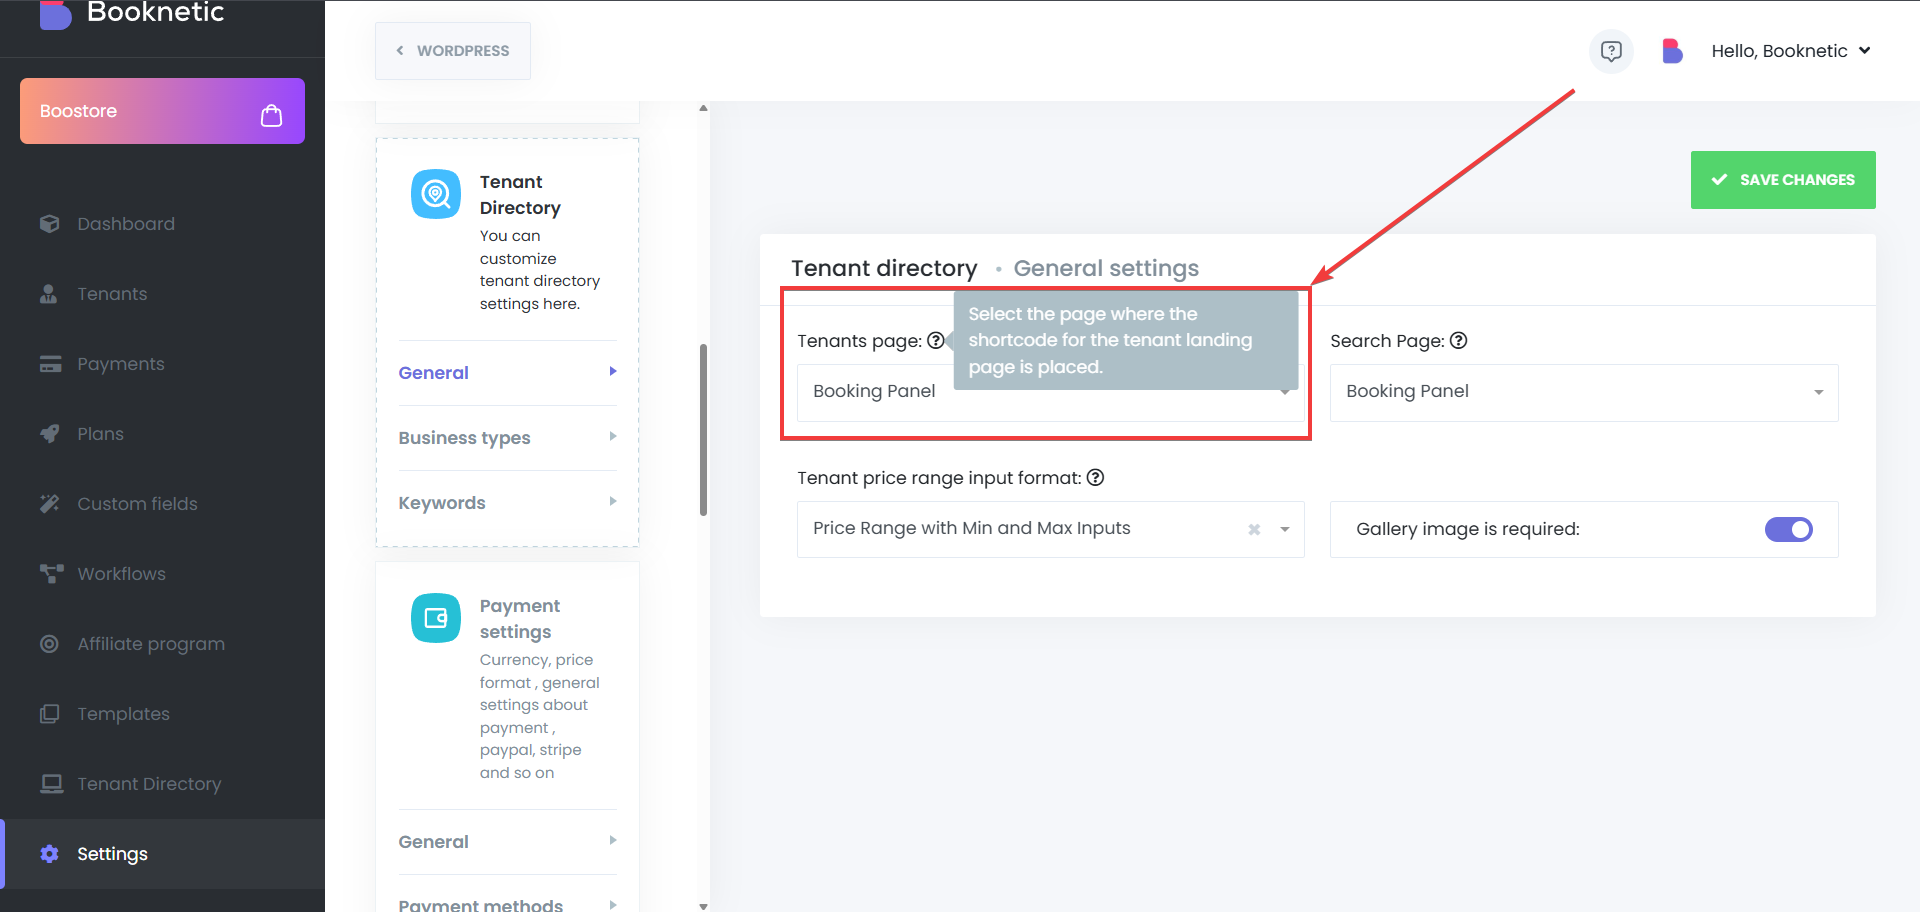
Set Tenant Landing Page:
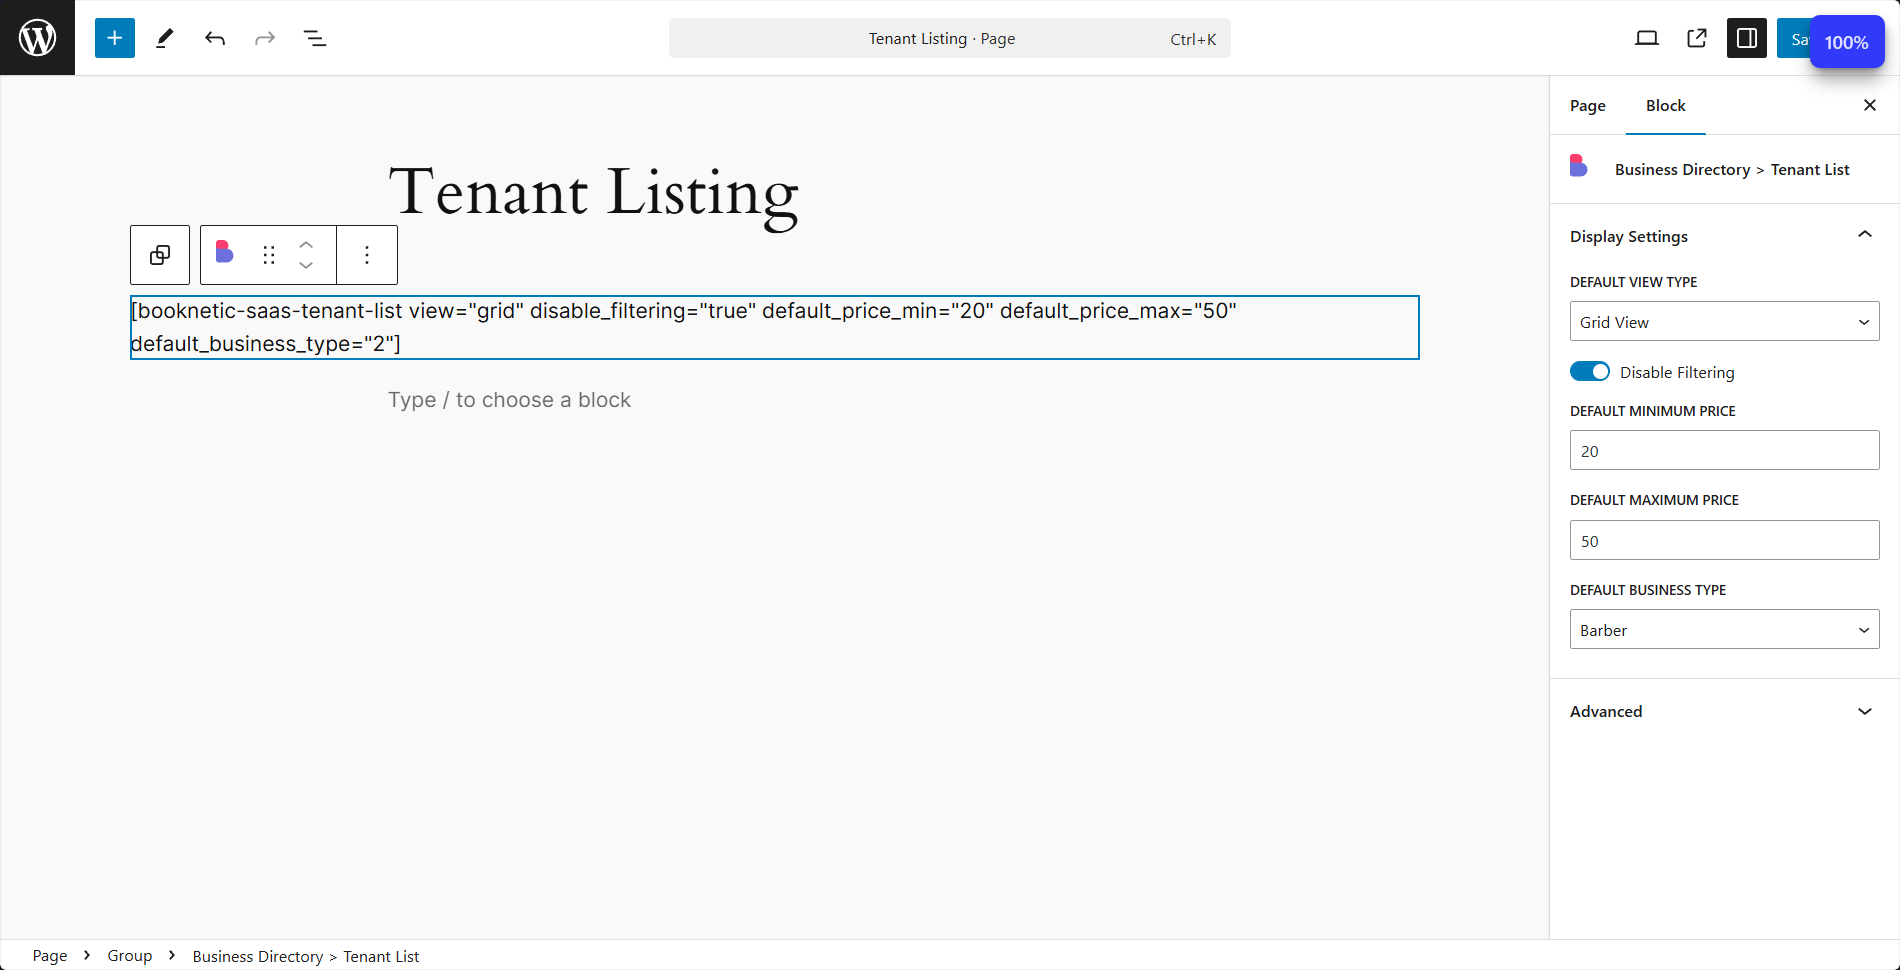
The administrator can select a WordPress page as the Tenant Landing Page. This is done through a select box element, where the admin chooses one page from the list of available WordPress pages. Make sure to select the page where you have added the [booknetic-saas-tenant-page] shortcode.
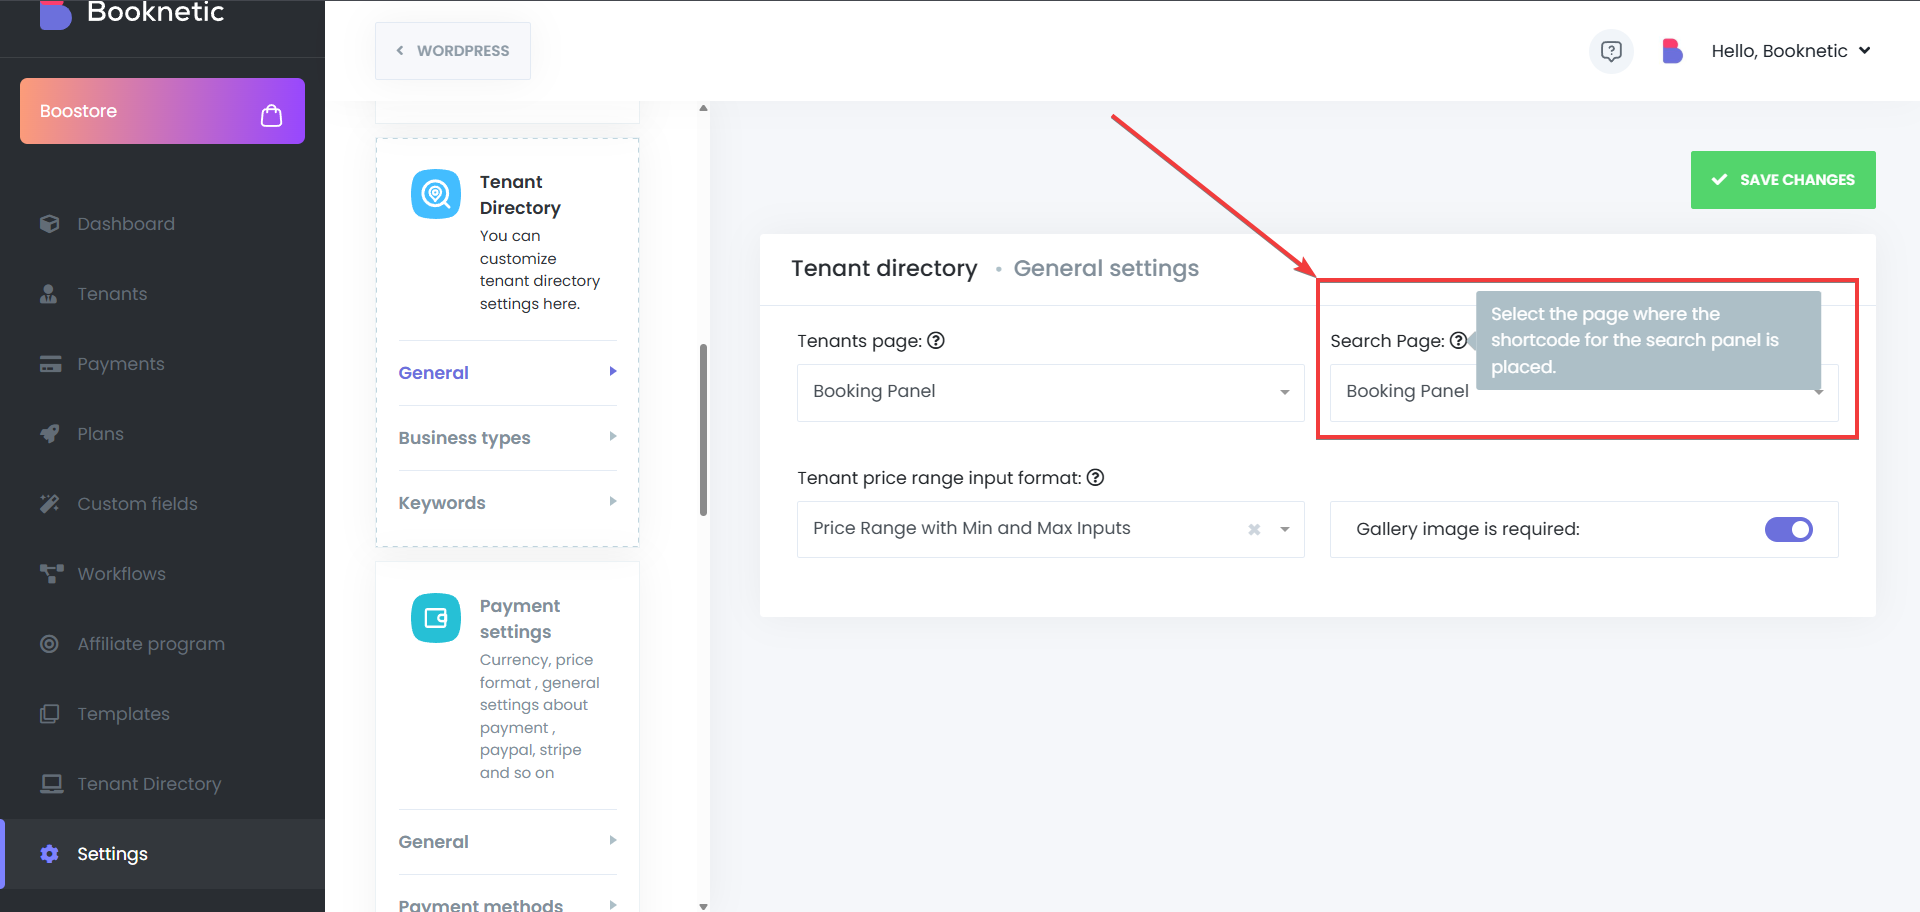
Set Search Page:
Admins must specify a search page by selecting it from the available WordPress pages list. For this part, make sure that you have selected a page that has the [booknetic-saas-tenant-list view="grid"] shortcode added. This shortcode is added as [booknetic-saas-tenant-list view="grid"] by default, but it is possible to change the default view by changing the shortcode to list view by adding it as [booknetic-saas-tenant-list view="list"].
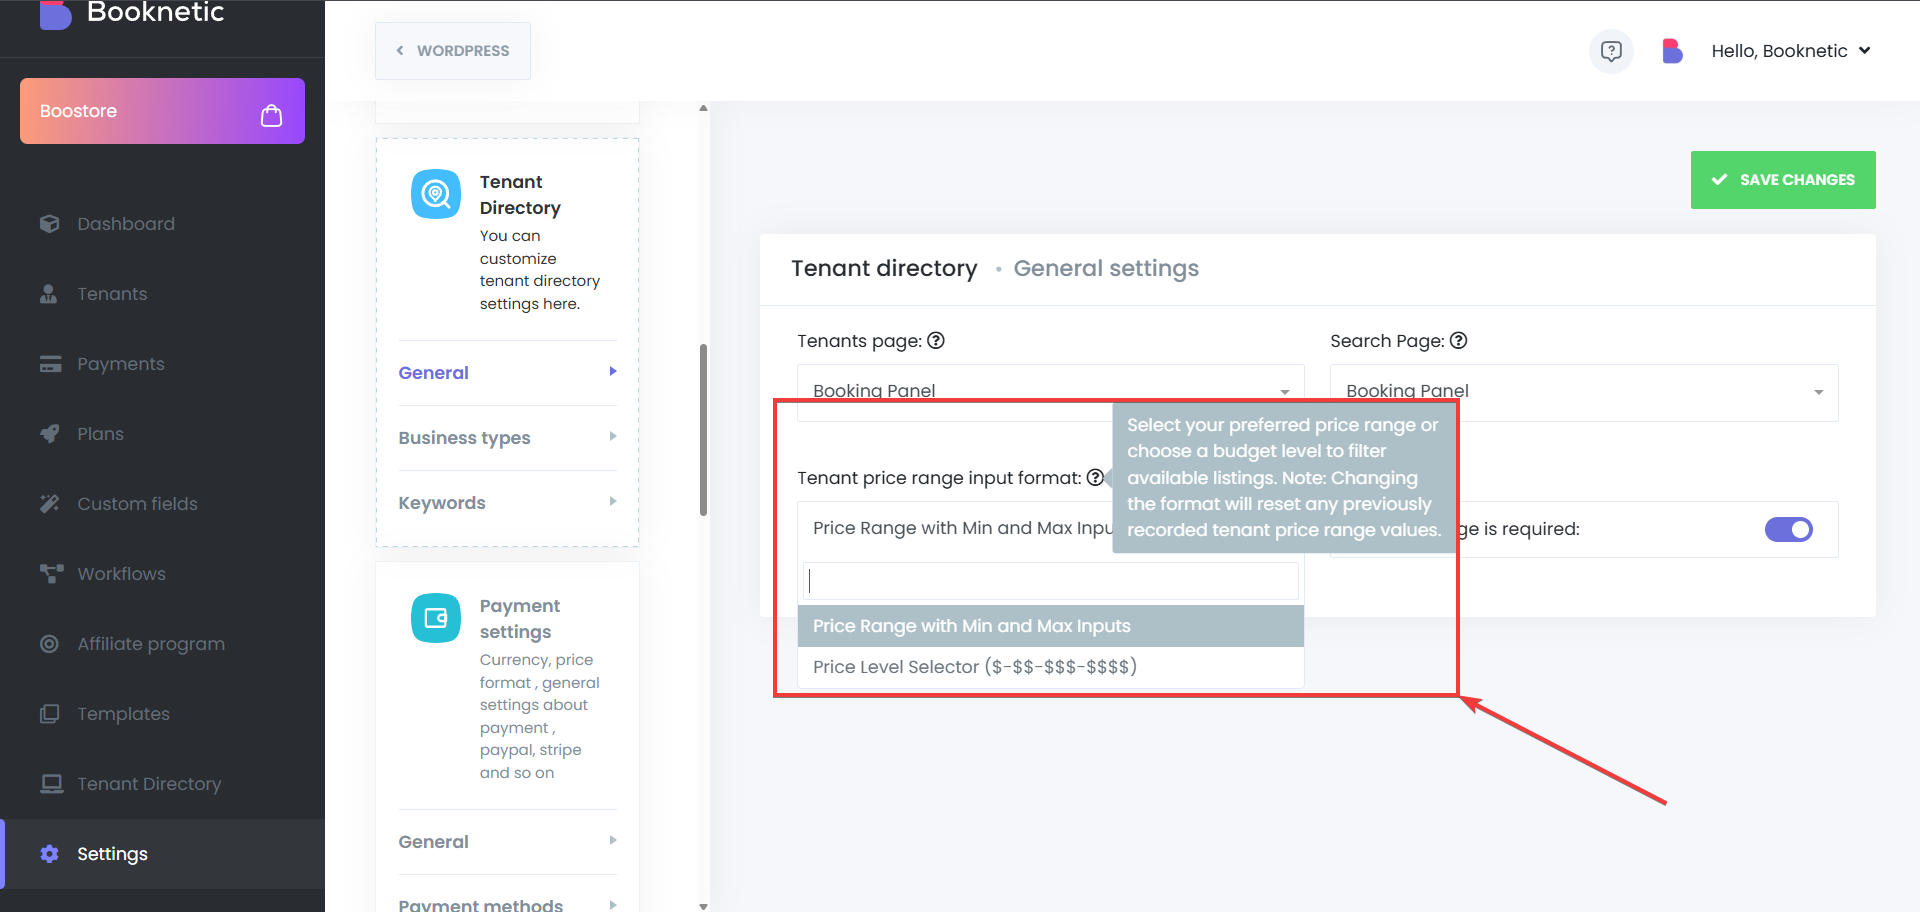
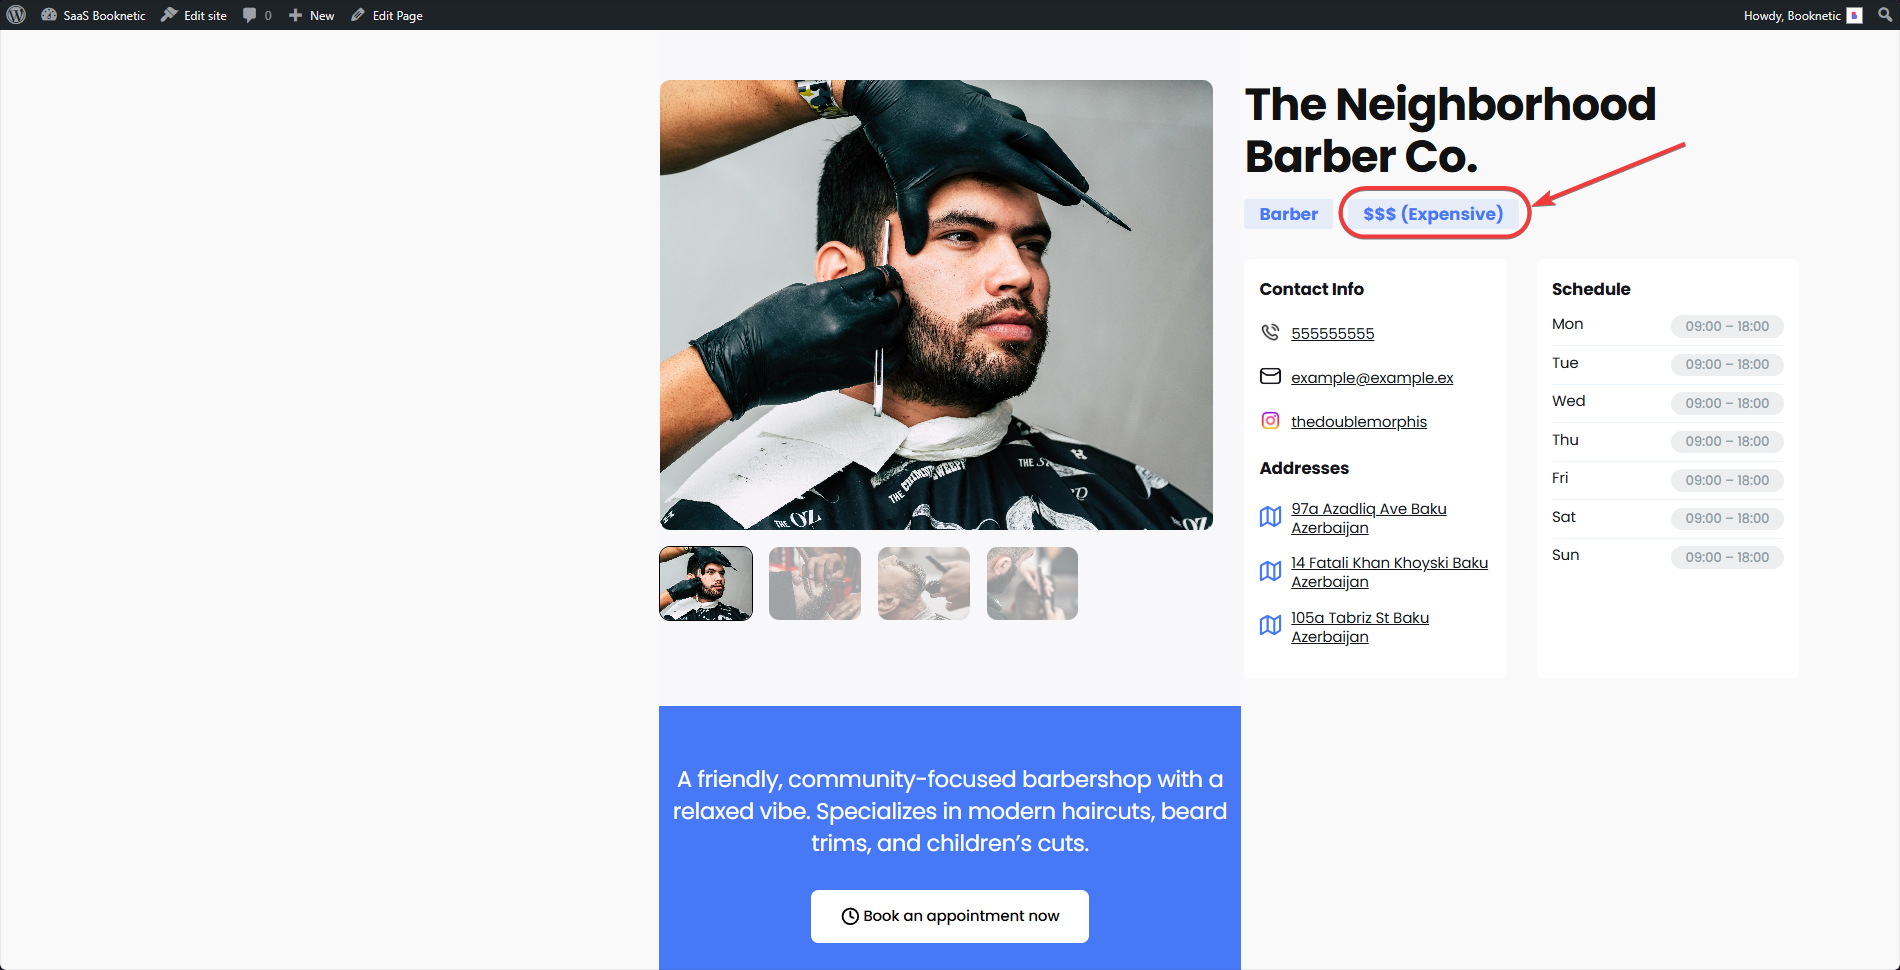
Tenant Price Range Format:
Administrators can configure how tenant price ranges are input. The options are:
Business Type Management:
The admin can create, view, and delete business types. (Example: Massage, Barbershop, Consulting, etc)

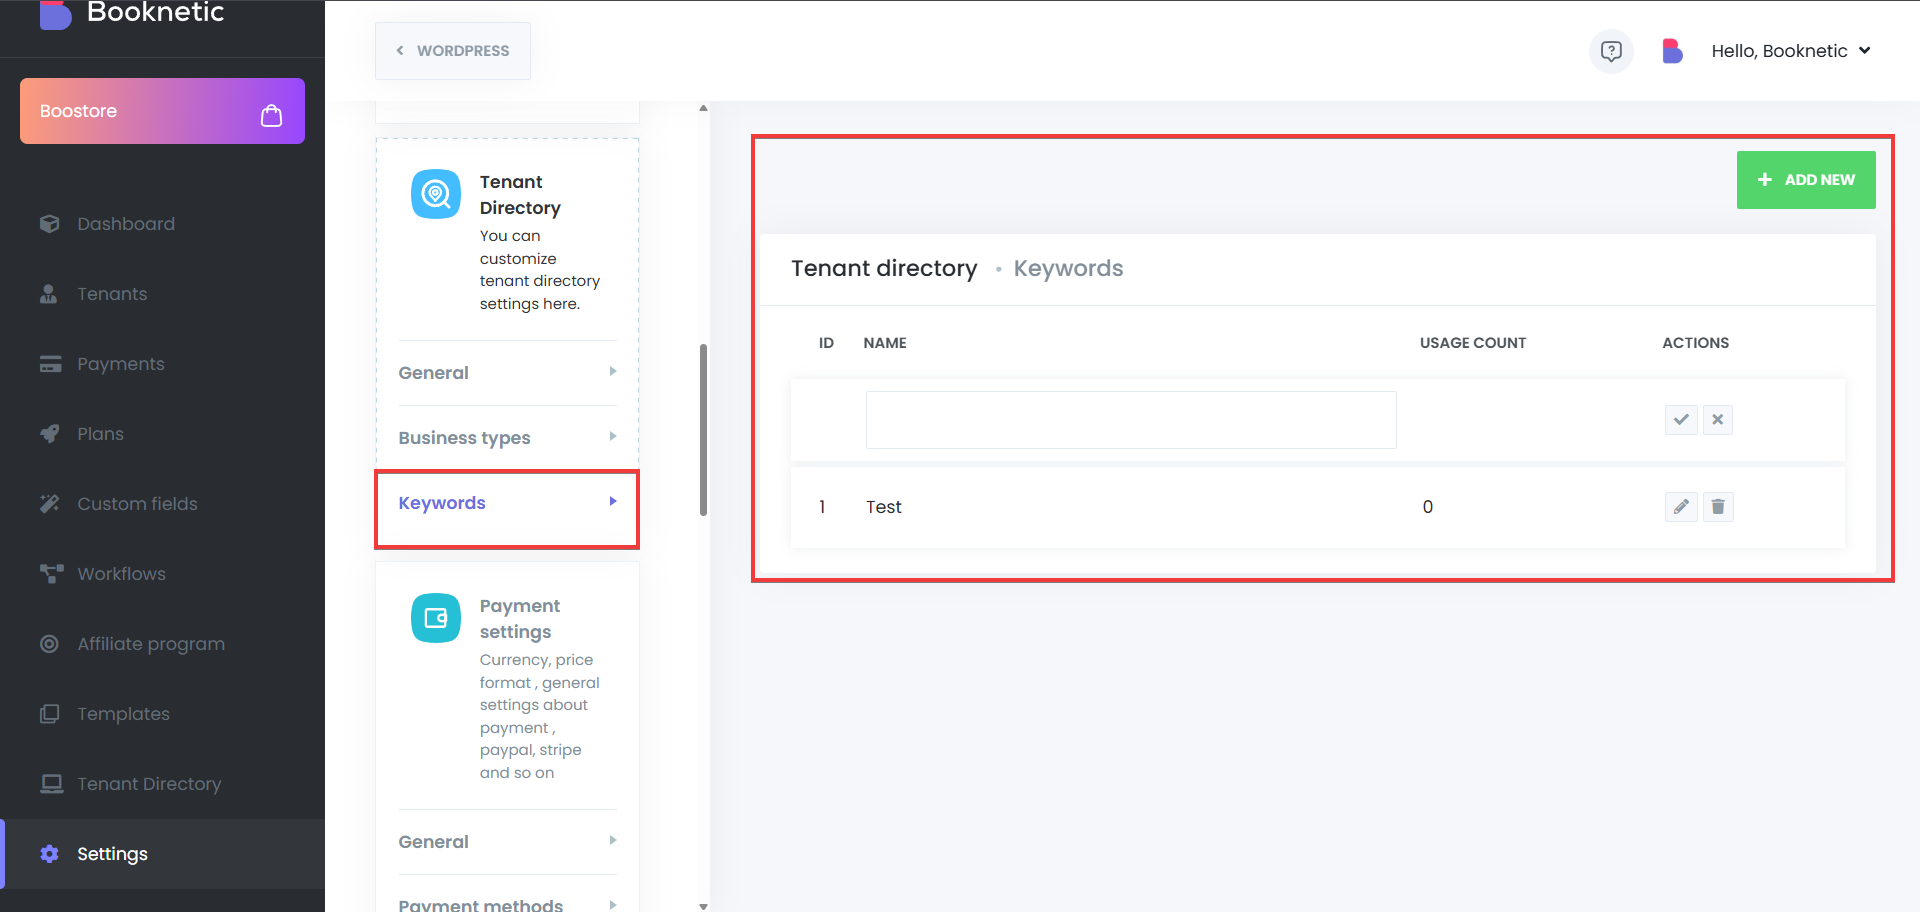
Keyword Management:
Admins can create, view, and delete keywords, which tenants use to add business information. (Example: Haircut, Gym, HR Consulting, etc)
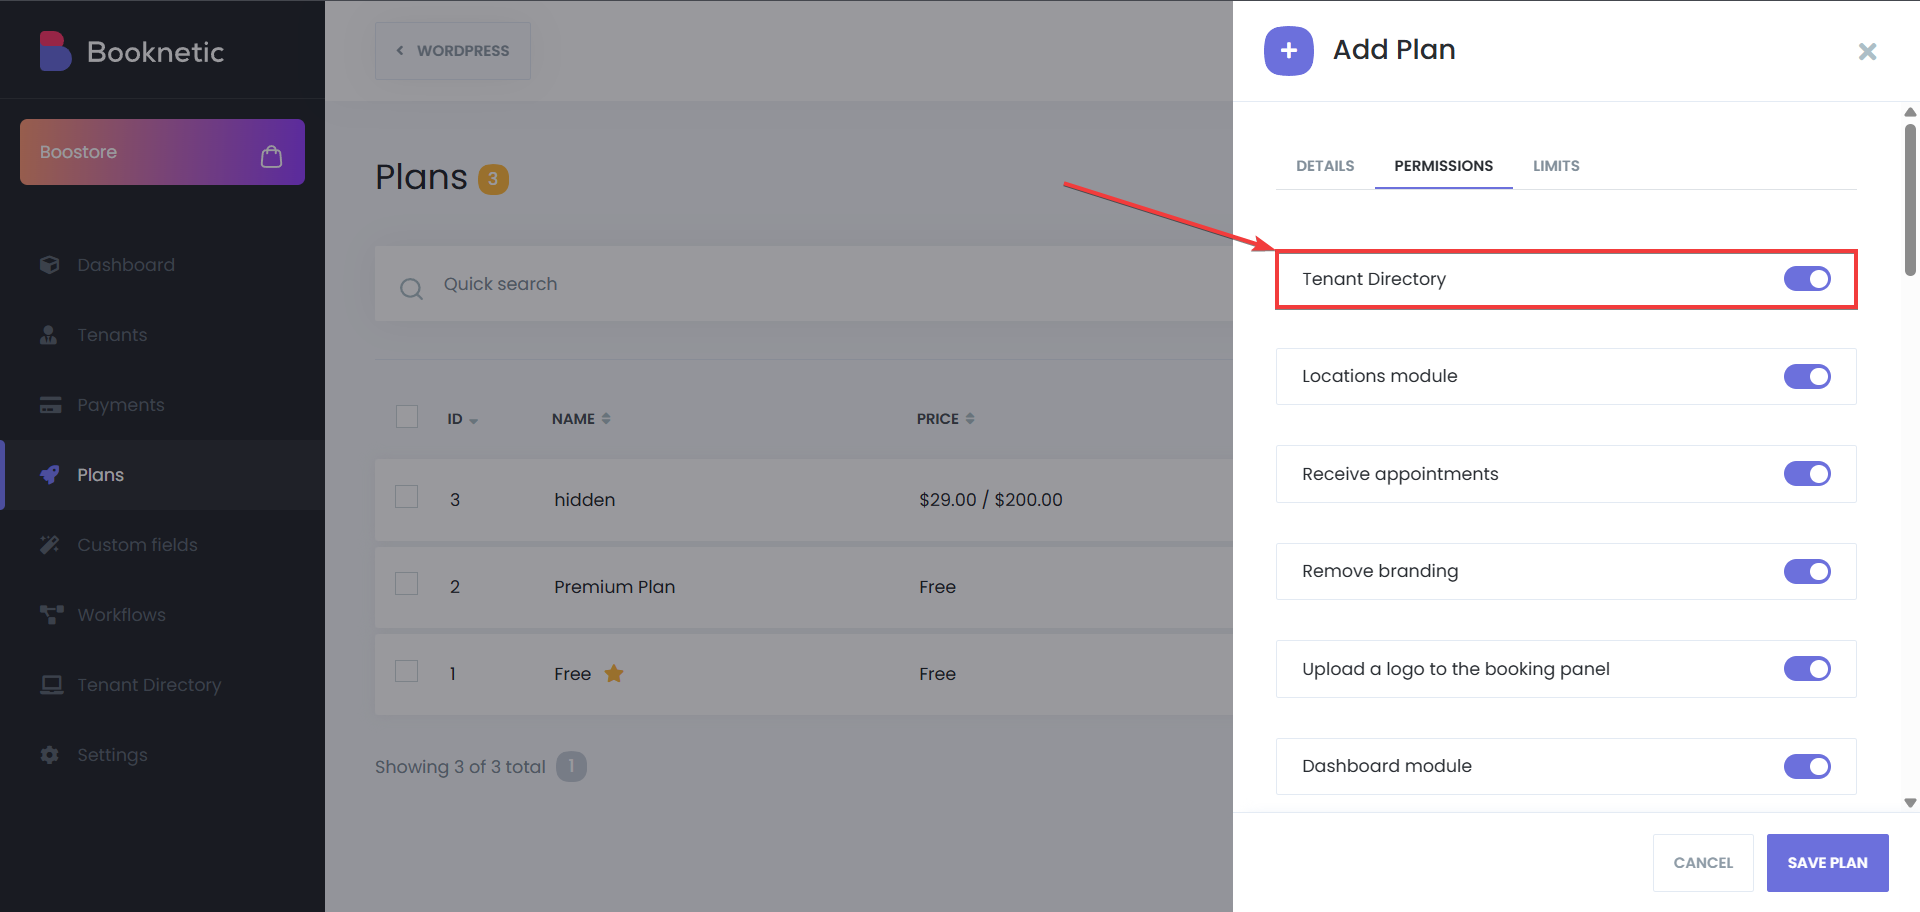
Allow to use Tenant Directory through the plans:
Admins can configure which Tenant Directory features are available to tenants based on their subscription plan. This allows SaaS administrators to offer the directory as part of specific service plans, ensuring that only tenants on eligible plans can access and utilize the directory feature.
Below is information about how can a tenant apply for a landing page, how can SaaS admin respond, and lastly information other parts of the Tenant Directory add-on.
The Tenant Landing Page is an essential feature that allows tenants to showcase their business information publicly within the Booknetic system. Tenants can apply for a landing page through the application process, which requires them to fill out a form with their business details. This section explains the process of tenants applying for their landing pages and what steps are involved.
Tenants must submit an application to create their landing page, which includes filling out a form with all the necessary business details. The application process ensures that all required information is gathered before submission to the administrator for approval.
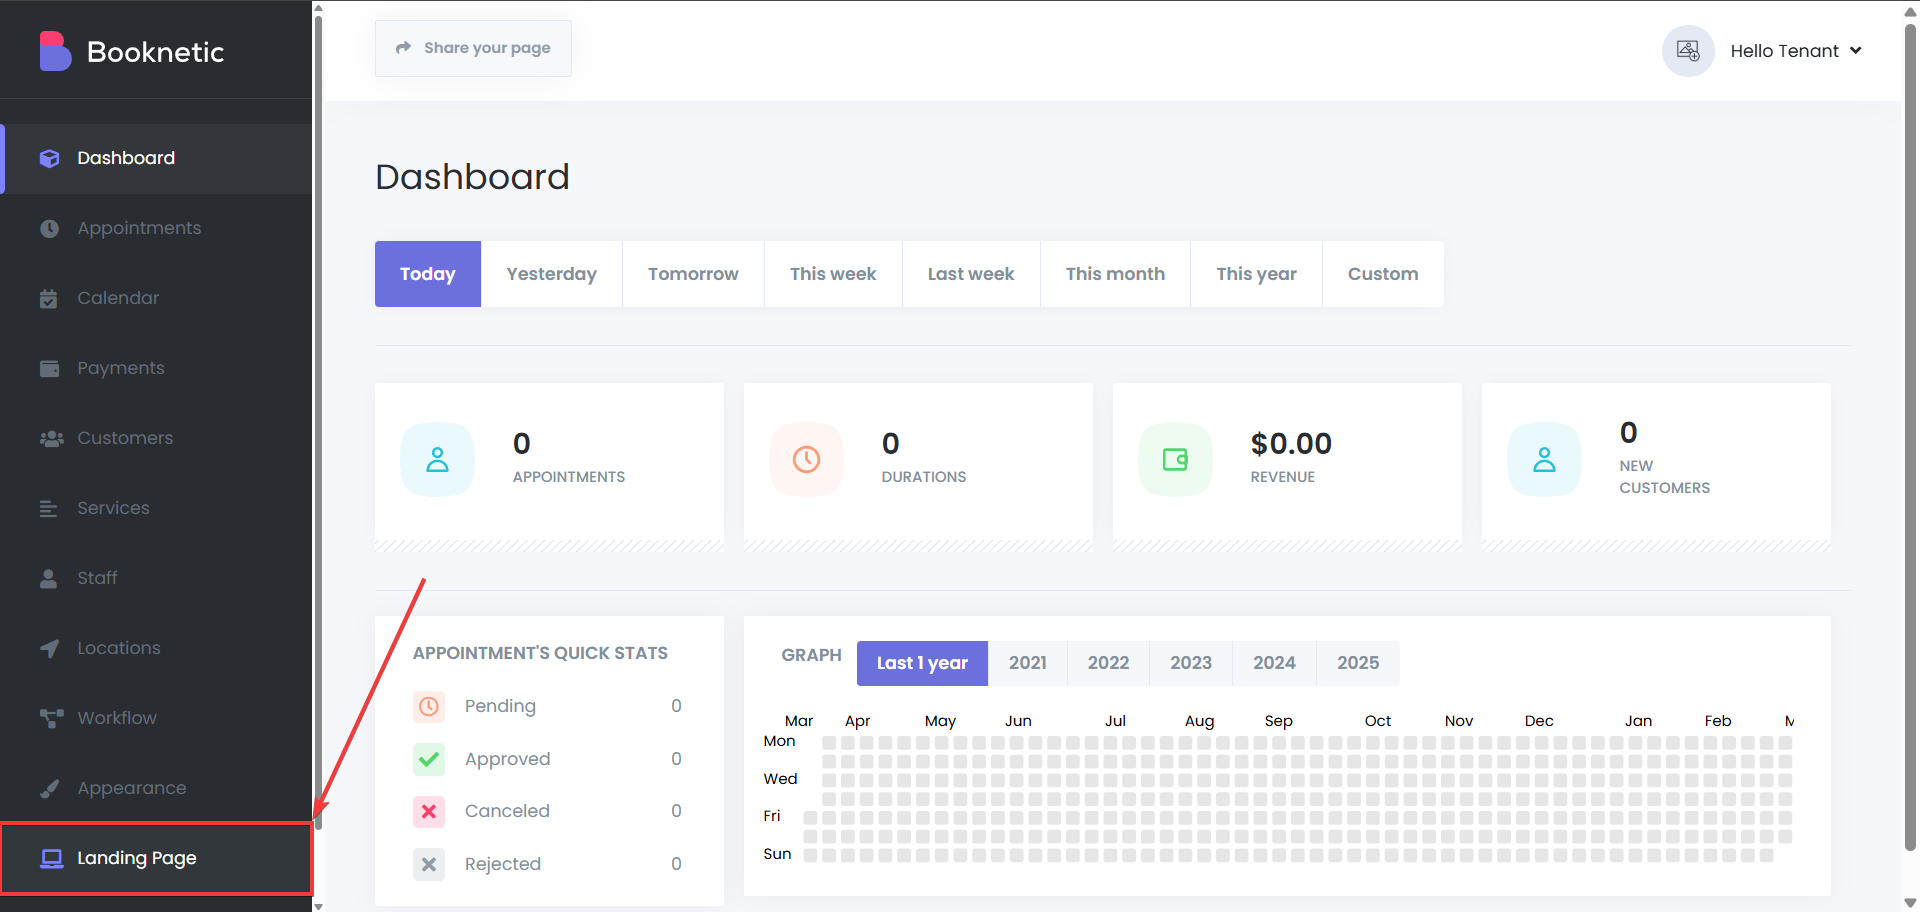
Step 1: Access the Tenant Dashboard
Tenants will log in to their dashboard and navigate to the Landing Page section.
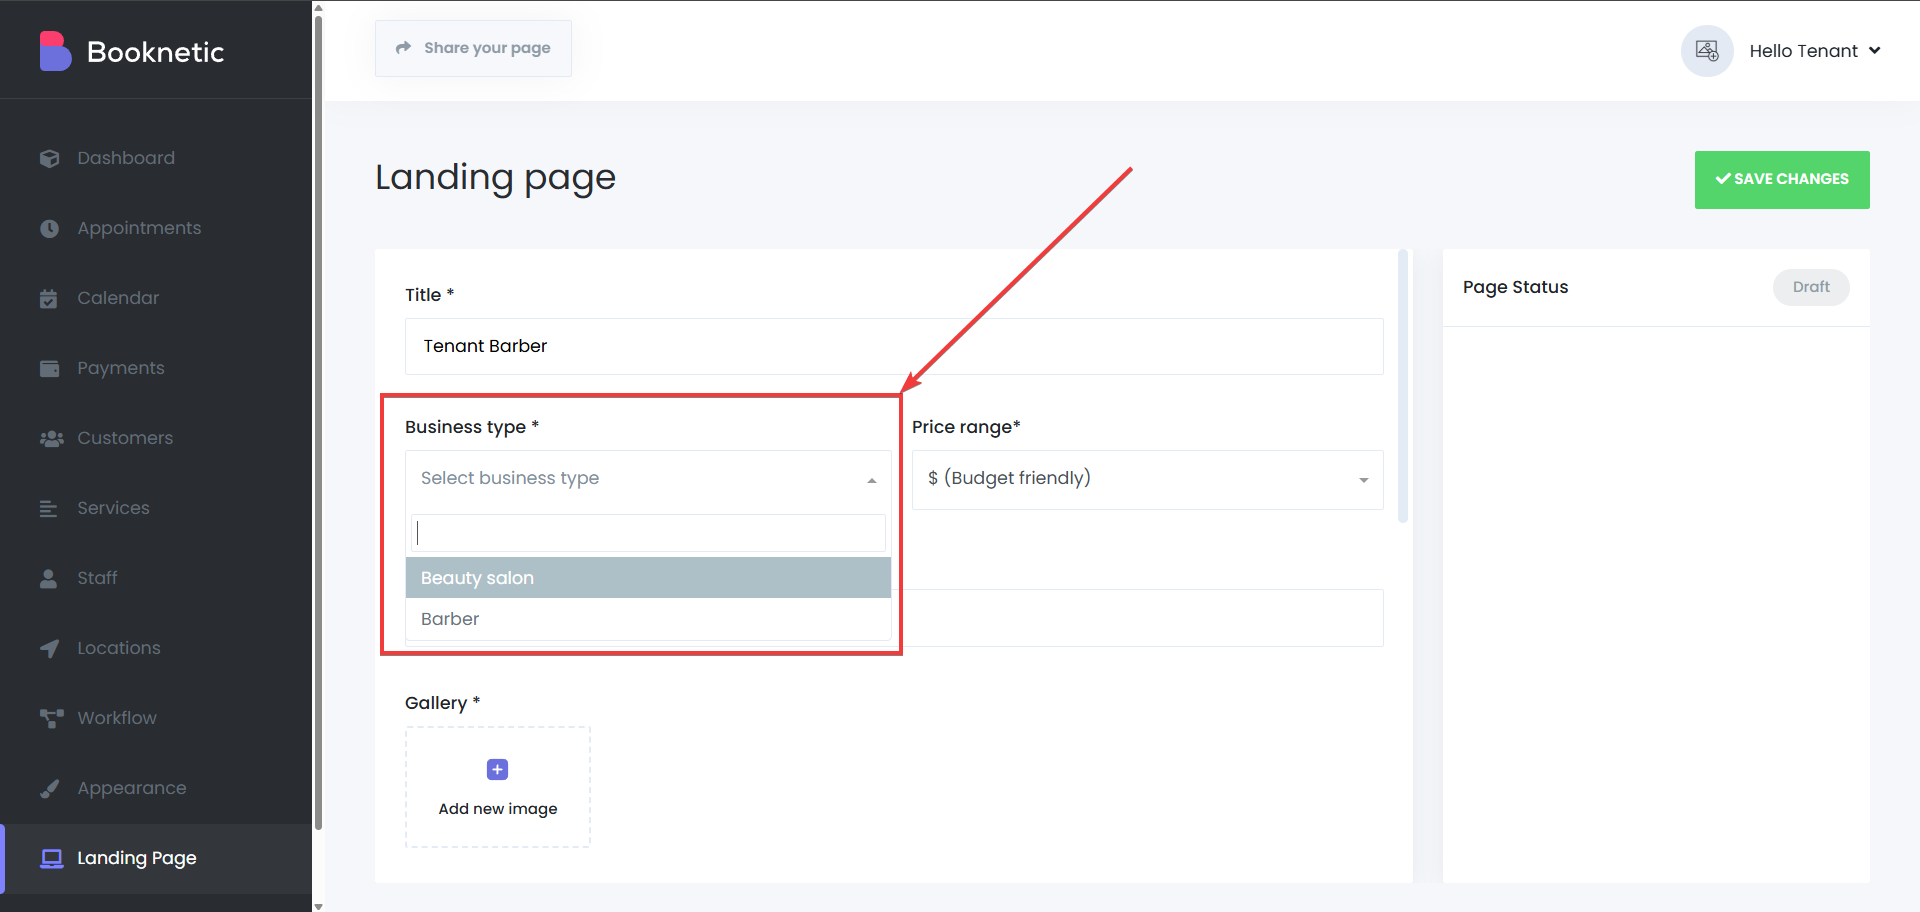
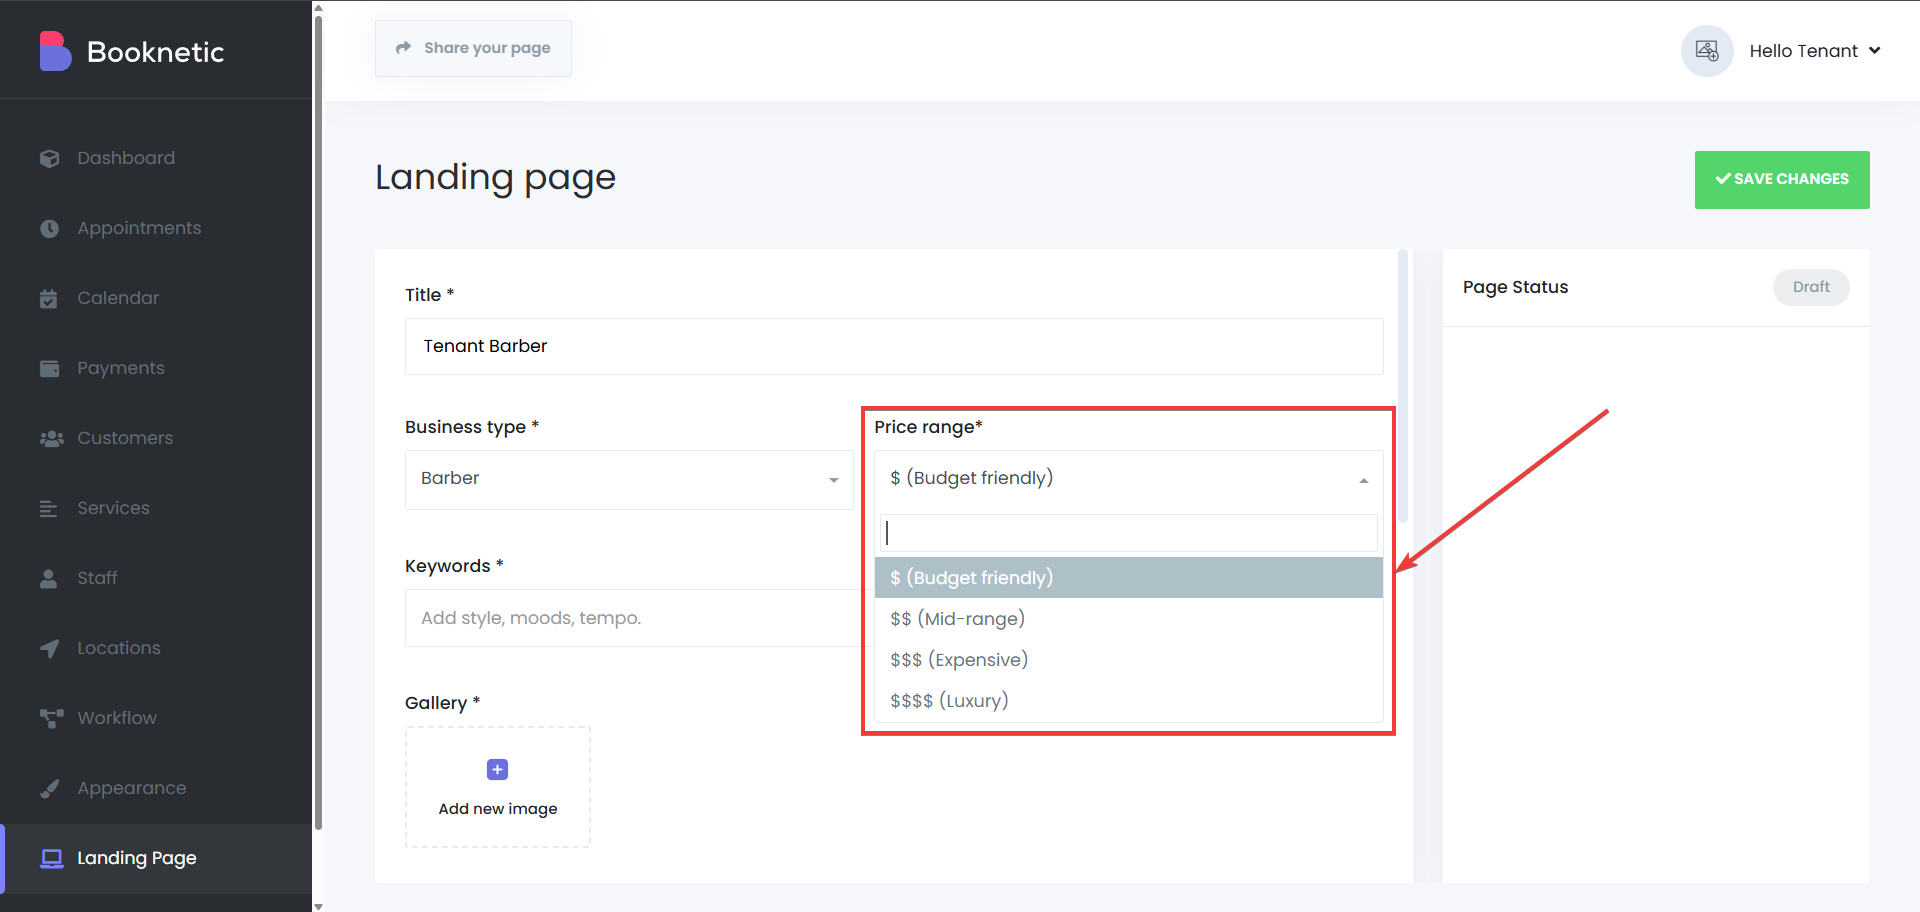
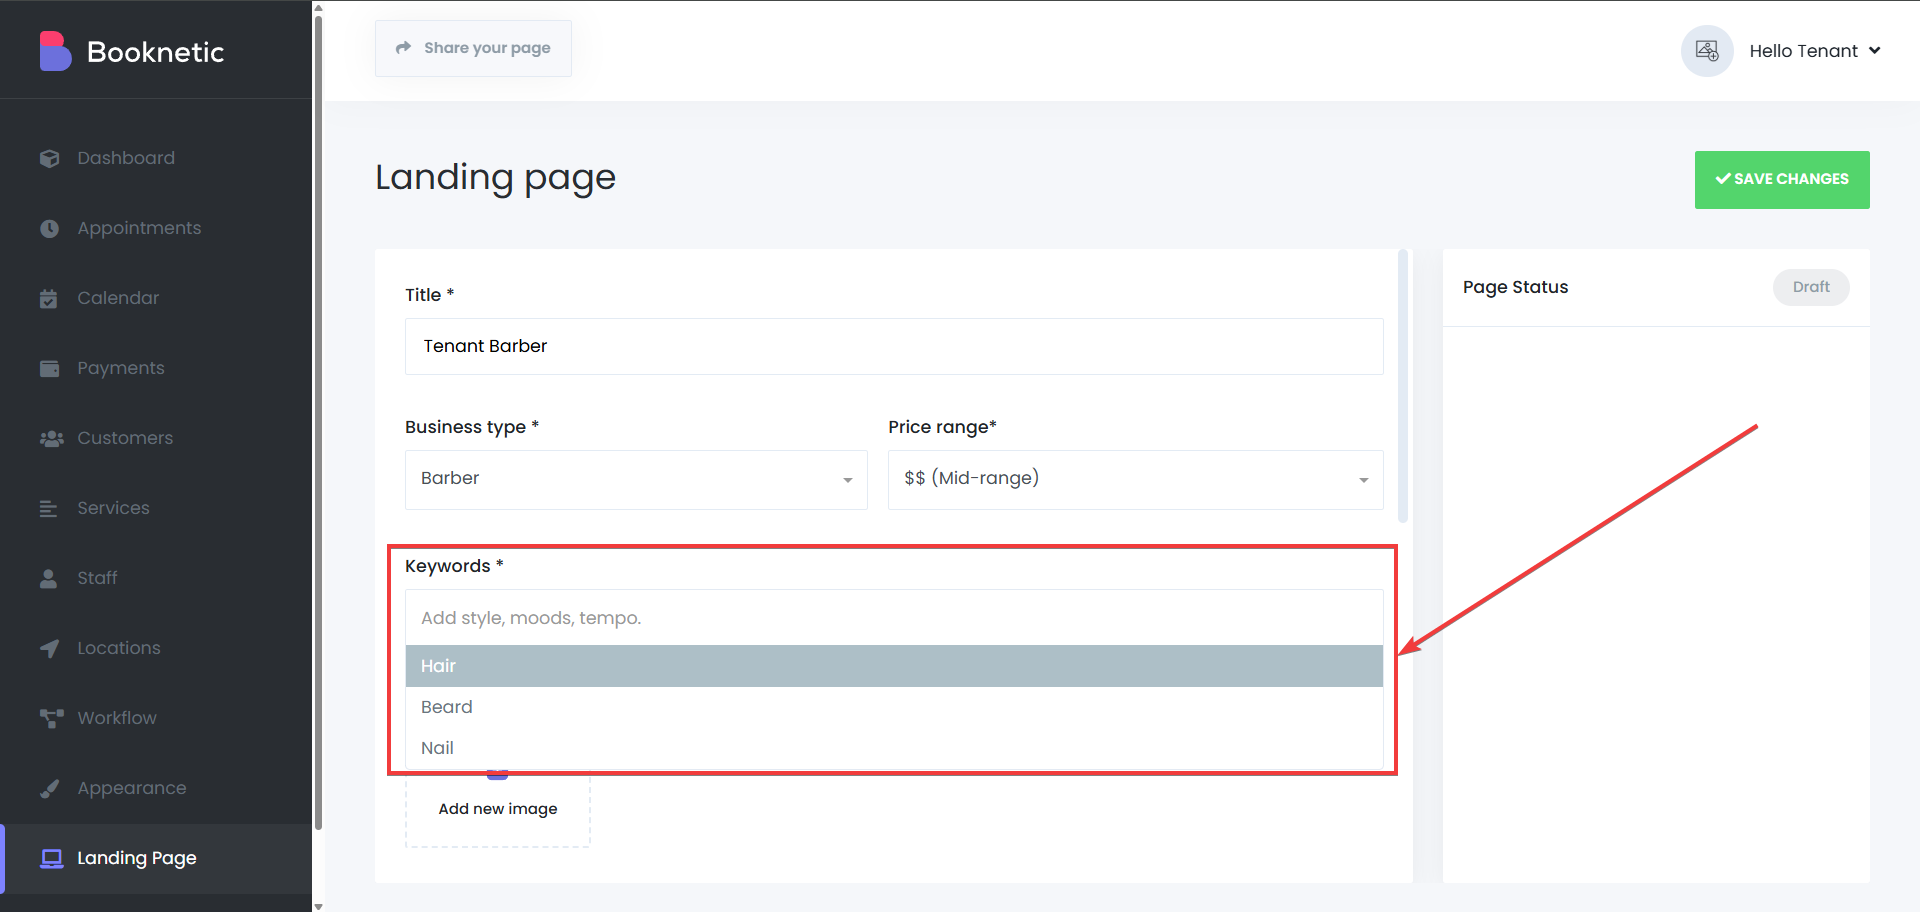
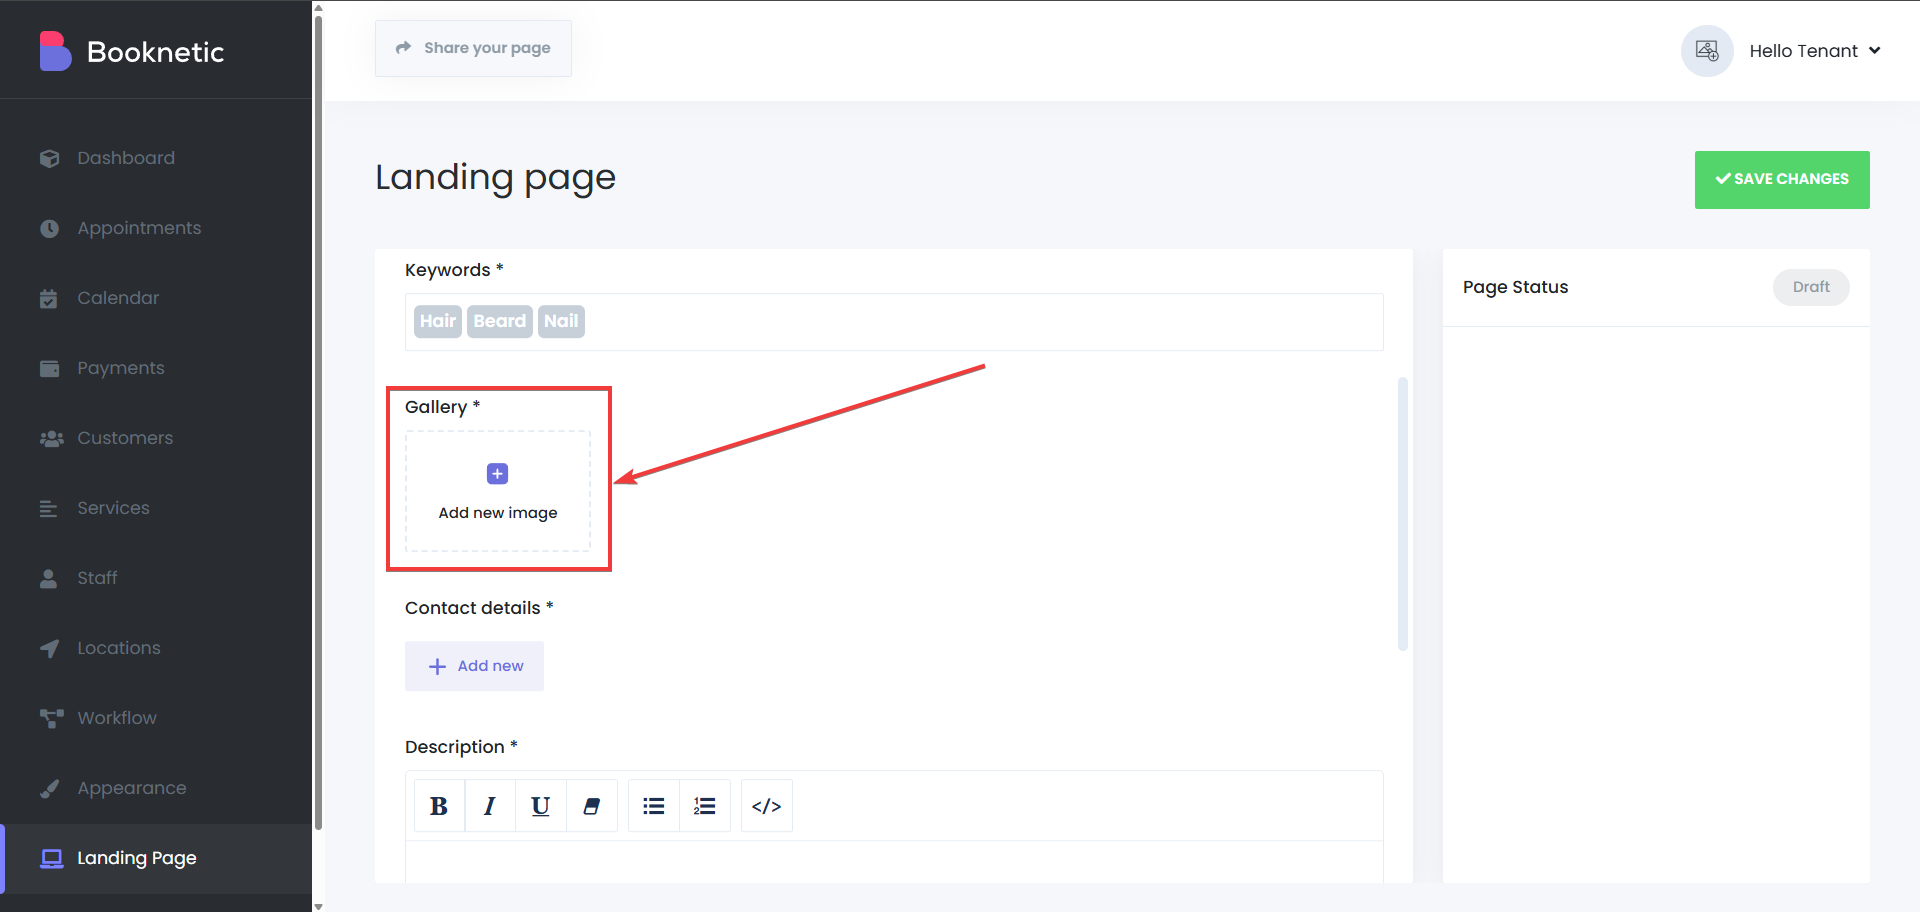
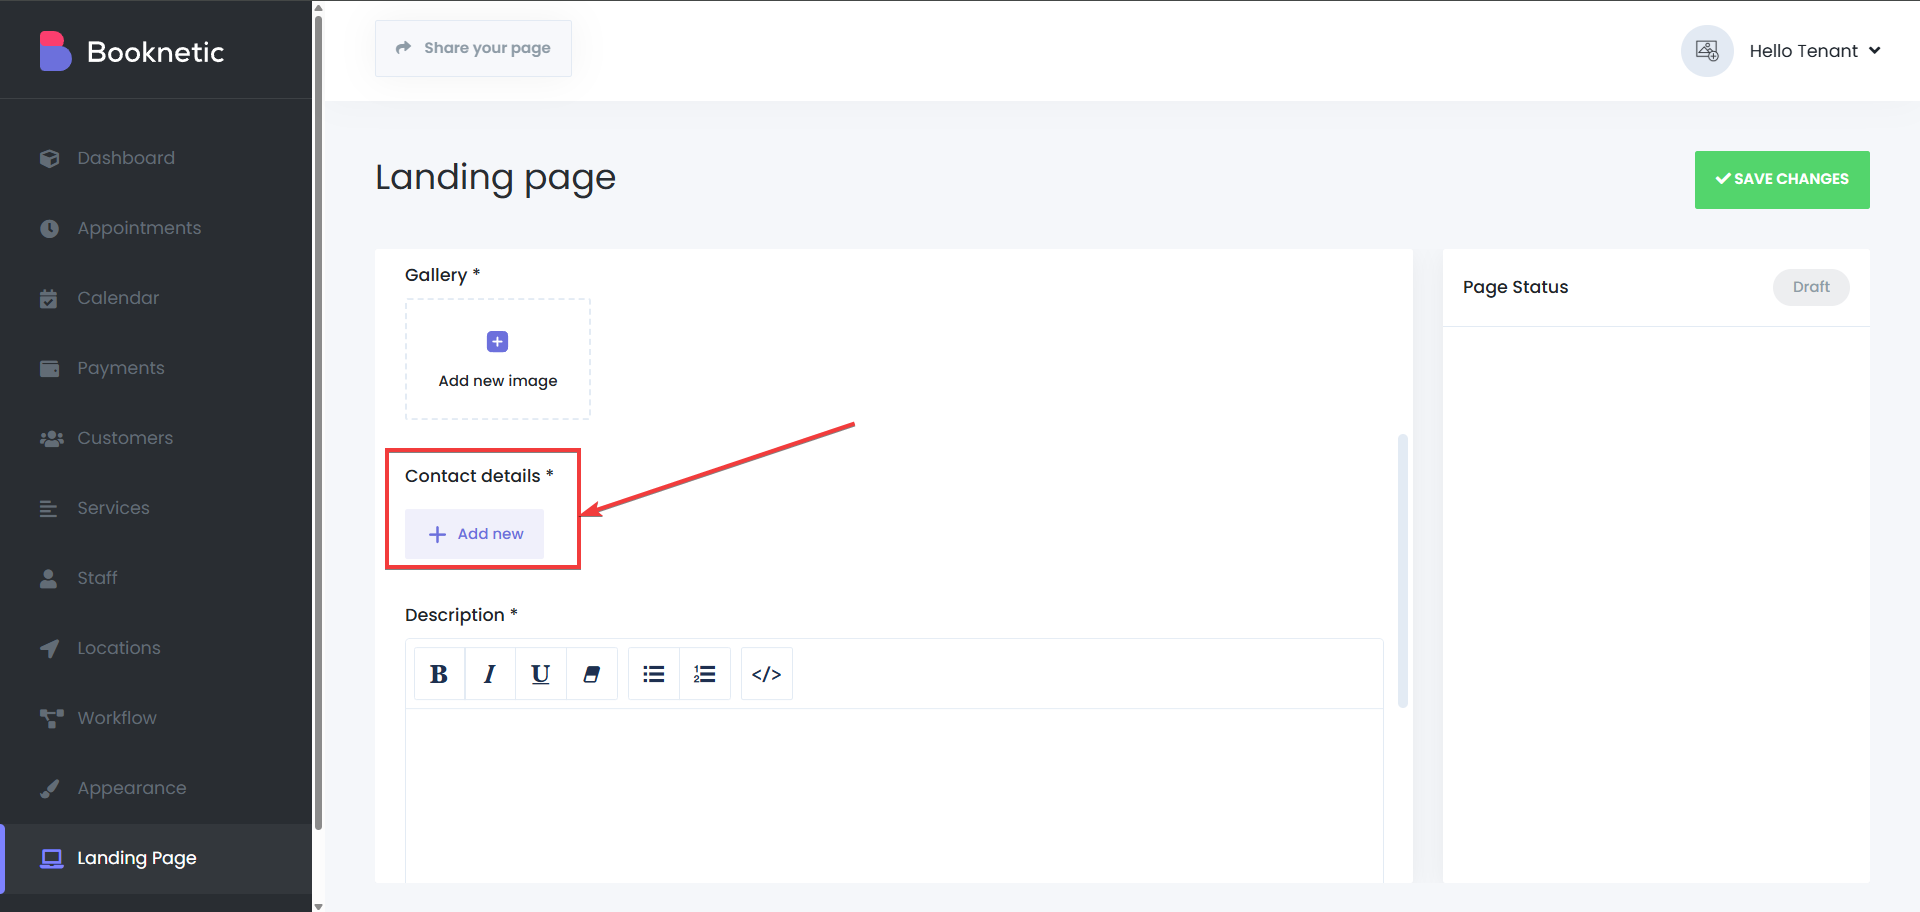
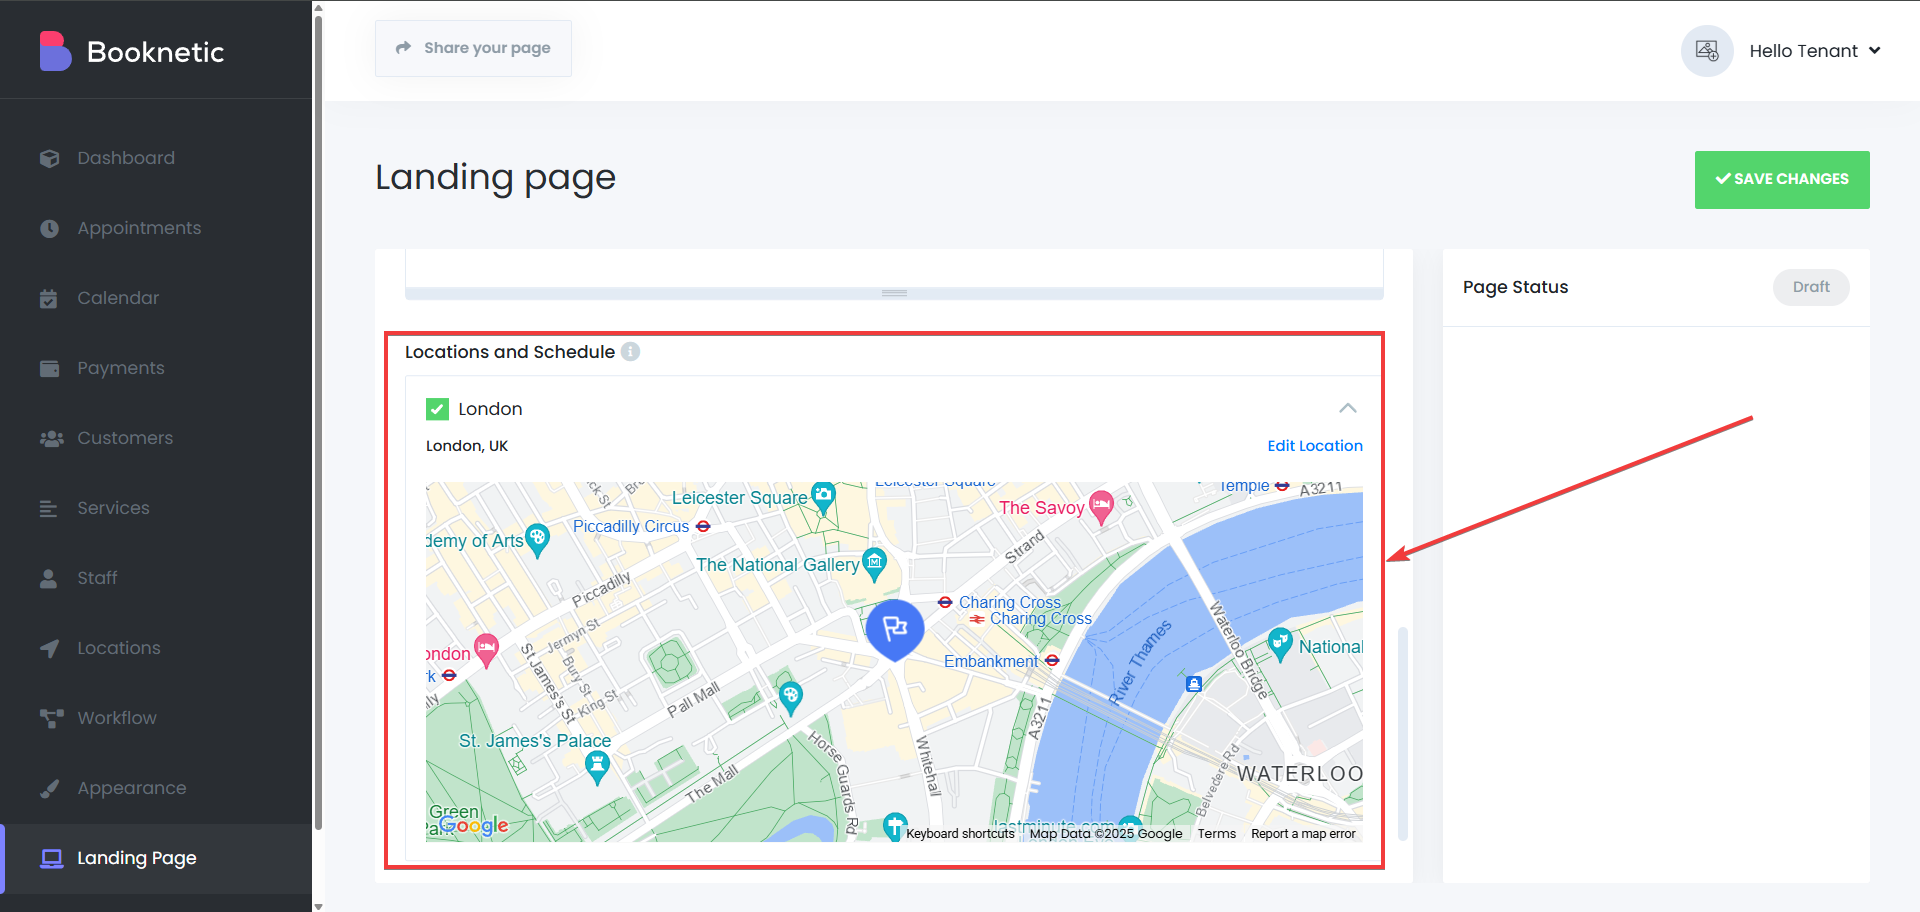
Step 2: Complete the Application Form
The form requires tenants to provide the following details:

Step 3: Submit the Form
After completing the form, tenants can submit the application for review and approval by the superadmin.
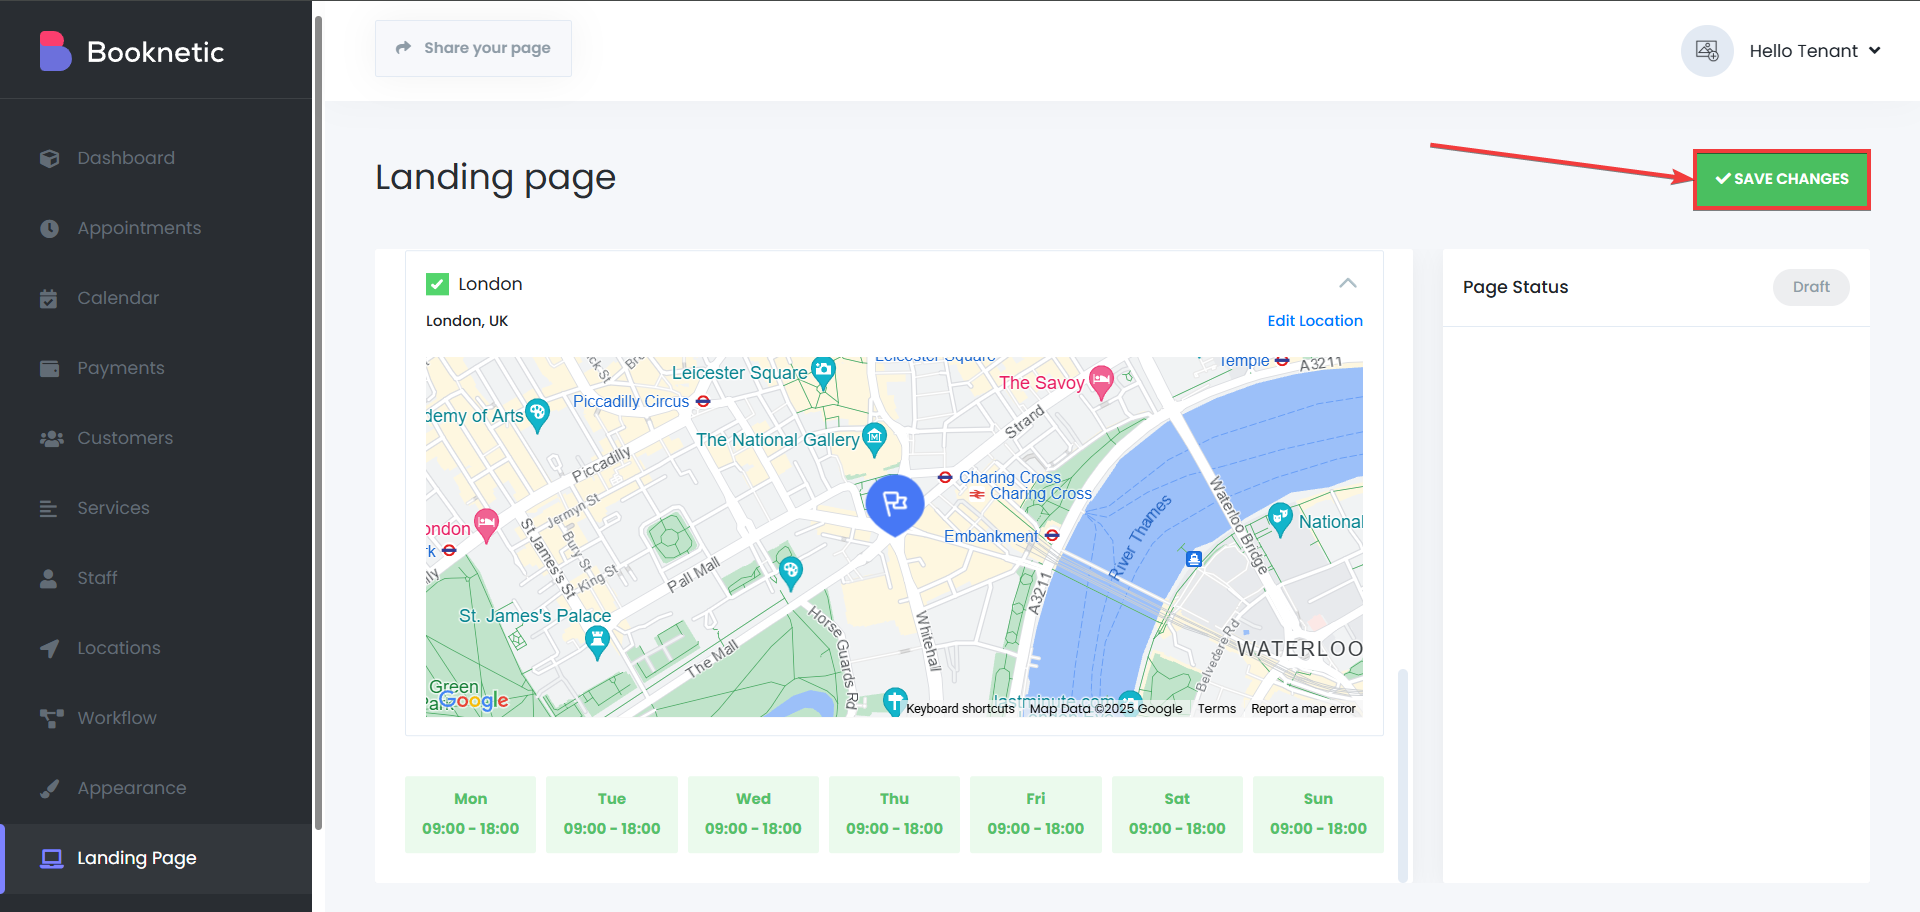
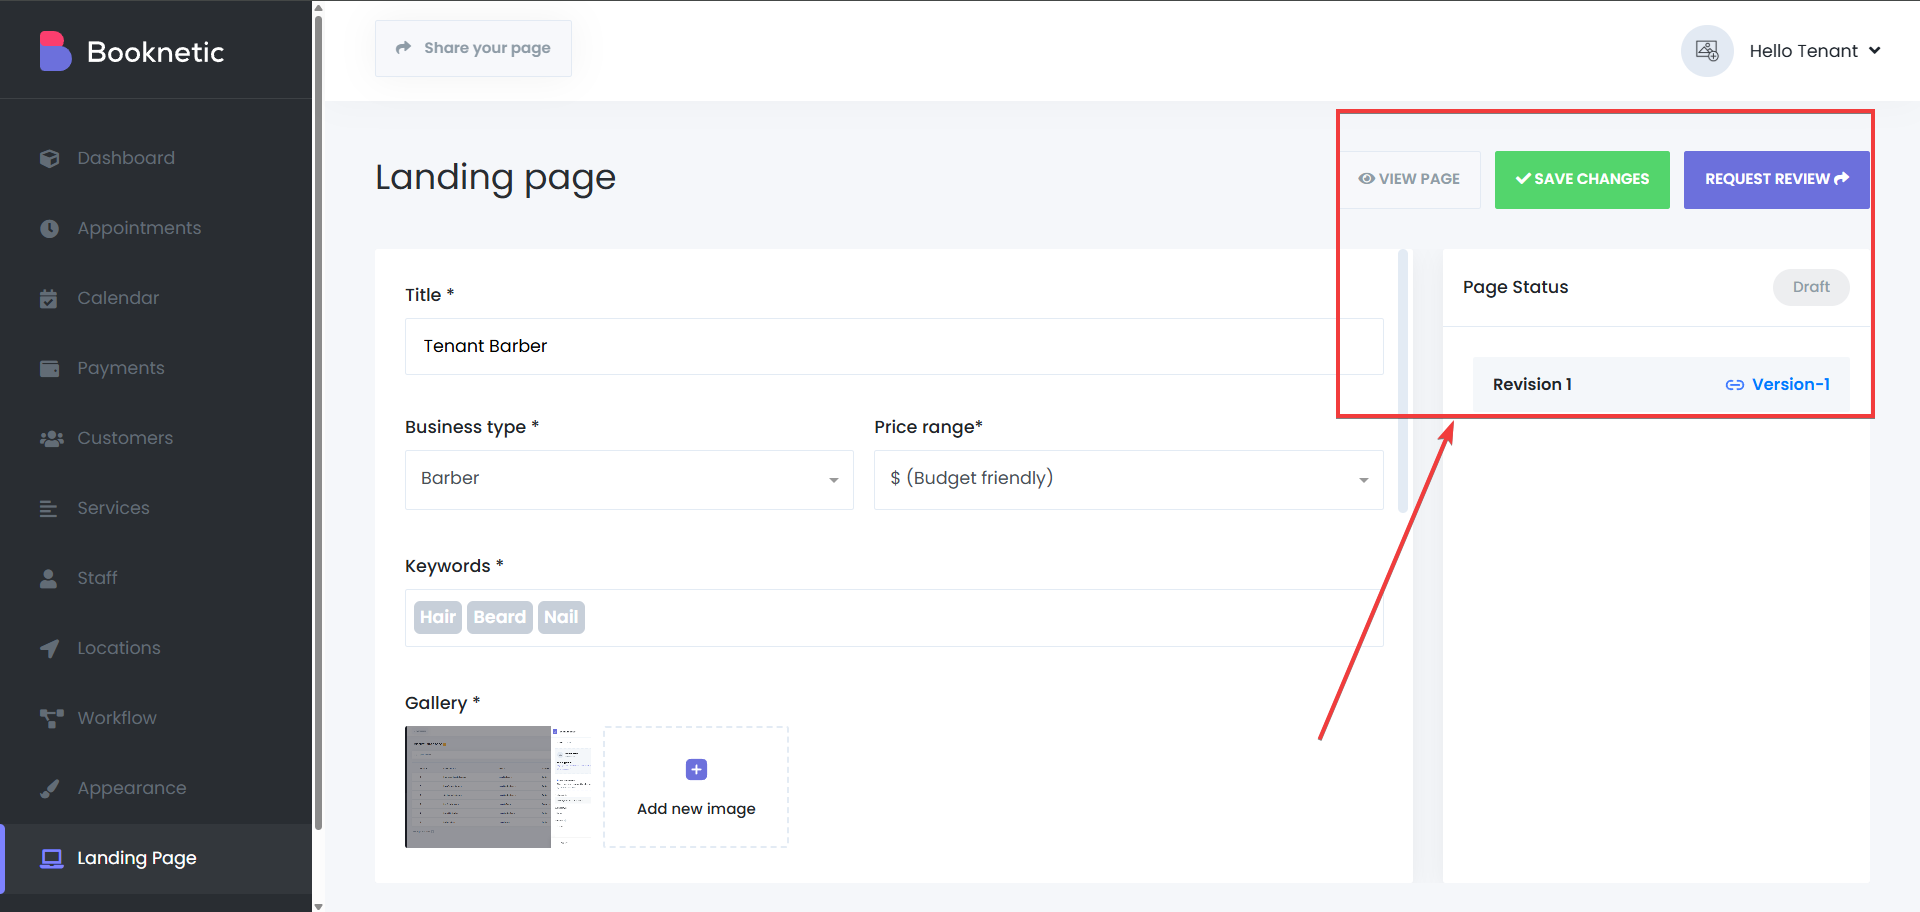
After submitting, the tenants will see the same page in a different style in the right side, that will provide them with more information about their Landing Page. In this case, if the “Request Review” button is selected, this landing page will be sent to the SaaS owner for review.
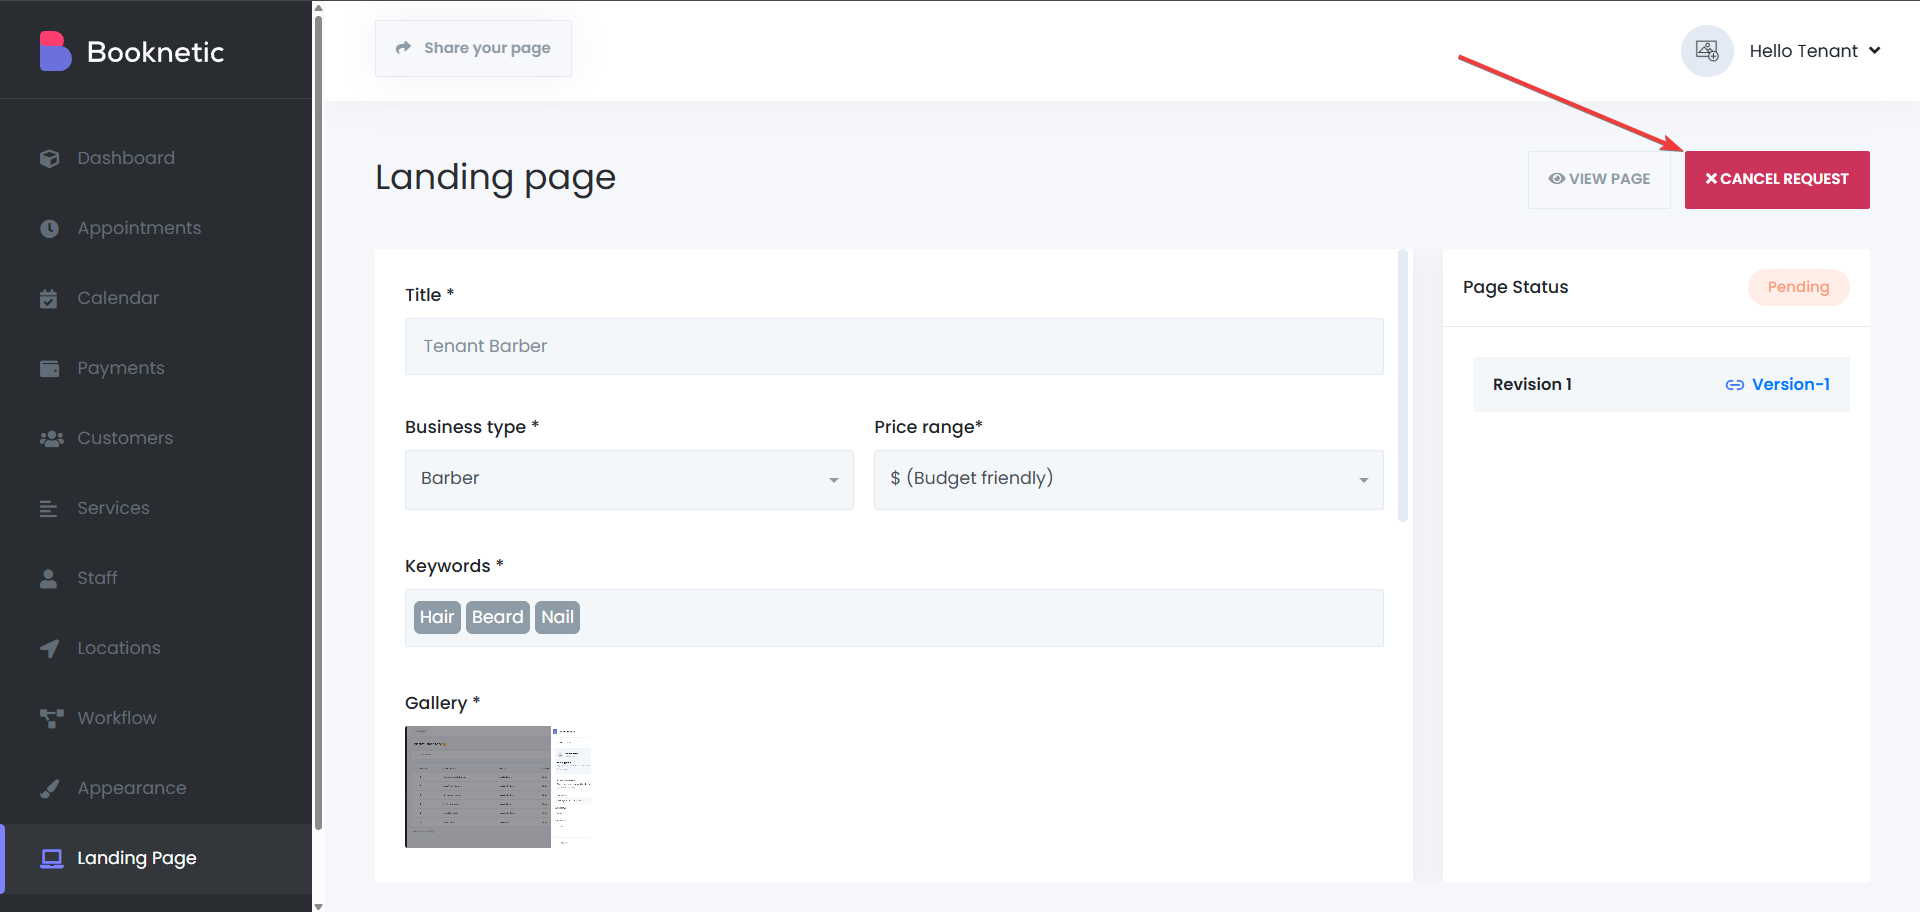
If tenants change their mind they can also cancel their Landing Page request by clicking the button on the top-right side:
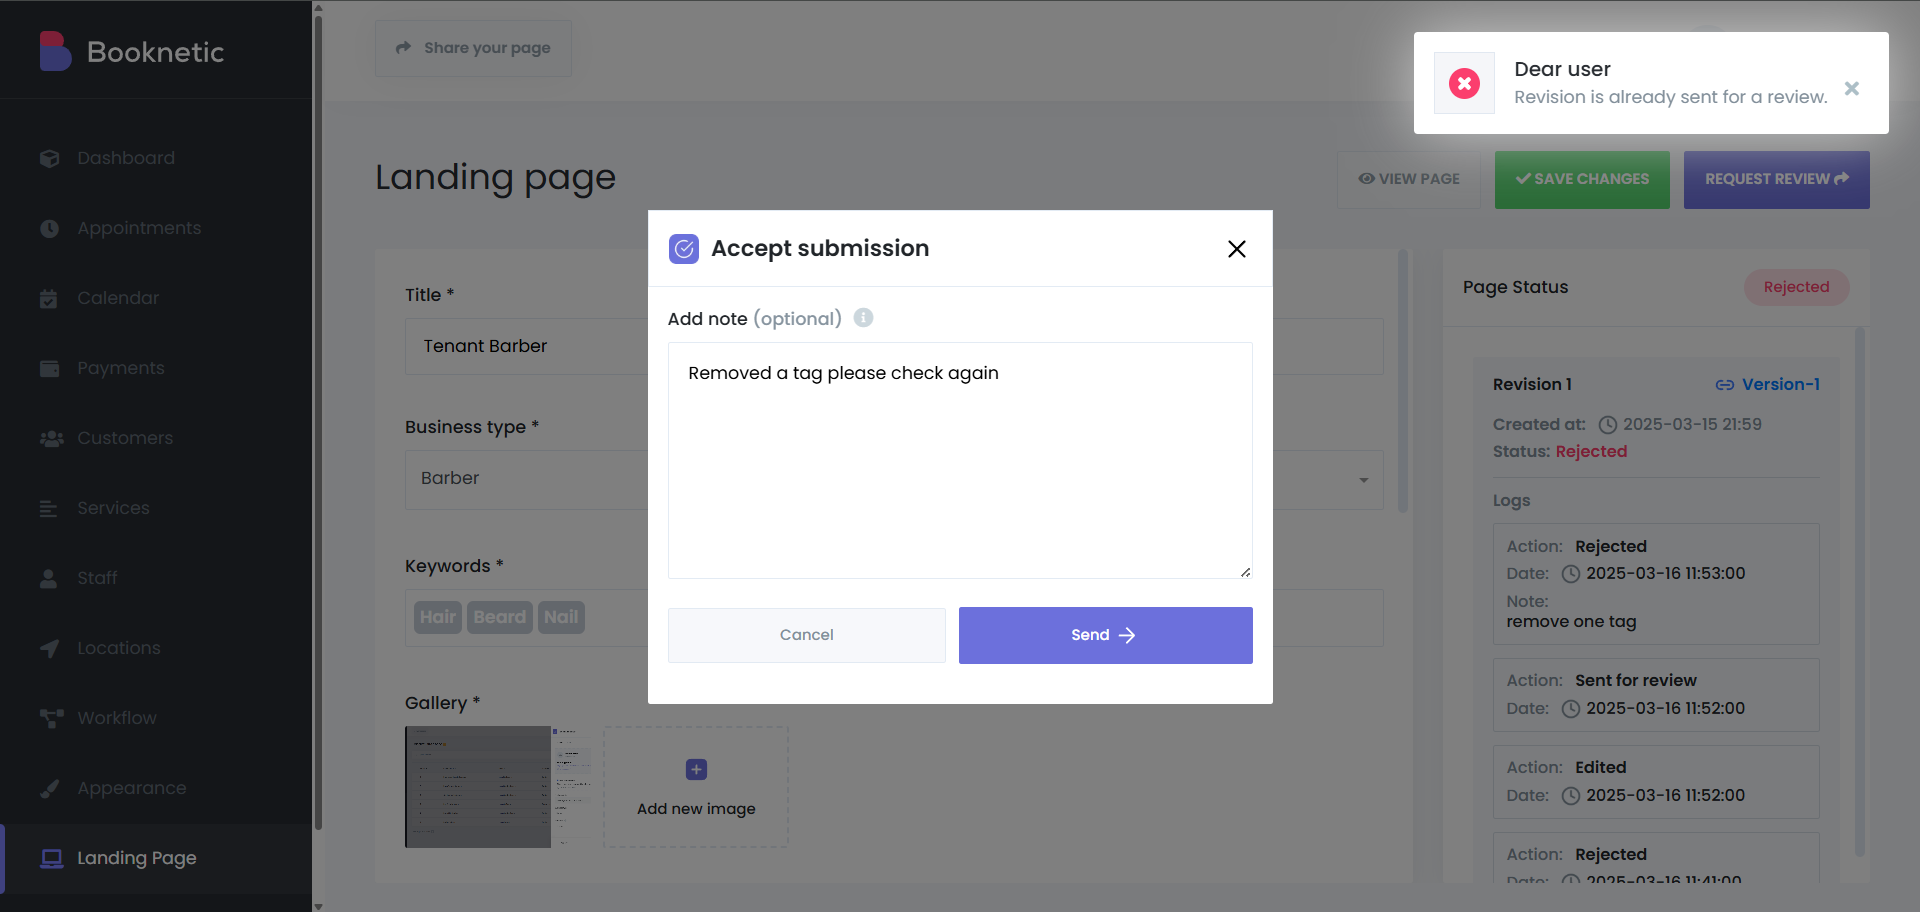
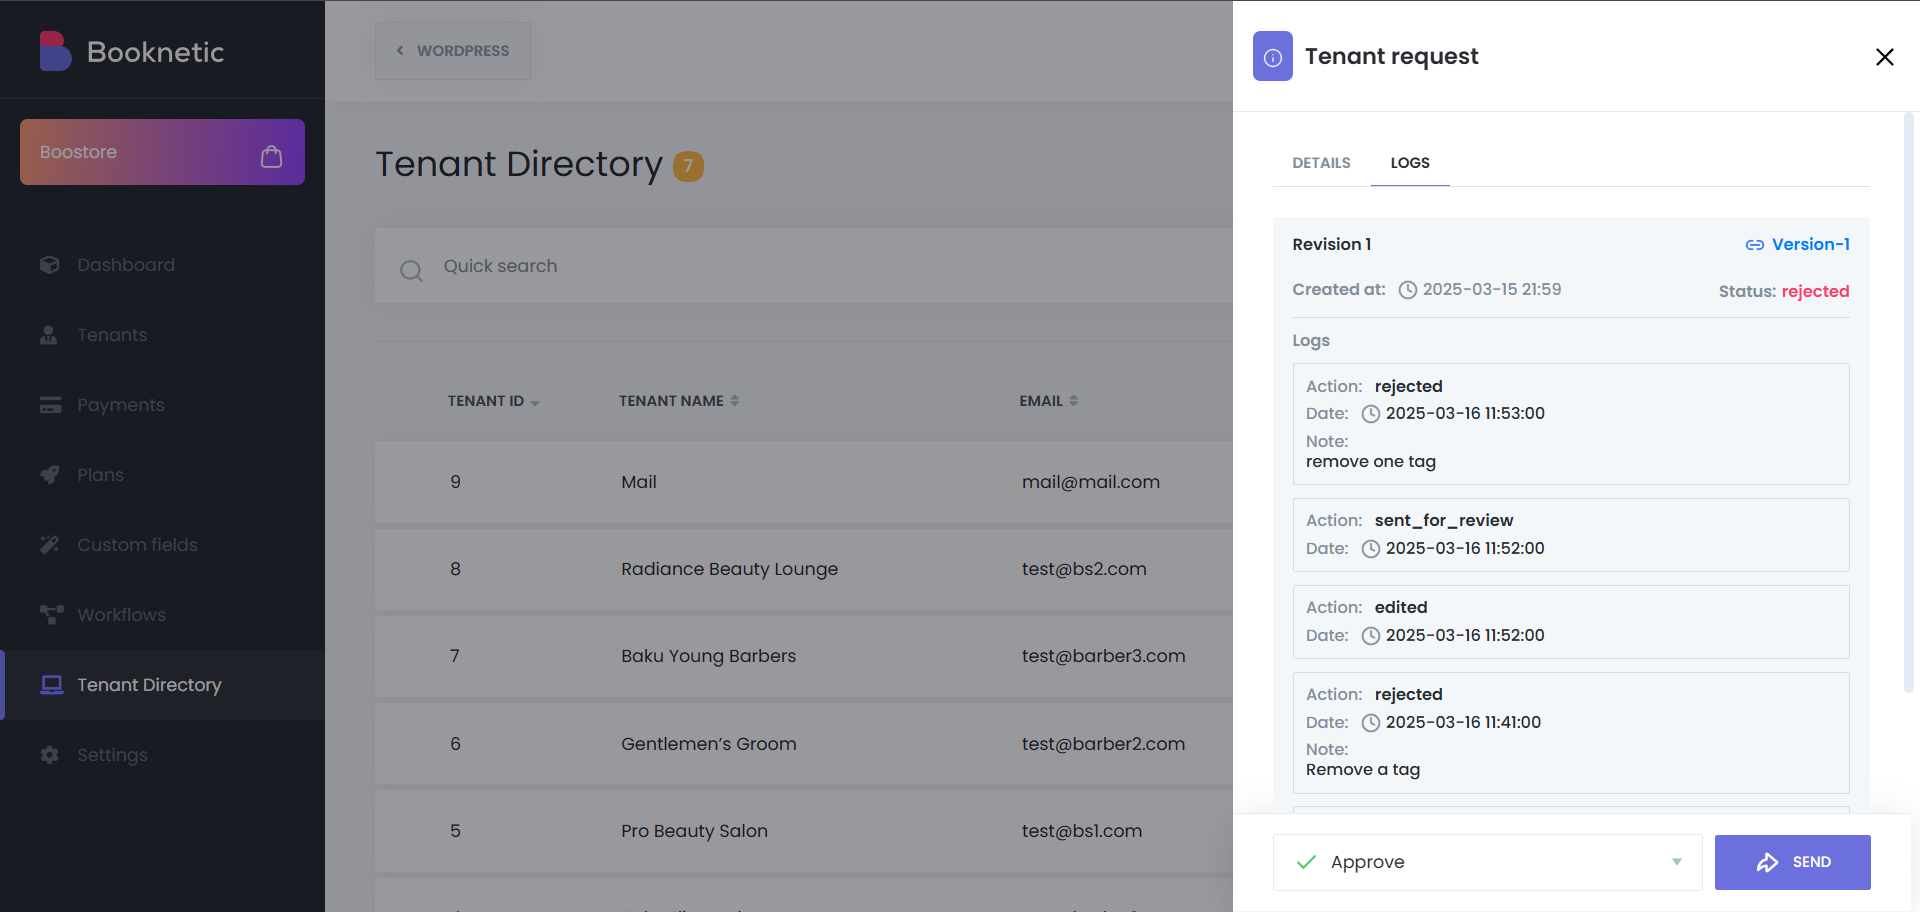
After getting rejected by the SaaS admin, tenants can make some changes in their Landing Page, then send the page for a review again. However, if tenants don’t change anything and just ask for a review again, they will get an error informing them that the same page can’t be sent for a review after declining.
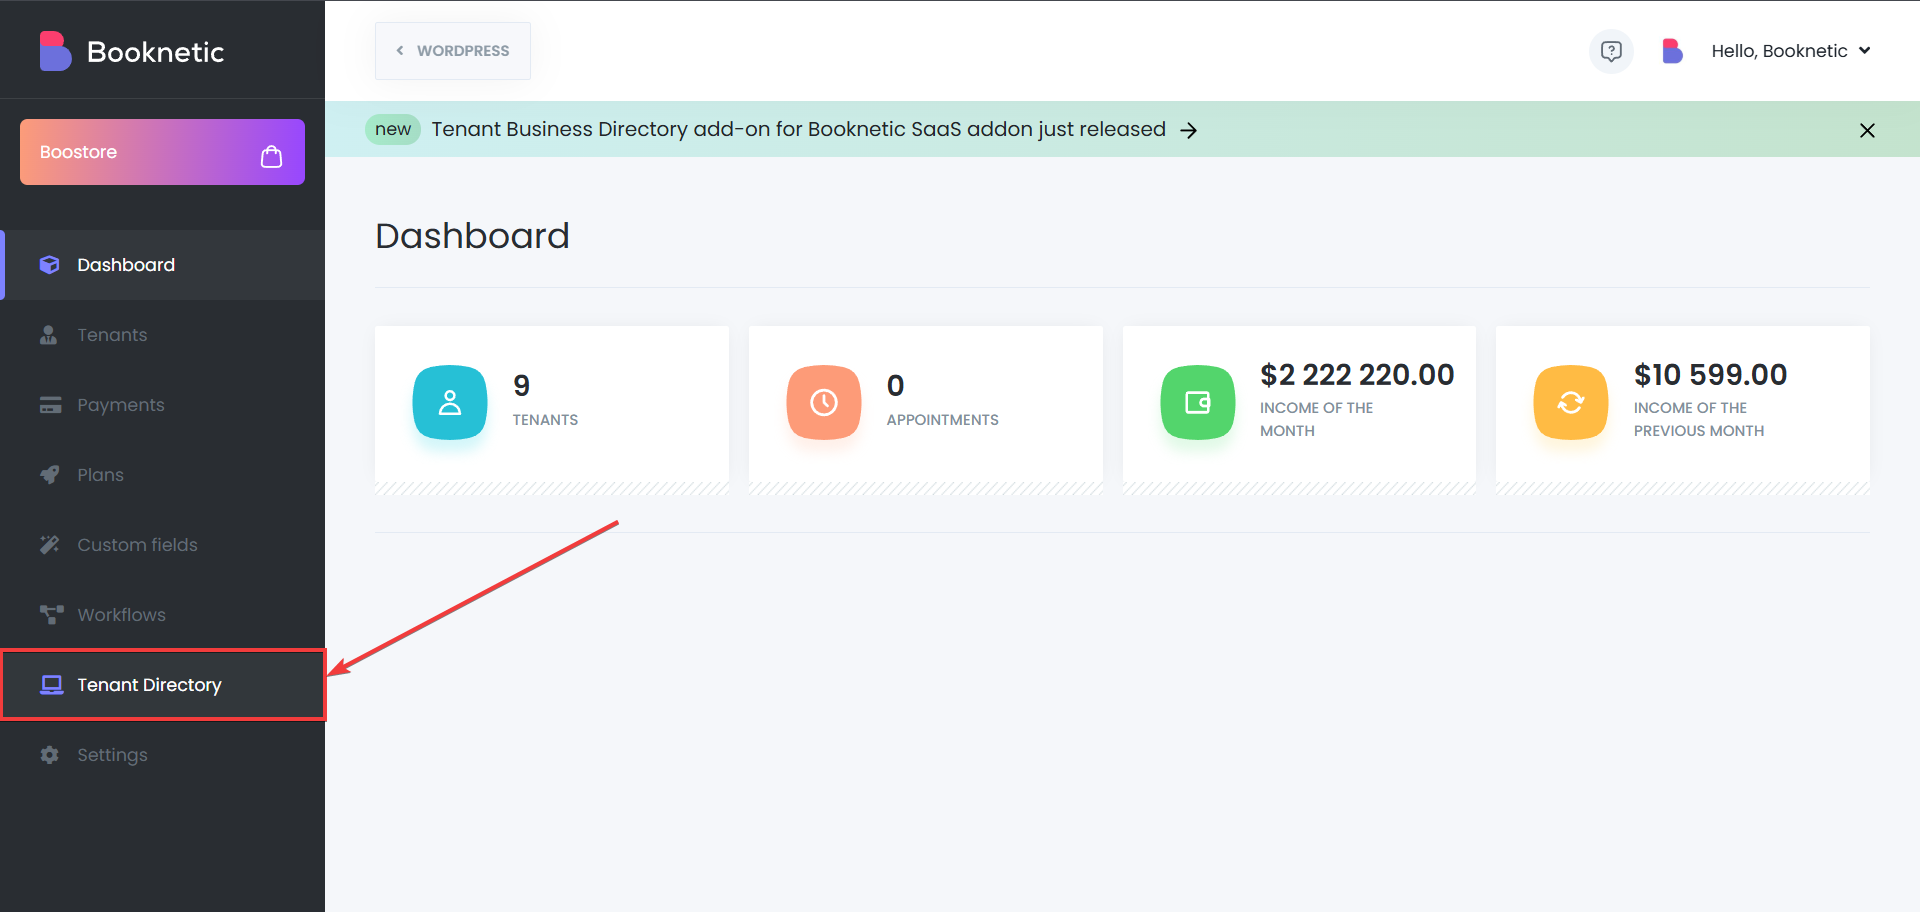
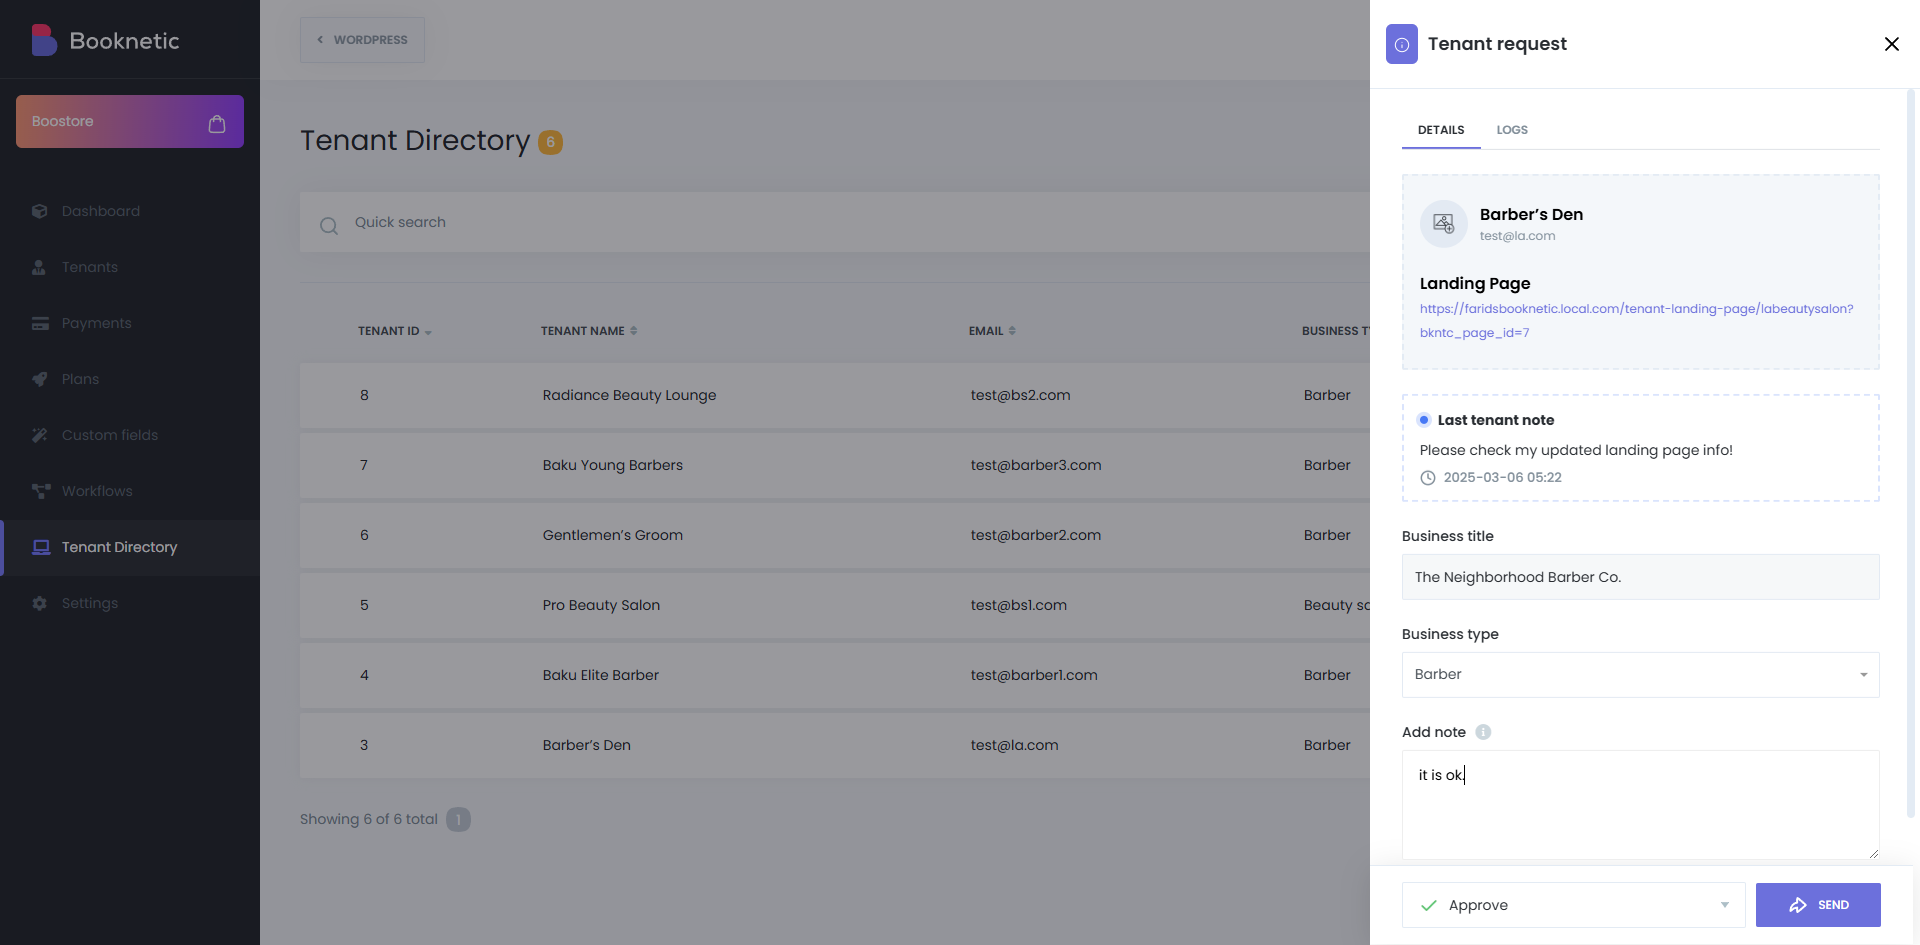
SaaS admin should log in to their dashboard and navigate to the Tenant Directory section.
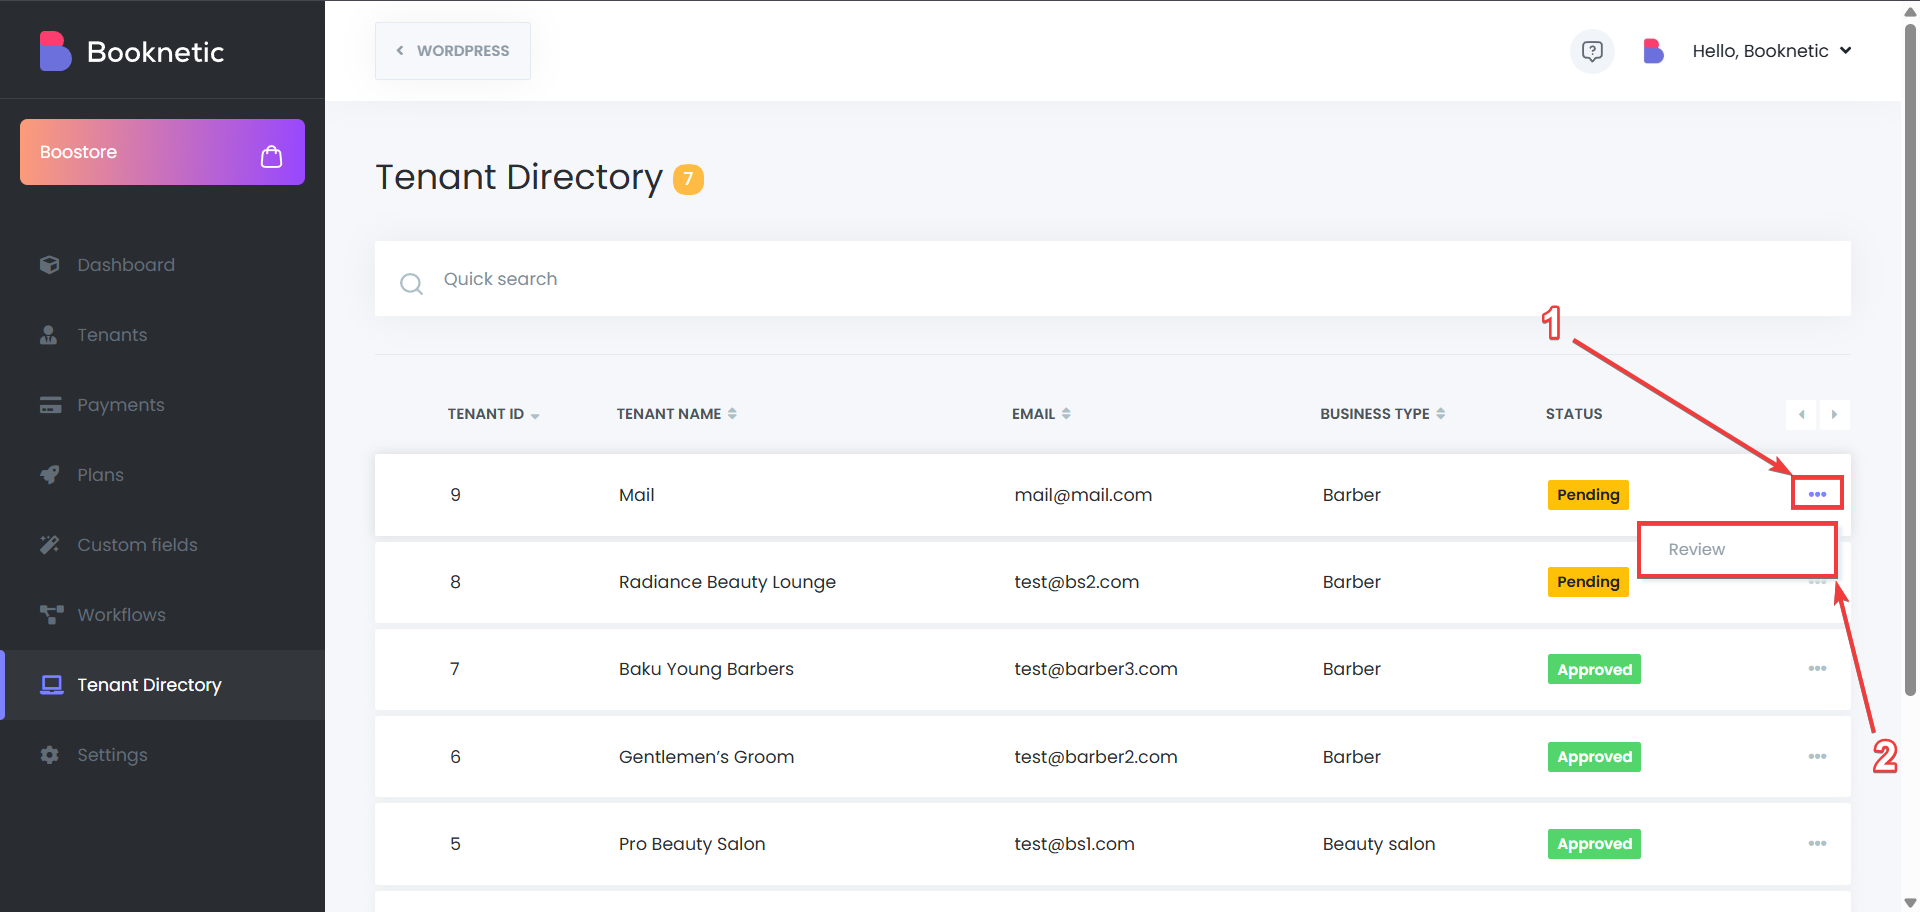
After that, SaaS admin should click on 3 dots next to a tenant’s name, then click on the “Review” button:
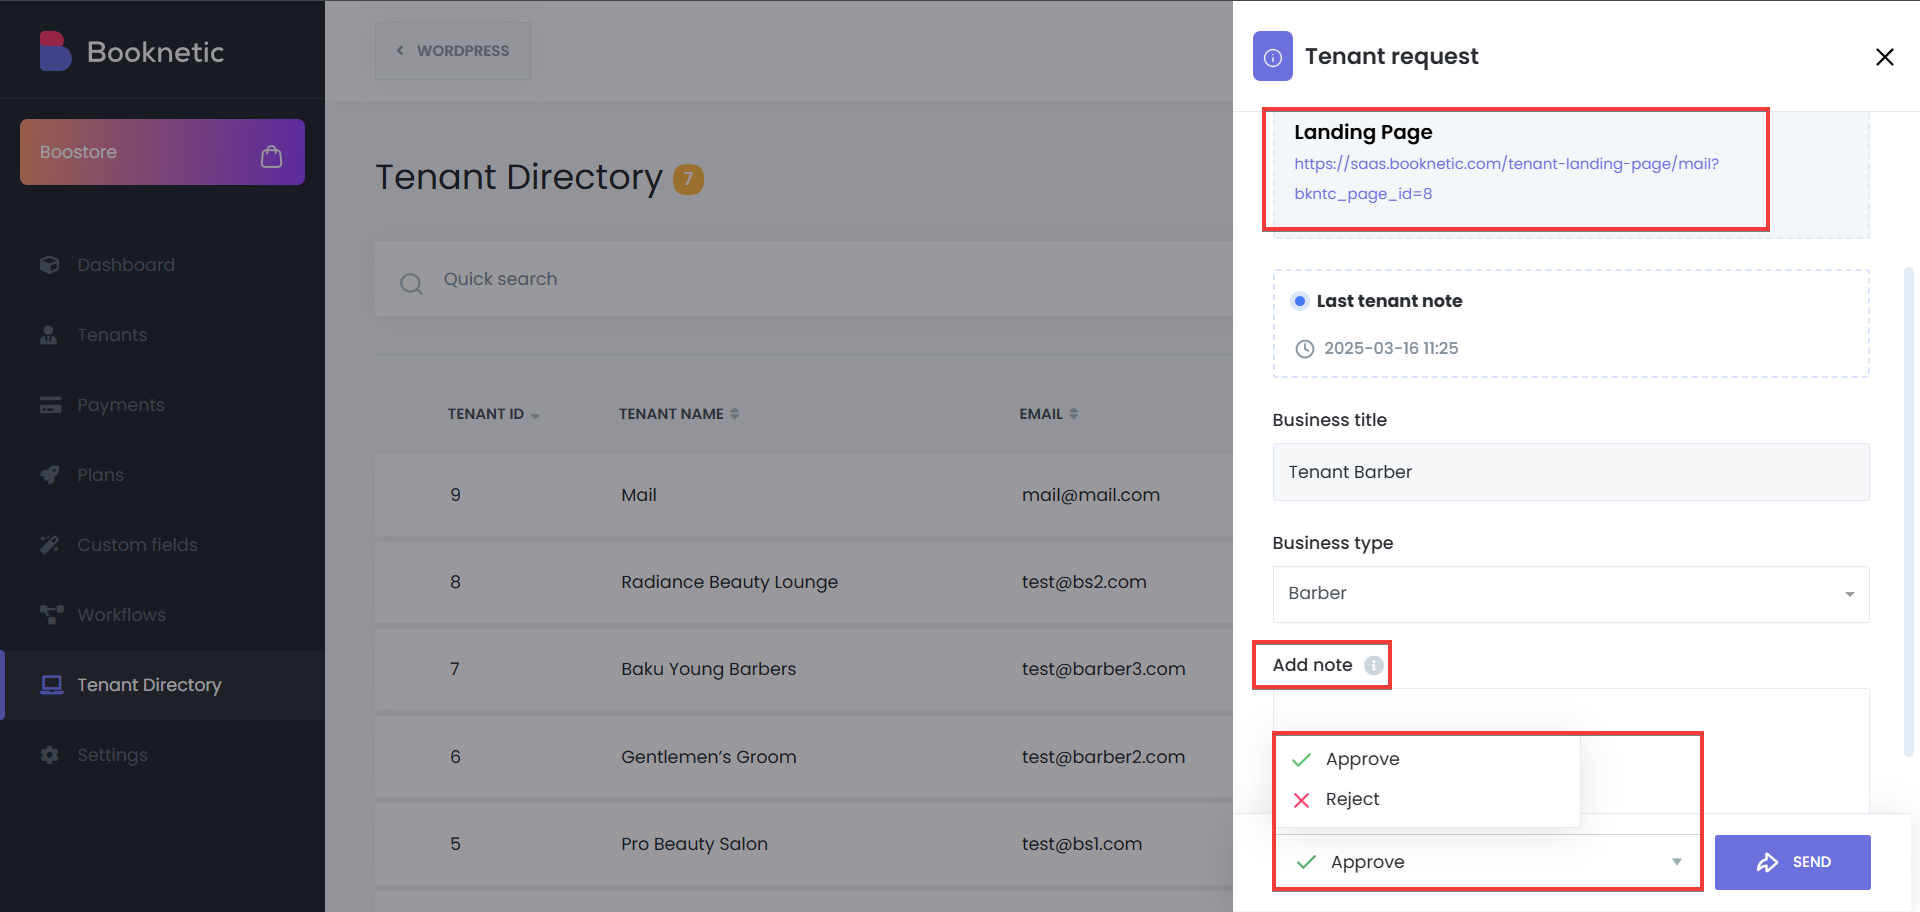
In this page, SaaS admin can view the tenant landing page by clicking on the link at the top of the opened panel, and after they check the page, they can approve or reject the request, and also add their own notes if needed:
The Tenant Landing Page allows tenants to provide detailed business information that will be displayed publicly. The form is designed for easy completion and submission to administrators for review and approval.
Business Type:
A view-only field displaying the type of business the tenant operates, providing essential categorization information within the directory.

Price Range:
A view-only field displaying the price range of the tenant’s services, helping users understand the cost tier of the services offered.
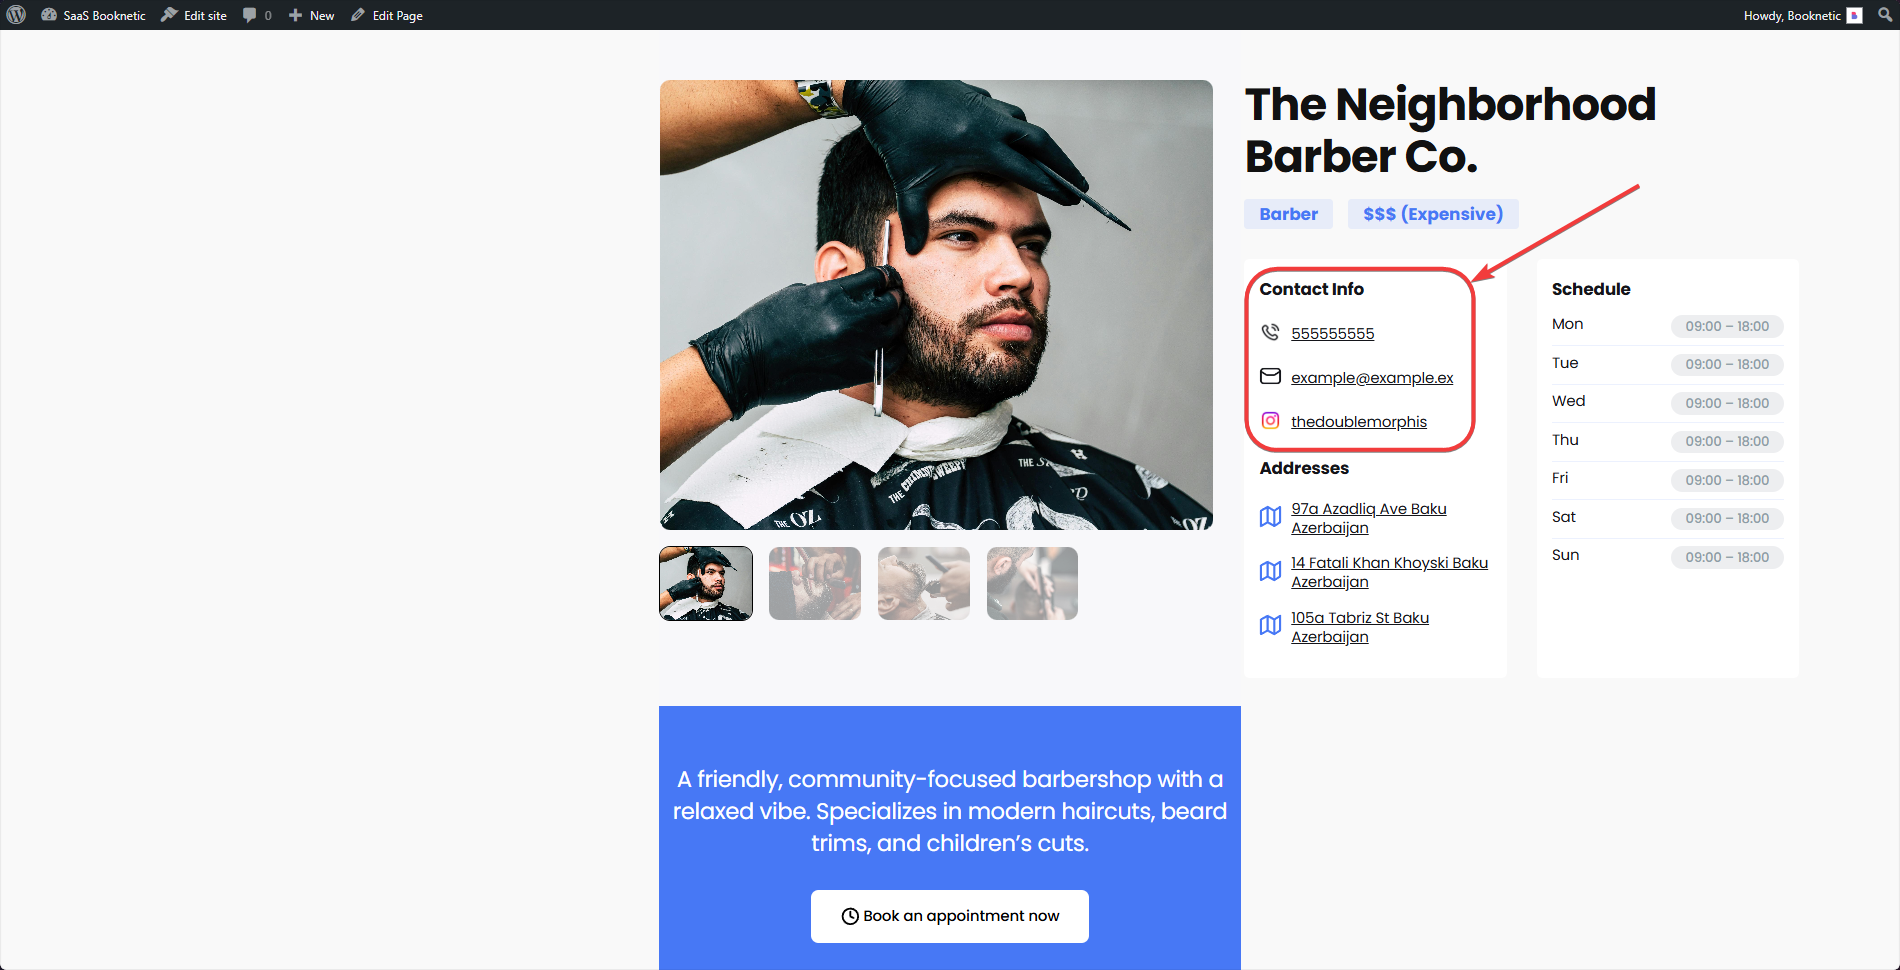
Contact Info:
A view-only section displaying the tenant's contact details, including phone number, email, and social media links, allowing users to easily reach out for inquiries.
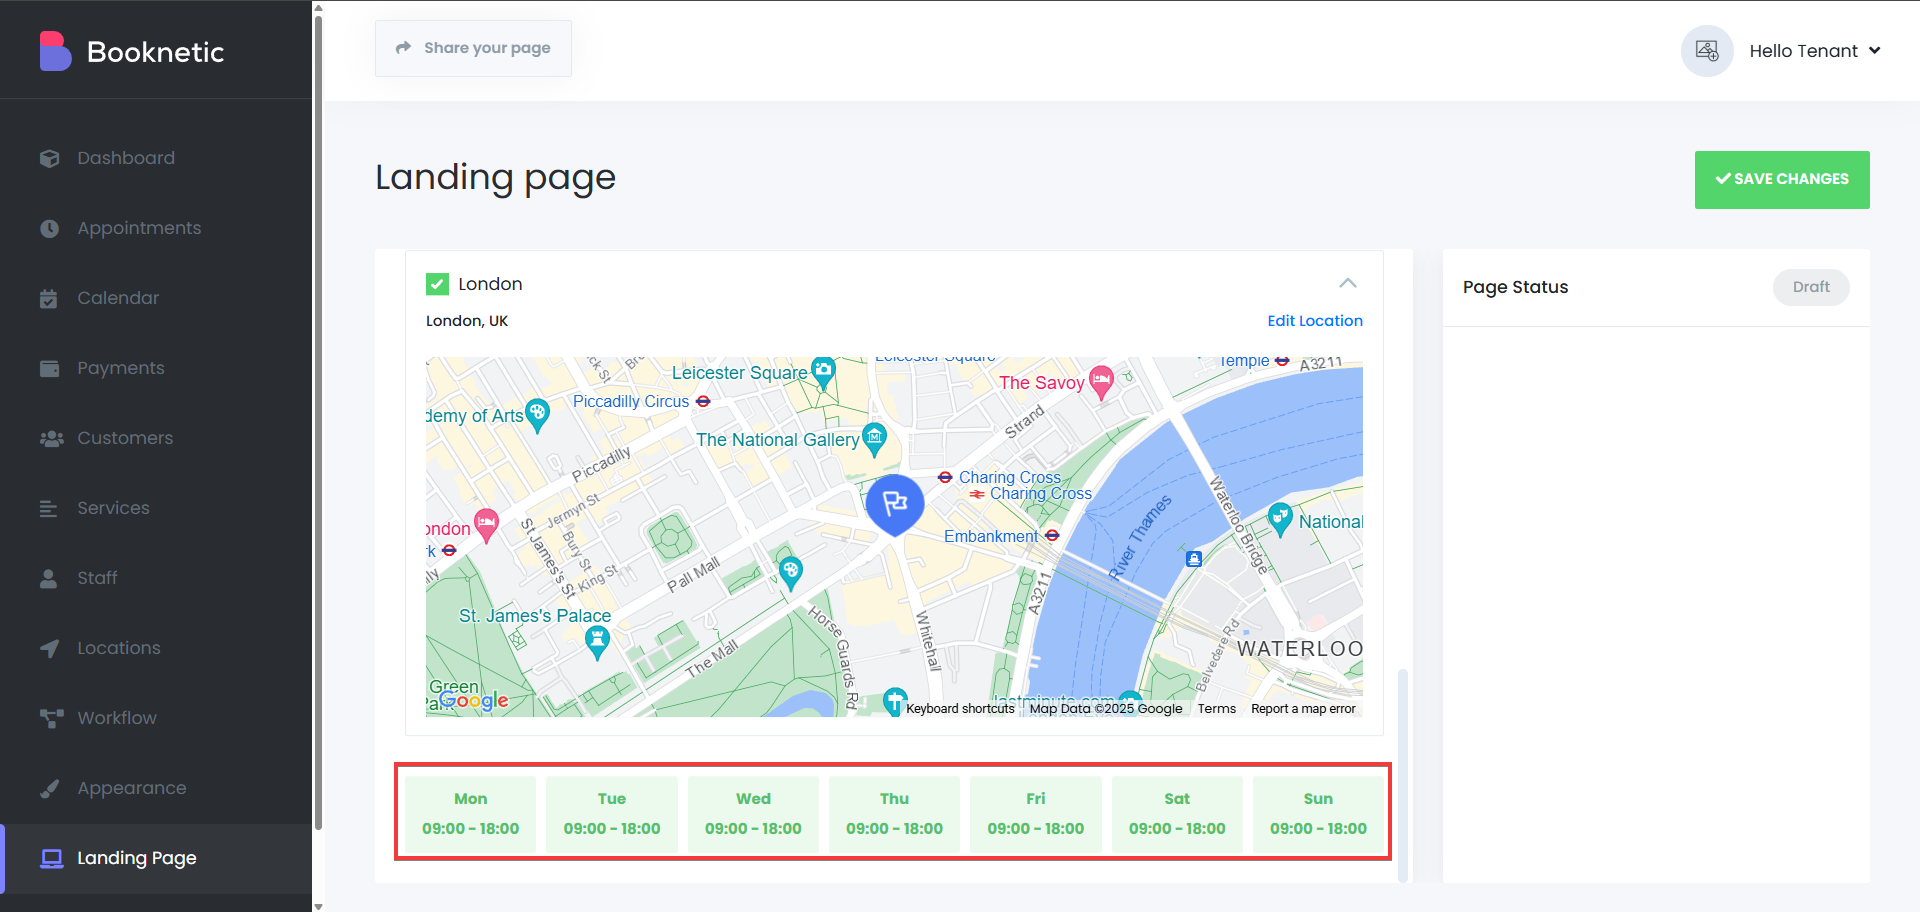
Locations:
A view-only section displaying the tenant's business locations, including the full address and a location point on the map, helping users find and visit the tenant's physical sites.
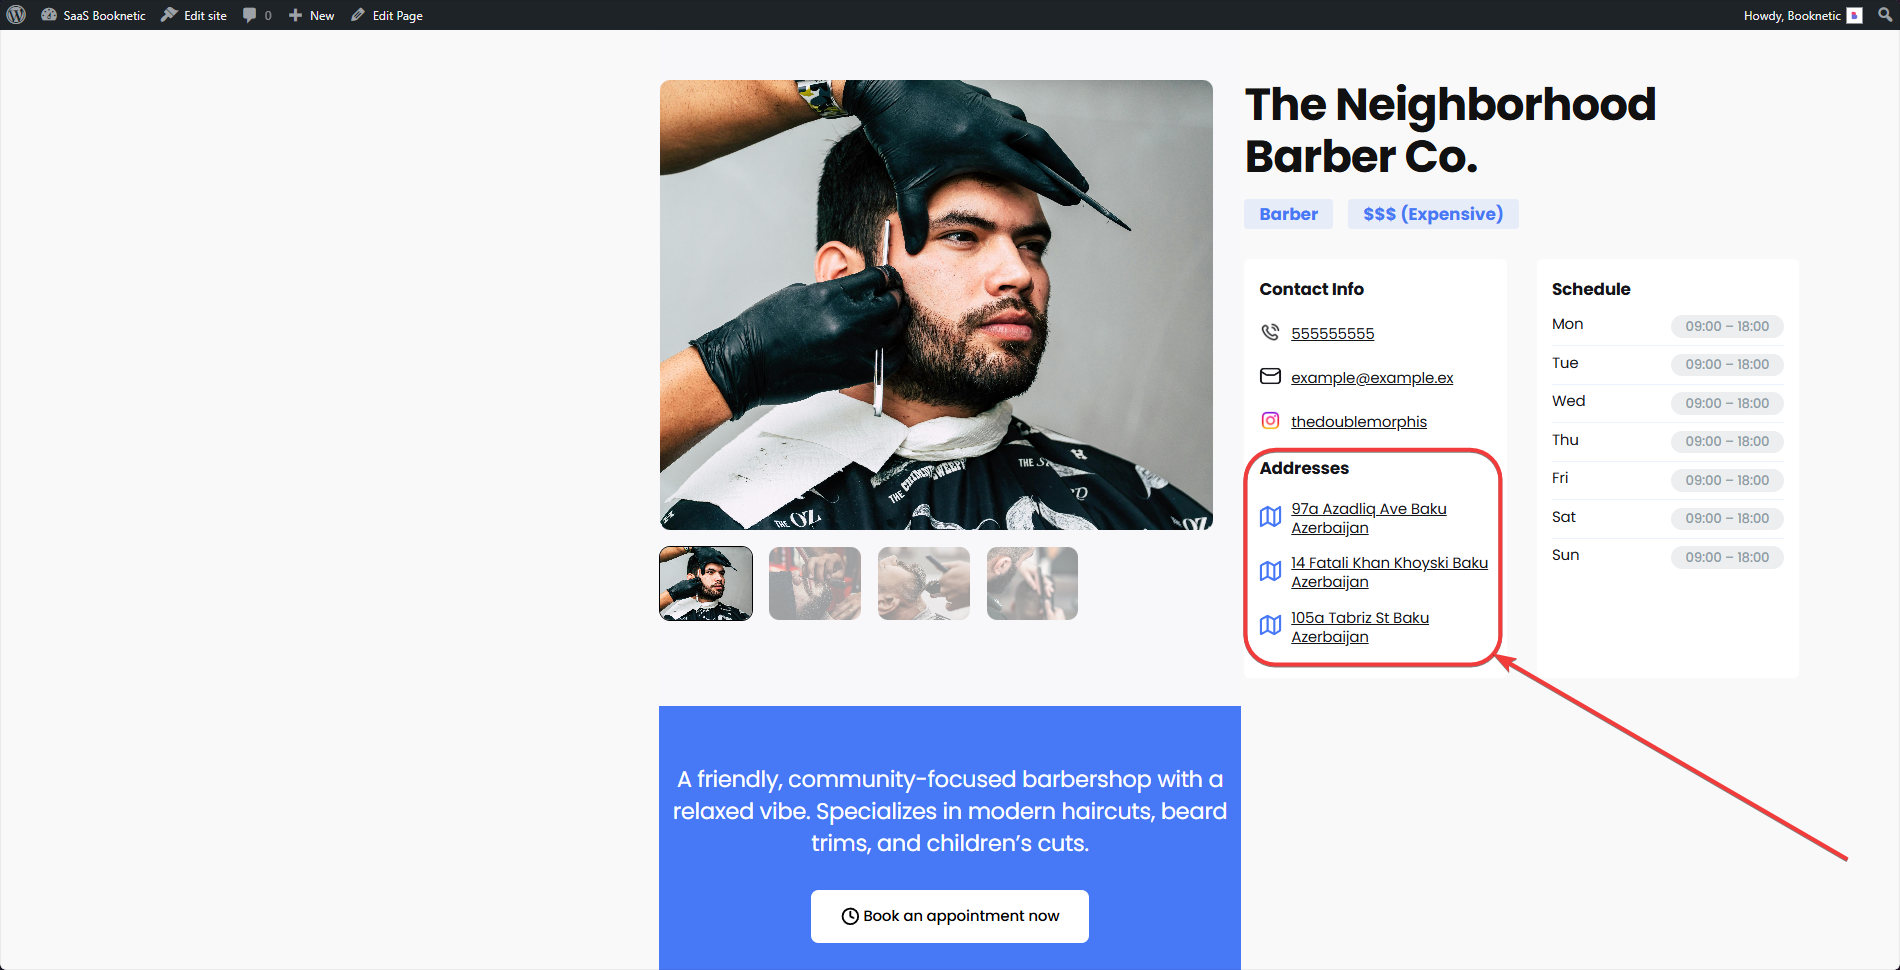
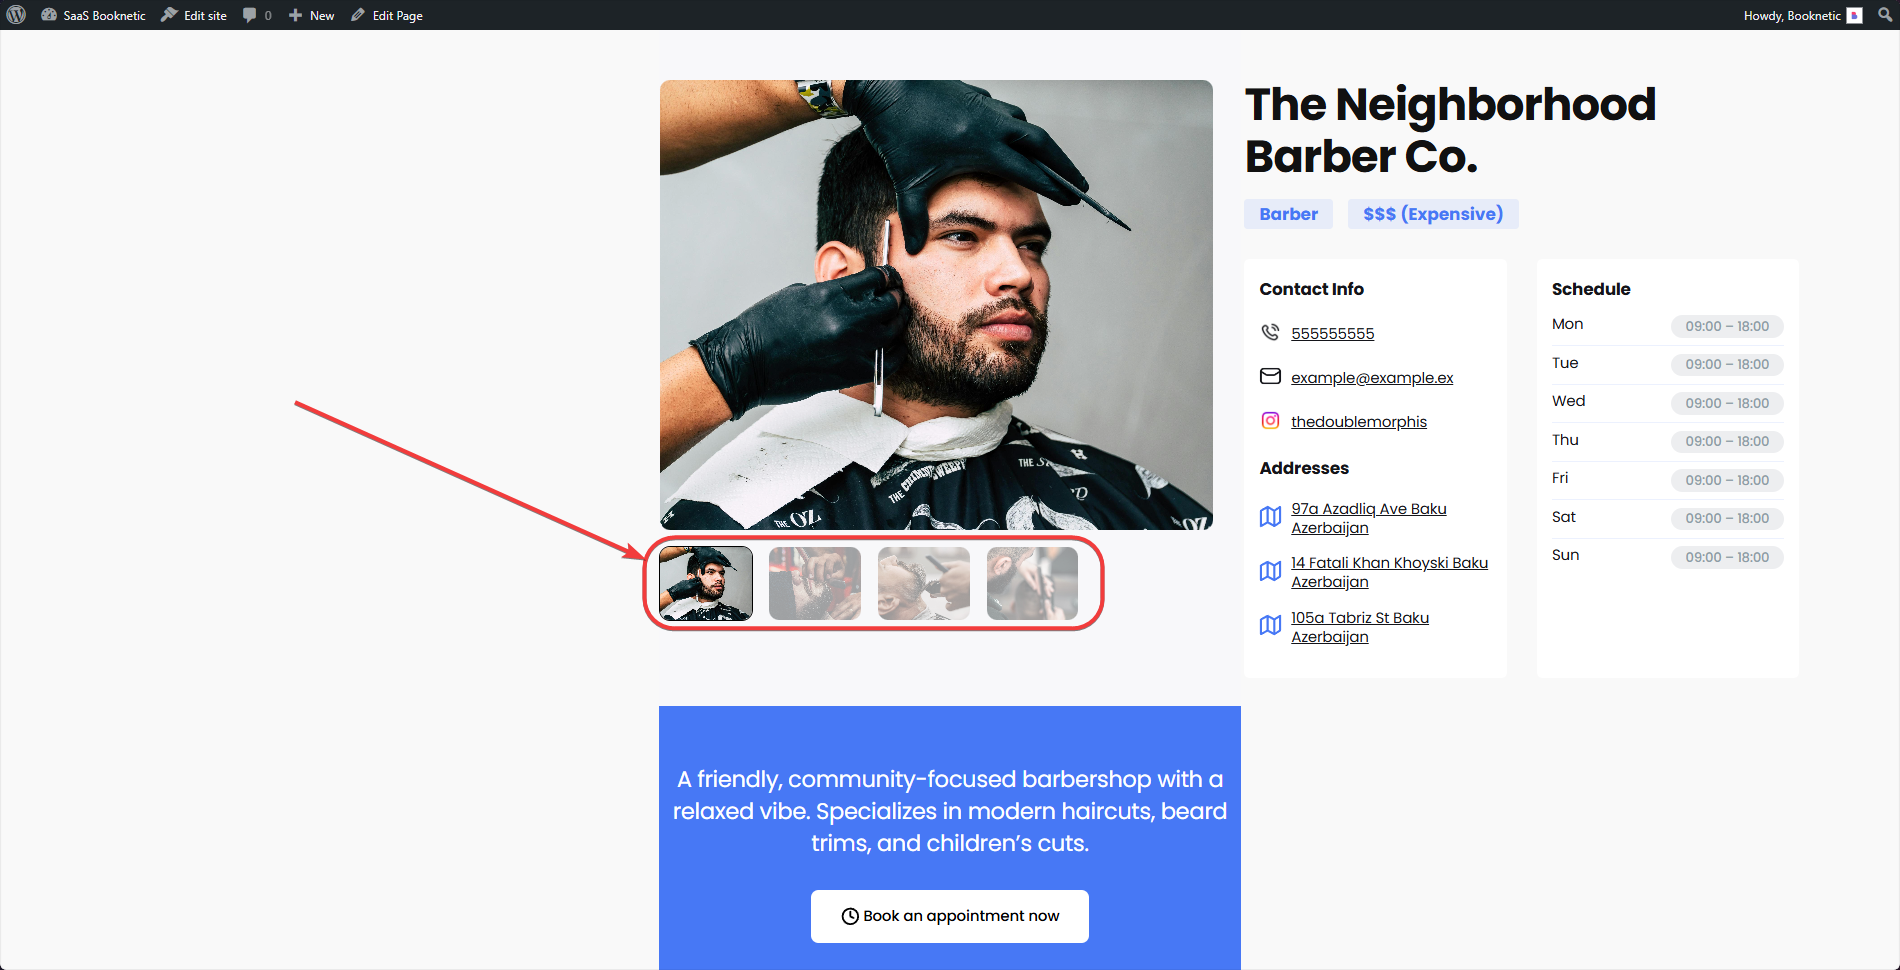
Image Gallery:
A view-only section displaying the tenant's uploaded images, providing a visual showcase of their services or business to help attract potential customers.
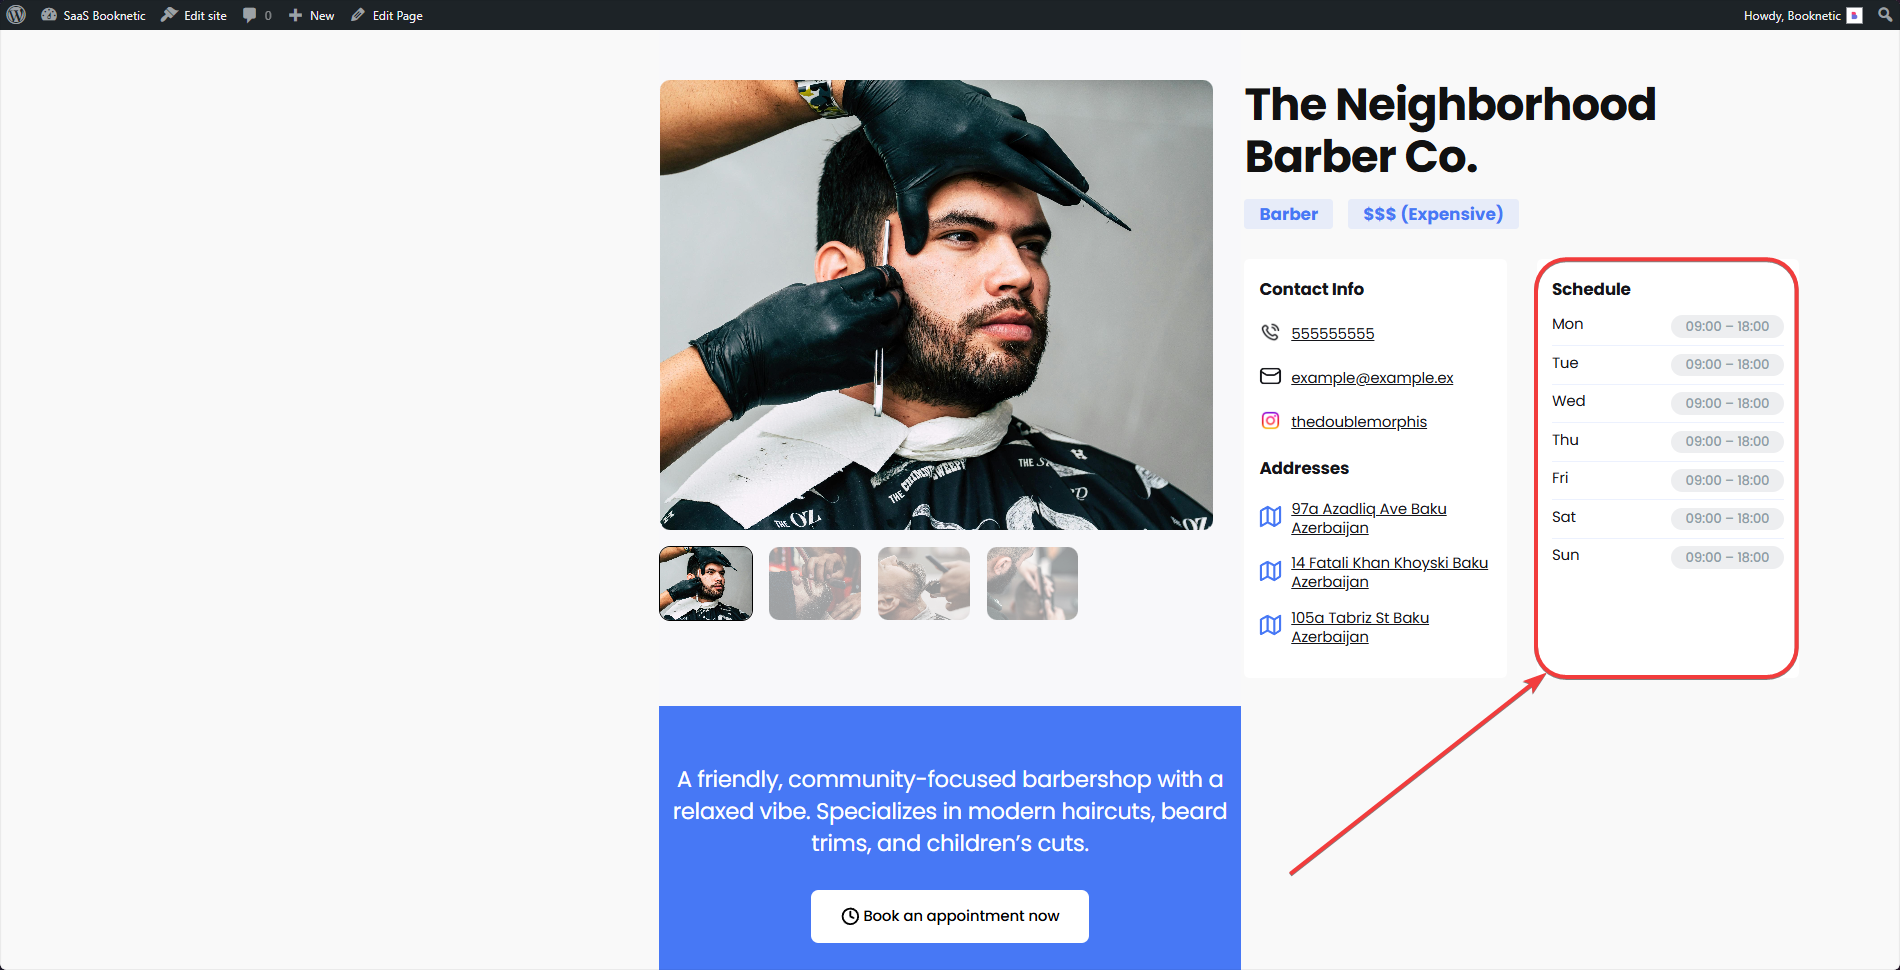
Schedule:
Working hours of the business, displayed on the tenant’s landing page, based on the tenant’s business hour settings.
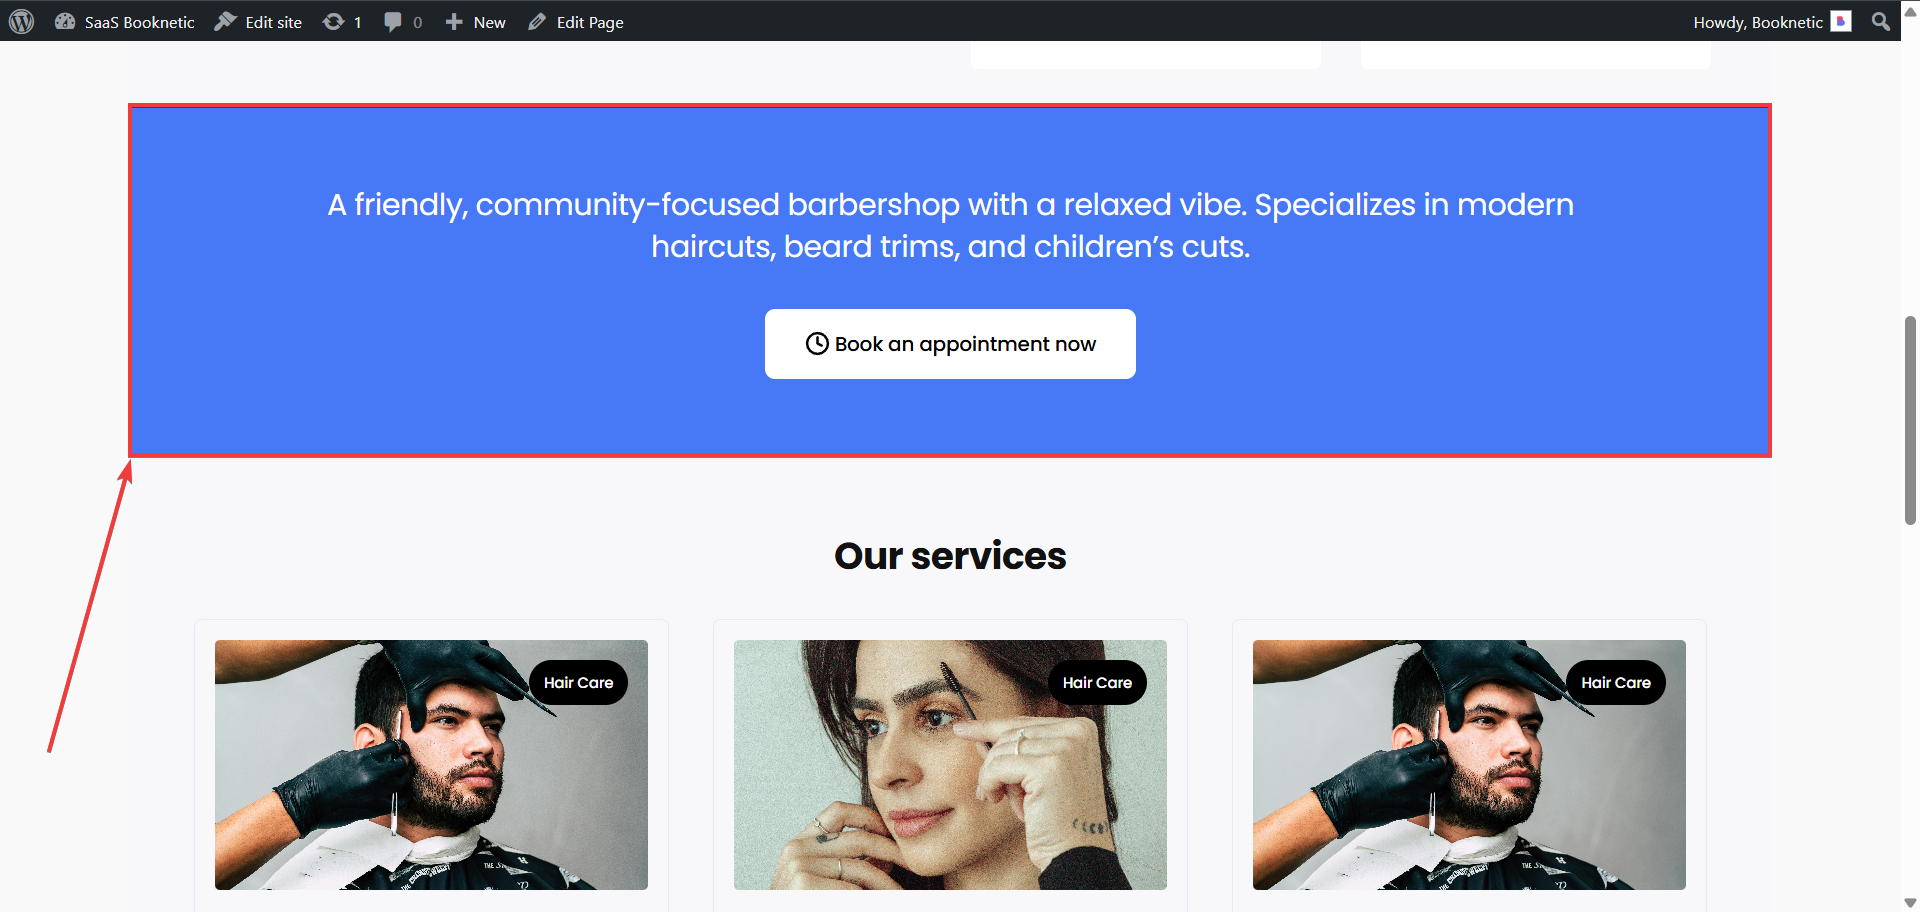
Description:
A text area for tenants to provide a detailed description of their business or services.
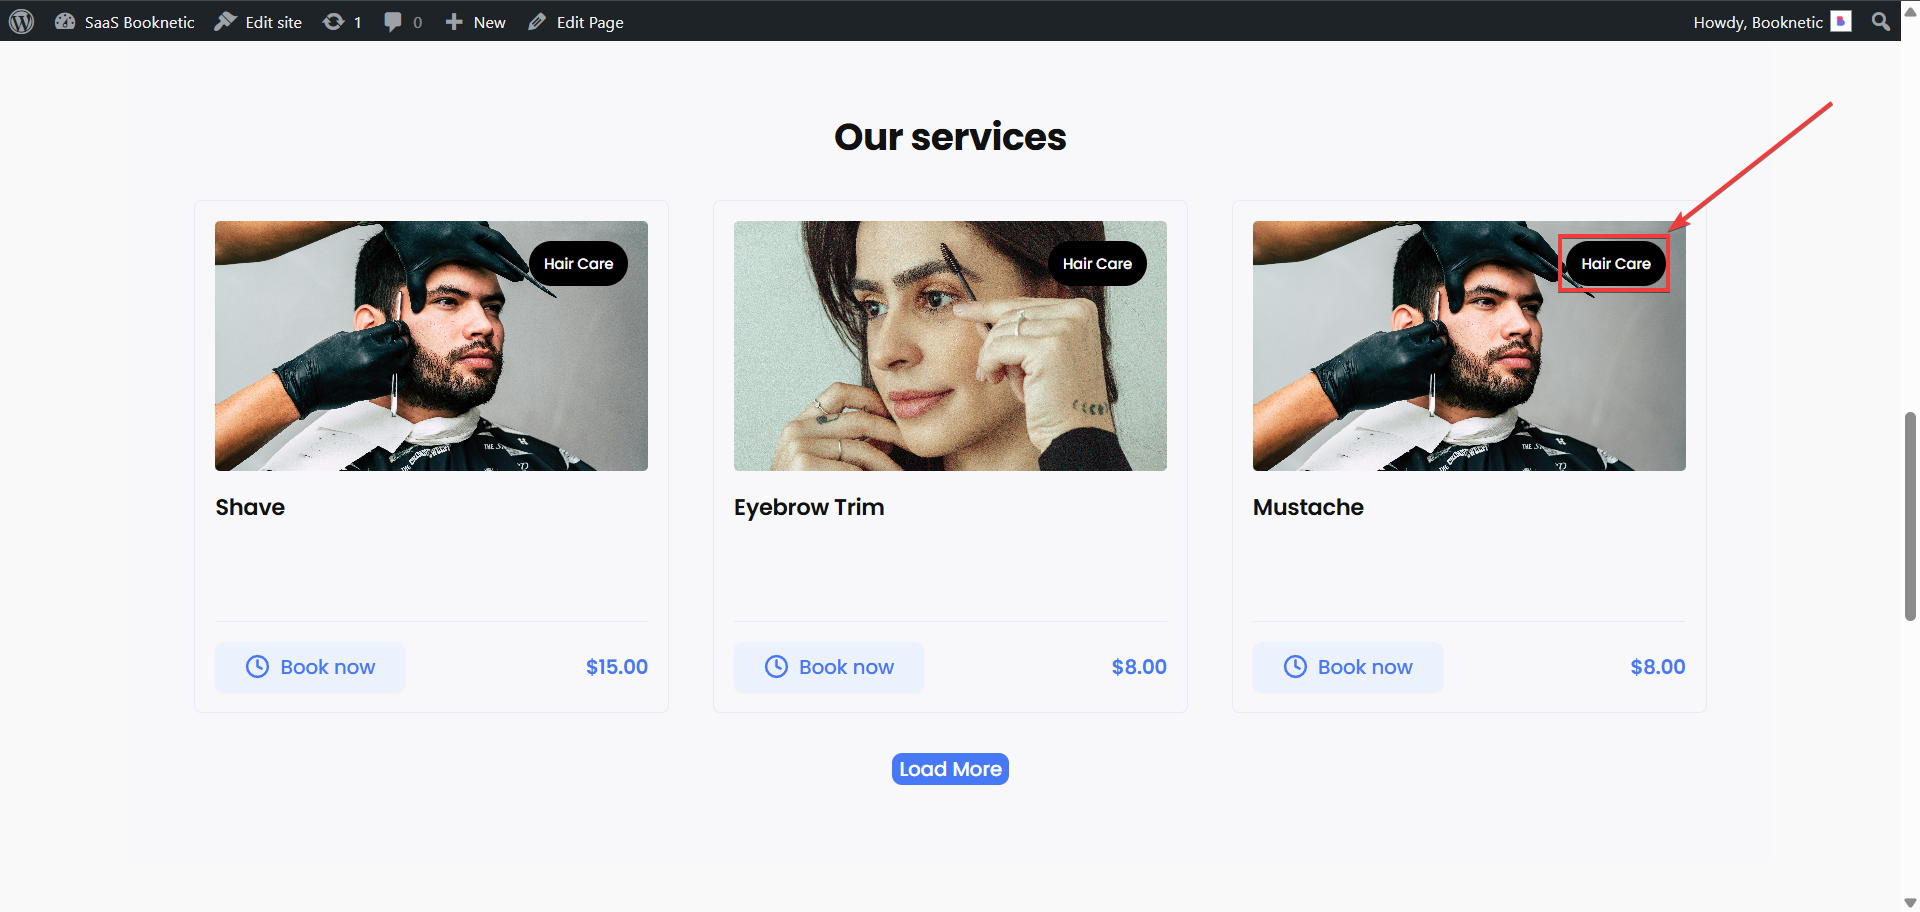
Services:
An area to display tenants services, and their categories (categories are displayed on the top-right side of the service box).
Administrators can monitor and manage tenant landing pages through a structured table and efficient workflows:
Columns displayed in the management table:
Search by Tenant Name: Activated after typing 3 or more characters.
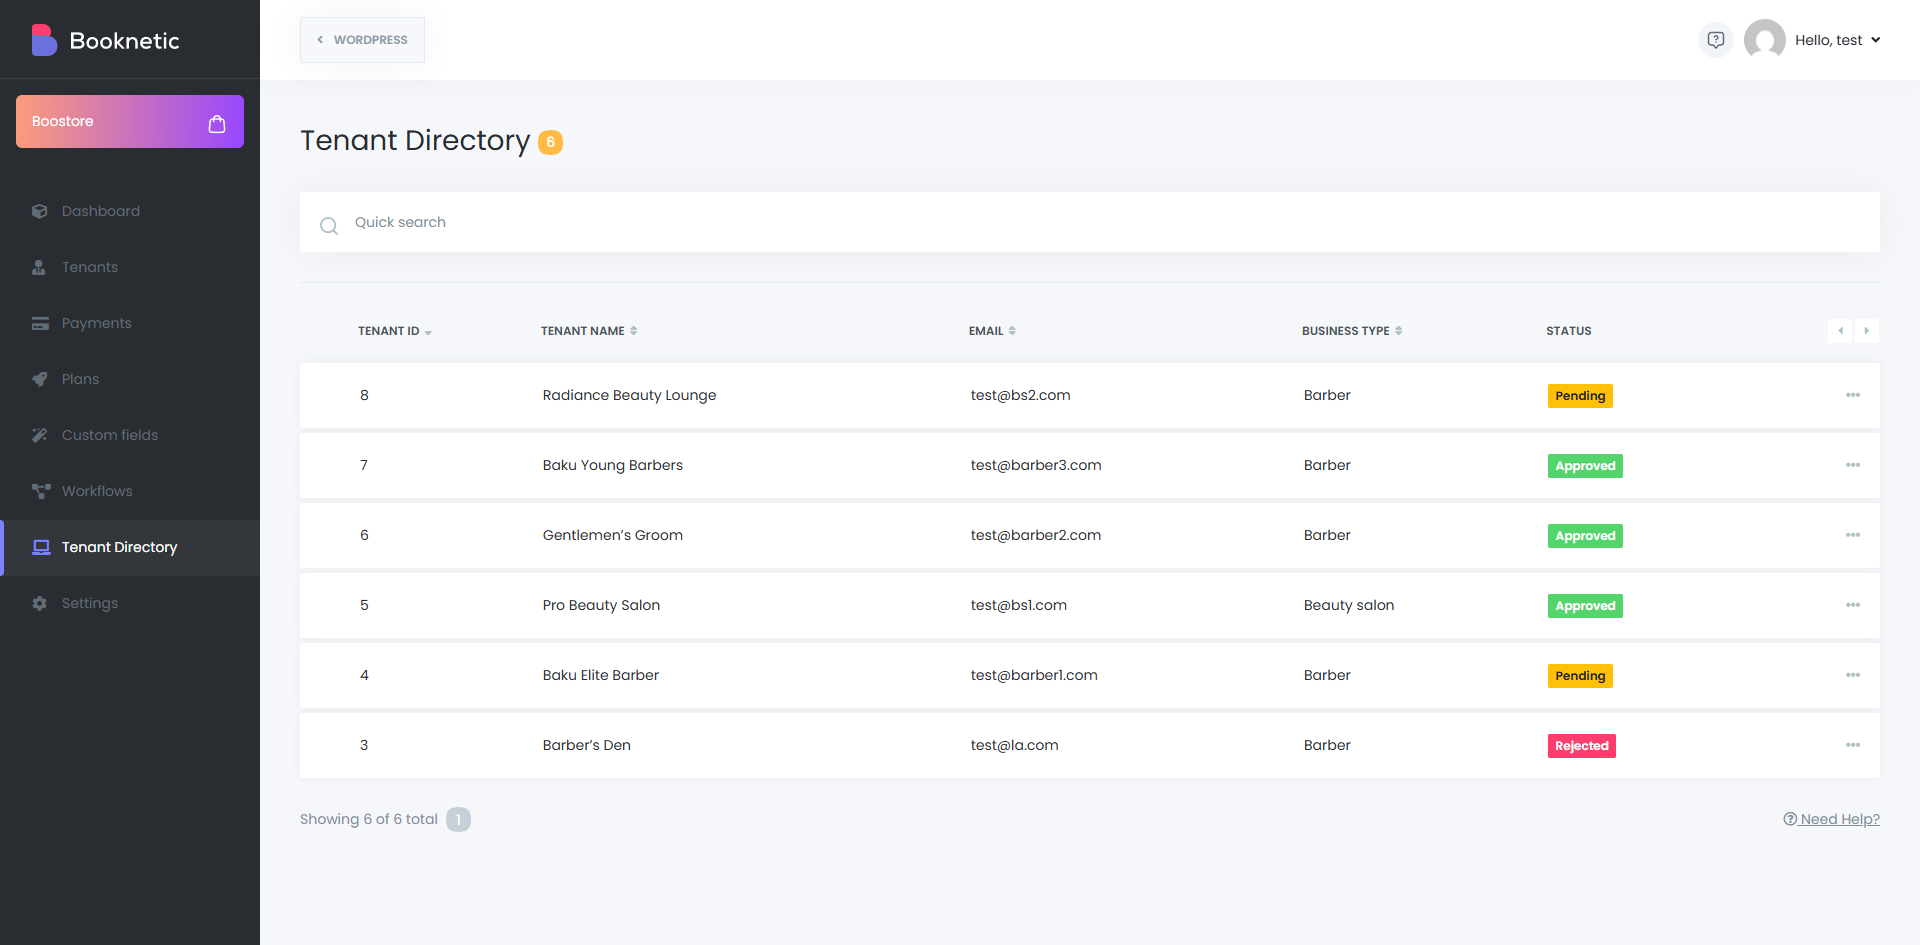
Displays tenant information, business type, and a preview link for the landing page.
Logs all actions performed on the tenant landing page, including:
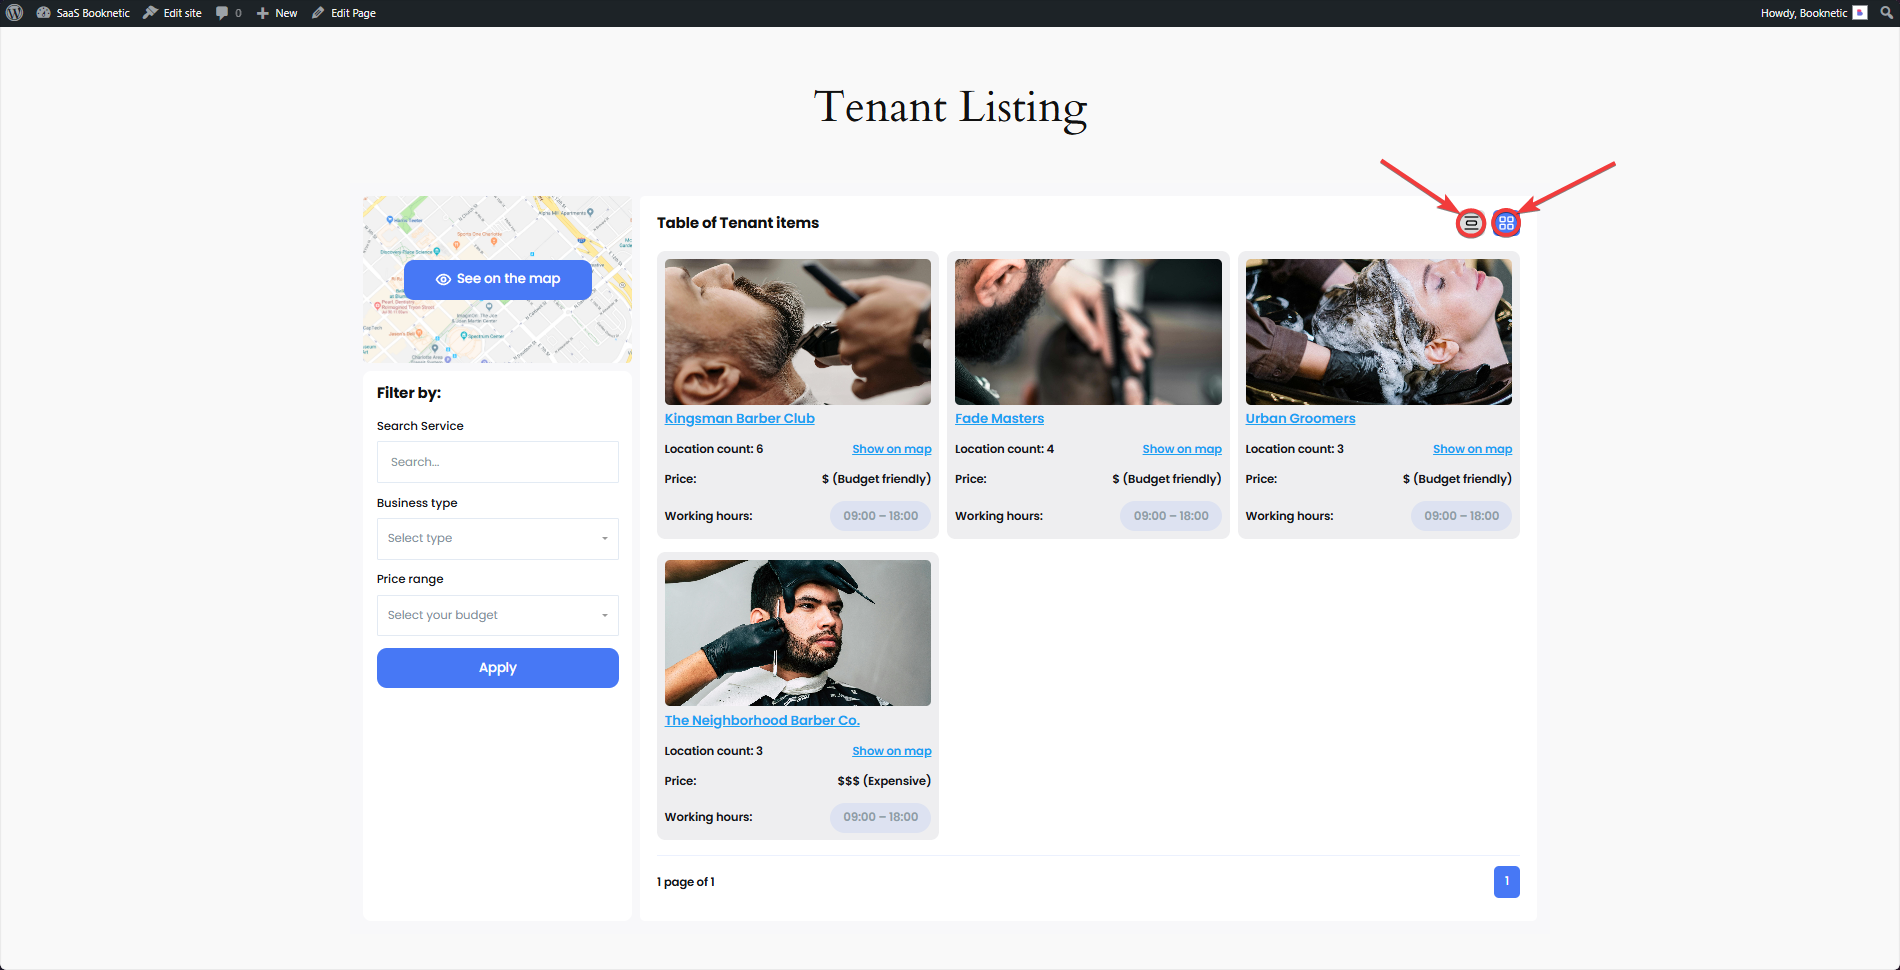
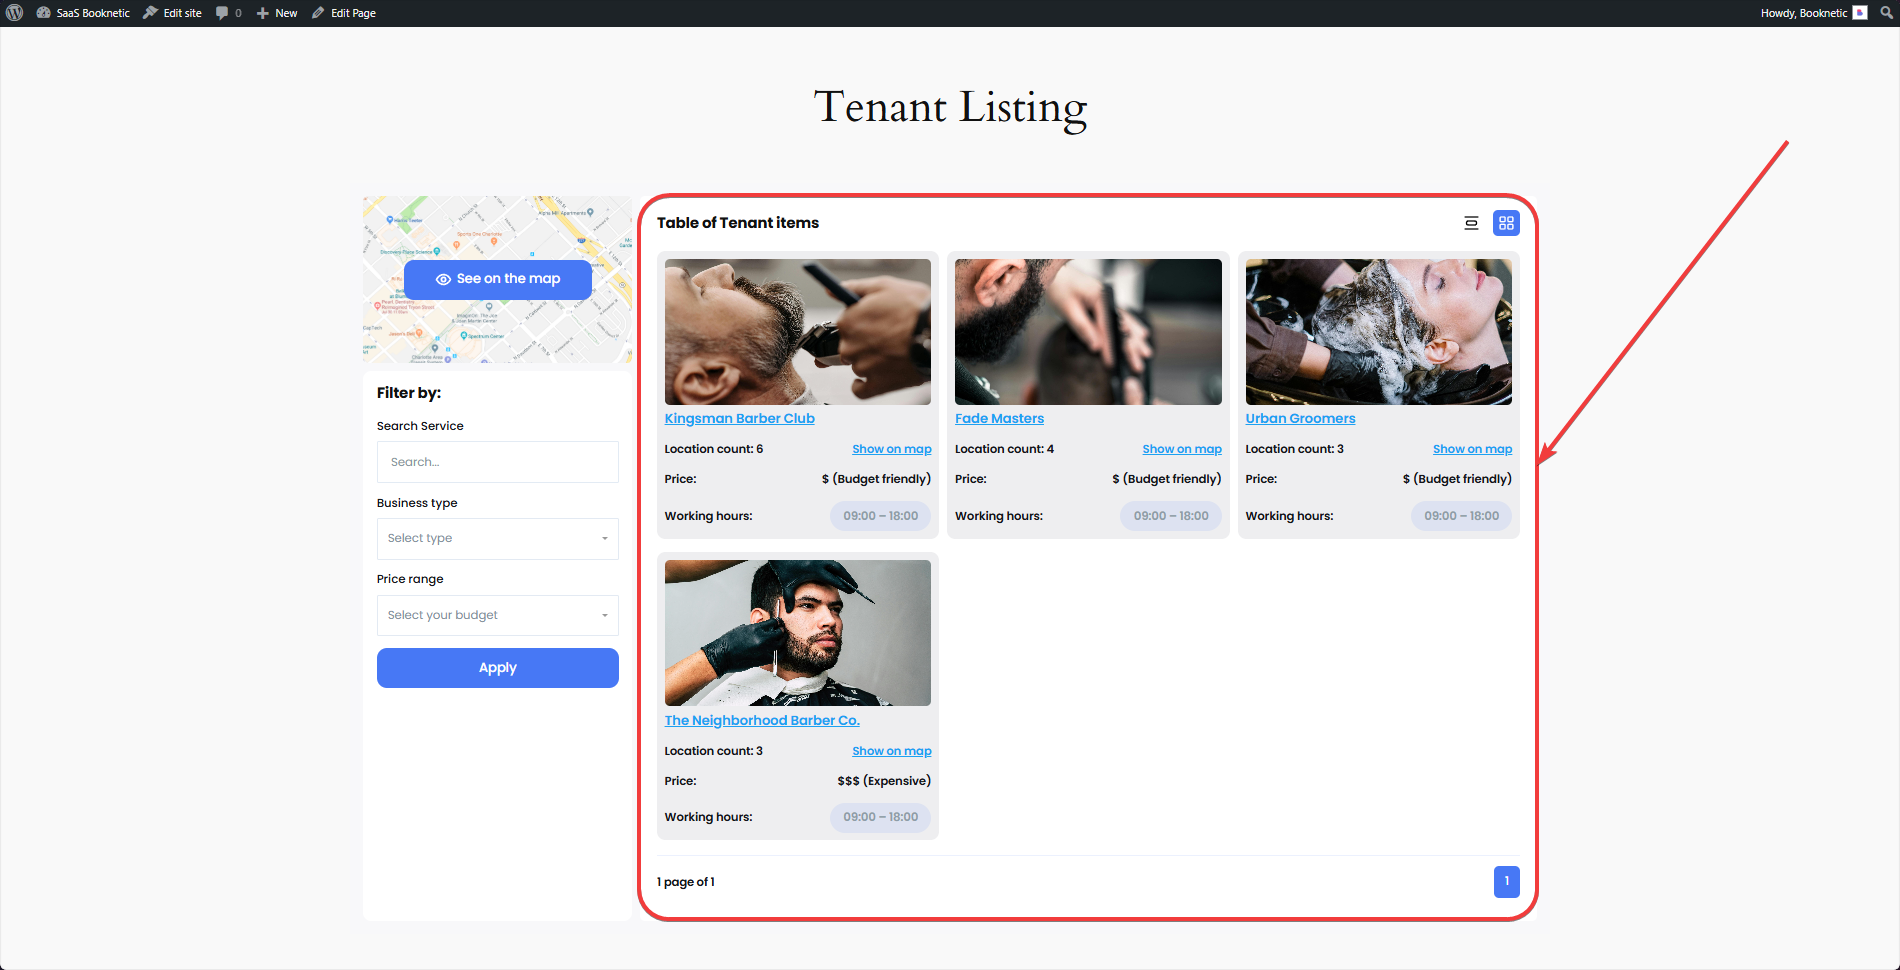
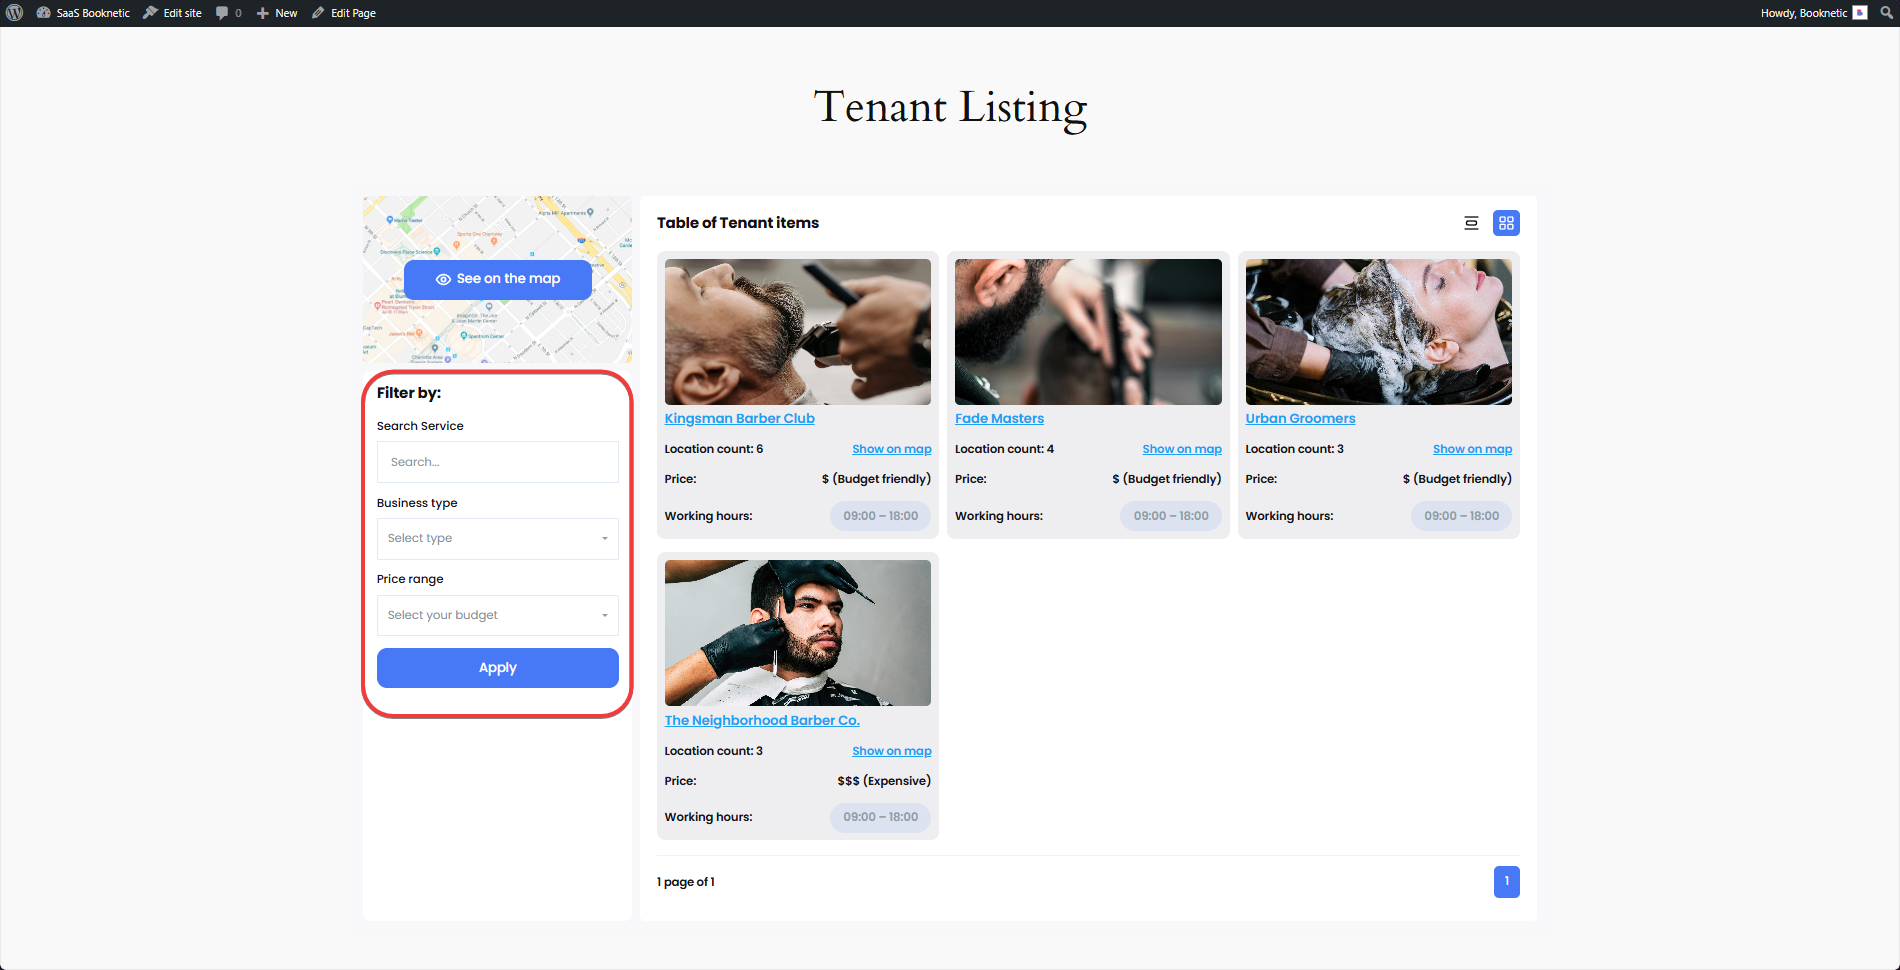
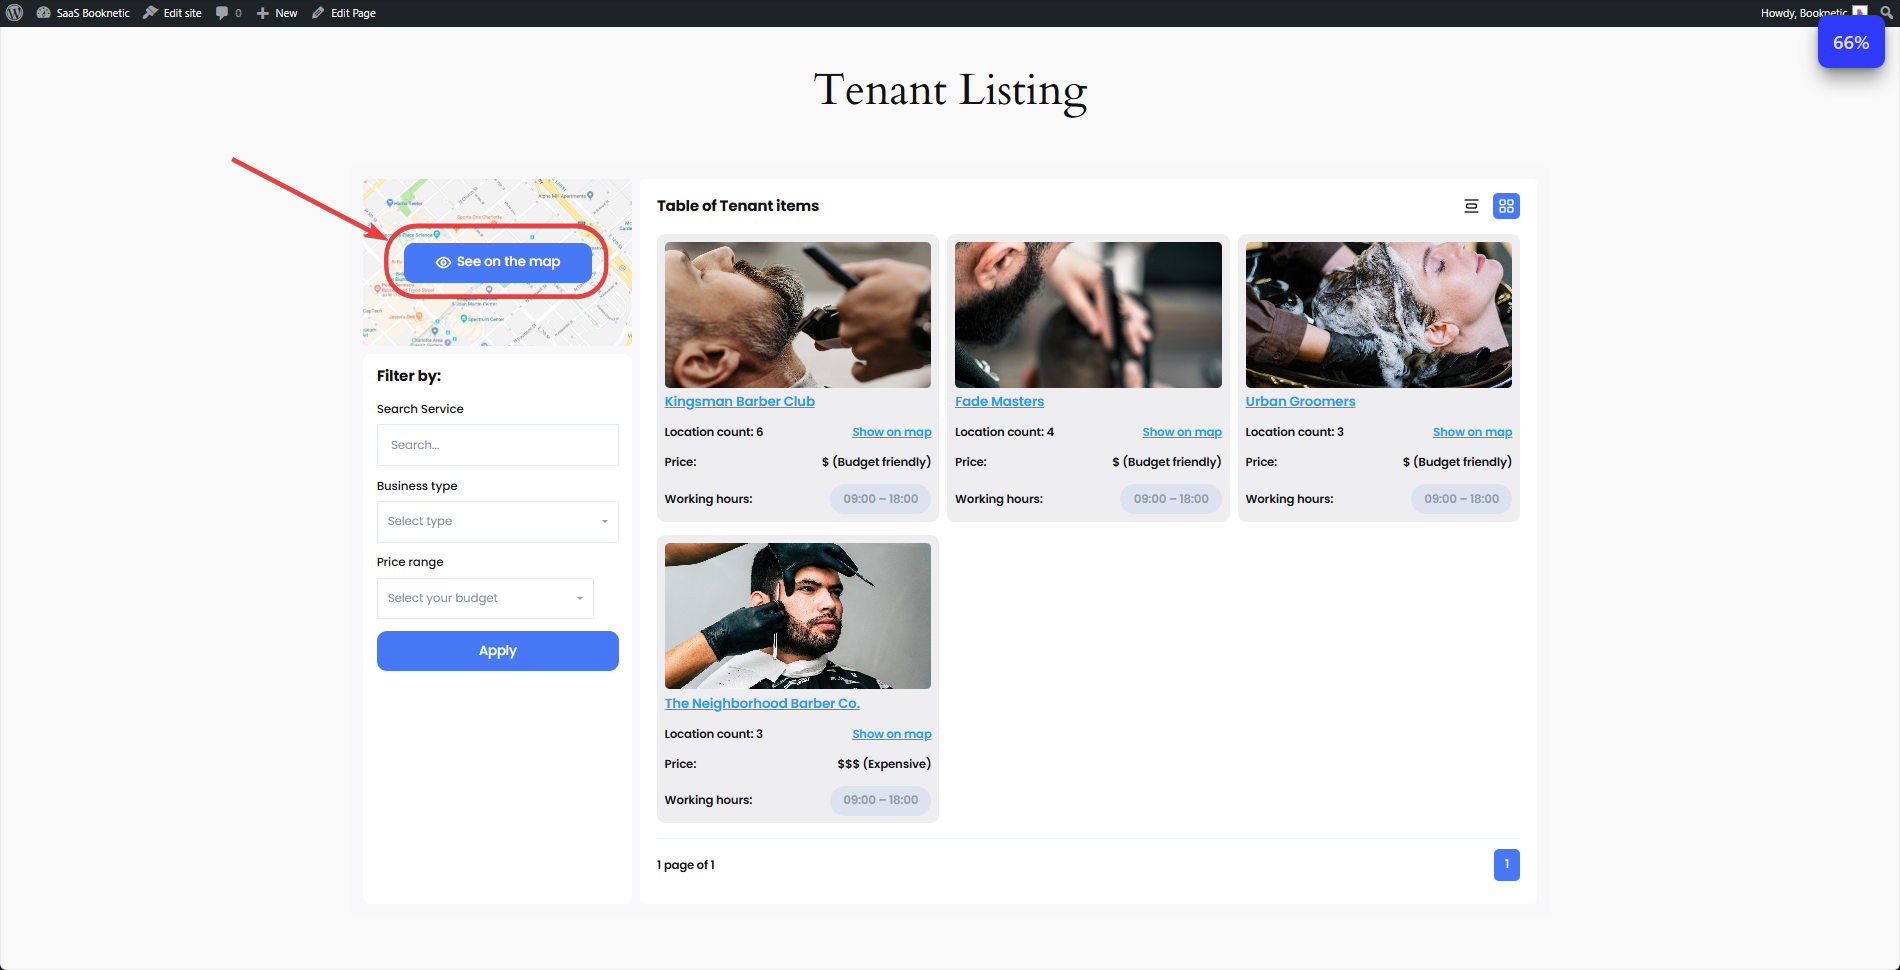
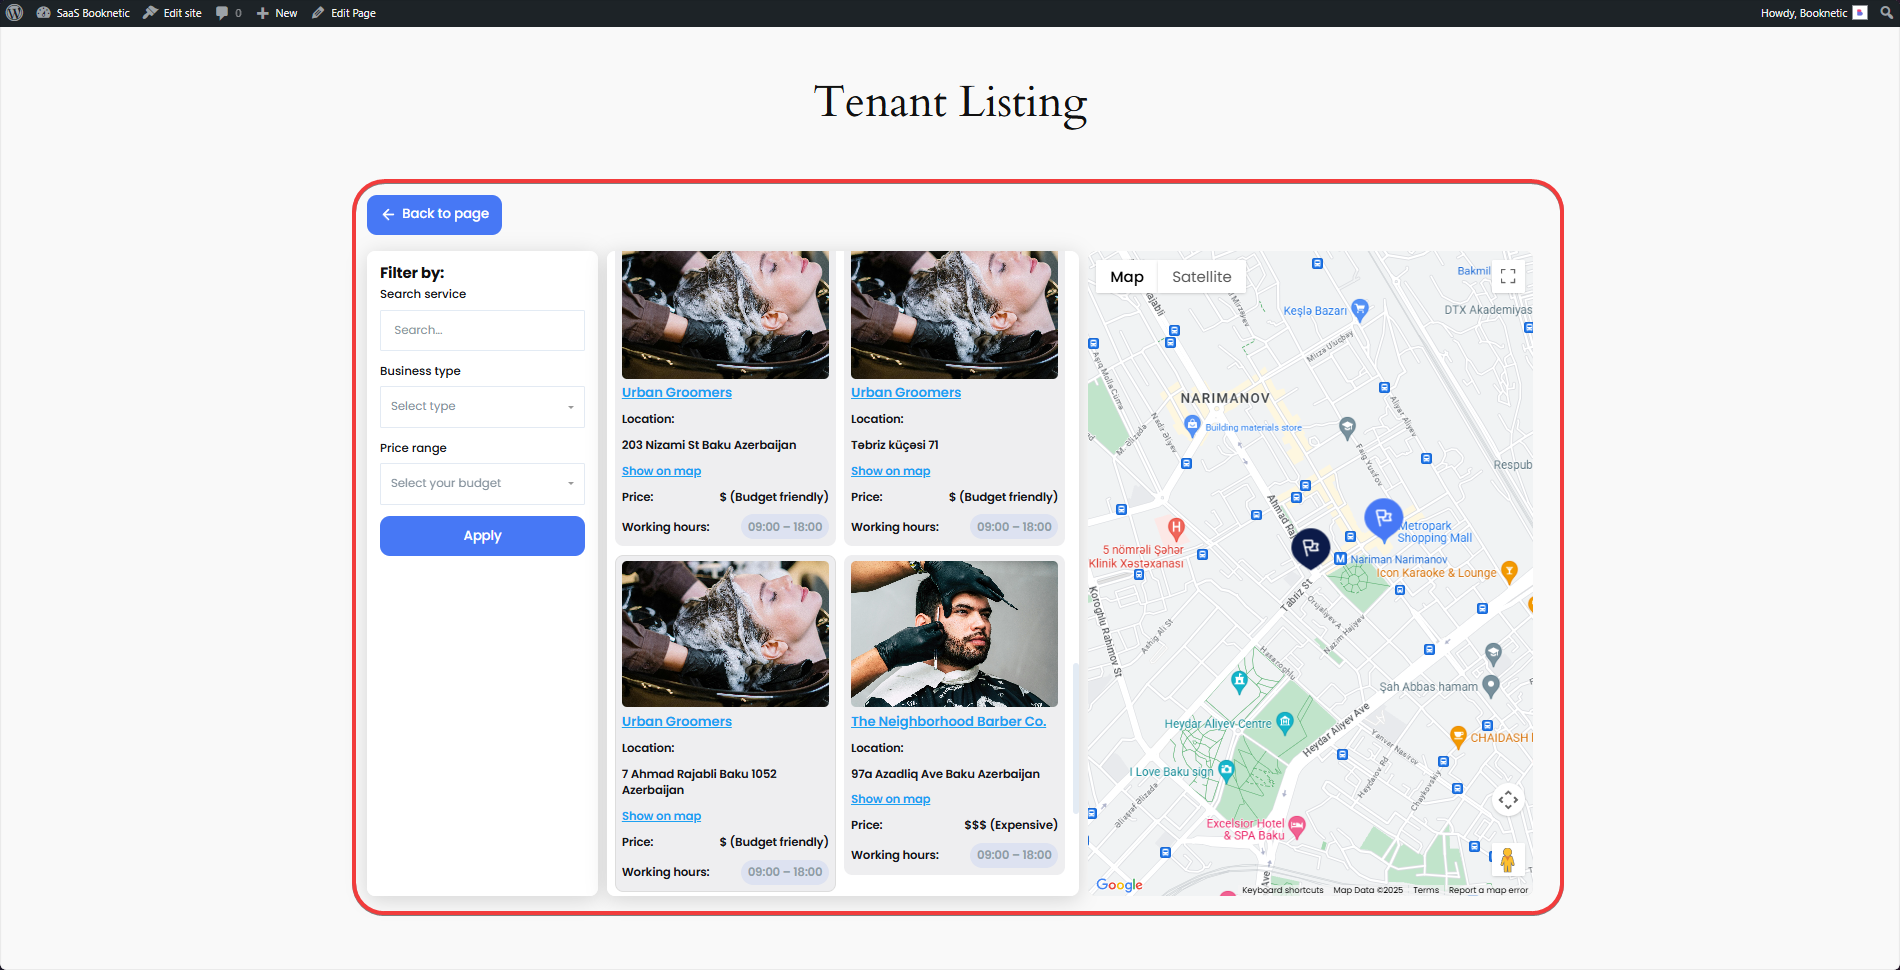
Administrators can use the [booknetic-saas-tenant-list] shortcode to display tenant listings on a WordPress page. In this page, the services of the tenants (only those who has their landing page approved) services will be displayed. For the directory landing page and tenant listing shortcode, select the "Group" element, set its width, and insert the shortcode.
Tenant Details:
Features:
Default Views:
Use view="grid" or view="list" for layout selection. Example: [booknetic-saas-tenant-list view="grid"].
Filters:
This system offers a dynamic, customizable tenant listing and search experience for administrators and users alike.