WhatsApp Notifications
WhatsApp Notifications
We use cookies on our website to provide you with the best possible user experience. By using our website or services, you agree to their use.
WhatsApp Notifications
Welcome to the integration documentation for Twilio WhatsApp for Booknetic. This comprehensive guide will walk you through the process of seamlessly integrating Twilio WhatsApp into your Booknetic. By combining the powerful capabilities of Twilio WhatsApp with the efficient functionality of Booknetic, you can create a seamless communication experience for both your business and your customers.
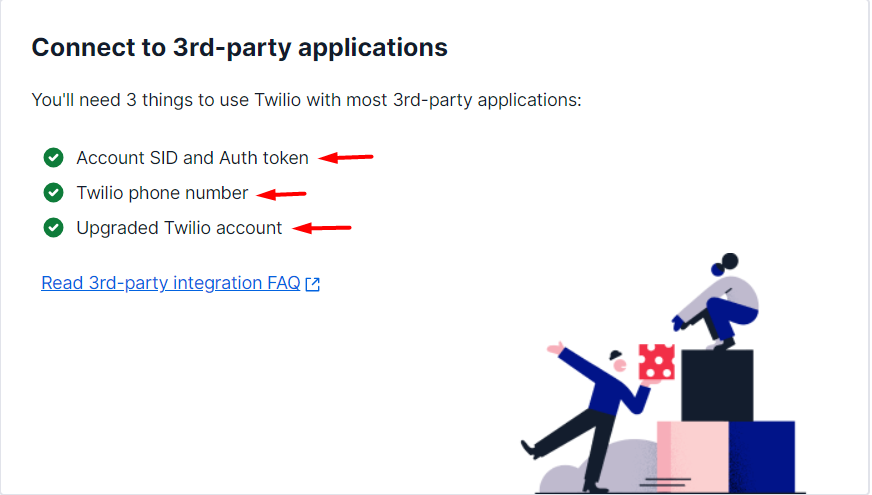
Step 1: Obtain Twilio API Credentials
Step 2: Purchase a number from Twilio
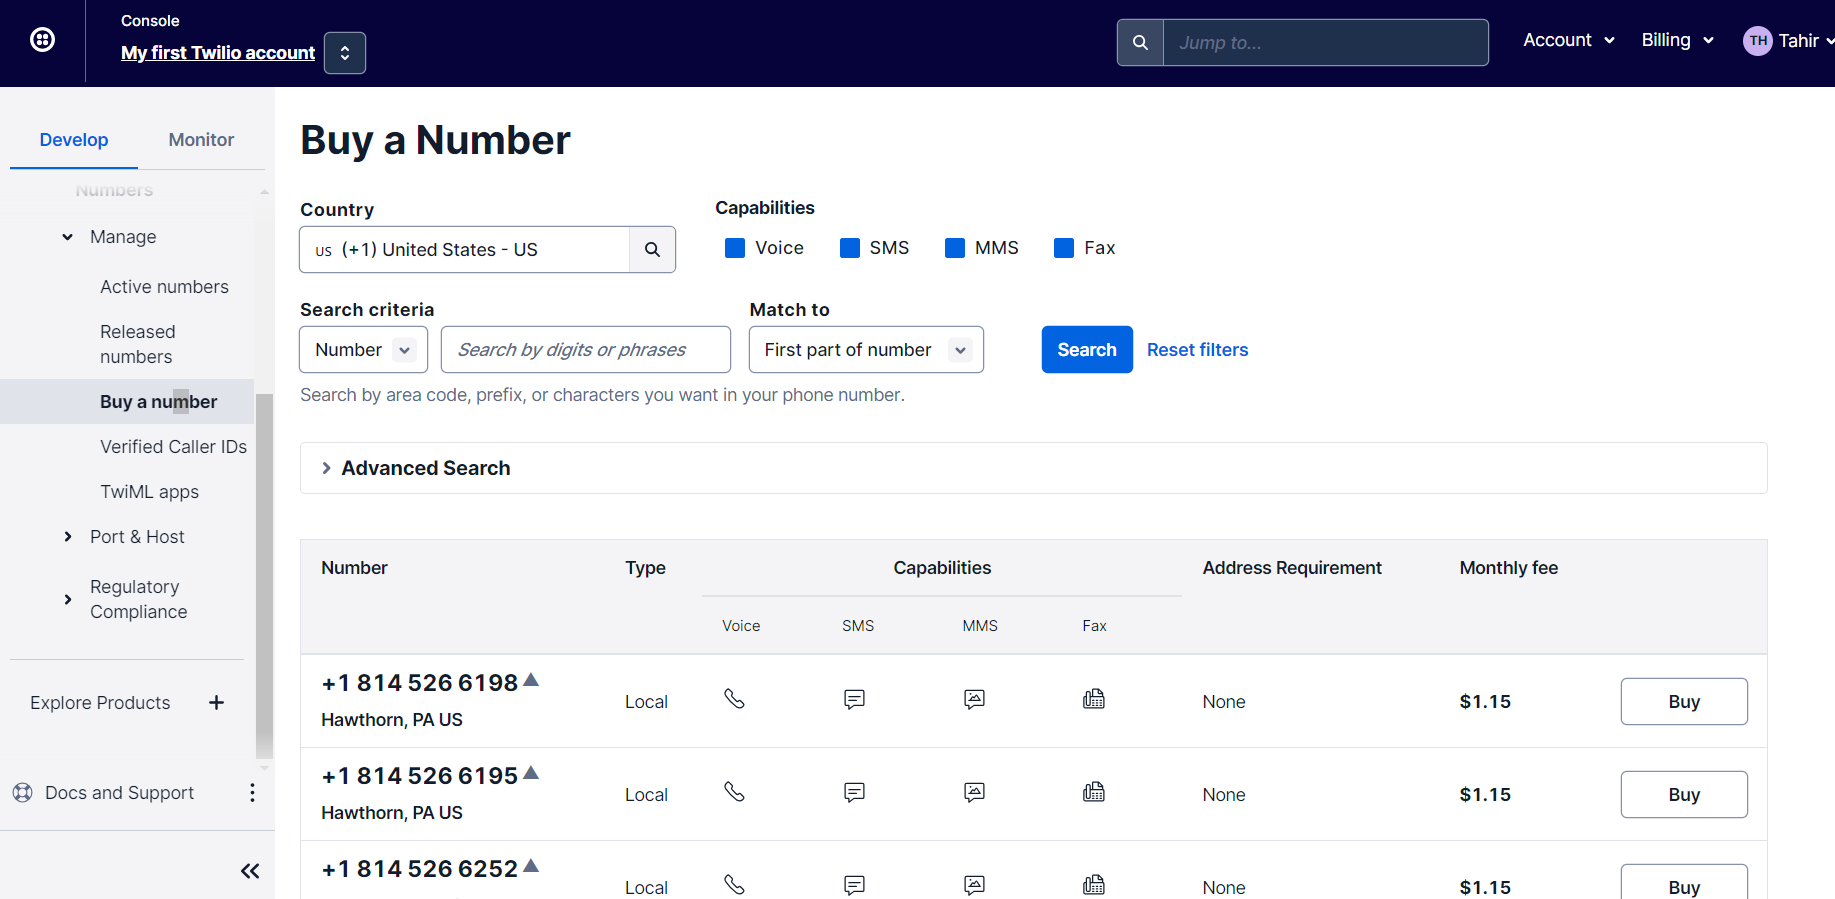
Once you have purchased the number, you will see it listed in your Twilio account. You can then start using the number for your business.
Here are some additional things to keep in mind when purchasing a number from Twilio:
Step 3: Enable your WhatsApp Sender
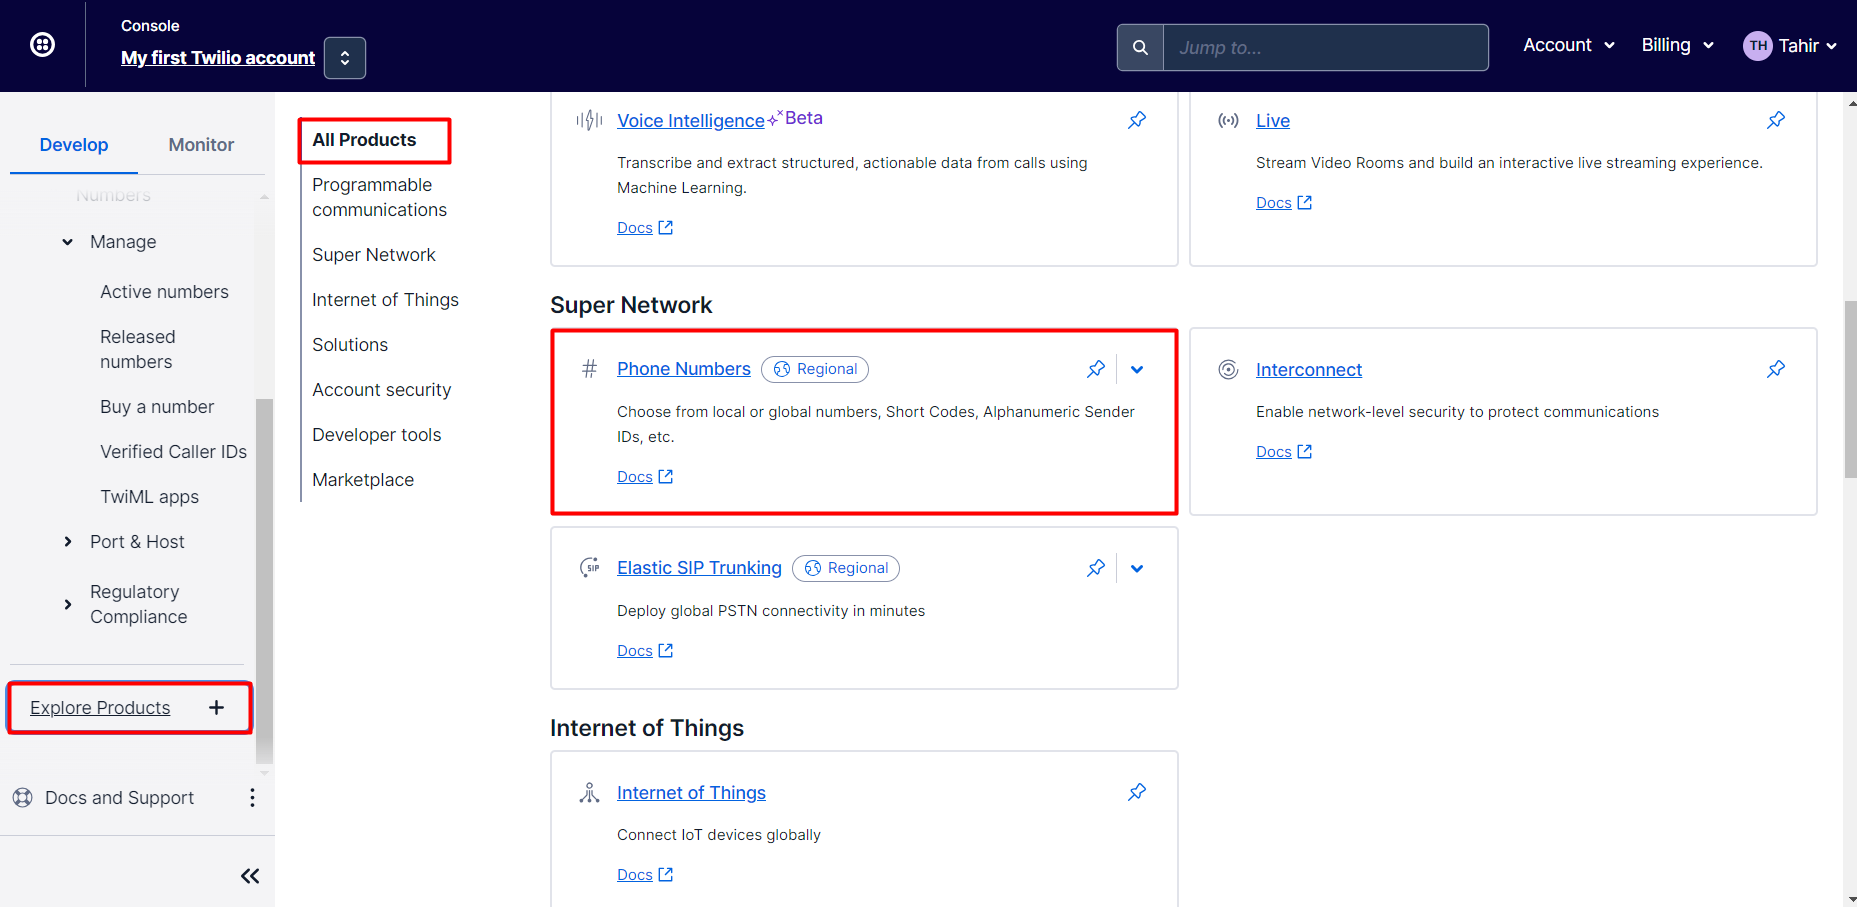
Click on the “Explore Products” button and select the “Messaging” tab.
Here click on the “WhatsApp Sender” button and click on the “Get Started” button to start verifying your Sender ID.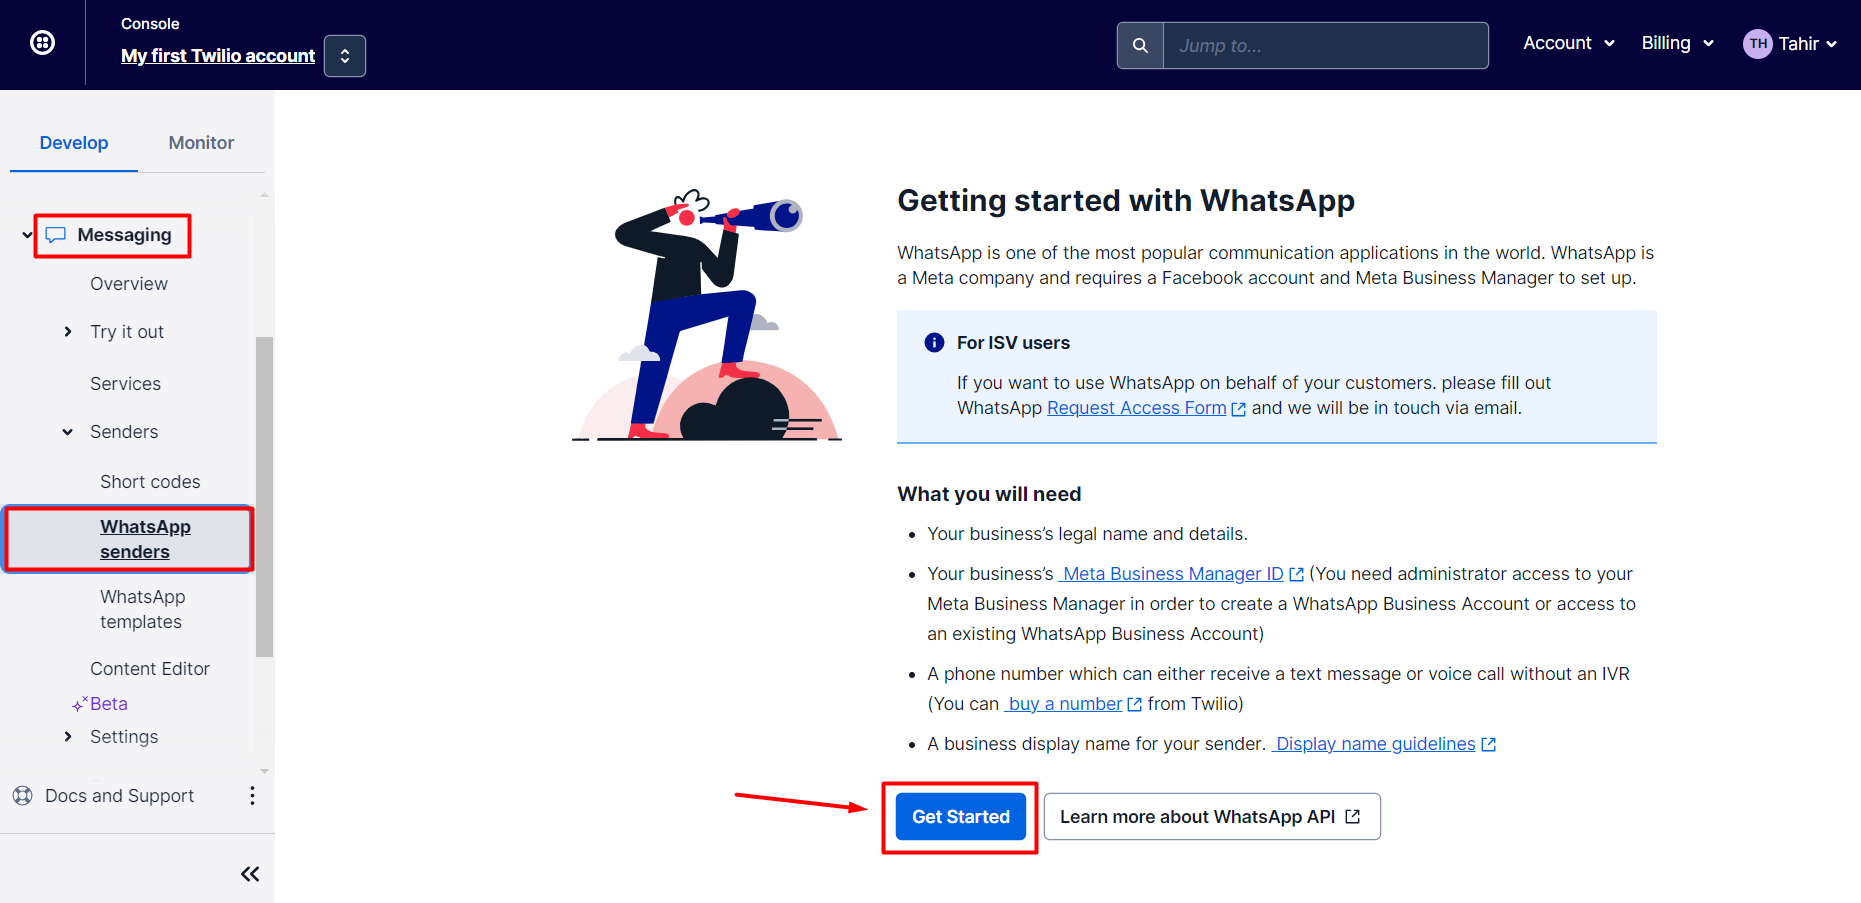 Step 4: Verify the message template
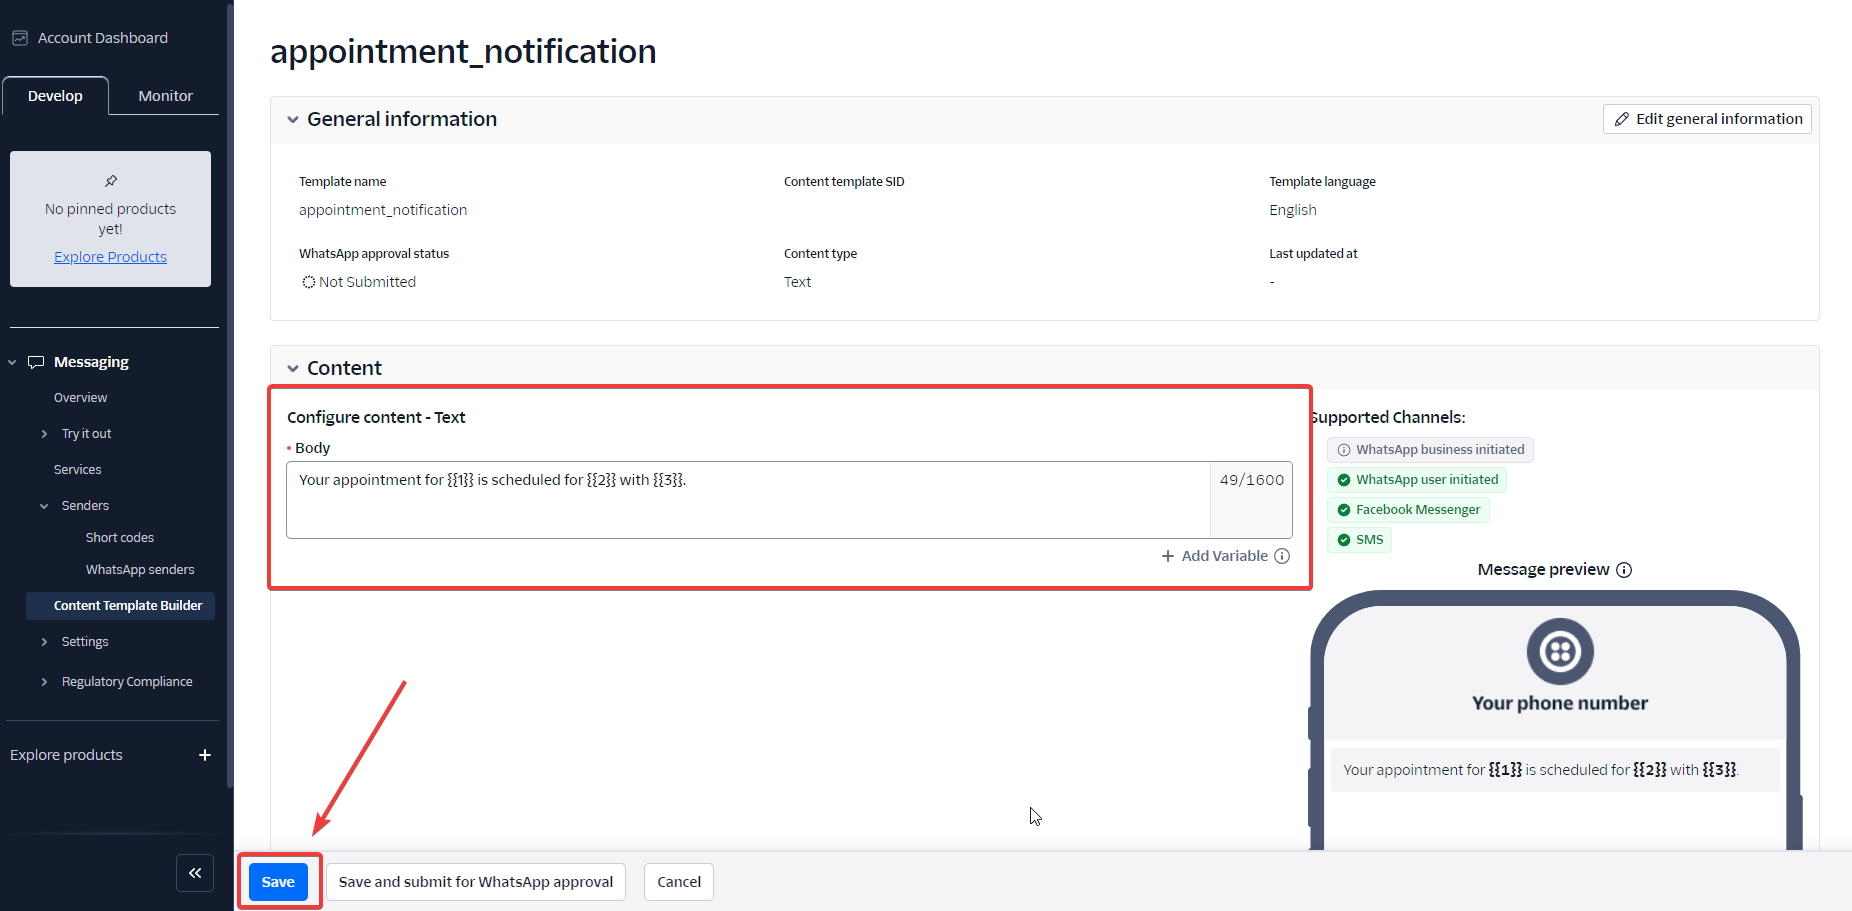
Twilio now provides a Content Template Builder for creating rich messaging templates, which includes options for text, media, buttons, and lists. These templates are mandatory for sending notifications on WhatsApp. You must get your template verified and approved by WhatsApp before it can be used.
From the Twilio console, navigate to the Messaging > Content Template Builder section.
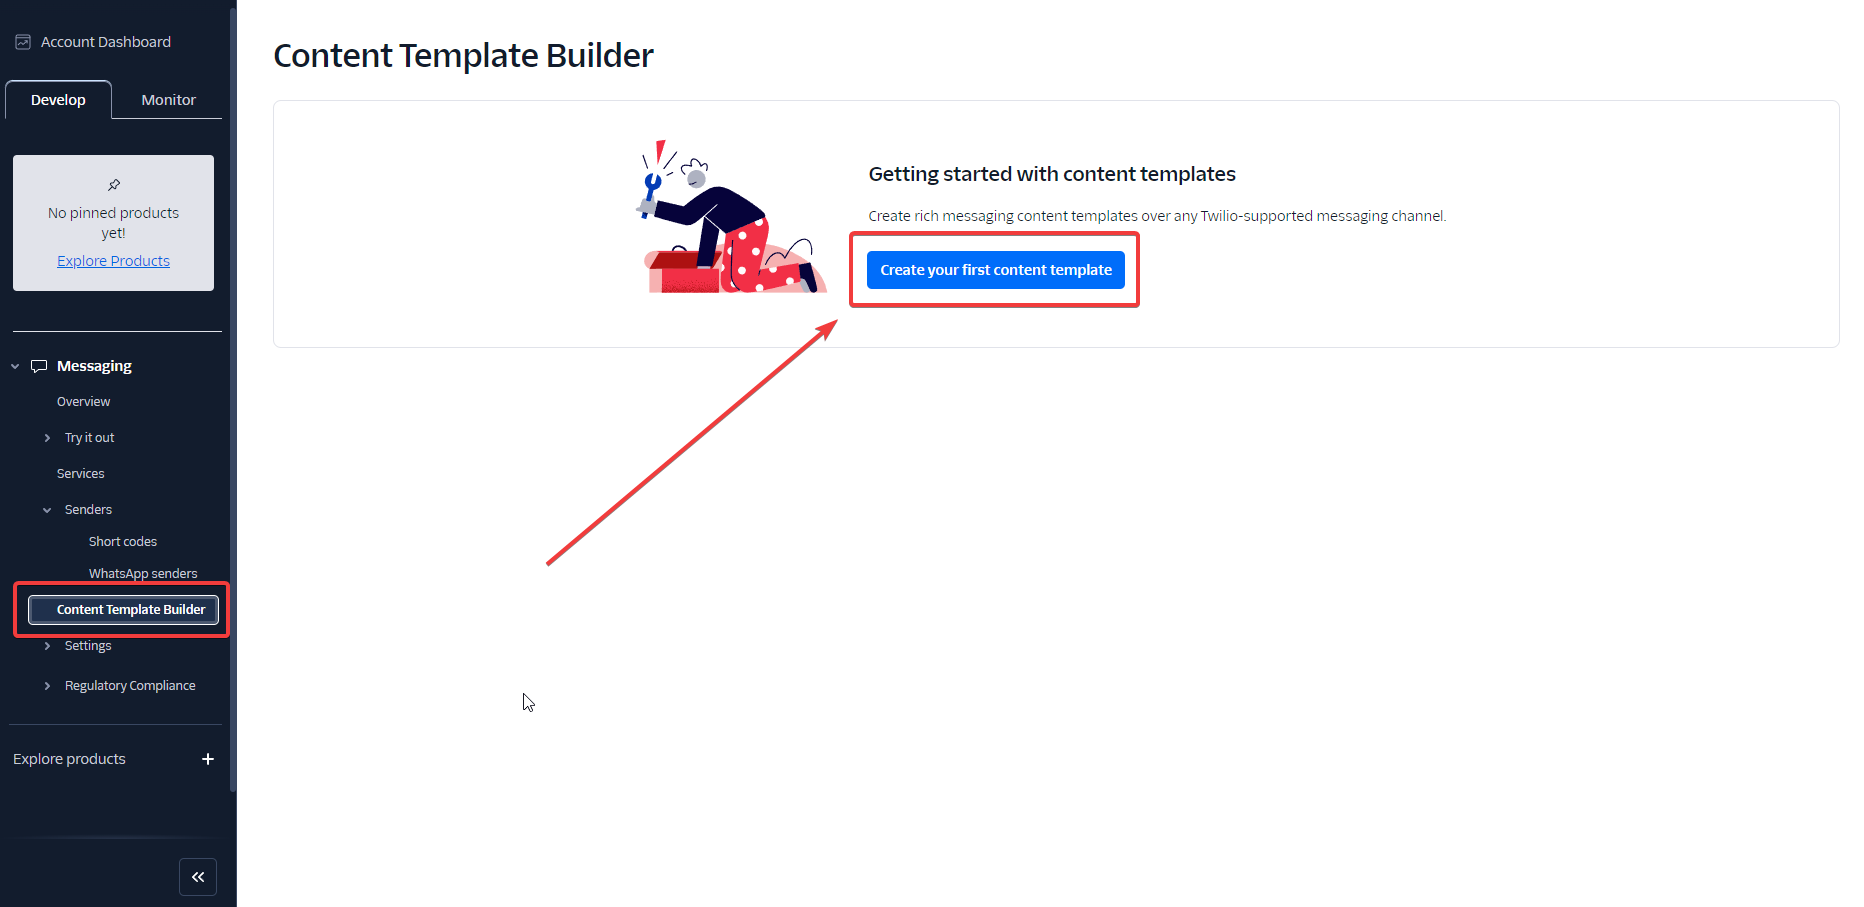
Click on "Create your first content template" to begin setting up your template.
Provide the required details such as template name, language, and content type. For appointment notifications, select Text as the content type.
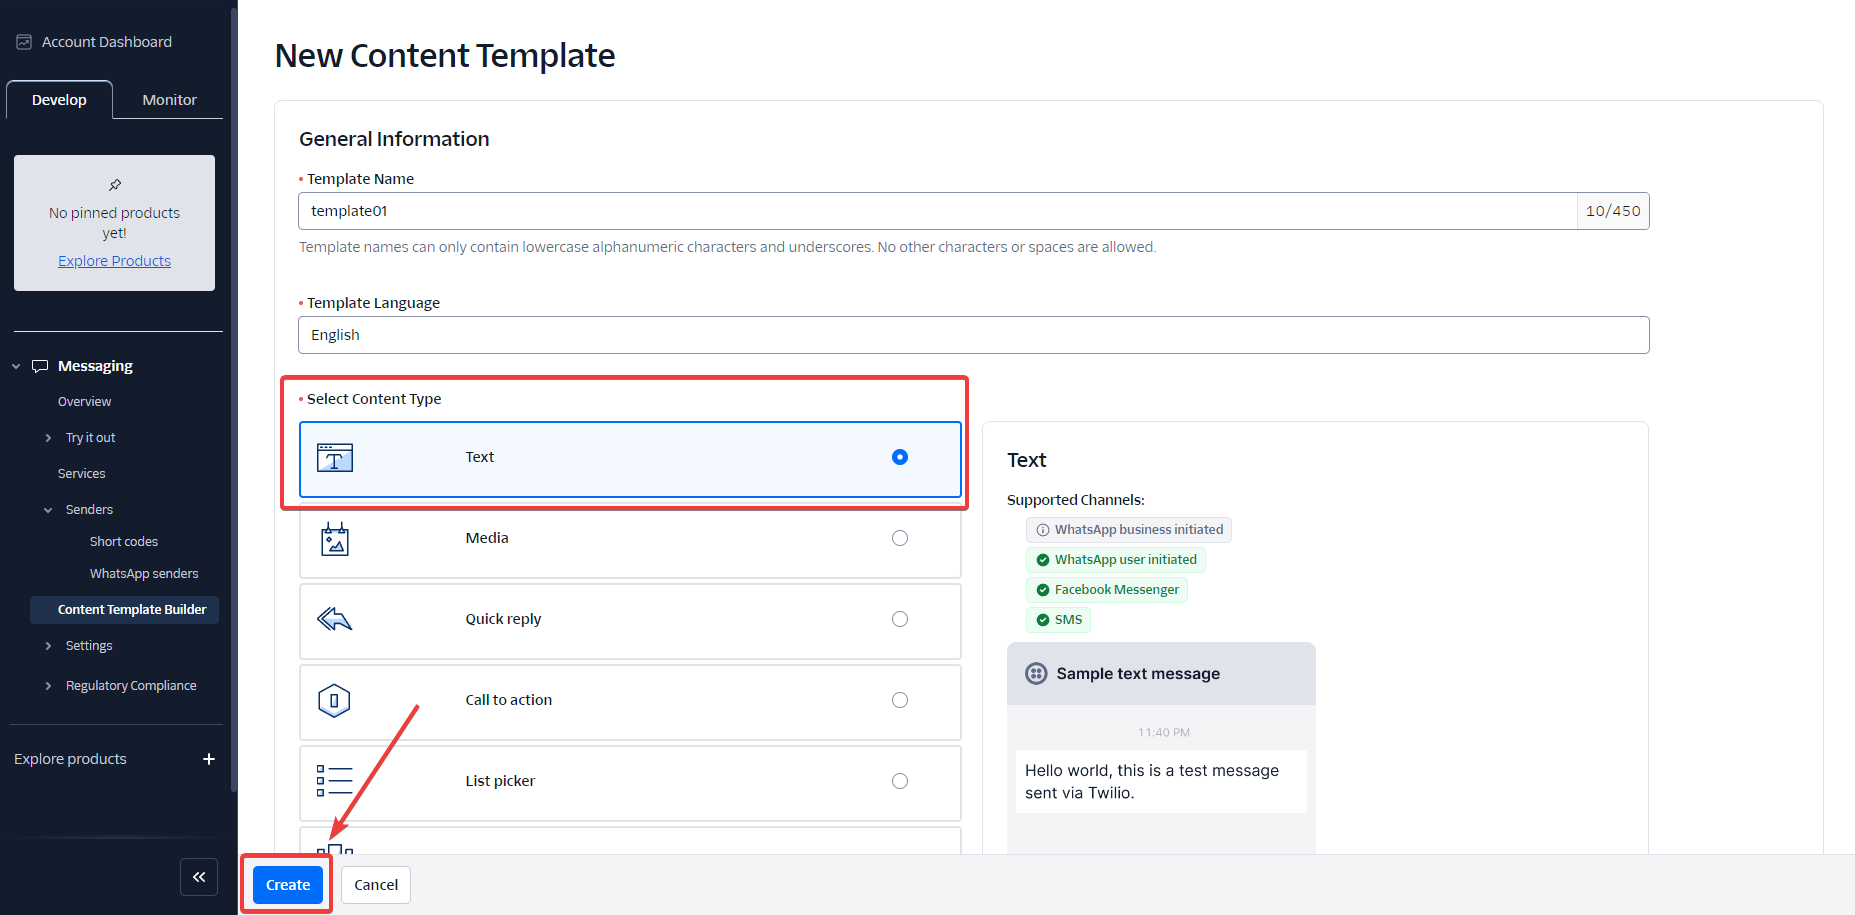
Fill in the placeholders in double-bracket format (e.g., {{1}}, {{2}}) corresponding to dynamic data. Twilio will replace these placeholders with values from Booknetic. Input your template message content. For example:
Your appointment for {{1}} is scheduled for {{2}} with {{3}}.
When you submit this message for approval, the placeholders will be dynamically replaced with the actual appointment details when the message is sent to customers.
To ensure the template works correctly, you must add sample data for each variable. For example:
Sample for {{1}}: Haircut
Sample for {{2}}: July 10th, 2024, 3:00 PM
Sample for {{3}}: John Doe

Submit for WhatsApp Approval:
After configuring the content, click Save and Submit for WhatsApp approval.
Select the appropriate template category (e.g., Utility) for the message type.
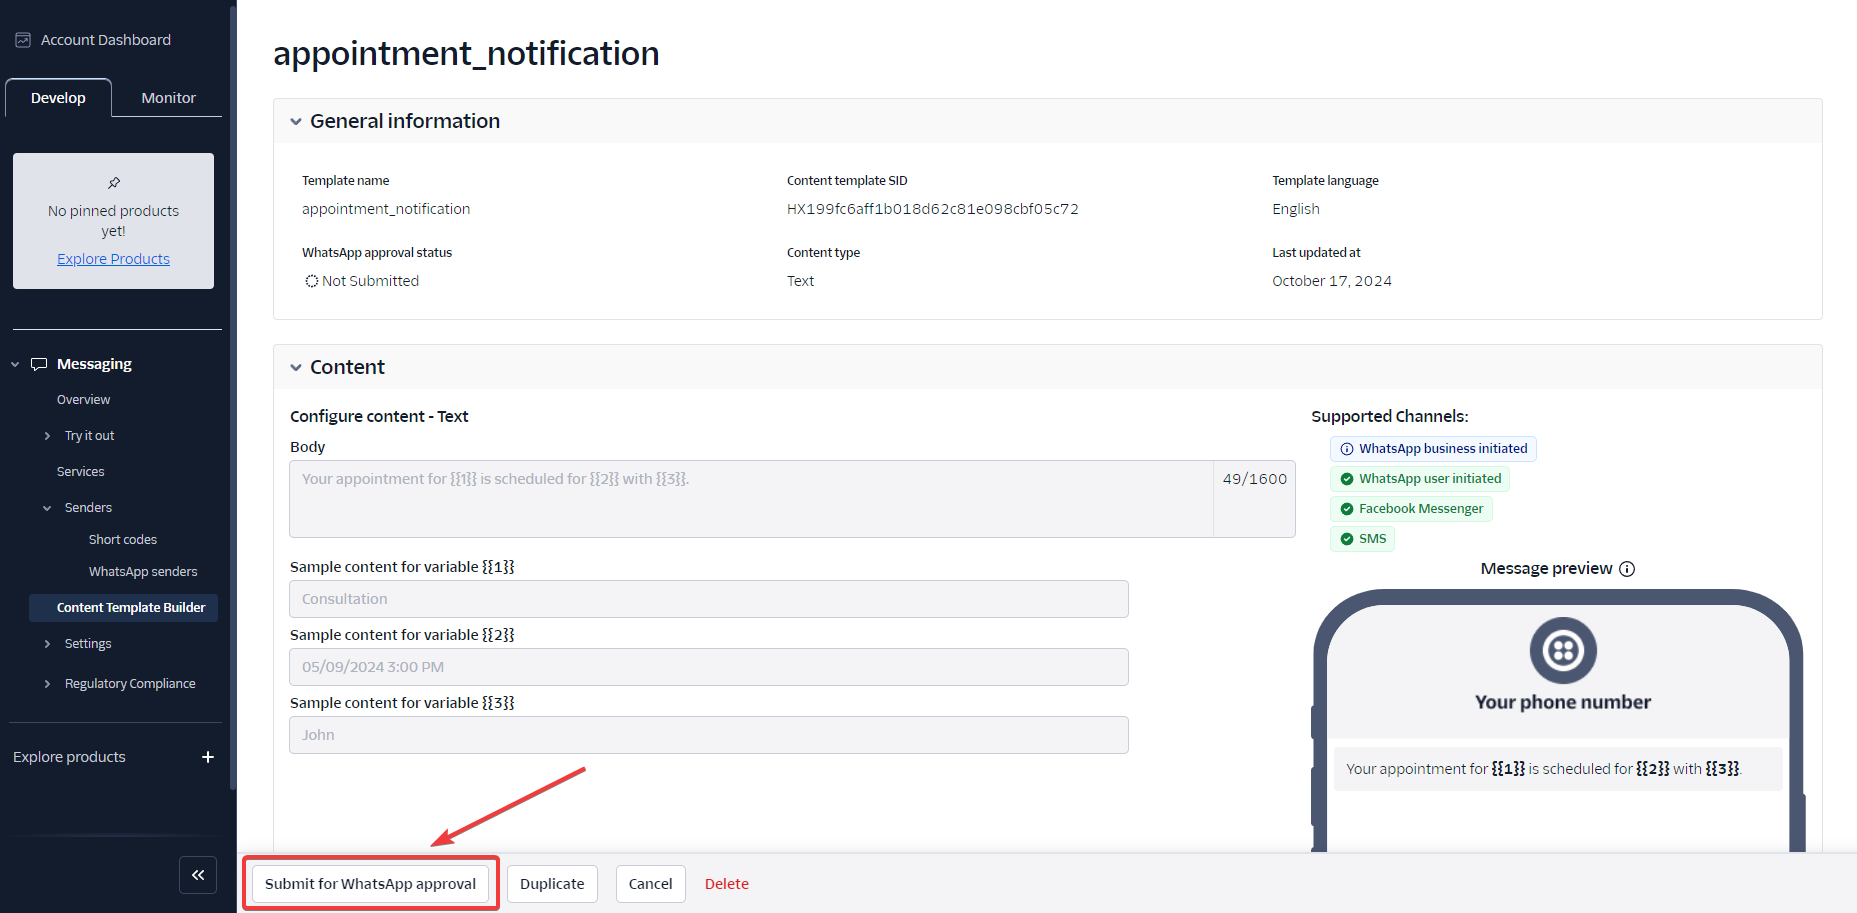 WhatsApp usually reviews and approves the template within 48 hours.
Step 5: Integrate API Credentials in Booknetic
Once your template is approved, you'll need to configure the Twilio WhatsApp API credentials in Booknetic to enable automatic WhatsApp notifications.
Navigate to Booknetic > Settings > Integration Settings > WhatsApp Twilio.
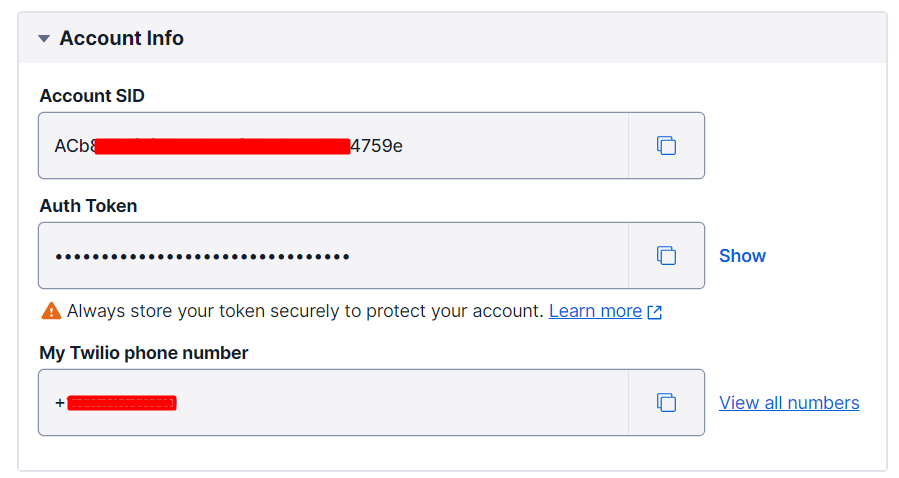
Enter your Account SID, Auth Token, and WhatsApp-enabled phone number (now called WhatsApp Sender).
Save the Settings.

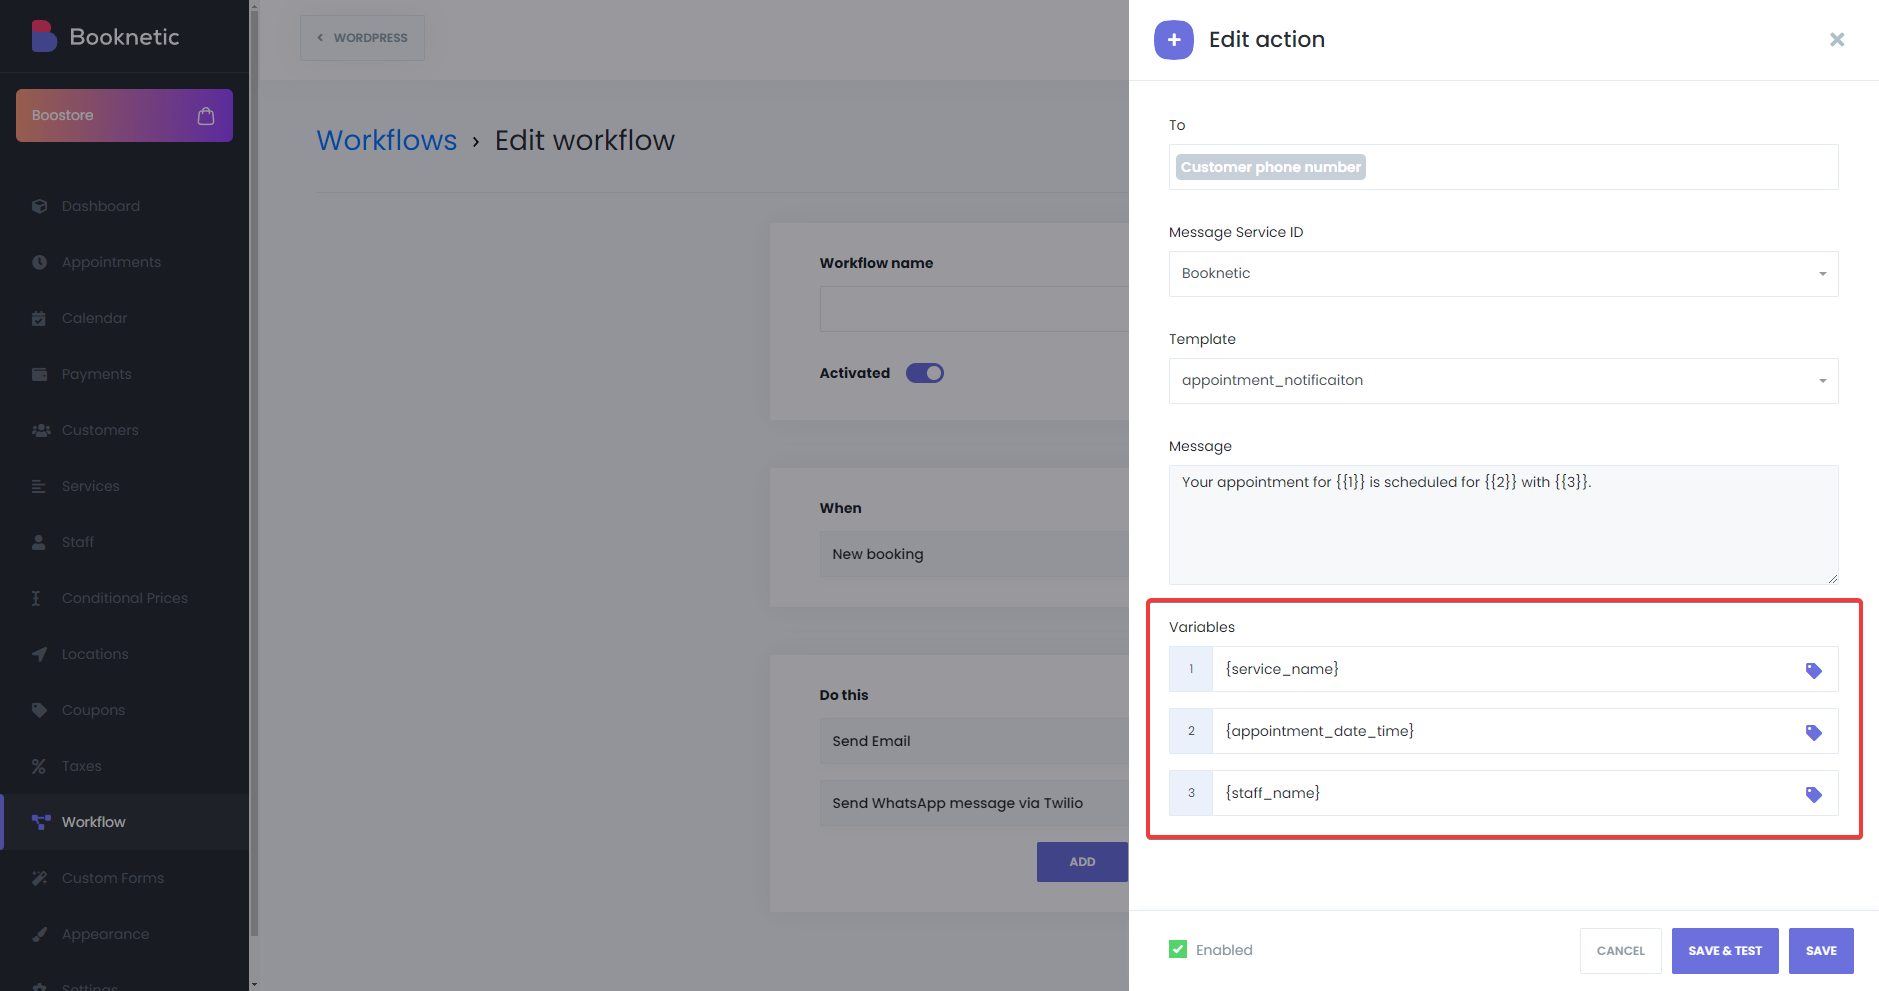
Step 6: Set Up WhatsApp Notifications Workflow
You can now create a workflow that sends automatic WhatsApp notifications to customers.
Go to Workflows in Booknetic and create or edit a workflow.
Add a Send WhatsApp Message via Twilio event.
Select the approved WhatsApp template and map the dynamic variables from Booknetic to the placeholders in the template.
Example:
Variable {{1}}: {service_name}
Variable {{2}}: {appointment_date_time}
Variable {{3}}: {staff_name}
Step 1: Click on Booknetic
.png)
Step 2: Go to Boostore
.png)
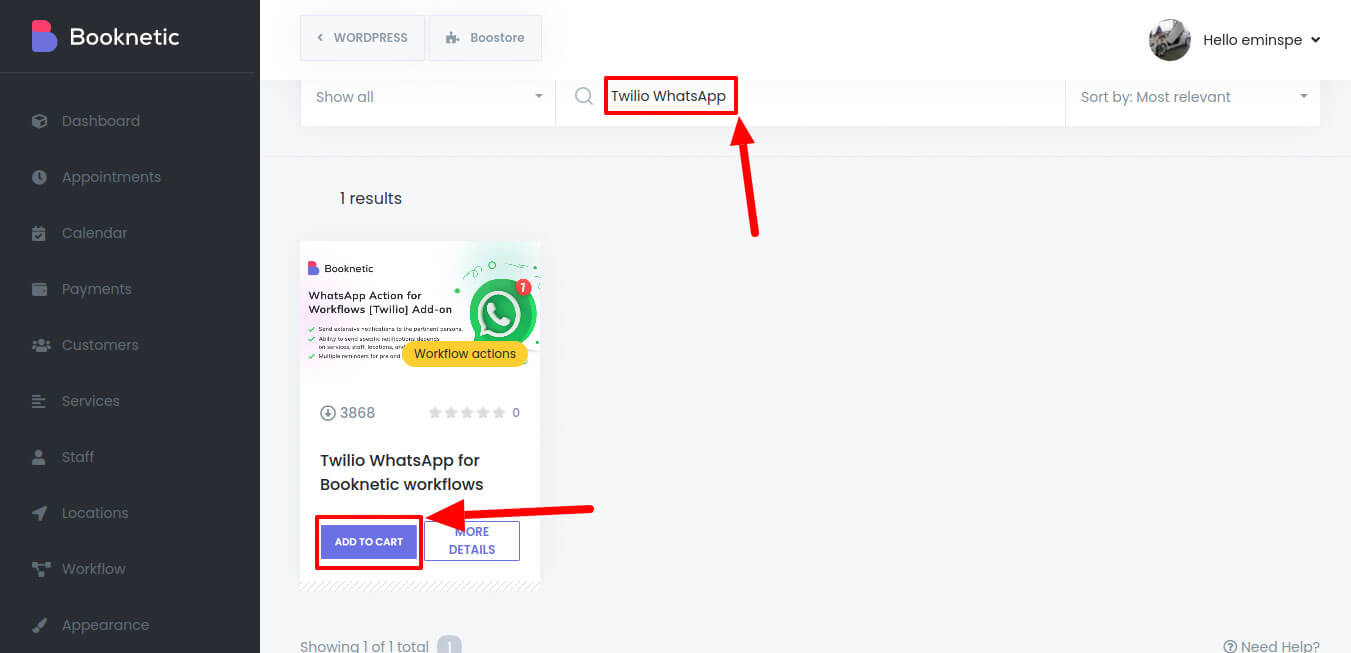
Step 3: Write the name of the add-on to search bar
.png)
Step 4: Click add to cart