Getting Started

Basics
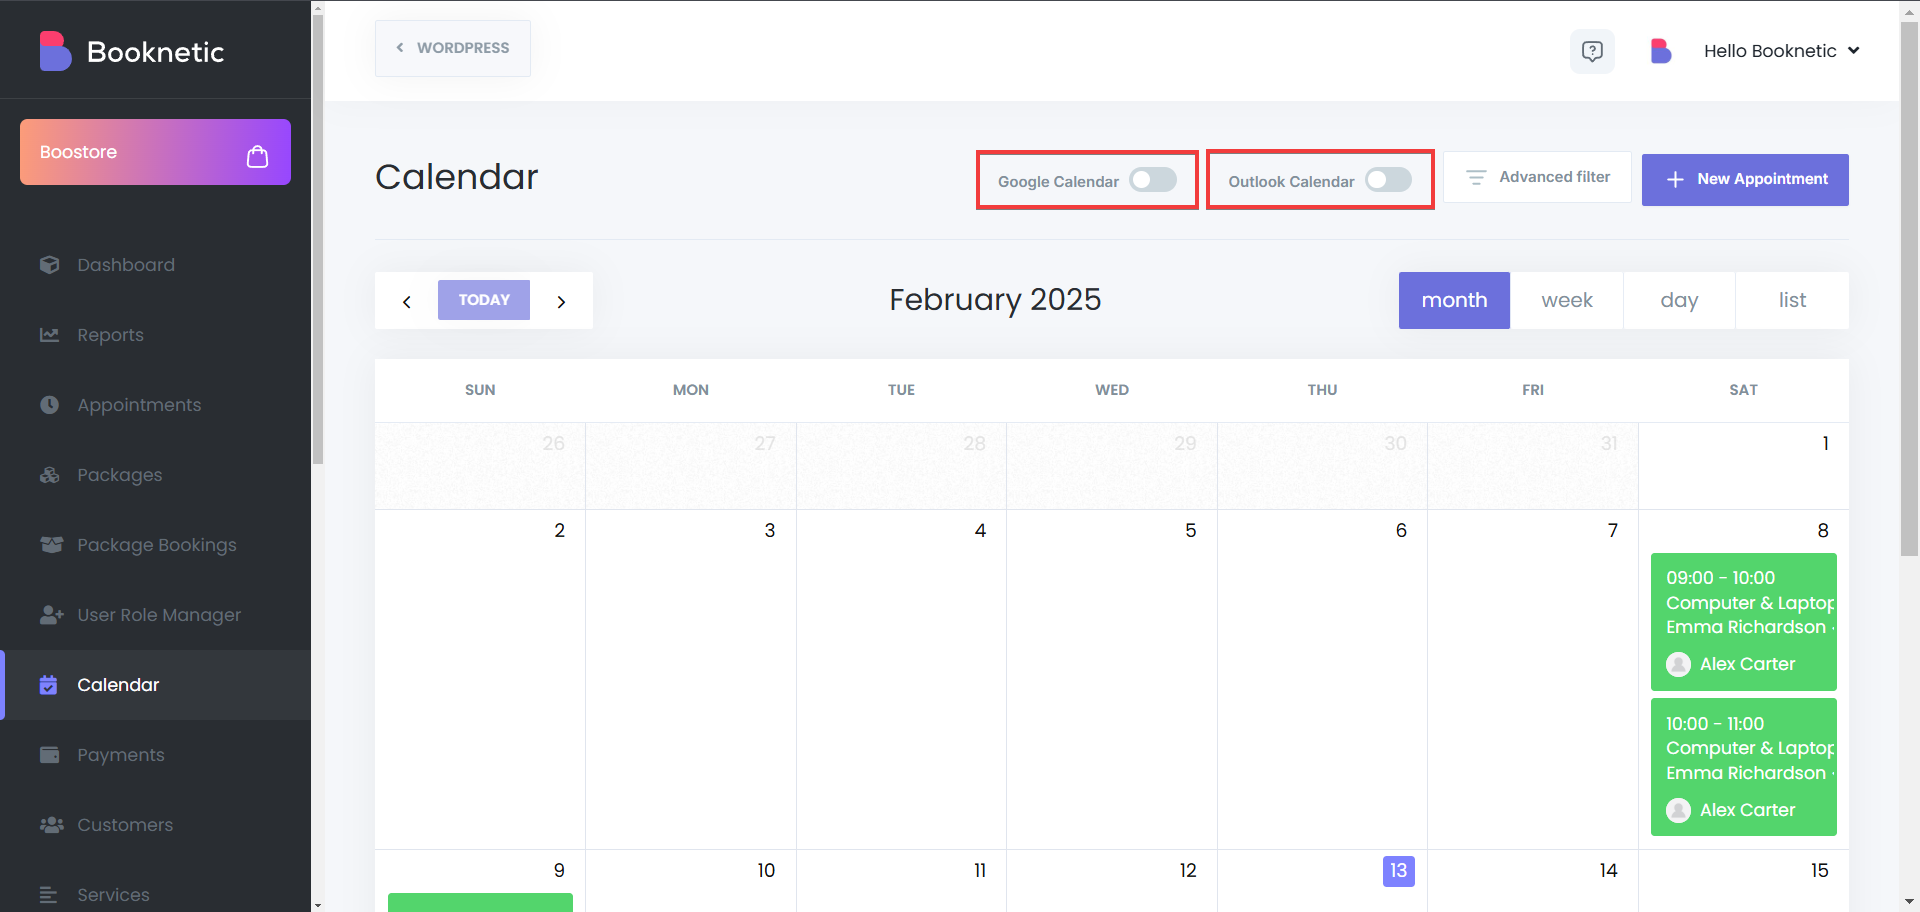
Calendar Module

The Calendar Module in Booknetic provides a centralized view of all appointments, allowing businesses to manage schedules efficiently. With multiple viewing modes, filtering options, and both Google Calendar and Outlook Calendar integrations, the calendar ensures smooth appointment tracking for both administrators and staff.
Accessing the Calendar Module
- Navigate to the Booknetic Plugin
- Open the WordPress Admin Panel.

- Go to Booknetic > Calendar to access the scheduling interface.
- Overview of the Calendar Interface
- Displays all scheduled appointments in an organized format.
- Provides quick actions to create, edit, or filter appointments.
- Synchronizes with Google Calendar and Outlook Calendar for seamless scheduling updates.
Calendar Viewing Modes
Booknetic offers multiple viewing options to accommodate different scheduling preferences:
- Monthly View – Displays all booked appointments for the selected month.
- Weekly View – Provides a week-long breakdown of scheduled appointments.
- Daily View – Shows a detailed schedule for a single day, including staff columns for better organization.
- List View – Displays appointments in a structured list format for quick browsing.
Managing Appointments from the Calendar
Adding a New Appointment
Click on the desired date within the calendar.
Fill in the mandatory appointment details, including:
- Location
- Category
- Service
- Staff
- Date & Time
- Customer
Click Save to confirm the booking, however, beware of the fact that if the “Run workflows on save” button is enabled, it will activate your workflows upon creation of a new appointment, meaning, it may send your customer and staff notifications about the appointment, based on your workflows.
Editing an Appointment
Click on an existing appointment in the calendar.
Click edit, and then modify the necessary details (e.g., time, staff, or service).
Click Update to save the changes. As before, when you edit an appointment, and the “Run workflows on save” button is enabled, it will activate your workflows upon creation of a new appointment, meaning, it may send your customer and staff notifications about the appointment, based on your workflows..
Deleting an Appointment
Select an appointment from the calendar.
Click Delete and confirm the action.
The appointment will be removed from the system.
Filtering and Searching Appointments
To quickly find specific appointments, use the built-in filters and search options:
- Filter by Location – View appointments at a specific branch or service area.
- Filter by Service – Display only bookings related to a particular service.
- Filter by Staff – Show appointments assigned to a specific staff member.
- Search Bar – Enter customer names or appointment details to find a booking instantly.
Google Calendar and Outlook Calendar Integration
Booknetic supports two-way synchronization with Google Calendar, ensuring that appointments are updated across both platforms.
Benefits of Google Calendar Sync
- Automatically syncs appointments between Booknetic and Google Calendar, or Outlook Calendar.
- Updates in Google Calendar or Outlook Calendar reflect instantly in Booknetic.
- Helps prevent double bookings and scheduling conflicts.
How to Enable Google Calendar Integration
- Navigate to Booknetic > Settings > Integrations.
- Select Google Calendar or the Outlook Calendar.
- Configure synchronization settings to match business requirements.
- Save changes and verify the connection.