Booknetic Appointment Booking Plugin has tons of features that allow customers to customize the booking form as they want. It is possible to customize nearly everything you see in the booking widget. You can change the colors of the booking panel, add additional forms to your booking form, enable-disable, reorder the booking steps and even you can show the booking form with the pre-selected service, staff, location, etc.
Built-in form builder
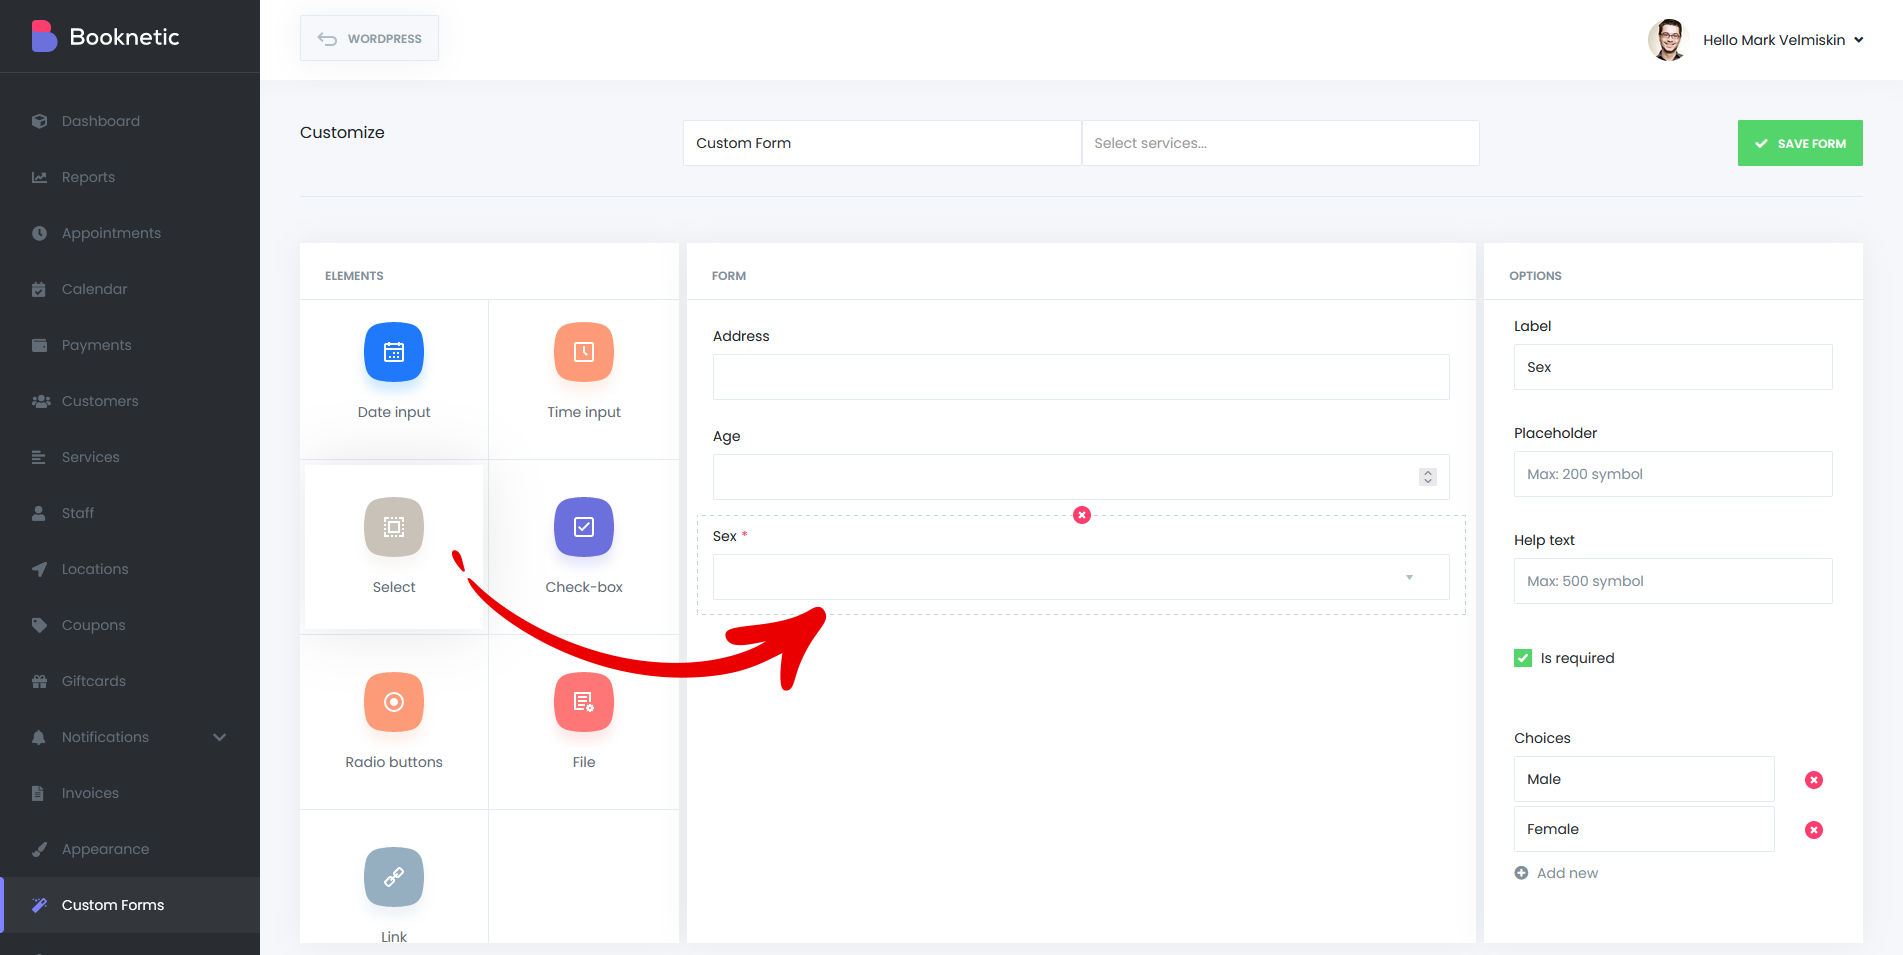
In the Information section of your booking form, there are 4 forms that are displayed as default. Name, Surname, E-mail, Phone number. If you require you can combine the Name and Surname fields as a single field. Also, it is possible to set E-Mail and Phone sections as optional fields. If this information is not enough for you, you can require additional information from your customers. This information changes depending on your business type. You can request nearly all the information you want with the rich forms inputs. There are 11 inputs available.
- Label- This field will not contain any labels that are desired in your form. There will be no functionality available. You can simply add text labels.
- Text input- This input can be used if you want a brief information about customers consisting of a short sentence or a single word.
- Text area - If you require more information, this entry will be suitable for you.
- Number input - If you want your customers to let you know any number, this input is exactly what you are looking for!
- Date input - Your customers can send you information including birth date or any other date with the help of this form.
- Time input - Do your customers need to tell you any additional hours? You can use that input!
- Select - This input allows your customers to choose from multiple selections.
- Checkboxes - Checkboxes adds the checkboxes that customers marks on to your form. It can be used for terms and conditions.
- Radio buttons - Using the radio buttons, you can ask your customers to choose from multiple selections.
- File - Do customers need to send you any files? It can be an image or any file. You can determine the file format.
- Link - You can use this field if you want to add a link to your form.
- Email - You can add an Email field to your Information section and request the additional email address from your customer. Notifications can be sent to this email address automatically.
- Phone - You can add a Phone field to your Information section and request the additional phone number from your customer. Notifications can be sent to this phone number automatically.

Appearance
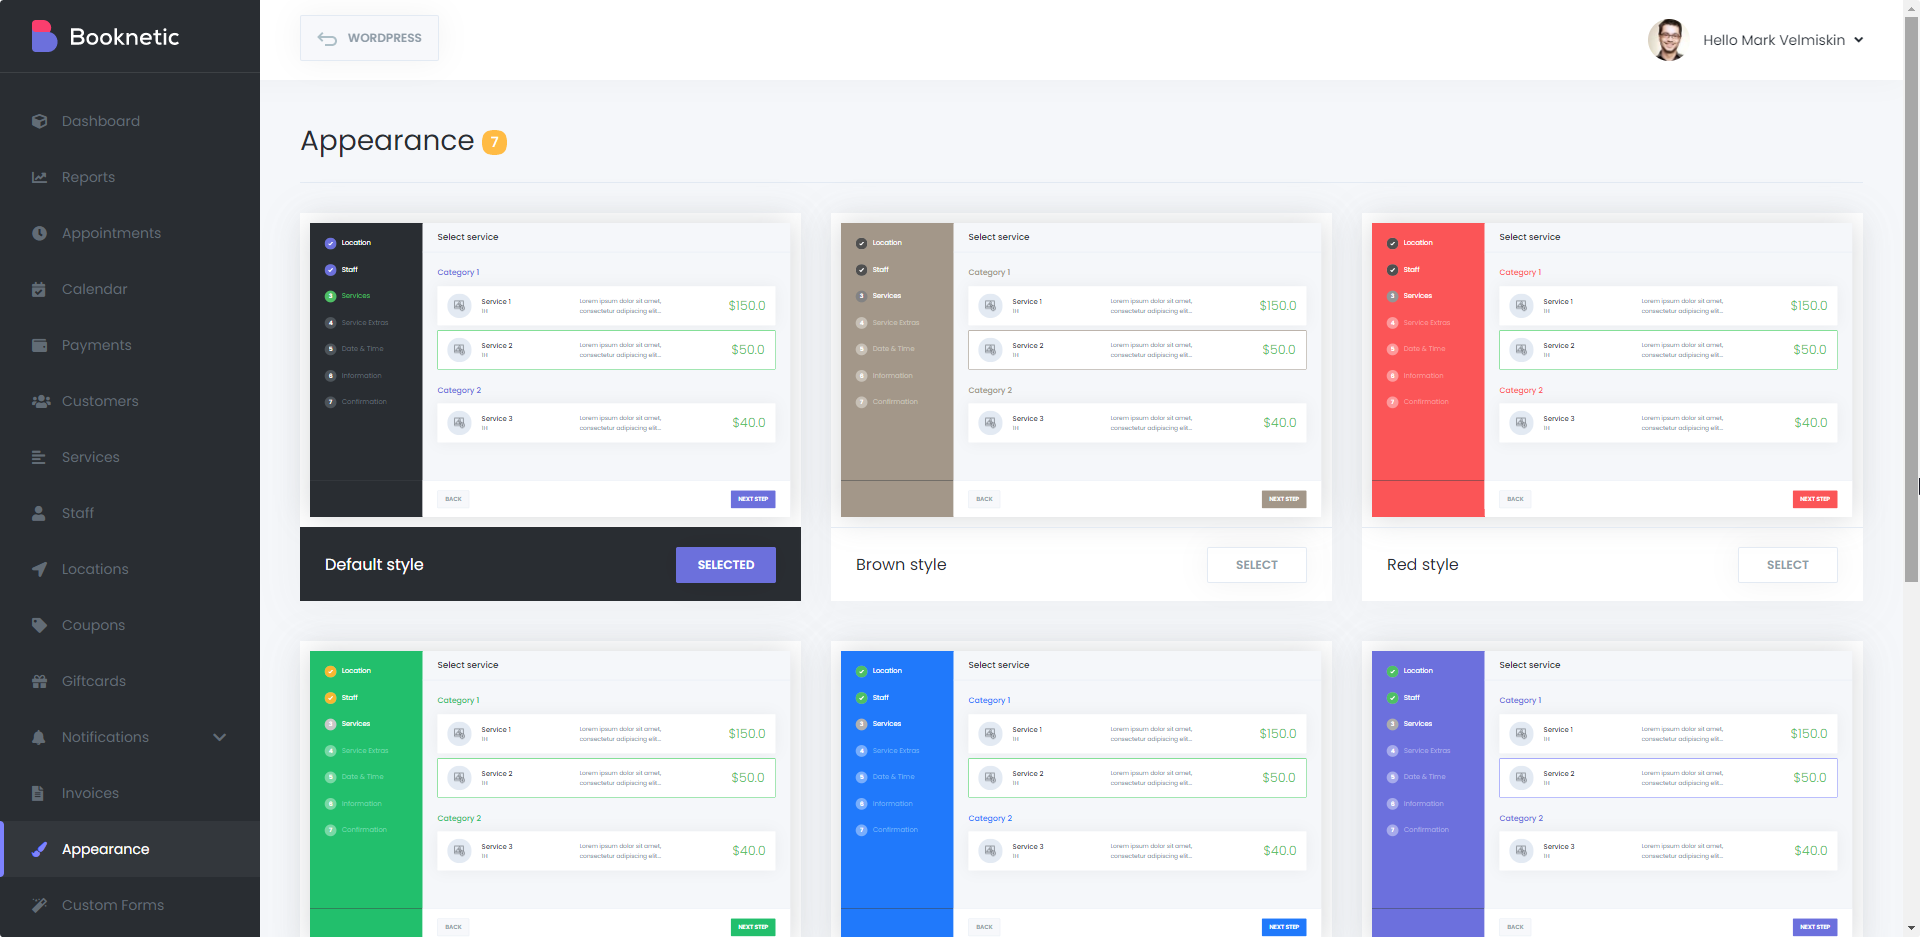
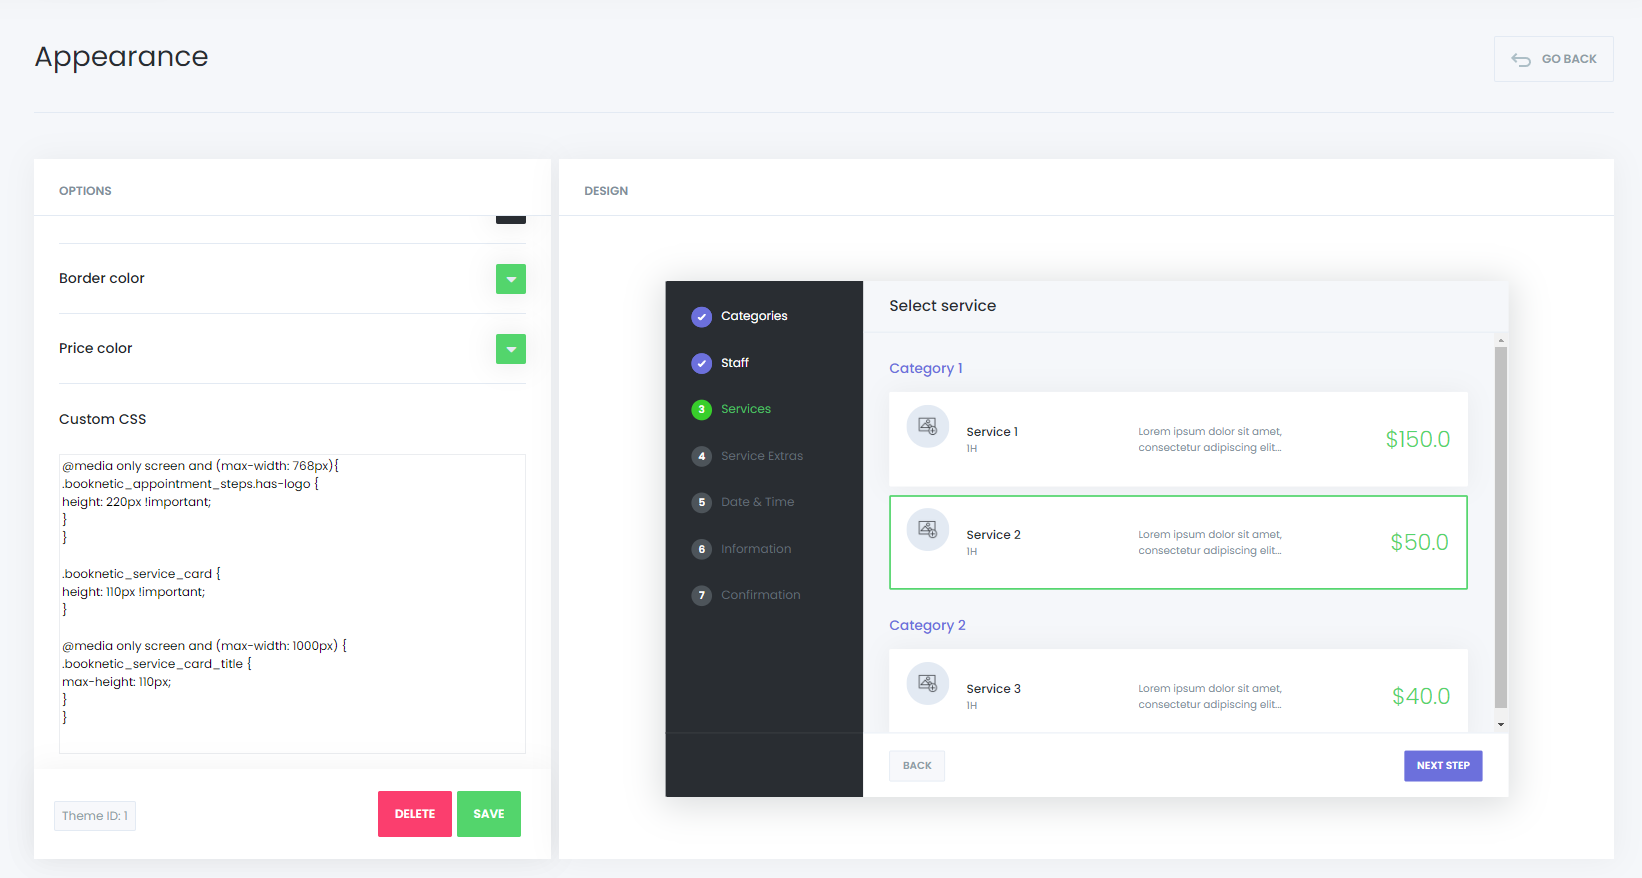
With the Booknetic plugin, you can change the appearance of your booking panel. There are 7 themes in the Appearance module and you can choose any color you want according to your business branding color. At the same time, you can choose the theme you want among the existing themes and make the changes you want on it. Also, you can create a new theme for yourself and customize the colors according to your wishes. You can adjust the height of your booking panel and you can use any Google Fonts in your booking panel. It is possible to adjust the color of almost every part of the Booking panel as you wish. The fact that the color selection is dynamic also provides an easier customization opportunity. The booking panel view is located in the right side of the screen, which allows you to see your customizations in real-time.
Also, if you want to add custom codes to the booking form, you can add it with the help of Custom CSS feature. You can make any changes you want in the booking panel by writing custom CSS codes. The CSS codes you have added via Custom CSS section will not be lost with the updates. Our plugin is very rich with classes, which provides extensive customization possibilities. You can completely change the appearance of your booking panel if you need, with the help of Custom CSS.
Reorder the booking steps
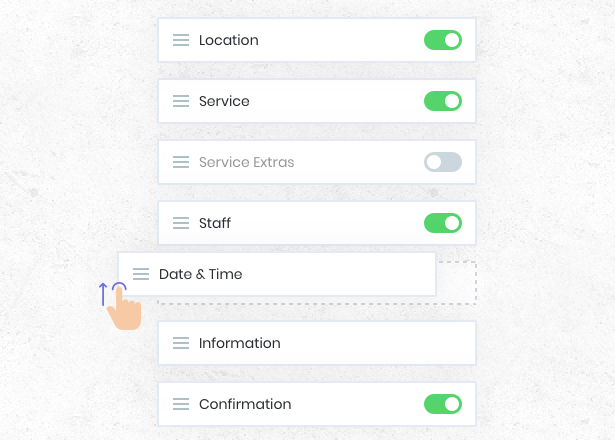
There are 7 steps in the booking form to make an appointment. But it is not important to use all the steps if it is not necessary. For example, if you have only one location, staff, etc., you can hide these steps from the booking form. Also, you can re-order these steps according to your business type. To do this, you can sort the order by catching the move icon and pulling it up or down. All this sorting change will not complicate the system. If the staff step comes first and the service comes after, after the staff is selected, only the services belonging to this staff will come, and when the service is selected, only the staff members who offer that service will appear. We can say the same words about the Date and Time step. When any date is selected, only the available staff for that date will be displayed on the booking panel. If any step is not necessary for you, you can turn it off, only the date and time and information step cannot be turned off, but you can hide all other booking steps.
Pre-selected booking form
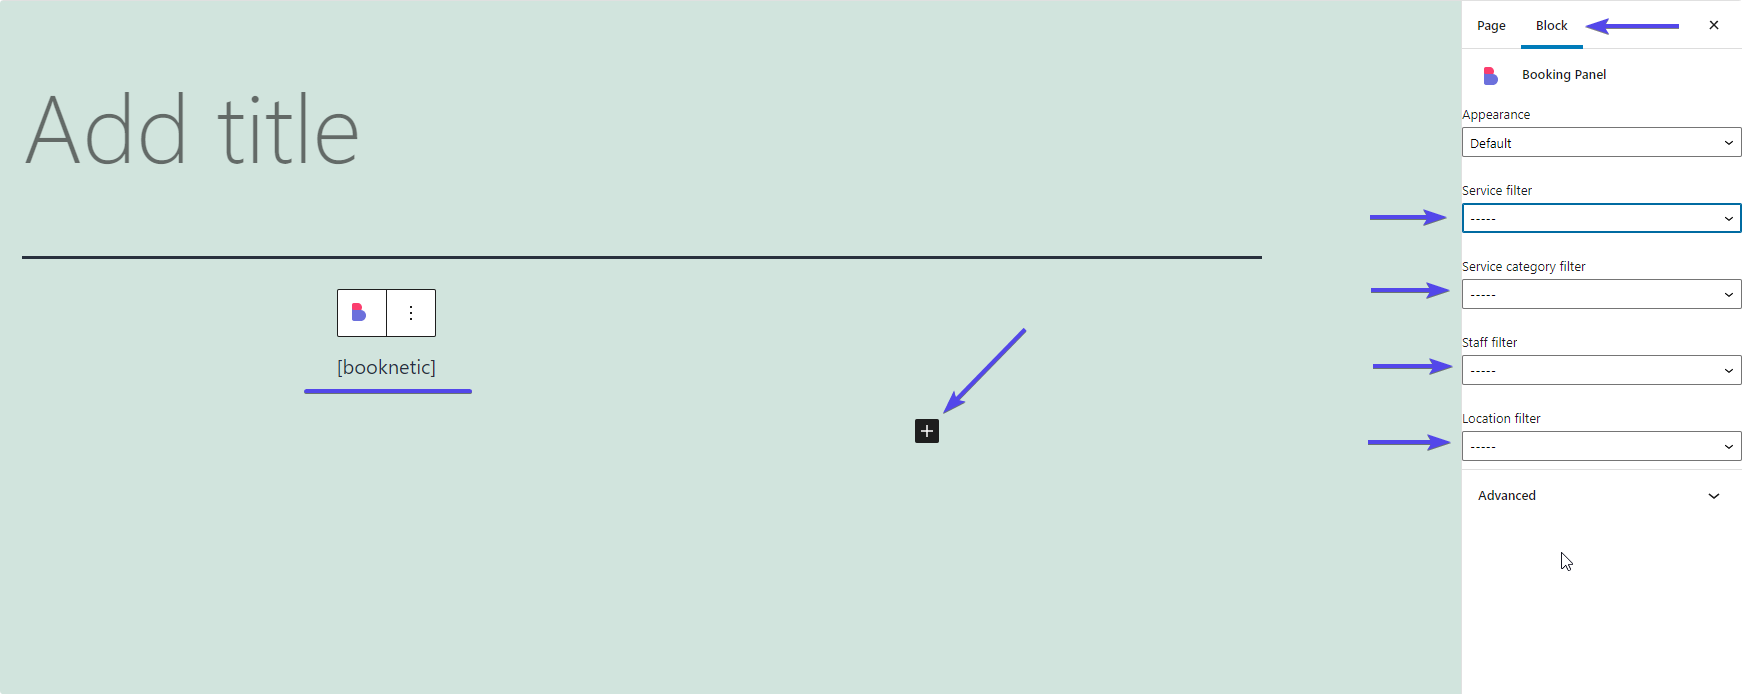
You can display the booking form with the pre-selected service, staff, location, etc. If we would like to show an example for this case, you can create different pages and you can put your staff members booking widgets separately to these pages. With the help of this feature, each of your staff members can have their own booking page. Also, you can use the same feature for your services. You can show the specific booking panels with pre-selected services on different pages. To do this, you need to use the [booknetic service=ID] shortcode instead of the [booknetic] shortcode. If you are using Gutenberg, search for Booknetic in the blocks and select it. The Service filter will open on the right. You can filter any service, category, staff, location, theme as you wish.
If you do not use Gutenberg you can manually add it:
Only services relevant to a specific location are displayed - [booknetic location=ID]
Only services relevant to a specific staff are displayed - [booknetic staff=ID]
Only services relevant to a specific service are displayed - [booknetic service=ID]
Only services relevant to a specific category are displayed - [booknetic category=ID]
Also, it is possible to use shortcodes at the same time: [booknetic staff=2 service=1 category=1 location=1]
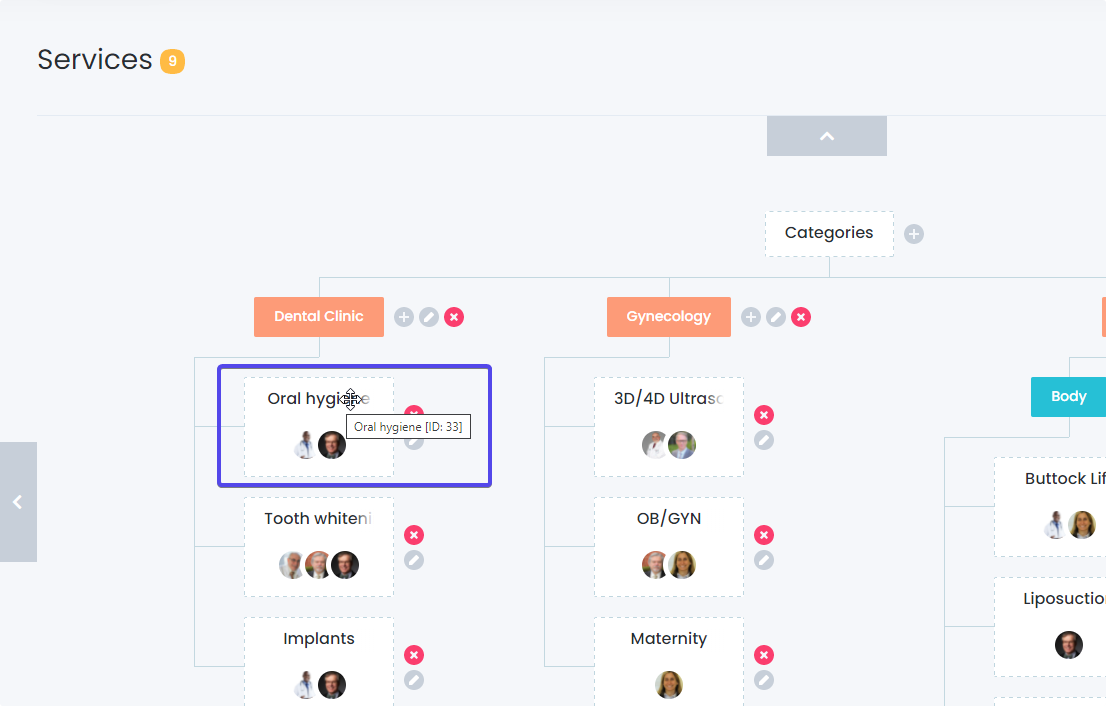
In order to get the service ID, you need to move the mouse cursor over the service name. At the same time, if you switch to list view, the service ID will be visible.